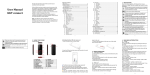
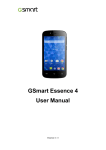
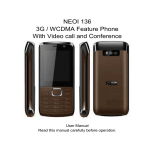
1
M3447
Copyright
All mobile products by GIGA-BYTE COMMUNICATIONS INC. mentioned in this document, including the
device, accessories, software, text, music, and pictures, are owned by, or authorized by original manufacturers
to GIGA-BYTE COMMUNICATIONS INC. Reproduction, transfer, distribution, or storage of part or all of the
contents in this document in any form without the prior written permission of GIGA-BYTE COMMUNICATIONS
INC. is prohibited.
GIGA-BYTE COMMUNICATIONS INC., GIGA-BYTE Group
M3447│0-1
Safety Information
This section contains important information on safe and efficient operation. Please read this information before
using the device.
• Use only the batteries and power adapter provided by the manufacturer. Use of unauthorized accessories
may void your warranty.
• Do not remove the battery while the phone is charging.
• Avoid using the phone near electromagnetic sources such as TVs, radios, and microwave ovens.
• Unplug the power adapter from the wall outlet during lightning storms to avoid electric shock or fire.
• Do not expose the phone or the battery to direct sunlight.
• Do not store your phone in temperatures higher than 60ºC or 140ºF.
• Do not use harsh chemicals or detergents to clean your phone.
• Do not handle the phone with wet hands while it is being charged. This may cause
an electric shock or serious damage to the phone.
SAFETY PRECAUTIONS FOR BATTERY USE
• Use only approved battery. The phone may have the risk of the explosion, if the battery is replaced by an
incorrect type.
• Keep the battery dry and away from any liquid since this may cause a short circuit.
• Keep the battery away from metal objects since this may cause a short circuit.
• Do not use damaged or deformed batteries.
• If the battery emits a foul odor, discontinue use.
• Keep the battery away from babies and small children.
• If the battery leaks:
• Do not allow the leaking fluid to come in contact with your skin, eyes or clothing. If already in contact, rinse
with clean water immediately and seek medical advice.
• Keep the battery away from fire since this may cause the battery to explode.
• Do not attempt to open or service the battery yourself.
• Do not dispose battery in fire or water.
• Recycle or dispose used batteries according to the local regulations.
SAFETY PRECAUTIONS FOR DEVICE USE
• Please use earphones or headphones carefully. The excessive sound pressure from your earphone or your
headphone may cause the hearing loss.
• The device shall only be connected to the USB 2.0 or higher, and the connection to the power USB is
prohibited.
• The adapter shall be installed near your device and shall be accessible easily.
• In order to comply with RF exposure requirements for mobile transmitting devices, a minimum distance of 20
cm must be maintained between the antenna and all persons.
M3447│0-2
ROAD AND ENVIRONMENTAL SAFETY
• Turn off the phone in areas with a potentially explosive atmosphere or where flammable objects exist such as
gas stations, fuel depots, and chemical plants among others. Sparks from these areas could cause explosion
or fire and result in injury or even death.
• Do not use hand-held phones while driving a vehicle. Use hands-free devices as an alternative.
SAFETY IN AIRCRAFT
Do not use the phone on board an aircraft. The phone’s network signals may cause interference to the
navigation system. As a safety measurement, it is against the law in most countries to use the phone on board
an aircraft.
SAR Information
THIS MOBILE DEVICE MEETS GUIDELINES FOR EXPOSURE TO RADIO WAVES. Your mobile device is a
radio transmitter and receiver. It is designed not to exceed the limits for exposure to radio waves
recommended by international guidelines. These guidelines were developed by the independent scientific
organization ICNIRP and include safety margins designed to assure the protection of all persons, regardless of
age and health. The exposure guidelines for mobile devices employ a unit of measurement known as the
Specific Absorption Rate or SAR. The SAR limit stated in the ICNIRP guidelines is 2 W/kg averaged over 10
grams of tissue. Tests for SAR are conducted using standard operating positions with the device transmitting
at its highest certified power level in all tested frequency bands. The actual SAR level of an operating device
can be below the maximum value because the device is designed to use only the power
required to reach the network. That amount changes depending on a number of factors such as how close you
are to a network base station. The highest SAR value under the ICNIRP guidelines for use of the device at the
ear is 0.98 W/kg. Use of device accessories and enhancements may result in different SAR values. SAR
values may vary depending on national reporting and testing requirements and the network band. Additional
SAR information can be found on the Cellular Telecommunications Industry Association (CTIA) website at
www.wow-com.com.
THE SAR OF THE DEVICE
M3447│0-3
WEEE Notice
The WEEE logo on the document or on the package box indicates that this product must not be disposed of or
dumped with your other household waste. You are liable to dispose of all your electronic or electrical waste
equipment by relocating over to the specified collection point for recycling of such hazardous waste. Isolated
collection and proper recovery of your electronic and electrical waste equipment at the time of disposal will
allow us to help conserve natural resources. Moreover, proper recycling of the electronic and electrical waste
equipment will ensure safety of human health and environment. For more information about electronic and
electrical waste equipment disposal, recovery, and collection points, please contact your local city center,
household waste disposal service, shop from where you purchased the equipment, or manufacturer of the
equipment.
RoHS Compliance
This product is in compliance with Directive 2002/95/EC of the European Parliament and of the Council of 27
January 2003, on the restriction of the use of certain hazardous substances in electrical and electronic
equipment (RoHS) and its amendments.
European Union Regulatory Conformance
The equipment complies with the RF Exposure Requirement 1999/519/EC, Council Recommendation of 12
July 1999 on the limitation of exposure of the general public to electromagnetic fields (0–300 GHz). This
equipment meets the following conformance standards: EN 300 328, EN 301489-1, EN 301489-7, EN
301489-17, EN 301 511, EN 301 908-1/2, EN 301489-24, EN50360. Changes or modifications to this product
not authorized by the manufacturer could void the EMC compliance and negate your authority to operate the
product. This product has demonstrated EMC compliance under conditions that included the use of compliant
peripheral devices and shielded cables between system components. It is important that you use compliant
peripheral devices and shielded cables between system components to reduce the possibility of causing
interference to radios, televisions, and other electronic devices. We, hereby, declare that this cellular &
Bluetooth radio is in compliance with the essential requirements and other relevant provisions of Directive
1999/5/EC.
M3447│0-4
General Information
This section contains important information on safe and efficient operation. Please read this information before
using the device. Ignorance of the following notices may lead to violations of the law.
•
•
•
•
•
•
•
•
•
•
•
•
•
•
•
Before using the device, please make sure you have fully charged the battery.
Do NOT remove the battery from the device during charging.
Before inserting SIM card into the device, make sure that the device is switched off.
Do NOT attempt to dissemble the device on your own. This should be done by an authorized person.
Use the device in accordance to instructions when in public facilities.
In some countries, it is a violation against the law to record phone conversations. Always ask permission of
the other party when you are going to record a conversation.
To protect your ears, turn down the volume before you use stereo headsets or other audio devices.
To avoid damaging the touch screen and the device, do NOT apply excessive pressure on them, and
remove the device from your pants’ pocket before you sit down. It is also recommended that you only use
the stylus or your finger to interact with the touch screen. It is not covered by the warranty that you crack the
touch screen because of the improper usage.
When you use the device for a long time, such as talking on the phone, browsing online, or charging the
battery, the device may become warm. In most cases, this condition is normal.
Refer servicing to the provider, or an authorized technician under the following conditions: 1. The device
has been damaged. 2. When you follow the instructions to use your device, it does not operate normally. 3.
The device has been exposed to water. 4. Liquid has been spilled or an object has fallen onto the device.
Do Not push unauthorized objects into slots and openings in your device.
The device should be placed away from heat sources such as stoves, radiators, heat registers, or other
products that produce heat.
Condensation may form on or within your device, when you move your device between environments with
very different temperature and/or humidity ranges. To avoid damaging your device, make the moisture to
evaporate before you use the device.
To avoid damaging your device, do Not put your device on an unstable table, stand, bracket, or other
places.
Before you clean your device, unplug it, please. Use a damp cloth for cleaning, but do Not use water, liquid
cleaners, or aerosol cleaners to clean the touch screen.
M3447│0-5
Table of Contents
Copyright .................................................................................................................................................... 0-1
Safety Information ...................................................................................................................................... 0-2
General Information.................................................................................................................................... 0-5
Chapter 1 Getting Started ........................................................................................................................ 1-1
1.1 Your Phone .......................................................................................................................................... 1-1
1.2 Installing or Uninstalling the SIM Card and Battery .............................................................................. 1-3
1.3 Charging the Battery............................................................................................................................. 1-4
1.4 Using Headset...................................................................................................................................... 1-4
1.5 Lock/Unlock.......................................................................................................................................... 1-4
1.6 Turning the Phone On or Off ................................................................................................................ 1-4
1.7 Phonebook ........................................................................................................................................... 1-5
1.8 The Home Screen ................................................................................................................................ 1-5
1.9 Bluetooth .............................................................................................................................................. 1-7
Chapter 2 Phone Functions & Input........................................................................................................ 2-1
2.1 Voice Calls ........................................................................................................................................... 2-1
2.2 Video Calls ........................................................................................................................................... 2-2
2.3 Using the Keyboard .............................................................................................................................. 2-2
Chapter 3 Email & Messaging ................................................................................................................. 3-1
3.1 Text Message ....................................................................................................................................... 3-1
3.2 Multimedia Message............................................................................................................................. 3-1
3.3 Broadcast Message.............................................................................................................................. 3-2
3.4 Email Accounts..................................................................................................................................... 3-2
3.5 Using Email .......................................................................................................................................... 3-3
Chapter 4 Multimedia Applications ......................................................................................................... 4-1
4.1 Photos and Videos ............................................................................................................................... 4-1
4.2 Image Viewer ....................................................................................................................................... 4-3
4.3 Media Player ........................................................................................................................................ 4-3
4.4 Photo Editor.......................................................................................................................................... 4-4
4.5 AB Repeater......................................................................................................................................... 4-4
4.6 Sound Recorder ................................................................................................................................... 4-4
4.7 FM Radio.............................................................................................................................................. 4-5
4.8 Melody Composer ................................................................................................................................ 4-5
4.9 Slide Show ........................................................................................................................................... 4-6
Chapter 5 Programs ................................................................................................................................. 5-1
5.1 File Manager ........................................................................................................................................ 5-1
M3447│0-6
5.2 Fun & Games ....................................................................................................................................... 5-1
5.3 Extra ..................................................................................................................................................... 5-1
5.4 Service ................................................................................................................................................. 5-1
5.5 Organizer.............................................................................................................................................. 5-1
5.6 User Profile........................................................................................................................................... 5-2
5.7 Shortcuts .............................................................................................................................................. 5-2
Chapter 6 Managing Your Phone ............................................................................................................ 6-1
6.1 Settings ................................................................................................................................................ 6-1
6.2 PC Sync Tool ....................................................................................................................................... 6-2
6.3 Specifications ....................................................................................................................................... 6-2
M3447│0-7
1. Getting Started
1.1 Your Phone
This section introduces you to the hardware of the
device.
3
5
Front Camera
Lens
Left Key
6
Talk Key
7
Message Key
8
Screen
4
9
10
11
No.
1
2
Items
12
Functions
Use a headset for
Earphone jack hands-free conversation
or listening to music.
It is for hanging cell phone
Strap hole
strap.
LED / Speaker
13
14
15
M3447│1-1
LED Signals:
Red light: Charging is
activated.
Blue light: Bluetooth is
activated.
Flashing green light: Got
missed calls or unread
messages.
Speaker: The source of
music and voice.
Use when making video
calls.
Tap to execute.
• Activate the call history,
if you dial before.
• Make or answer a call.
Tap to launch Message.
Display screen.
Tap to select an option
(Up, down, right, or left).
Dedicated Key
You can press the central
button to execute.
Right Key
Tap to execute.
•End or reject a call.
End Key
•Press and hold to turn on
or turn off the phone.
Tap to activate
Phonebook Key
Phonebook.
Use the keyboard to input
Keyboard
messages.
MIC
Sound Receiver.
• Connect USB cable to
Micro USB port PC as a modem / USB
mass storage.
• Connect USB cable and
the AC adapter to charge
the battery.
No.
Items
16
Volume Key
17
Camera Key
18
Micro SD slot
Functions
Press upwards or
downwards to increase
or decrease the
volume.
Tap to activate the
camera.
Insert your Micro SD
card into the slot.
No.
Items
19
2 Megapixels
Camera
20
Back cover
21
Speaker
M3447│1-2
Functions
The camera on the
back of the device
supports 2-mega-pixel
photo and high-quality
video.
You need to open the
cover to install or
uninstall the battery and
SIM card.
The source of music
and voice.
1.2 Installing or Uninstalling the
SIM Card and Battery
3. Stay your palm close to the back cover.
To remove the back cover
1. Please turn over your phone with the back
cover facing up.
4. Then pull the back cover with your fingertip to
remove it.
2. Please move your fingertip into the slot
located at the top of the back cover.
SIM card
The SIM card contains your phone number,
memory storage, and network service details.
Your phone supports two SIM cards.
To install the SIM card
M3447│1-3
Insert the SIM card. Make sure the gold contacts
are facing down and the cut-off corner is facing
towards the battery slot.
To remove the SIM card
1. Remove battery.
2. Use your finger to slide the SIM card from the
card slot.
Battery
Your phone comes with a rechargeable battery.
Battery life varies depending on the network, used
applications, and the type of connections attached
to your phone.
To install the battery
Insert the battery. Make sure the contacts of the
battery are aligned with the connectors on the
battery slot.
2. Plug the AC adapter to an outlet to start
charging.
NOTE:
• The battery can also be charged when you
connect your phone to the computer.
• To ensure safety, do not remove the battery
from the phone while the AC adapter is
connected or while it is being charged.
1.4 Using Headset
For hands-free conversation or listening to music,
plug a headset to headset jack.
NOTE:
• When using a headset, your ability to hear
outside sounds may be limited. Do not use
headset if it will endanger you.
• Do not set the volume to its maximum with a
headset as it may damage your hearing.
1.5 Lock/Unlock
To remove the battery
Use your fingertip to lift the battery, and then,
remove it.
1. Lock the device:
To replace the back cover
Secure the hooks on the back cover with
designated holes on the phone and close the
back cover.
NOTE: To ensure battery performance and
avoid the risk of fire:
• Use only original batteries designated for the
phone.
• Do not store the battery in temperatures
below -10ºC or higher than 45ºC.
1.3 Charging the Battery
To fully charge the battery, charge it for 2 hours.
1. Plug the battery charger to the Micro USB port
of your device.
Tap
on the keypad. Then tap Yes on
screen to lock the device. When you do that,
the keypad and the screen are locked.
2. Unlock the device:
Press Talk Key, and then, click the green ball
on screen, or press * to unlock the device.
1.6 Turning the Phone On or Off
After installing the SIM card and charging the
battery, you are now ready to turn on your phone.
To turn on your phone
Press and hold End Key until the phone is turned
on.
To turn off your phone
M3447│1-4
Press and hold End Key until the phone is turned
off.
NOTE: If your phone is locked, please un-lock
it first. Then you can turn off your phone.
1.7 Phonebook
Phonebook helps you store names, phone
numbers, e-mail addresses and other information.
Adding a Contact
1. Tap Application Drawer > Phonebook.
2. Tap Add new contact > Select.
3. Tap each field to enter the contact information.
4. Select Options > Done > Yes to save.
Searching for Contacts
On the search bar, type the first few letters of the
contact to search. The list is filtered as you type.
Importing Contacts
When you insert your SIM card into you device,
you can copy SIM contacts to the phone by the
on-screen instructions.
Exporting Contacts
1. Tap Application Drawer > Phonebook.
2. Select a contact, and then, tap Options > Copy.
You can select a place to save the contact.
Delete a Contact
1. Tap Application Drawer > Phonebook.
2. Select a contact, and then, tap Options.
3. Tap Delete > Yes to delete it.
Delete All Contacts
1. Tap Application Drawer > Phonebook.
2. Tap Options > Phonebook settings > Delete all
contacts.
3. Select to delete all contacts in the phone or in
the SIM card(s).
Add Contacts to Blacklist
1. Tap Application Drawer > Phonebook.
2. Select a contact, and then, tap Options.
3. Tap Add to Blacklist > Yes to do that.
Change Preferred Storage
1. Tap Application Drawer > Phonebook.
2. Tap Options > Phonebook settings > Preferred
storage. Then select the preferred storage.
1.8 The Home Screen
On the home screen, you can quickly access
common features and view notifications of missed
calls, received messages, battery, and connection
status.
Settings of the Home Screens
You can slide the home screen from the left side
to the right side or from the right side to the left
side to switch it.
• Clock Home Screen: Tap Clock to adjust the
display, the date, and the time.
• Calendar Home Screen: Tap Calendar to view
and add events.
• Weather Home Screen: Tap
to adjust the
settings of the weather. Tap Zone Setting to
select the country / area and the city. Tap
Options to select the type of display and the type
of updating the time. Tap GPRS > SIM1 or SIM2
(If have) > Accounts to select your Internet
Service Provider (ISP) or your Telecom
Operator.
Before you update the information of the weather,
make sure the time and date of your phone are
correct. Then tap
M3447│1-5
to update the information
of the weather.
NOTE: When you update the information of the
weather, you may be charged.
Status Bar Icons
The Status bar icons indicate different types of
information.
Other Icons of the Home Screen
Icon
Description
Tap Widget to select the
widgets you want. You can
move the widget you select
from the widget bar to the
home screen.
Types
Icons
Descriptions
Ring only.
NOTE: The widget bar will be
hidden automatically, if you
do not use your phone for
several seconds.
Vibrate only.
Volume
Ring and vibrate.
Tap Application Drawer to
review all programs.
Tap Shortcut to review all
shortcuts. When you tap it, you
can move the shortcuts you
want from the list of shortcut to
the bar located at the bottom of
the screen.
You can also move the
shortcuts you do not want from
the bar back to the list of
shortcut.
Ring after vibrate
Battery is full.
Battery
Battery is low.
Phone
Network
No network signal.
Maximum signal
strength. Fewer
bars indicate lower
signal strength.
M3447│1-6
2G network is in
use.
The device is
locked.
Lock/Unlock
3G network is in
use.
The device is
unlocked.
1.9 Bluetooth
Roaming.
Your phone connects to the Internet via GPRS /
EDGE / 3G.
NOTE: When you turn on the phone, you may
connect to the Internet automatically (If your
SIM card supports that). You may be charged
the network fee.
No SIM card
inserted.
Connection
Bluetooth
connection is
active.
To turn Bluetooth on or off
1. Tap Application Drawer > Settings >
Connectivity > Bluetooth.
2. Tap Power to turn Bluetooth on or off.
The headset is
plugged in.
To make your phone visible to others
1. Tap Application Drawer > Settings >
Connectivity > Bluetooth.
2. Tap Visibility to turn on or off.
New message
notification
Notification
Alarm is activated.
Missed call
notification
Connecting to Bluetooth Devices
A connection to a Bluetooth device is called a
partnership. You need to pair and create a
partnership with a Bluetooth device to exchange
information.
1. Tap Application Drawer > Settings >
Connectivity > Bluetooth.
2. Tap My device > Search new device > Yes (If
you do not turn on Bluetooth before, please tap
Yes).
3. Select a device, and then, tap Pair.
4. To start pairing, enter the password, and then,
M3447│1-7
tap OK.
NOTE:
• The password you enter on your phone must
be the same password to be entered on the
other Bluetooth device.
• Once a partnership has been created,
connecting to that device again will no
longer require entering the password.
M3447│1-8
2. Phone Functions & Input
To open Phone screen, tap any of number keys
on the keyboard.
on the Phone screen.
Phonebook
2. Tap the desired contact, and then, tap Call or
press Talk Key.
To make emergency calls
Enter the international emergency number 112,
and then, press Talk Key. If your device has
entered Device Lock Mode, you have to un-lock
the device before you make an emergency call.
Answering a call
When you receive an incoming call:
• The phone rings if the ring volume is turned on.
• A notification message appears on the screen.
To accept or reject an incoming call
• To accept a call, press Talk Key.
• To reject a call, press End Key.
2.1 Voice Calls
Making a call
To make a call from the Phone screen
1. Tap any of number keys on the keyboard to
open the Phone screen.
2. Input the phone number you want, and then,
press Talk Key to dial.
NOTE: Tap Clear to erase a wrong number.
Tap and hold Clear to erase the entire number.
NOTE: On the Phone screen, you can select
SIM1
or SIM2
(if have) to dial
the number.
3. To end the call, press End Key.
To make a call from Phonebook
1. Tap Application Drawer > Phonebook, or tap
To put a call on hold
If you are having a call conversation and there is
another incoming call, tap Options > Answer to
answer the incoming call and put the original call
on hold.
To switch between calls
If you are having a call conversation, and there is
another incoming call, tap Options > Answer to
answer the incoming call and put the first call on
hold. Then tap Options > Swap to switch between
calls.
To set up conference calls
If you are having a call conversation, and there is
another incoming call, tap Options > Answer to
answer the incoming call and put the first call on
M3447│2-1
hold. Then tap Options > Conference to set up
conference calls.
NOTE: Conference call is a network service.
Check with your network provider for the
availability of this function.
To manage other voice call features
• When you are on call, tap H-Free to activate the
speakerphone, or tap H-Held to deactivate the
speakerphone.
• When you are on call, tap Options > Mute to
mute the microphone, or tap Mute again to
un-mute the microphone.
Ending a call
To end a call, press End Key.
Functions about video calls
When the video call is connected successfully,
you can use some functions. You can use the
on-screen keyboard to input phone numbers.
Adjust the brightness of the preview picture.
Resize the preview picture. You can also switch
the preview picture or close it. You can mute the
voice from your own side or from the other side.
Tap Options for more advanced settings. You can
also turn on or turn off the speaker.
Switch to voice call
When you are on a video call, tap Options >
Switch to voice call, and then, tap Yes to process.
2.2 Video Calls
Ending a video call
To end a video call, press End Key.
The device allows you to make a video call in
addition to making an audio call.
2.3 Using the Keyboard
Making a video call
You have several ways to make a video call:
• On Phone screen, input the phone number you
want to dial. Then tap Options > Call > Video call.
• Tap Application Drawer > Phonebook, and then,
select a contact you want to dial. Tap Call >
Video call.
• Tap Application Drawer > Call center > Call
history. Then select SIM1 or SIM2 call history (if
have). Select a phone number you want to dial,
and then, tap Call > Video call.
NOTE: Before you make a video call, make
sure your network is 3G. Switch between 2G
and 3G: 1. Tap Application Drawer > Settings >
Network settings. 2. Select SIM1 or SIM2(If
have) network settings > Network selection >
Select network. You can select the 2G or 3G.
• Use the keys on the keyboard as you do on
computer keyboard.
• Tap the keys to enter the characters.
• Some keys on the keyboard have two symbols,
to input the
numbers, or alphabets. Tap
upper symbols, numbers, or alphabets on the
keys. Tap it twice to input them continually. Tap it
again to input the lower symbols, numbers, or
alphabets on the keys.
• To toggle between upper and lower case letter
display, tap
. Tap it twice to input capital
letters continually. Tap it again to input a
small letter.
M3447│2-2
• To display the symbols keyboard, tap
• To switch numbers and alphabets, tap
.
.
M3447│ 2-3
3. Email & Messaging
Use Messaging to access text and MMS
messages. Use Email to send and receive e-mail
messages via your Internet e-mail accounts.
3.1 Text Message
A text message can only contain texts, numbers,
and symbols.
Creating and sending an text message
From the Messaging screen
1. Tap Application Drawer > Messaging.
2. Tap Write message > Text message.
3. Compose your message.
4. Tap Options > Send to > tap Enter number or
tap Add from Phonebook to select the
contact(s).
5. Tap Options > Send to send your message.
From Phonebook
1. Tap Application Drawer > Phonebook.
2. Select a contact, and then, tap Options.
3. Tap Send text message.
4. Compose your message.
5. Tap Options > Send to.
6. If you want to send this message to other
contacts, tap Enter number or tap Add from
Phonebook to select the contact(s).
7. Tap Options > Send to send your message.
From Call center
1. Tap Application Drawer > Call center.
2. Tap Call history to view all call history.
3. Tap a call from Call history.
4. Tap Send text message.
5. Compose your message.
6. Tap Options > Send to.
7. If you want to send this message to other
contacts, tap Enter number or tap Add from
Phonebook to select the contact(s).
8. Tap Options > Send to send your message.
Note: If you want to save your message to the
draft, tap Options > Save to Drafts, when you
are composing the message.
To request message delivery notification
1. Tap Application Drawer > Messaging >
Message settings > Text message or
multimedia message > SIM1 or SIM2 (If have)
message settings > Common settings.
2. Check Delivery report.
To reply to a text message
1. Tap Application Drawer > Messaging.
2. Tap the message you got in Inbox.
3. Tap Reply by SMS to enter your message.
4. Tap Options > Send to.
5. If you want to send this message to other
contacts, tap Enter number or tap Add from
Phonebook to select the contact(s).
6. Tap Options > Send to send your message.
To forward a text message
1. Tap Application Drawer > Messaging.
2. Tap the message you got in Inbox.
3. Tap Forward to compose your message.
4. Tap Options > Send to > tap Enter number or
tap Add from Phonebook to select the
contact(s).
5. Tap Options > Send to send your message.
To delete a text message
1. Tap Application Drawer > Messaging > Inbox.
2. Select the message you want to delete, and
then, tap Options > Delete.
M3447│3-1
2. Select a contact, and then, tap Options.
3. Tap Send multimedia message.
4. Compose your message. Tap Options > Add
picture, Add sound, or Add video.
5. Tap Options > Send to.
6. If you want to send this message to other
contacts, tap Enter number or tap Add from
Phonebook to select the contact(s).
7. Tap Options > Send to send your message.
3. Tap Yes to delete the message.
To delete all text messages
1. Tap Application Drawer > Messaging.
2. Tap Inbox > Options > Delete all.
3. Tap Yes to delete all messages.
3.2 Multimedia Message
A Multimedia message can contain letters, an
image, an audio, or a video file.
Before send a multimedia message, you need
to activate multimedia message first
• Tap Application Drawer > Messaging > Message
settings > Multimedia message > Profiles to
select your Telecom Operator. Then tap
Options > Activate to activate multimedia
message.
• If you do not find your Telecom Operator in
Profiles, tap “Add new” in Profiles to edit a
profile. You may need to get the setting values of
multimedia message from your Telecom
Operator.
Creating and sending an MMS message
Your phone offers several ways to create and
send a MMS message.
From the Messaging screen
1. Tap Application Drawer > Messaging.
2. Tap Write message > Multimedia message.
3. Compose your message. Tap Options > Add
picture, Add sound, or Add video.
4. Tap Options > Send to > Enter number or tap
Add from Phonebook to select the contact(s).
5. Tap Options > Send to send your message.
From Phonebook
1. Tap Application Drawer > Phonebook.
From Call center
1. Tap Application Drawer > Call center.
2. Tap Call history to view all call history.
3. Tap a call from Call history.
4. Tap Send multimedia message.
5. Compose your message. Tap Options > Add
picture, Add sound, or Add video.
6. Tap Options > Send to.
7. If you want to send this message to other
contacts, tap Enter number or tap Add from
Phonebook to select the contact(s).
8. Tap Options > Send to send your message.
3.3 Broadcast Message
1. Tap Application Drawer > Messaging >
Broadcast message.
2. You can select SIM1 or SIM2 (If have)
broadcast message.
3. Turn on Receive mode to receive broadcast
messages.
3.4 Email Accounts
Your phone can send and receive emails just as
you do with a computer. Your phone supports
Internet email: email account provided by an
Internet Service Provider (ISP) or web-based
email, such as Gmail, Hotmail, Yahoo! Mail, etc.
M3447│3-2
Setting up an Internet e-mail account
1. Tap Application Drawer > Messaging.
2. Tap Email > Email accounts > Options > New
Account > Yes.
3. Input Email address, and then, tap Options >
Next.
4. Select a protocol, and then, tap Options >
Next.
5. Input the data account, and then, tap Options >
Next.
6. Input the incoming server, and then, tap
Options > Next.
7. Input the outgoing server, and then, tap Options
> Next.
8. Input the user name, and then, tap Options >
Next.
9. Input the password, and then, tap Options >
Next.
10. Input the account name, and then, tap Options
> Done.
11. In Email accounts screen, select an account,
and then, tap Options > Activate.
2. Tap Email > Write Email.
3. In the “To” field, tap Edit to enter the recipient’s
email address.
4. In the “Subject”, enter the subject.
5. Compose your e-mail. Tap Options > Done to
complete the composing.
6. Tap Done > Send to send your e-mail.
Receiving emails
Emails are received in your Inbox automatically
when your phone connects to wireless networks.
Reading and replying to emails
The Inbox displays email headers. Open the email
to view the complete content.
Customizing Account settings
You can configure the general settings of your
email account.
1. Tap Application Drawer > Messaging.
2. Tap Email > Email accounts, and then, select a
built email account. Then tap Options > Edit >
Advance settings > Account settings.
To select an account
1. Tap Application Drawer > Messaging.
2. Tap Email > Email accounts to view all email
accounts.
3. Tap the e-mail account you want to access.
To configure email settings
1. On your accounts screen, tap to select an
e-mail account.
2. Tap Options > Edit to edit the settings of your
email accounts.
3.5 Using Email
Composing and sending an E-mail
1. Tap Application Drawer > Messaging.
M3447│3-3
4. Multimedia Applications
4.1 Photos and Videos
Tap to activate the
settings.
Your phone is equipped with a 2.0 megapixels
camera to take photos and videos.
Tap to take a photo.
Taking a photo
1. Tap Application Drawer > Multimedia >
Camcorder.
NOTE: To activate the camera at anytime, press
the camera key on the side.
2. Aim the phone at the subject, and then, press
the camera key, or tap the camera icon
on screen to take the shot.
Tap to go back to
Multimedia.
Reviewing a photo
After taking a shot screen, the function of reviewing
a photo:
1. Launch the advanced settings.
2. Attach the file to the MMS.
3. Leave the review mode.
Recording Video
1. Tap Application Drawer > Multimedia >
Camcorder. Tap the settings icon
, and
then, tap Video recorder.
2. Aim the phone at the subject.
3. To start recording, press the camera key, or tap
the video recorder icon
on screen .
4. To stop recording, press the camera key again
or tap the stop icon on the screen. Tap the
pause icon on the screen to pause the
recording.
Icon
Function
Tap to adjust the
brightness of the picture.
Tap to zoom the screen in
or out.
M3447│4-1
Configuring camera settings
On the camera screen, tap the settings icon
. Tap to view and adjust the general settings
of your camera and video recorder.
Mode
Setting
Switch to
Icon
Capture
mode
Function
Tap to adjust the
brightness of the picture.
Tap to zoom the screen in
or out.
Tap to activate the
settings.
Tap to record video.
Tap to go back to
Multimedia.
Scene mode
Image size
Self-timer
Camera
mode
Reviewing video
After recording video, the function of reviewing
video:
1. Launch the advanced settings.
2. Leave the review mode.
White
balance
Effects
Adv. settings
M3447│4-2
Available
options
Photo album,
Video recorder,
and Use front
camera.
Normal,
Continuous shot,
Burst shot sel.,
Panorama, and
Add frame
Auto, Night.
Wallpaper, VGA,
1MP, and 2MP
Off, 5 sec., and
10 sec.
Auto, Daylight,
Tungsten,
Fluorescent,
Cloudy, and
Incandescent
Normal,
Grayscale,
Sepia, Sepia,
green, Sepia
blue, and Color
invert
Storage, Image
quality, Time
stamp, Shutter
sound,
Anti-flicker, and
Restore to
Switch to
Scene mode
Record size
White
balance
Video
recorder
mode
Effects
Record limit
Adv. settings
default.
Camera, Use
front camera.
Auto, Night.
176x144 (QCIF),
320x240(QVGA),
352x288(CIF),
and
640x480(VGA)
Auto, Daylight,
Tungsten,
Fluorescent,
Cloudy, and
Incandescent
Normal,
Grayscale,
Sepia, Sepia,
green, Sepia
blue, and Color
invert
No limit, Time 15
sec., Time 30
sec., and Time
60 sec.
Storage, video
quality, Record
audio,
Anti-flicker, and
Restore to
default.
4.2 Image Viewer
To view photos in the album
1. Tap Application Drawer > Multimedia > Image
viewer.
2. Tap an image to view.
To play slideshow
1. Tap Application Drawer > Multimedia > Image
viewer.
2. Select an image, and then, tap Options > Slide
show > Play.
3. Tap the pause icon to pause the slide show.
Tap the leave icon to leave the slide show
To set the image as Wallpaper
1. Tap Application Drawer > Multimedia > Image
viewer.
2. Select an image, and then, tap Options > Use
as > Wallpaper.
3. Tap OK to set the image as the wallpaper.
To save image to Caller icon
1. Tap Application Drawer > Multimedia > Image
viewer.
2. Select an image, and then, tap Options > Use
as > Caller picture.
To edit an image
1. Tap Application Drawer > Multimedia > Image
viewer.
2. Select an image, and then, tap Options > Edit.
4.3 Media Player
To play audio files
Tap Application Drawer > Multimedia > Media
player. Tap My playlist > Options > New, and then,
input the name of the playlist. Tap Options > Done.
Tap the established playlist, and then, tap Open >
Options > Add > Phone or Memory card (if have) >
Select. The system will get audio files from the
storage.
Playback screen
Displays the playback area with the playback
M3447│4-3
controls.
To remove an audio file from the playlist
1. While playing an audio file, tap Options >
Current playlist.
2. Select an audio file in the playlist.
3. Tap Options > Remove > Yes, and then, the
song is removed from the playlist.
4.4 Photo Editor
You can use this function to edit photos. You can
use the photos in the storage or capture photos by
taking a picture. Tap Application Drawer >
Multimedia > Photo editor.
4.5 AB Repeater
Icon
Function
Album art picture
or animation
Tap to go to the
previous audio file.
Tap to play the
audio file.
Tap to stop the
audio file.
Tap to go to the
next audio file.
Slide to go forward
or backward.
Tap to adjust the
volume.
Tap Application Drawer > Multimedia > AB
repeater.
NOTE: Before activate AB repeater, you need to
have a recorded file in the phone or the SD
card.
4.6 Sound Recorder
You can use this function to record sound. Tap
Application Drawer > Multimedia > Sound recorder.
Tap to shuffle.
Tap to enable or
disable the repeat
function.
M3447│4-4
Icon
Function
Icon
Tap to record.
Tap to play or pause the
audio file.
Tap to go to the
previous audio file.
Function
Tap to decrease the
frequency by 0.1 MHz.
Tap to play or pause the
channel.
Tap to increase the
frequency by 0.1 MHz.
Tap to help you search
the channel.
Tap to go to the next
audio file.
While you have the recorded files already, tap
Options > List, and then, you can select a file to do
the further settings including play, delete, rename,
etc.
4.7 FM Radio
You can use this function to listen to the radio. Tap
Application Drawer > Multimedia > FM radio.
Tap to adjust the
volume.
Tap to adjust the
settings.
Establish channel list
Tap Application Drawer > Multimedia > FM radio >
Options > Channel list > Options > Edit, and then,
input the name of the channel and the frequency.
In Channel list, select the established channel and
then, tap Options > Play to play my favorite
channel.
Manual input
1. Tap Application Drawer > Multimedia > FM radio
> Options > Manual input.
2. Input the channel you want, and then, tap OK to
play it.
4.8 Melody Composer
You can compose the melody. Tap Application
Drawer > Multimedia > Melody composer.
M3447│4-5
Add melody
1. Tap Application Drawer > Multimedia > Melody
composer > Add.
2. Begin to compose the melody.
3. Tap Options to play, to adjust the playing speed,
to select the instrument, or to save the file.
4.9 Slide Show
Tap Application Drawer > Multimedia > Slide show.
Select a photo from the phone or the SD card, and
then, to play the slide show.
M3447│4-6
5. Programs
5.1 File Manager
Help you browse the files in your phone and in your
memory card. Tap Application Drawer > File
manager.
5.2 VRE
You can use VRE (virtual runtime environment) to
access some programs supported by it. Tap
Application Drawer > VRE.
•OperaMini
You can use this function to connect to the Internet.
Tap Application Drawer > VRE > OperaMini.
5.3 Tools & Games
Calculator
With Calculator, you can perform basic arithmetic
functions on your phone. Tap Application Drawer >
Tools & Games > Calculator.
Unit converter
Help you convert units. Tap Application Drawer >
Tools & Games > Unit converter.
Ebook reader
Help you read electronic books. Tap Application
Drawer > Tools & Games > Ebook reader.
Java
You can use Java to access some programs
supported by it. Tap Application Drawer > Tools &
Games > Java.
•eBuddy
You can use the Instant Message to chat with your
friends. Tap Application Drawer > Tools & Games
> Java > eBuddy.
NOTE: Before you use this function, please
connect to the Internet. When you do that, you
may be charged.
Games
You can play games. Tap Application Drawer >
Tools & Games > Games.
5.4 Services
Currency converter
Help you convert currency. Tap Application Drawer
> Tools & Games > Currency converter.
Health
Help you calculate your body mass index (BMI).
Tap Application Drawer > Tools & Games > Health.
Stopwatch
Tap Application Drawer > Tools & Games >
Stopwatch. You can select Typical stopwatch or
nWay stopwatch.
Tap Application Drawer > Services.
Activate the Internet
Tap Application Drawer > Services > Internet
service > Settings > Profiles. Select your Internet
Service Provider (ISP) or your Telecom Operator,
and then, tap Activate.
NOTE: If you do not find your Internet Service
Provider (ISP) or your Telecom Operator in
Profiles, you need to set up the Internet
manually.
M3447│5-1
Set up the Internet manually
1. Tap Application Drawer > Settings >
Connectivity > Data account > GPRS > Options
> Add to input the setting values of the network.
You may need to get the setting values of the
network from your Internet Service Provider
(ISP) or your Telecom Operator.
2. Tap Application Drawer > Services > Internet
service > Settings > Profiles > Add new > Data
account > GPRS to select the built data account.
3. Input the website in Homepage, and input the
name in Profile name. Then tap Done.
4. Select the built Internet Service Provider (ISP) or
the Telecom Operator in Profiles, and then, tap
Activate.
Browsing online
1. Tap Application Drawer > Services > Internet
service > Input address.
2. Tap Input address to input the address you want,
and then, tap Options > Done.
NOTE: The WAP browser does not support the
HTML. Some webpage may not display
normally.
Add bookmarks
1. Tap Application Drawer > Services > Internet
service > Bookmarks > Options > Add
bookmark.
2. Input the title and the address, and then, tap
Done > Yes.
5.5 Organizer
Tap Application Drawer > Organizer.
Calendar
Help you schedule and sound alarms for
appointments, meetings, and other events.
1. In order to add events in the calendar, tap
Application Drawer > Organizer > Calendar.
2. Select a date, and then, tap Options > Add
event.
3. Input the information in every single field, and
then, tap Done > Yes.
Tasks
1. In order to add tasks, tap Application Drawer >
Organizer > Tasks > Add.
2. Input the information in every single field, and
then, tap Done > Yes.
Alarm
1. Tap Application Drawer > Organizer > Alarm.
2. Select an alarm, and then, input the information
in every single field, and then, tap Done > Yes.
World clock
Help you check the worldwide time. Tap
Application Drawer > Organizer > World clock.
Notes
1. In order to add notes, tap Application Drawer >
Organizer > Notes > Add.
2. Input the information, and then, tap Options >
Done.
Answer machine
When your friends call you, they can leave
messages to you. Tap Application Drawer >
Organizer > Answer machine.
• Record greeting messages:Tap Application
Drawer > Organizer > Answer machine > Settings.
Then turn on Auto answer. If you want to customize
your own greeting message, tap Greeting file >
From files. Then select an audio file from the
storage, and select Set as greeting file. Tap Done
to finish the settings.
M3447│5-2
• Listen to leaving messages:Tap Application
Drawer > Organizer > Answer machine > Leaving
messages. Select the audio file, and then, tap Play.
5.6 User Profile
Help you adjust the settings of tone, volume, alert,
ring, and answer mode. Tap Application Drawer >
User profile.
You can select General, Meeting, Outdoor, Indoor,
Headset, or Bluetooth. Select one of them, and
then, you can decide to activate it directly, or
customize your own settings.
5.7 Shortcuts
Help you activate the functions quickly. Tap
Application Drawer > Shortcuts.
M3447│5-3
6. Managing Your Phone
6.1 Settings
Tap Application Drawer > Settings to view and adjust
the settings of your phone.
Themes
Dual SIM switch
You can select “select with SIM status” or “use
default mode”.
Greeting text
Dual SIM settings
Help you adjust the settings of the dual SIM. You can
decide which SIM card is activated. You can also
turn on the flight mode.
Pen calibration
Help you calibrate your phone.
Phone settings
Application
Time and date
Schedule power
on/off
Language
Writing language
Encoding
Display
Description
Help you set time/date
of home and foreign
cities.
Help you schedule
when the power is
turned on/off.
Help you change the
default language in
your phone.
Enable or disable the
different writing
languages.
Help you encode to
display your file
normally.
Help you adjust the
settings of the display
including wallpaper,
Dedicated key
Auto update of date
and time
UART settings
Misc. settings
screen saver, etc.
Change the
background.
If you activate this
function, the greeting
text will show up on
the screen, when you
turn on the device.
Help you activate
some functions
quickly.
You can change the
time when the new
time zone is detected.
Settings of universal
asynchronous
Receiver / Transmitter.
You can use your
phone as a modem to
connect to the Internet
via SIM1 or SIM2.
Adjust the brightness
of the backlight.
Network settings
Help you adjust the settings of the network. You can
also check the information about the network.
Switch between 2G and 3G:
1. Tap Application Drawer > Settings > Network
settings.
2. Select SIM1 or SIM2 (if have) network settings >
Network selection > Select network. You can
select the 2G or 3G.
M3447│6-1
Security settings
You can lock/unlock the SIM card and the programs.
When you do that, you need to input the password
first. You can change the passwords for the SIM card
and the programs also.
•Change the password of your SIM card
You may get the default password for your SIM card
from your Telecom Operator.
Tap Application Drawer > Settings > Security
settings > SIM1or SIM2 (If have) security settings >
Change password to change the password for your
SIM card.
•Change the password of the programs
The default password is 0000.
Tap Application Drawer > Settings > Security
settings > Change password to change the
passwords of the programs.
NOTE: If you forget the passwords of the
programs, you need to send your device to the
repair service center or the original manufacturer.
The repair may result in the loss of the data in
your device. Please back up the data in other
storage.
Connectivity
Help you adjust the settings of Bluetooth and GPRS.
Restore factory settings
Help you restore the device to the default settings.
Input the password (0000), and then, tap OK > Yes
to execute.
Sound effects
Help you adjust the effects of audio and turn on/off
bass enhancement.
6.2 PC Sync Tool
PC Sync Tool is a powerful software to manage your
mobile phone through your PC. You can: Quickly
input messages on your PC and send out via your
phone; backup and restore contacts, calendars or
messages on your PC; even enjoy chatting like MSN
or Skype; enjoy new MP3s, pictures, videos on your
phone; transfer photos to your PC, save them, share
them with others.
Please connect your phone to your PC when you use
this software. When you use it, please tap
the user manual and more information.
NOTE: Please download PC Sync Tool on
GSmart’s official website.
6.3 Specifications
System Information
Processor
Memory
Display
Size
Resolutions
Size
Dimensions
(L x W x T)
Weight
Power
Rechargeable
Battery
Standby time
M3447│6-2
MT6268 at 246MHz
ROM 128 MB
RAM 64 MB
2.4"
320 x 240 QVGA
110 x 59 x 13 mm
95 grams with battery
Li-Ion 900mAh
Up to 450 hours for GSM
Up to 200 hours for 3G
(It may vary depending on
the availability of local
networks and individual
usage.)
for
Up to 4.5 hours for GSM
(No backlight)
Up to 4 hours for 3G
(No backlight)
Up to 2.5 hours for 3G
Talk time
Video Call
(It may vary depending on
the availability of local
networks and individual
usage.)
Radio Band & Standard
850 / 900 / 1800 /1900
GSM/GPRS/EDGE
MHz
WCDMA
2100 MHz
Connectivity
Bluetooth
Bluetooth 2.1 + EDR
USB
USB 2.0
Audio Jack
3.5 mm stereo audio jack
Digital Camera
2.0 Megapixel Color
Rear Camera
Camera with Video
Recording
0.3 Megapixel Color
Front Camera
Camera
External Memory
MicroSD supports up to
Memory Card
16GB
Temperature
Operating
-10°C to 45°C
SIM card slot
Dual SIM card slot. SIM1 supports 2G and 3G.
SIM2 supports 2G only.
Note: Specifications are subject to change
without prior notice. They may vary in some
regions also.
SPECIAL NOTE: If you do not insert the SIM card,
and
may show up. In this situation, you
may only dial the emergency number. If you
insert the SIM card,
and/or
may show up.
In this situation, you may dial the phone number
you want.
If this document is modified, please download the
latest version on GSmart’s official website.
GIGA-BYTE COMMUNICATIONS INC.
B2, No. 207, Sec. 3, Beixin Road,
Xindian, Taipei, 231, Taiwan
+886-2-89132220
www.gigabytecm.com
M3447│6-3