1
User's manual TopGun 3
Part No. 7500.TG3
_
Functional check
The gun has a built-in LED with 2 light intensity levels. When the (mains) voltage is on, the
LED will be dimly lit. After the gun has been put into operation, the LED will light up more
brightly.
An electrostatic field meter must be used to measure the efficiency of the TopGun3 ionizing
air gun. Measure the charge on the object before and after the TopGun3 has been used for
the blowing-off job. The charge measured should have disappeared afterwards.
Remote control installation
Warning:
When carrying out work on the equipment: De-energise the equipment. Electrical
installation and repairs shall be performed by a skilled electrical engineer.
Summary
The power unit can be equipped with the switch (relay) for remote control (not wireless).
The voltage on this circuit is 100 V DC. The power unit is switched on by making the
contacts.
Installation
1. Remove the 2 screws from the side and open the box.
2. Remove the press-out plate beside the IEC connector.
3. Fit a gland and feed the wiring through it.
4. Connect the flat-pin plugs to the wiring.
5. Fit the flat-pin plugs on tabs J4 and J5.
6. Close the box and fit the 2 screws into the side.
Attention:
The LED in the gun indicates “standby” (The Led will be dimly lit) if the remote control
is used.
Maintenance
Warning:
When carrying out work on the equipment: De-energise the equipment.
Emitter point
The emitter point must be clean and sharp.
Regularly clean the emitter point with a cotton tip or a soft cloth, slightly soaked in alcohol.
Make sure that:
− no lint remains on the emitter point.
− the point is entirely dry before switching on the TopGun3 again.
Replacing the filter nozzle
The filter turns red as a result of fouling. Replace the filter nozzle when it is discoloured.
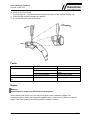
1. De-energise the TopGun3.
2. Disconnect the compressed air supply.
Seite 5 von 6
V0503