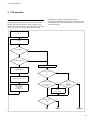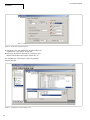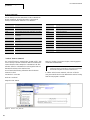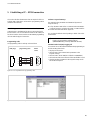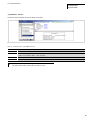
1
Eaton Corporation Eaton ist ein führendes EnergieManagement-Unternehmen. Weltweit ist Eaton mit Produkten, Systemen und Dienstleistungen in den Bereichen Electrical, Hydraulics, Aerospace, Truck und Automotive tätig. Eatons Electrical Sector Eatons Electrical Sector ist weltweit führend bei Produkten, Systemen und Dienstleistungen zu Energieverteilung, sicherer Stromversorgung und Automatisierung in der Industrie, in Wohn- und Zweckbauten, öffentlichen Einrichtungen, bei Energieversorgern, im Handel und bei OEMs. Zu Eatons Electrical Sector gehören die Marken Cutler-Hammer®, Moeller®, Micro Innovation, Powerware®, Holec®, MEM® und Santak®. www.eaton.com Eaton Adressen weltweit: www.moeller.net/address E-Mail: [email protected] Internet: www.eaton.com/moellerproducts www.eaton.comDirecciones de Eaton en todo el mundo: www.moeller.net/address E-Mail: [email protected] Internet: www.eaton.com/moellerproducts www.eaton.comIndirizzi EATON nel mondo: www.moeller.net/address 4 *patpks#nycmyn* Rückenbreite 4 – 6 mm (1 Blatt = 0,106 mm für XBS Digitaldruck) (1 Blatt = 0,080 mm für Eberwein Digitaldruck bei 80 g/m2) easy800 User Manual Modular PLC XC-CPU101…(-XV) 10/10 MN05003004Z-EN replaces 01/08 AWB2724-1453GB Rückenbreite festlegen! (1 Blatt = 0,106 mm, gilt nur für XBS) All brand and product names are trademarks or registered trademarks of the owner concerned. Emergency On Call Service Please call your local representative: http://www.eaton.com/moeller/aftersales or Hotline After Sales Service: +49 (0) 180 5 223822 (de, en) [email protected] Original Operating Instructions The German-language edition of this document is the original operating manual. Translation of the original operating manual All editions of this document other than those in German language are translations of the original German manual. 1st published 2002, edition date 06/02 2nd edition 10/2002 3rd edition 04/2003 4th edition 08/2003 5th edition 11/2003 6th edition 12/2003 7th edition 06/2004 8th edition 11/2004 9th edition 03/2005, 10th edition 01/2008 11th edition 10/2010 see revision protocol in the “About this manual“ chapter © Eaton Industries GmbH, 53105 Bonn Authors: Editor: Translator: Werner Albrecht, Peter Roersch Thomas Kracht, Barbara Petrick globaldocs GmbH All rights reserved, including those of the translation. No part of this manual may be reproduced in any form (printed, photocopy, microfilm or any other process) or processed, duplicated or distributed by means of electronic systems without written permission of Eaton Industries GmbH, Bonn. Subject to alteration without notice. Danger! Dangerous electrical voltage! Before commencing the installation • Disconnect the power supply of the device. • Ensure that devices cannot be accidentally restarted. • Verify isolation from the supply. • Earth and short circuit. • Cover or enclose neighbouring units that are live. • Follow the engineering instructions (AWA) of the device concerned. • Only suitably qualified personnel in accordance with EN 50110-1/-2 (VDE 0105 Part 100) may work on this device/system. • Before installation and before touching the device ensure that you are free of electrostatic charge. • The functional earth (FE) must be connected to the protective earth (PE) or to the potential equalisation. The system installer is responsible for implementing this connection. • Connecting cables and signal lines should be installed so that inductive or capacitive interference does not impair the automation functions. • Install automation devices and related operating elements in such a way that they are well protected against unintentional operation. • Ensure a reliable electrical isolation of the low voltage for the 24 volt supply. Only use power supply units complying with IEC 60364-4-41 (VDE 0100 Part 410) or HD 384.4.41 S2. • Deviations of the mains voltage from the rated value must not exceed the tolerance limits given in the specifications, otherwise this may cause malfunction and dangerous operation. • Emergency stop devices complying with IEC/EN 60204-1 must be effective in all operating modes of the automation devices. Unlatching the emergency-stop devices must not cause restart. • Devices that are designed for mounting in housings or control cabinets must only be operated and controlled after they have been installed with the housing closed. Desktop or portable units must only be operated and controlled in enclosed housings. • Measures should be taken to ensure the proper restart of programs interrupted after a voltage dip or failure. This should not cause dangerous operating states even for a short time. If necessary, emergency-stop devices should be implemented. • Wherever faults in the automation system may cause damage to persons or property, external measures must be implemented to ensure a safe operating state in the event of a fault or malfunction (for example, by means of separate limit switches, mechanical interlocks etc.). Eaton Industries GmbH Safety instructions • Suitable safety hardware and software measures should be implemented for the I/O interface so that a line or wire breakage on the signal side does not result in undefined states in the automation devices. I II 10/10 MN05003004Z-EN Contents About this manual List of revisions Abbreviations and symbols Additional documentation 1 2 3 Design of the XC100 5 5 6 6 CPU with PSU and local inputs/outputs 24 V PSU with local inputs/outputs – Task – Surface mounting – Connecting interrupt inputs – Local bus expansion with XIOC-BP-EXT CPU – Task – Use of the CPU types – Surface mounting – LED status indicator – Operating mode selector switch – Multimedia Card (MMC)/Memory card – Programming device interface – CANopen interface – Real-time clock – XC-CPU101-…-XV – Battery CPU installation Detaching the CPU 7 7 7 7 8 9 10 10 10 10 11 11 11 11 12 14 15 15 15 16 16 Control panel layout – Ventilation – Layout of units Preventing interference – Suppressor circuitry for interference sources – Shielding Lighting protection Wiring examples – PSU – Power supply of the digital inputs/outputs 17 17 17 17 17 17 17 18 18 18 18 Startup behaviour Switch-off behaviour Start behaviour Stop behaviour Cold start Warm start Test and commissioning – Breakpoint/single-step mode – Single-cycle mode – Forcing – Status indication, easySoft-CoDeSys 19 19 20 20 20 20 20 20 20 20 20 20 Engineering CPU operation 1 Contents 10/10 MN05003004Z-EN Programreset – Warm reset – Cold reset – Full reset Program parameterization – Maximum program cycle time – Start behaviour at Power-On Creating and transferring a boot project Create boot project after online change Updating the operating system (OS) – Transferring the operating system from the PC to the PLC – Transferring the operating system from the PC into the MMC – Transferring the operating system from the MMC into the PLC – Update of further XC100 PLCs 4 Program processing and system time Cycle-time monitoring System libraries, function blocks and functions – Library manager Target system specific libraries – Lib_Common – Libraries of the “Lib_CPU101” Direct peripheral access – Functions – Error code with “direct peripheral access” Interrupt processing Interrupt prioritising – Timer interrupt – DisableInterrupt – EnableInterrupt – Creating and integrating an interrupt function System events Browser commands – “canload” browser command Data remanence Program transfer Operating states Limit values for memory usage Addressing inputs/outputs and markers – “Activate Automatic addresses” – Check for overlapping addresses – Uneven word addresses – Address range – Free assignment or modification of addresses of input/output modules and diagnostic addresses – Run “Automatic calculation of addresses” Diagnostics 5 Establishing a PC – XC100 connection Establishing a connection via the RS232 interface (XC100) – Programming cable – Software easySoft-CoDeSys 2 21 21 21 21 21 21 21 21 21 22 22 23 23 23 25 25 25 25 26 26 27 29 30 33 34 34 35 36 36 37 39 40 40 41 41 41 42 43 43 43 43 43 44 44 44 45 45 45 45 10/10 MN05003004Z-EN 6 7 8 Contents Creating a sample project Task Procedure – Setting up a target system – Configure XC100 controller – Writing a program 47 47 47 47 50 54 Prerequisites Notes Addressing Communication with the target PLC PLC combinations for routing Number of communication channels 55 55 56 56 57 58 58 Programming via CANopen network (Routing) RS232 interface in transparent mode (COM 1/2/3) 59 Demands placed on the functionality of the transparent mode – “SysComOpen” function – “SysComClose” function – “SysComRead” function – “SysComWrite” function – “SysComSetSettings” functions – “SysComReadControl” function – “SysComWriteControl” function – Automatic closing of the interface 60 60 63 64 65 66 68 69 69 Compatibility Dimensions – XC-CPU101... – XT-FIL-1 line filter – Racks Technical data 71 71 72 72 72 72 73 Appendix Index 77 3 10/10 MN05003004Z-EN 4 10/10 MN05003004Z-EN About this manual List of revisions Edition date Page Keyword 10/02 70 “External filter: If required” 04/03 20 „Warm start“ 29 „Direct peripheral access“ j 22 „Updating the operating system (OS)“ j 34 „Interrupt processing“ j 11 „Data access to the multimedia card“ j 40 „Browser commands“ j 51 “Routing” j All Baud rate modified from 57600 to 38400 20 „Status indication, easySoft-CoDeSys“ j 32 “Communication interrupted” message j 39 „System events“ j 45 „Communication fault(#0): Logging off“ j 69 Battery life 10, 69 XC-CPU-101-C256k-8DI-6DO (-XV) 08/03 08/03 (Reprint) 12/03 New Modificatio n j j j j j Completely revised 12/03 (Reprint) 41 „Data remanence“, 1st paragraph 04/04 42 „Limit values for memory usage“ j 06/04 18, 68, 72 “External 24 V DC line filter for the XC100 power supply” j 11/04 11 MMC j 19 „Startup behaviour“ j 21 „Full reset“ j 21 „Creating and transferring a boot project“ j 22 „Updating the operating system (OS)“ j 42 „Segment size of the XC-CPU101-C256k“ j 43 „Addressing inputs/outputs and markers“ j 44 „Diagnostics“ j 55 „Programming via CANopen network (Routing)“ 21 „Create boot project after online change“ 41 „Data remanence“ j 55 „Programming via CANopen network (Routing)“ j All Change to Eaton terminology 03/05 01/08 10/10 Omitted j j j j j 5 About this manual Abbreviations and symbols Symbols used in this manual have the following meanings: MWS Menu selector switch BAS Operating mode switch CPU Central processing unit CRC Cyclic redundancy check MMC Multimedia card I/O Inputs/outputs X indicates instructions to be followed Select ‹File r New› means: activate the instruction “New” in the “File” menu. Attention! Warns of the risk of material damage Caution! Warns of the possibility of serious damage and slight injury Warning! Indicates the risk of major damage to property, or serious or fatal injury. For clarity of layout, we adhere to the following conventions in this manual: at the top of left-hand pages you will find the Chapter heading, at the top of right-hand pages the current Section heading; exceptions are the first pages of Chapters and empty pages at the end of Chapters. Additional documentation At different points in this manual, references are made to more detailed descriptions in other manuals. These are described with their title and documentation number (e.g. MN04802001Z-EN). All manuals are available in PDF format. If for some reason the manual is not supplied on the product CD, it is available for download as a PDF file. Go to http://www.eaton.com/moeller a Support and enter the document number in the Quick Search field. 6 10/10 MN05003004Z-EN 10/10 MN05003004Z-EN 1 Design of the XC100 The XC-CPU101-... controllers – referred to below simply as XC100 – have been designed for application in machinery and plant control systems. These controllers are fitted with interfaces for connecting to a programming device (RS232) and for linking to decentralized CANopen expansion units, so they can form the core of a comprehensive automation system. The XC100 controller has a compact design, and can be fitted with either local or decentralized expansion. The basic unit consists of: CPU with PSU and local inputs/outputs The CPU module of the XC100 has a compact design that is divided into two functional units: • Processor unit with interfaces • 24 V PSU with integral digital inputs (eight) and digital outputs (six). • Rack, • A CPU for control or visualisation, with integral power supply and local inputs/outputs, • XIOC signal modules. a b Figure 1: Layout of the XC-CPU101 with XIOC modules h Further details about the CPU can be found in the next section. Detailed information about the module racks and XIOC modules can be found in the manual “Hardware and Engineering, XIOC Signal modules”. This manual is provided as a PDF file (h1452g.pdf) on the CD. The latest versions of specific manuals can be found at http://www.eaton.com/moeller a Support. Search item: MN05002002Z-EN Figure 2: Assembly of the CPU module XC-CPU101 a Processor unit b 24 V PSU with local inputs/outputs 24 V PSU with local inputs/outputs The power supply unit provides the operating voltages required by the processor unit and the inputs/outputs (local and decentralized). Task The power supply transforms the 24 V DC supply voltage into the voltages required by the system. These voltages are fed to the bus on the basic rack unit and any expansion rack units that are present. The special feature of connection to the 24 V supply voltage is that the processor unit and the local inputs/outputs can be fed separately. One 24 V connection is provided for the processor unit (labelled: 24V/0V) and another 24 V connection for the local inputs/outputs (labelled: 24VQ/0VQ). 7 10/10 MN05003004Z-EN Design of the XC100 Surface mounting Table 1: Limitations which apply when using the XC100-CPU and the XIOC-Signal modules in an ABS plastic enclosure Fitted in: Installation location internal temperature: Current rating of the 5 V system voltage of the I/O bus CI enclosure > 40 °C Use of the XC100 not permissible 0 to 40 °C max. 1.5 A1 Distribution fuse-board 0 to 55 °C max. 1.5 A1 Control panel > 40 °C max. 1.5 A1 0 to 40 °C max. 3.2 A a 8 DI b 6 DO Enable 24 V H 24 VQ 0 VQ 24 V 0V Figure 3: 5VH 3.3 V H e VCC I/O 5VH 24 V H PFI c d Block diagram: power supply unit a Status indicator for I/Os b Front connection terminals c Internal filter d Buffer e XIOC I/O-bus, module rack PFI = Power Fail Interrupt The voltage connection 0VQ/24VQ is only for the supply voltage to the integral local inputs (8) and outputs (6), and is electrically isolated from the bus. The 0V/24V voltage connection is internally filtered and buffered and fed to a voltage transformer which generates the required system voltages. The internal power supply for the 5 V system voltage is designed so that the processor unit is supplied with the required current. i Caution! When using the XC100-CPU and the XIOC-Signal modules in an ABS plastic enclosure, the limitations stated in table 1apply. ABS enclosures are identified with “ABS” on the surface which faces the backplane. 1) On the outputs of the CPU made of ABS enclosure material, a utilization factor g of 0.5 applies h Limitations in performance for the digital I/O modules with ABS enclosures are described in the documentation for the XIOC signal modules (MN05002002Z-EN; previously AWB2725-1452GB). If there is an interruption break or collapse of the 24 V supply (threshold is about 10 V) then a power-down logic switches of the 5 V supply to the signal modules (central I/O). The sequence is initiated by the PFI signal and leads to a power-down through the CPU. Local digital inputs The 18-pole terminal block which has the power supply to the CPU, the local I/Os and the physical connection to the local inputs/outputs is located on the right half of the CPU behind the front enclosure. The eight digital inputs and six semiconductor outputs are designed for 24 V signals and have a common 0VQ/24VQ power supply which is potentially isolated right up to the bus. Local digital inputs/outputs The outputs Q0.0 to Q0.5 can be loaded with 500 mA, a duty factor (ED) of 100% and a utilization factor (g) of “1”. h Attention! Please observe the limitations of performance for the outputs with ABS enclosures in a table 1. The outputs are short-circuit proof. A short-circuit state should, however, not be permitted to exist over a longer period. 8 10/10 MN05003004Z-EN 24 V PSU with local inputs/outputs Terminal assignments LED displays The LEDs indicate the signal status for the inputs and outputs. An LED that is ON indicates a H-level signal on the corresponding terminal. I 0.0 I 0.1 I 0.2 I 0.3 I 0.4 1 2 3 4 5 6 7 0 1 2 3 4 5 I 0.5 I 0.6 I 0.7 Q 0.0 Q 0.1 Q 0.2 Q 0.3 Q 0.4 Inputs 0.0 to 0.3 Inputs 0.4 to 0.7 Outputs 0.0 and 0.3 Outputs 0.4 and 0.5 Q 0.5 24 VQ 0 VQ 24 V 0V Figure 5: Figure 4: 0 LEDs for the integral inputs/outputs The two upper rows of LEDs show the signal status for the eight digital inputs of the CPU module (I0.0 to I0.7), and the two lower rows show the signal status for the six digital outputs (Q0.0 to Q0.5). Connections for PSU and local I/O I0.0 to I0.7: local digital inputs Q0.0 to Q0.5: local digital outputs 0VQ/+24VQ: supply voltage for the local inputs/outputs 0V/+24V: supply voltage to the processor unit Connecting interrupt inputs The inputs I0.0, I0.1, I0.2, I0.3 can be used as interrupt inputs. The L/H edges are evaluated. The interrupt inputs act immediately and independently of the cycle time for the application and they start the programmed Interrupt routines. The program section which has been processed up to the arrival of the Interrupt signal is interrupted immediately. All further Interrupt processes should be application related programmed. I0.0 I0.1 I0.2 I0.3 Interrupt 1 1 Interrupt 2 2 Interrupt 4 Interrupt 3 3 4 24 VQ 0 VQ 24 V 0V Figure 6: Interrupt input connections 9 10/10 MN05003004Z-EN Design of the XC100 h If an XC100 PLC is replaced by an XC200 PLC, the interrupt inputs are connected to other physical input addresses! Local bus expansion with XIOC-BP-EXT The XIOC-BP-EXT backplane enables expansion of local system busses from a max. of 7 to a max. of 15 slots. C64K, C128K and C256K are a measure for the size of the user memory. “XV” designates a visualisation CPU, and permits the direct connection to and control of a text display (XV-101). In accordance with the size of the application program, the following memory values apply: XC-CPU101-…(-XV) C256K-8DI-6DO Further information can be found in the “XIOC signal modules” (MN05002002Z-EN; previously AWB2725-1452GB) documentation. Integration of the bus expansion via the software is explained in the “Expansion of the XIOC bus” section. C128K-8DI-6DO The possible arrangement of the backplane is described in the documentation of the XIOC signal modules (MN05002002Z-EN; previously AWB2725-1452GB). Please pay attention to the current requirements, particularly the current supplied by the power supply and the current requirement of the signal modules. C64K-8DI-6DO The intelligent modules such as network and gateway modules can only be inserted into I/O slots 1 to 3. All other modules can be connected to any slot. Program code 64 kByte 128 Kbyte 256 kByte Program data, of which: 64 kByte 128 Kbyte 256 kByte Markers 4 kByte 8 kByte 16 kByte Retain data 4 kByte 8 kByte 16 kByte The XC-CPU...-XV types have an additional 64 kByte flash memory for text CPU The XC-CPU101...(-XV) types of CPU are based on a processor with an integrated CAN interface, and include battery-buffered flash and SRAM memories. The CAN fieldbus interface is electrically isolated. A battery is required for the operation of the data-saving function. The monitoring of the system voltage ensures that the data-saving routine will be initiated if the voltage goes below a fixed preselected level. In order to ensure that the stored energy required for the data-saving routine is not used up by I/O activities, the 5 V system voltage for the I/O modules is switched off. The internal real-time clock facilitates time and date dependent control functions. The available operating and interface control devices are: • • • • • 10 LED display for RUN/Stop and general error Operating-mode selector switch RUN/Stop RS232 interface, e.g. for programming device interfacing CANopen interface as a fieldbus interface Interface for a multimedia memory card (MMC). Task The task of the CPU is to generate output signals from the incoming local and central/decentralized signal, in accordance with the application program. Input/output signal can be, for instance: • • • • • • • digital or analog signals commands from the text display1) output to the text display1) connections to the programming system connections to the CANopen bus interface connections to fieldbus modules, if present connections to intelligent signal modules, if present. 1) Only with XC-CPU...-XV Use of the CPU types XC100 The CPUs for XC100 controllers are available in various different versions: CPU types • XC-CPU101-C64K-8DI-6DO (-XV) • XC-CPU101-C128K-8DI-6DO (-XV) • XC-CPU101-C256K-8DI-6DO (-XV) XC-CPU101... XC-CPU101…(-XV) Text display XV-101-… K42 K84 j – – j j j 10/10 MN05003004Z-EN CPU Surface mounting h From operating system (OS) version 03.03 it is possible to a Py b Px c transfer the operating system to the memory card and to transfer it from there to other PLCs, a section “Updating the operating system (OS)” on page 22. f + GPIO 80C164 SPI MMC Adr. Data d e SRAM h FLASH (XV) g RS 232 (LCD/ Touch Panel) CAN UART Erasing functions Use the browser “Format” command in order to erase the entire content on the MMC. You can delete the boot project and the operating system on the MMC using the “Reset (Original)” command. Data access to the multimedia card The “XC100_File” library is contained in the “Lib_CPU101”. It provides the elements for access to the MMC. It is necessary to add the respective library to the “Library manager”: Change to the library manager and position the mouse pointer on the field for the libraries. Then press the right-hand mouse button. X Select the “Additional library insert” command in the new opened information window. X Select the “Lib_CPU101” library and then the “XC100_File” file. Open this file. X Figure 7: a b c d e f g h Block diagram of the XC-CPU101 State indication RUN, Stop, SF Operating mode selector switch Multimedia card Programming device interface: RS232 on XC-CPU101 CANopen fieldbus interface Voltage monitoring I/O bus interface XIOC I/O bus (on module rack) LED status indicator a chapter “Operating states” on page 41. Operating mode selector switch The operating modes “Stop” and “Run” are selected by a rocker switch at the front of the CPU module. Please note that the position of the operating mode selector switch sets the behaviour of the CPU. The effectiveness of the software settings depends on the position of the operating mode selector switch. If the selector switch is changed to the “Stop” position while the equipment is in the “Run” mode, then the CPU will switch from the operating mode “Run” to the “Stop” state at the end of the cycle that is currently running. The position of the operating mode selector switch is polled at the end of each cycle, and the controller switches to the selected state, a chapter “CPU operation”. The module is integrated into the library manager with the “Open” command. The following functions are now available: • • • • • • • • FileClose FileDelete FileGetSize FileOpen FileRead FileRename FileSetPos FileWrite. Further information about these modules can be found in the “Libraries of the XC100_File.lib” section and the in the manual “Function Blocks for easySoft-CoDeSys” (MN05010002Z-EN; previously AWB2786-1456GB). h Attention! • The “FAT16 file system” is not transaction-safe. • The control voltage/control may not be switched off when a File service is still open. • A voltage failure or shut down of the supply voltage with an open File service can lead to destruction of the multimedia card. Multimedia Card (MMC)/Memory card The multimedia card is used as an optional backup medium for the (boot) project and to save recipe data. The operating system supports memory capacities up to a maximum of 128 MByte. At present, Eaton offers MMCs in the sizes 16 and 32 MByte, with the type designations XT-MEM-MM16M and XT-MEM-MM32M. To write data to the multimedia card, just plug it into the corresponding MEM CARD slot in the CPU. Use the command “create boot project” to transfer the project to the MMC. 11 Design of the XC100 Programming device interface The CPU is fitted with an RS232 interface. This serial interface enables a point-to-point connection. The handshake lines are not available. Communication between the controller and the programming device takes place through this RS232 interface. Physically, the interface is an RJ45 socket. Use the programming cable XT-SUB-D/RJ45 for connecting XC100. The interface is not electrically isolated. Interface assignment RS232 8 7 6 5 4 3 2 1 8 7 6 5 4 3 2 1 RxD GND – TxD GND – – – Data transfer rate modification X Open the ‹Resources r PLC Configuration› dialog field. X Activate the “Other parameters” tab. X Select the required data transfer rate in the “Baudrate” list field. In the example, this is 38400 kBit/s. Figure 8: X X 12 Controller configuration – “Other parameters” Close the “Other Parameters” window. Select the menu ‹Online r Login›. 10/10 MN05003004Z-EN 10/10 MN05003004Z-EN CPU X If you answer this query with “Yes”, and you see the following error message shown below for a communication error, the baud rates for XC100 and XSoft do not match. The next steps show you how to set the baud rate. Figure 11: Communication fault X X Acknowledge the error message, with “OK”. Select the menu ‹Online r Communication parameters› (a figure 9). Now you will see the “Communication window”, as shown in the next diagram. Figure 9: Menu “Online” The query as illustrated in (a figure 10) appears: Figure 12: Communication parameters Figure 10: Query concerning program change X Use a double-click to select the field with the preset baud rate. This field now has a grey background. Double-click this field once more to choose the Baud rate, e.g. 38400 Bit/s Confirm with “OK”. X Select the menu ‹Online r Log-in› again. X Once again, you will see the following message: Figure 13: Confirmation request after program change X X Again, answer this query with “Yes”. Select the menu ‹Online r Start› (a figure 9). This puts the controller into the RUN mode. The subsequent communication between the XC100 and the PC (as the programming device) will be made at the selected transmission rate. 13 Design of the XC100 10/10 MN05003004Z-EN CANopen interface Bus terminating resistors The ends of the network link must be terminated with 120 O bus termination resistors: The CPUs can be connected to the CANopen bus via the electrically isolated ISO-11898 interface. The connector has the following assignment: 6 Terminal 6 5 4 3 2 1 Signal 6 GND 5 CAN_L 4 CAN_H 3 GND 2 CAN_L 1 CAN_H 6 6 5 5 4 4 3 3 3 2 2 2 1 1 1 5 4 120 O CAN_L CAN_H 120 O Figure 14: Possible configuration of a CANopen bus with bus termination resistors Terminals 1 and 4, 2 and 5, 3 and 6 are internally connected. Properties of the CANopen cable Use only cable approved for CANopen applications and with the following characteristics: Connector type: 6-pole, plug-in spring-loaded terminal block, conductor cross-section up to 0.5 mm2 The CPUs can be operated on the CAN bus either as the network (NMT) master or as the NMT slave. • Characteristic impedance 100 to 120 O • Capacitance < 60 pF/m The CPU can be used to send/receive CAN telegrams directly to/from the user program. An interruption on the CAN Bus will only be recognised when the respective CAN slave is monitored by the PLC (Nodeguarding function). The demands placed on the cable, connectors and bus termination resistors are specified in ISO 11898. Following you will find some demands and stipulations listed for the CANopen network. In the following table, standard parameters for the CANopen network with less than 64 CANopen slaves are listed (table complies with the stipulations of the ISO 11898). Power supply The sequence in which the power supply of the individual CAN slaves is connected does not have an effect on the functionality of the CAN bus. Depending on the parametric programming, the PLC “waits” for the non-existent slave or starts it at the time at which the slave is interfaced to the CAN network. Start/Stop behaviour If you set the operating mode selector to the “Stop” position, all outputs of the decentralized devices will be set to the “0” level. Table 2: Bus length Loop resistance [m] [mO/m] Standard parameters for CANopen network cable according to the ISO 11898 Conductor crosssection Bus termination resistor [mm2] [O] Transfer rate with cable length [kBit/s] 0 – 40 70 0.25 – 0.34 124 1000 at 40 m 40 – 300 < 60 0.34 – 0.6 150 – 300 > 500 at 100 m 300 – 600 < 40 0.5 – 0.6 150 – 300 > 100 at 500 m 600 – 1000 < 26 0.75 – 0.8 150 – 300 > 50 at 1000 m The length of the CANopen bus cable is dependant on the conductor cross-section and the number of bus users connected. The following table includes values for the bus length in dependance on the cross-section and the connected bus users, which guarantee a secure bus connection (table corresponds with the stipulations of the ISO 11898). 14 10/10 MN05003004Z-EN Table 3: CPU Cable cross-section, bus length and number of bus slaves conform to ISO 11898 Cable cross-section [mm] Maximum length [m] n = 32 n = 64 n = 100 0.25 200 170 150 0.5 360 310 270 0.75 550 470 410 XC-CPU101-…-XV The XC-CPU101-...-8DI-6DO- XV units are equipped with an expandable operating system. The functionality of the system permits operation of these CPUs with text displays from the XV-101-.. h The text displays are described in the separate manual “Hardware and Engineering“ (MN04802001Z-EN; previously AWB2726-1461GB). n = number of connected bus users If the bus length is greater than 250 m and/or are more than 64 slaves connected, the ISO 11898 demands a residual ripple of the supply voltage of F 5%. As the bus cable is connected directly to the COMBICON connector of the CPU, additional details concerning stub lines are not required. The bus users are configured in the “PLC Configuration” window of the CPU in the programming software. Cable recommendation: LAPP cable UNITRONIC-BUS LD Real-time clock Battery A lithium battery, type 1/2 AA (3.6 V) is used for data-saving. The battery compartment can be found on the left side of the CPU unit, behind a cover plate. The charge level of the battery is monitored. If the battery voltage falls below a fixed preset level, then a general error message will be generated. The battery buffer times are: • Worst-case: 3 years continuous buffering • Typical: 5 years of continuous buffering h Attention! To avoid loss of data, the battery must be changed when the low threshold level has been reached. Ordering designation of the battery: XT-CPU-BAT-1 The XC100 features a real-time clock, which can be referenced in the user program via the functions from the “SysLibRTC” library. The following functions are possible: • Display of the battery charge state • Display mode for hours (12/24 hour display) • Reading and setting of the real-time clock. A description of the functions can be found in the “SysLibRTC.pdf” file. h For the XC100 the “GetRealTimeClock” (evaluation of the real-time clock) and “SetRealTimeClock” (setting of the real-time clock) function blocks can continue to be used. However, they are not supported by the XC200 and XN-PLC-CANopen controls. More information about the function blocks can be found in the separate “Function blocks for easySoft CoDeSys” (MN05010002Z-EN; previously AWB2786-1456GB) manual. 15 10/10 MN05003004Z-EN Design of the XC100 CPU installation Detaching the CPU h Detailed information about the installation of the backplanes and XI/OC modules can be found in the manual “Hardware and Engineering XI/OC Signal Modules“ (MN05002002Z-EN; previously AWB27251452GB). Here you can also find further information on the various types of module rack and the individual slot assignments for the CPU and the XI/OC signal modules. Insert the loop on the bottom of the CPU module into the hole in the module rack 1 . X Press the top of the CPU module onto the module rack, until you hear it click into position 2 . Press in the catch 1 . Keep the catch pressed in, and pull the top of the CPU module forwards 2 . X Lift up the CPU module and remove it 3 . X X 1 3 X 2 2 Figure 16: Detaching the modules 1 Figure 15: CPU installation 16 10/10 MN05003004Z-EN 2 Engineering Control panel layout Preventing interference The layout of the components inside the control panel is a major factor for achieving interference-free functioning of the plant or machinery. During the project planning and design phase, as well as its implementation, care must be taken that the power and control sections are separated. The power section includes: Cable routing and wiring Cables are divided into the following categories: • • • • • Contactors, Coupling/interfacing components, Transformers, Frequency inverters, Converters. • Electric power lines (e.g. power lines carrying high currents, or lines to converters, contactors, solenoid valves) • Control and signal cables: (e.g. digital input lines) • Measurement and signal cables (e.g. fieldbus connections) h Always route power cables and control cables as far apart In order to effectively exclude any electromagnetic contamination, it is a good idea to divide the system into sections, according to their power and interference levels. In small switchgear cabinets it is often enough to provide a sheet steel dividing wall, to reduce interference factors. Ventilation In order to ensure sufficient ventilation a minimum clearance of 50 mm to passive components must be observed. If the neighbouring components are active elements, such as power supplies or transformers, then the minimum spacing should be 75 mm. The values that are given in the technical data must be observed. as possible. This avoids capacitive and inductive coupling. If separate routing is not possible, then the first priority must be to shield the cable responsible for the interference. Take care to implement proper cable routing both inside and outside the control panel, to keep interference as low as possible: Avoid parallel routing of sections of cable in different power categories. X As a basis rule, keep AC cable separated from DC cables. X Keep to the following minimum spacing: – at least 10 cm between power cables and signal cables; – at least 30 cm between power cables and data or analog cables. – When routing cables, make sure that the outgoing and return leads of a circuit pair are routed together: The currents flowing in opposite directions thus cancel each other out as a summation. The generated electromagnetic fields cancel each other out. X Layout of units Build the module racks and the controls into the switchgear cabinet in a horizontal position: Suppressor circuitry for interference sources X c All suppressor circuitry should be wired in as close to the source of interference (contactors, relays, solenoids) as possible. h Switched inductors should always have suppressor ab circuitry fitted. Shielding a b a b X Use shielded cables for the connections to the data interfaces. The general rule is: the lower the coupling impedance, the better the shielding effect. ab Figure 17: Control panel layout a Spacing > 50 mm b Spacing > 75 mm to active elements c Cable duct 17 10/10 MN05003004Z-EN Engineering Lighting protection PSU External lightning protection All cables that go outside buildings must be shielded. Metal conduit is the best solution to this problem. For signal cables, use overvoltage protection devices, such as varistors or other similar devices. Install the protection devices as close as possible to the cable entry into the building, at the latest there were the cable enters the switchgear cabinet. a L1 L2 L3 N PE b c Internal lightning protection Internal lightning protection covers all those measures taken to reduce the effects of a lightning strike and the resulting electrical and magnetic fields on metallic installation and electrical plant. These measures are: f 2*) h You can find wiring examples for the XI/OC modules in the manual “Hardware and Engineering, XI/OC signal Modules” (MN05002002Z-EN; previously AWB27251452GB). = de 1*) XT-FIL-1 1*) 24 V 1*) 0 V DC 24 VQ 0 VQ DC (Voltage supply of CPU101) (Voltage supply of the local digital inputs/outputs) XC-CPU101-CxxK-8DI-6DO Please consult the following manuals for advice on cable routing and shielding measures: Wiring examples ~ = de • equipotential bonding/earthing • shielding • using overvoltage protection devices • AWB27-1287 “EMC Engineering Guidelines for Automation Systems” • TB27-001-GB “Electromagnetic Compatibility (EMC) for Automation systems” • TB02-022-GB “Electromagnetic Compatibility (EMC) for Machinery and Plant” ~ Figure 18: Wiring example for the supply section Main switches Circuit protection device 24 V DC supply voltage Earthed operation In floating (i.e. unearthed) operation, an isolation monitor must be used (IEC 204-1, EN 60204-1, DIN EN 60204-1). f 24 V DC line filter; ensures that a current of up to 2.2 A (maximum) is available at a rated voltage of 24 V DC. Ensures that the EMC stipulations for devices are fulfilled when the filter is used. The filter is not a component of the CPU and must therefore be ordered separately: Type: XT-FIL-1, Article no.: 285316 (Supplier: Eaton Industries GmbH) a „Dimensions“on page 72 a „Technical data“on page 76 1*) Internal jumper 2*) Additional PE connection via contact spring on rear a b c d e Power supply of the digital inputs/outputs 0 2 4 6 0 2 4 24 VQ 24 V 1 3 5 7 1 3 5 0 VQ 0V + 24 V H 0VH Figure 19: Example for wiring the terminal block The wiring example indicates the wiring of a separate voltage supply for inputs/outputs. 18 10/10 MN05003004Z-EN 3 CPU operation completed, the operating system (OS) takes over the communication with the programming system as well as execution and debugging of the application program. It only supports one application program. Startup behaviour After the supply voltage is switched on the CPU will carry out a self-test and several CRC checks. If a fault is detected, it will remain in the “Switch-on not OK” state, a chapter “Operating states” on page 41. After the tests have been successfully Power on PLC Start BTS in MMC? No yes BTS MMC k BTS PLC? yes no CPU start BTS MMC a PLC Boot projekt in MCC No yes Application will be deleted Default settings: 38,4 KB COM1 125 KB CAN 127 CAN Node ID Boot project MCC = Main memory project (SRAM) yes RUN/STOP switch in RUN? No Load project in main memory (SRAM), prepare cold start Executable project in working memory (SRAM) No yes No yes RUN READY NOT READY Figure 20: Startup behaviour 19 10/10 MN05003004Z-EN CPU operation Switch-off behaviour Warm start Switch-off (operating mode selector switch: Run r Stop) leads to an interruption of the program run the end of the cycle. Running of the program is ended immediately with a voltage dip (switching via the PFI signal). The outputs are switched off at the same time. When the supply voltage returns, the controller carries out a restart (see section “Startup behaviour”). All further starts of the loaded program as well as after “Warm resets” are warm starts. The variables that were declared with “RETAIN” retain their values, the other variables are set to their initialisation values and program is started. Test and commissioning Start behaviour The start behaviour of the controller depends on: • the position of the local operating mode selector switch • the parameter settings for start behaviour that were set in the programming system. (With the CPU version “XV” (visualisation CPU), it is basically possible to operate the system from the system menu in the display). The position of the operating mode switch determines whether the operating states changes from “Stop” to“Run”.This change cant be forced by a corresponding choice within the programming system. When a program starts, a check is made whether the configured inputs and outputs match those that are actually present. A check is also made whether the module that was parameterized is physically present, or a different module. A module that is not present will not have any effect on the start of the application program, but if the module is a different type, the start will be prevented. When the application program starts, a distinction is made between (see also the following sections): • Cold start • Warm start Stop behaviour The processing of the application program always halts at the end of a program cycle. The PLC supports the following test and commissioning features: • • • • • Breakpoint/single-step mode Single cycle mode Forcing Online modification Status indication (Power Flow). Breakpoint/single-step mode Breakpoints can be set within the application program. If an instruction has a breakpoint attached, then the program will halt at this point. The following instructions can be executed in single-step mode. The cycle-time monitoring is deactivated. i Caution! At this moment any outputs set will remain set! Single-cycle mode In single-cycle operation, one program cycle is performed in real time. The outputs are enabled during the cycle. At the end of the cycle, the output states are cancelled and the outputs are switched off. The cycle-time monitoring is active. Forcing All the variables in an application program can be forced to a given setting. If variables for physical outputs of the local I/Os are forced, they will only be connected through to the peripherals in the “Run” state. Status indication, easySoft-CoDeSys Cold start A cold start is initiated during the initial start, after loading a program to the PLC and after every “Cold reset”. During this start, all the program variables are set to their initialisation values and the program is started. 20 • The signal state of the physical, Boolean inputs are displayed in “Start” and “Stop” mode. • The signal state of the physical, Boolean outputs are only displayed in “Start” (RUN) mode. • The display for a low signal is displayed with “FALSE” and has a black background. • The display for a high signal is displayed with “TRUE” and has a blue background. • All other variables are only displayed in “Start” mode with the current respective variable value. 10/10 MN05003004Z-EN Programreset Programreset Creating and transferring a boot project The application program can be reset to one of the following levels: A boot project is generated by a loaded user program and saved on the MMC. • Warm reset • Cold reset • Full reset The following steps are necessary in order to create a boot project: Warm reset This correspond to the initialisation during a warm start, see section “Warm start”on page 20. Cold reset This correspond to the initialisation during a cold start, see section “Cold start”on page 20. Full reset The application program in the controller is completely deleted. After this, the controller is in the “NOT READY” state. The boot project and the operating system on the MMC will also be deleted. Program parameterization Insert an MMC into the “MEM Card” slot of the CPU. Change over to the “Online” folder. X Select the “Login” command. X Select the “Create boot project” command. X X h The boot project is dependent to the operating system version with which it was generated. If you wish to transfer the boot project on a PLC into a further PLC, remove the MMC (with boot project) from the source PLC and insert it into the target PLC. Then switch the PLC off and on. The target PLC can only operate with the new boot project when the source PLC has the same operating system as that which has generated the boot project, a section “Updating the operating system (OS)”on page 22. Create boot project after online change After an online change has been carried out, you can create a new boot project. Please note the following information: An application program has various parameters that can be set or adjusted in the programming system: • Maximum program cycle time • Start behaviour at Power-On • Parameters for CAN Routing. Maximum program cycle time Figure 21: Download: Selection and information The maximum cycle time for the application program can be set, in the range from 20 ms to 1000 ms. The default value is 20 ms. Start behaviour at Power-On This setting defines how the controller should respond after switch-on, if an application program is present and the operating mode selector switch is in the “Run” position. The following settings are available: • WARMSTART (default setting), • COLDSTART, • STOP. 21 10/10 MN05003004Z-EN CPU operation Updating the operating system (OS) With the XC100, you have the possibility of replacing the operating system (OS) supplied with the PLC by a more recent one. Eaton offers the most recent operating system version for download on the Internet. h Not all of the functions of the new operating system (OS) are supported by the older XC100 versions. You have two choices available to transfer the operating system (OS). • Directly from the PC to the PLC • From the PC into the MMC. A transfer of the OS from the PC to the MMC of the PLC is possible only when the PLC has an OS from version 03.03 or higher. Transferring the operating system from the PC to the PLC If an operating system (OS) is loaded into the PLC, the existing operating system (OS) as well as the user program are deleted. Figure 23: Download: Selection and information X Press the “Operating System File” button and select the required operating system file (*.hex). h The files opened last can be selected via the drop-down menu. Procedure: Insert an MMC into the “MEM Card” slot of the CPU. Establish a serial connection via the RS232 interface of the PC with the XC100, see a page 45. X Activate the “Other Parameters” tap in the “PLC Configuration” window. X X Figure 24: Operating system file selection After the operating system file has been selected (from version V03.03) you receive information concerning the target type and file version. X Click the Transfer Device button. Transfer commences. Figure 22: Start the download of the XC100 operating system X Click on the “Start” button. The “Download” window opens. 22 h If a warning symbol appears in the “Download operating system - Status” field, the supply voltage may not be switched off! 10/10 MN05003004Z-EN Updating the operating system (OS) Transferring the operating system from the PC into the MMC If an OS is loaded into the MMC, the OS and the boot project on the MMC and the user program in the PLC are deleted. The procedure is similar to the description in section “Transferring the operating system from the PC to the PLC” on page 22. Transferring the operating system from the MMC into the PLC Switch the PLC off and on. The transfer can take more than 30 seconds as the CPU must be booted several times. Do not interrupt the process, e.g. by switching off the supply voltage! Figure 25: Warning during download Update of further XC100 PLCs Wait for the following display. If you wish to transfer the new operating system to further PLCs, insert the MMC into the PLC, which also features an OS from V03.03 or higher. The OS of the PLC is updated during the switch on process and a boot project is loaded into the PLC. Figure 26: OS successfully transferred to the PLC X In this window click the Exit button. After download of the OS into the PLC the “Communication interrupted” message may appear as the PLC is rebooted after every download of the OS. Renewed login is required after each reboot. As soon as you have logged on, the following message appears: “No program on the PLC! Should the new program be loaded? The program is loaded after you have acknowledged the question with “Yes”. You can then create the boot project. 23 10/10 MN05003004Z-EN 24 10/10 MN05003004Z-EN 4 Program processing and system time The application program is processed cyclically. The states of the inputs are read before the start of each program cycle, and the output states are written to the physical outputs at the end of the cycle. In addition, all system activities carried out before or after the processing cycle. Among these are: • Communication with easySoft-CoDeSys • Online modifications • Processing of the CANopen protocol stack, etc. As a result of the software architecture of the run-time system, timing jitter may occur between individual processing cycles. Cycle-time monitoring The cycle-time monitoring monitors the cyclic task of the application program using a hardware timer. If the time exceeds the parameterized time, the outputs of the controller will be disconnected and the XC100 is put into the “Stop” state. System libraries, function blocks and functions You can use various system libraries with the respective functions and function blocks for your application. Generally, the following libraries are available after the target system selection: • • • • Standard.lib RTCLib.lib Counter.lib SYSLIBCALLBACK.LIB In these libraries, general IEC modules and functions for the XC PLCs are included. You will find the above mentioned libraries in the easySoft-CoDeSys under ‹Resources l Library manager›. Further libraries which are subsequently installed are also displayed in the library manager. The description of the function blocks and functions can be found in the Library/Online help of the programming system: X Start the easySoft-CoDeSys, click on the “Help” button and select “Contents“. In this window you can choose between "Contents", "Index", and "Search". Library manager The installed libraries are placed in the Library Manager. Figure 27: Standard libraries in the library manager 25 Program processing and system time Target system specific libraries For the XC100 target system, the “Lib_Common” and “Lib_CPU101” libraries are required. 10/10 MN05003004Z-EN Standard.lib The IEC function blocks and standard functions are contained in the Standard.lib. The description of the function blocks and functions can be found in the programming software manual (MN05010003Z-EN; previously AWB2700-1437GB) and in the Library/Online help of the programming system. Figure 28: Target system specific libraries Lib_Common The basic functions which are required for the entire XC target systems are contained in the “Lib_Common”. Furthermore, this library contains the S40 typical function blocks which have been adopted from the PS40 system to the easySoft-CoDeSys system. Figure 30: Function blocks and functions of the “Standard.lib” Figure 29: Files of the “Lib_Common” Further information concerning the “STANDARD.lib” and “XS40_MoellerFB.lib” libraries can be found following this paragraph. More detailed explanations of the other libraries are not undertaken; they are explained in the (MN05010003Z-EN; previously AWB2700-1437GB) programming software manual and/or in the Library/Online help of the programming system. 26 10/10 MN05003004Z-EN XS40_MoellerFB.lib You can find the descriptions of the “XS40_MoellerFB” in the “Function Blocks for easySoft CoDeSys“ manual (MN05010002Z-EN; previously AWB2786-1456GB). Target system specific libraries • XC-...-XION: Connection of the XION products (AN2700K18GB) • XC-...-XC: Network variables (AN2700K19GB) • Coupling multiple autonomous controls (CAN-Device) via CANopen (AN2700K20GB). • Engineering of CAN stations (AN2700K27GB). “Counter.lib” library: The COUNTER library provides functions in order to integrate the XIOC-1CNT-100KHZ and XIOC-2CNT-100KHZ counter modules in the XC100 system. The description of the COUNTER library can be found in the “Function blocks for easySoft-CoDeSys “ manual (MN05010002Z-EN; previously AWB2786-1456GB) in the “Counter modules: counter.lib” section. Figure 33: Function blocks of the “Counter.lib” Figure 31: Function blocks of the “XS40_MoellerFB.lib” Libraries of the “Lib_CPU101” “RTCLib” library The “RTCLib” library provides read and write functions for access to the real-time clock. The description of the “RTCLib” library can be found in the “Function blocks for easySoft-CoDeSys“ manual (MN05010002Z-EN; previously AWB2786-1456GB) in the “Clock modules: RTCLib.lib” section. Libraries which are required for the XC100 target system are compiled together in the “Lib_CPU101” library. Figure 34: Function blocks of the “RTCLib.lib” Figure 32: Function blocks of the “Lib_CPU101” The libraries designated with “1)” include functions for the CANopen fieldbus. The CANopen bus expansion is described in the application notes regarding the CANopen bus. The application notes provide information concerning the following topics: 27 10/10 MN05003004Z-EN Program processing and system time SYSLIBCALLBACK.LIB library The SYSLIBCALLBACK.LIB provides defined callback functions for activation of run-time events (e.g. logon and logoff of the event functions). The description of the library can be found in the programming software manual (MN05010003Z-EN; previously AWB27001437GB) and in the Library/Online help of the programming system. “VISU” library The “VISU” library provides functions with which process visualisation can be implemented in the easySoft-CoDeSys. The description of the “VISU” library can be found in the “Function blocks for easySoft-CoDeSys“ manual (MN05010003Z-EN; previously AWB2786-1456GB) in the “Visualisation modules: VISU.lib” section. Figure 35: Functions of the “SysLibCallBack.lib” “SysLibSem” library The “SysLibSem” library provides functions to generate and use Semaphore (an enclosed information medium which cant be interrupted) for the synchronisation of tasks. Semaphore prevents simultaneous access to critical data which is used by multiple tasks. If a task accesses a certain area, the mechanism prevents that other tasks access the same area simultaneously. Only after the task authorised for access has ended access, is it possible for another task to access this area. The description of the functions can be found in the programming software manual (MN05010003Z-EN; previously AWB27001437GB) manual and in the Library/Online help of the programming system. Figure 37: Functions of the “VISU.lib” XC100_File.lib library The “XC100_File.lib” library provides functions with which the easySoft-CoDeSys can access the file system of the Multimedia Card “MMC”. The description of the “XC100_File.lib” library can be found in the “Function blocks for easySoft-CoDeSys“ manual (MN05010002Z-EN; previously AWB2786-1456GB) in the “File access block: XC100_File.lib” section. Figure 36: Functions of the “SysLibSem.lib” Figure 38: Functions of the “XC100_File.lib” 28 10/10 MN05003004Z-EN Direct peripheral access XC100_SysLibCom.lib library The “XC100_SysLibCom.lib” library provides functions to operate the RS232 interface in transparent mode. The description of the “XC100_SysLibCom.lib” library can be found in the manual in the “RS232 interface in transparent mode” section. “Library XC100_Util.lib” The “XC100_Util.lib” library also provides various function blocks e.g., in order to integrate the following functionality's in the application: Figure 40: Functions of the “XC100_Util.lib” Figure 39: Functions of the “XC100_SysLibCom.lib” You can find the descriptions of the function blocks in the manual “Function Blocks for easySoft-CoDeSys” (MN05010002Z-EN; previously AWB2786-1456GB). Direct peripheral access The “Direct peripheral access” function enables access directly to the local and central input and output signals of the control. The I/ O access does not occur via the input/output image. The local and central input and output signals you can find the input and output signals of the CPU and the centrally expanded XC-100 control with the XIOC signal modules. XIOC signal modules which can be integrated via a bus system can't be accessed via the “Direct peripheral access”. Table 4: Addressing is dependent on the slot number “0 to 15” of the signal modules. Further differentiation within the slot exists and relates to bit number “0 to max. 63” of the Inputs/Outputs. Depending on the functionality of the XIOC signal modules, access occurs as a bit/word or read/write operation. The access parameter indicates the table 4. The inputs/outputs which are required for “Direct peripheral access” are physically connected in the same manner as normal inputs/outputs. “Direct peripheral access” overview Module I/O bit access I/O word access I/O slot Read Write Param./Module Read Write Param./Module Param. XC-CPU101-C256K-8DI-6DO j j DI: 0 to 7; DO: 0 to 5 j j 0 0 XC-CPU101-C256K-8DI-6DO-XV j j DI: 0 to 7; DO: 0 to 5 j j 0 0 XC-CPU101-C128K-8DI-6DO j j DI: 0 to 7, DO: 0 to 5 j j 0 0 XC-CPU101-C128K-8DI-6DO-XV j j DI: 0 to 7, DO: 0 to 5 j j 0 0 XC-CPU101-C64K-8DI-6DO j j DI: 0 to 7, DO: 0 to 5 j j 0 0 XC-CPU101-C64K-8DI-6DO-XV j j DI: 0 to 7, DO: 0 to 5 j j 0 0 XIOC-8DI j – 0 to 7 j – 0 1 to 15 XIOC-16DI j – 0 to 15 j – 0 1 to 15 XIOC-16DI-AC j – 0 to 15 j – 0 1 to 15 29 10/10 MN05003004Z-EN Program processing and system time Module I/O bit access I/O word access Write Param./Module Read Write Param./Module Param. XIOC-8DO – j 0 to 7 – j 0 1 to 15 XIOC-16DO – j 0 to 15 – j 0 1 to 15 XIOC-16DO-S – j 0 to 15 – j 0 1 to 15 XIOC-12DO-R – j 0 to 11 – j 0 1 to 15 XIOC-16DX – j 0 to 15 j j 0 1 to 15 XIOC-8AI-I2 – – – j – 0 to 7 1 to 15 XIOC-8AI-U1 – – – j – 0 to 7 1 to 15 XIOC-8AI-U2 – – – j – 0 to 7 1 to 15 XIOC-4T-PT – – – j – 0 to 3 1 to 15 XIOC-2AO-U1-2AO-I2 – – – – j 0 to 3 1 to 15 XIOC-4AO-U1 – – – – j 0 to 3 1 to 15 XIOC-4AO-U2 – – – – j 0 to 3 1 to 15 XIOC-2AO-U2 – – – – j 0 to 1 1 to 15 XIOC-4AI-2AO-U1 – – – j j AI: 0 to 3, AO: 0 to 1 1 to 15 XIOC-2AI-1AO-U1 – – – j j AI: 0 to 1, AO: 0 1 to 15 XIOC-1CNT-100KHZ – – – – – – 1 to 15 XIOC-2CNT-100KHZ – – – – – – 1 to 15 XIOC-2CNT-2AO-INC – – – j j XIOC-SER – – – – – COM2, COM3 1 to 15 XIOC-NET-DP-M – – – – – – 1 to 3 Functions ReadBitDirect A bit of an input module can be read directly with this function. The state of an input bit is stored in the variables, which indicate to the parameterized pointer “ptr_xValue”. The pointer variable will not be changed when a fault occurs during processing. Figure 41: ReadBitDirect function 30 I/O slot Read 1 to 15 10/10 MN05003004Z-EN Table 5: Direct peripheral access Parameters of the “ReadBitDirect” function uiSlot: Slot number of the signal module. For possible parameters see table 4 on page 29 uiBit: Bit position within the input value of the signal module. For possible parameters see table 4 on page 29 ptr_xValue: Pointer to the variable value ReadBitDirect: Display of the fault code, see table 9 on page 33 ReadWordDirect A word of an input module can be read directly with this function. The state of an input word is stored in the variables, which indicate to the parameterized pointer “ptr_wValue”. The pointer variable will not be changed when a fault occurs during processing. Figure 42: ReadWordDirect function Table 6: Parameters of the “ReadWordDirect” function uiSlot: Slot number of the signal module. For possible parameters see table 4 on page 29 uiOffset: Word offset within a signal module. For possible parameters see table 4 on page 29 ptr_wValue: Pointer to the variable value ReadWordDirect: Display of the fault code, see table 9 on page 33 31 Program processing and system time WriteBitDirect A bit of an output module can be controlled directly with this function. The respective output image is refreshed in addition to the physical output. Writing to the output is possible and not subject to limitation, for only the local 6 outputs of the XC100-CPU with slot “0”. The following limitations apply to slots “1” and above: An individual output cant be written with a “direct peripheral access”. Writing of an entire output word is always the case. This means that the output image which is active at the time of the “direct access” will be output with the modified output bit. Thus, an output from other outputs within the output word occurs at the point of time when it is accessed and not at the end of the cycle. For this reason, with a “direct peripheral access” to an output bit within a program cycle, the remaining outputs of the output word should not be used and evaluated. A further refresh of the output word occurs at the end of the cycle. Figure 43: WriteBitDirect function Table 7: 32 Parameters of the “WriteBitDirect” function uiSlot: Slot number of the signal module. For possible parameters see table 4 on page 29 uiBit: Output bit within the signal module. For possible parameters see table 4 on page 29 xValue: Input parameter from “Bit” type WriteBitDirect Display of the fault code, see table 9 on page 33 10/10 MN05003004Z-EN 10/10 MN05003004Z-EN Direct peripheral access WriteWordDirect A word of an output module can be written directly with this function. At the time of access, the respective output image is also refreshed in addition to the physical output. A further refresh of the output word occurs at the end of the cycle. Figure 44: WriteWordDirect function Table 8: Parameters of the “WriteWordDirect” function uiSlot: Slot number of the signal module. For possible parameters see table 4 on page 29 uiOffset: Output word within a signal module. For possible parameters see table 4 on page 29 wValue: Input parameter from “Word” type WriteWordDirect Display of the fault code, see table 9 on page 33 Error code with “direct peripheral access” All functions verify as far as possible for the validity of the call parameters. Verification is undertaken to determine if the access occurs in dependance on the parameterized signal module and the physical existence of the signal module. If a fault is determined, access is not undertaken and an error code is output a table 9 The data fields for the value transfer remain unchanged. Table 9: Error code with direct peripheral access IO_ACCESS_NO_ERROR data type IO_ACCESS_NO_ERROR: 0: No error IO_ACCESS_INVALID_ SLOTNUMBER 1: Slot = 0 or greater than 7 IO_ACCESS_INVALID_OFFSET 2: BitWord offset is too large IO_ACCESS_DENIED 3: Invalid access, e.g. write access to input module, read access to output module or access to non-available address range (offset too large) IO_ACCESS_NO_MODULE 4: No module available at the parameterized slot IO_ACCESS_INVALID_VALUE 4: Result is not “0” or “1” with “WriteBitDirect” IO_ACCESS_ INVALID _BUFFER 5: No or incorrect pointer to the output variables 33 Program processing and system time 10/10 MN05003004Z-EN Interrupt processing In the XC100 it is possible to program and parameterize up to seven interrupt events. Interrupts can be activated by: • physical inputs I0.0 to I0.3 of the XC-CPU101 • XIOC signal modules with interrupt features • TIMER_Interrupt. The interrupt events listed in figure 45 are available: If an interrupt occurs, the runtime module executes the program organisational unit (POU) which is linked to the interrupt source. Execution of the POU is time-monitored. The parameterized cycle time is used for this cycle time. The interrupts are enabled when changed to the RUN state and inhibited when changed to the STOP state. Interrupt sources which are not enabled in the configuration do not initiate an interrupt. If a POU is not assigned to an enabled interrupt source, the interrupt is recognised and executed but without running a POU. Figure 45: User events Interrupt prioritising In task configuration you can assign a physical interrupt input I0.0, I0.1, I0.2 or I0.3 to an interuppt channel. Three channels are available. Channels 1 to 3 have a high priority, channels 4 to 6 have a low priority. Lower priority interrupts can be interrupted by those with higher priority. 34 Frequent occurrence of an interrupt during a cycle can cause the cycle time to time-out and result in a reset being initiated by the Watchdog. User interrupts can be inhibited and re-enabled from the program. The functions “DisableInterrup” and “EnableInterrupt” are provided for this purpose. A call parameter in the easySoft CoDeSys determines if an individual interrupt or all interrupts are enabled or inhibited. Enabling of an inhibited interrupt must be performed with the same parameter used to inhibit it. Both the “DisableInterrupt” and “EnableInterrupt” functions are components of the “XC100_Util.lib” library. This library must – if not already done so – be integrated into the library manager of the easySoft CoDeSys. 10/10 MN05003004Z-EN Interrupt prioritising Timer interrupt An interrupt channel for a timer interrupt is available in addition to the six different interrupt channels for inputs with interrupt capability. The start condition and the setpoint value definition are application related in the easySoft-CoDeSys. The following illustration indicates the function and the parametric programming for the “Timer Interrupt”. This function is contained in the “XC101_Util.lib”. Figure 46: Function “Timer Interrupt” The setpoint value setting occurs on the “dwTimerTickUS” input. The minimum value is 500, the maximum value is 2500000 microseconds. If the upper or lower limit value is exceeded on the “dwTimerTickUS” function module input, the function call returns FALSE as the feedback value and the timer is not started. The setpoint value is accepted with the start of the timer and can not be modified for the run time. The linking of the timer interrupt with the respective IEC program occurs as with the IO interrupts via ‹Task configuration l System events›. The entered interrupt function is executed immediately as soon as the interrupt occurs. The running IEC program cycle can be interrupted at any point. The timer interrupt can also itself be interrupted by higher priority system interrupts, e.g. as with CAN. Cycle time monitoring is active during execution of the timer interrupt. Cycle time monitoring is orientated exclusively to the value entered for the maximum program cycle time. If very frequent timer and IO interrupts occur, they can lead to the program cycle time being exceeded. If the program cycle time is exceeded the XC-CPU101 changes from the RUN to the STOP operating status. The Timer interrupts can be inhibited and enabled from the user program. Use the “DisableInterrupt” and “EnableInterrupt” functions for this case. 35 Program processing and system time DisableInterrupt With this function, you disable (deactivate) a parameterized physical interrupt by accessing it from the user program. Figure 47: DisableInterrupt function EnableInterrupt With this function, the physical interrupt which was deactivated beforehand can now be re-enabled as an active interrupt. Figure 48: EnableInterrupt function 36 10/10 MN05003004Z-EN 10/10 MN05003004Z-EN Interrupt prioritising Creating and integrating an interrupt function The formal procedure for the provision and integration of an interrupt function is described in individual steps in the following. In the example, a H-signal on input I0.0 should branch into an interrupt module and execute it. X Create a program module for the normal application (“PLCPRG”) for this purpose and a further module with the interrupt functionality “Interrupt1”. The following figure shows you both modules: Figure 49: “PLC_PRG” and “Interrupt_1” modules X Changeover to the PLC Configuration and assign Interrupt_0.0 from the list field to input I1. 37 Program processing and system time Figure 50: Assign input I0.0 with interrupt 4 Changeover to the “Task configuration” and tick the box in the “System events” input field for “IO-Interrupt1”. X Now stay on the same row and mark the “called POU” field with the left-hand mouse key and press function key “F2”. X The “Help Manager” window opens in which all predefined programs are listed: Figure 51: Parameterization of the interrupt source 38 10/10 MN05003004Z-EN 10/10 MN05003004Z-EN X System events Select the “Interrupt_1 (PRG)” POU with a double click and then the POU “Timer_Interrupt (PRG)”. The following window appears: Figure 52: Interrupt module completed task configuration X Save the program created, compile it and logon to the PLC and test the functions of the program modules which you have created. System events Not only can a task call up a project module for processing, a system event (event) can also call it up. The system events which can be used for the purpose are target system dependant. They are comprised of the standard system and the target system dependant events. Possible events are e.g.: • • • • • • • Stop Start Coldstart Warm start IO interrupt Timer interrupt Online modification See also figure 52. h The single step mode is not possible with program modules of the system events. 39 10/10 MN05003004Z-EN Program processing and system time Browser commands You can directly access the states/events in the XC100 with the Browser commands. The Online description in the easySoftCoDeSys can be found at: ‹Resources l PLC-Browser›. Command Description Command Description ? Get a list of implemented commands. GetNodeId Output CANopen Node ID reflect Mirror current command line for test purposes. SetNodeId Set CANopen Node ID mem Memory-dump, Syntax: mem <start-addr> <end-addr> metrics Output PLC information memc As mem, addresses are added to the start address of the code range. reload Load boot project from the MMC on the PLC remove Erase boot project from the MMC memd As mem, addresses are added to the start address of the data range. format Formatting of the MMC pinf Output project information getswitchpos Output switch position ppt Output module pointer table getbattery Output battery status dpt Output data pointer table getrtc Read-out real-time clock [HH:MM:SS] pid Output project ID setrtc Set real-time clock [HH:MM:SS] cycle Output cycle time canload Displays the load of the CANopen fieldbus. “canload” browser command The “canload” function is contained in the “XC100_Util.lib”. They can be called up as browser commands. With this command, the current utilization of the CANopen bus is determined. The data utilization of the bus is determined via and integration time and determined in relation to the CAN baud rate. You will receive the following information after the browser command is called: CAN Busload = 51 Percent Baud rate: 125 Kbaud Integration Time: 504 ms. Figure 53: Function “Can_Busload” 40 With a bus loading of 75 percent or higher, a warning appears ATTENTION: HIGH BUSLOAD. h Caution! Overload of the local CAN bus in conjunction with further short term load peaks can lead to CAN data loss. In addition to the browser command, a function call for the CAN_BUSLOAD function block to determine the CAN bus loading from the user program is available. 10/10 MN05003004Z-EN Data remanence Data remanence Operating states The controller has a memory area for remanent data a page 10. The variables declared with “VAR_RETAIN” are saved in this area and are thus retentive during a warm start of the application program (Caution: This does not apply for I, Q and M variables!). Data that are remanent for a cold start – “VAR_RETAIN Persistent” are not supported. Remanence (non-volatility) of the data is guaranteed when the PLC is switched off if a battery is inserted. In the following overview you will find the state definitions of XC100. The LED-displays of the corresponding states are also detailed.. If it was not possible to finish a cycle that was being processed, because of a supply interruption, then the data will not be consistent, since the interruption could have occurred at any point of the cycle. When the voltage supply recovers, the residual-cycle will not be completed. The control starts according to the set start behaviour. If this is to be prevented, appropriate measures must be taken as part of the engineering. One solution for this problem is an uninterruptible power supply with additional accumulator buffering. Program transfer The transfer of an application program always takes place via the battery-buffered SRAM area in the controller. Afterwards, a backup can be created on the multimedia card by using the “Create boot project” command. A program backup can only be created while the system is in the “HALT” state. The internal FLASH memory of the CPU cant be used as storage for a program backup. State Display Definition RUN/STOP SF System test off off System test in progress System update on on System update in progress Switch-on OK off off System test finished without error Switch-on not OK blinks blinks System test generated an error NOT READY off on No application program present STOP blinks off Application program loaded, PLC in “STOP” state RUN on off Application program loaded, PLC in “RUN” state STOP/RUN with general error, diagnosis message on on General error/ diagnosis message available 41 10/10 MN05003004Z-EN Program processing and system time Limit values for memory usage The data memory of the XC100 is divided into memory segments. The segment sizes are shown in figure 54. The global data utilises multiple segments. The required amount can be specified to suit the size of the loaded program. The segment size for the different control types can be found under ‹Target Settings l Memory Layout›: In order to ensure that you use the available memory for the global data in an optimum and efficient manner, we recommend that you make the following settings when a new project is being created: PLC type Number of data segments (global) XC-CPU101-C64K-8DI-6DO 16 XC-CPU101-C128K-8DI-6DO 12 XC-CPU101-C256K-8DI-6DO 14 The number of segments is set to 1 by default. The number of segments is changed as follows: X Select ‹Project l Options l Compile options›; select the data segments field and enter the number of segments listed above for the respective control type. Figure 54: Segment size of the XC-CPU101-C256k The hexadecimal values of the other PLC types must be converted to decimal values. Figure 55: Memory management: Change the number of data segments 42 10/10 MN05003004Z-EN Addressing inputs/outputs and markers Addressing inputs/outputs and markers Check for overlapping addresses If you open the PLC configuration of a new project, you will receive the current view of the default settings of the addressing. In this setting the addresses are automatically assigned and address conflicts (overlaps) are reported. If the check for overlapping addresses is activated, addresses which are assigned twice will be detected and an error message is generated during compilation. This setting should not be modified. Uneven word addresses (Independent of the “Check for overlapping addresses” setting) If you assign an uneven address to a word addressable module in the entry field address e.g. IB3, the PLC configurator automatically shows the following even word address (IW4). Figure 56: Default setting of the addressing If you add a module to the PLC in the configurator, the configurator will assign this module with an address. Further modules are assigned with the next addresses in ascending order. You can also assign the addresses freely. However, if you access the “Automatic calculation of addresses” function later, the addresses are shown in reassigned ascending order. Figure 57: Uneven address “Activate Automatic addresses” The addresses are automatically assigned or modified if a module is changed or added. This can occur with a centrally assigned module as well as a module which is a component of a decentral PROFIBUS-DP slave or CAN station. Address range Addresses can only be assigned within the valid ranges. The range details can be found under ‹Target Settings l Memory Layout l Size›. If you add a module, the addresses of all the subsequent modules (independently of the line) are offset by the address value of the added module, and the added module is assigned with an address. Modules which are located in the configuration before the added module are not changed. If you remove the tick in the “Automatic calculation of addresses” checkbox, the addresses remain unchanged with modifications/expansions. The addresses are checked during compilation. It is essential to ensure that the addresses of the configured module are used (referenced) in the program. If the address exceeds the range, a fault is signalled. Table 10: Address ranges PLC Input Output Markers Size Max. Byte address Max. Word address Size Max. Byte address Max. Word address Size Max. Byte address Max. Word address XC100-64k 2k 2047 2046 2k 2047 2046 4k 4095 4094 XC100-128k 4k 4095 4094 4k 4095 4094 8k 8191 8190 XC100-256k 16k 16383 16382 16k 16383 16382 16k 16383 16382 XC200-256k 4k 4095 4094 4k 4095 4094 16k 16383 16382 XC200-512k 4k 4095 4094 4k 4095 4094 16k 16383 16382 43 10/10 MN05003004Z-EN Program processing and system time Free assignment or modification of addresses of input/ output modules and diagnostic addresses Depending on the module, you can assign/modify the input, output and the diagnostics(marker) addresses: In order to make the modifications visible in the PLC configurator it is necessary to click once on the PLC Configurator or to select another module after the address has been edited. They will be accepted in all cases during compilation. Run “Automatic calculation of addresses” With the “Automatic calculation of addresses” function which you can run either via the context menu or the menu bar, all the respective addresses are recalculated. If you are dealing with a bus master module, the calculation is also carried out for the modules which are constituents of the slave on the bus line. The freely entered addresses of subordinate modules are overwritten when the address of a higher level module is calculated. If the addresses have changed and you wish to implement the “Automatic calculation of addresses”, you must first of all activate the change. Click first of all on the nodes to drop down the structure or set the cursor in the PLC Configuration field and press the left mouse button. If you mark the “Configuration XC-CPU...” text and call the “Automatic calculation of addresses”, all the addresses are recalculated h Enter the addresses in an ascending order and in continuous blocks. Diagnostics You can run diagnostics with the help of the diagnostics function block. The following possibilities are available: 44 Type of diagnostics Function block Library Documentation Inspection of the XI/OC modules: • Does the configuration of the hardware correspond with the configurator? • Is the module function ok? Note: These tests are undertaken once during switch on or after loading/start of the program XDiag_SystemDiag xSysDiagLib MN05010002Z-EN; previously AWB2786-1456GB Inspection of the XIOC-NET-DP-M module and the stations on the DP line XDiag_SystemDiag XDiag_ModuleDiag XSysDiagLib MN05010002Z-EN; previously AWB2786-1456GB DiagGetState BusDiag MN05002002Z-EN; previously AWB2725-1452GB Inspection of the XIOC-NET-DP-S module XDiag_SystemDiag XDiag_ModuleDiag xSysDiagLib MN05010002Z-EN; previously AWB2786-1456GB DP slave provides the master with additional diagnostics data XDPS_SendDiag xSysNetDPSDiag MN05002002Z-EN; previously AWB2725-1452GB 10/10 MN05003004Z-EN 5 Establishing a PC – XC100 connection This section describes the measures that are required to link a PC to the XC100, so that the PC can be used as a programming device (hardware and software). Software easySoft-CoDeSys The communication parameters are determined by means of easySoft-CoDeSys. Call up the menu item ‹Online r Communication Parameters› in easySoft CoDeSys, and select the COM1 or COM2 interface. X Preselect the values indicated in Figure 59. X Establishing a connection via the RS232 interface Communication is implemented via the non-optocoupled serial RS232 interface. You can use either the COM1 or the COM2 port for the PC interface. Please use the XT-SUB-D/RJ45 programming cable to make the physical connection. You can alter the default values by making a double-click on the entered value. h Further notes on the communication parameters can be found in the programming software manual (MN05010003Z-EN; previously AWB2700-1437GB). Programming cable The programming cable is made up as shown below: SUB D socket 6 2 7 3 8 4 2 3 5 9 5 8 4 • the physical connection • the baud rate of the communication parameters in the easySoft CoDeSys • the baud rate in the XC100 (set as default to 38400 kBit/s) • the baud rate of the CAN connection if the CAN fieldbus is used. • that the interface parameters in the easySoft CoDeSys and in the XC100 correspond! 5 1 2 3 4 5 6 7 8 programming cable 1 RJ45 plugs Communication fault(#0): Logging off A connection can not be established between the programming PC and the XC100, please check: Figure 58: Pin assignment RS232 programming cable Figure 59: Select communication parameters 45 10/10 MN05003004Z-EN 46 10/10 MN05003004Z-EN 6 Creating a sample project The following example aims to help you learn how to use the easySoft CoDeSys software. You create a project by creating a configuration and a program. You can then test out the project after it has been downloaded. The configuration is created in the easySoft CoDeSys configuration editor. A distinction is made between local and central I/Os: The local (digital) inputs and outputs are integral parts of the CPU module, implemented on the power supply board. They are already pre-configured in the configuration editor. The central inputs/outputs are implemented in the signal modules, which can be joined up via the module rack. Configure them to suit the requirements of the application. The available XI/OC signal modules can be used. Task Make a logical AND linkage of inputs I0.0 and I2.7 on the XC100. The result of this logical operation should be presented at output Q0.3. The second step is to read in the inputs/generate the outputs, using a CAN Master. Activate the appropriate CAN libraries before linking the CAN Master [VAR] module into the controller configuration. This sequence will not take place automatically, but must be explicitly carried out by the user. Procedure Connect appropriate CANopen fieldbus participants to the CANopen interface. The basis for the configuration is the following hardware layout. Setting up a target system After starting easySoft CoDeSys, create a new file: X X Select the menu item ‹File r New›. Answer the query about saving the old project. Figure 61: Save old project? %IX0.0 %QX0.3 %IX2.7 Figure 60: Hardware layout for the sample project Select the target system. In the example, the system XC-CPU101C64K-8DI-6DO has been selected. 47 Creating a sample project Figure 62: Select target system A double click on the target system leads to the following (see figures). The register tabs “Target platform”, Memory layout” and “General” just present information about the target system. No settings can be made in these tabbed screens. Figure 63: Target system settings – target platform X If a CANopen slave is to be integrated into the configuration, click the “Networkfunctionality” tab and tick the “Support network variables” check box. You will get a message that this target system supports the CAN network. The “Support network variables” control box must only be activated if you wish to work with network variables. When activated, the libraries required for operation of network variables are added automatically. This function is not required if you use a CAN Master/CAN Device. 48 10/10 MN05003004Z-EN 10/10 MN05003004Z-EN Procedure Figure 64: Target system settings – CAN network functions (1) X Activate the “Support parameter manager” check box in order to view additional information concerning the index ranges. The CAN relevant Parameter manager is only required for a CAN device. Standard settings are available for this purpose, which means that no modifications must be made. Figure 65: Target system settings – CAN network functions (2) X X Close this selection with “OK”. Select the POU type “Program” and the programming language “IL”: 49 Creating a sample project Figure 66: Select POU type X Confirm with “OK” and save the file under “sample-1”. A window will now appear, in which you can continue with the programming or configuration: Figure 67: POU type “Program” in IL representation Configure XC100 controller The example makes use of the “XC-CPU101-C64K-8DI-6DO”. X 50 Select the “Resources” register (left half of window, at bottom), to configure the XC100 with the local and central inputs and outputs. 10/10 MN05003004Z-EN 10/10 MN05003004Z-EN Procedure Figure 68: Configure XC100 controller X Double-click on the directory “Controller configuration”. Another window is opened: “PLC configuration”: : Figure 69: Basic configuration of the XC100 – settings X Click on the register card “Additional parameters“. A window appears with the default values for the “XC-CPU101-C64K-8DI-6DO”. 51 10/10 MN05003004Z-EN Creating a sample project Figure 70: Basic configuration of the XC100 – additional parameters X To display the I/O configuration, click on the plus sign in front of the directory “XC-CPU101-C64K-8DI-6DO”. The local inputs and outputs (integral parts of the CPU) are already configured: • “AT %IB0;Byte; (*Local Inputs*)” • “AT %QB0;Byte; (*Local Outputs*)” You can also set the parameters for up to 15 central signal modules. The slots “EMPTY-SLOT” are wildcards for central expansion of the signal modules. If you want to join up a central digital input module with 16 inputs, right next to the CPU, then carry out the following steps: X A window is opened X 52 Select the field “Replace element”. The window that is now opened lists the signal modules which are available. X Figure 71: Basic configuration of the XC100 – local I/Os Mark the first “EMPTY-SLOT” and then click the right mouse button. Select the module “XIOC-16DI”. 10/10 MN05003004Z-EN Procedure The configuration now looks as follows: Figure 72: Configuration XC-CPU101-C64K-8DI-6DO X In addition, click on the plus sign in front of the modules – “AT %IB0;Byte; (*Local Inputs*)” – “AT %QB0;Byte; (*Local Outputs*)” – XIOC-16DI (SLOT). You will now get detailed information, with the physical address area of the inputs and outputs. Figure 73: Address area of the configuration 53 Creating a sample project Writing a program As described in the description of the task on Page 47, a logical AND combination is to be made between input I0.0 and input I2.7. The result of this logical operation is to be presented at output Q0.3. I0.0 I2.7 X AND Q0.3 Select the “POUs” tab and double click on the “PLC-PRG” element. The declaration and program window will be opened. Figure 74: Program and declaration window X Create the declaration and the program, as shown in the following diagram, and then compile the project. Figure 75: Compiled program X X 54 Load the project into the controller. Test the project. 10/10 MN05003004Z-EN 10/10 MN05003004Z-EN 7 Programming via CANopen network (Routing) “Routing” is the capability to establish an Online connection from a programming device (PC) to any desired (routing capable) control in a CAN network, without having to directly connect the programming device directly with the target PLC. It can instead be connected to any other PLC in the network. All actions that are available through a direct PC–PLC connection can also be implemented through the routing connection: • • • • • • Program download Online modifications Program test (Debugging) Generation of boot projects Writing files in the PLC Reading files from the PLC Routing has the advantage that a PLC connected to the programming PC can access all routing capable PLCs on the CAN bus. You can determine in the project selection which controller you wish to communicate with. This provides an easy way of controlling remote PLCs. However, the data transfer rate with routing connections is considerably slower than with direct connections (serial or TCP/IP). This results, for example, in slower display refresh rates of variables and longer download times. Table 11: Block size for data transfer Program/file transfer Routing OS < V1.03.02 OS f V1.03.02 OS < V1.03.02 OS f V1.03.02 128/4 kByte Routing not possible 4 kByte Block size 128 kByte Default: 128 kByte h Attention! The program download with a block size of 4 KByte to a PLC with an operating system version earlier than V1.03.02 will cause faulty behaviour! If a program download is performed, the progress bar on the programming device monitor will only change erratically (about every 10 seconds). Routing with the XC200 is possible from BTS version 1.03.02. The setting of the block size (change of the value in the registry) is explained as follows. h You can change this setting only if you have administrator rights on your PC. Changing the block size Prerequisites The following prerequisites must be fulfilled to use routing: • • • • X X Close all easySoft-CoDeSys applications. Close the CoDeSys gateway server. The routing PLC and the target PLC must both support routing. Both PLCs must be connected via the CAN bus. The PLCs must both have the same active CAN baud rate. The valid routing node ID must be set on both PLCs. Routing through XC200 To perform a program transfer or routing using TCP/IP through a connection between XC200 and PC, you must first set the block size for the transferred data. The packet size (4 KByte or 128 KByte) depends on the transfer type (program transfer or routing) and the operating system, a table 11. Figure 76: Closing the CoDeSys gateway server X Change the block size to the required value. The following *.reg files are available in the easySoft CoDeSys installation directory to enter the block size in the registry: BlockSizeDefault.reg Enters a block size of 20000hex =128 Kbyte (default value) in the Registry. BlockSizeRout.reg Enters a block size of 1000hex = 4 KByte in the Registry. 55 10/10 MN05003004Z-EN Programming via CANopen network (Routing) Alternatively, you can use the BlockSizeEditor application to change the block size. Table 12: Example for setting the Node Id, Baud rate PLC Functio n Node ID Routing ID Baud rates Se e ? i? . Routing controller Master 1 127 125 KB 79 Target controller Device 3 54 125 KB 80 The download block size is defined in the following registry key: [HKEY_LOCAL_MACHINE\SOFTWARE\3S-Smart Software Solutions GmbH\Gateway Server\Drivers\Standard\Settings\Tcp/Ip (Level 2 Route)] “Blocksize“=dword:00020000 The default block size is 20000hex (=128 Kbyte), the block size for routing is 1000hex (= 4 Kbyte). h The following applies for device PLCs: The Routing-ID must not be equal to the Node-ID (Basis communication)! Notes • If large files are written to the target PLC or read from the PLC, it is possible that the online connection will be interrupted after the transfer process has been completed. Renewed connection is possible. • If a program with a modified routing node ID is loaded into the target PLC, the target PLC accepts the modified routing node ID; however, the communication connection will be interrupted. Reconnection with a corrected routing Node ID is possible. • If a PLC receives a program without valid routing parameters (Baud rate / Node ID), this PLC cannot be connected via a routing connection. • The routing is independent of the configuration (master/slave): a target PLC that has not been configured as a master or as a slave can be accessed. It must only receive the basic parameters such as Node ID and baud rate, as well as a simple program. The exception is the XC100 with operating system f V2.0: the Routing-ID must be equal to the Node-ID! The Routing-ID of the master (XC100, XC200) can be set in the PLC configurator under the “Other parameters” tab: Addressing PLCs on the CAN-Bus can be configured as a master or as a slave. The PLCs are assigned with a Node ID/node number (address) in order to uniquely identify them (with the basis communication). To use the routing function to access a target PLC, you must assign a further routing ID to the routing and target PLC. An RS200 or Ethernet interface can be used as a connection between the PC and XC232 . Routing control (Master) Target controller (Device) Node-ID: 1 Routing ID: k Routing-ID n Node-ID m Figure 78: CAN Master routing settings (XC200) The ID for basis communication is defined in the “CanMaster” folder in the “CAN parameters” tab (Figure 79). PC RS232 Ethernet a CANopen k, n, m = 2…127 Figure 77: Routing via XC…, EC4-200 a Ethernet connection only possible with XC200 Figure 79: CAN Master: Node ID for basis communication 56 10/10 MN05003004Z-EN Communication with the target PLC Communication with the target PLC Connect the PC to the routing PLC. Select the target PLC with which you want to communicate for the project. X Determine the communication settings for the PC and the PLC connected to the PC. X Enter the target ID (Target ID = Node ID!) of the target PLC, as in the example, and log on. X X You can run the following functions: • • • • • Program download ONLINE modification Program test (Debugging) Create bootable project Filing source code. Figure 80: CAN device parameters ID and baud rate are transferred with the project download. Example In the following example which is based on Figure 81 the procedure for access to a PLC program is explained. Note for project creation a Assign two Node-IDs to the target PLC: X X b c One ID for basic communication One ID for routing If you are using an XC100, enter the same number for both IDs. The routing ID and the baud rate of the target PLC (XC 100) to the routing function can be defined in the “Additional parameters” window in the PLC Configuration. Enter the baud rate and the node ID in the "RS232 l CAN routing settings" field. The CAN baud rate depends on the operating system version: Table 13: Baud rates for CAN connection CAN Figure 81: Diagnostics possibilities a XC100 with Node ID 1 b XC200 with node ID 2, routing ID 127 c PLC (e.g . XC100) with node ID 3 and routing ID 3 Operating System Version You have connected the PC to the PLC with node ID “2” and want to access the target PLC with routing ID “3”. Baud rates < V. 2.0 f V 2.0 10000 j j 20000 j j 50000 j j 100000 j j 125000 j j 250000 j j 500000 – j The “New Channel” window appears. 800000 – j X 1000000 – j h To guarantee a fast data transfer, the routing should be performed only with a CAN baud rate of at least 125 KBit/s. Open the project of the target PLC whose program you wish to edit or test. X First configure the parameters for the hardware connection PC n PLC (Node ID 2). X From the Online menu select Communication Parameters… X Click the New button under “local” channels. X Select the channel in the “Device” window: Serial [RS232] [Level 2 Route] or TCP/IP [Level 2 Route]. X You can assign a new name in the Name field, e.g. "Rout_232". X Confirm with OK and return to the original window. The ID for basis communication is defined in the “CanDevice” in the “CAN setting” tab a figure 80. 57 10/10 MN05003004Z-EN Number of communication channels Several communication channels can be opened, e.g. PC n PLC 2, PC n PLC 3 in dependence on the PLC (communication channel) which is connected to the PC. The status display of control 2 and 3 can be implemented simultaneously. Table 14: Figure 82: Channel parameter setting You have now determined the parameters for the hardware connection between the PC and the PLC (node ID 2). Call up the communications parameters in the “Online” menu once again and select the control which you want to program/ test. X Enter the number 3 as the target ID in the example. The target ID is identical to the routing ID! To enter the target ID, click on the field in the Value column, to the right of the term Target ID. Enter the number 3 there and confirm with OK. X Log on and carry out the action. X PLC combinations for routing The following PLC support routing: XC100 XC121 XC2001) EC4-200 XC100, XC121 x x x XC2001) x x x EC4-200 x x x From P To O 1) XC200 from version V2001-03-01 58 Type and number of communication channels Communications channel PLC Max. channel count TCP/IP Level2Route XC200 5 Serial RS 232 Level2Route XC…/EC4-200 1 10/10 MN05003004Z-EN 8 RS232 interface in transparent mode (COM 1/2/3) The transparent mode serves data exchange with data terminals (e.g. terminals, printers, PCs, measurement devices etc.) via the RS232 serial interface connection. The data transfer is transparent; i.e. the data is transferred without it being interpreted further. This functionality is provided on the XC100 by the “XC100_SysLibCom” library. The library must be integrated into the “Library Manager”. The library contains functions for opening and closing the interface, for sending and receiving data and for setting the interface parameters and control cables. If control lines of the integrated XC100 interfaces on the RS232 are contacted in the function module, they will not function as the control lines do not physically exist. However, these “XC100_SysLibCom functions” are implemented for reasons of compatibility. With the XIOC-SER hardware interface module, the control lines are available and are operated via the “SysComReadControl” and “SysComWriteControl” function calls. If transparent mode is active, no communication is possible with the programming system. Transparent mode must first be disabled. When Transparent mode is closed, the original communication parameters are reinitialised. The transparent mode is forcibly deactivated when the PLC changes to the STOP mode. A prerequisite for operating the RS232 interface in transparent mode is hardware version 02 and operating system version V02.00 or higher. 59 RS232 interface in transparent mode (COM 1/2/3) Demands placed on the functionality of the transparent mode “SysComOpen” function The function opens the RS232 interface for transparent mode. After the interface has been successfully opened, the function returns a value greater than 0. X Enter this value with the following functions as the “dwHandle” parameter. If a fault has occurred, the feedback value is equal to “0”. Transparent mode of the interface will not be enabled. For operation of the serial interface, the following parameters (ENUMERATION types/List types) are available: Baud rate for COM 1, COM 2, COM 3 Figure 83: Baud rate selection Number of data bits Figure 84: Number of data bits 60 10/10 MN05003004Z-EN 10/10 MN05003004Z-EN Demands placed on the functionality of the transparent mode Selection of the parity Figure 85: Even/uneven parity Selection of the COM interface Figure 86: Selection of the COM interface Number of stop bits Figure 87: Stop bits 61 RS232 interface in transparent mode (COM 1/2/3) Parametric programming of the control lines/cables of the COM 2/COM 3 interface The operation of the control lines/cables is implemented with the “ComControl” module. This function only serves the DTR, DSR and DCD interface lines of the XIOC-SER hardware interface module. The ERROR LED available on the module is also operated via this module and controlled with the TRUE command. If the respective interface lines are parameterized with TRUE, read/write access is possible. Figure 88: Parametric programming of the control lines of the COM 2 and COM 3 interfaces and the ERR-LED Parametric programming of the interface In the “ComSettings” module the complete interface parameters of the COM 2 or COM3 interface are deposited and stored. These parameters are activated by the call up of the module and assigned to the respective hardware interface. Figure 89: Interface parameter of the COM 2 or COM 3 interface 62 10/10 MN05003004Z-EN 10/10 MN05003004Z-EN Demands placed on the functionality of the transparent mode Figure 90: “SysComOpen” function Table 15: Parameters of the “SysComOpen” function Port SysComOpen Selection of the interface Parameter: Specify the interface to be opened. Return value 0: Return value > 0: Opening of the RS232 interface was not successful. Opening of the RS232 interface was successful. “SysComClose” function The function closes any RS232 interface opened in transparent mode. During closing, the communication parameters which were set last are restored. The function returns the TRUE return value when the action has been completed successfully. Figure 91: SysComClose function Table 16: Parameters of the “SysComClose” function dwHandle Return value of the “SysComOpen” function SysComClose Return value TRUE: Closing of the RS232 interface was successful 63 RS232 interface in transparent mode (COM 1/2/3) “SysComRead” function Data received via the RS232 interface in transparent mode can be read with this function. Figure 92: SysComRead function Table 17: Parameters of the “SysComRead” function dwHandle Return value of the “SysComOpen” function SysComClose Return value TRUE: Closing of the RS232 interface was successful dwBufferAddress Address under which the read data is stored dwBytesToRead Limitation of the max. number of data bytes (COM 1: max. 190 bytes; COM 2 + 3: max. 250 bytes) dwTimeout Parameter without meaning SysComRead Return value: Informs you about the number of read data bytes. h 64 Caution! Test of the buffer address or the buffer size does not occur! 10/10 MN05003004Z-EN 10/10 MN05003004Z-EN Demands placed on the functionality of the transparent mode “SysComWrite” function This function allows output of the data via the RS232 interface. Figure 93: SysComWrite function Table 18: Parameters of the “SysComWrite” function dwHandle Return value of the “SysComOpen” function dwBufferAddress Address under which the output data is stored dwBytesToWrite Number of data bytes to be sent (COM 1: max. 190 bytes; COM 2, 3: max. 250 bytes) dwTimeout Parameter without meaning SysComWrite Return value: Informs you about the amount of sent data. h Caution! Test of the buffer address or the buffer size does not occur! 65 RS232 interface in transparent mode (COM 1/2/3) “SysComSetSettings” functions Interface parameters of the RS232 interface for the transparent mode can be set with this function. Figure 94: SysComSettings function Table 19: Parameters of the “SysComSettings” function 66 dwHandle Return value of the “SysComOpen” function ComSettings Pointer which points to the memory range in which the interface parameter is stored SysComSetSettings Return value TRUE, if the interface has been parameterized successfully, otherwise FALSE 10/10 MN05003004Z-EN 10/10 MN05003004Z-EN Demands placed on the functionality of the transparent mode Example The example opening, a text output and closing of the RS232 interface with the XC100. Figure 95: Programming example for Transparent mode 67 10/10 MN05003004Z-EN RS232 interface in transparent mode (COM 1/2/3) “SysComReadControl” function With the onboard RS232 interface of the CPU101 the control cables/lines are not available. Therefore, the “SysComReadControl” module is not to be used for this interface. The XIOC-SER hardware interface module has control/interface lines available. This allows the “SysComReadControl” module read access to the control/interface lines of the COM 2 and COM 3 interface. Figure 96: Read access to the control/interface lines of the COM 2 or COM 3 interface Table 20: Parameters of the “SysComReadContro” function dwHandle Return value of the “SysComOpen” function Control COM 1: Function discontinued COM 2, COM 3: TRUE = read command on the control lines/cables of the hardware interface COM 1: Function discontinued COM 2, COM 3: TRUE = read command was successful; FALSE = read command was not successful SysComReadControl 68 10/10 MN05003004Z-EN Demands placed on the functionality of the transparent mode “SysComWriteControl” function With the integrated RS232 interface of the CPU101 the control cables/lines are not available. Therefore, the “SysComWriteControl” module is not to be used for this interface. The XIOC-SER hardware interface module has control/interface lines available. This allows the “SysComWriteControl” module write access to the control/interface lines of the COM 2 and COM 3 interface. Figure 97: Write access to the control/interface lines of the COM 2 or COM 3 interface Table 21: Parameters of the “SysComWriteControl” function dwHandle Return value of the “SysComOpen” function Control COM 1: Function discontinued COM 2, COM 3: TRUE = write command on the control lines/cables of the hardware interface COM 1: Function discontinued COM 2, COM 3: Feedback: TRUE = read command was successful; FALSE = read command was not successful SysComReadControl Automatic closing of the interface The transparent mode is automatically ended by the operating system with a PLC state change of the XC100 to STOP. The interface is reinitialised with the interface parameters last used. 69 10/10 MN05003004Z-EN 70 10/10 MN05003004Z-EN Appendix Compatibility h • The compatibility for older operating systems of the XC101 is guaranteed. • Due to the modified control configuration with existing projects, it might be necessary that the control configuration may need to be re-entered. • If a project with a new control configuration is loaded onto an XC101 with an older operating system version, only the functions of the older operating system are available for use. The functional range of the XC-CPU101 is dependant on the hardware (HW), the installed operating system (BTS) and the version of the programming software. The following overview informs you about the functionality in dependence on the hardware, BTS and easySoft-CoDeSys versions: Functionality Hardware version: V01 V02 V04 From operating system version: easySoft-CoDeSys-Version: Basic functionality V1.2 – – F V2.2.5.+Rev. B PRG default baud rate 57.6 kBit/s Only V1.2 – – V2.3.1 PRG default baud rate 38.4 kBit/s V1.3 – – V2.3.1 Multiple CAN users V1.3 – – V2.3.1 CAN Device V1.3 – – V2.3.1 Programming via CANopen (Routing) V1.3 – – V2.3.1 MMC access – V2.0 – V2.3.1 Interrupt functionality – V2.0 – V2.3.1 RS232 interface in Transparent mode – V2.0 – V2.3.1 Peripheral direct access – V2.0 – V2.3.1 CAN direct access – V2.0 – V2.3.1 CAN baud rate up to 500 kBit/s – V2.0 – V2.3.1 XI/OC bus expansion with XIOC-BP-EXT V1.3 – – V2.3.2 Introduction of the CAN bus load “canload” V1.3 – – V2.3.2 Storage of text data bank on the MMC V1.3 – – V2.3.2 Storage of project information on the MMC V1.3 – – V2.3.2 System events warm and cold start V1.3 – – V2.3.2 Timer interrupt V1.3 – – V2.3.2 Serial interface module XIOC-SER V1.3 – – V2.3.2 PROFIBUS-DP M module – – V3.01 V2.3.2 SUCONET K slave – – V3.02 V2.3.2 Update of the MMC's operating system – – V3.03 V2.3.2 PROFIBUS-DP S module – – V3.10 V2.3.2 Suconet K master module – – V3.10 V2.3.2 Diagnostics – – V3.10 V2.3.2 Free address specification DP – – V3.10 V2.3.2 71 10/10 MN05003004Z-EN Appendix Dimensions XT-FIL-1 line filter 100 90 XC-CPU101... 35 60 30 100 Racks XIOC-BP-XC XIOC-BP-XC1 39 53.5 90 50 50 53.5 1 50 53.5 50 1 8.5 53.5 88 3.5 3 35.5 4.5 M4 39 60 3.5 14 21 72 16 16 60 3 10/10 MN05003004Z-EN Technical data Technical data XC-CPU101-C…K-8DI-6DO(-XV) General Standards IEC/EN 61131-2 EN 50178 Ambient temperature °C 0 to +55 Storage °C –25 to +70 horizontal Mounting position Relative humidity, non-condensing (IEC/EN 60068-2-30) % 10 to 95 Air pressure (operation) hPa 795 to 1080 Vibration resistance 10 to 57 Hz g0.075 mm 57 to 150 Hz g1.0 g Mechanical shock resistance 15 g/11 ms Overvoltage category II Pollution degree 2 Degree of protection IP20 Rated insulation voltage V 500 Emitted interference EN 50081-2, Class A Interference immunity EN 50082-2 Battery (service life) Worst case 3 years, typ.5 years Weight kg 0.23 Dimensions (W x H x D) mm 90 x 100 x 100 Terminations Plug-in terminal block Terminal capacity Screw terminals Flexible with ferrule mm² 0.5 to 1.5 solid mm² 0.5 to 2.5 Flexible mm² 0.14 to 1.0 solid mm² 0.34 to 1.0 kV 4 V/m 10 Power cables kV 2 Signal cables kV 1 High-energy pulses (surge) (IEC/EN 61000-4-5) kV 0.5 Conducted (IEC/EN 1 1-1-1) V 10 Spring-loaded terminals Electromagnetic compatibility (EMC) Electrostatic discharge (IEC/EN 61000-4-2, Level 3, ESD) Contact discharge Electro-magnetic fields (IEC/EN 61000-4-3, RFI) Burst pulses (IEC/EN 61000-4-4, level 3) 73 10/10 MN05003004Z-EN Appendix XC-CPU101-C…K-8DI-6DO(-XV) Supply voltage for the CPU (24 V/0 V) Hold-up time on supply drop-out Duration of brownout ms 10 Repeat rate s 1 Input voltage V DC 24 Permissible range V DC 20.4 to 28.8 Power consumption W max. 26 Residual ripple % F5 W 6 Maximum power dissipated (without local I/O) Pv Overvoltage protection Yes Protection against polarity reversal Yes External supply filter Type: XT-FIL-1, see the technical data on Page 76 Internal supply filter Yes Inrush current x In Not limited, (limiting only by a supply-side 24 V DC PSU) Rated value V DC 5 Output current A 3.2 Output voltage for the signal modules Off-load stable Yes Short-circuit rating Yes Electrically isolated from supply voltage No CPU Microprocessor Infineon C164 Memory Program code (C64K/C128K/C256K) program code (C64K/C128K/C256K) kByte 64/128/256 Program data (C64K/C128K/C256K) kByte 64/128/256 Marker and / or retain data (C64K/C128K/C256K) kByte 4/8/16 Cycle time for 1 k of instructions (Bit, Byte) ms 0.5 Interfaces Multimedia card Yes, optional, 16 MB or 32 MB, to be ordered separately Serial interface (RS232) without handshake line Transfer rate kBit/s 38.4 Connection types RJ45 Electrical isolation No In the “transparent mode”: 74 Data transfer rate 300, 600, 1200, 2400, 4800, 9600, 19200, 38400,57600 Bit/s Character formats 8E1, 8O1, 8N1, 8N2, 7E2, 7O2, 7N2, 7E1 Number of transmission bytes in a block 190 bytes Number of received bytes in a block 190 bytes 10/10 MN05003004Z-EN Technical data XC-CPU101-C…K-8DI-6DO(-XV) CANopen Maximum data transmission rate bit/s Operating system version < 2.0: maximum 250000 Operating system version = 2.0: maximum 1000000 Potential isolation Yes Device profile According to DS 301 V4 PDO type asyn., cyc., acyc. Connection Plug-in spring-loaded terminal block, 6-pole Bus terminating resistors External Station Quantity max. 126 Watchdog Yes RTC (Real-Time Clock) Yes Power supply of local inputs/outputs ((24 VQ/0 VQ) Input voltage V DC 24 Voltage range V DC 19.2 to 30, observe polarity Potential isolation Power supply against CPU voltage Yes Overvoltage protection Yes Protection against polarity reversal Yes Digital inputs Input current per channel at nominal voltage mA Power loss per channel type. 3.5 type 85 mW Switching levels as per EN 61131-2 Limit values type “1” low < 5 V DC, high > 15 V DC Input delay Off r On ms type 0.1 On r Off ms type 0.1 Inputs Quantity 8 Channels with the same reference potential Quantity 8 Status indication LED Digital outputs1 Power loss per channel QX0.0 and QX0.5 W 0.08 A 0.5 Load circuits QX0.0 and QX0.5 Output delay Off r On type 0.1 ms On r Off type 0.1 ms Channels Quantity 6 Channels with the same reference potential Quantity 6 Status indication LED Duty factor % ED 100 Utilization factor g 1 1) Observe the limitations with use of the XC-CPU101 in an ABS enclosure, a table 1 on Page 8. 75 10/10 MN05003004Z-EN Appendix 24-V-DC-Filter XT-FIL-1 General Standards IEC/EN 61131-2 EN 50178 Ambient temperature °C 0 to +55 Storage °C –25 to +70 Horizontal/vertical Mounting position Relative humidity, non-condensing (IEC/EN 60068-2-30) % 10 to 95 Air pressure (operation) hPa 795 to 1080 Vibration resistance 10 to 57 Hz g0.075 mm 57 to 150 Hz g1.0 g Mechanical shock resistance 15 g/11 ms Impact resistance 500 g/o 50 mm g 25 g Overvoltage category II Pollution degree 2 Degree of protection IP20 Rated impulse voltage V 850 Emitted interference EN 50081-2, Class A Interference immunity EN 50082-2 Weight g 95 Dimensions (W x H x D) mm 35 x 90 x 30 Terminations Screw terminal Terminal capacity Screw terminals Flexible with ferrule mm² 0.2 to 2.5 (AWG22-12) solid mm² 0.2 to 2.5 (AWG22-12) V DC 24 Permissible range V DC 20.4 to 28.8 Residual ripple % F5 Power supply Input voltage Overvoltage protection Yes Potential isolation Input voltage against PE Yes Input voltage against output voltage No Output voltage to PE Yes Output voltage Output current 76 V DC 24 A 2.2 10/10 MN05003004Z-EN Index A Abbreviations . . . . . . . . . . . . . . . . . . . . . . . . . . . . . . . . 6 Address overlaps . . . . . . . . . . . . . . . . . . . . . . . . . . . . . 43 Address range . . . . . . . . . . . . . . . . . . . . . . . . . . . . . . . 43 Addressing PLC on CAN Bus . . . . . . . . . . . . . . . . . . . . . . . . . . 56 Addressing, inputs/outputs and markers . . . . . . . . . . . 43 Automatic addressing . . . . . . . . . . . . . . . . . . . . . . . . . 43 B Battery . . . . . . . . . . . . . . . . . . . . . . . . . . . . . . . . . . . . . 15 Battery buffer . . . . . . . . . . . . . . . . . . . . . . . . . . . . . . . 41 Battery change . . . . . . . . . . . . . . . . . . . . . . . . . . . . . . 15 Baud rate adjustment . . . . . . . . . . . . . . . . . . . . . . . . . 12 Baud rates . . . . . . . . . . . . . . . . . . . . . . . . . . . . . . . . . . 56 Baud rates, for CAN connection . . . . . . . . . . . . . . . . . . 57 Block diagram CPU . . . . . . . . . . . . . . . . . . . . . . . . . . . . . . . . . . . 11 Power supply module . . . . . . . . . . . . . . . . . . . . . . . 8 Block size, for data transfer . . . . . . . . . . . . . . . . . . . . . 55 Boot project Generating transferring . . . . . . . . . . . . . . . . . . . . . . . . . . . . . . 21 Bootable project Create . . . . . . . . . . . . . . . . . . . . . . . . . . . . . . . . . 41 Breakpoint . . . . . . . . . . . . . . . . . . . . . . . . . . . . . . . . . . 20 Browser commands . . . . . . . . . . . . . . . . . . . . . . . . . . . 40 C Cable routing . . . . . . . . . . . . . . . . . . . . . . . . . . . . . . . . 17 CAN Device parameters . . . . . . . . . . . . . . . . . . . . . . . . 57 Master routing settings . . . . . . . . . . . . . . . . . . . . . 56 CAN telegrams Receive/send from user program . . . . . . . . . . . . . . 14 CoDeSys gateway server . . . . . . . . . . . . . . . . . . . . . . . 55 Communication parameters . . . . . . . . . . . . . . . . . . . . . 45 Communication with the target PLC . . . . . . . . . . . . . . 57 Communications channel . . . . . . . . . . . . . . . . . . . . . . . 58 Connect PC . . . . . . . . . . . . . . . . . . . . . . . . . . . . . . . . . 45 Connect programming device . . . . . . . . . . . . . . . . . . . 45 Connect text displays . . . . . . . . . . . . . . . . . . . . . . . . . . 15 Connection PSU and local I/O . . . . . . . . . . . . . . . . . . . . . . . . . . 9 Control panel layout . . . . . . . . . . . . . . . . . . . . . . . . . . 17 CPU module . . . . . . . . . . . . . . . . . . . . . . . . . . . . . . . . . 7 CRC checks . . . . . . . . . . . . . . . . . . . . . . . . . . . . . . . . . 19 Create bootable project postOnline change . . . . . . . . . . . . . . . . . . . . . . . . 21 Creating a program (sample project) . . . . . . . . . . . . . . 54 Cycle time, max. . . . . . . . . . . . . . . . . . . . . . . . . . . . . . 21 Cycle-time monitoring . . . . . . . . . . . . . . . . . . . . . . . . . 25 D Data remanence . . . . . . . . . . . . . . . . . . . . . . . . . . . . . . 41 Data transfer rate modification . . . . . . . . . . . . . . . . . . 12 Data-saving . . . . . . . . . . . . . . . . . . . . . . . . . . . . . . 10, 15 Declaration . . . . . . . . . . . . . . . . . . . . . . . . . . . . . . . . . 54 Diagnostics . . . . . . . . . . . . . . . . . . . . . . . . . . . . . . . . . 44 via CAN . . . . . . . . . . . . . . . . . . . . . . . . . . . . . . . . 57 Direct peripheral access Error code . . . . . . . . . . . . . . . . . . . . . . . . . . . . . . . 33 E Electromagnetic contamination . . . . . . . . . . . . . . . . . . 17 EMPTY-SLOT . . . . . . . . . . . . . . . . . . . . . . . . . . . . . . . . 52 Engineering . . . . . . . . . . . . . . . . . . . . . . . . . . . . . . . . . 17 Erasing Boot project . . . . . . . . . . . . . . . . . . . . . . . . . . . . . 11 Contents from the Multi Media Card . . . . . . . . . . . 11 Operating system . . . . . . . . . . . . . . . . . . . . . . . . . 11 Error code, with direct peripheral access . . . . . . . . . . . 33 Ethernet patch cable . . . . . . . . . . . . . . . . . . . . . . . . . . 12 Example project . . . . . . . . . . . . . . . . . . . . . . . . . . . . . . 47 F Forcing . . . . . . . . . . . . . . . . . . . . . . . . . . . . . . . . . . . . . 20 Function blocks . . . . . . . . . . . . . . . . . . . . . . . . . . . . . . 25 Functions . . . . . . . . . . . . . . . . . . . . . . . . . . . . . . . . . . . 25 Functions, XIOC DisableInterrupt . . . . . . . . . . . . . . . . . . . . . . . . . . 36 EnableInterrupt . . . . . . . . . . . . . . . . . . . . . . . . . . . 36 ReadBitDirect . . . . . . . . . . . . . . . . . . . . . . . . . . . . 30 ReadWordDirect . . . . . . . . . . . . . . . . . . . . . . . . . . 31 WriteBitDirect . . . . . . . . . . . . . . . . . . . . . . . . . . . . 32 WriteWordDirect . . . . . . . . . . . . . . . . . . . . . . . . . . 33 H Handshake lines . . . . . . . . . . . . . . . . . . . . . . . . . . . . . . 12 Hardware timer . . . . . . . . . . . . . . . . . . . . . . . . . . . . . . 25 I Inductors . . . . . . . . . . . . . . . . . . . . . . . . . . . . . . . . . . . 17 Inputs Addressing . . . . . . . . . . . . . . . . . . . . . . . . . . . . 43 Insert input module (in easySoft-CoDeSys) . . . . . . . . . . 52 Installation, CPU . . . . . . . . . . . . . . . . . . . . . . . . . . . . . 16 Interface CANopen . . . . . . . . . . . . . . . . . . . . . . . . . . . . . . . 14 Interface assignment, programming device interface . . 12 Interfacing Communication (programming device) . . . . . . . . . 12 Interference factors . . . . . . . . . . . . . . . . . . . . . . . . . . . 17 Interrupts . . . . . . . . . . . . . . . . . . . . . . . . . . . . . . . . . . . 34 77 10/10 MN05003004Z-EN Index J Jitter . . . . . . . . . . . . . . . . . . . . . . . . . . . . . . . . . . . . . . .25 L Layout of units . . . . . . . . . . . . . . . . . . . . . . . . . . . . . . .17 LED indicators . . . . . . . . . . . . . . . . . . . . . . . . . . . . . . . . .9 Lightning protection . . . . . . . . . . . . . . . . . . . . . . . . . . .18 Loading the operating system . . . . . . . . . . . . . . . . . . . .22 M Markers Addressing . . . . . . . . . . . . . . . . . . . . . . . . . . .43 Memory Card . . . . . . . . . . . . . . . . . . . . . . . . . . . . . . . .11 Memory usage, limit values . . . . . . . . . . . . . . . . . . . . .42 Memory, application program . . . . . . . . . . . . . . . . . . . .10 Monitoring, system voltage . . . . . . . . . . . . . . . . . . . . . .10 Mounting position . . . . . . . . . . . . . . . . . . . . . . . . . . . .17 Multimedia card . . . . . . . . . . . . . . . . . . . . . . . . . . . . . .11 N Node ID . . . . . . . . . . . . . . . . . . . . . . . . . . . . . . . . . . . .56 Node number . . . . . . . . . . . . . . . . . . . . . . . . . . . . . . . .56 O Operating mode selector switch . . . . . . . . . . . . . . . . . .11 Operating states . . . . . . . . . . . . . . . . . . . . . . . . . . . . . .41 Outputs Addressing . . . . . . . . . . . . . . . . . . . . . . . . . . .43 P Parameterisation . . . . . . . . . . . . . . . . . . . . . . . . . . . . . .21 Program processing . . . . . . . . . . . . . . . . . . . . . . . . . . .25 Program run interrupted . . . . . . . . . . . . . . . . . . . . . . . .20 Program transfer . . . . . . . . . . . . . . . . . . . . . . . . . . . . . .41 Programming cable for RS232 interface . . . . . . . . . . . .45 PSU . . . . . . . . . . . . . . . . . . . . . . . . . . . . . . . . . . . . . . . .7 R 78 Real-time clock . . . . . . . . . . . . . . . . . . . . . . . . . . . . . . .15 Reset . . . . . . . . . . . . . . . . . . . . . . . . . . . . . . . . . . . . . .21 Residual cycle . . . . . . . . . . . . . . . . . . . . . . . . . . . . . . . .41 RJ45 plug . . . . . . . . . . . . . . . . . . . . . . . . . . . . . . . . . . .12 RS232 interface . . . . . . . . . . . . . . . . . . . . . . . . . . . . . .12 S Segments . . . . . . . . . . . . . . . . . . . . . . . . . . . . . . . . . . 42 Select POU type . . . . . . . . . . . . . . . . . . . . . . . . . . . . . 50 Shielding . . . . . . . . . . . . . . . . . . . . . . . . . . . . . . . . . . . 17 Single cycle mode . . . . . . . . . . . . . . . . . . . . . . . . . . . . 20 Single-step mode . . . . . . . . . . . . . . . . . . . . . . . . . . . . 20 Start behaviour, at Power-On . . . . . . . . . . . . . . . . . . . 21 Startup behaviour . . . . . . . . . . . . . . . . . . . . . . . . . 19, 20 Status indication, easySoft-CoDeSys . . . . . . . . . . . . . . 20 Stop behaviour . . . . . . . . . . . . . . . . . . . . . . . . . . . . . . 20 Supply interruption . . . . . . . . . . . . . . . . . . . . . . . . . . . 41 Suppressor circuitry for interference sources . . . . . . . . 17 Switch-off behaviour . . . . . . . . . . . . . . . . . . . . . . . . . . 20 Symbols . . . . . . . . . . . . . . . . . . . . . . . . . . . . . . . . . . . . 6 System libraries . . . . . . . . . . . . . . . . . . . . . . . . . . . . . . 25 System time . . . . . . . . . . . . . . . . . . . . . . . . . . . . . . . . 25 T TCP/IP connection (for routing) . . . . . . . . . . . . . . . . . . 55 Terminal assignments . . . . . . . . . . . . . . . . . . . . . . . . . . 9 Test and commissioning . . . . . . . . . . . . . . . . . . . . . . . 20 U Uneven word addresses . . . . . . . . . . . . . . . . . . . . . . . 43 Uninterruptible power supply . . . . . . . . . . . . . . . . . . . 41 V Ventilation . . . . . . . . . . . . . . . . . . . . . . . . . . . . . . . . . 17 Versions, CPU . . . . . . . . . . . . . . . . . . . . . . . . . . . . . . . 10 W Warm start . . . . . . . . . . . . . . . . . . . . . . . . . . . . . . . . . Wiring . . . . . . . . . . . . . . . . . . . . . . . . . . . . . . . . . . . . . Wiring example Power supply of the digital inputs/outputs . . . . . . Power supply unit . . . . . . . . . . . . . . . . . . . . . . . . Word addresses, uneven . . . . . . . . . . . . . . . . . . . . . . . X 20 17 18 18 43 XC100 configuration . . . . . . . . . . . . . . . . . . . . . . . . . . 50 XIOC modules . . . . . . . . . . . . . . . . . . . . . . . . . . . . . . . . 7