1
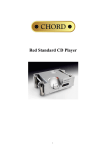
Chord Electronics Limited QBD76HD DIGITAL / ANALOGUE CONVERTER OPERATING INSTRUCTIONS -1- Contents Page 1 2 3 4 4 4 5 5 5 9 12 12 13 Title page Table of Contents Input / Output connection diagram for the QBD76 Mains connection instructions Cleaning and care instructions Initial Start-up Audio Outputs Digital Input Selection Using HD USB digital audio Sample rate setup De-emphasis coding Setting the RAM buffer Product Specification -2- Chord Quarter Back DAC 76 connection diagram RAM buffer selector Display Output phase selector Digital input selector USB HD connector (Connect to supplied cable) Standard Definition USB input Word Clock output Plastic fibre optical inputs AES balanced XLR inputs 75ohm SP/DIF2 BNC Coax inputs Right Unbalanced output Left Unbalanced output Left Balanced output Right Balanced output -3- Chord Quarter Back DAC 76HD Operating Instructions Mains connection instructions Please ensure that the IEC mains lead is correctly terminated: UK / Europe Function USA / Canada Brown Live Black Blue Neutral White Green / Yellow Earth Green WARNING THE QBD76HD MUST BE EARTHED AT ALL TIMES VIA ITS OWN MAINS LEAD. FAILURE TO DO THIS MAY BE HAZARDOUS. Plug the supplied lead into the AC inlet and then switch on. Cleaning and care instructions The QBD76HD requires no special care other than common sense. Spray window cleaner (clear type) may be used (if first sprayed onto a soft cloth) to remove surface blemishes such as finger marks from the metal casing. Never spray directly onto the converter and never use abrasive cleaning, use only a lint free soft cloth. There are no user serviceable parts in the QBD76HD. It should be serviced only by Chord Electronics Limited or their expressly approved service agents. NB: This unit must be ventilated at all times with at least 5cm space around and above the unit. Initial Start-up If there is no output from the DAC once everything has been connected and the digital source is playing it may be that the DAC has not set itself. Remove the power lead and wait for 30 seconds before powering up. This should be enough time for the DAC to configure itself. -4- Audio Outputs There is one pair of Left & Right fully balanced outputs, via Neutrik XLR style connectors and one pair of Left & Right unbalanced outputs, via gold plated RCA phono style connectors. Each of these will drive down to a 50ohm load. This means that the QBD76HD will work with all known preamplifiers and is able to drive very long audio cables without difficulty. Both audio outputs work at the same time, this allows the QBD76HD to be connected to two pre-amplifiers if needed. Digital Input Selection The QBD76HD enables you to use any one of five digital input formats. These consist of two 75ohmSP/DIF2 BNC (COAX) and two AES balanced XLR input (AES) and two Plastic Fibre Optic (Opt) and a USB B type connector (USB1) and USB HD 192KHz (USB2) using the supplied cable. Each of these inputs can be selected by using the selector switch on the top panel of the unit. The switch is located directly above the display, see connection diagram. The sequence of input selection is as follows; Function USB HD 192KHz 75ohm-SP/DIF2 BNC AES balanced XLR Plastic Fibre Optic USB B type connector Display - USB2 COAX AES OPT USB1 On powering the unit there should be a coloured glow from the central located glass window, the display will then scroll the word chord, then display the source that is selected, then the phase mode (positive or negative), then the level of RAM buffer selected (0BUF if RAM buffer is not in use) and then will remain displaying the input selected. Once digital lock has been achieved the word LOCK will be displayed briefly then the frequency that the lock has been achieved at (either 44K, 48K, 88K, 96K, 176K or 192K to represent 44.1Khz, 48Khz, 88.2Khz, 96Khz, 176.4Khz or 192Khz). Using USB HD Digital Audio Connection to the host computer Connect the QBD76HD to the host computer by inserting the supplied USB lead into any available USB 2.0 socket. To support 192KHz the USB socket on the computer must be USB 2.0 or above. Once connected insert the other end of the supplied cable into the QBD76HD making sure that the red dots are aligned and pointing upwards. If a driver hasn‟t been installed on your computer, an automatic driver installation wizard may appear. Note: If you want to avoid the automatic driver installation, please connect the QBD76HD to the computer after manually installing the driver. Driver installation The drivers for QBD76HD are available on the supplied CD. Windows drivers are contained in zip files, Mac drivers are contained in dmg files. For Windows XP use chordxp.zip, for Windows Vista or Windows 7 use chordwin7.zip. For the Apple Mac operating systems the dmg files are for OS 10.4(ChordUsb_148104.dmg), 10.5(ChordUsb_148105.dmg) or the latest Snow Leopard 10.6(ChordUsb_148106.dmg). If you have lost the CD please download drivers at www.chordelectronics.co.uk on the QBD76HD product page. -5- Installing the driver on a Windows PC Create a temporary folder on the hard disk of your computer (this can be on your desktop). Double-click on the zip file contained on the CD to open it. Select and drag all files in the temporary folder, this will automatically unzip all the files. Automatic installation Connect QBD76HD to the PC. Following the negotiation process, the driver installation wizard is automatically launched. Click on the button to proceed. Choose automatic installation (as recommended) and proceed to next step. Indicate the folder where you have previously unzipped the driver and proceed to installation. Click on Continue. The installation will proceed to the end. You may get warning messages indicating that the driver is not digitally signed - just click yes to continue installation. Click on Finish to complete the driver installation. Note: the wizard appearance and the guided installation procedure may slightly vary from XP to Vista to Windows 7. Manual installation Sometimes it is necessary or advisable to install the driver manually. The installation package offers two installation utilities, “setup32.exe” and “setup64.exe”. The former is for 32 bit operating systems, while the latter is for 64 bit operating systems. Without connecting QBD76HD to the PC, double-click on either “setup64.exe” or “setup32.exe”, depending on your operating system: the driver will automatically be installed on your PC. Installing the driver on a Mac Double-click on the zip file to open it. It contains a single dmg file. Extract it from the zip and doubleclick on it to open it. It only contains a pkg file. Double click on it to start driver installation. Click on the Continue button. Select “Install for all users”, then click on Continue button. You‟ll be asked to type in the administrator password. After doing that, the installation process will continue and you‟ll be asked for a confirmation to continue the process up to the computer restart. Click on Continue Installation button. The installation will continue until the final window appears showing the successful installation of the driver. Click on Restart button to complete the installation process. Unistalling the driver ( Windows PC only ) Sometimes it is necessary to uninstall the driver to roll back to a previous version. Uninstall is a quite simple procedure which depends on the operating system and the way the driver was installed. Uninstalling the driver on a Windows-based PC after installation with setup32.exe or setup64.exe Go to the control panel and launch the program and features (add/remove programs) utility. Look for the Chord Async USB 44.1kHz–192kHz driver item in the list. Double-click on it to launch uninstalling. Manually uninstalling the driver on a Windows-based PC Connect QBD76HD to the PC. Go to the control panel and launch the “System” utility, then select Hardware tab. Open the Device Management window. You will find Chord Async USB 44.1kHz–192kHz device listed under Audio, Video and Game controllers. Right-click to access the available actions. Select “Uninstall”. -6- Configuring the computer to use QBD76HD Configuring a PC with Windows XP A PC with Windows XP can use QBD76HD in two different ways: Direct Sound (DS) and Kernel Streaming (KS). Direct Sound is suitable for players which can‟t operate in Kernel Streaming mode (such as Windows Media Player and iTunes) or for Internet streaming. Kernel Sound can be chosen (for better performance) with players which can operate in Kernel Streaming mode (such as FooBar, Winamp, Monkey Media, JRiver). Please note that in Windows XP there is no direct sample rate setup in the audio settings panel. Sample rate can only be selected in Kernel Streaming mode with an appropriate player. Configuring for Direct Sound with Windows XP Connect QBD76HD to your PC. Then, go to the Control Panel and launch the Sound and Audio Peripherals utility. Select the Audio tab. In the Predefined Peripheral drop-down menu of the Playback area, select “Chord Async USB 44.1kHz–192kHz” Then, select the “Voice” Tab. Again, select “Chord Async USB 44.1kHz–192kHz” in the drop-down menu of the Playback area. Click on OK button. Please be advised that even if the QBD76HD peripheral is listed as “kernel streaming”, it will operate in Direct Sound mode when listed here. From now on, unless QBD76HD is disconnected or settings are changed again, QBD76HD is the audio peripheral all audio programs will use when operating in direct sound mode. Configuring for Kernel Streaming with Windows XP Kernel Streaming has no standard setting in Windows XP. KS must be selected in the specific player you choose to use. For example, when using FooBar, with QBD76HD connected to the PC, go to the File/Preferences/Playback /Output tab and select “Chord Async USB 44.1kHz–192kHz” as output device. Other players will require different settings. Using QBD76HD in both Kernel Streaming and Direct Sound mode When QBD76HD is selected as an audio peripheral, it‟s possible to use it in both Kernel Streaming mode and Direct Sound mode. When using it in KS mode, it is necessary that no other application accesses QBD76HD in DS mode. If this happens, Windows XP‟s Kernel Mixer takes control of QBD76HD‟s driver and from then on, no KS application can access QBD76HD unless the PC is restarted or QBD76HD connection to the PC is cycled. -7- Configuring a PC with Windows Vista or Windows 7 A PC with Windows Vista or Windows 7 can use QBD76HD in three different ways: Direct Sound (DS), Kernel Streaming (KS) and WASAPI. DS is suitable for players which can‟t operate in Kernel Streaming mode nor with WASAPI or for Internet streaming; KS can be chosen (for better performance) with players which can operate in Kernel Streaming mode (such as FooBar, Winamp, Monkey Media, JRiver). WASAPI (Windows Audio Standard API) is a standard interface for audio players which allows to get the same performance of KS with applications which can‟t operate in KS mode, at the cost of higher CPU load. Configuring for Direct Sound with Windows Vista or Windows 7 Open control Panel and select Hardware and Sounds. Under Audio, click on Manage Audio Devices. Set Chord Async USB 44.1kHz–192kHz as default device. Then, click on OK. Configuring for Kernel Streaming with Windows Vista or Windows 7 As for Windows XP, Kernel Streaming has no standard setting in Windows Vista and Windows 7. KS must be selected in the specific player you choose to use. For example, when using FooBar, with QBD76HD connected to the PC, go to the File/Preferences/Playback /Output tab and select “Kernal Streaming Chord Async USB 44.1kHz– 192kHz” as output device. Other players will require different settings. Configuring for WASAPI with Windows Vista or Windows 7 Similar to Kernel Streaming, WASAPI cannot be directly accessed. WASAPI must be selected in the specific player you choose to use. For example, when using FooBar, with QBD76HD connected to the PC, go to the File/Preferences/Playback /Output tab and select “WASAPI: Chord Async USB 44.1kHz–192kHz” as output device. Other players will require different settings. Configuring Mac OS X Open the System Environment Settings from the Start menu. Open the Sound options from the System Environment settings. Select the Output tab and confirm the Chord Async USB 44.1kHz–192kHz USB audio codec appearance as the default output device. Sample Rate Setup Open the Audio MIDI Settings options (Application – Utility - Set Audio MIDI). Select the Audio Output tab in the Set Audio MIDI. Select the desired sample frequency from the options given. Configuring the player for Kernel Streaming: some examples FooBar To use FooBar in KS mode it is necessary to download the DLL for Kernel Streaming from the FooBar2000 website and install it in the Components sub-folder inside FooBar2000 main folder in your hard disk. The DLL can be found at http://www.foobar2000.org/components/view/foo_out_ks. It is a zip folder which contains the DLL. Extract it from the zip and copy to the Components folder. Then, restart FooBar, go to the File/Preferences/Playback/Output window and set Parameters. -8- 5.2. Winamp and MediaMonkey These two players are actually the same player with different skins, so they can share the same plugins. A freeware plug-in for Kernel Streaming by Steve Monks is available on the Internet (http://www.stevemonks.com/ksplugin/) that can be used to enable Kernel Streaming operation with these players. Download the zip file, extract the dll file and copy it into the Plugins folder inside Winamp main folder. With QBD76HD connected, right-click on Winamp and select Display/Select Plug-ins. The Preferences window of Winamp will open. Go to Plug-in/Output and select “Kernel Streaming Output”. Then click on Configure button. Choose QBD76HD Kernel Streaming in the output device list. Configuring the player for WASAPI: an example FooBar To use FooBar with WASAPI under Windows 7 it is necessary to download the DLL for WASAPI from the FooBar2000 website and install it in the Components sub-folder inside FooBar2000 main folder in your hard disk. The DLL can be found at http://www.foobar2000.org/components/view/foo_out_wasapi . It is a zip folder which contains the DLL. Extract it from the zip and copy to the Components folder. Then, restart FooBar, go to the File/Preferences/Playback/Output window and set parameters. Sample rate setup for QBD76 HD (Windows Vista Example) Once the driver software has been installed and the QBD76 HD connected to a Windows based computer then the digital audio sample rate needs to be set as follows:- Stage 1:- Configuring audio devices Connect the QBD76 HD to the computer with the supplied USB cable. Run the Windows Control panel and select Hardware and Sound The select „Manage Audio Devices‟ -9- Here you have a list of the connected audio devices. The QBD76 HD is identified as a digital output device with the „Chord Async USB 44.1kHz-192kHz‟ driver installed. Shown at the top of the list here. Right click the digital output and select properties to show the following screen:- Select the Advanced tab at the top of the window - 10 - Here you can change the default format to the sample frequency you require. We recommend 2 channel 24 bit, 192000 Hz (Studio Quality). Click the arrow and select the format. Then click OK - 11 - It is also a good idea at this stage to set the Digital Output as the default sound output device. Highlight Digital Output as shown then click the Set Default button at the bottom of the page. Click the OK button to continue. Sample rate setup is now complete. De-emphasis coding The QBD76HD will automatically detect when a pre-emphasized recording is being played, and will set the correct de-emphasis filters in the converter section. Setting the RAM buffer There are three settings for the RAM buffer. The options are as follows; Buffer applied No buffering Minimum buffering Maximum buffering Display - 0BUFF MIN MAX The receiver chip takes the data from the transport and generates clocks and data in a form that the filter can accept. This has two major benefits – all digital data extraction and a RAM buffer. This RAM buffer sequentially takes all the data, retimes it, and sends it out. The RAM buffer allows the jitter free local clock operation without needing to send back a clock signal to the data source. There is however a word clock output located by the power connector on the rear of the QBD76HD. N.B. When using the QBD76HD with the buffer set to anything apart from 0BUFF there is a time delay from pressing “Play” to hearing music. Whenever switching between the different buffer settings there is a delay another delay before the music resumes. N.B. It is important to set the volume on the pre-amp/amplifier to minimum when switching between digital inputs or setting the Ram buffer on the QBD76HD. - 12 - Product Specification HARMONIC DISTORTION < -103dB SIGNAL TO NOISE RATIO >120dB CHANNEL SEPARATION >125dB @ 1KHz DYNAMIC RANGE 122dB DIGITAL INPUTS 2 x 75 SP/DIF BNC Coax 44.1KHz - 192KHz 2 x AES Balanced XLR 44.1KHz - 96KHz, (176KHz-192KHz dual cable) 2 x Plastic fibre optic ( TOSlink ) 44KHz - 96KHz, (176KHz-192KHz dual cable) 1 x USB ( B type ) 44.1KHz - 48KHz 1 x 4 pin high speed to USB ( A type ) 44KHz - 192KHz ANALOGUE OUTPUTS 2 x RCA Phono 2 x Balanced XLR RAM BUFFER SWITCH switches between; No buffering, Minimum buffering and Maximum buffering PHASE SWITCH 2 Settings Positive or Negative output phase SAMPLE FREQUENCIES 44.1Khz - 192Khz (input dependant) OUTPUT MAX 6V rms. Balanced. 3V rms. unbalanced OUTPUT IMPEDANCE 75ohm (short circuit protected) DIMENSIONS IN MM 338 x 60 x 145mm (Width x Height x Depth) WEIGHT 7Kg - 13 -