1
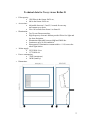
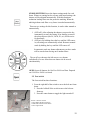
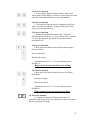
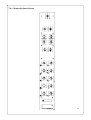
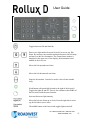
User Guide
Masks the viewing area for two rows of 18x24 cm films.
Masks the viewing area for two rows of 24x30 cm films.
Masks the viewing area for 35x43 cm films. The belt also stops
with the film clip at the top of the viewing area to make it possible
to load large films. To exit this mode press either 18x24 or 24x30.
User programmable keys for shutter positions.
Set the shutters to the desired position using the arrow keys and/or
joystick. Press and hold any of the P1-P4 keys until the LED lights up to
store the shutter position. The stored position can now be retrieved using
the same P key. Light stays on until you press another command, e.g.
18x24 or P2. It takes two seconds to program.
Sets the shutters to a small spot. The size of the spot can be
programmed in the same way as the P1-P4 keys. Pressing the Spot
key again, retrieves the previous shutter settings.
Opens all shutters fully. The position for the upper and lower
shutters depends on the 18x24/24x30 setting.
Moves the upper, left, lower or right shutter inwards or outwards.
The shutter moves while the key is pressed.
Moves the belt one half of a frame when using the arrow keys. The
upper half of the viewing area is masked.
Stores shutter settings. Two different functions, toggle between
them by keeping the key pressed until the LED goes on or off.
(LED off): Save shutter settings you have made by pressing the
key.
(LED on): The shutter settings are stored automatically for each
frame.
Erase the shutter settings for all frames. First press Save Mask
then OPEN (without releasing Save Mask).
Moves the masking window in any direction.
52