1
Page 1 of 14
Touch Potentiometer Hookup Guide
Introduction
The Touch Potentiometer, or Touch Pot for short, is an intelligent, linear
capacitive touch sensor that implements potentiometer functionality with
256 positions. It can operate as a peripheral to a computer, embedded
microcontroller or in a stand-alone capacity. The Touch Potentiometer
provides both a dual-channel analog and PWM output for direct control of
other circuitry. Configurable analog and PWM transfer functions support a
wide variety of applications.
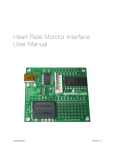
The SparkFun Touch Potentiometer front and back
Note: This product is a collaboration with danjuliodesigns. A portion of each
sales goes back to them for product support and continued development.
Recommended Materials
This tutorial will go over numerous examples of how to us the Touch
Potentiometer. The materials needed to follow along with each example will
be listed at the beginning of that example’s section.
Suggested Reading/Viewing
First and foremost, Dan Julio of danjuliodesigns has written an amazing
user manual for the Touch Potentiometer. Most of the information you need
to know about the Touch Pot can be found in that document including
maximum power ratings, dimensional drawing, and very detailed
operational instructions. You can download the manual via the link below or
you can always grab the most up-to-date version from his website.
TOUC H POTE NT IOME TE R USE R MANUAL
Page 2 of 14
To better understand the Touch Potentiometer and how it functions, it will
help to have a good understanding of the following concepts. If there’s any
you are unfamiliar with, visit the corresponding tutorial first, then head on
back.
• Resistors - The section on potentiometers is of particular interest.
• Serial Communication - The Touch Pot uses Serial Communication
to talk to the utility used to configure the board.
• I2C - The Touch Pot uses I2C Communication to communicate with
embedded microcontrollers or with other Touch Pots on the bus.
• Pulse-width Modulation - The Touch Pot has a PWM output for
interfacing with lighting systems or other controllers that accept PWM
inputs.
• Hexadecimal and Binary are used a lot when diving in to the
operation of the Touch pot.
• The Touch Pot relies on Capacitive Sensing to detect changes to its
current setting. Check out the video below for a detailed breakdown
of how Cap Sensing works and different methods of detecting cap
sense.
Board Overview
There are several different ways to interface to the Touch Potentiometer.
This section will briefly cover each of these methods. Most of this
information can be found in the user manual.
Digital I/O
The Touch Potentiometer Digital IO connections consist of the VIN and
Ground power signals for the micro-controller and digital portion of the
AD5262, a TTL-level serial interface, an I2C interface, and the PWM output.
The Touch Potentiometer communicates to a host device using TTL-level
serial interface or an I2C interface. Both interfaces are active
Page 3 of 14
simultaneously. The serial interface operates at 9600 baud. The I2C
interfaces is a 7-bit slave with a maximum clock rate of 100 kHz. It does not
support General Call or 10-bit addressing.
Pin Label
Function
GND
Ground
VIN
+5-12 Volt power input
SDA
I2C SDA (Data)
SCL
I2C SCL (Clock)
RX
Serial TTL RX Input
TX
Serial TTL TX Output
PWM
Pulse-width Modulation Output
Power
The Touch Pot has a 5V LDO voltage regulator (Vreg) to allow the board to
be powered from external sources that are larger than 5V (great for lighting
and audio systems that require 9-12V). The VIN pin can be powered with
any voltage between 4.6-12V. The datasheet for the Vreg can be found
here.
Important Note about Power Supplies
The capacitive sensors may be adversely affected by electrical noise.
They are sensitive to 50 and 60-Hz energy that may be coupled
through power supplies with inadequate line filtering or configurations
with a ground loop (for example, a system that has a DC power supply
and is also connected to a computer with its own power supply). It
may be necessary to include an AC line filter in front of some cheap
switch-mode power supplies to eliminate ground loop conditions.
Serial Communication
A computer with a USB interface and terminal emulator program can
access the Touch Potentiometer using the serial interface connected to a
USB-to-serial device like a FTDI Basic Breakout Board or a micro-controller
like the 5V Pro Micro that has both a USB interface with Communications
Device Class (CDC) support and a serial port. The Touch Potentiometer
serial interface operates at 5V logic levels with a data rate of 9600 baud,
eight data bits, no parity and one stop bit (8N1).
I2C Communication
The Touch Pot communicates over I2C just as any other I2C sensor would.
It supports 7-bit addressing and a maximum transfer rate of 100 kHz. It may
be connected to a 5V Arduino I2C peripheral (A4/A5) directly. Level
translators should be used for 3.3V Arduino boards (or other 3.3V microcontrollers). The Touch Potentiometer activates weak pull-ups on its I2C
signals, so pull-up resistors are not necessary for short connections (a few
inches). Pull-up resistor values of 4.7kΩ to 10kΩ may be used.
The default I2C address is 0x08. There are 64 available I2C addresses.
The Touch Pot uses two consecutive I2C addresses, which is why only 64
are available. Details on changing that address in the utility app and on the
fly will discussed later in the tutorial.
Page 4 of 14
Pulse-width Modulation
The PWM output generates a signal with a duty-cycle that is proportional to
the current Touch Potentiometer value. A value of zero results in a PWM
output of 0% duty cycle (off). A value of 255 (full-scale) results in a PWM
output of nearly 100% duty cycle (on).
Analog I/O
The Touch Potentiometer Analog IO signals consist of the [AD5262] wiper
and wiper power supply signals. The AD5262 supports two separate digital
20kΩ potentiometers, each with two terminals and a wiper connection. They
have their own power supply connections allowing the voltage levels on the
potentiometers to exceed the +5 volt logic power supply (see important note
below).
Pin
Label
Function
A1, A2
A Terminals for potentiometer 1 and 2
W1,
W2
Wiper Terminals for potentiometer 1 and 2
B1, B2
B Terminals for potentiometer 1 and 2
V+
Positive Power Supply. Connected at the factory to the 5V logic
signal by jumper J1. With J1 removed this may be connected to
a positive voltage up to 15V. Note the sum of |V-| + |V+| must
be 15V or less.
V-
Negative Power Supply. Connected at the factory to ground by
jumper J2. With J2 removed this may be connected to a
negative voltage down to -5V. Note the sum of |V-| + |V+| must
be 15V or less.
Current Limitations: The maximum amount of current allowed
through the A or B to W pins is 5mA continuous, 20 mA intermittent.
Important Notes about V+ and VCare must be taken with V+ and V- to prevent damage to the ICs on
the Touch Potentiometer.
1. V+ and V- must always be connected to power and should be
powered before or at the same time voltages appear on the A, B and
W signals and 5V input.
2. By default, V+ is connected to 5V with jumper J1 and V- is
connected to ground with jumper J2. Voltages on the A, B and W
signals should not exceed the range of 0 - 5V with these jumpers
installed. Remove these jumpers by removing the solder blob if a
different power supply will be connected to V+ and/or V-.
3. The maximum voltage potential between V- and V+ is 15 volts. Vmaximum is -5V. V+ maximum is 15V.
4. Electrical noise on V- and V+ may be coupled into the signal
Page 5 of 14
passing through the potentiometer. A power supply connected to Vand V+ may require additional filtering to eliminate this noise.
Calibration/Configuration Button
The Touch Pot has a button located on the backside that allows the user to
change both the I2C address on the fly as well as calibrate the capacitive
touch sensor on the fly. As indicated by the silkscreen near the button,
three rapid, successive presses will enter I2C address change mode, and
four presses will start the calibration process. The presses have to be
complete within 2 seconds, or they are ignored
Touch Pot Utility App
Dan Julio has created a desktop application that communicates with the
Touch Pot over a serial connection. From this utility app you can change
configuration settings, alter LED behavior, calibrate the capacitive touch
sensor, view current readings in jabber mode, and much more.
You can download the utility, known as tputil, from danjuliodesigns.com.
Versions for Windows, Mac and Linux are all available.
In order to communicate between the Touch Pot and tputil, you’ll need to
create a serial connection. The easiest way to do this is to solder some
headers onto the Touch Pot. You’ll need some form of TTL-to-USB
converter such as our USB to TTL Serial Cable or something like an FTDI
Basic with some male-to-female jumper wires.
Make your connections as follows:
TTL-to_USB Device
Touch Potentiometer
GND
GND
VCC
VIN
TX
RX
RX
TX
Touch Potentiometer connected to computer via a USB to TTL Serial
Cable. (Note: the logic levels on this cable are 3.3V but work well enough.)
Once the Touch Pot is connected, open the tputil. Select the correct serial
port, and click connect. Once connected, you can alter a variety of settings
for the Touch Pot.
Page 6 of 14
Checking the Jabber check box will display the current value of the senor.
Sliding your finger along the sensor will change this value in real time.
Other setting such as LED behavior can be altered here. The PWM output
can be set to linear or non-linear for lighting systems. The analog output
can be set to Log instead of Linear for audio systems.
The Configure tab offers lots of options such as calibration of the cap
sense, factory reset, changing the I2C address, and getting the current
EEPROM and sensor values.
More details about the functionality that the utility app provides access to
can be found under the Operation section of the User Manual.
Example 1: PWM Lighting Controller
This example will demonstrate how to use the PWM output on the Touch
Potentiometer to control an LED lighting system.
Many LED lighting systems use constant current power supplies, such as
our PicoBuck and FemtoBuck LED Drivers. These drivers usually have a
PWM input, allowing you to fade the LEDs on or off. The best part: there is
no programming necessary.
Hardware Hookup
Before making any connections, you’ll need to decide how you want your
lighting system to behave. The PicoBuck has three, independentlycontrolled channels capable of handling PWM signals, whereas the
FemtoBuck has only one channel and one PWM input. For this example, all
three inputs on a PicoBuck were tied together so that all three channels
would fade in unison. You can leave each channel separate, which is great
for RGB color blending systems, but you’ll need a Touch Pot for each
individual channel in that scenario or a way to switch between channels.
Page 7 of 14
The Touch Pot works best as a lighting dimmer control when the PWM
output set to Non-linear. This can be accomplished in the tputil app
mentioned in the previous section.
Connecting the Touch Pot to the PicoBuck only requires two wires. Ground
needs to connect to ground on the opposite board. The PWM output pin on
the Touch Pot connects to the three input pins on the PicoBuck (IN1, IN2,
and IN3) that are tied together, as mentioned above.
Here is a wiring diagram showing how this would look with a FemtoBuck.
The same would apply to the PicoBuck; just tie the three PWM pins
together.
Note: You could also power the Touch Pot with the 12V supply, since it has
the 5V LDO regulator on it. However, if you’re powering you’re LEDs with
more than 12V, you’ll need the secondary 5V-12V supply for the Touch Pot.
Last, you’ll need to power both the Touch Pot and the Constant Current
Driver. The Driver will accept voltages up to 36V, but 12V will be more
common. You will also need to power the Touch Pot with 5V. You can use
two separate power supplies, such as a 5V and 12V wall adapter, or you
can find a dual-voltage supply. We offer a 12V/5V power supply. However,
we DO NOT recommend using this power supply with the Touch
Potentiometer. This power supply lacks proper filtering and tends to wreak
havoc on the Touch Potentiometer. For a more robust lighting system, we
recommend getting a decent power supply such as a Meanwell.
Once everything is connected, you should be able to apply power to the
Touch Pot and the LED Driver. Everything should power on, and the Touch
Pot should start in the ‘off’ position. Run your finger along the capacitive
touch strip, and watch the LEDs fade on and off.
Page 8 of 14
You can read more about the PWM capabilities of the Touch Pot here.
Example 2: Analog Volume Controller
The next example will show how to use the Analog Potentiometer
functionality of the Touch Pot to control both the left and right volume for an
audio amplifier. This example will be using the SparkFun Audio Amplifier
Kit. The same hookup could be used with the SparkFun Mono Audio Amp
Breakout as well.
Hardware Hookup
If you have not done so already, you’ll need to build the Audio Amp Kit. Be
sure to omit the two PTH Potentiometers included in the kit.
The analog transfer function of the Touch Pot can be set to Logarithmic for
a more realistic volume control Non-linear. This can be accomplished in
the tputil app mentioned previously.
Next, connect the Analog Potentiometer pins on the Touch Pot to the Audio
Amp pins where the PTH potentiometers would have been. There are two
channel, each consisting of an A, W and B. We’ll consider A as ‘+’, W as
Wiper and B as ‘-’. One the PCB, these inputs map like this:
Here is a look at the underside of the connections.
And from the top…
Page 9 of 14
Once both volume channels are connected, we’ll need to provide power to
the Amp and the Touch Pot. Since the Touch Pot has a 5V LDO voltage
regulator, we can use the same power supply to power both the Amp and
the Touch Pot. A supply between the range of 9V-12V should be used to
power both. Power routed from the input can be seen in the image below.
Last, you’ll need to connect some wires for audio in and audio out. This can
be achieved several different ways. The speakers can be attached directly
to the amp, or an audio output cable can be attached, as was the case in
our example. You can use an audio input cable on the input side. This
allows for phones, MP3 players and other 3.5mm jack-type devices to play
music through this setup.
With everything connected, apply power. You should see the Amp and the
Touch Pot power on. Connect a speaker and an audio source, play some
tunes and use the Touch Pot to control the volume!
Complete Audio setup.
You can read more about the analog output capabilities in the User Manual.
Example 3: Interfacing with
Microcontrollers
The first two examples showed how you can use the Touch Pot right out of
the box, no programming necessary. This example will show you how to
connect the Touch Pot to a microcontroller. It will also cover how to add
more than one Touch Pot to an I2C bus. For an example of interfacing the
Touch Pot to a computer over serial, visit the User Manual
Page 10 of 14
Hardware Hookup
This example uses a Pro Micro 5V to communicate with the Touch Pot over
I2C. The connections between the two are as follows:
You should end up with something that looks like this:
Note: The white and blue wires are connected to the serial interface to
allow the Pro Micro to talk to the tputil as well using a different sketch,
tp_test_sketch, found on danjuliodesign.com.
If you have not used a Pro Micro before, you should visit the Hookup Guide.
In particular, you’ll need to install some additional drivers and add the board
definitions for the Pro Micro to the Arduino IDE. The Hookup guide covers
this for both Windows and Mac and Linux users. Alternatively, you could
use any microcontroller that has I2C and Serial communications.
Page 11 of 14
Once the Pro Micro is setup in the Arduino IDE, select the correct board
(Pro Micro) and serial port.
Then, upload the following code to the Pro Micro:
Page 12 of 14
/* * Simple Touch Potentiometer Example with Arduino * * Reads the pot value and controls the brightness of the Ardu
ino LED on * Digital Pin 13. Also logs new values to the serial port. Utilizes * both the direct and indirect command interface forms. * * Assumes Touch Pot is at I2C Address 8 * * Released into the public domain by Dan Julio. This softwar
e is supplied on an asis * basis and no warranty as to its suitability for any particu
lar purpose is either made * or implied. danjuliodesigns, LLC. will not accept any clai
m for damages howsoever * arising as a result of use or failure of this software. */
#include "Wire.h"
int i2cAddr = 8; // Direct access at i2cAddr, indirect registe
rs at i2cAddr+1
uint8_t prevValue; uint8_t curValue; void setup() {
Serial.begin(115200);
Wire.begin();
pinMode(13, OUTPUT);
// Demonstrate access to Touch Potentiometer registers
WriteTpReg(1, 128); // set to 50% by writing to register 1
curValue = ReadTpReg(1); // read back value just set
// Set Arduino LED PWM to match
analogWrite(13, curValue);
prevValue = curValue;
} void loop() {
delay(50); // Read ~20 times/second
// Demonstrate direct access to Touch Potentiometer value
curValue = ReadTpValue(); // faster I2C access than registe
r read
if (curValue != prevValue) {
analogWrite(13, curValue);
Serial.println(curValue);
prevValue = curValue;
} } // Write a Touch Potentiometer register
void WriteTpReg(uint8_t addr, uint8_t data) {
Wire.beginTransmission(i2cAddr+1);
Wire.write('W');
Wire.write(addr);
Wire.write(data);
Wire.endTransmission();
} // Get the Touch Potentiometer value
Page 13 of 14
uint8_t ReadTpValue() {
Wire.requestFrom(i2cAddr, 1);
if (Wire.available()) {
return Wire.read();
} else {
return 0;
} } // Read a Touch Potentiometer register
uint8_t ReadTpReg(uint8_t addr) {
Wire.beginTransmission(i2cAddr+1);
Wire.write('R');
Wire.write(addr);
Wire.endTransmission();
Wire.requestFrom(i2cAddr+1, 1);
if (Wire.available()) {
return Wire.read();
} else {
return 0;
} } Once that is uploaded, open your favorite Serial Terminal at 115200 baud.
As you slide your finger along the capacitive touch strip ion the Touch Pot,
you should see the current PWM value print out on the terminal.
Multiple Touch Potentiometers
Building on this same example, we can add a second Touch Pot to the I2C
bus. You can use the SMD pads found on the back of the Touch Pot to
solder a second Touch Pot to the first.
In order for this to work, you’ll need to change the I2C address on one of the
Touch Pots. This can be accomplished through the TP Utility app, or it can
be changed on the fly by pressing the button on the back of the Touch Pot
three times.
Page 14 of 14
You will see the all the LEDs on the Touch Pot blink three times, indicating
you are in address change mode. As you slide your finger along the sensor,
the LEDs will change. They are telling you the address in binary. Holding
the Touch Pot sideways, with the PTH holes on the left, you will see every
combination of numbers between 0b01 and 0b64.
You can repeat this process adding up to 64 Touch Pots on a single I2C
bus.
More information on interfacing to microcontrollers through the I2C port can
be found in the User Manual.
Resources and Going Further
Thanks for reading! Here are all the resources mentioned throughout the
tutorial.
•
•
•
•
•
Touch Potentiometer Product Page @ danjuliodesigns.com
Touch Potentiometer User Manual
Touch Pot Utility Application
Digital Potentiometer AD5262BRU Datsheet
Touch Potentiometer GitHub Repository
For more Capacitive Touch fun, check out the other great SparkFun
tutorials.
MPR121 Hookup Guide
How to get started using the
MPR121 for capacitive touch
sensing with your Arduino.
AT42QT1010 Capacitive
Touch Breakout Hookup
Guide
Learn how to use the simple
AT24QT1010 Capacitive Touch
Breakout.
Touch Potentiometer
Hookup Guide
Bare Conductive Musical
Painting
Learn how to use the SparkFun
Touch Potentiometer to control
lighting, volume or other inputs in
your daily life.
Learn how to make a musical
painting using the Bare Conductive
Touch Board and Conductive Paint.
https://learn.sparkfun.com/tutorials/touch-potentiometer-hookup-guide?_ga=1.266042959... 11/16/2015