1
PSL3 User Manual
© 2011 Cast & Crew Entertainment Services, LLC.
All rights reserved. No parts of this work may be reproduced in any form or by any means - graphic, electronic, or
mechanical, including photocopying, recording, taping, or information storage and retrieval systems - without the
written permission of the publisher.
Products that are referred to in this document may be either trademarks and/or registered trademarks of the
respective owners. The publisher and the author make no claim to these trademarks.
While every precaution has been taken in the preparation of this document, the publisher and the author assume no
responsibility for errors or omissions, or for damages resulting from the use of information contained in this
document or from the use of programs and source code that may accompany it. In no event shall the publisher and
the author be liable for any loss of profit or any other commercial damage caused or alleged to have been caused
directly or indirectly by this document.
Compiled and Curated by: Virginia R. Rios (Cast & Crew Product Support Department)
Printed: November 2011
Contents
5
Table of Contents
Part I HOW TO USE THIS MANUAL
11
1 PREFACE
................................................................................................................................... 12
Audience
.......................................................................................................................................................... 12
Training
.......................................................................................................................................................... 12
Cast & Crew Website
Info
..........................................................................................................................................................
12
PSL3 System Requirem
ents
..........................................................................................................................................................
13
2 ACCESSING
...................................................................................................................................
AND LOGGING INTO PSL3
14
Opening the PSL3
Web Page
..........................................................................................................................................................
14
Logging in
.......................................................................................................................................................... 14
Selecting a database
.......................................................................................................................................................... 15
3 UNDERSTANDING
...................................................................................................................................
PROGRAMS AND COMMAND SCREENS
16
Program Menu
Bar
..........................................................................................................................................................
16
4 ICONS
...................................................................................................................................
AND SHORTCUTS
18
Toolbar Icons .......................................................................................................................................................... 18
Function Keys.......................................................................................................................................................... 19
Nam e Keys and
Key Com binations
..........................................................................................................................................................
20
Part II SETUP
25
1 Bank ...................................................................................................................................
Code Entry
26
2 Production
...................................................................................................................................
Code Entry
32
3 Company
...................................................................................................................................
Code Entry
35
4 Currency
...................................................................................................................................
Code Entry
38
5 Series
...................................................................................................................................
Code Entry
42
6 Location
...................................................................................................................................
Code Entry
45
7 Set Code
...................................................................................................................................
Entry
48
8 Additional/Optional
...................................................................................................................................
Setup Screens
51
Part III VENDORS
57
1 Vendor
...................................................................................................................................
Entry
58
2 Vendor
...................................................................................................................................
Listing Report
65
3 Additional
...................................................................................................................................
Vendor Screens/Reports
69
Part IV PURCHASE ORDER
73
1 P/O Entry
................................................................................................................................... 74
2 P/O Edit
...................................................................................................................................
List
81
3 Additional
...................................................................................................................................
P/O Screens/Reports
85
Part V ACCOUNTS PAYABLE
89
1 A/P Entry
................................................................................................................................... 90
© 2011 Cast & Crew Entertainment Services, LLC.
5
6
PSL3 User Manual
2 Post A/P
...................................................................................................................................
Transactions/Edit List
98
3 Defer
...................................................................................................................................
Open Items
104
4 Modify
...................................................................................................................................
Open Items
107
5 Void...................................................................................................................................
Open Items
112
6 1099...................................................................................................................................
Reporting Screens
115
7 Additional
...................................................................................................................................
A/P Screens/Reports
117
Part VI PETTY CASH
121
1 P/C Entry
................................................................................................................................... 122
2 Post...................................................................................................................................
P/C Transactions/Edit List
131
3 P/C Crew
...................................................................................................................................
Advances/Activity Report
136
4 P-Card
...................................................................................................................................
View/Report
140
Part VII JOURNAL ENTRY
149
1 Journal
...................................................................................................................................
Entry
150
2 Post...................................................................................................................................
J/E Transactions/Edit List
156
3 Posted
...................................................................................................................................
Transaction/Item Editor
161
4 G/L Transaction
...................................................................................................................................
Changes Report
165
5 Import
...................................................................................................................................
an Excel File
168
Part VIII PAYROLL
175
1 Load/Interface
...................................................................................................................................
C&C Payroll Invoice
176
2 Payroll
...................................................................................................................................
Entry
180
3 Post...................................................................................................................................
P/R Transactions/Edit List
188
4 Load...................................................................................................................................
Payroll/Other Company
194
5 Print...................................................................................................................................
Payroll Checks
198
6 Payroll
...................................................................................................................................
History Report
200
7 Additional
...................................................................................................................................
Payroll Screens/Reports
204
Part IX GENERAL LEDGER
209
1 Chart
...................................................................................................................................
of Accounts Entry
210
2 Chart
...................................................................................................................................
of Accounts Listing Report
215
3 Trial...................................................................................................................................
Balance Report
218
4 Bible...................................................................................................................................
Report
224
5 Additional
...................................................................................................................................
G/L Entry Screens
231
6 Additional
...................................................................................................................................
G/L Inquiries and Reports
233
Part X CHECKS
237
1 Pre-Check
...................................................................................................................................
Printing Report
238
2 Computer
...................................................................................................................................
Checks and Check Register Summary Report
241
3 Void...................................................................................................................................
and Reissue Checks
249
© 2011 Cast & Crew Entertainment Services, LLC.
Contents
7
4 Bank...................................................................................................................................
Reconciliation
255
5 Positive
...................................................................................................................................
Pay Export and Report
261
6 Additional
...................................................................................................................................
Check Screens/Reports
266
Part XI BUDGET
271
1 Import
...................................................................................................................................
a Budget
272
2 Create
...................................................................................................................................
a Budget
277
3 Delete
...................................................................................................................................
a Budget
281
4 Budget
...................................................................................................................................
Amount Entry
284
5 Budget
...................................................................................................................................
Listing Report
288
6 Additional
...................................................................................................................................
Budget Screens
290
7 Additional
...................................................................................................................................
Budget Inquiries and Reports
292
Part XII COST
297
1 EFC ...................................................................................................................................
Entry
298
2 Variance
...................................................................................................................................
Entry
304
3 Cost...................................................................................................................................
Report/EFC Worksheet
310
4 Estimated
...................................................................................................................................
Final Cost Report
319
5 Additional
...................................................................................................................................
Cost Report Screens/Reports
327
Part XIII CLOSING
331
1 Close
...................................................................................................................................
Period
332
Part XIV RECURRING BATCH
339
1 Create/Establish
...................................................................................................................................
Recurring Batches
340
2 Process
...................................................................................................................................
Recurring Batches
343
3 List of
...................................................................................................................................
Batches Report
346
Part XV GLOSSARY
351
© 2011 Cast & Crew Entertainment Services, LLC.
7
HOW TO USE THIS
MANUAL
Section
I
HOW TO USE THIS MANUAL
Section 1
11
HOW TO USE THIS MANUAL
Welcome to the User Manual for Cast & Crew's PSL3. The purpose of this manual is to give you an
organized guide to assist you in your use of the program.
We encourage you to review this manual in order to better understand the powerful capabilities of the
PSL3 program.
This manual contains step-by-step instructions, covering every aspect of the program. Additionally, you
will notice along the way, various Note and Warning messages are displayed which may be helpful in
your use of the program. These are noted as follows:
NOTE:
Notes are designed to remind you of certain
program behaviors or alert you to things which
may be beneficial as you use the program. Notes
may also include examples to better illustrate or
explain the topic on which you are working.
WARNING:
Warnings are exactly that - a warning. As you
complete certain function such as deleting items
or changing values, these are things which you
should be aware of before proceeding.
© 2011 Cast & Crew Entertainment Services, LLC.
12
PSL3 User Manual
Chapter 1.1
PREFACE
PSL3 offers an internet-based solution to your Production Accounting software needs. This efficient,
secure and easy-to-use Production Accounting software features a multitude of aspects including:
Production Cost capability
Multiple Production capability
Multiple Company capability
Special Episodic-Television formats
Payroll Interface
Onsite Payroll Check Printing
Extensive, secure web access
Multi-user, worldwide capabilities
Multi-tasking capability
Optional database hosting
Customizable reports
Report previewing
Twenty-four hour support, seven days a week (24/7)
Audience
This manual is for anyone using PSL3 to manage Production Payroll and costs. It introduces new users
to the fundamentals of PSL3.
This document assumes that you have online access to PSL3 and are familiar with the Windows
platform, Internet Explorer web browser, as well as Production Accounting.
Training
Whether you’re starting a new job and will be using PSL3, or simply want to bolster your skill set for
your resume, Cast & Crew offers hands-on tutorials in our Burbank office, or visually enhanced, on-line
remote sessions to allow you to “see what your instructor is seeing” from the comfort of your own office,
anywhere in the world. Training sessions are usually held on a weekly basis but it is best to call in
advance to schedule. Please note there is no cost to attend a PSL3 Training session.
NOTE:
Please email [email protected] or
contact the Support Department at 818-848-0999
to set up a free PSL3 Training Session. Please
provide your full name, studio and film/show you
are working on (if any), position and contact
information.
Cast & Crew Website Info
To learn more about Cast & Crew and all it's services including PSL3 Support, please visit the following
website: https://www.castandcrew.com .
© 2011 Cast & Crew Entertainment Services, LLC.
HOW TO USE THIS MANUAL
13
PSL3 System Requirements
Recommended System Requirements for PSL3 Client Computers:
Hardware:
Intel Pentium 4 GHz Processor or higher
Video Processor with minimum 128MB Video Memory
Minimum 2 GB RAM
80 GB Free Hard Drive Space (larger databases may need additional storage for reports)
Software:
Operating System – Windows XP Pro 32-bit, Windows Vista and Windows 7
Java Version – 1.5.07
Web Browser - Internet Explorer 7.0 or later, Mozilla Firefox 7.0 or later
Internet Access (choose one of the following):
Broadband Internet Service Provider (DSL or Cable Modem)
Dedicated Internet Access (Corporate LAN) providing at least 128 kbps throughput for the
PSL3 Workstation
Printer:
For a complete list of compatible printers, please email [email protected] or
contact the Support Department at 818-848-0999.
For magnetic (MICR) Check Printing, use MICR toner (for On-Site Check Printing)
USB Printers not supported
© 2011 Cast & Crew Entertainment Services, LLC.
14
PSL3 User Manual
Chapter 1.2
ACCESSING AND LOGGING INTO PSL3
PSL3 is a completely internet based system that can be accessed worldwide, using a web browser
such as Internet Explorer, Mozilla Firefox, etc.
Opening the PSL3 Web Page
Opening the PSL3 web page for your PSL3 database:
Start by opening the PSL3 web page in Internet Explorer, using the internet address, User Name and
Password supplied by the Support Department via email. You may want to add the web address to your
browser’s list of Favorites for easy access.
For example:
To access your PSL3 database:
Type this address in the address field of your internet browser and press Enter. The first time you visit
the PSL3 web site, a screen appears, asking whether you want shortcuts created.
If you choose to create shortcuts, the next time you want to access PSL3, you can double-click the
shortcut on the Desktop or click the PSL3 Start-menu item as shown in the following example.
Logging in
You'll need a User Name and Password to access PSL3 which is supplied by the Support Department
via email. Upon logging in to PSL3, you have the option to change your Password in the Change
Password [newpass] screen located in the 'Setup' module.
© 2011 Cast & Crew Entertainment Services, LLC.
HOW TO USE THIS MANUAL
15
To log in to PSL3:
Please note the User Name and Password are case sensitive fields, usually lower case.
Type in your User Name.
Click in the password field or press the Tab Key. Type your Password and press the Enter
Key or click 'OK'.
Selecting a database
Your PSL3 is set up with at least one database. If it’s set up with more than one (if you’re working on
more than one show), you can choose which database to open. If you need to switch databases, first
logout, then login and select the new database. To have two PSL3 databases open, start another PSL3
session (in a new web browser window) and select the new database.
To select from among multiple databases:
Once you have successfully input your login credentials, select a database and press Enter or click
'OK'. The home screen for your database displays. Now you are ready to explore the functions and
capabilities of PSL3.
© 2011 Cast & Crew Entertainment Services, LLC.
16
PSL3 User Manual
Chapter 1.3
UNDERSTANDING PROGRAMS AND
COMMAND SCREENS
Program screens allow you to open or close programs, enter setup records, enter or post transactions,
retrieve (find) entries, inquire into entries, and generate reports. As with the home screen, you can type
on the Keyboard or click the mouse to navigate the screens and command the programs.
Program screens include the following areas:
Title bar
Program menu bar
Toolbar
Working area
Hint bar
Activity bar, for screens where you work with entries
The exact layout of the program screens depends, in part, on the type of accounting
procedures it supports:
Setup (record) entry
Transaction entry
Reporting
Posting
Inquiry
Screens that support the same type of procedures have similar layouts. For example, record entry and
transaction entry require similar steps and thus the setup entry and transaction entry screens are
similar. The other factor affecting the layout is the type of data the screen displays, for example, bank
data versus vendor data. Once you’re finished working in a program screen, you use a command screen
to finalize your task.
Program Menu Bar
The program menu bar displays the names of the menus for working with program screens.
Click on the name to open the menu. If there is a keyboard shortcut for the menu item, it is displayed to
the right of the item. Menu items with an arrow to the right open to a sub-menu when you mouse over
them.
© 2011 Cast & Crew Entertainment Services, LLC.
HOW TO USE THIS MANUAL
17
The following are brief descriptions of the menus you can access from the program menu bar.
File - The File menu allows you to set up printer pages and exit the program.
Edit - The Edit menu allows you to edit and find (retrieve all or some) transaction entries.
Programs - The Programs menu (shown at the beginning of this section) provides another
option for opening programs. Although it uses a menu format instead of a tree format, the
programs are organized as they are in the program tree.
Options - The Options menu provides a mouse-based way of accessing keyboard shortcuts
for working with fields, working with entries, and for opening Help. You can also use it to exit
(close) a program.
Favorites - The Favorites menu provides quick access to programs you’ve added to your
PSL3 favorites. This function allows you to add and quickly access bookmarked programs.
Help - The Help menu provides several types of help, as well as “about the program”
information.
© 2011 Cast & Crew Entertainment Services, LLC.
18
PSL3 User Manual
Chapter 1.4
ICONS AND SHORTCUTS
PSL3 provides several methods for interacting with the program, including icons, keyboard shortcuts and
mouse shortcuts. You can pick the method that best suits your work style. You may want to print the
following tables to use as a quick reference.
Toolbar Icons
Toolbar icons are displayed at the very top of each PSL3 screen. The following tables describe the
PSL3 icons for program toolbars which are as follows. Please note if an icon is colored gray instead of
blue, the action is not available.
© 2011 Cast & Crew Entertainment Services, LLC.
HOW TO USE THIS MANUAL
19
Function Keys
Function keys provides shortcuts to commands, additional information, and inputting, finding, saving or
changing entries. The results of pressing a function key depend on the location of the cursor:
© 2011 Cast & Crew Entertainment Services, LLC.
20
PSL3 User Manual
Name Keys and Key Combinations
The behavior of name keys and key combinations may change, depending on the location of the cursor.
© 2011 Cast & Crew Entertainment Services, LLC.
HOW TO USE THIS MANUAL
© 2011 Cast & Crew Entertainment Services, LLC.
21
SETUP
Section
II
SETUP
Section 2
SETUP
This section will address the following programs:
Bank Entry
Production Code Entry
Company Code Entry
Currency Code Entry
Series Code Entry
Location Code Entry
Set Code Entry
Additional/Optional Setup Screens
© 2011 Cast & Crew Entertainment Services, LLC.
25
26
PSL3 User Manual
Chapter 2.1
Bank Code Entry
Use Bank Code Entry [subank] to set up a Bank Code for each bank account you intend to use during
Production. This screen is also where you can set up a Petty Cash Bank if needed. The data you enter
in the Bank Code Entry [subank] screen can be changed at any time, except that the Bank Code itself
can not be changed. Please note a Bank Code record can not be deleted once it has been used in
PSL3.
If you would like to print a list of all Bank Codes entered in the database, click the 'Report' module, then
'Setup & Maintenance' sub-folder. Listed is the Bank Codes List Report.
Open:
To access the Bank Code Entry [subank] screen, click the 'Setup' module from the menu
tree (see following screen shot).
You can also access this screen by typing the screen or acronym name in the blue prompt
bar located above the 'Setup' menu. Then, press Enter.
The screen then appears.
© 2011 Cast & Crew Entertainment Services, LLC.
SETUP
27
Bank Information:
Code - Input the code identifying the bank which can hold up to three alpha/numeric
characters. After entering the new Bank Code, PSL3 asks, "That Bank Code Entry is not in
the database. Would you like to add it?". Select 'Yes'.
Name - Input the name of the bank which can hold up to 30 alpha/numeric characters.
Enter the bank's Branch, Address, Contact, Phone, and Account if applicable.
Check Number Information:
Starting and Ending - Input the first and last check numbers from the current box of checks
for this bank.
Last Used - Number of the last check used from the current box of checks for this bank.
Please note once printed, the last used check number of the bank defaults in this field.
Currency/Date Information:
© 2011 Cast & Crew Entertainment Services, LLC.
28
PSL3 User Manual
Currency - Input the Currency Code associated with the Bank Code in which the currency for
the checks will print. Please note the Currency Code should default in this field depending on
what information was specified on the initial database request. If the Currency Code doesn't
exist in PSL3, you can add it by pressing the F5 Key or selecting the 'Zoom' icon
located on the toolbar. This zooms into the Currency Code Entry [sucur] screen in which
you can add the Currency Code immediately. Once saved, press the F1 Key, then 'F' option
or select the 'Fetch' icon
screen.
to fetch the currency back to the Bank Code Entry [subank]
Date Format - Date format in which the checks for this bank will print. Press the F2 Key or
right click to view and select the Date format options along with their descriptions which are
as follows:
Bank Type - Bank Type in which the checks for this bank will print. Press the F2 Key or
right click to view and select the Bank Type options along with their descriptions which are as
follows:
Check Printing Information:
Check Form - Input the form that matches the check stock you are using to print checks.
The most common Check Form is 'LASER'. A Check Form is needed before you can print
checks so if you are not sure which Check Form to select, it is suggested to select
'LASER' (for the majority of independent databases); if needed, the Support Department can
make the necessary check alignment adjustments. Press the F2 Key or right click to view
and select the Check Form options along with their descriptions which are as follows:
© 2011 Cast & Crew Entertainment Services, LLC.
SETUP
29
NOTE:
Please note PSL3 is compatible with MICR Check
Printing and has it's own Check Form (MICRFM or
MICRLA). If you would like to have this feature set
up, please email [email protected] for
more information.
Prefix - Character(s) (usually a number) to be printed at the beginning of all check numbers.
For example, if the number '3' was input in this field and the next available check number to
print was 000123, then the check would print as '3 - 000123'. This field can hold up to six
alpha/numeric characters.
Account Information:
An account number must be input for all fields in the Account Information section even if you will not be
using them all. For example, if you are not going to be using the A/P Discount field, you can not leave
this field blank , you must enter an account number as it is a white required field.
Cash in Bank - Chart of Accounts number representing the checking account for this bank
account; usually an Asset account. If the account number doesn't exist in PSL3, you can
add it by pressing the F5 Key or selecting the 'Zoom' icon
located on the toolbar. This
zooms into the Chart of Accounts Entry [glca] screen in which you can add the account
number immediately. Once saved, press the F1 Key, then 'F' option or select the 'Fetch' icon
© 2011 Cast & Crew Entertainment Services, LLC.
30
PSL3 User Manual
to fetch the account back to the Bank Code Entry [subank] screen.
A/P Clearing - Chart of Accounts number representing the account from which all A/P
invoices will be cleared; usually a Liability account. This account number is the credit entry
also known as the offset account for A/P expenses after you post the A/P transaction(s).
A/P Discount - Chart of Accounts number representing the account from which all A/P
discount amounts will be recorded; usually a Liability account.
P/C Box - Chart of Accounts number representing the account for the Petty Cash Box/
Custodian from which Petty Cash will be disbursed; usually an Asset account.
P/C Clearing - Chart of Accounts number representing the account from which all P/C
invoices will be cleared; usually a Liability account. This account number is the credit entry
also known as the offset account for P/C expenses after you post the P/C transaction(s).
Please note if you will not be using a P/C Clearing account, you can input the same account
number from the P/C Box field here.
Company Information:
Code - Input the Company Code associated with the Bank Code.
Helpful Hints:
Make sure to input all white colored fields as white fields are required before saving in PSL3.
To save this entry, select either 'Save' icon
located on the toolbar.
You can also press the F1 Key, then 'U' option to Update which saves and remains on screen
or press the F1 Key, then 'A' option to Accept which saves and clears the screen (most
common).
To delete an unused Bank Code, place your cursor in the specific Bank Code you want to
delete and press the F10 Key or select the 'Delete' icon
which are deleted upon saving.
. Red strike-through lines appear
To search for an existing Bank Code, press the F7 Key or select the 'Find' icon
when
© 2011 Cast & Crew Entertainment Services, LLC.
SETUP
31
the screen is clear. All records appear in which you can scroll through using the 'Arrow' icons
(First, Prior,Next and Last)
Down' Keys until you find the code needed.
© 2011 Cast & Crew Entertainment Services, LLC.
or by pressing the 'Page Up' or 'Page
32
PSL3 User Manual
Chapter 2.2
Production Code Entry
Production is the second phase in film making, which starts when principal photography begins and
ends. Use Production Code Entry [suprod] to set up a Production Code for your database. Most
PSL3 databases only use one Production Code but you can set up additional codes if needed. A
common Chart of Accounts must be used for all Productions within a database. If a Production requires
a unique Chart of Accounts, then it is suggested to create a new database. Please note a Production
Code record can not be deleted once it has been used in PSL3.
If you would like to print a list of all Production Codes entered in the database, click the 'Report' module,
then 'Setup & Maintenance' sub-folder. Listed is the Production Codes List Report.
Open:
To access the Production Code Entry [suprod] screen, click the 'Setup' module from the
menu tree (see following screen shot).
You can also access this screen by typing the screen or acronym name in the blue prompt
bar located above the 'Setup' menu. Then, press Enter.
The screen then appears.
© 2011 Cast & Crew Entertainment Services, LLC.
SETUP
33
Fields:
Code - Input the code identifying the Production which can hold up to six alpha/numeric
characters. After entering the new Production Code, PSL3 asks, "That Production Code is
not in the database. Would you like to add it?". Select 'Yes'.
Description - Input the name of the Production which can hold up to 30 alpha/numeric
characters.
Comp Code - Input the Company Code associated with the Production Code (optional).
Helpful Hints:
Make sure to input all white colored fields as white fields are required before saving in PSL3.
To save this entry, select either 'Save' icon
located on the toolbar.
You can also press the F1 Key, then 'U' option to Update which saves and remains on screen
or press the F1 Key, then 'A' option to Accept which saves and clears the screen (most
common).
© 2011 Cast & Crew Entertainment Services, LLC.
34
PSL3 User Manual
To delete an unused Production Code, place your cursor in the specific Production Code you
want to delete and press the F10 Key or select the 'Delete' icon
appear which are deleted upon saving.
. Red strike-through lines
To search for an existing Production Code, press the F7 Key or select the 'Find' icon
when the screen is clear. All records appear in which you can scroll through using the 'Arrow'
icons (First, Prior, Next and Last)
'Page Down' Keys until you find the code needed.
or by pressing the 'Page Up' or
© 2011 Cast & Crew Entertainment Services, LLC.
SETUP
Chapter 2.3
35
Company Code Entry
Use Company Code Entry [sucomp] to set up a Company Code for your database. If your database is
associated with more than one company, PSL3 allows you to input multiple Company Codes under the
same Production Code to easily track separate costs. Please note all independent PSL3 database are
already set up with a default Company Code (usually '001') but you can always change it if needed as
long as it has not been used in PSL3.
Open:
To access the Company Code Entry [sucomp] screen, click the 'Setup' module from the
menu tree (see following screen shot).
You can also access this screen by typing the screen or acronym name in the blue prompt
bar located above the 'Setup' menu. Then, press Enter.
The screen then appears.
© 2011 Cast & Crew Entertainment Services, LLC.
36
PSL3 User Manual
Company:
Code - Input the code identifying the company which can hold up to three alpha/numeric
characters. After entering the new Company Code, PSL3 asks, "That Company Information
Entry is not in the database. Would you like to add it?". Select 'Yes'.
Name - Input the name of the company which can hold up to 30 alpha/numeric characters.
Name on Reports: Input the name of the company as how you would like it to display on
reports which can hold up to 50 alpha/numeric characters.
Address:
Enter the company's Address, City, State and Zip Code if applicable.
Tax Info:
Federal Tax ID - Input the Federal Employer Identification Number of the company for tax
reporting purposes. This field can hold up to 15 alpha/numeric characters.
State Tax ID - Input the State Employer Identification Number of the company for tax
reporting purposes. This field can hold up to 15 alpha/numeric characters.
Company Info:
© 2011 Cast & Crew Entertainment Services, LLC.
SETUP
37
Project ID - Project ID number associated with the database; production assigned. Please
note this field is only used for some major studios. If your studio is independent, leave this
field and the Uploadable and Downloading fields blank.
Contact Info:
Enter the company's point of contact in the Contact Name field as well as the Phone
Number if applicable.
Helpful Hints:
Make sure to input all white colored fields as white fields are required before saving in PSL3.
To save this entry, select either 'Save' icon
located on the toolbar.
You can also press the F1 Key, then 'U' option to Update which saves and remains on screen
or press the F1 Key, then 'A' option to Accept which saves and clears the screen (most
common).
To delete an unused Company Code, place your cursor in the specific Company Code you
want to delete and press the F10 Key or select the 'Delete' icon
appear which are deleted upon saving.
. Red strike-through lines
To search for an existing Company Code, press the F7 Key or select the 'Find' icon
when the screen is clear. All records appear in which you can scroll through using the 'Arrow'
icons (First, Prior, Next and Last)
'Page Down' Keys until you find the code needed.
© 2011 Cast & Crew Entertainment Services, LLC.
or by pressing the 'Page Up' or
38
PSL3 User Manual
Chapter 2.4
Currency Code Entry
Use Currency Code Entry [sucomp] to set up a Currency Code for each currency you intend to use
during Production. A Currency Code record includes the exchange rate so reports can be printed in both
local currency and base currency. Please note a Currency Code record can not be deleted once it has
been used in PSL3.
If you would like to print a list of all Currency Codes entered in the database, click the 'Report' module,
then 'Setup & Maintenance' sub-folder. Listed is the Currency Codes List Report.
Open:
To access the Currency Code Entry [sucomp] screen, click the 'Setup' module from the
menu tree (see following screen shot).
You can also access this screen by typing the screen or acronym name in the blue prompt
bar located above the 'Setup' menu. Then, press Enter.
The screen then appears.
© 2011 Cast & Crew Entertainment Services, LLC.
SETUP
39
Currency Information:
Code - Input the code identifying the currency which can hold up to two alpha/numeric
characters. After entering the new Currency Code, PSL3 asks, "That Currency Code is not in
the database. Would you like to add it?". Select 'Yes'.
Description - Input the name of the currency which can hold up to 20 alpha/numeric
characters (e.g., US Dollars, Mexican Pesos, French Francs, etc.)
Country - Input the name of the country which uses this currency. This field can hold up to
15 alpha/numeric characters.
Rate Information:
Budgeted - Input the currency exchange rate used to convert the base currency to this
currency. If this currency is the base currency, then '1.000000' defaults automatically as the
Budgeted Rate. This rate is used to convert amounts on reports and to convert budgeted
amounts that use different currencies when copying/merging budgets.
Date - Input the date the Budgeted exchange rate reflects as of. Type in the date or press
the F2 Key or right click in this field for the calendar selection to appear.
© 2011 Cast & Crew Entertainment Services, LLC.
40
PSL3 User Manual
ISO - Input the International Organization for Standardization three letter currency abbreviation
used to represent a country's currency. For example, the United States dollar’s ISO
alphabetic currency code is 'USD' for the United States Dollar. This field can hold up to three
alpha/numeric characters.
Check Printing Information:
Bill - Input the name of the currency which can hold up to 20 alpha/numeric characters
(example: 'Dollars').
"and" - Input the word meaning 'and' in the language in which checks will be written when
using this Currency Code. This field can hold up to 20 alpha/numeric characters.
Coin - Input the word meaning 'coins' in the language in which checks will be written when
using this Currency Code (example: Cents). This field can hold up to 20 alpha/numeric
characters.
"pay to" - Input the words for "Pay to the order of" in the language in which checks will be
written when using this Currency Code. This field can hold up to 20 alpha/numeric
characters.
Decimal Digits:
Input - Number of digits to appear to the right of the decimal point in transaction entry fields.
Enter one digit, from 0 to 4, to indicate the number of digits you would like displayed after the
decimal point. The most common number entered is '2'.
Reports - Number of digits to appear to the right of the decimal point on all reports, except
Cost Reports. Enter one digit, from 0 to 4, to indicate the number of digits you would like
displayed after the decimal point. The most common number entered is '2'.
Cost Reports - Number of digits to appear to the right of the decimal point on Cost Reports.
Enter one digit, from 0 to 4, to indicate the number of digits you would like displayed after the
decimal point. The most common number entered is '0' to round to the nearest dollar.
© 2011 Cast & Crew Entertainment Services, LLC.
SETUP
41
Helpful Hints:
Make sure to input all white colored fields as white fields are required before saving in PSL3.
To save this entry, select either 'Save' icon
located on the toolbar.
You can also press the F1 Key, then 'U' option to Update which saves and remains on screen
or press the F1 Key, then 'A' option to Accept which saves and clears the screen (most
common).
To delete an unused Currency Code, place your cursor in the specific Currency Code you
want to delete and press the F10 Key or select the 'Delete' icon
appear which are deleted upon saving.
. Red strike-through lines
To search for an existing Currency Code, press the F7 Key or select the 'Find' icon
when the screen is clear. All records appear in which you can scroll through using the 'Arrow'
icons (First, Prior, Next and Last)
'Page Down' Keys until you find the code needed.
© 2011 Cast & Crew Entertainment Services, LLC.
or by pressing the 'Page Up' or
42
PSL3 User Manual
Chapter 2.5
Series Code Entry
Use Series Code Entry [suser] to set up Series Codes for tracking expenses by series/episode.
Please note if you are not tracking series expenses, you must setup at least a default Series Code (e.
g., '0000') to be used in the transaction entry screens. You can also use the Series Code like a Free
Field Code to track other items such as all travel costs for all series if you prefer. Please note a Series
Code record can not be deleted once it has been used in PSL3.
If you would like to print a list of all Series Codes entered in the database, click the 'Report' module, then
'Setup & Maintenance' sub-folder. Listed is the Series Codes List Report.
Open:
To access the Series Code Entry [suser] screen, click the 'Setup' module from the menu
tree (see following screen shot).
You can also access this screen by typing the screen or acronym name in the blue prompt
bar located above the 'Setup' menu. Then, press Enter.
The screen then appears.
© 2011 Cast & Crew Entertainment Services, LLC.
SETUP
43
Fields:
Production - Input the Production Code associated with the Series Code.
Series - Input the code identifying the series which can hold up to four alpha/numeric
characters. After entering the new Series Code, PSL3 asks, "That Series Code is not in the
database. Would you like to add it?". Select 'Yes'.
Description - Input the name of the series which can hold up to 30 alpha/numeric characters.
Helpful Hints:
Make sure to input all white colored fields as white fields are required before saving in PSL3.
To save this entry, select either 'Save' icon
located on the toolbar.
You can also press the F1 Key, then 'U' option to Update which saves and remains on screen
or press the F1 Key, then 'A' option to Accept which saves and clears the screen (most
common).
© 2011 Cast & Crew Entertainment Services, LLC.
44
PSL3 User Manual
To delete an unused Series Code, place your cursor in the specific Series Code you want to
delete and press the F10 Key or select the 'Delete' icon
which are deleted upon saving.
. Red strike-through lines appear
To search for an existing Series Code, press the F7 Key or select the 'Find' icon
when
the screen is clear. All records appear in which you can scroll through using the 'Arrow' icons
(First, Prior, Next and Last)
Down' Keys until you find the code needed.
or by pressing the 'Page Up' or 'Page
© 2011 Cast & Crew Entertainment Services, LLC.
SETUP
Chapter 2.6
45
Location Code Entry
Use Location Code Entry [suloc] to set up Location Codes for tracking expenses by location. Please
note if you are not tracking location expenses, you must setup at least a default Location Code (e.g.,
'0000') to be used in the transaction entry screens. You can also use the Location Code like a Free
Field Code to track other items such as all travel costs for all locations if you prefer. Please note a
Location Code record can not be deleted once it has been used in PSL3.
If you would like to print a list of all Location Codes entered in the database, click the 'Report' module,
then 'Setup & Maintenance' sub-folder. Listed is the Location Codes List Report.
Open:
To access the Location Code Entry [suloc] screen, click the 'Setup' module from the menu
tree (see following screen shot).
You can also access this screen by typing the screen or acronym name in the blue prompt
bar located above the 'Setup' menu. Then, press Enter.
The screen then appears.
© 2011 Cast & Crew Entertainment Services, LLC.
46
PSL3 User Manual
Fields:
Production - Input the Production Code associated with the Location Code.
Location - Input the code identifying the location which can hold up to four alpha/numeric
characters. After entering the new Location Code, PSL3 asks, "That Location Code is not in
the database. Would you like to add it?". Select 'Yes'.
Description - Input the name of the location which can hold up to 30 alpha/numeric
characters.
Helpful Hints:
Make sure to input all white colored fields as white fields are required before saving in PSL3.
To save this entry, select either 'Save' icon
located on the toolbar.
You can also press the F1 Key, then 'U' option to Update which saves and remains on screen
or press the F1 Key, then 'A' option to Accept which saves and clears the screen (most
common).
© 2011 Cast & Crew Entertainment Services, LLC.
SETUP
47
To delete an unused Location Code, place your cursor in the specific Location Code you want
to delete and press the F10 Key or select the 'Delete' icon
appear which are deleted upon saving.
. Red strike-through lines
To search for an existing Location Code, press the F7 Key or select the 'Find' icon
when the screen is clear. All records appear in which you can scroll through using the 'Arrow'
icons (First, Prior, Next and Last)
'Page Down' Keys until you find the code needed.
© 2011 Cast & Crew Entertainment Services, LLC.
or by pressing the 'Page Up' or
48
PSL3 User Manual
Chapter 2.7
Set Code Entry
Use Set Code Entry [suset] to set up Set Codes for tracking expenses by set. Please note if you are
not tracking set expenses, you must setup at least a default Set Code (e.g., '0000') to be used in the
transaction entry screens. You can also use the Set Code like a Free Field Code to track other items
such as all travel costs for all sets if you prefer. Please note a Set Code record can not be deleted once
it has been used in PSL3.
If you would like to print a list of all Set Codes entered in the database, click the 'Report' module, then
'Setup & Maintenance' sub-folder. Listed is the Set Codes List Report.
Open:
To access the Set Code Entry [suset] screen, click the 'Setup' module from the menu tree
(see following screen shot).
You can also access this screen by typing the screen or acronym name in the blue prompt
bar located above the 'Setup' menu. Then, press Enter.
The screen then appears.
© 2011 Cast & Crew Entertainment Services, LLC.
SETUP
49
Fields:
Production - Input the Production Code associated with the Set Code.
Set - Input the code identifying the set which can hold up to four alpha/numeric characters.
After entering the new Set Code, PSL3 asks, "That Set Code is not in the database. Would
you like to add it?". Select 'Yes'.
Description - Input the name of the set which can hold up to 30 alpha/numeric characters.
Helpful Hints:
Make sure to input all white colored fields as white fields are required before saving in PSL3.
To save this entry, select either 'Save' icon
located on the toolbar.
You can also press the F1 Key, then 'U' option to Update which saves and remains on screen
or press the F1 Key, then 'A' option to Accept which saves and clears the screen (most
common).
© 2011 Cast & Crew Entertainment Services, LLC.
50
PSL3 User Manual
To delete an unused Set Code, place your cursor in the specific Set Code you want to delete
and press the F10 Key or select the 'Delete' icon
are deleted upon saving.
. Red strike-through lines appear which
To search for an existing Set Code, press the F7 Key or select the 'Find' icon
when the
screen is clear. All records appear in which you can scroll through using the 'Arrow' icons
(First, Prior, Next and Last)
Down' Keys until you find the code needed..
or by pressing the 'Page Up' or 'Page
© 2011 Cast & Crew Entertainment Services, LLC.
SETUP
Chapter 2.8
51
Additional/Optional Setup Screens
PSL3 offers additional/optional Setup Screens which are listed below.
Open:
To access the following Setup Screens, click the 'Setup' module from the menu tree.
Additional Setup Screens are also listed in in the 'Setup' module, then 'Reports' sub-folder
(see following screen shot).
You can also access these screens by typing the screen or acronym name in the blue
prompt bar located above the 'Setup' menu. Then, press Enter.
© 2011 Cast & Crew Entertainment Services, LLC.
52
PSL3 User Manual
Additional Setup Screens are as follows:
Batch Maintenance Entry [batchent]
Change Password [newpass]
Control A/P Information Entry [suapctrl]
Default Accounts Entry [suacct]
Employee Entry [pcemp]
Free Field Code Entry (1-4) [sufree]
Insurance Code Entry [suins]
Report Group Entry [surpt] (also listed in Additional G/L Entry Screens)
Database Information Entry [sudbinfo]
State Code Entry [sustate]
© 2011 Cast & Crew Entertainment Services, LLC.
SETUP
User Entry [suuser]
System Control Information Entry [suctrl]
Line Type Entry [sulntyp]
© 2011 Cast & Crew Entertainment Services, LLC.
53
VENDORS
Section
III
VENDORS
Section 3
VENDORS
This section will address the following programs:
Vendor Entry
Vendor Listing Report
Additional Vendor Screens/Reports
© 2011 Cast & Crew Entertainment Services, LLC.
57
58
PSL3 User Manual
Chapter 3.1
Vendor Entry
A vendor is an individual or company providing a product or service. The Vendor Entry [apven] program
is used to find, modify and delete unused vendor records. This screen allows you to set up a vendor
record for each vendor you plan to do business with during production. The data you enter in the
Vendor Entry [apven] screen can be changed at any time except the Vendor ID Number and Vendor
Name once a check has been processed. Please note a vendor can not be deleted once it has been
used in PSL3.
Open:
To access the Vendor Entry [apven] screen, click the 'Setup', 'A/P' or 'P/C' modules from the
menu tree (see following screen shot).
You can also access this screen by typing the screen or acronym name in the blue prompt
bar located above the 'Setup' menu. Then, press Enter.
The screen then appears.
© 2011 Cast & Crew Entertainment Services, LLC.
VENDORS
59
Vendor Information:
Vendor ID - Identification code for a vendor (or for an employee who will receive Petty Cash
Advances) which can hold up to six characters (depending on your studio). Press the F4
Key or select the 'Add' icon
located on the toolbar to generate the next numerical
Vendor ID Number. You can also manually enter a unique Vendor ID with a combination of
alpha/numeric characters to represent the new vendor. Then press the Enter Key. PSL3
asks, "That Vendor is not in the database. Would you like to add it?". Select 'Yes'. If you
manually enter a Vendor ID Number of less than six characters, PSL3 automatically zeropads the number. For example, if you enter '13' as the Vendor ID Number, PSL3 adds zeroes
in front of the number as follows: 000013. To see if the vendor already exists in PSL3, press
the F2 Key or right click in the Vendor ID field. Once the list of vendors appears, you can
scroll through to find the vendor or click on the column headers: Vendor, Name or City to sort
alphabetically or numerically.
Vendor Name - Name of the vendor (or employee who will receive Petty Cash Advances).
Enter a unique Vendor Name of up to 30 alpha/numeric characters. It is best to be consistent
in style when entering Vendor Names. Commonly, names are entered in ALL CAPS. If the
vendor is a person, the last name is entered first, followed by a back slash and then the first
name. You can enter a middle initial after the first name but enter a space before the middle
initial. The Vendor Name format is as follows: SMITH\JOHN D. The same format is the same
© 2011 Cast & Crew Entertainment Services, LLC.
60
PSL3 User Manual
for company names as well: PRODUCTION COMPANY\THE. To see if the vendor already
exists in PSL3, type the wildcard character using the asterisk (*) in the Vendor Name field.
For example, if you want to see if vendor John Smith exists, you would type *John* or *Smith*
and press the F7 Key or select the 'Find' icon
located on the toolbar. PSL3 displays
how many records for that criteria exist by selecting the 'Arrow' icons (First, Prior, Next and
Last)
located on the toolbar or by pressing the 'Page Up' or 'Page
Down' Keys until you find the vendor needed.
WARNING:
Please be advised Vendor Names use the back
slash (\) not forward slash (/) sign to separate the
Last and First name.
NOTE:
After a check is written for a vendor, the Vendor
Name can not be changed. Please email a
request to [email protected] to turn this
feature off.
If you need to change the name of a vendor,
please email a request to support@castandcrew.
com with what you would like it to read.
Vendor Contact Information:
Enter the vendor or employee's Address, City, State, Zip, Country, Contact, Phone #, Fax
# and Email if applicable.
Tax ID Information:
Tax ID # - Nine-digit Tax Identification Number, usually beginning with '95-'. If the vendor is a
person, enter his or her Social Security Number (SSN). If the vendor is a business/company,
enter the Employer Identification Number (EIN).
Tin Type - Taxpayer Identification Number Type. Press the F2 Key or right click to view and
select the Tin Type options along with their descriptions which are as follows:
© 2011 Cast & Crew Entertainment Services, LLC.
VENDORS
61
1099 Type - 1099 Type associated with this vendor or employee. The 1099 Code selected
defaults in transaction distribution lines for this vendor or employee, but can be overridden.
Press the F2 Key or right click to view and select the 1099 Type options along with their
descriptions which are as follows:
W9 on File - Indicate if a W9 is on file for this vendor or employee. The default is 'N' for No.
Terms:
Terms - Description of the vendor's or employee's payment terms (e.g., Net 30; Net on
Receipt, etc.). Enter a free-form description of up to 15 alpha/numeric characters of how soon
after the invoice date the vendor expects to be paid and if there are any discounts. Please
note entering data here has no effect on an A/P Entry [apte] transaction as no discounts are
computed based on the data entered in this field.
© 2011 Cast & Crew Entertainment Services, LLC.
62
PSL3 User Manual
Due Days - Number of days from the invoice date until the invoice is due. Enter the Due
Days here, if any. Please note if you enter a number in this field, the Invoice Due Date field
defaults in A/P Entry [apte] when entering a new invoice. The Invoice Due Date equals the
Invoice Date + Due Days.
Other Information:
Comment - Free-form field to input any additional comments regarding the vendor which can
hold up to 30 alpha/numeric characters.
Petty Cash - Check mark this option if this vendor or employee will be using Petty Cash.
Once check marked, the P/C Advance Account field becomes accessible to input the
account number.
Status/Inactive - Check mark this option if you would like to mark the vendor or employee
inactive in the database. If the Inactive field is check marked, PSL3 blocks all users from
using the vendor in the transaction entry screens.
NOTE:
If your database has duplicate vendor records, you
can check mark the Inactive field for one of the
vendors or email a request to
[email protected] for a Vendor Merge.
Please specify which Vendor ID Number you
would like to remain in PSL3.
Defaults:
Currency Code - Currency Code representing the currency in which this vendor is normally
paid. To add a new currency, use the Currency Code Entry [sucur] screen located in the
'Setup' module.
Default Account - Expense Account Number most often used when you enter invoices for
this vendor. The Default Account selected automatically defaults in the transaction
distribution lines for this vendor, but you can override it. Press the F2 Key or right click to
select the account number. If the account number doesn't exist in PSL3, you can add it by
pressing the F5 Key or selecting the 'Zoom' icon
located on the toolbar. This zooms
into the Chart of Accounts Entry [glca] screen in which you can add the account number
immediately. Once saved, press the F1 Key, then 'F' option or select the 'Fetch' icon
fetch the account back to the Vendor Entry [apven] screen.
to
P/C Advance Account - Petty Cash Advance Account Number that automatically defaults in
the P/C Entry [pcent] distribution lines for this vendor. Press the F2 Key or right click to
© 2011 Cast & Crew Entertainment Services, LLC.
VENDORS
63
select the account number. If the account number doesn't exist in PSL3, you can add it by
pressing the F5 Key or selecting the 'Zoom' icon
located on the toolbar. This zooms
into the Chart of Accounts Entry [glca] screen in which you can add the account number
immediately. Once saved, press the F1 Key, then 'F' option or select the 'Fetch' icon
fetch the account back to the Vendor Entry [apven] screen. Please note this field only
becomes accessible when the Petty Cash field above is check marked.
to
Tin Name - Official name of the Tax ID holder if different from the Vendor Name field. The
TIN Name is used as the primary name for 1099 reporting purposes and the Vendor Name is
used as the secondary name. Please note if the Vendor Name and Tin Name are the same,
leave this field blank.
State Worked - State the vendor or employee is currently employed for 1099 reporting
purposes.
ICR 1099 Information:
First Name / MI / Last Name - Enter in how you would like the name to read for 1099
Independent Contracting Reporting purposes.
Helpful Hints:
Make sure to input all white colored fields as white fields are required before saving in PSL3.
To save this entry, select either 'Save' icon
located on the toolbar.
You can also press the F1 Key, then 'U' option to Update which saves and remains on screen
or press the F1 Key, then 'A' option to Accept which saves and clears the screen (most
common).
To delete an unused vendor record, place your cursor in any field within the screen and press
the F10 Key or select the 'Delete' icon
deleted upon saving.
. Red strike-through lines appear which are
To search for an existing entry, press the F7 Key or select the 'Find' icon
when the
screen is clear. All records appear in which you can scroll through using the 'Arrow' icons
© 2011 Cast & Crew Entertainment Services, LLC.
64
PSL3 User Manual
(First, Prior, Next and Last)
Down' Keys until you find the entry needed.
or by pressing the 'Page Up' or 'Page
© 2011 Cast & Crew Entertainment Services, LLC.
VENDORS
Chapter 3.2
65
Vendor Listing Report
The Vendor Listing Report [apvenp] generates a listing of all vendors in your database.
Open:
To access the Vendor Listing Report [apvenp], click the 'A/P' module, then 'Vendor' subfolder from the menu tree (see following screen shot).
The Vendor Listing Report [apvenp] is also located in the 'Report' folder under the 'A/P',
'Setup & Maintenance' and 'Vendors' sub-folders.
You can also access this report by typing the screen or acronym name in the blue prompt bar
located above the 'Setup' menu. Then, press Enter.
The screen then appears.
© 2011 Cast & Crew Entertainment Services, LLC.
66
PSL3 User Manual
© 2011 Cast & Crew Entertainment Services, LLC.
VENDORS
67
To select criteria, press the F2 Key or right click in most fields to mak e your selection. You can also
simply type in the criteria in the allotted fields. If you wish to include all criteria information, leave
all fields blank except for any white colored fields as white fields are required before proceeding
in PSL3.
Vendor Information:
Starting and Ending Vendor Numbers - Vendors to include in the report. To restrict the
report to only include information for a single vendor, input the same Vendor Number in both
the Starting and Ending fields. To select all vendors, leave both fields blank.
Report Format:
Order By - The report can be ordered by Vendor Number (entries are sorted in ascending
order, by number first, then alphabetically), Name or Tax ID.
Include - You can include vendors that are Active or Inactive (or both), select whether they
have a W9 on file or not (or both) and specify only A/P Vendors or P/C Vendors (or both).
Type - Select whether you want to view a Detailed, Summary or Vendor Spend Report.
Vendor Spend Parameters / Period:
Period - System-assigned Period Number that indicates the Accounting Period in which
these costs were entered. If you chose to run the report by Period Number, then the Start
Date and End Date fields default for the period chosen.
Start and End Dates - Transaction Effective Dates to include in the report as PSL3 is datedriven. To restrict the report to only include information for a single date, input the same date
in both the Start Date and End Date fields. To select all dates from inception to future, leave
both fields blank. Press the F2 Key or right click in either date field for the calendar selection
to appear.
© 2011 Cast & Crew Entertainment Services, LLC.
68
PSL3 User Manual
Vendor Spend Parameters / Multiple Currency:
Source Currency - If you have more than one currency in your database, you can choose to
include only transactions denominated in one currency, two, three, etc., or all currencies. To
choose multiple Currency Codes, press the F2 Key or right click in the field and hold down
the Control Key while simultaneously using your mouse to select. Each currency in your
database and its conversion rate are listed in the report heading.
Target Currency - Base currency set up in the System Control Information Entry [suctrl]
screen located in the 'Setup' module defaults. This Currency Code is what all transactions
are converted to on the report. Each currency in your database and its conversion rate are
listed in the report heading.
Print/Preview the Report: Located in the top right hand corner of the screen, you can choose the
following options to generate the report:
Print - Opens the Print Dialogue box and sends the report directly to the printer.
Preview - Generates a PDF format report and appears instantly on your screen. You are still
able to print from the PDF format.
Spreadsheet - Generates an Excel format report and appears instantly on your screen. You
are still able to print from the Excel format. Please note if you select this option, you are able
to have additional sorting options within Excel.
© 2011 Cast & Crew Entertainment Services, LLC.
VENDORS
Chapter 3.3
69
Additional Vendor Screens/Reports
PSL3 offers additional Vendor Screen/Reports which are listed below. Some of these reports can also
be found in the section Additional A/P Screens/Reports.
Open:
To access the following Vendor Screen/Reports, click the 'A/P' module, then 'Vendor' subfolder from the menu tree (see following screen shot).
These additional Vendor Screen/Reports are also located in the 'Report' module under the 'A/
P', 'Setup & Maintenance' and 'Vendors' sub-folders.
You can also access these screens/reports by typing the screen or acronym name in the
blue prompt bar located above the 'Setup' menu. Then, press Enter.
To select criteria for the following reporting screens, press the F2 Key or right click in most fields to
mak e your selection. You can also simply type in the criteria in the allotted fields. If you wish to
include all criteria information, leave all fields blank except for any white colored fields as white
fields are required before proceeding in PSL3.
Account/Vendor Totals Report [accvt] - Use [accvt] to print a total for each account/vendor
combination. Only paid (or voided) A/P distributions contribute to the totals. This report
converts all amounts to the base currency. You can enter Starting and Ending Dates, a range
of Vendor ID Numbers, Starting and Ending Account Numbers and Multiple Currency as
selection criteria.
© 2011 Cast & Crew Entertainment Services, LLC.
70
PSL3 User Manual
A/P Vendor Analysis Report [apvena] - Use [apvena] to track A/P transaction activity by
vendor. You can choose the Report Type (Vendor ID, Vendor Name, State or Invoice) and
include the Transaction Type (Unposted, Open, Paid and/or Void). You can also enter a
range of Vendor ID Numbers, Start and End Dates, Multiple Currency, etc. as selection
criteria.
A/P Vendor Inquiry [apvinq] - Use [apvinq] to look up information on posted A/P
transactions. You can specify the Invoice Selection by Vendor, Reference Number, Invoice
Number, P/O Number and/or Location Code. You can also choose the Currency, Transaction
Type (Open and/or Paid Items), Start and End Dates, etc. as selection criteria.
Vendor/Employee Labels [labels] - Use [labels] to print vendor and/or employee mailing
labels. The labels can be sorted by ID Number, Name or Zip Code. PSL3 prints two or three
column labels and is compatible with Avery 5161 for two columns or Avery 5160 for three
columns. Please note you can multi-pick vendors/employees instead of printing an entire
range by pressing the F2 Key or right clicking in the Starting and Ending fields and holding
down the Control Key while simultaneously using your mouse to select.
NOTE:
The reports are available in either Print, Preview
and/or Spreadsheet formats.
NOTE:
Please email [email protected] if you
don't see a specific PSL3 report currently listed as
an option in your database.
© 2011 Cast & Crew Entertainment Services, LLC.
PURCHASE ORDER
Section
IV
PURCHASE ORDER
Section 4
PURCHASE ORDER
This section will address the following programs:
P/O Entry
P/O Edit List
Additional P/O Screens/Reports
© 2011 Cast & Crew Entertainment Services, LLC.
73
74
PSL3 User Manual
Chapter 4.1
P/O Entry
A Purchase Order is a record of expenses or financial commitment that serves as an approved, written
contract for goods and services. Purchase Orders are entered in the P/O Entry [poent] screen. To
transfer P/O lines to A/P, use A/P Entry [apte]. Once a P/O is entered and saved in PSL3, it is
considered an Open P/O and appears as a commitment on the Estimated Final Cost Report [efcrpt].
Please note P/O transactions do not get posted.
Open:
To access the P/O Entry [poent] screen, click on Tab #2 or press 'ALT' and the number '2'
Key simultaneously to open the screen.
P/O Entry [poent] can also be accessed from the menu tree under the 'P/O' module (see
following screen shot).
You can also access this screen by typing the screen or acronym name in the blue prompt
bar located above the 'Setup' menu. Then, press Enter.
The screen then appears.
© 2011 Cast & Crew Entertainment Services, LLC.
PURCHASE ORDER
75
Reference Information:
Reference Number - System-assigned number that is also referred to as transaction
number. To generate the next sequential Reference Number, press the F4 Key or select the
'Add' icon
located on the toolbar. You can also right click outside a field (in which the
'Add' option appears) to add the next record.
Effective Date - Date of the transaction that is recorded on the Bible Report [bdbr] and
appears as a Committed Cost on the Estimated Final Cost Report [efcrpt]; should default
with today's date after generating the Reference Number. You can always change it by typing
over the defaulted date or by right clicking in that field for the calendar selection to appear.
Please note you can not input a date that is in a previously closed period.
© 2011 Cast & Crew Entertainment Services, LLC.
76
PSL3 User Manual
NOTE:
Please email a request to support@castandcrew.
com if you need a transaction's Effective Date
changed and include the Reference Number(s).
Please be advised depending on your specific
studio's guidelines, the Support Department may
need to obtain approval from your Studio Finance
Executive before proceeding.
Description - Explanation of this P/O transaction as a whole which can hold up to 30 alpha/
numeric characters. This Reference Description defaults in the distribution lines. If this field
is left blank, PSL3 defaults the distribution description with the description of the first account
number selected.
Status - Overall status of the transaction. Status types of the entire P/O are as follows:
O (Open) - The P/O transaction status is Open and appears as a commitment on the
Estimated Final Cost Report [efcrpt].
C (Closed) - The P/O transaction status is Closed either by the P/O lines being
relieved to A/P Entry [apte] or by manually closing the P/O.
PSL3 updates the status automatically when relieving the P/O to A/P Entry [apte].
Batch Information:
Codes that are attached to the transaction. These fields are pulled from the User Entry
[suuser] screen located in the 'Setup' module (if setup beforehand). To change the defaulted
codes, press the F2 Key or right click in any of these fields (Batch, Production, Company
and Currency) to make your selection.
© 2011 Cast & Crew Entertainment Services, LLC.
PURCHASE ORDER
77
Vendor Information:
Select the vendor needed by pressing the F2 Key or by right clicking in the Vendor ID field.
Once the list of vendors appears, you can scroll through to find the vendor or click on the
column headers: Name, City or Vendor to sort alphabetically or numerically. If the vendor
does not exist in PSL3, you can add it by pressing the F5 Key or selecting the 'Zoom' icon
located on the toolbar. This zooms into the Vendor Entry [apven] screen. To search
for a vendor while zoomed into the Vendor Entry [apven] screen, type the wildcard character
using the asterisk (*) in the Vendor Name field. For example, if you want to see if vendor
John Smith exists, you would type *John* or *Smith* and press the F7 Key or select the 'Find'
icon
located on the toolbar. PSL3 displays how many records for that criteria exist by
selecting the 'Arrow' icons (First, Prior, Next and Last)
located on the
toolbar or by pressing the 'Page Up' or 'Page Down' Keys until you find the vendor needed.
Once you locate the vendor, press the F1 Key, then 'F' option or select the select the 'Fetch'
icon
to fetch this record back to the P/O Entry [poent] screen.
P/O Information:
P/O Number - Number of the P/O which can hold up to ten alpha/numeric characters
(depending on your studio); usually production assigned. The P/O Number is used in A/P
Entry [apte] to transfer the P/O lines.
Expiry Date - Date by which the goods ordered by the P/O should be received; this date
should appear on the P/O. If the goods haven't been received by this date and the P/O is still
Open, the P/O would be considered past due.
P/O Type - User-defined code to track your company's different classifications of P/O's which
can hold up to 3 alpha/numeric characters. This field is similar to a Free Field Code in that
you determine your own codes for each P/O Type. Please note P/O Types do not appear as
search criteria in the Bible Report [bdbr] as they only appear in the P/O Edit List [poedtl]
and P/O Report [poentp].
Amounts:
P/O Amount - Dollar or other currency amount due for the P/O.
Amount Remaining - Dollar or other currency amount of the P/O distribution lines that have
not been Closed, Transferred, or Relieved (in other words, this is the amount remaining to be
relieved).
Amount Distributed - Dollar or other currency amount that should match the Amount
Remaining. Please note you are not able to access this field.
Distribution Lines:
© 2011 Cast & Crew Entertainment Services, LLC.
78
PSL3 User Manual
Account Number - Chart of Accounts number that will be debited or credited on this
distribution line. Press the F2 Key or right click to choose the account number. If the
account number doesn't exist in PSL3, you can add it by pressing the F5 Key or selecting the
'Zoom' icon
located on the toolbar. This zooms into the Chart of Accounts Entry [glca]
screen in which you can add the account number immediately. Once saved, press the F1
Key, then 'F' option or select the 'Fetch' icon
[poent] screen.
to fetch the account back to the P/O Entry
NOTE:
The Series, Location, Set and Free Field
Codes are brought over from the User Entry
[suuser] screen located in the 'Setup' module if
setup. Otherwise, press the F2 Key or right click
in these fields to make your selection.
1099 and Third Party Expense - 1099 Code associated with the distribution, if any. A 1099
is a tax form. Press the F2 Key or right click to choose the necessary code. The State
Worked field in the Vendor Information section must be input for the 9 field to be accessible.
Please note if the 9 field does not have a code displayed, the 3rd Party field will not be
available to select the Third Party Vendor.
Description - Explanation for this distribution line which can hold up to 30 alpha/numeric
characters.
Amount - Dollar or other currency amount for this distribution line; should default with the
remaining P/O amount when you select or input an account number. Please note if you press
the F2 Key or right click in the Amount field, a calculator displays for your convenience.
ST (Status) - Status types of individual P/O distribution lines are as follows:
© 2011 Cast & Crew Entertainment Services, LLC.
PURCHASE ORDER
79
O (Open) - The distribution line is still open (it has not been Transferred, Closed or
Relieved). This field does not display a status type if Open (it is just left blank).
T (Transferred) - The distribution line has been Transferred to A/P Entry [apte], but
the A/P transaction has not yet been posted. This distribution line is still a
commitment on the Estimated Final Cost Report [efcrpt].
R (Relieved) - The distribution line has been Relieved (transferred to A/P Entry [apte]
and the A/P has been posted and/or paid.)
C (Closed) - The distribution line has been Closed.
Manually Closing and Re-opening Entire P/O's and Individual P/O Lines:
To close an entire P/O that has not been relieved to A/P Entry [apte], place your cursor in
the Reference Number field in P/O Entry [poent] and press the F1 Key, then 'P' option to
close. PSL3 then prompts you to input a closing date.
To close an individual P/O line that has not been relieved to A/P Entry [apte], place your
cursor in the distribution line you would like to close in P/O Entry [poent] and press F1 Key,
then 'L' option. PSL3 then prompts you to input a closing date.
To re-open an entire P/O, place your cursor in the Reference Number field in P/O Entry
[poent] and press the F1 Key, then 'O' option to open.
To re-open an individual P/O line, place your cursor in the distribution line you would like to
open in P/O Entry [poent] and press the F1 Key, then 'L' option.
Please make sure to save after performing any of the previously mentioned commands or the
updates will not take effect.
Helpful Hints:
Make sure to input all white colored fields as white fields are required before saving in PSL3.
To save this entry, select either 'Save' icon
located on the toolbar.
You can also press the F1 Key, then 'U' option to Update which saves and remains on screen
or press the F1 Key, then 'A' option to Accept which saves and clears the screen (most
common).
© 2011 Cast & Crew Entertainment Services, LLC.
80
PSL3 User Manual
To add another distribution line, press Enter or Tab where the last line was entered.
To insert a distribution line in between already existing lines, place your cursor where you
want to add and press the F4 Key or select the 'Add' icon
. A new line is added beneath.
To delete a distribution line, place your cursor in the line you want to delete and press the F10
Key or select the 'Delete' icon
saving.
. A red strike-through line appears which is deleted upon
To search for an existing entry, press the F7 Key or select the 'Find' icon
when the
screen is clear. All records appear in which you can scroll through using the 'Arrow' icons
(First, Prior, Next and Last)
Down' Keys until you find the entry needed.
or by pressing the 'Page Up' or 'Page
© 2011 Cast & Crew Entertainment Services, LLC.
PURCHASE ORDER
Chapter 4.2
81
P/O Edit List
The P/O Edit List [poedtl] reports on all purchase order distribution lines that are Relieved, Open or
Both. This report is similar to the P/O Report [poentp] except it has a wider variety of Report Type
sorting options available.
Open:
To access the P/O Edit List Report [poedtl], click the 'P/O' module from the menu tree (see
following screen shot).
The P/O Edit List Report [poedtl] is also located in the 'Report' folder under the 'Purchase
Order' sub-folder.
You can also access this report by typing the screen or acronym name in the blue prompt bar
located above the 'Setup' menu. Then, press Enter.
The screen then appears.
© 2011 Cast & Crew Entertainment Services, LLC.
82
PSL3 User Manual
To select criteria, press the F2 Key or right click in most fields to mak e your selection. You can also
simply type in the criteria in the allotted fields. If you wish to include all criteria information, leave
all fields blank except for any white colored fields as white fields are required before proceeding
in PSL3.
Account Range:
Starting and Ending - Account numbers to include in the report. To restrict the report to only
include information for a single account number, input the same account in both the Starting
and Ending fields. To select all account numbers, leave both fields blank.
Date Range:
Starting and Ending - Transaction Effective Dates to include in the report as PSL3 is datedriven. To restrict the report to only include information for a single date, input the same date
in both the Starting and Ending fields. Press the F2 Key or right click in either date field for
the calendar selection to appear.
© 2011 Cast & Crew Entertainment Services, LLC.
PURCHASE ORDER
83
P/O Range:
Starting and Ending - P/O Numbers to include in the report. To restrict the report to only
include information for a single P/O Number, input the same P/O Number in both the Starting
and Ending fields. To select all P/O Numbers, leave both fields blank.
P/O Status - Status of the P/O. Select whether you want the report to include P/O's that are
Relieved, Open or Both.
P/O Type - User-defined code to track your company's different classifications of P/O's. Input
the P/O Type to run the report by, if any. If a P/O Type is input here, then the report only
displays P/O transactions for that P/O Type.
Selection Criteria:
Press the F2 Key or right click in any of these fields (Batch Number, Production, Vendor
Number, Series, Location, Set and Free Field(s)) to choose the necessary codes if they
don't already default. To choose multiple codes for a particular field, press the F2 Key or right
click in that field and hold down the Control Key while simultaneously using your mouse to
select. By making a selection, this isolates the report to only display items based on the
code(s) selected.
© 2011 Cast & Crew Entertainment Services, LLC.
84
PSL3 User Manual
Multiple Currency:
Source - If you have more than one currency in your database, you can choose to include
only transactions denominated in one currency, two, three, etc., or all currencies. To choose
multiple Currency Codes, press the F2 Key or right click in the field and hold down the Control
Key while simultaneously using your mouse to select. Each currency in your database and
its conversion rate are listed in the report heading.
Target - Base currency set up in the System Control Information Entry [suctrl] screen
located in the 'Setup' module defaults. This Currency Code is what all transactions are
converted to on the report. Each currency in your database and its conversion rate are listed
in the report heading.
Report Types:
The Report Types (By Account Number, By Free Field, etc.) are all sorting options available
for you to select per your preference.
Print/Preview the Report: Located in the top right hand corner of the screen, you can choose the
following options to generate the report:
Print - Opens the Print Dialogue box and sends the report directly to the printer.
Preview - Generates a PDF format report and appears instantly on your screen. You are still
able to print from the PDF format.
Spreadsheet - Generates an Excel format report and appears instantly on your screen. You
are still able to print from the Excel format. Please note if you select this option, you are able
to have additional sorting options within Excel.
© 2011 Cast & Crew Entertainment Services, LLC.
PURCHASE ORDER
Chapter 4.3
85
Additional P/O Screens/Reports
PSL3 offers additional P/O Screens/Reports which are listed below.
Open:
To access the following P/O Screens/Reports, click the 'P/O' module from the menu tree (see
following screen shot).
These additional P/O Screens/Reports are also located in the 'Report' module under the
'Purchase Order' sub-folder.
You can also access these screens/reports by typing the screen or acronym name in the
blue prompt bar located above the 'Setup' menu. Then, press Enter.
To select criteria for the following reporting screens, press the F2 Key or right click in most fields to
mak e your selection. You can also simply type in the criteria in the allotted fields. If you wish to
include all criteria information, leave all fields blank except for any white colored fields as white
fields are required before proceeding in PSL3.
P/O Report [poentp] - Use [poentp] to print a list of all P/O transactions. The report can be
ran to include P/O Type, Reference Number, Vendor and a range of P/O Numbers. You can
also include Closed P/O's, Open P/O's and/or Transferred Items. Effective and Expiry Start
and End Dates can also be input as selection criteria. In addition, you can sort the report by
Reference Entry, P/O number, Distribution Entry and/or Account Number order. This report is
similar to the P/O Edit List [poedtl] except it does not offer a wide variety of Report Type
sorting options.
Pending Items Report [pirpt] - Use [pirpt] look for transactions that you may want to post,
pay, defer or relieve. Pending items are transactions that have been entered in the database,
but have not gone all the way through the accounting process. You can enter a range of
© 2011 Cast & Crew Entertainment Services, LLC.
86
PSL3 User Manual
Account Numbers, choose the Account Type and generate either a Combined or Individual
Detail or Summary Report. You can also input Start and End Dates and choose the Date
Type by Effective or A/P Due Date. In addition, you can include the Transaction Status
(Postable, Deferred, Payable and/or Open P/O) and Multiple Currency as selection criteria.
Please note this report is also accessible in the 'A/P' module.
Non Existing P/O Report [nepor] - Use [nepor] to print a list of all A/P Entry [apte]
transactions containing a P/O Number that does not exist in P/O Entry [poent]. You can
enter a range of Vendor ID Numbers, P/O Numbers, Start and End Dates, etc. as selection
criteria. Please note depending on your studio restrictions, your PSL3 database may not
allow you to manually input A/P transactions with a non-existent P/O Number.
NOTE:
The reports are available in either Print, Preview
and/or Spreadsheet formats.
NOTE:
Please email [email protected] if you
don't see a specific PSL3 report currently listed as
an option in your database.
© 2011 Cast & Crew Entertainment Services, LLC.
ACCOUNTS PAYABLE
Section
V
ACCOUNTS PAYABLE
Section 5
ACCOUNTS PAYABLE
This section will address the following programs:
A/P Entry
Post A/P Transactions/Edit List
Defer Open Items
Modify Open Items
Void Open Items
1099 Reporting Screens
Additional A/P Screens/Reports
© 2011 Cast & Crew Entertainment Services, LLC.
89
90
PSL3 User Manual
Chapter 5.1
A/P Entry
Accounts Payable is the obligations to suppliers of merchandise or services purchased on an open
account. In the A/P Entry [apte] program, you can record amounts that your production owes to
vendors, but has not yet paid. Whether your production uses purchase orders or not, you can input
invoices before issuing a check for the payment process. Entering new A/P invoices, looking up,
modifying, setting up recurring batches, transferring P/O distribution lines and deleting unposted A/P
transactions can be done in the A/P Entry [apte] screen.
Open:
To access the A/P Entry [apte] screen, click on Tab #1 or press 'ALT' and the number '1' Key
simultaneously to open the screen.
A/P Entry [apte] can also be accessed in the 'A/P' module from the menu tree (see following
screen shot).
You can also access this screen by typing the screen or acronym name in the blue prompt
bar located above the 'Setup' menu. Then, press Enter.
The screen then appears.
© 2011 Cast & Crew Entertainment Services, LLC.
ACCOUNTS PAYABLE
91
Reference Information:
Reference Number - System-assigned number that is also referred to as transaction
number. To generate the next sequential Reference Number, press the F4 Key or select the
'Add' icon
located on the toolbar. You can also right click outside a field (in which the
'Add' option appears) to add the next record.
Effective Date - Date of the transaction that is recorded on the Bible Report [bdbr] and
appears as an Actual Cost on the Estimated Final Cost Report [efcrpt]; should default with
today's date after generating the Reference Number. You can always change it by typing over
the defaulted date or by right clicking in that field for the calendar selection to appear. Please
note you can not input a date that is in a previously closed period.
© 2011 Cast & Crew Entertainment Services, LLC.
92
PSL3 User Manual
NOTE:
Please email a request to support@castandcrew.
com if you need a transaction's Effective Date
changed and include the Reference Number(s).
Please be advised depending on your specific
studio's guidelines, the Support Department may
need to obtain approval from your Studio Finance
Executive before proceeding.
Description - Explanation of this A/P transaction as a whole which can hold up to 30 alpha/
numeric characters. This Reference Description defaults in the distribution lines. If this field
is left blank, PSL3 defaults the distribution description with the description of the first account
number selected.
Status - Overall status of the transaction. This field is marked with a 'U' for an Unposted entry
until you post it in the Post A/P Transactions [appost] screen. As long as the transaction is
marked with an unposted status, you are able to modify it. Once posted, it is marked with an
'O' for Open or 'P' for Paid once a check has been processed. PSL3 updates the status
automatically.
© 2011 Cast & Crew Entertainment Services, LLC.
ACCOUNTS PAYABLE
93
NOTE:
Please email a request to support@castandcrew.
com if you need a transaction unposted and
include the Reference Number(s). Please be
advised depending on your specific studio's
guidelines, the Support Department may need to
obtain approval from your Studio Finance
Executive before proceeding.
Batch Information:
Codes that are attached to the transaction. These fields are pulled from the User Entry
[suuser] screen located in the 'Setup' module (if setup beforehand). To change the defaulted
codes, press the F2 Key or right click in any of these fields (Batch, Production, Company,
Bank and Currency) and make your selection.
Vendor Information:
Select the vendor needed by pressing the F2 Key or by right clicking in the Vendor ID field.
Once the list of vendors appears, you can scroll through to find the vendor or click on the
column headers: Name, City or Vendor to sort alphabetically or numerically. If the vendor
does not exist in PSL3, you can add it by pressing the F5 Key or selecting the 'Zoom' icon
located on the toolbar. This zooms into the Vendor Entry [apven] screen. To search
for a vendor while zoomed into the Vendor Entry [apven] screen, type the wildcard character
using the asterisk (*) in the Vendor Name field. For example, if you want to see if vendor
John Smith exists, you would type *John* or *Smith* and press the F7 Key or select the 'Find'
icon
located on the toolbar. PSL3 displays how many records for that criteria exist by
selecting the 'Arrow' icons (First, Prior, Next and Last)
located on the
toolbar or by pressing the 'Page Up' or 'Page Down' Keys until you find the vendor needed.
Once you locate the vendor, press the F1 Key, then 'F' option or select the select the 'Fetch'
icon
to fetch this record back to the A/P Entry [apte] screen.
Invoice Information:
Invoice Number - Invoice Number from the vendor's invoice which can hold up to 15 alpha/
numeric characters (depending on your studio).
Date - Date of the invoice which is separate from the Effective Date of the transaction.
© 2011 Cast & Crew Entertainment Services, LLC.
94
PSL3 User Manual
NOTE:
Please email a request to support@castandcrew.
com to make the Invoice Number and Invoice
Date (white) mandatory fields.
Due Date - Date by which the invoice needs to be paid. If the Due Days field in Vendor
Entry [apven] was entered for this vendor, then this field automatically defaults with the
amount of days specified.
Amount - Dollar or other currency amount due for the invoice.
Discount - Amount by which the check amount is reduced. Invoice Amount - Discount
Amount = Check Amount. The discount can be input by using a dollar amount or percentage;
for example you can enter ‘10%’ in this field and PSL3 will automatically calculate the amount
for you.
NOTE:
Please email a request to support@castandcrew.
com to deactivate the Discount field. This field
will no longer be accessible in your database.
Check Information:
Combine - Defaults to 0 (zero) which means PSL3 will generate one check for all invoices for
the same vendor. If you want a separate check for each invoice, input a number between 1
through 9 for each A/P Entry [apte] transaction.
Hold - Check mark this option if the vendor will be picking up the check. The check will print
with the words "HOLD FOR PICK UP" instead of the address; therefore, no need to mail it
out.
Number - Number of the check that paid the invoice. This field is automatically filled in after
the check is printed. The Check Number field is also where you can input a manual check
or wire transfer number. Manual checks are checks that have been hand-written or typed,
rather than generated by PSL3. Please note if a number is manually input in this field, PSL3
will not print a check; however the check number is still recorded on the Summary Check
Register Report.
Date - Date the check was issued. This field automatically defaults after the check is printed.
© 2011 Cast & Crew Entertainment Services, LLC.
ACCOUNTS PAYABLE
95
Amount - Amount the check was made for less the Discount Amount. If you have combined
this invoice with other invoices payable to the same vendor, then the Check Amount field
reflects the total amount of the combined invoices. This field automatically defaults after the
check is printed.
Distribution Lines:
P/O Number - If a P/O number(s) exists for a vendor, press the F2 Key or right click to view
all P/O numbers listed and make your selection. The selected distribution lines will transfer
over. If a P/O does not exist for a vendor, you can manually enter it in this field for reference.
To print a list of all A/P Entry [apte] transactions containing a P/O Number that does not exist
in P/O Entry [poent], please refer to the Non Existing P/O Report [nepor] located in the 'P/O'
module.
Account Number - Chart of Accounts number that will be debited or credited on this
distribution line. If a P/O does not exist, press the F2 Key or right click to choose an account
number. If the account number doesn't exist in PSL3, you can add it by pressing the F5 Key
or selecting the 'Zoom' icon
located on the toolbar. This zooms into the Chart of
Accounts Entry [glca] screen in which you can add the account number immediately. Once
saved, press the F1 Key, then 'F' option or select the 'Fetch' icon
back to the A/P Entry [apte] screen.
to fetch the account
NOTE:
The Series, Location, Set and Free Field
Codes are brought over from the User Entry
[suuser] screen located in the 'Setup' module if
setup. Otherwise, press the F2 Key or right click
in these fields to make your selection.
1099 and Third Party Expense - 1099 Code associated with the distribution, if any. A 1099
is a tax form. Press the F2 Key or right click to choose the necessary code. The State
Worked field in the Vendor Information section must be input for the 9 field to be accessible.
Please note if the 9 field does not have a code displayed, the 3rd Party field will not be
available to select the Third Party Vendor.
Description - Explanation for this distribution line which can hold up to 30 alpha/numeric
characters.
Amount - Dollar or other currency amount for this distribution line; should default with the
remaining invoice amount when you input an account number. Please note if you press the
F2 Key or right click in the Amount field, a calculator displays for your convenience.
© 2011 Cast & Crew Entertainment Services, LLC.
96
PSL3 User Manual
Helpful Hints:
Make sure to input all white colored fields as white fields are required before saving in PSL3.
To save this entry, select either 'Save' icon
located on the toolbar.
You can also press the F1 Key, then 'U' option to Update which saves and remains on screen
or press the F1 Key, then 'A' option to Accept which saves and clears the screen (most
common).
To add another distribution line, press Enter or Tab where the last line was entered.
To insert a distribution line in between already existing lines, place your cursor where you
want to add and press the F4 Key or select the 'Add' icon
. A new line is added beneath.
To delete a distribution line, place your cursor in the line you want to delete and press the F10
Key or select the 'Delete' icon
saving.
. A red strike-through line appears which is deleted upon
To search for an existing entry, press the F7 Key or select the 'Find' icon
when the
screen is clear. All records appear in which you can scroll through using the 'Arrow' icons
(First, Prior, Next and Last)
or by pressing the 'Page Up' or 'Page
© 2011 Cast & Crew Entertainment Services, LLC.
ACCOUNTS PAYABLE
Down' Keys until you find the entry needed.
© 2011 Cast & Crew Entertainment Services, LLC.
97
98
PSL3 User Manual
Chapter 5.2
Post A/P Transactions/Edit List
Use the Post A/P Transactions/Edit List [appost] screen to review and post A/P transactions. You can
post transactions one at a time or all transactions at the same time if you prefer. It is recommended to
first generate an “Edit List”: a list of the transactions you’ve selected prior to posting. The purpose of the
Edit List is for you to review the A/P transactions for any errors as well as to make sure the transactions
listed are indeed the ones you want to post. You can print the Edit List or view it straight from your
screen. If you need to make any corrections, do so in the A/P Entry [apte] screen. After accepting the
changes, generate another Edit List to verify the corrections. Once you’re satisfied with the changes,
move forward with the Posting Register.
Posting is the act of permanently transferring a transaction to the Bible Report/General Ledger [bdbr].
Please note checks are posted automatically when they are printed.
Open:
To access the Post A/P Transactions/Edit List [appost] screen, click the 'A/P' module, then
click the 'A/P Entry' sub-folder from the menu tree (see following screen shot). Listed are the
Edit List and Post Reports. You will notice once you click either report, the other also
becomes selected as you can view both reports from the same screen.
The Post A/P Transactions/Edit List [appost] screen is also located in the 'Report' module
under the 'A/P' sub-folder.
You can also access this screen by typing the screen or acronym name in the blue prompt
bar located above the 'Setup' menu. Then, press Enter.
© 2011 Cast & Crew Entertainment Services, LLC.
ACCOUNTS PAYABLE
The screen then appears.
© 2011 Cast & Crew Entertainment Services, LLC.
99
100
PSL3 User Manual
Post A/P Transactions Selection Criteria:
To select an entry, press the F2 Key or right click in any of these fields (Batch, Reference,
Vendor, Production, Company, Bank and/or Currency) to select the item(s) needed. You
can also choose multiple entries by holding down the Control Key and simultaneously using
the mouse to select. By making a selection, this isolates the report to only display items
based on the code(s) selected. If you wish to select all unposted A/P transactions, leave all
fields blank.
Report Type:
Defaults to Edit List to review your A/P entries and make any necessary modifications prior to
posting. To move forward with posting, select 'Posting Register' followed by either the Print,
© 2011 Cast & Crew Entertainment Services, LLC.
ACCOUNTS PAYABLE
101
Preview or Spreadsheet option; this will transfer the transaction(s) to the Bible Report [bdbr].
Report Formats:
'Report Format', 'Report Sort' and 'Description Of' are all sorting options available for you to
select per your preference.
Include Vendor/W9 Report:
Check mark this option to print a separate report after the A/P Edit List [appost] and/or
Posting Register [appost]. The Vendor/W9 Report includes the Vendor Number, Name,
Address and displays whether the vendor has a W9 on File. This information is pulled from
the Vendor Entry [apven] screen.
Print/Preview the Report: Located in the top right hand corner of the screen, you can choose the
following options to generate the report:
Print - Opens the Print Dialogue box and sends the report directly to the printer.
Preview - Generates a PDF format report and appears instantly on your screen. You are still
able to print from the PDF format.
Spreadsheet - Generates an Excel format report and appears instantly on your screen. You
are still able to print from the Excel format. Please note if you select this option, you are able
to have additional sorting options within Excel.
© 2011 Cast & Crew Entertainment Services, LLC.
102
PSL3 User Manual
Once you select 'Posting Register' followed by either the Print, Preview or Spreadsheet option,
PSL3 displays the following message prompt:
If you select 'No', PSL3 asks "Would you like to reprint the register?". If you still select 'No',
you will receive a prompt notifying you the posting process is not done; therefore you are still
able to make any needed changes. If you select 'Yes', you will receive a prompt confirming the
selected A/P transactions are now marked posted.
NOTE:
Please note if you need to make distribution
changes to posted items, this can be done in the
Posted Transaction/Item Editor [glfix] screen
located in the 'J/E' module depending on your User
ID and studio permissions. You can also email a
request to [email protected] if you need
a transaction unposted and include the Reference
Number(s). Please be advised depending on your
specific studio's guidelines, the Support
Department may need to obtain approval from your
Studio Finance Executive before proceeding.
© 2011 Cast & Crew Entertainment Services, LLC.
ACCOUNTS PAYABLE
NOTE:
Please note you are not able to re-print a Posting
Register once the transaction(s) are posted;
therefore, if you need a copy of the report sent to
you, please email a request to
[email protected] with the approximate
date and time that the report was ran. PSL3
houses all generated reports on a server.
© 2011 Cast & Crew Entertainment Services, LLC.
103
104
PSL3 User Manual
Chapter 5.3
Defer Open Items
The Defer Open Items [ckdef] program allows you to defer an open A/P or P/C transaction payment
from your next check run. The Defer Open Items [ckdef] screen also allows you to change a
transaction's A/P Discount Amount or A/P Due Date. You can also determine if an open item has been
deferred if you enter the open item's Reference Number and press the Enter Key.
Open:
To access the Defer Open Items [ckdef] screen, click the 'A/P' module, then click the 'A/P
Entry' sub-folder from the menu tree (see following screen shot).
Defer Open Items [ckdef] is also located in the 'Report' module under the 'A/P' sub-folder.
You can also access this screen by typing the screen or acronym name in the blue prompt
bar located above the 'Setup' menu. Then, press Enter.
The screen then appears.
© 2011 Cast & Crew Entertainment Services, LLC.
ACCOUNTS PAYABLE
105
Selection Criteria:
Reference Number - Enter the Reference Number of the A/P or P/C transaction whose
payment you want to defer and press the Enter Key. You can also press the F2 Key or right
click in the Reference Number field to select a transaction from the list. The Due Date and
Discount Amount fields default if you entered them in the original transaction or if you have
already modified these fields in this screen.
Due Date - Date by which the A/P transaction should be paid. When you enter a Reference
Number for the first time, the original Due Date entered on that A/P transaction record
displays. If you have previously changed the Due Date field in this screen, that date displays
instead. When you change the Due Date here, then the Due Date field of the A/P Entry
[apte] transaction record also updates accordingly. Please note P/C transactions do not have
Due Dates. To select the date, press the F2 Key or right click in the Due Date field for the
calendar selection to appear or manually type in the date.
© 2011 Cast & Crew Entertainment Services, LLC.
106
PSL3 User Manual
Discount Amount - Amount by which the check amount is reduced. Invoice Amount Discount Amount = Check Amount. You can neither modify a Discount Amount unless it was
originally entered in A/P Entry [apte] nor increase a Discount Amount. You can only reduce
a Discount Amount from what was originally posted. Please note P/C records do not have
Discount Amounts. To input the amount, press the F2 Key or right click in the Discount
Amount field for the calculator option to display or manually type in the amount.
Defer Indefinitely - Check mark this option if you want to defer the open item indefinitely or
just defer it until the Due Date entered on this screen. If check marked, the selected
transaction will not be included on any future check runs until you uncheck this option.
Defer:
To proceed with the deferring process, press the F1 Key, then 'D' option or select 'Defer'
located in the top right hand corner of the screen. PSL3 automatically saves the change and
clears the screen. Please note the Defer Open Items [ckdef] screen does not generate a
report.
© 2011 Cast & Crew Entertainment Services, LLC.
ACCOUNTS PAYABLE
Chapter 5.4
107
Modify Open Items
The Modify Open Items [apopmod] program is used to change a posted A/P transaction's Bank Code.
This program allows you to select either one open A/P Reference Number or multiple open A/P
Reference Numbers and modify the Bank Code associated with those transactions. The A/P Open
Items Modification Report prints the final Bank Code change(s) for your records.
NOTE:
Please note you can not change the Bank Code of
an open A/P Entry [apte] transaction that contains
a distribution line transferred from a P/O.
Open:
To access the Modify Open Items [apopmod] screen, click the 'A/P' module, then click the
'A/P Entry' sub-folder from the menu tree (see following screen shot).
You can also access this screen by typing the screen or acronym name in the blue prompt
bar located above the 'Setup' menu. Then, press Enter.
© 2011 Cast & Crew Entertainment Services, LLC.
108
PSL3 User Manual
The screen then appears.
© 2011 Cast & Crew Entertainment Services, LLC.
ACCOUNTS PAYABLE
© 2011 Cast & Crew Entertainment Services, LLC.
109
110
PSL3 User Manual
Selection Criteria:
Reference Number - Reference Number of the A/P Open Item(s) whose Bank Code you
want to change. To choose multiple A/P Open Item(s), press the F2 Key or right click in the
Reference Number field and hold down the Control Key while simultaneously using your
mouse to select. Please note all transactions selected must be coded to the same Bank
Code.
Transaction For:
Bank Code - Bank Code of the selected A/P Open Item(s) entered in the Reference
Number field defaults.
Currency Code - Currency Code associated with the Bank Code of the selected A/P Open
Item(s) defaults. Please note you can not access this field.
A/P Clearing - A/P Clearing Account Number associated with the Bank Code of the selected
A/P Open Item(s) defaults. Please note you can not access this field.
Change To:
Bank Code - New Bank Code to which you want the selected A/P Open Item(s) to be
changed to. Press the F2 Key or right click in this field to choose the necessary code.
Currency Code - Currency Code associated with the new Bank Code defaults. Please note
you can not access this field
A/P Clearing - A/P Clearing Account Number associated with the new Bank Code defaults.
Please note you can not access this field.
Print/Preview the Report: Located in the top right hand corner of the screen, you can choose the
following options to generate the report:
Preview - Generates a PDF format report and appears instantly on your screen. You are still
able to print from the PDF format.
Start - Opens the Print Dialogue box, sends the report directly to the printer and begins the
modification process.
© 2011 Cast & Crew Entertainment Services, LLC.
ACCOUNTS PAYABLE
111
Once you select 'Start' and the report has printed, PSL3 displays the following message prompt:
If you select 'No', PSL3 asks "Would you like to reprint the register?". If you still select 'No', the
modification process is not done. If you select 'Yes', PSL3 then displays a secondary prompt:
If you select 'Yes', the selected A/P transactions are now modified to the new Bank Code. If
you select 'No', the modification process is not done.
© 2011 Cast & Crew Entertainment Services, LLC.
112
PSL3 User Manual
Chapter 5.5
Void Open Items
The Void Open Items [apvoid2] program is used to void an A/P Open Item(s) and/or reissue the original
A/P transaction(s) if needed. The Voided Open Items Register prints the voided change(s) for your
records.
Open:
To access the Void Open Items [apvoid2] screen, click the 'A/P' module, then click the 'A/P
Entry' sub-folder from the menu tree (see following screen shot).
Void Open Items [apvoid2] is also located in the 'Report' module under the 'A/P' sub-folder.
You can also access this screen by typing the screen or acronym name in the blue prompt
bar located above the 'Setup' menu. Then, press Enter.
The screen then appears.
© 2011 Cast & Crew Entertainment Services, LLC.
ACCOUNTS PAYABLE
113
Open Item Selection:
Reference Number - Reference Number of the A/P Open Item(s) which you want to void. To
choose multiple A/P Open Item(s), press the F2 Key or right click in the Reference Number
field and hold down the Control Key while simultaneously using your mouse to select.
Reissue - Check mark this option to create a new, unposted A/P transaction(s) of the original
A/P Open Items(s) selected in the Reference Number field within the Current Period.
Print/Preview the Report: Located in the top right hand corner of the screen, you can choose the
following options to generate the report:
Print Edit - Opens the Print Dialogue box and sends the report directly to the printer.
Preview Edit - Generates a PDF format report and appears instantly on your screen. You
are still able to print from the PDF format.
Void A/P - Opens the Print Dialogue box, sends the report directly to the printer and begins
the voiding process.
© 2011 Cast & Crew Entertainment Services, LLC.
114
PSL3 User Manual
Once you select 'Void A/P' and the report has printed, PSL3 displays the following message
prompt:
If you select 'No', PSL3 asks "Would you like to reprint the register?". If you still select 'No', the
voiding process is not done. If you select 'Yes', PSL3 then displays a secondary prompt:
If you select 'Yes', the Voided Open Items Register prints and the selected A/P transactions
are now voided and/or reissued. If you select 'No', the Voided Open Items Register is not
printed; however the void and/or reissue process is now complete.
Once the void and/or reissue process is complete, PSL3 automatically updates the A/P
transaction(s) status as follows:
Original A/P transaction(s) is marked with a 'V' for Void.
Reversal A/P transaction(s) is marked with an 'R' for Reversal.
Reissued A/P transaction(s) is marked with a 'U' for Unposted to make any necessary
modifications.
© 2011 Cast & Crew Entertainment Services, LLC.
ACCOUNTS PAYABLE
Chapter 5.6
115
1099 Reporting Screens
PSL3 offers 1099 Screens/Reports which are listed below.
Open:
To access the following 1099 Screens/Reports, click the 'A/P' module, then click the '1099'
and '1099' ICR' sub-folders from the menu tree (see following screen shot).
These additional 1099 Screens/Reports are also located in the 'Report' module under the
'Vendors' sub-folder.
You can also access these screens/reports by typing the screen or acronym name in the
blue prompt bar located above the 'Setup' menu. Then, press Enter.
To select criteria for the following reporting screens, press the F2 Key or right click in most fields to
mak e your selection. You can also simply type in the criteria in the allotted fields. If you wish to
include all criteria information, leave all fields blank except for any white colored fields as white
fields are required before proceeding in PSL3.
1099 Forms or Audit Report [bd1099] - Use [bd1099] to print paper 1099 forms, generate a
listing of all vendors and/or employees including all amounts that have been paid to them, as
wells as generate a listing of vendors and/or employees who have invalid Tax ID Numbers.
You can specify the report format as Detailed, Summary, Blank Tax ID, Paper 1099 Form or
© 2011 Cast & Crew Entertainment Services, LLC.
116
PSL3 User Manual
Spreadsheet (Text/Tab delimited (.txt) and sort by Tax ID or Vendor Name. You can include
or exclude the following options: TIN Name, TIN Type, State Worked, 3rd Party 1099's only,
Withholding Taxes only, T4 only, Federal Filing Limit and Non-1099'able Items in addition to
Multiple Currency, etc. as selection criteria.
1099 ICR (Independent Contract Reporting) Report [icr1099] - Use [icr1099] to create an
export file that includes vendors and/or employees who have earned $600 or more of 1099'able
amounts in the tax year or since the date the last export file was created. This file should be
sent to the EDD (Employment Development Department). To find out more about Independent
Contractor Reporting or sending the file to the EDD, visit the EDD web site at www.edd.ca.gov
. Please note if you need to reset the ICR Export Date for any reason, please email
[email protected] .
NOTE:
The reports are available in either Print, Preview
and/or Spreadsheet formats.
NOTE:
Please email [email protected] if you
don't see a specific PSL3 report currently listed as
an option in your database.
© 2011 Cast & Crew Entertainment Services, LLC.
ACCOUNTS PAYABLE
Chapter 5.7
117
Additional A/P Screens/Reports
PSL3 offers additional A/P Screens/Reports which are listed below. Some of these reports can also be
found in the section Additional Vendor Screens/Reports .
Open:
To access the following A/P Screens/Reports, click the 'A/P' module, then click the 'Vendor'
and 'A/P Entry' sub-folders from the menu tree (see following screen shot).
These additional A/P Screens/Reports are also located in the 'Report' module under the 'A/P'
sub-folder.
You can also access these screens/reports by typing the screen or acronym name in the
blue prompt bar located above the 'Setup' menu. Then, press Enter.
To select criteria for the following reporting screens, press the F2 Key or right click in most fields to
mak e your selection. You can also simply type in the criteria in the allotted fields. If you wish to
include all criteria information, leave all fields blank except for any white colored fields as white
fields are required before proceeding in PSL3.
Account/Vendor Totals Report [accvt] - Use [accvt] to print a total for each Account/Vendor
combination. Only paid (or voided) A/P distributions contribute to the totals. This report
converts all amounts to the base currency. This report can be ran by Starting and Ending
Dates, a range of Vendor ID Numbers, Starting and Ending Account Numbers and Multiple
Currency as selection criteria.
© 2011 Cast & Crew Entertainment Services, LLC.
118
PSL3 User Manual
A/P Open Items Report [apopenp] - Use [apopenp] to view which A/P invoices have been
posted, but not yet paid. This report can be used to determine which A/P transactions you
want to pay with your next check run. You can enter a range of Vendor ID Numbers, Aging
Date, Effective Date as well as include Detail and Items Past Selected Aging Date as
selection criteria. The report can be sorted by Vendor Number or Vendor Name.
A/P Vendor Analysis Report [apvena] - Use [apvena] to track A/P transaction activity by
vendor. You can choose the Report Type (Vendor ID, Vendor Name, State or Invoice) and
include the Transaction Type (Unposted, Open, Paid and/or Void). You can also enter a
range of Vendor ID Numbers, Start and End Dates, Multiple Currency, etc. as selection
criteria.
A/P Vendor Inquiry [apvinq] - Use [apvinq] to look up information on posted A/P
transactions. You can specify the Invoice Selection by Vendor, Reference Number, Invoice
Number, P/O Number and/or Location Code. You can also choose the Currency, Transaction
Type (Open and/or Paid Items), Start and End Dates, etc. as selection criteria.
Pending Items Report [pirpt] - Use [pirpt] look for transactions that you may want to post,
pay, defer or relieve. Pending items are transactions that have been entered in the database,
but have not gone all the way through the accounting process. You can enter a range of
Account Numbers, choose the Account Type and generate either a Combined or Individual
Detail or Summary Report. You can also input Start and End Dates and choose the Date
Type by Effective or A/P Due Date. In addition, you can include the Transaction Status
(Postable, Deferred, Payable and/or Open P/O), Multiple Currency, etc. as selection criteria.
Please note this report is also accessible in the 'P/O' module.
NOTE:
The reports are available in either Print, Preview
and/or Spreadsheet formats.
NOTE:
Please email [email protected] if you
don't see a specific PSL3 report currently listed as
an option in your database.
© 2011 Cast & Crew Entertainment Services, LLC.
PETTY CASH
Section
VI
PETTY CASH
Section 6
PETTY CASH
This section will address the following programs:
P/C Entry
Post P/C Transactions/Edit List
P/C Crew Advances/Activity Report
P-Card View/Report
© 2011 Cast & Crew Entertainment Services, LLC.
121
122
PSL3 User Manual
Chapter 6.1
P/C Entry
Petty Cash is the distribution of cash funds to pay for employees' on a Productions for various
expenses, usually smaller purchases such as materials and supplies. Use the P/C Entry [pcent]
program to record both Petty Cash Advances (Amount Advanced), Petty Cash Receipts and Petty Cash
Returned (Accounted for Amount). To disburse Petty Cash to each vendor and/or employee, he or she
must be set up in Vendor Entry [apven] and have a Petty Cash Advance Account Number entered in his
or her record.
WARNING:
Please be advised you are not able to access the P/C Entry [pcent] screen until your User ID and
default codes are setup. If they are not setup, the following warning message will display upon
opening the screen.
Your default Series, Location and Set Codes can be input in the User Entry [suuser] screen
located in the 'Setup' module. Once saved, the P/C Entry [pcent] screen becomes accessible.
Open:
To access the P/C Entry [pcent] screen, click on Tab #5 or press 'ALT' and the number '5'
Key simultaneously to open the screen.
P/C Entry [pcent] can also be accessed in the 'P/C' module from the menu tree (see following
screen shot).
You can also access this screen by typing the screen or acronym name in the blue prompt
bar located above the 'Setup' menu. Then, press Enter.
© 2011 Cast & Crew Entertainment Services, LLC.
PETTY CASH
The screen then appears.
© 2011 Cast & Crew Entertainment Services, LLC.
123
124
PSL3 User Manual
Reference Information:
Reference Number - System-assigned number that is also referred to as transaction
number. To generate the next sequential Reference Number, press the F4 Key or select the
'Add' icon
located on the toolbar. You can also right click outside a field (in which the
'Add' option appears) to add the next record.
Effective Date - Date of the transaction that is recorded on the Bible Report [bdbr]; should
default with today's date after generating the Reference Number. You can always change it
by typing over the defaulted date or by right clicking in that field for the calendar selection to
appear. Please note you can not input a date that is in a previously closed period.
© 2011 Cast & Crew Entertainment Services, LLC.
PETTY CASH
125
NOTE:
Please email a request to support@castandcrew.
com if you need a transaction's Effective Date
changed and include the Reference Number(s).
Please be advised depending on your specific
studio's guidelines, the Support Department may
need to obtain approval from your Studio Finance
Executive before proceeding.
Description - Explanation of this P/C transaction as a whole which can hold up to 30 alpha/
numeric characters.
Status - Overall status of the transaction. This field is marked with a 'U' for an Unposted entry
until you post it in the Post P/C Transactions [pcpost] screen. As long as the transaction is
marked with an unposted status, you are able to modify it. Once posted, it is marked with a
'P' for Posted. PSL3 updates the status automatically.
NOTE:
Please email a request to support@castandcrew.
com if you need a transaction unposted and
include the Reference Number(s). Please be
advised depending on your specific studio's
guidelines, the Support Department may need to
obtain approval from your Studio Finance
Executive before proceeding.
© 2011 Cast & Crew Entertainment Services, LLC.
126
PSL3 User Manual
Batch Information:
Codes that are attached to the transaction. These fields are pulled from the User Entry
[suuser] screen located in the 'Setup' module (if setup beforehand). To change the defaulted
codes, press the F2 Key or right click in any of these fields (Batch, Production, Company,
Bank and Currency) and make your selection. Please note the Bank Code field setup in
the Bank Entry [subank] screen is where the P/C Box/Custodian Account is pulled from. To
set up a new P/C Custodian, do so in the Bank Entry [subank] screen located in the 'Setup'
module.
Vendor Information:
Only vendors with Advanced Accounts setup in Vendor Entry [apven] are displayed in the vendor pick
list in P/C Entry [pcent]. This is done by check mark ing the 'Petty Cash' option in which the P/C
Advance Account field becomes accessible in Vendor Entry [apven].
Select the vendor needed by pressing the F2 Key or by right clicking in the Vendor ID field.
Once the list of vendors appears, you can scroll through to find the vendor or click on the
column headers: Name, City or Vendor to sort alphabetically or numerically. If the vendor
does not exist in PSL3, you can add it by pressing the F5 Key or selecting the 'Zoom' icon
located on the toolbar. This zooms into the Vendor Entry [apven] screen. To search
for a vendor while zoomed into the Vendor Entry [apven] screen, type the wildcard character
using the asterisk (*) in the Vendor Name field. For example, if you want to see if vendor
John Smith exists, you would type *John* or *Smith* and press the F7 Key or select the 'Find'
icon
located on the toolbar. PSL3 displays how many records for that criteria exist by
selecting the 'Arrow' icons (First, Prior, Next and Last)
located on the
toolbar or by pressing the 'Page Up' or 'Page Down' Keys until you find the vendor needed.
Once you locate the vendor, press the F1 Key, then 'F' option or select the select the 'Fetch'
icon
to fetch this record back to the P/C Entry [pcent] screen.
Envelope Information:
Envelope Number - User-defined code or number identifying each P/C envelope which can
hold up to eight alpha/numeric characters. The concept of an envelope is that each P/C
transaction can involve not only disbursing cash, but also receiving receipts and cash from
vendors. The receipts would be kept in an envelope for future reference and the transactions
would be listed on the front of the envelope.
© 2011 Cast & Crew Entertainment Services, LLC.
PETTY CASH
127
NOTE:
Please email a request to support@castandcrew.
com to make the Envelope Number a white
colored field as white fields are required before
proceeding in PSL3.
Amount Advanced - Dollar or other currency amount that is being given (advanced) to the P/
C Vendor. After inputting the Amount Advanced, PSL3 automatically creates two distribution
lines. The first automated line displays the Advance Account Number for the P/C Vendor set
up in the Vendor Entry [apven] screen (debiting the P/C vendor's Advance Account). The
second automated distribution lines displays the account number for the P/C Box/Custodian
set up in the Bank Entry [subank] screen (crediting the P/C Box/Custodian 's account).
Accounted for Amount - Total amount (total cash + receipts) that is being received from the
P/C Vendor. After inputting the Accounted for Amount, PSL3 automatically creates one
distribution line. The automated line displays the Advance Account Number for the P/C
Vendor set up in the Vendor Entry [apven] screen.
Amount Distributed - Read-only field that sums the amounts coded to Expense Account
Numbers in the distribution lines. As you enter amounts coded to Expense Accounts, this
field totals those amounts. The Amount Distributed must equal the Accounted for Amount
before you can save the P/C Entry [pcent] transaction. Please note you are not able to
access this field.
Distribution Lines:
PSL3 automatically creates distribution line(s) once you enter an amount in the Amount Advanced and
Accounted for Amount fields.
First Amount Advanced Distribution Line - This automatically created distribution line is
created if you enter an amount in the Amount Advanced field. It displays the Advance
Account Number for the P/C Vendor set up in the Vendor Entry [apven] screen (the debit
from the P/C vendor's Advance Account).
Second Amount Advanced Distribution Line - This automatically created distribution line
is created if you enter an amount in the Amount Advanced field. It displays the account
number for the P/C Box/Custodian set up in the Bank Entry [subank] screen (the credit from
the P/C Box/Custodian 's account).
First Accounted For Amount Distribution Line - This automatically created distribution line
is created only if you enter an amount in the Accounted For Amount field. It displays the
Advance Account Number for the P/C Vendor set up in the Vendor Entry [apven] screen.
© 2011 Cast & Crew Entertainment Services, LLC.
128
PSL3 User Manual
NOTE:
Please email a request to support@castandcrew.
com to turn off the P/C Entry [pcent] automated
distribution lines function. If this feature is turned
off, you will have to input the distribution lines in
manually.
If you prefer not to have PSL3 automatically create the distribution line(s), input the following fields
manually.
Account Number - Chart of Accounts number that will be debited or credited on this
distribution line. Press the F2 Key or right click to choose the account number. If the
account number doesn't exist in PSL3, you can add it by pressing the F5 Key or selecting the
'Zoom' icon
located on the toolbar. This zooms into the Chart of Accounts Entry [glca]
screen in which you can add the account number immediately. Once saved, press the F1
Key, then 'F' option or select the 'Fetch' icon
[pcent] screen.
to fetch the account back to the P/C Entry
NOTE:
The Series, Location, Set and Free Field
Codes are brought over from the User Entry
[suuser] screen located in the 'Setup' module if
setup. Otherwise, press the F2 Key or right click
in these fields to make your selection.
1099 and Third Party Expense - 1099 Code associated with the distribution, if any. A 1099
is a tax form. Press the F2 Key or right click to choose the necessary code. The State
Worked field in the Vendor Information section must be input for the 9 field to be accessible.
Please note if the 9 field does not have a code displayed, the 3rd Party field will not be
available to select the Third Party Vendor.
Description - Explanation for this distribution line which can hold up to 30 alpha/numeric
characters.
Amount - Dollar or other currency amount for this distribution line; should default with the
remaining P/C amount when you input an amount in the Amount Advanced and/or
Accounted for Amount fields. Please note if you press the F2 Key or right click in the
Amount field, a calculator displays for your convenience.
© 2011 Cast & Crew Entertainment Services, LLC.
PETTY CASH
129
Helpful Hints:
Make sure to input all white colored fields as white fields are required before saving in PSL3.
To save this entry, select either 'Save' icon
located on the toolbar.
You can also press the F1 Key, then 'U' option to Update which saves and remains on screen
or press the F1 Key, then 'A' option to Accept which saves and clears the screen (most
common).
To add another distribution line, press Enter or Tab where the last line was entered.
To insert a distribution line in between already existing lines, place your cursor where you
want to add and press the F4 Key or select the 'Add' icon
. A new line is added beneath.
To delete a distribution line, place your cursor in the line you want to delete and press the F10
Key or select the 'Delete' icon
saving.
. A red strike-through line appears which is deleted upon
To search for an existing entry, press the F7 Key or select the 'Find' icon
when the
screen is clear. All records appear in which you can scroll through using the 'Arrow' icons
© 2011 Cast & Crew Entertainment Services, LLC.
130
PSL3 User Manual
(First, Prior, Next and Last)
Down' Keys until you find the entry needed.
or by pressing the 'Page Up' or 'Page
© 2011 Cast & Crew Entertainment Services, LLC.
PETTY CASH
Chapter 6.2
131
Post P/C Transactions/Edit List
Use the Post P/C Transactions/Edit List [pcpost] screen to review and post P/C transactions. You can
post transactions one at a time or all transactions at the same time if you prefer. It is recommended to
first generate an “Edit List”: a list of the transactions you’ve selected prior to posting. The purpose of the
Edit List is for you to review the P/C transactions for any errors as well as to make sure the transactions
listed are indeed the ones you want to post. You can print the Edit List or view it straight from your
screen. If you need to make any corrections, do so in the P/C Entry [pcent] screen. After accepting
the changes, generate another Edit List to verify the corrections. Once you’re satisfied with the
changes, move forward with the Posting Register.
Posting is the act of permanently transferring a transaction to the Bible Report/General Ledger
[bdbr].
Open:
To access the Post P/C Transactions/Edit List [pcpost] screen, click the 'P/C' module from
the menu tree (see following screen shot). Listed are the Edit List and Post Reports. You
will notice once you click either report, the other becomes selected as you can view both
reports from the same screen.
The Post P/C Transactions/Edit List [pcpost] screen is also located in the 'Report' module
under the 'Petty Cash' sub-folder.
You can also access this screen by typing the screen or acronym name in the blue prompt
bar located above the 'Setup' menu. Then, press Enter.
© 2011 Cast & Crew Entertainment Services, LLC.
132
PSL3 User Manual
The screen then appears.
© 2011 Cast & Crew Entertainment Services, LLC.
PETTY CASH
133
Post P/C Transactions Selection Criteria:
To select an entry, press the F2 Key or right click in any of these fields (Batch, Reference,
Vendor, Production, Company, Bank and/or Currency) to select the item(s) needed. You
can also choose multiple entries by holding down the Control Key and simultaneously using
the mouse to select. By making a selection, this isolates the report to only display items
based on the code(s) selected. If you wish to select all unposted P/C transactions, leave all
fields blank.
Report Type:
Defaults to Edit List to review your P/C entries and make any necessary modifications prior to
posting. To move forward with posting, select 'Posting Register' followed by either the Print,
Preview or Spreadsheet option; this will transfer the transaction(s) to the Bible Report [bdbr].
© 2011 Cast & Crew Entertainment Services, LLC.
134
PSL3 User Manual
Report Formats:
'Report Format', 'Report Sort' and 'Description Of' are all sorting options available for you to
select per your preference.
Print/Preview the Report: Located in the top right hand corner of the screen, you can choose the
following options to generate the report:
Print - Opens the Print Dialogue box and sends the report directly to the printer.
Preview - Generates a PDF format report and appears instantly on your screen. You are still
able to print from the PDF format.
Spreadsheet - Generates an Excel format report and appears instantly on your screen. You
are still able to print from the Excel format. Please note if you select this option, you are able
to have additional sorting options within Excel.
Once you select 'Posting Register' followed by either the Print, Preview or Spreadsheet option,
PSL3 displays the following message prompt:
If you select 'No', PSL3 asks "Would you like to reprint the register?". If you still select 'No',
you will receive a prompt notifying you the posting process is not done; therefore you are still
able to make any needed changes. If you select 'Yes', you will receive a prompt confirming the
selected P/C transactions are now marked posted.
© 2011 Cast & Crew Entertainment Services, LLC.
PETTY CASH
NOTE:
Please note if you need to make distribution
changes to posted items, this can be done in the
Posted Transaction/Item Editor [glfix] screen
located in the 'J/E' module depending on your User
ID and studio permissions. Please be advised P/C
Entry [pcent] distribution lines will not appear in
the Posted Transaction/Item Editor [glfix] if they
were automatically created by PSL3; therefore you
are not able to make changes to them in this
program. P/C distribution lines only appear in the
Posted Transaction/Item Editor [glfix] screen if
they were manually created. You can also email a
request to [email protected] if you need
a transaction unposted and include the Reference
Number(s). Please be advised depending on your
specific studio's guidelines, the Support
Department may need to obtain approval from your
Studio Finance Executive before proceeding.
NOTE:
Please note you are not able to re-print a Posting
Register once the transaction(s) are posted;
therefore, if you need a copy of the report sent to
you, please email a request to
[email protected] with the approximate
date and time that the report was ran. PSL3
houses all generated reports on a server.
© 2011 Cast & Crew Entertainment Services, LLC.
135
136
PSL3 User Manual
Chapter 6.3
P/C Crew Advances/Activity Report
The P/C Crew Advances/Activity Report [pcar] displays posted Petty Cash transaction amounts
broken down by Amounts Advanced, Accounted for Amounts (receipts) and the amount of the Advance
Outstanding (the difference between the Amounts Advanced and the Accounted for Amounts).
Open:
To access the P/C Crew Advances/Activity Report [pcar], click the 'P/C' module from the
menu tree (see following screen shot).
The P/C Crew Advances/Activity Report [pcar] is also located in the 'Report' folder under
the 'Petty Cash' sub-folder titled P/C Activity Report [pcar].
You can also access this report by typing the screen or acronym name in the blue prompt bar
located above the 'Setup' menu. Then, press Enter.
The screen then appears.
© 2011 Cast & Crew Entertainment Services, LLC.
PETTY CASH
137
To select criteria, press the F2 Key or right click in most fields to mak e your selection. You can also
simply type in the criteria in the allotted fields. If you wish to include all criteria information, leave
all fields blank.
Vendor Range:
Starting and Ending - Vendors to include in the report. To restrict the report to only include
information for a single vendor, input the same Vendor Number in both the Starting and
Ending fields. To select all vendors, leave both fields blank.
Transaction Selection:
Press the F2 Key or right click in any of these fields (Production, Company, Bank and
Currency) to choose the necessary codes if they don't already default. To choose multiple
codes for a particular field, press the F2 Key or right click in that field and hold down the
Control Key while simultaneously using your mouse to select. By making a selection, this
isolates the report to only display items based on the code(s) selected.
Date Range:
Starting and Ending - Transaction Effective Dates to include in the report as PSL3 is datedriven. To restrict the report to only include information for a single date, input the same date
© 2011 Cast & Crew Entertainment Services, LLC.
138
PSL3 User Manual
in both the Starting and Ending fields. To select all dates from inception to future, leave both
fields blank. Press the F2 Key or right click in either date field for the calendar selection to
appear.
Envelope Information:
Number - User-defined code or number identifying each P/C envelope.
P/C Cash Account Range:
Starting and Ending - Account numbers to include in the report. To restrict the report to only
include information for a single account number, input the same account in both the Starting
and Ending fields. To select all account numbers, leave both fields blank. Please note these
fields only become accessible when you select 'Include A/P Transactions' and/or 'Include J/E
Transactions' in the Report Selection area.
© 2011 Cast & Crew Entertainment Services, LLC.
PETTY CASH
139
Report Selection:
Show Detail - Check mark to include detail distribution data for each transaction.
Include P/C Transactions - Check mark to include transactions that were entered in P/C
Entry [pcent].
Include A/P Transactions - Check mark to include transactions that were entered in A/P
Entry [apte].
Include J/E Transactions - Check mark to include transactions that were entered in Journal
Entry [jete].
J/E Transactions:
J/E Number - User-defined code or number also known as the User Source Code to track
your company's different classifications of Journal Entries. Please note this field only
becomes available when you select 'Include J/E Transactions' in the Report Selection area.
Print/Preview the Report: Located in the top right hand corner of the screen, you can choose the
following options to generate the report:
Print - Opens the Print Dialogue box and sends the report directly to the printer.
Preview - Generates a PDF format report and appears instantly on your screen. You are still
able to print from the PDF format.
Spreadsheet - Generates an Excel format report and appears instantly on your screen. You
are still able to print from the Excel format. Please note if you select this option, you are able
to have additional sorting options within Excel.
© 2011 Cast & Crew Entertainment Services, LLC.
140
PSL3 User Manual
Chapter 6.4
P-Card View/Report
Cast & Crew Entertainment Services, in an effort to maximize efficiency with regard to a Production's
purchasing needs, offers its Purchasing Card (P-Card) service. Through this system, in conjunction with
Wells Fargo Bank, a Production is able to request Purchase Cards for members of the crew which can
be used anywhere major credit cards are accepted. Productions are then able to reconcile these
transactions in PSL3 using the P-Card View/Report [pcardlp] program. Within this program, you are
able to view transactions by specific Card Number and date selection, make coding assignments and
then export into either A/P Entry [apte] or an Excel Spreadsheet for further modification through the
Import an Excel File [xlint] screen.
NOTE:
Please note not all databases are setup with the
P-Card View/Report [pcardlp] program. Please
contact Cast & Crew's Finance Department at
[email protected] or by phone at (818)
848-6022 to be setup to use P-Cards in PSL3 for
your Production.
Also, for information on the administration of the
Wells Fargo Commercial Card Expense Reporting
(CCER) system including adjustments to credit
limits, please contact Cast & Crew's Finance
Department at [email protected] or by
phone at (818) 848-6022.
Open:
To access the P-Card View/Report [pcardlp], click the 'P/C' module from the menu tree (see
following screen shot).
You can also access this screen by typing the screen or acronym name in the blue prompt
bar located above the 'Setup' menu. Then, press Enter.
© 2011 Cast & Crew Entertainment Services, LLC.
PETTY CASH
The screen then appears.
Card Information:
© 2011 Cast & Crew Entertainment Services, LLC.
141
142
PSL3 User Manual
Card Number - Valid Card Numbers with purchases made are listed here. Press the F2 Key
or right click to select a Card Number. You can also choose multiple Card Numbers by
holding down the Control Key and simultaneously using the mouse to select. To select all
Card Numbers, leave this field blank.
NOTE:
Please note Card Numbers are usually not listed
right away after making purchases as it takes a
couple of days for P-Card transactions to post to
the bank and appear in this screen.
Transaction Date Selection:
Start Date and End Date - Dates to include for viewing the P-Card transactions. Press the
F2 Key or right click in either date field for the calendar selection to appear. To restrict the
screen to only include information for a single date, input the same date in both the Start
Date and End Date fields. To select all dates from inception to future, leave both fields blank.
Include:
New - Select to only include data which has not previously been exported by P-Card View/
Report [pcardlp] into either the A/P Entry [apte] or Import an Excel File [xlint].
Exported - Select to only include data which has previously been exported by P-Card View/
Report [pcardlp] into either the A/P Entry [apte] or Import an Excel File [xlint].
Both - Select to include both New and previously Exported data.
© 2011 Cast & Crew Entertainment Services, LLC.
PETTY CASH
143
Sort By:
'Transaction Date', 'New on top', 'Exported on top' are all sorting options available for you to
select per your preference.
Amounts:
Total Billing Amount ($US) - Displays the total dollar amount billed in U.S. Currency for the
selected Card Number(s). Please note you can not access this field.
Total Marked for Export - Displays the total dollar amount marked for export for the selected
Card Number(s). Please note you can not access this field.
Start to populate data:
To proceed with the exporting process, press the F1 Key, then 'S' option or select 'Start'
located in the top right hand corner of the screen. Once you select 'Start', the transaction
details at the bottom of the screen are displayed. You are then able to mark a transaction for
export and select the account number and Envelope Number (if any).
P-Card Transaction Details:
Export - Check mark to indicate that a given line item should be part of the A/P Entry [apte]
or Import an Excel File [xlint] export process.
Account Number - Chart of Accounts number associated with a given transaction. Press the
F2 Key or right click to choose the account number. If the account number doesn't exist in
PSL3, you can add it by pressing the F5 Key or selecting the 'Zoom' icon
located on the
toolbar. This zooms into the Chart of Accounts Entry [glca] screen in which you can add
the account number immediately. Once saved, press the F1 Key, then 'F' option or select the
'Fetch' icon
to fetch the account back to the P-Card View/Report [pcardlp] screen.
Envelope Number - User-defined code or number associated with a given transaction to
correspond with receipts submitted to the accounting office. This field can hold up to eight
alpha/numeric characters.
ST (Status) - Exported status of the transaction. Status types are as follows:
N (New) - The transaction status is New and has not been previously exported in PCard View/Report [pcardlp]
E (Exported) - The P/O transaction status is Exported and has been previously
exported in P-Card View/Report [pcardlp].
PSL3 updates the status automatically when exporting to either A/P Entry [apte] or
Import an Excel File [xlint]. Please note you can not access this field.
© 2011 Cast & Crew Entertainment Services, LLC.
144
PSL3 User Manual
Transaction Date - Displays the Transaction Date for a given line item. Please note you
can not access this field.
Card Number - Displays the Card Number for a given line item. Please note you can not
access this field.
Merchant Name - Displays the Merchant Name for a given line item. Please note you can
not access this field.
Billing Amount ($US) - Displays the transaction dollar amount billed in U.S. Currency.
Please note credit amounts will appear in parentheses; for example (100.00). Please note
you can not access this field.
Helpful Hints:
To save this entry, select either 'Save' icon
located on the toolbar.
You can also press the F1 Key, then 'U' option to Update which saves and remains on screen
or press the F1 Key, then 'A' option to Accept which saves and clears the screen (most
common).
Print/Preview the Report: Located in the top right hand corner of the screen, you can choose the
following options to export and generate the report:
Print - Opens the Print Dialogue box and sends the report directly to the printer.
Preview - Generates a PDF format report and appears instantly on your screen. You are still
able to print from the PDF format.
Spreadsheet - Generates an Excel format report and appears instantly on your screen. You
are still able to print from the Excel format. Please note if you select this option, you are able
to have additional sorting options within Excel.
A/P Export - Allows you to export the selected transactions directly to A/P Entry [apte] in
which you can post thereafter. Please note the selected transactions must have an account
number input before exporting to A/P Entry [apte] or else you will receive the following warning
message:
© 2011 Cast & Crew Entertainment Services, LLC.
PETTY CASH
145
Once all account numbers have been input, the Export to A/P screen appears in which you can
apply coding to the transaction. Input all white required fields and select the 'OK' option located
in the top right hand corner of the screen. An A/P transaction is created and the A/P Entry
[apte] Reference Number displays on the screen. Please note the purpose of the Export to A/P
screen is to apply default codes to the transactions contained within a particular P-Card export.
Each individual line item may be recoded with its one attributes once the export reaches the A/
P Entry [apte] screen as the transaction exports with an unposted status. For field details in
the Export to A/P screen, please refer to A/P Entry.
XLINT Export - Allows you to export the selected transactions directly into an Excel
Spreadsheet specifically formatted to be re-imported back into PSL3 through the Import an
Excel File [xlint] screen. The data which can be coded in the Excel Spreadsheet is as
follows:
Account Number
© 2011 Cast & Crew Entertainment Services, LLC.
146
PSL3 User Manual
Series Code
Location Code
Set Code
1099 Code
Insurance Code
Free Field 1-4
Distribution Description
Amount *
Envelope Number
Transaction Date *
Card Number *
Merchant Name *
* Please note these items (marked with an '*' asterisk) are populated in the Excel Spreadsheet
by P-Card View/Report [pcardlp] and it is recommended that they are not changed. For
details and step by step directions on the Import an Excel File [xlint] process into the
Transaction Type of your choice, please refer to Import an Excel File.
© 2011 Cast & Crew Entertainment Services, LLC.
JOURNAL ENTRY
Section
VII
JOURNAL ENTRY
Section 7
JOURNAL ENTRY
This section will address the following programs:
Journal Entry
Post J/E Transactions/Edit List
Posted Transaction/Item Editor
G/L Transaction Changes Report
Import an Excel File
© 2011 Cast & Crew Entertainment Services, LLC.
149
150
PSL3 User Manual
Chapter 7.1
Journal Entry
A Journal Entry is the recording of financial data in the form of a debit and credit transaction. Use the
Journal Entry [jete] program to record J/E transactions such as depositing cash in checking accounts,
replenishing Petty Cash, correcting account coding and amounts as well as recording bank charges and
interest payments, etc.
Open:
To access the Journal Entry [jete] screen, click on Tab #3 or press 'ALT' and the number '3'
Key simultaneously to open the screen.
Journal Entry [jete] can also be accessed in the 'J/E' module from the menu tree (see
following screen shot).
You can also access this screen by typing the screen or acronym name in the blue prompt
bar located above the 'Setup' menu. Then, press Enter.
The screen then appears.
© 2011 Cast & Crew Entertainment Services, LLC.
JOURNAL ENTRY
151
Reference Information:
Reference Number - System-assigned number that is also referred to as transaction
number. To generate the next sequential Reference Number, press the F4 Key or select the
'Add' icon
located on the toolbar. You can also right click outside a field (in which the
'Add' option appears) to add the next record.
Effective Date - Date of the transaction that is recorded on the Bible Report [bdbr] and
appears as an Actual Cost on the Estimated Final Cost Report [efcrpt]; should default with
today's date after generating the Reference Number. You can always change it by typing over
the defaulted date or by right clicking in that field for the calendar selection to appear. Please
note you can not input a date that is in a previously closed period.
© 2011 Cast & Crew Entertainment Services, LLC.
152
PSL3 User Manual
NOTE:
Please email a request to support@castandcrew.
com if you need a transaction's Effective Date
changed and include the Reference Number(s).
Please be advised depending on your specific
studio's guidelines, the Support Department may
need to obtain approval from your Studio Finance
Executive before proceeding.
Description - Explanation of this Journal transaction as a whole which can hold up to 30
alpha/numeric characters. This Reference Description defaults in the distribution lines. If this
field is left blank, PSL3 defaults the distribution description with the description of the first
account number selected.
Status - Overall status of the transaction. This field is marked with a 'U' for an Unposted entry
until you post it in the Post J/E Transactions [jepost] screen. As long as the transaction is
marked with an unposted status, you are able to modify it. Once posted, it is marked with a
'P' for Posted. PSL3 updates the status automatically.
© 2011 Cast & Crew Entertainment Services, LLC.
JOURNAL ENTRY
153
NOTE:
Please email a request to support@castandcrew.
com if you need a transaction unposted and
include the Reference Number(s). Please be
advised depending on your specific studio's
guidelines, the Support Department may need to
obtain approval from your Studio Finance
Executive before proceeding.
Batch Information:
Codes that are attached to the transaction. These fields are pulled from the User Entry
[suuser] screen located in the 'Setup' module (if setup beforehand). To change the defaulted
codes, press the F2 Key or right click in any of these fields (Batch, Production, Company
and Currency) and make your selection.
Journal Information:
J/E Number - User-defined code or number also known as the User Source Code to track
your company's different classifications of Journal Entries. This field can hold up to six alpha/
numeric characters.
Total Debits - Total amount of the debit entries calculated in the distribution lines. Please
note you are not able to access this field.
Total Credits - Total amount of the credit entries calculated in the distribution lines. Please
note you are not able to access this field.
Please note when entering a new Journal Entry, PSL3 tallies the debit and credit entries you
make in the distribution lines. Entering a positive amount in the distribution line Amount field
increases total debits. Entering a negative amount (input a minus sign before the number) in
the distribution line Amount field increases the total credits. Please be advised debits and
credits must equal before you can save the transaction.
Distribution Lines:
PSL3 automatically creates the debit and/or credit offset distribution line(s) once you input the account
number on the second distribution line.
Account Number - Chart of Accounts number that will be debited or credited on this
distribution line. Press the F2 Key or right click to choose the account number. If the
account number doesn't exist in PSL3, you can add it by pressing the F5 Key or selecting the
'Zoom' icon
located on the toolbar. This zooms into the Chart of Accounts Entry [glca]
screen in which you can add the account number immediately. Once saved, press the F1
© 2011 Cast & Crew Entertainment Services, LLC.
154
PSL3 User Manual
Key, then 'F' option or select the 'Fetch' icon
Entry [jete] screen.
to fetch the account back to the Journal
NOTE:
The Series, Location, Set and Free Field
Codes are brought over from the User Entry
[suuser] screen located in the 'Setup' module if
setup. Otherwise, press the F2 Key or right click
in these fields to make your selection.
Description - Explanation for this distribution line which can hold up to 30 alpha/numeric
characters.
Amount - Dollar or other currency amount for this distribution line. Input the journal debit or
credit amount. If you are entering a negative amount, input the minus sign before the number.
Please note if you press the F2 Key or right click in the Amount field, a calculator displays
for your convenience.
Journal Entry Was-Is Distribution Changes:
Once a Journal has been posted, you are able to make distribution changes directly from the
Journal Entry [jete] screen (in addition to the Posted Transaction/Item Editor [glfix]
depending on your User ID access level). This includes Account, Series, Location, Sets,
Insurance, Free Field(s) and Description changes. This excludes Amount changes. To make
changes, simply input the Reference Number of the Journal in the Journal Entry [jete] screen,
followed by the Enter or F7 Key or select the 'Find' icon
located on the toolbar; the
transaction appears in which you can proceed with the necessary modifications from there.
Please note your are not able to add or delete lines to a posted Journal transaction while in the
Journal Entry [jete] screen.
© 2011 Cast & Crew Entertainment Services, LLC.
JOURNAL ENTRY
155
After you make the necessary modification(s), make sure to save. PSL3 creates a new,
unposted Journal Entry Reference Number reflecting the new distribution change(s) which is
referred to as a Journal Entry WAS-IS as the new transaction displays the WAS (what the
original transaction data was before being changed in the Journal Entry [jete] screen) and IS
(what the transaction data is now after the change(s)), detailing the original distribution line
values as well as what they reflect now. PSL3 automatically updates the Reference Description
of this new, unposted Journal transaction to 'WAS-IS FROM REF #' (# = original Journal Entry
Reference Number). Please note you still have to post the new Journal Entry WAS-IS
transaction in the Post J/E Transactions [jepost] screen.
Helpful Hints:
Make sure to input all white colored fields as white fields are required before saving in PSL3.
To save this entry, select either 'Save' icon
located on the toolbar.
You can also press the F1 Key, then 'U' option to Update which saves and remains on screen
or press the F1 Key, then 'A' option to Accept which saves and clears the screen (most
common).
To add another distribution line, press Enter or Tab where the last line was entered.
To insert a distribution line in between already existing lines, place your cursor where you
want to add and press the F4 Key or select the 'Add' icon
. A new line is added beneath.
To delete a distribution line, place your cursor in the line you want to delete and press the F10
Key or select the 'Delete' icon
saving.
. A red strike-through line appears which is deleted upon
To search for an existing entry, press the F7 Key or select the 'Find' icon
when the
screen is clear. All records appear in which you can scroll through using the 'Arrow' icons
(First, Prior, Next and Last)
Down' Keys until you find the entry needed.
© 2011 Cast & Crew Entertainment Services, LLC.
or by pressing the 'Page Up' or 'Page
156
PSL3 User Manual
Chapter 7.2
Post J/E Transactions/Edit List
Use the Post J/E Transactions/Edit List [jepost] screen to review and post Journal Entry transactions.
You can post transactions one at a time or all transactions at the same time if you prefer. It is
recommended to first generate an “Edit List”: a list of the transactions you’ve selected prior to posting.
The purpose of the Edit List is for you to review the Journal transactions for any errors as well as to
make sure the transactions listed are indeed the ones you want to post. You can print the Edit List or
view it straight from your screen. If you need to make any corrections, do so in the Journal Entry [jete]
screen. After accepting the changes, generate another Edit List to verify the corrections. Once you’re
satisfied with the changes, move forward with the Posting Register.
Posting is the act of permanently transferring a transaction to the Bible Report/General Ledger
[bdbr].
Open:
To access the Post J/E Transactions/Edit List [jepost] screen, click the 'J/E' module from
the menu tree (see following screen shot). Listed are the Edit List and Post Reports. You
will notice once you click either report, the other also becomes selected as you can view both
reports from the same screen.
The Post J/E Transactions/Edit List [jepost] screen is also located in the 'Report' module
under the 'Journal Entry' sub-folder.
You can also access this screen by typing the screen or acronym name in the blue prompt
bar located above the 'Setup' menu. Then, press Enter.
© 2011 Cast & Crew Entertainment Services, LLC.
JOURNAL ENTRY
157
The screen then appears.
Post J/E Transactions Selection Criteria:
To select an entry, press the F2 Key or right click in any of these fields (Batch, Reference,
Production, Company, and/or Currency) to select the item(s) needed. You can also
choose multiple entries by holding down the Control Key and simultaneously using the mouse
to select. By making a selection, this isolates the report to only display items based on the
code(s) selected. If you wish to select all unposted Journal Entry transactions, leave all fields
blank.
Report Type:
Defaults to Edit List to review your Journal Entries and make any necessary modifications
prior to posting. To move forward with posting, select 'Posting Register' followed by either the
Print, Preview or Spreadsheet option; this will transfer the transaction(s) to the Bible Report
[bdbr].
Report Formats:
© 2011 Cast & Crew Entertainment Services, LLC.
158
PSL3 User Manual
'Report Format', 'Report Sort' and 'Description Of' are all sorting options available for you to
select per your preference.
Print/Preview the Report: Located in the top right hand corner of the screen, you can choose the
following options to generate the report:
Print - Opens the Print Dialogue box and sends the report directly to the printer.
Preview - Generates a PDF format report and appears instantly on your screen. You are still
able to print from the PDF format.
Spreadsheet - Generates an Excel format report and appears instantly on your screen. You
are still able to print from the Excel format. Please note if you select this option, you are able
to have additional sorting options within Excel.
© 2011 Cast & Crew Entertainment Services, LLC.
JOURNAL ENTRY
159
Once you select 'Posting Register' followed by either the Print, Preview or Spreadsheet option,
PSL3 displays the following message prompt:
If you select 'No', PSL3 asks "Would you like to reprint the register?". If you still select 'No',
you will receive a prompt notifying you the posting process is not done; therefore you are still
able to make any needed changes. If you select 'Yes', you will receive a prompt confirming the
selected Journal Entry transactions are now marked posted.
NOTE:
Please note if you need to make distribution
changes to posted items, this can be done in the
Posted Transaction/Item Editor [glfix] screen
located in the 'J/E' module depending on your User
ID and studio permissions. You can also email a
request to [email protected] if you need
a transaction unposted and include the Reference
Number(s). Please be advised depending on your
specific studio's guidelines, the Support
Department may need to obtain approval from your
Studio Finance Executive before proceeding.
© 2011 Cast & Crew Entertainment Services, LLC.
160
PSL3 User Manual
NOTE:
Please note you are not able to re-print a Posting
Register once the transaction(s) are posted;
therefore, if you need a copy of the report sent to
you, please email a request to
[email protected] with the approximate
date and time that the report was ran. PSL3
houses all generated reports on a server.
© 2011 Cast & Crew Entertainment Services, LLC.
JOURNAL ENTRY
Chapter 7.3
161
Posted Transaction/Item Editor
The Posted Transaction/Item Editor [glfix] program allows you to change distribution codes on
transactions that have a posted or paid status. Depending on your User ID access and studio
permissions, the following distribution fields can be changed in this program: Account, Series,
Location, Set, 1099, Insurance, Free Field(s), Description, Amount and 3rd Party.
NOTE:
Please email a request to [email protected] if
you do not currently have access to make distribution
changes in the Posted Transaction/Item Editor [glfix]
screen. You can request 'Full Access' (make changes
to all distribution fields) or 'Limited Access' (make
changes to only certain fields). Please be advised
depending on your specific studio's guidelines, the
Support Department may need to obtain approval from
your Studio Finance Executive before proceeding. You
will know if you have access or not when you try to
make a change in one of the distribution fields as a
warning message will display if you do not have access.
For example, if you tried to change the account number
and do not have access, the following warning message
automatically appears on the screen:
Open:
To access the Posted Transaction/Item Editor [glfix] screen, click the 'J/E' module from the
menu tree (see following screen shot).
You can also access this screen by typing the screen or acronym name in the blue prompt
bar located above the 'Setup' menu. Then, press Enter.
© 2011 Cast & Crew Entertainment Services, LLC.
162
PSL3 User Manual
The screen then appears.
Reference Information:
© 2011 Cast & Crew Entertainment Services, LLC.
JOURNAL ENTRY
163
To begin making distribution changes, input the Reference Number of the original transaction
that you need to change followed by the Enter or F7 Key or select the 'Find' icon
located on the toolbar; the transaction appears in which you can proceed with the necessary
modifications. Please note the only fields you are able to modify in the Reference/Header
section are the Reference Description and State Worked fields. All other fields in the
Reference/Header section are not accessible.
Distribution Lines:
After inputting the Reference Number in the Reference/Header section, the distribution lines of
the specified transaction default. To change the defaulted codes of the original transaction,
press the F2 Key or right click in any of these fields (Account, Series, Location, Set, 1099,
Insurance, Free Field(s), Description, Amount and 3rd Party). Please note if you press
the F2 Key or right click in the Amount field, a calculator displays for your convenience.
NOTE:
Please note P/C Entry [pcent] distribution lines
will not appear in the Posted Transaction/Item
Editor [glfix] if they were automatically created by
PSL3; therefore you are not able to make changes
to them in this program. P/C distribution lines
only appear in this screen if they were manually
created. An alternative to make changes to
automatically created P/C distribution lines is to
do so in the Journal Entry [jete] screen.
© 2011 Cast & Crew Entertainment Services, LLC.
164
PSL3 User Manual
WARNING:
Please be advised PSL3 does not allow you to
save the change(s) unless the original debit and/or
credit amount remains the same as the original
transaction. Also, please be advised there is not
an Audit Trail when using the Posted
Transaction/Item Editor [glfix]
Helpful Hints:
Make sure to input all white colored fields as white fields are required before saving in PSL3.
To save this transaction, select either 'Save' icon
located on the toolbar.
You can also press the F1 Key, then 'U' option to Update which saves and remains on screen
or press the F1 Key, then 'A' option to Accept which saves and clears the screen (most
common).
To add another distribution line, press Enter or Tab where the last line was entered.
To insert a distribution line in between already existing lines, place your cursor where you
want to add and press the F4 Key or select the 'Add' icon
. A new line is added beneath.
To delete a distribution line, place your cursor in the line you want to delete and press the F10
Key or select the 'Delete' icon
saving.
. A red strike-through line appears which is deleted upon
To search for an existing entry, press the F7 Key or select the 'Find' icon
when the
screen is clear. All records appear in which you can scroll through using the 'Arrow' icons
(First, Prior, Next and Last)
Down' Keys until you find the entry needed.
or by pressing the 'Page Up' or 'Page
© 2011 Cast & Crew Entertainment Services, LLC.
JOURNAL ENTRY
Chapter 7.4
165
G/L Transaction Changes Report
The G/L Transaction Changes Report [glfixp] reports on any distribution changes made in the Posted
Transaction/Item Editor [glfix] screen. The G/L Transaction Changes Report [glfixp] is also referred
to as the G/L WAS-IS Report as the report displays the WAS (what the original transaction data was
before being changed in the Posted Transaction/Item Editor [glfix] screen) and IS (what the
transaction data is now after the change(s)), detailing the original distribution line values as well as what
they reflect now.
Open:
To access the G/L Transaction Changes Report [glfixp], click the 'J/E' module from the
menu tree (see following screen shot).
You can also access this screen by typing the screen or acronym name in the blue prompt
bar located above the 'Setup' menu. Then, press Enter.
The screen then appears.
© 2011 Cast & Crew Entertainment Services, LLC.
166
PSL3 User Manual
To select criteria, press the F2 Key or right click in most fields to mak e your selection. You can also
simply type in the criteria in the allotted fields. If you wish to include all criteria information, leave
all fields blank.
From and To:
Effective Date - Transaction Effective Dates to include in the report as PSL3 is date-driven.
To restrict the report to only include information for a single date, input the same Effective
Date in both the From and To fields. To select all dates from inception to future, leave both
fields blank. Press the F2 Key or right click in either date field for the calendar selection to
appear.
© 2011 Cast & Crew Entertainment Services, LLC.
JOURNAL ENTRY
167
Account Number - Account numbers to include in the report. To restrict the report to only
include information for a single account number, input the same account in both the From
and To fields. To select all account numbers, leave both fields blank.
Reference Number - Reference Numbers to include in the report. To restrict the report to
only include information for a single Reference Number, input the same account in both the
From and To fields. To select all Reference Numbers, leave both fields blank.
Selection Criteria:
Press the F2 Key or right click in any of these fields (User, Company, Source, Production,
Series, Location, Set, 1099, Insurance, Free Field(s), J/E Number, Currency, 3rd Party)
to choose the necessary codes if they don't already default. Some fields allow you to choose
multiple codes for a particular field in which you can press the F2 Key or right click in that
field and hold down the Control Key while simultaneously using your mouse to select. By
making a selection, this isolates the report to only display items based on the code(s)
selected.
Print/Preview the Report: Choose from the following options to generate the report:
Print - Press the F1 Key, then 'R' option or select the 'Print' icon
Dialogue box and send the report directly to the printer.
to open the Print
Preview - Select the 'Preview' icon
to generate a PDF format report which appears
instantly on your screen. You are still able to print from the PDF format.
© 2011 Cast & Crew Entertainment Services, LLC.
168
PSL3 User Manual
Chapter 7.5
Import an Excel File
The Import an Excel File [xlint] program allows you to import data from an Excel Spreadsheet into
PSL3 as a transaction. All Transaction Types (P/O, A/P, P/C, J/E and V/A) can be imported in this
screen except Payroll transactions. The transaction loads in to PSL3 with an unposted status; therefore
you are able to make any necessary modifications before posting.
NOTE:
Please note prior to the file import, please see the following Excel template as to how to format and
enter in data. Please note the PSL3 Excel template contains a total of twelve columns (A-L)
including Free Fields 1 through 4. If your database is not utilizing all four Free Fields and/or any
additional columns, please leave the fields blank. PSL3 automatically excludes the unused
columns upon importing.
Please email a request to [email protected] if you would like the PSL3 Excel template
emailed to you.
Open:
To access the Import an Excel File [xlint] screen, click the 'J/E' module from the menu tree
(see following screen shot).
You can also access this screen by typing the screen or acronym name in the blue prompt
bar located above the 'Setup' menu. Then, press Enter.
© 2011 Cast & Crew Entertainment Services, LLC.
JOURNAL ENTRY
The screen then appears.
© 2011 Cast & Crew Entertainment Services, LLC.
169
170
PSL3 User Manual
Once the data is entered in to the Excel Spreadsheet correctly, save the file as a Text/Tab delimited (.
txt) format to your desired directory as shown on the following screen shot. Please note you can also
save as a Comma delimited (.csv) format if the Text/Tab delimited (.txt) option does not import properly.
© 2011 Cast & Crew Entertainment Services, LLC.
JOURNAL ENTRY
171
Interface File:
Select File - Choose the Text/Tab delimited (.txt) or Comma delimited (.csv) file you wish to
load. Please note that files are loaded one at a time.
Transaction Type:
Select the type of transaction you wish to load which are as follows: J/E, P/O, A/P, P/C and
VA. Please note this program does not import Payroll transactions.
Default Distribution Codes:
Press the F2 Key or right click in any of these fields (Batch, Production, Company, Bank,
Currency, Series, Location, Set, Insurance and Free Field(s)) to choose the necessary
codes if they don't already default. Please note if you leave the Series, Location or Set
columns blank on the Excel Spreadsheet, PSL3 loads the file with the codes you input here
in the ‘Default Distribution Codes’ section. The other fields (Vendor Number, State Worked
, P/O Number, Invoice Number and Envelope Number) only become accessible
depending on the Transaction Type selected.
*Make sure to input all white colored fields as white fields are required before proceeding in
PSL3.
Report Type:
Defaults to Edit List to review the file import prior to loading. To move forward with loading,
select 'Loading Register' followed by either the Print or Preview option.
Print/Preview the Report: Located in the top right hand corner of the screen, you can choose the
following options to generate the report:
Print - Opens the Print Dialogue box and sends the report directly to the printer.
Preview - Generates a PDF format report and appears instantly on your screen. You are still
able to print from the PDF format.
© 2011 Cast & Crew Entertainment Services, LLC.
172
PSL3 User Manual
Once you select 'Loading Register' followed by either the Print or Preview option, PSL3 displays
the following message prompt confirming the file is now interfaced:
Once imported, the newly created Reference Number is listed on the Excel Interface Register.
The new transaction is also created with an unposted status in which you can still modify
before posting.
Upon selecting 'Loading Register', you may also receive the following warning message if your
Excel Spreadsheet file contained errors:
If you received this message, the importing process is not completed until the errors are
corrected. The main reason you would receive this error message is because the Excel
Spreadsheet file is not formatted correctly; please refer to the PSL3 Excel template.
NOTE:
Please email the Excel Spreadsheet file to
[email protected] should you encounter
any problems with the import process. The
Support Department is happy to assist in
troubleshooting and/or loading the file for you upon
request.
© 2011 Cast & Crew Entertainment Services, LLC.
PAYROLL
Section
VIII
PAYROLL
Section 8
175
PAYROLL
Cast & Crew's Payroll Coordinator receives the time cards that have been submitted by the Accountant
and enters this data into the Payroll System. After Payroll is calculated, the Payroll Coordinator sends
the Accountant an email notification with the Payroll Edit file attachment. The Edit file displays how
Payroll will be processed based on the data entered.
The Accountant reviews the Payroll Edit file and contacts the Payroll Coordinator if there are any coding
modifications (hours, series, location, set, etc.) needed. If so, the Payroll Coordinator makes any
requested changes in which the Accountant then has the option to approve the changes or receive
another Edit file for review.
When the Payroll Edit file is finalized, Payroll checks are cut and the Payroll Interface file is created and
sent to PSL3. The Accountant is notified by an email notification that includes the Payroll invoice
number.
This section will address the following programs:
Load/Interface C&C Payroll Invoice
Payroll Entry
Post P/R Transactions/Edit List
Load Payroll/Other Company
Print Payroll Checks
Payroll History Report
Additional Payroll Screens/Reports
© 2011 Cast & Crew Entertainment Services, LLC.
176
PSL3 User Manual
Chapter 8.1
Load/Interface C&C Payroll Invoice
When the Payroll Edit file is finalized, Payroll checks are cut and the Payroll Interface file is created and
sent to the PSL3 server that houses the database. The Accountant is notified by email that the Payroll
Interface file is ready to load into PSL3. Upon interfacing, should your Payroll Edit List encounter any
errors (e.g., illegal/invalid account, series, location, set, etc.), this usually means that the Payroll
System has codes that differ and/or do not exist in PSL3. To correct this, add the necessary codes in
PSL3 then review the Edit List again or load the file with the errors and make the corrections in the
Payroll Entry [prent] screen. You can also contact your Payroll Coordinator to make any revisions
before interfacing into PSL3.
Open:
To access the Load/Interface C&C Payroll Invoice [printr] screen, click the 'P/R' module
from the menu tree (see following screen shot).
You can also access this screen by typing the screen or acronym name in the blue prompt
bar located above the 'Setup' menu. Then, press Enter.
The screen then appears.
© 2011 Cast & Crew Entertainment Services, LLC.
PAYROLL
177
Invoice Information:
Invoice - Select the Payroll invoice you wish to load by pressing the F2 Key or by right
clicking in this field to choose from the list. All unimported invoices that have not been
interfaced display on the pick list. You can also simply type in the invoice number and press
Enter. Please note invoice numbers are loaded one at a time.
Interface File Information:
File - This field automatically populates once you input an invoice number. The invoice
number displays at the end of the file name and looks something like this: /usr/pa/inv/
yourdatabasename/123456. Please note you are not able to access this field.
Load Data:
Load only the employee information, without the payroll data - Check mark this box
only if you want to load new employee records. Otherwise, to load both new employee
records and the Payroll invoice data into PSL3, leave this box unchecked which is the default.
© 2011 Cast & Crew Entertainment Services, LLC.
178
PSL3 User Manual
Default Distribution Codes:
Press the F2 Key or right click in any of these fields (Batch, Production, Company, Bank,
Currency, Series, Location, Set, Insurance and Free Field(s)) to choose the necessary
codes if they don't already default. Inputting the default codes here does not change the
existing codes already on the Payroll Interface file; it simply takes the place of any errors (e.
g., illegal/invalid account, series, location, set, etc.) that have been encountered upon loading.
Please note whichever Batch Number you input here is carried through to Payroll Entry
[prent] in addition to A/P Entry [apte] if your database is setup for the Automatic A/P option.
You can also create a new Batch Number with up to six alpha/numeric characters (e.g.,
PAYROLL) to keep track of all Payroll transactions.
*Make sure to input all white colored fields as white fields are required before proceeding in
PSL3.
Report Type:
Defaults to 'Edit List' to review the selected invoice file and check for any errors (e.g., illegal/
invalid account, series, location, set, etc.) prior to loading. If you have encountered any
errors, they are listed on the Edit List and this usually means that the Payroll System has
codes that differ and/or do not exist in PSL3. To correct this, add the necessary codes in
PSL3 then review the Edit List again or load the file with the errors and make the corrections
in the Payroll Entry [prent] screen. You can also contact your Payroll Coordinator to make
any revisions before interfacing into PSL3. To move forward with loading, select 'Loading
Register' followed by either the Print or Preview option.
Print/Preview the Report: Located in the top right hand corner of the screen, you can choose the
following options to generate the report:
Print - Opens the Print Dialogue box and sends the report directly to the printer.
Preview - Generates a PDF format report and appears instantly on your screen. You are still
able to print from the PDF format.
© 2011 Cast & Crew Entertainment Services, LLC.
PAYROLL
179
Once you select 'Loading Register' followed by either the Print or Preview option, PSL3 displays
the following message prompt:
If you select 'No', PSL3 asks "Would you like to reprint the register?". If you still select 'No', the
loading process is not done. If you select 'Yes', you will receive a secondary prompt confirming
the selected Payroll invoice is now loaded in which PSL3 will provide you the Payroll Entry
[prent] Reference Number for this invoice. Upon selecting 'Yes', you may also receive the
following warning message if your Payroll Interface file contained errors:
If you select 'No', you will receive a prompt notifying you the loading process is not done. If you
select 'Yes', you will then receive the prompt confirming the selected Payroll invoice is now
loaded in which PSL3 will provide you the Payroll Entry [prent] Reference Number for this
invoice. With this new Reference Number, you can still make any needed changes in Payroll
Entry [prent] before posting as it is created with an unposted status.
© 2011 Cast & Crew Entertainment Services, LLC.
180
PSL3 User Manual
Chapter 8.2
Payroll Entry
Payroll Entry [prent] allows you to modify the Payroll data that was loaded into your database through
the Load/Interface C&C Payroll Invoice [printr] screen. Each Payroll transaction is equivalent to a
single Payroll invoice which may include many employees, displaying a number of accounts such as
Labor, Fringe, FICA, etc. In Payroll Entry [prent], you can change almost any distribution coding (e.g.,
account, series, location, set, etc.) on the Payroll Interface file. You can also add a line to split
amounts for each employee as well as delete a line. However, you can not change the invoice total or
the total amount for each employee. The Payroll Entry [prent] screen is not used to enter new Payroll
transactions; only loaded Payroll invoices. Please contact your Cast & Crew Payroll Coordinator to
issue a new or revised Payroll invoice if needed.
If no changes need to be made on the Payroll Interface file, the Payroll Entry [prent] screen can be
skipped and you can proceed to post the invoice in the Post P/R Transactions [prpost] screen.
Open:
To access the Payroll Entry [prent] screen, click on Tab #6 or press 'ALT' and the number '6'
Key simultaneously to open the screen.
Payroll Entry [prent] can also be accessed in the 'P/R' module from the menu tree (see
following screen shot).
You can also access this screen by typing the screen or acronym name in the blue prompt
bar located above the 'Setup' menu. Then, press Enter.
© 2011 Cast & Crew Entertainment Services, LLC.
PAYROLL
The screen then appears.
© 2011 Cast & Crew Entertainment Services, LLC.
181
182
PSL3 User Manual
Reference Information:
Reference Number - System-assigned number that is also referred to as transaction
number. This automated number is generated after loading the Payroll Interface file in the
Load/Interface C&C Payroll Invoice [printr] screen. To bring up the Payroll transaction,
type in the Reference Number previously assigned and press Enter, the F7 Key or select the
'Find' icon
located on the toolbar; the transaction appears in which you can proceed
with the necessary modifications. If you forgot to write down the Reference Number assigned,
you can also bring up the Payroll transaction by pressing the F2 Key or right clicking in the
Invoice Number field to choose from the list.
Effective Date - Date of the transaction that is recorded on the Bible Report [bdbr] and
appears as an Actual Cost on the Estimated Final Cost Report [efcrpt]; should default with
the date the Payroll Interface file was loaded into PSL3. You can always change the Effective
Date by typing over the defaulted date or by right clicking in that field for the calendar
selection to appear. Please note you can not input a date that is in a previously closed
period.
© 2011 Cast & Crew Entertainment Services, LLC.
PAYROLL
183
NOTE:
Please email a request to support@castandcrew.
com if you need a transaction's Effective Date
changed and include the Reference Number(s).
Please be advised depending on your specific
studio's guidelines, the Support Department may
need to obtain approval from your Studio Finance
Executive before proceeding.
Description - Week-ending date from the Payroll invoice which can hold up to 30 alpha/
numeric characters. If this invoice was loaded through the Load/Interface C&C Payroll
Invoice [printr] screen, this Reference Description is normally not changed.
Status - Overall status of the transaction. This field is marked with a 'U' for an Unposted entry
until you post it in the Post P/R Transactions [prpost] screen. As long as the transaction is
marked with an unposted status, you are able to modify it. Once posted, it is marked with a
'P' for Posted. PSL3 updates the status automatically.
© 2011 Cast & Crew Entertainment Services, LLC.
184
PSL3 User Manual
NOTE:
Please email a request to support@castandcrew.
com if you need a transaction unposted and
include the Reference Number(s). Please be
advised depending on your specific studio's
guidelines, the Support Department may need to
obtain approval from your Studio Finance
Executive before proceeding.
Batch Information:
Codes that are attached to the transaction. These fields are pulled from the Load/Interface
C&C Payroll Invoice [printr] screen. To change the defaulted codes, you can press the F2
Key or right click in any of these fields (Batch, Production, Company, Bank and Currency)
and make your selection.
Invoice Information:
Invoice Number - Cast & Crew assigned invoice number generated from the Payroll Edit file.
If you forgot to write down the Reference Number assigned, you can also bring up the Payroll
transaction by pressing the F2 Key or right clicking in this field to choose from the list.
Payroll Information:
Total Debits - Total amount of the debit entries calculated in the distribution lines that
defaults from the Payroll Edit file. Please note you are not able to access this field.
Total Credits - Total amount of the credit entries calculated in the distribution lines that
defaults from the Payroll Edit file. Please note you are not able to access this field.
Entering a positive amount in the distribution lines Amount field increases the Total Debits
field. Entering a negative amount (input a minus sign before the number) in the distributions
line Amount field increases the Total Credits field. Debits and credits must equal before you
can save the transaction.
Distribution Lines:
The distribution lines automatically default from the Payroll Edit file. To mak e any necessary coding
changes, press the F2 Key or right click in most of these fields (Account, Series, Location, Set,
Insurance, Free Field(s), Description, Employee Number and Amount) and mak e your selection.
You can also simply type in the changes in the allotted fields.
Account Number - Chart of Accounts number that will be debited or credited on this
distribution line. If the Payroll Interface file contains an account number that does not exist in
PSL3, then the Suspense Account will automatically default if setup; otherwise, the Account
© 2011 Cast & Crew Entertainment Services, LLC.
PAYROLL
185
Number field is left blank. Press the F2 Key or right click to change the account number. If
the account number doesn't exist in PSL3, you can add it by pressing the F5 Key or selecting
the 'Zoom' icon
located on the toolbar. This zooms into the Chart of Accounts Entry
[glca] screen in which you can add the account number immediately. Once saved, press the
F1 Key, then 'F' option or select the 'Fetch' icon
Payroll Entry [prent] screen.
to fetch the account back to the
WARNING:
Please be advised although you can save a Payroll
transaction with a Suspense Account Number in
Payroll Entry [prent], PSL3 does not allow you to
post it in the Post P/R Transactions [prpost]
screen.
NOTE:
The Series, Location, Set, Insurance and Free
Field Codes are brought over from Payroll
Interface file. If the Payroll Interface file contains
codes that do not exist in PSL3, the codes input
in the Load/Interface C&C Payroll Invoice
[printr] screen default instead. To make any
necessary coding changes, press the F2 Key or
right click in these fields and make your selection.
Description - Explanation for this distribution line which can hold up to 30 alpha/numeric
characters.
Employee Number - Number of the employee who will receive payment. This number is
usually for your records only.
Amount - Dollar or other currency amount for this distribution line. Type over the debit or
credit to change the amount. If you are entering a negative amount, input the minus sign
before the number. After making changes, total debits must equal total credits. In addition,
the invoice total and the total amount for each employee must stay the same. Please note if
you press the F2 Key or right click in the Amount field, a calculator displays for your
convenience.
© 2011 Cast & Crew Entertainment Services, LLC.
186
PSL3 User Manual
Helpful Hints:
Make sure to input all white colored fields as white fields are required before saving in PSL3.
To save this entry, select either 'Save' icon
located on the toolbar.
You can also press the F1 Key, then 'U' option to Update which saves and remains on screen
or press the F1 Key, then 'A' option to Accept which saves and clears the screen (most
common).
To add another distribution line, press Enter or Tab where the last line was entered.
To insert a distribution line in between already existing lines, place your cursor where you
want to add and press the F4 Key or select the 'Add' icon
. A new line is added beneath.
To delete a distribution line, place your cursor in the line you want to delete and press the F10
Key or select the 'Delete' icon
saving.
. A red strike-through line appears which is deleted upon
To search for an existing entry, press the F7 Key or select the 'Find' icon
when the
screen is clear. All records appear in which you can scroll through using the 'Arrow' icons
(First, Prior, Next and Last)
or by pressing the 'Page Up' or 'Page
© 2011 Cast & Crew Entertainment Services, LLC.
PAYROLL
Down' Keys until you find the entry needed.
© 2011 Cast & Crew Entertainment Services, LLC.
187
188
PSL3 User Manual
Chapter 8.3
Post P/R Transactions/Edit List
Use the Post P/R Transactions/Edit List [prpost] screen to review and post Payroll Entry transactions.
You can post transactions one at a time or all transactions at the same time if you prefer. It is
recommended to first generate an “Edit List”: a list of the transactions you’ve selected prior to posting.
The purpose of the Edit List is for you to review the Payroll transactions for any errors as well as to
make sure the transactions listed are indeed the ones you want to post. You can print the Edit List or
view it straight from your screen. If you need to make any corrections, do so in the P/R Entry [prent]
screen. After accepting the changes, generate another Edit List to verify the corrections. Once you’re
satisfied with the changes, move forward with the Posting Register.
Posting is the act of permanently transferring a transaction to the Bible Report/General Ledger
[bdbr].
NOTE:
Please email a request to support@castandcrew.
com prior to posting if you would like your
database setup with the Automatic A/P option
when posting Payroll transactions. Please provide
the Vendor ID Number as well as any Vacation or
Holiday Accrual Accounts that you want excluded
on the newly created A/P transaction. You will
receive the Automatic A/P prompt upon posting in
the Post P/R Transactions [prpost] screen. If you
prefer not to have this option setup, you will have
to manually enter in the A/P transaction in the A/P
Entry screen [apte].
Open:
To access the Post P/R Transactions/Edit List [prpost] screen, click the 'P/R' module from
the menu tree. Listed are the Edit List and Post Reports. You will notice once you click
either report, the other also becomes selected as you can view both reports from the same
screen.
The Post P/R Transactions/Edit List [prpost] screen is also located in the 'Report' module
under the 'Payroll' sub-folder.
You can also access this screen by typing the screen or acronym name in the blue prompt
bar located above the 'Setup' menu. Then, press Enter.
© 2011 Cast & Crew Entertainment Services, LLC.
PAYROLL
The screen then appears.
© 2011 Cast & Crew Entertainment Services, LLC.
189
190
PSL3 User Manual
Post P/R Transactions Selection Criteria:
To select an entry, press the F2 Key or right click in any of these fields (Batch, Reference,
Invoice, Production, Company, Bank and/or Currency) to select the item(s) needed. You
can also choose multiple entries by holding down the Control Key and simultaneously using
the mouse to select. By making a selection, this isolates the report to only display items
based on the code(s) selected. If you wish to select all unposted Payroll transactions, leave
all fields blank.
Report Type:
Defaults to Edit List to review your Payroll entries and make any necessary modifications
prior to posting. To move forward with posting, select 'Posting Register' followed by either the
Print, Preview or Spreadsheet option; this will transfer the transaction(s) to the Bible Report
[bdbr].
Report Formats:
© 2011 Cast & Crew Entertainment Services, LLC.
PAYROLL
191
'Report Format', 'Report Sort' and 'Description Of' are all sorting options available for you to
select per your preference.
Print/Preview the Report: Located in the top right hand corner of the screen, you can choose the
following options to generate the report:
Print - Opens the Print Dialogue box and sends the report directly to the printer.
Preview - Generates a PDF format report and appears instantly on your screen. You are still
able to print from the PDF format.
Spreadsheet - Generates an Excel format report and appears instantly on your screen. You
are still able to print from the Excel format. Please note if you select this option, you are able
to have additional sorting options within Excel.
© 2011 Cast & Crew Entertainment Services, LLC.
192
PSL3 User Manual
Once you select 'Posting Register' followed by either the Print, Preview or Spreadsheet option,
PSL3 displays the following message prompt:
If you select 'No', PSL3 asks "Would you like to reprint the register?". If you still select 'No',
you will receive a prompt notifying you the posting process is not done; therefore you are still
able to make any needed changes. If you select 'Yes', you will receive a secondary prompt
confirming the selected Payroll transactions are now marked posted.
In addition, if your database is setup with the Automatic A/P option, you will receive the
following prompt:
If you select 'Yes', the newly created A/P Entry [apte] Reference Number will display on the
screen immediately following. With this new Reference Number, you can still make any needed
changes in A/P Entry [apte] before posting as it is created with an unposted status. In addition,
if you have requested to exclude any Vacation or Holiday Accrual Accounts, they will not
transfer over to the new A/P transaction. If you do not want the Automatic A/P option setup,
you will have to manually enter in the transaction in the A/P Entry screen [apte].
© 2011 Cast & Crew Entertainment Services, LLC.
PAYROLL
NOTE:
Please note if you need to make distribution
changes to posted items, this can be done in the
Posted Transaction/Item Editor [glfix] screen
located in the 'J/E' module depending on your User
ID and studio permissions. You can also email a
request to [email protected] if you need
a transaction unposted and include the Reference
Number(s). Please be advised depending on your
specific studio's guidelines, the Support
Department may need to obtain approval from your
Studio Finance Executive before proceeding.
NOTE:
Please note you are not able to re-print a Posting
Register once the transaction(s) are posted;
therefore, if you need a copy of the report sent to
you, please email a request to
[email protected] with the approximate
date and time that the report was ran. PSL3
houses all generated reports on a server.
© 2011 Cast & Crew Entertainment Services, LLC.
193
194
PSL3 User Manual
Chapter 8.4
Load Payroll/Other Company
The Load Payroll/Other Company [pr2psl] program is used to load Payroll invoices generated from
Payroll companies other than Cast & Crew. Production has the option to use a 3rd Party Payroll
company for their extra’s Payroll locally or when in another country. Upon importing, should your Payroll
Data file encounter any errors (e.g., illegal/invalid account, series, location, set, etc.), this usually means
that the file has codes that differ and/or do not exist in PSL3. To correct this, add the necessary codes
in PSL3 then review the Edit List again or load the file with the errors and make the corrections in the
Journal Entry [jete] screen. Once the Payroll Data file is imported, PSL3 creates a new, unposted
journal entry transaction which you can still modify before posting.
NOTE:
Please email a request to support@castandcrew.
com if you do not see this program listed as an
option in your database and would like it made
available.
Open:
To access the Load Payroll/Other Company [pr2psl] screen, click the 'P/R' module from
the menu tree (see following screen shot).
You can also access this screen by typing the screen or acronym name in the blue prompt
bar located above the 'Setup' menu. Then, press Enter.
© 2011 Cast & Crew Entertainment Services, LLC.
PAYROLL
The screen then appears.
© 2011 Cast & Crew Entertainment Services, LLC.
195
196
PSL3 User Manual
Invoice File Information:
Prior to the import process, first save the Payroll Data file sent to you via email to your computer. The
file should already be in (.fil) format.
Invoice Number - Input the Payroll Invoice Number that you received via email.
Select File - Choose the (.fil) file you wish to load. Please note that files are loaded one at a
time.
Clearing:
Clearing Account - Input the Payroll Clearing Account Number. The Payroll Clearing
Account Number is used as the offset or the credit entry when Payroll transactions are
posted. When the invoice is paid, this account number is debited and cash is credited.
Default Batch Codes:
Press the F2 Key or right click in any of these fields (Batch, Production, Company, Bank
and Currency) to choose the necessary codes if they don't already default. Please note
whichever Batch Number you input here is carried through to the Journal Entry [jete] screen.
You can also create a new Batch Number with up to six alpha/numeric characters (e.g.,
© 2011 Cast & Crew Entertainment Services, LLC.
PAYROLL
197
PAYROLL) to keep track of all Payroll transactions.
Default Distribution Codes:
Press the F2 Key or right click in any of these fields (Series, Location, Set, Insurance and
Free Field(s)) to choose the necessary codes if they don't already default. Inputting the
default codes here does not change the existing codes already on the Payroll Data file; it
simply takes the place of any errors (e.g., illegal/invalid account, series, location, set, etc.)
that have been encountered.
*Make sure to input all white colored fields as white fields are required before proceeding in
PSL3.
Print/Preview the Report: Located in the top right hand corner of the screen, you can choose the
following options to generate the report:
Print Edit - Opens the Print Dialogue box and sends the report directly to the printer.
Preview Edit - Generates a PDF format report and appears instantly on your screen. You
are still able to print from the PDF format.
Import - Opens the Print Dialogue box, sends the report directly to the printer and begins the
importing process.
Once you select 'Import' and the report has printed, PSL3 displays the following message
prompt:
If you select 'No', PSL3 asks "Would you like to reprint the register?". If you still select 'No', the
interface process is not done. If you select 'Yes', you will receive a secondary prompt
confirming the Payroll invoice is now loaded in which PSL3 will provide you the Journal Entry
[jete] Reference Number for this invoice. With this new Reference Number, you can still make
any needed changes in Journal Entry [jete] before posting as it is created with an unposted
status.
© 2011 Cast & Crew Entertainment Services, LLC.
198
PSL3 User Manual
Chapter 8.5
Print Payroll Checks
The Print Payroll Checks [prckprnt] screen allows you to print onsite/location Payroll checks from the
convenience of your own printer. The Accountant is notified by email that the Payroll Check file is
available to print from PSL3. If this is your first time printing Payroll checks, it is recommended to print
a test Alignment to ensure that all check form fields are printing in the designated positions.
Open:
To access the Print Payroll Checks [prckprnt] screen, click the 'P/R' module from the menu
tree (see following screen shot).
You can also access this screen by typing the screen or acronym name in the blue prompt
bar located above the 'Setup' menu. Then, press Enter.
The screen then appears.
© 2011 Cast & Crew Entertainment Services, LLC.
PAYROLL
199
Alignment and Check Printing:
Alignment - If this is your first time printing Payroll checks, it is recommended to print a test
Alignment form to ensure that all check form fields are printing in the designated positions.
Press the F1 Key, then 'A' option or select 'Alignment' located in the top right hand corner.
Please contact the Support Department for a walk-through of this process if preferred.
Print - After the Alignment is complete, make sure to put in the correct toner and check
stock for Payroll checks. Press the F1 Key, then 'P' option or select 'Print' located in the top
right hand corner to choose the Payroll Check file you wish to print from the list. All invoices
that have not been printed display on the pick list. Please note Payroll Check files are printed
one at a time.
NOTE:
Please email a request to support@castandcrew.
com if you need to reprint Payroll checks for any
reason (e.g., wrong toner, forgot to load in check
stock, etc.) and need them to be made available
again. Please provide the invoice number and/or
certain check numbers along with the reason for
the reprint.
© 2011 Cast & Crew Entertainment Services, LLC.
200
PSL3 User Manual
Chapter 8.6
Payroll History Report
The Payroll History Report [prhist] generates a complete listing of an employee's Payroll history. The
report can also include multiple employees or all employees' Payroll history in the database. You can
view the employee's Payroll data through the many selection criteria and sorting options listed on the
report screen. At the end of each employee listing, PSL3 prints a Distribution Summary in account
order, followed by a Check Line/Stub Summary.
Please note the Payroll History Report [prhist] displays only the Payroll transactions that were
interfaced in the Load/Interface C&C Payroll Invoice [printr] screen. It does not show Payroll entries
manually created in Payroll Entry [prent].
Open:
To access the Payroll History Report [prhist], click the 'P/R' module from the menu tree
(see following screen shot).
The Payroll History Report [prhist] is also located in the 'Report' module under the 'Payroll'
sub-folder.
You can also access this screen by typing the screen or acronym name in the blue prompt
bar located above the 'Setup' menu. Then, press Enter.
© 2011 Cast & Crew Entertainment Services, LLC.
PAYROLL
201
The screen then appears.
To select criteria, press the F2 Key or right click in most fields to mak e your selection. You can also
simply type in the criteria in the allotted fields. If you wish to include all criteria information, leave
all fields blank except for any white colored fields as white fields are required before proceeding
in PSL3.
From and To:
P/R Check Number - Payroll Check Numbers to include in the report. To restrict the report
to only include information for a single Payroll check, input the same Payroll Check Number
in both the From and To fields. To select all Payroll checks, leave both fields blank.
Employee Number - Employee Numbers to include in the report. To restrict the report to
only include information for a single employee, input the same Employee Number in both the
From and To fields. To select all employees, leave both fields blank.
Week Ending - Payroll Week Ending dates to include in the report as PSL3 is date-driven.
This is the date marking the end of a weekly pay period. To restrict the report to only include
information for a single date, input the same Week Ending date in both the From and To
fields. To select all dates from inception to future, leave both fields blank. Press the F2 Key
or right click in either date field for the calendar selection to appear.
© 2011 Cast & Crew Entertainment Services, LLC.
202
PSL3 User Manual
Selection Criteria:
Press the F2 Key or right click in any of these fields (SSN, Reference #, Production,
Company Code, Payroll Company and Free Field(s)) to choose the necessary codes if
they don't already default. Some fields allow you to choose multiple codes for a particular
field in which you can press the F2 Key or right click in that field and hold down the Control
Key while simultaneously using your mouse to select. By making a selection, this isolates
the report to only display items based on the code(s) selected.
Report:
'Employee Sort Order', 'Check Sort Order' and 'Format' are all sorting options available for you
to select per your preference.
Multiple Currency:
Source Currency - If you have more than one currency in your database, you can choose to
include only transactions denominated in one currency, two, three, etc., or all currencies. To
choose multiple Currency Codes, press the F2 Key or right click in the field and hold down
the Control Key while simultaneously using your mouse to select. Each currency in your
database and its conversion rate are listed in the report heading.
Target Currency - Base currency set up in the System Control Information Entry [suctrl]
screen located in the 'Setup' module defaults. This Currency Code is what all transactions
are converted to on the report. Each currency in your database and its conversion rate are
listed in the report heading.
Print/Preview the Report: Located in the top right hand corner of the screen, you can choose the
following options to generate the report:
Print - Opens the Print Dialogue box and sends the report directly to the printer.
Preview - Generates a PDF format report and appears instantly on your screen. You are still
© 2011 Cast & Crew Entertainment Services, LLC.
PAYROLL
able to print from the PDF format.
© 2011 Cast & Crew Entertainment Services, LLC.
203
204
PSL3 User Manual
Chapter 8.7
Additional Payroll Screens/Reports
PSL3 offers additional Payroll Screens/Reports which are listed below. Please note if PSL3 does not
provide a reporting option you need, please contact your Payroll Coordinator as the Payroll Department
has a wider variety of Payroll Reports including additional criteria and sorting options per your
preference.
Open:
To access the following Payroll Screens/Reports, click the 'P/R' module from the menu tree
(see following screen shot).
These additional Payroll Screens/Reports are also located in the 'Report' module under the
'Payroll' sub-folder.
You can also access these screens/reports by typing the screen or acronym name in the
blue prompt bar located above the 'Setup' menu. Then, press Enter.
To select criteria for the following reporting screens, press the F2 Key or right click in most fields to
mak e your selection. You can also simply type in the criteria in the allotted fields. If you wish to
include all criteria information, leave all fields blank except for any white colored fields as white
fields are required before proceeding in PSL3.
Accrued Holiday Report [acvhrpt] - Use [acvhrpt] to generate a listing of a single or all
employees' Vacation and Holiday Accrual Account totals ran by Social Security Number.
This report displays the Invoice Number, Check Number, Reference Number and Balance
sorted by the employee's last name.
Payroll Invoice Status Report [prinvp] - Use [prinvp] to display the status of each Payroll
invoice. This report displays the Invoice Number, Reference Number, Description and Status
(Posted or Not Posted) sorted by invoice.
© 2011 Cast & Crew Entertainment Services, LLC.
PAYROLL
205
Payroll Was/Is Report [prwasis] - Use [prwasis] to track and report all changes made to a
Payroll Invoice file after being loaded into PSL3. This report can be ran by Payroll Check
Number, Employee Number, Week Ending Date and Reference Number. The report displays
the WAS (what the original data was in the Payroll Invoice File before loaded into PSL3) and
IS (what the data is now), detailing the changes for all distribution fields for each transaction
on the Payroll Invoice File.
NOTE:
The reports are available in either Print, Preview
and/or Spreadsheet formats.
NOTE:
Please email [email protected] if you
don't see a specific PSL3 report currently listed as
an option in your database.
© 2011 Cast & Crew Entertainment Services, LLC.
GENERAL LEDGER
Section
IX
GENERAL LEDGER
Section 9
GENERAL LEDGER
This section will address the following programs:
Chart of Accounts Entry
Chart of Accounts Listing Report
Trial Balance Report
Bible Report
Additional G/L Entry Screens
Additional G/L Inquiries and Reports
© 2011 Cast & Crew Entertainment Services, LLC.
209
210
PSL3 User Manual
Chapter 9.1
Chart of Accounts Entry
Chart of Accounts is the master list of all account numbers used to track Production costs including
Assets, Liabilities, Capital, Income and Expenses. The Chart of Accounts Entry [glca] screen is used
to set up Chart of Accounts, search for account numbers and add/delete/modify accounts. Setting up
your Chart of Accounts accurately is one of the most important functions in PSL3. If the account
numbers are set up correctly, then the reports generate properly and are placed in the correct category
(Type, Line, Post and Sub). Many users create their Chart of Accounts through the Import a Budget
screen located in the 'Budget' folder in which there is an option to 'Create New Accounts'. Please be
advised that PSL3 only imports budget files from EP/Movie Magic Budgeting and only accepts (.dsc) or
(.txt) file formats.
Please note PSL3 does not allow more than one Chart of Accounts per database.
NOTE:
Please email a request to support@castandcrew.
com if you would like the PSL3 "Import a Budget
from EP/Movie Magic Step-by-Step Guidelines"
emailed to you. In the Import a Budget [bdint]
screen, the option to 'Create New Accounts' is
displayed.
Also, please email a request to
[email protected] if you would like the
Chart of Accounts imported into your new
database from a PSL3 database you previously
worked on if none was specified on the initial
database request.
Open:
To access the Chart of Accounts Entry [glca] screen, click the 'G/L' module from the menu
tree (see following screen shot).
You can also access this screen by typing the screen or acronym name in the blue prompt
bar located above the 'Setup' menu. Then, press Enter.
© 2011 Cast & Crew Entertainment Services, LLC.
GENERAL LEDGER
211
The screen then appears.
Account Number - Combination of characters of the same length and format as the account
mask. After entering the new account number, PSL3 asks, "That Account is not in the
database. Would you like to add it?". Select 'Yes'. To search for an existing account, press
the F2 Key or right click in the Account Number field to choose from the list. You can also
search for a range of account numbers by using the wildcard character aka asterisk (*). For
example, if you want to view all 1100 accounts, type 11* and press the F7 Key or select the
'Find' icon
located on the toolbar. PSL3 displays all matching account numbers.
© 2011 Cast & Crew Entertainment Services, LLC.
212
PSL3 User Manual
Please note PSL3 is compatible with almost all account masks formats (e.g., XXXX, XX-XX,
etc).
NOTE:
Please email a request to support@castandcrew.
com if you need the account mask in your
database changed. New databases usually
default to 'XXXX' if none is specified on the initial
database request. Please be advised depending
on your specific studio's guidelines, the Support
Department may need to obtain approval from your
Studio Finance Executive before proceeding.
Description - Name or title of the account number which can hold up to 30 alpha/numeric
characters. To search for an existing account by description, use the the wildcard character
aka asterisk (*). For example, if you want to view all accounts with the word 'bank', type
*bank* and press the F7 Key or select the 'Find' icon
displays all matching account descriptions.
located on the toolbar. PSL3
Type - Single letter classification indicating the Account Type. Press the F2 Key or right
click to select the Account Type options which are displayed below.
Line - Single letter classification indicating the Line Type. Only Expense Accounts have a
Line Type. Press the F2 Key or right click to select the Line Type options which are
displayed below.
© 2011 Cast & Crew Entertainment Services, LLC.
GENERAL LEDGER
213
Post - Check mark this option if the account can have amounts posted to it. If this field is left
unchecked, PSL3 does not allow you to post transactions to the account number.
Sub - Check mark this option if the account is a Sub-account and not a Header or Standalone
Account.
Helpful Hints:
Make sure to input all white colored fields as white fields are required before saving in PSL3.
To save this entry, select either 'Save' icon
located on the toolbar.
You can also press the F1 Key, then 'U' option to Update which saves and remains on screen
or press the F1 Key, then 'A' option to Accept which saves and clears the screen (most
common).
To add another account number, press Enter or Tab where the last line was entered.
To insert an account number in chronological order between already existing account
numbers, place your cursor where you want to add and press the F4 Key or select the 'Add'
© 2011 Cast & Crew Entertainment Services, LLC.
214
PSL3 User Manual
icon
. A new line is added beneath.
To delete an account number, place your cursor in the account you want to delete and press
the F10 Key or select the 'Delete' icon
. A red strike-through line appears which is
deleted upon saving. Please note PSL3 only allows you to delete an account number that is
not attached to an transaction.
To search for an existing account number, press the F7 Key or select the 'Find' icon
when the screen is clear. All records appear in which you can scroll through until you find the
account needed.
© 2011 Cast & Crew Entertainment Services, LLC.
GENERAL LEDGER
Chapter 9.2
215
Chart of Accounts Listing Report
The Chart of Accounts Listing Report [glcap] generates a listing of all account numbers in your
database. These account numbers are pulled from the Chart of Accounts Entry [glca] screen. Chart of
Accounts is the master list of all account numbers used to track Production costs including Assets,
Liabilities, Capital, Income and Expenses.
Open:
To access the Chart of Accounts Listing Report [glcap], click the 'G/L' module from the
menu tree (see following screen shot).
The Chart of Accounts Listing Report [glcap] is also located in the 'Report' folder under the
'General Ledger' and 'Setup & Maintenance' sub-folders.
You can also access this report by typing the screen or acronym name in the blue prompt bar
located above the 'Setup' menu. Then, press Enter.
The screen then appears.
© 2011 Cast & Crew Entertainment Services, LLC.
216
PSL3 User Manual
© 2011 Cast & Crew Entertainment Services, LLC.
GENERAL LEDGER
217
To select criteria, press the F2 Key or right click in most fields to mak e your selection. You can also
simply type in the criteria in the allotted fields. If you wish to include all criteria information, leave
all fields blank.
Chart of Accounts Information:
Starting and Ending Account - Account numbers to include in the report. To restrict the
report to only include information for a single account number, input the same account in both
the Starting Account and Ending Account fields. To select all account numbers, leave both
fields blank.
Account Type Information: The report can also be run to include only certain account numbers
based on the following option types:
Account Type - Single letter classification indicating the Account Type (Asset, Liability, C
apital, Income, Expense).
Line Type - Single letter classification indicating the Line Type (A, B, C, D, E, F, G). Only
Expense Accounts have a Line Type.
Allow Posting - Indicate (Y/N) if you want to include only account numbers that can have
transactions posted to them.
Sub-Account - Indicate (Y/N) if you want to include only Sub-accounts or only Header and
Standalone Accounts.
Subtotal Level - Indicate if you want to include only accounts with a specific Level. If so,
enter a number between 0 through 9.
Integrity Check:
Integrity Check Only - Check mark this option to view if there are any errors or formatting
issues within your Chart of Accounts. Selecting this option will generate the Chart of
Accounts Integrity Check Report in which the errors are display in bold (if any).
Print/Preview the Report: Located in the top right hand corner of the screen, you can choose the
following options to generate the report:
Print - Opens the Print Dialogue box and sends the report directly to the printer.
Preview - Generates a PDF format report and appears instantly on your screen. You are still
able to print from the PDF format.
Spreadsheet - Generates an Excel format report and appears instantly on your screen. You
are still able to print from the Excel format. Please note if you select this option, you are able
to have additional sorting options within Excel.
© 2011 Cast & Crew Entertainment Services, LLC.
218
PSL3 User Manual
Chapter 9.3
Trial Balance Report
The Trial Balance Report [gltb] is the orderly summary of ledger accounts used specifically to extract
financial statement information. The Trial Balance Report [gltb] generates a listing of each postable
account, displaying its Beginning Balance, Debits, Credits, Net Change, and Ending Balance based on
the period or date range input. You can generate a Detail, Summary or customized report per your
preference.
Open:
To access the Trial Balance Report [gltb], click on Tab #9 or press 'ALT' and the number '9'
Key simultaneously to open the screen.
The Trial Balance Report [gltb] is also accessible if you click the 'G/L' module from the
menu tree (see following screen shot) as well as the 'Report' folder under the 'General Ledger'
and 'Weekly' sub-folders.
You can also access this report by typing the screen or acronym name in the blue prompt bar
located above the 'Setup' menu. Then, press Enter.
© 2011 Cast & Crew Entertainment Services, LLC.
GENERAL LEDGER
219
The screen then appears.
To select criteria, press the F2 Key or right click in most fields to mak e your selection. You can also
simply type in the criteria in the allotted fields. If you wish to include all criteria information, leave
all fields blank except for any white colored fields as white fields are required before proceeding
in PSL3.
© 2011 Cast & Crew Entertainment Services, LLC.
220
PSL3 User Manual
Report Selection:
Report ID - Detail, Summary or customized Report ID to format the report by. To create a
customized Report ID, use the Report Group Entry [surpt] screen located in both the 'Setup'
and 'G/L' modules. Please note you must select a Report ID in order to run the report as it is
a white required field.
NOTE:
Please email a request to support@castandcrew.
com if you would like the customized Report ID
format imported from a previous PSL3 database.
Period Selection:
Period - System-assigned Period Number that indicates the Accounting Period in which
these costs were entered. If you chose to run the report by Period Number, then the Start
Date and End Date fields default for the period chosen.
Start Date and End Date - Transaction Effective Dates to include in the report as PSL3 is
date-driven. Current Period Start and End Dates default. You can always change the date by
typing over the defaulted date or by right clicking in either field for the calendar selection to
appear. To restrict the report to only include information for a single date, input the same date
in both the Start Date and End Date fields. To select all dates from inception to future, leave
both fields blank.
© 2011 Cast & Crew Entertainment Services, LLC.
GENERAL LEDGER
221
Account Selection:
From and To - Account numbers to include in the report. To restrict the report to only include
information for a single account number, input the same account in both the From and To
fields. To select all account numbers, leave both fields blank.
Selection Criteria:
Press the F2 Key or right click in any of these fields (Production, Company, Series,
Location, Set, Insurance, Free Field(s), Source Code and J/E Number) to choose the
necessary codes if they don't already default. To choose multiple codes for a particular field,
press the F2 Key or right click in that field and hold down the Control Key while
simultaneously using your mouse to select. To run the report by a specific transaction type
(A/P, C/K, J/E, P/C, P/O, and/or P/R), use the Source Code field. By making a selection,
this isolates the report to only display items based on the code(s) selected.
Include:
Detail - Check mark to include detail distribution data.
Inactive Accounts - Check mark to include accounts that had no activity/distributions posted
to them during the period or date range selected or that have a zero dollar balance.
Beginning Balance is Activity - Check mark to consider active accounts that have a nonzero Beginning Balance.
Show:
Series Separation - Check mark if you want transactions for each Series Code displayed
separately. If selected, the report is broken down by account number, then Series Code.
Location Separation - Check mark if you want transactions for each Location Code
displayed separately. If selected, the report is broken down by account number, then
Location Code (if Series Separation is not check marked first).
Set Separation - Check mark if you want transactions for each Set Code displayed
separately. If selected, the report is broken down by account number, then Set Code (if
Series and/or Location Separation is not check marked first).
© 2011 Cast & Crew Entertainment Services, LLC.
222
PSL3 User Manual
Multiple Currency:
Source Currency - If you have more than one currency in your database, you can choose to
include only transactions denominated in one currency, two, three, etc., or all currencies. To
choose multiple Currency Codes, press the F2 Key or right click in the field and hold down
the Control Key while simultaneously using your mouse to select. Each currency in your
database and its conversion rate are listed in the report heading.
Target Currency - Base currency set up in the System Control Information Entry [suctrl]
screen located in the 'Setup' module defaults. This Currency Code is what all transactions
are converted to on the report. Each currency in your database and its conversion rate are
listed in the report heading.
Print/Preview the Report: Located in the top right hand corner of the screen, you can choose the
following options to generate the report:
Print - Opens the Print Dialogue box and sends the report directly to the printer.
Preview - Generates a PDF format report and appears instantly on your screen. You are still
able to print from the PDF format.
Spreadsheet - Generates an Excel format report and appears instantly on your screen. You
are still able to print from the Excel format. Please note if you select this option, you are able
to have additional sorting options within Excel.
*Below is a sample Detail Trial Balance Report [gltb] broken down by Assets, Liabilities, etc.,
containing one line Expenses.
© 2011 Cast & Crew Entertainment Services, LLC.
GENERAL LEDGER
© 2011 Cast & Crew Entertainment Services, LLC.
223
224
PSL3 User Manual
Chapter 9.4
Bible Report
The Bible Report [bdbr] or also commonly referred to as the General Ledger is the original financial
statement that produces a Detailed or Summary Report on distributions based on the date range or
period selected. The Bible Report [bdbr] generates a reference copy of all transactions that were
entered in your PSL3 database. The major difference between the Bible Report [bdbr] and the
Chronological Bible Report [bdbible] is that the Bible Report [bdbr] is organized by Account Number
and the Chronological Bible Report [bdbible] is organized by Reference Number.
Open:
To access the Bible Report [bdbr], click on Tab #8 or press 'ALT' and the number '8' Key
simultaneously to open the screen.
The Bible Report [bdbr] is also accessible if you click the 'G/L' module from the menu tree
(see following screen shot) as well as the 'Report' folder under the 'General Ledger' and
'Weekly' sub-folders.
You can also access this report by typing the screen or acronym name in the blue prompt bar
located above the 'Setup' menu. Then, press Enter.
© 2011 Cast & Crew Entertainment Services, LLC.
GENERAL LEDGER
The screen then appears.
© 2011 Cast & Crew Entertainment Services, LLC.
225
226
PSL3 User Manual
To select criteria, press the F2 Key or right click in most fields to mak e your selection. You can also
simply type in the criteria in the allotted fields. If you wish to include all criteria information, leave
all fields blank except for any white colored fields as white fields are required before proceeding
in PSL3.
Period Selection:
Period - System-assigned Period Number that indicates the Accounting Period in which
these costs were entered. If you chose to run the report by Period Number, then the Start
Date and End Date fields default for the period chosen.
Start Date and End Date - Transaction Effective Dates to include in the report as PSL3 is
date-driven. Current Period Start and End Dates default. You can always change the date by
typing over the defaulted date or by right clicking in either field for the calendar selection to
appear. To restrict the report to only include information for a single date, input the same date
in both the Start Date and End Date fields. To select all dates from inception to future, leave
both fields blank.
© 2011 Cast & Crew Entertainment Services, LLC.
GENERAL LEDGER
© 2011 Cast & Crew Entertainment Services, LLC.
227
228
PSL3 User Manual
Account Selection:
From and To - Account numbers to include in the report. To restrict the report to only include
information for a single account number, input the same account in both the From and To
fields. To multi-pick certain accounts, press the F2 Key or right click in either field and hold
down the Control Key while simultaneously using your mouse to select. To select all account
numbers, leave both fields blank.
Account Type - Single letter classification indicating the Account Type (Asset, Liability, C
apital, Income, Expense).
Selection Criteria:
Press the F2 Key or right click in any of these fields (Production, Company, Source,
Series, Location, Set, Insurance, Free Field(s), Vendor and J/E Number) to choose the
necessary codes if they don't already default. To choose multiple codes for a particular field,
press the F2 Key or right click in that field and hold down the Control Key while
simultaneously using your mouse to select. To run the report by a specific transaction type
(A/P, C/K, J/E, P/C, P/O, and/or P/R), use the Source Code field. By making a selection,
this isolates the report to only display items based on the code(s) selected.
Include/Exclude:
Include Detail - Check mark to include detail distribution data.
Include Inactive Accounts - Check mark to include accounts that had no activity/
distributions posted to them during the period or date range selected or have a zero dollar
balance.
Include P/O's - Check mark to include open P/O's. If a P/O distribution line is transferred to
an A/P transaction but the A/P is not yet posted, then the P/O line is still considered open.
A P/O distribution line remains open and is considered a Commitment on the Estimated
Final Cost Report [efcrpt] until the A/P containing the transferred P/O line is posted, marking
it relieved or until the P/O line is closed.
Include Beginning Balance/Beginning Balance is Activity - Check mark to include the
Beginning Balance and consider active accounts that have a non-zero Beginning Balance.
Include Audit Information/Include User - Check mark to isolate transactions entered by a
single User ID for auditing purposes.
Show/Hide:
Series Separation - Check mark if you want transactions for each Series Code displayed
separately. If selected, the report is broken down by account number, then Series Code.
Location Separation - Check mark if you want transactions for each Location Code
displayed separately. If selected, the report is broken down by account number, then
Location Code (if Series Separation is not check marked first).
© 2011 Cast & Crew Entertainment Services, LLC.
GENERAL LEDGER
229
Set Separation - Check mark if you want transactions for each Set Code displayed
separately. If selected, the report is broken down by account number, then Set Code (if
Series and/or Location Separation is not check marked first).
Company Separation - Check mark if you want transactions for each Company Code
displayed separately. If selected, the report is broken down by account number, then
Company Code (if Series, Location and/or Set Separation is not check marked first).
Reference Description - Check mark to include the Reference Description in addition to the
Distribution Description of each transaction. If selected, the report usually defaults to
Landscape layout due to the additional column.
Multiple Currency:
Source Currency - If you have more than one currency in your database, you can choose to
include only transactions denominated in one currency, two, three, etc., or all currencies. To
choose multiple Currency Codes, press the F2 Key or right click in the field and hold down
the Control Key while simultaneously using your mouse to select. Each currency in your
database and its conversion rate are listed in the report heading.
Target Currency - Base currency set up in the System Control Information Entry [suctrl]
screen located in the 'Setup' module defaults. This Currency Code is what all transactions
are converted to on the report. Each currency in your database and its conversion rate are
listed in the report heading.
Print/Preview the Report: Located in the top right hand corner of the screen, you can choose the
following options to generate the report:
Print Combined Report - Opens the Print Dialogue box and sends the report (combining all
Series, Location and Set Codes onto one report) directly to the printer.
Print Individual Report - Opens the Print Dialogue box and sends the report (separating
each Series, Location and Set Codes into separate reports) directly to the printer.
Preview Combined Report - Generates a PDF format report (combining all Series, Location
and Set Codes onto one report) and appears instantly on your screen. You are still able to
print from the PDF format.
Preview Individual Report - Generates a PDF format report (separating each Series,
Location and Set Codes into separate reports) and appears instantly on your screen. You are
still able to print from the PDF format.
Spreadsheet - Generates an Excel format report and appears instantly on your screen. You
are still able to print from the Excel format. Please note if you select this option, you are able
to have additional sorting options within Excel.
TSV Spread - Generates a Text (.txt) file in which you save to your computer and 'Open With'
the desired program of your choice. This option is usually selected in lieu of the 'Spreadsheet'
option in the instance the report exceeds the number of lines allotted in Excel. The 'TSV
Spread' option does not have line limitations whereas depending on the version of Excel, the
'Spreadsheet' option may.
© 2011 Cast & Crew Entertainment Services, LLC.
230
PSL3 User Manual
*Below is a sample of the Combined Bible Report [bdbr] with 'Include Detail' check marked.
© 2011 Cast & Crew Entertainment Services, LLC.
GENERAL LEDGER
Chapter 9.5
231
Additional G/L Entry Screens
PSL3 offers additional G/L Entry Screens which are listed below.
Open:
To access the following G/L Screens, click the 'G/L' module from the menu tree (see following
screen shot).
You can also access these screens by typing the screen or acronym name in the blue
prompt bar located above the 'Setup' menu. Then, press Enter.
To select criteria for the following screens, press the F2 Key or right click in most fields to mak e your
selection. You can also simply type in the criteria in the allotted fields.
Asset Disposition/Maintenance Entry [assetdis] - Use [assetdis] to find all transactions
coded to 'A' (Assets) or any other Free Field Code and provide the Method of Disposition
description(s). This screen allows you to not only input the Method of Disposition next to
items flagged as Assets, but also input the Recovered Amount and Disposition Date. Once
entered and saved, you can generate the Asset Recovery Report or Bible Report [bdbr] to
display the reporting details.
Report Group Entry [surpt] - Use [surpt] to customize your preferred Trial Balance Report
[gltb] format. This screen allows you to categorize and group together Account Types
(Assets, Liabilities, Capital, Income and Expenses) based upon a range of account numbers
and Company Codes. You are able to provide your own descriptions for each account
grouping and select whether to include Control Account Totals Only, Sub-totals and/or
Company Sub-totals to display. Once saved, the newly created format will now display as an
option in the Report ID field within the Trial Balance Report [gltb] screen. Please note all
PSL3 databases are already pre-set with the SUMMARYTB and DETAILTB Report ID formats
as default options (and if you are associated with a studio, then that studio's customized
© 2011 Cast & Crew Entertainment Services, LLC.
232
PSL3 User Manual
format).
© 2011 Cast & Crew Entertainment Services, LLC.
GENERAL LEDGER
Chapter 9.6
233
Additional G/L Inquiries and Reports
PSL3 offers additional G/L Inquiries and Reports which are listed below.
Open:
To access the following G/L Reports, click the 'G/L' module from the menu tree (see following
screen shot).
These additional G/L Reports are also located in the 'Report' module under the 'General
Ledger' sub-folder.
You can also access these reports by typing the screen or acronym name in the blue prompt
bar located above the 'Setup' menu. Then, press Enter.
To select criteria for the following reporting screens, press the F2 Key or right click in most fields to
mak e your selection. You can also simply type in the criteria in the allotted fields. If you wish to
include all criteria information, leave all fields blank except for any white colored fields as white
fields are required before proceeding in PSL3.
Account Number Inquiry Report [glaa] - Use [glaa] to generate a report of distribution lines
coded to a specific account number. This report displays transaction details only for items
that have been posted for the account number selected. Please note this report is ran by only
one account number at a time.
Asset Report [assetrpt] - User [assetrpt] to generate a Detailed or Summary Report on
distributions based on the date range or period and Free Field Codes (Assets, etc.) selected.
This report generates a reference copy of all transactions based on the criteria selected,
identical to the Bible Report [bdbr]. This report can be used in conjunction with the Asset
Disposition/Maintenance Entry [assetdis] screen.
© 2011 Cast & Crew Entertainment Services, LLC.
234
PSL3 User Manual
Checks Inquiry [ckinq] - Use [ckinq] to display information for any check that has been
printed. This report lists all details attached to the check number including (but not limited to)
the Check Date, Void Date (if any), Clear Date as well as the attached A/P Reference
Numbers, etc. This report can also be found in the 'Checks' module and it's main use is to
provide a quick look up of details pertaining to a single check.
Chronological Bible Report [bdbible] - Use [bdbible] to run a transaction log sorted by
Reference Number. The major difference between the Chronological Bible Report [bdbible]
and the Bible Report [bdbr] is that the Chronological Bible Report [bdbible] is organized
by Reference Number as opposed to Account Number.
Inquiry by Reference Number Report [glrinq] - Use [glrinq] to display information for a
specific Reference Number. This report is helpful for determining the Source Code (P/O, A/P,
etc.) of a transaction. It's also useful for viewing several transactions from different programs
without having to open a new screen. Please note this report is ran by only one Reference
Number at a time.
Ledger/Bible Report [ledbib] - Use [ledbib] to print a detailed ledger of transaction data but
with the added search criteria of an Amount Range and Reference and/or Distribution
Description(s). Active Accounts, Beginning Balance, Debits, Credits, and Ending Balance are
included in the report. Accounts with no activity during the date range are not included.
NOTE:
The reports are available in either Print, Preview
and/or Spreadsheet formats.
NOTE:
Please email [email protected] if you
don't see a specific PSL3 report currently listed as
an option in your database.
© 2011 Cast & Crew Entertainment Services, LLC.
CHECKS
Section
X
CHECKS
Section 10 CHECKS
This section will address the following programs:
Pre-Check Printing Report
Computer Checks and Check Register Summary Report
Void and Reissue Checks
Bank Reconciliation
Positive Pay Export and Report
Additional Check Screens/Reports
© 2011 Cast & Crew Entertainment Services, LLC.
237
238
PSL3 User Manual
Chapter 10.1 Pre-Check Printing Report
The Pre-Check Printing Report [ckpcr] lists the posted Accounts Payable transactions that will be
included in the next check run. The report displays the details of the open A/P transactions, including
check and invoice information.
Open:
To access the Pre-Check Printing Report [ckpcr], click the 'Checks' module from the menu
tree (see following screen shot).
The Pre-Check Printing Report [ckpcr] is also located in the 'Report' module under the
'Checks' sub-folder.
You can also access this screen by typing the screen or acronym name in the blue prompt
bar located above the 'Setup' menu. Then, press Enter.
© 2011 Cast & Crew Entertainment Services, LLC.
CHECKS
239
The screen then appears.
To select criteria, press the F2 Key or right click in most fields to mak e your selection. You can also
simply type in the criteria in the allotted fields. If you wish to include all criteria information, leave
all fields blank.
Bank Info:
Bank - Bank Code representing the bank to be used in the next check run. By choosing a
Bank Code, the report displays only open A/P items coded to the Bank Code selected.
Currency - Currency Code representing the currency to be printed in the next check run. By
choosing a Currency Code, the report displays only open A/P items coded to the Currency
Code selected. Please note if you have selected the Bank Code, the Currency Code defaults
as it is attached to the bank.
Selection Criteria:
Press the F2 Key or right click in any of these fields (Production, Batch Number,
Reference Number, Vendor Number and Employee Number) to choose the necessary
codes if they don't already default. By making a selection, this isolates the report to only
© 2011 Cast & Crew Entertainment Services, LLC.
240
PSL3 User Manual
display items based on the code(s) selected.
Date Selection:
Select A/P by Due Date - Indicate if you want to restrict the A/P open items included in the
report to those that have a Due Date on or before the date entered.
Sort By:
'Vendor ID' and 'Vendor Name' are the sorting options available to select per your preference.
Print/Preview the Report: Located in the top right hand corner of the screen, you can choose the
following options to generate the report:
Print - Opens the Print Dialogue box and sends the report directly to the printer.
Preview - Generates a PDF format report and appears instantly on your screen. You are still
able to print from the PDF format.
© 2011 Cast & Crew Entertainment Services, LLC.
CHECKS
241
Chapter 10.2 Computer Checks and Check Register
Summary Report
Use the Computer Checks [ckprnt] program to print PSL3 created checks. The Computer Checks
[ckprnt] screen is most commonly used to print a run of checks for posted Accounts Payable invoices,
but you can also print individual computer checks based on the Open Item Selection Criteria. If there
are leading check stubs, the check prints first and the check that gets voided prints after.
To view a list of all the open items that will be included in the next check run before proceeding with the
check printing process, it is suggested to run a Pre-Check Printing Report beforehand.
NOTE:
Please note PSL3 is compatible with MICR Check
Printing and has it's own Check Form (MICRFM or
MICRLA). If you would like to have this feature set
up, please email [email protected] for
more information.
Open:
To access the Computer Checks [ckprnt] screen, click on Tab #4 or press 'ALT' and the
number '4' Key simultaneously to open the screen.
Computer Checks [ckprnt] can also be accessed in the 'Checks' and 'A/P' modules from the
menu tree (see following screen shot).
You can also access this screen by typing the screen or acronym name in the blue prompt
bar located above the 'Setup' menu. Then, press Enter.
© 2011 Cast & Crew Entertainment Services, LLC.
242
PSL3 User Manual
The screen then appears.
© 2011 Cast & Crew Entertainment Services, LLC.
CHECKS
243
To select criteria, press the F2 Key or right click in most fields to mak e your selection. You can also
simply type in the criteria in the allotted fields. If you wish to include all criteria information, leave
all fields blank except for any white colored fields as white fields are required before proceeding
in PSL3.
Check Information:
Company - Company Code representing the company to be used in the check run.
Bank - Bank Code representing bank to be used in the check run.
Currency - Currency Code representing the currency to be printed in the check run. Please
note if you have selected the Bank Code, the Currency Code defaults as it is attached to the
bank.
Starting Check # - First check number in which the check run will begin. The check number
should default upon selecting the Bank Code but you can change it. The Starting Check
Number Information is pulled from the Bank Entry [subank] screen if it has been setup.
Check Date - Date that will print on the check(s); should default to today’s date. You can
always change it by typing over the defaulted date or by right clicking in that field for the
calendar selection to appear. Please note you can not input a date that is in a previously
closed period.
© 2011 Cast & Crew Entertainment Services, LLC.
244
PSL3 User Manual
Allow ZERO Checks to Print - Check mark this option if you want to print zero dollar amount
checks.
NOTE:
Please email a request to support@castandcrew.
com to have the 'Allow ZERO Checks to Print'
option automatically default upon entering the
screen.
Open Item Selection:
Press the F2 Key or right click in any of these fields (Select A/P by Due Date, Vendor,
Invoice, Batch, Reference and Production) to choose the necessary items you wish to
print if they don't already default. Some fields allow you to choose multiple codes for a
particular field in which you can press the F2 Key or right click in that field and hold down the
Control Key while simultaneously using your mouse to select. By making a selection, this
isolates PSL3 to only print checks based on the open item(s) selected. To select all posted
A/P transactions, leave all fields in the Open Item Selection blank.
Check Alignment and Printing Checks:
Alignment - Prior to the check printing process, you can choose the 'Alignment' option
located in the top right hand corner to estimate how the check(s) will be formatted.
© 2011 Cast & Crew Entertainment Services, LLC.
CHECKS
245
WARNING:
Please be advised if you select the 'Alignment'
option, the next available check number is used for
the Bank Code entered. This check number
appears on the Check Register Summary
Report [ckolcr] with the default description
"COMPUTER ALIGNMENT ***VOID***".
Print - To ensure check alignment accuracy, it is suggested to select the 'Print' option
located in the top right hand corner instead of 'Alignment' for your first computer check using
real check stock. In doing so, the Support Department can see exactly where the information
will be printed and make the necessary adjustments accordingly.
NOTE:
Please email a request to support@castandcrew.
com to have your scanned check alignment
adjusted. You can also fax us a copy at the
following number: 818-848-4780. Please be sure
to send an email or call to let us know you have
faxed the check copy in.
Once you have selected 'Print', PSL3 will take you through a series of prompts to ensure you
are printing the desired checks and choosing the correct printer which are in order as follows:
© 2011 Cast & Crew Entertainment Services, LLC.
246
PSL3 User Manual
© 2011 Cast & Crew Entertainment Services, LLC.
CHECKS
247
IMPORTANT Window Message:
Once the checks have printed, the last prompt you will see is the IMPORTANT window.
Since the checks in PSL3 print before the check data is saved to the database, the
IMPORTANT Window gives you the opportunity to verify that the checks actually printed
correctly. Until you go through all of the previous dialogue boxes and tell PSL3 the checks
printed correctly, the related A/P transactions will still have an 'O'pen status. So, if something
happens to interrupt the check run (e.g., a power outage, disruption of internet service, etc.)
even after the checks have printed correctly, the check process is really not complete. Do
not close out of the IMPORTANT window until the desired check(s) have printed
correctly.
If all checks printed correctly, then press the 'OK' option. However, if only some of the checks
printed, you can reset the Last correctly printed check # field. The number of the last check
printed defaults in this field. If at least one of the checks printed incorrectly or you need to
reprint any of the checks for any reason, enter the number of the last check that printed
correctly. Even if other checks printed correctly after the first incorrectly printed check, you
need to enter the number of the check that directly precedes the first check that printed
incorrectly and then press the Enter Key or 'OK' option. All of the checks that printed after the
last correctly printed check will be marked as Computer Alignment Voids and will need to be
reprinted.
For example, if you printed check number 000001 and something went wrong, you can reset
the Last correctly printed check # field to the prior number which in this case would be
000000. You can then make the Next available check # field reset to 000001 to reprint that
check number and any thereafter within the same check run.
Check Register Summary Report [ckolcr]:
© 2011 Cast & Crew Entertainment Services, LLC.
248
PSL3 User Manual
Upon exiting the Computer Checks [ckprnt] program, PSL3 automatically generates the
Check Register Summary Report [ckolcr] directly on your screen after successfully printing
checks. The Check Register Summary Report [ckolcr] displays a summary of the last
check run, listing one line of information per check and normally in check number order.
Once you receive the Check Register Summary Report [ckolcr], PSL3 displays the
following prompt:
If you select 'No', PSL3 continues to ask "Did register print properly (Y/N)?". If you still select
'No', you will continue to receive the prompt until you select 'Yes'. Once you select 'Yes', the
checks automatically post to the Bible Report [bdbr] and the related A/P transactions now
update to a 'P'aid status. Please note there is not an additional check posting process like
other software systems.
Please note the Check Register Summary Report [ckolcr] can also be ran at any time for any
date range as it is accessible in the 'Checks' module from the menu tree. It is also located in
the 'Report' module under the 'Checks' sub-folder. To generate the report manually from the
Check Register Summary Report [ckolcr] screen, you have the option to run it by Starting
and Ending Check Numbers and Check Run Numbers, Period, Date Range, Check Status
Information, etc. as selection criteria. This report provides the option to Print, Preview or
generate the report to an Excel Spreadsheet.
© 2011 Cast & Crew Entertainment Services, LLC.
CHECKS
249
Chapter 10.3 Void and Reissue Checks
The Void Checks [ckvoid] program is used to cancel the effect of printing/posting the check. By voiding
a check, PSL3 cancels the posting of the A/P Entry [apte] invoice associated with that check by voiding
the original transaction and then creating the reversing transaction. PSL3 also provides the option to
reissue the voided A/P Entry [apte] transaction.
Open:
To access the Void Checks [ckvoid] screen, click the 'Checks' or 'A/P' module from the menu
tree (see following screen shot).
Void Checks [ckvoid] is also located in the 'Report' module under the 'Checks' sub-folder.
You can also access this screen by typing the screen or acronym name in the blue prompt
bar located above the 'Setup' menu. Then, press Enter.
The screen then appears.
© 2011 Cast & Crew Entertainment Services, LLC.
250
PSL3 User Manual
To select criteria, press the F2 Key or right click in most fields to mak e your selection. You can also
simply type in the criteria in the allotted fields. If you wish to include all criteria information, leave
all fields blank except for any white colored fields as white fields are required before proceeding
in PSL3.
Check Selection:
Bank - Input the Bank Code that issued the check that you wish to void. Once entered, the
Check Number and Reference Number fields associated with the Bank Code selected
become accessible.
Check Number - Input the range of Check Numbers that you wish to void. To void a single
check, enter the same Check Number in both the From and To Check Number fields.
Reference Number - Input the range of Check Reference Numbers that you wish to void. To
void a single Check Reference Number, enter the same number in both the From and To
Reference Number fields. Generally, you would use the Check Number fields to void
checks and leave the Reference Number fields blank except in the instance there were
duplicate Check Numbers and you wanted to void only one of those checks. If you entered a
Check Number to void, all checks with that number would be voided; however, if you entered a
Check Reference Number, only one of the duplicate Check Numbers would be voided. For
example, if in A/P Entry [apte] you entered the same Manual Check Number to pay two
separate A/P transactions and then posted those A/P transactions, this Manual Check
Number would have two different Check Reference Numbers associated with it. If you wanted
to void only one of those checks, you would need to enter the Check Reference Number, not
just the Check Number. To view a check's Reference Number, you can run the Check
© 2011 Cast & Crew Entertainment Services, LLC.
CHECKS
251
Inquiry Report [ckinq] located in the 'Checks' module. The Check Reference Number is
displayed in the header section.
Void or Reissue:
Void Checks - Select this option to void the selected Check Number(s) which changes the
original check's status to 'V'oid. It also creates a new reversing check record that has the
effect of canceling the original check which is created in the Current Period. This reversing
check record is a duplicate of the original check, except that the duplicate check amount has
the opposite sign of the original check amount that was voided. For example, if the voided
check amount was $300, the reversing check amount now reflects negative $300. If the
voided A/P Entry [apte] transaction contains distribution lines that were transferred from P/O
Entry [poent] and you choose not to re-issue the A/P Entry [apte] transaction, the P/O lines
linked to the A/P that was voided will be re-opened.
Void then Reissue - Select this option to reissue the A/P Entry [apte] transaction(s) that is
voided upon voiding the check. If you select this option, the original A/P Entry [apte]
transaction is recreated with an unposted status in the Current Period which you can modify
in A/P Entry [apte], if necessary. All reissued A/P Entry [apte] transactions will have the
voided Check Number default in the Batch field. If the voided A/P Entry [apte] transaction
contains distribution lines that have been transferred from P/O Entry [poent], those P/O
distribution lines are automatically transferred to the new reissued A/P Entry [apte]
transaction.
WARNING:
Please be advised if you need to change the
Vendor Name on a check that has a P/O
attached, PSL3 does not allow you to change the
Vendor Name on a reissued transaction. It is
recommended to simply select 'Void' and input a
new A/P Entry [apte] transaction with the correct
information.
Void Date:
Date - Date that you are voiding the check(s); should default to today’s date. You can always
change it by typing over the defaulted date or by right clicking in that field for the calendar
selection to appear. Please note you cannot input a date that is in a previously closed period.
© 2011 Cast & Crew Entertainment Services, LLC.
252
PSL3 User Manual
Register:
Print Detail - Check mark this option to generate a Detailed Register of the check(s) which is
the default setting. If left unchecked, a Summary Register is printed instead.
Print/Preview the Report: Located in the top right hand corner of the screen, you can choose the
following options to void and/or reissue and generate the report:
Print - Opens the Print Dialogue box, sends the report directly to the printer and begins the
voiding process.
Preview - Generates a PDF format report and appears instantly on your screen. You are still
able to print from the PDF format.
WARNING:
Please be advised in order to complete the void
and/or reissue process, you must select the 'Print'
option. If you select 'Preview', the check(s) does
not get voided.
© 2011 Cast & Crew Entertainment Services, LLC.
CHECKS
253
Once you select 'Print', PSL3 displays the following message prompt:
If you select 'No', PSL3 asks "Would you like to reprint the register (Y/N)?". If you still select
'No', you will receive a prompt notifying you the voiding process is not done. If you select 'Yes',
you will receive a secondary prompt confirming the voiding process is completed.
If you selected the option to 'Void then Reissue', PSL3 also displays the following message
prompt:
If you select 'No', the Reissued A/P Invoice List Report is not printed. If you select 'Yes', the
Print Dialogue box opens and sends the report directly to the printer. The Reissued A/P
Invoice List Report includes the A/P invoices that were reissued. Please note in A/P Entry
[apte], the Batch Number on the reissued transaction(s) now reflect the Check Number of the
voided check(s). These reissued A/P invoices are created with an unposted status in which you
can modify before posting or delete if needed.
Once the void and/or reissue process is complete, PSL3 automatically updates the A/P
transaction(s) status as follows:
Original A/P transaction(s) is marked with a 'V' for Void.
Reversal A/P transaction(s) is marked with an 'R' for Reversal.
© 2011 Cast & Crew Entertainment Services, LLC.
254
PSL3 User Manual
Reissued A/P transaction(s) is marked with a 'U' for Unposted to make any necessary
modifications.
© 2011 Cast & Crew Entertainment Services, LLC.
CHECKS
255
Chapter 10.4 Bank Reconciliation
Bank Reconciliation is the procedure of reconciling the bank balance reflected on a ledger to the bank
balance reflected on a bank statement for a given period, to balance a bank statement. Bank
Reconciliation [ckrbs] is used to determine the actual Cash in Bank account balance on the date you
perform the reconciliation. Your Bank Reconciliation is balanced when the statement balance equals
the checkbook balance.
NOTE:
Please note any service charges or interest earned
items must be entered in through the Journal
Entry [jete] screen. You are not able to enter
them through the Bank Reconciliation [ckrbs]
screen.
Open:
To access the Bank Reconciliation [ckrbs] screen, click the 'Checks' module from the menu
tree (see following screen shot).
Bank Reconciliation [ckrbs] is also located in the 'Report' module under the 'Checks' subfolder.
You can also access this screen by typing the screen or acronym name in the blue prompt
bar located above the 'Setup' menu. Then, press Enter.
© 2011 Cast & Crew Entertainment Services, LLC.
256
PSL3 User Manual
The screen then appears.
© 2011 Cast & Crew Entertainment Services, LLC.
CHECKS
257
Selection Criteria:
Bank - Bank Code to perform the Bank Reconciliation. Press the F2 Key or right click to
select the bank.
Currency - Currency Code associated with the Bank Code defaults upon selecting the bank.
All transaction amounts included in the reconciliation are translated to this currency.
Cash Account - Cash in Bank Account associated with the Bank Code defaults upon
selecting the bank. This field is pulled from the Bank Code Entry [subank] screen.
Statement Date - Date when the items will be marked as 'Cleared'. This field defaults to
today's date, but you can change it by typing over the defaulted date or by right clicking in
this field for the calendar selection to appear.
© 2011 Cast & Crew Entertainment Services, LLC.
258
PSL3 User Manual
Use Statement Date as Cut-off Date - Check mark this option for the reconciliation to only
include items up to the Statement Date, not past it.
Include Checks - Check mark to include uncleared checks in the reconciliation.
Include Deposits - Check mark to include uncleared deposits in the reconciliation.
One Line per Check Number - Check mark to include only one line per Check Number in
the reconciliation.
Check Sort:
'Date', 'Check' Number' and 'Vendor Name' are all sorting options available for you to select
per your preference.
Totals:
© 2011 Cast & Crew Entertainment Services, LLC.
CHECKS
259
Balances:
Beginning - Beginning or opening balance since the last Bank Reconciliation. For example,
if the last Bank Reconciliation performed had a balance of $613.83 at the end of June, this
amount becomes the beginning balance for the beginning of July. Please note you are not
able to access this field.
Cleared - Cleared amount balance. Please note you are not able to access this field.
Statement - Input the Bank Statement balance. This amount is zero when you begin your
first Bank Reconciliation. As you clear items, this amount changes. Your Bank Statement is
reconciled when the statement balance equals the checkbook balance.
Difference - Difference amount balance. Cleared amount + Statement amount = Difference
amount balance. Please note you are not able to access this field.
Start to populate data:
To proceed with the clearing process, press the F1 Key, then 'S' option or select 'Start'
located in the top right hand corner of the screen. Once you select 'Start', the transaction
details at the bottom of the screen are displayed. You are then able to indicate whether an
item is cleared along with it's Clear Date.
Transaction Details:
Cleared - To manually mark an item as 'Cleared', enter the letter 'C' in this field. You also
have the option to automatically mark all checks or deposits as 'Cleared' by selecting either
'Clear All Checks' or 'Clear All Deposits' located in the right hand corner of the screen. In
addition, you have the option to automatically mark all checks or deposits as 'Uncleared' by
selecting either 'Unclear All Checks' or 'Unclear All Deposits'.
Clear Date - Once you have marked an item as 'Cleared', the Clear Date defaults with the
date input as the Statement Date. Please note you are able to change the Clear Date.
*Please note you are not able to access the following fields:
Check Number - Number of the check.
Effective Date or Check Date - Effective Date of the transaction or check.
Type - Types include 'Dep' = Deposit and 'Cmp' = Computer Check.
Reference Number - Reference Number of the transaction.
Reference Description or Vendor Name - Reference Description of the transaction or name
of the vendor or payee.
Amount - Amount of the transaction.
© 2011 Cast & Crew Entertainment Services, LLC.
260
PSL3 User Manual
Before proceeding with the reconciliation process, PSL3 provides you a variety of reporting options
(Summary, Work sheet, Edit, etc.) to view the Bank Reconciliation details which are located in the right
hand corner of the screen. In addition, PSL3 also provides the option of 'Reconciling Items' which is a
screen that allows you to input the description and amount of an item(s) in the event the Bank
Reconciliation does not balance. You can delete the reconciled item(s) once it actually processes.
Reconcile: To proceed with the reconciling process, press the F1 Key, then 'R' option or select
'Reconcile' located in the right hand corner of the screen. This opens the Print Dialogue box and
begins the reconciling process.
Once you select 'Reconcile', PSL3 displays the following message prompt:
If you select 'No', PSL3 asks "Would you like to reprint the register?". If you still select 'No',
you will receive a prompt notifying you the clearing process is not done. If you select 'Yes', you
will receive a secondary prompt confirming the clearing process was successful along with the
number of checks and deposits cleared and reconciled.
© 2011 Cast & Crew Entertainment Services, LLC.
CHECKS
261
Chapter 10.5 Positive Pay Export and Report
Positive Pay Export and Report [pospay] is a process whereby PSL3 electronically exports the check
file of all issued checks to the bank. The bank, therefore, only pays checks listed in that check file
register, with exactly the same specifications listed in the file (check number, payee name, dollar
amount, etc.). When these issued checks are presented for payment at the bank, they are compared
electronically against the list of transmitted checks. When a check is presented that does not have a
'match' in the file, it becomes an "exception item". The bank contacts the client and includes a fax or an
image of the exception item to the client. The client reviews the image and instructs the bank to pay or
return the check. This system dramatically reduces check fraud.
Open:
To access the Positive Pay Export and Report [pospay] screen, click the 'Checks' module
from the menu tree (see following screen shot).
The Positive Pay Export and Report [pospay] screen is also located in the 'Report' module
under the 'Checks' sub-folder.
You can also access this screen by typing the screen or acronym name in the blue prompt
bar located above the 'Setup' menu. Then, press Enter.
© 2011 Cast & Crew Entertainment Services, LLC.
262
PSL3 User Manual
The screen then appears.
© 2011 Cast & Crew Entertainment Services, LLC.
CHECKS
263
Selection Criteria:
Bank - Name of the bank in which the check file will be transmitted to. Press the F2 Key or
right click to select the Bank Code.
Production - Name of the Production; should default if there is only one Production Code
setup in the database.
Pospay Format - Format of the Pospay file that defaults when the Bank is selected. Please
note you are not able to access this field.
Cut Off Date - The Pospay Format field must be blank in order to enter a value for the cut off
date.
Check Type:
Defaults to 'All Exportable Checks' (most common).
Retrieve Existing Report/Export File(s):
Start Date and End Date - Dates to retrieve the archived report by. Press the F2 Key or right
click in either date field for the calendar selection to appear.
© 2011 Cast & Crew Entertainment Services, LLC.
264
PSL3 User Manual
Bank - Name of the bank to retrieve the archived report by. Press the F2 Key or right click to
select the Bank Code.
Retrieve Report - Generates a PDF format of the archived report which appears instantly on
your screen. You are still able to print from the PDF format. The title of the report is named
'(Bank Name) Checks Issued List'.
Retrieve Files - Opens the Save Dialogue box in which you are able to save the archived
report file directly to your computer.
Print/Preview the Report: Located in the top right hand corner of the screen, you can choose the
following options to export and generate the report:
Print Edit - Sends the report directly to the printer.
Preview Edit - Generates a PDF format report and appears instantly on your screen. You
are still able to print from the PDF format.
Send Export - Begins the exporting process.
© 2011 Cast & Crew Entertainment Services, LLC.
CHECKS
265
Once you select 'Send Export', PSL3 displays the following message prompt:
If you select 'No', PSL3 asks "Would you like to reprint the register?". If you still select 'No', the
exporting process is not done. If you select 'Yes', you will receive a secondary prompt
confirming the Positive Pay file is now sent.
WARNING:
Please be advised do not click 'Send Export' more
than one time within a 15 minute interval or else
two files get created. Please contact the Support
Department should this occur as one file becomes
overridden.
© 2011 Cast & Crew Entertainment Services, LLC.
266
PSL3 User Manual
Chapter 10.6 Additional Check Screens/Reports
PSL3 offers additional Check Screens/Reports which are listed below.
Open:
To access the following Check Screens/Reports, click the 'Checks' module from the menu
tree (see following screen shot).
These additional Check Screens/Reports are also located in the 'Report' module under the
'Checks' sub-folder.
You can also access these screens/reports by typing the screen or acronym name in the
blue prompt bar located above the 'Setup' menu. Then, press Enter.
To select criteria for the following reporting screens, press the F2 Key or right click in most fields to
mak e your selection. You can also simply type in the criteria in the allotted fields. If you wish to
include all criteria information, leave all fields blank except for any white colored fields as white
fields are required before proceeding in PSL3.
Checks Inquiry [ckinq] - Use [ckinq] to display information for any check that has been
printed in PSL3. This report lists all details attached to the check number including the
Check Date, Void Date (if any), Clear Date as well as the attached A/P Reference Numbers,
etc. This report can also be found in the 'G/L' module and it's main use is to provide a quick
look up of details pertaining to a single check.
Check Register Detailed Report [ckreg]- Use [ckreg] to print a detailed register of either all
checks or just manual checks issued. This report includes several summaries that display at
the end of the report which are as follows: Total Number of Checks and Total Stub Lines,
Grand Total for each Bank, Grand Total for each Currency, Currency Conversion Chart, Cash
in Bank and the Clearing Account details (Account Numbers, Descriptions and Amounts).
© 2011 Cast & Crew Entertainment Services, LLC.
CHECKS
267
Check Register History Report [ckdetcr] - Use [ckdetcr] to display a summary of all checks
that have printed. This report provides you the option to select the status type (Cleared,
Outstanding, Computer, Voided, Manual and/or Alignment) in addition to the Period or Date
Range to generate the report by. This report is similar to the Check Register Summary
Report [ckolcr] by listing one line of information per check; however it also includes the added
line item details of the A/P invoice transaction.
Rapid Check [ckent] - Use [ckent] to print a single demand check for immediate printing and
paying an invoice. This screen is especially beneficial when the A/P transaction has not been
entered in A/P Entry [apte] because this program creates an new unposted A/P transaction.
It is also helpful when the A/P transaction is unposted because you won't have to post it
before you print the check. Please note this program still prints a Check Register Report at
the end of the check printing process.
NOTE:
The reports are available in either Print, Preview
and/or Spreadsheet formats.
NOTE:
Please email [email protected] if you
don't see a specific PSL3 report currently listed as
an option in your database.
© 2011 Cast & Crew Entertainment Services, LLC.
BUDGET
Section
XI
BUDGET
Section 11 BUDGET
This section will address the following programs:
Import a Budget
Create a Budget
Delete a Budget
Budget Amount Entry
Budget Listing Report
Additional Budget Screens
Additional Budget Inquiries and Reports
© 2011 Cast & Crew Entertainment Services, LLC.
271
272
PSL3 User Manual
Chapter 11.1 Import a Budget
The Import a Budget [bdint] program is used to import a budget file from either Movie Magic or EP
Budgeting into PSL3. This program also provides the option to create new account numbers from the
budget you are importing, creating your Chart of Accounts. Once you have successfully imported a
budget into PSL3, you are able to make any necessary modifications (change budgeted amounts, enter
budget lines specific to a particular Series, Location or Set Code, delete an account, add an account,
etc.) manually in the Budget Amount Entry [bdent] screen.
Open:
To access the Import a Budget [bdint] screen, click the 'Budget' module from the menu tree
(see following screen shot).
You can also access this screen by typing the screen or acronym name in the blue prompt
bar located above the 'Setup' menu. Then, press Enter.
The screen then appears.
© 2011 Cast & Crew Entertainment Services, LLC.
BUDGET
273
Prior to the import process, first save the Movie Magic or EP Budget (.dsc) or Text/Tab delimited (.txt)
format file to your computer. If you are importing from Movie Magic, select 'File' > 'Export' > 'C&C
Format'. If you are importing from EP Budgeting, select 'File' > 'Export' > 'Other' > 'C&C Format'.
Interface File:
Select File - Choose the Text/Tab delimited (.txt) or (.dsc) file you wish to load. Please note
budgets are loaded one at a time.
Budget Information:
Budget Name - Input the name of the budget you are importing which can hold up to six
alpha/numeric characters. After entering the new Budget Name, PSL3 asks, "Budget is not
in the database. Do you wish to create it?". Select 'Yes'. Please note each Budget Name
must be unique. Immediately to the right of Budget Name, input the description of the budget
which can hold up to 50 alpha/numeric characters.
Production - Press the F2 Key or right click in this field if the Production Code for the budget
does not already default.
Create Budget Lines With:
© 2011 Cast & Crew Entertainment Services, LLC.
274
PSL3 User Manual
Press the F2 Key or right click in any of these fields (Series, Location, Set, and Currency)
to choose the necessary codes if they don't already default. The codes selected will be
associated with the budget lines once created.
*Make sure to input all white colored fields as white fields are required before proceeding in
PSL3.
Account Numbers:
Create New Accounts - Check mark this option to create new account numbers from the
budget you are importing. Imported budget line account numbers that do not exist in the
Chart of Accounts or that exist in the Chart of Accounts but do not exist in the Budget Name
you are importing will be copied into the budget. If the 'Create New Accounts' box is left
unchecked, PSL3 will not create new account numbers from the budget as there may already
be a Chart of Accounts for this Production. If you print the Edit List, the newly created
account numbers are identified as 'NEW'; if left unchecked, the report identifies the account
numbers as 'ACCOUNT NON-EXISTENT; ignored'.
Process Duplicate Budget Amounts:
If the Budget Name exists and already has budget lines but you are importing additional budget lines,
you must tell PSL3 what to do with budget amounts if the import file contains account numbers that
duplicate the existing account numbers. Otherwise, if this is a new Budget Name, leave the default
setting as is; nothing will be affected.
Combine - Add import file budget amounts to existing budget amounts. The result is the
sum of the import file budget amounts and the existing budget amounts.
Replace - Replace the existing budget amounts with the import file budget amounts. The
result is the import file budget amounts.
Preserve - Leave the existing budget amounts intact and ignore import file budget amounts.
The result is the existing budget amounts.
Masks:
Translation - Coding that displays how the budget line account numbers are formatted from
the file (. = include account numbers and 0 = ignore account numbers). Please note the
Support Department usually modifies this field if needed.
Account - Displays the account mask for the Chart of Accounts (e.g., XXXX, XX-XX, etc.).
Please note you are not able to access this field.
© 2011 Cast & Crew Entertainment Services, LLC.
BUDGET
275
NOTE:
Please email a request to support@castandcrew.
com if you need your databases' account mask
changed. The default account mask for a new
database is XXXX.
Print/Preview the Report: Located in the top right hand corner of the screen, you can choose the
following options to generate the report:
Print Edit - Opens the Print Dialogue box and sends the report directly to the printer.
Preview Edit - Generates a PDF format report and appears instantly on your screen. You
are still able to print from the PDF format.
Import - Begins the importing process.
Once you select 'Import', PSL3 displays a message similar to the following message prompt
confirming the budget is now loaded:
To review or make any changes to the budget, use the Budget Amount Entry [bdent] screen
located in the 'Budget' module, then 'Maintenance' sub-folder.
© 2011 Cast & Crew Entertainment Services, LLC.
276
PSL3 User Manual
WARNING:
Please be advised if you are importing a budget file
from Movie Magic, PSL3 imports both Header and
Sub-accounts on occasion. This works fine for
creating the Chart of Accounts, which does not
include any amounts; however, the result for the
budget is that the budget amount doubles the
original amount. The solution is to manually
delete Header Accounts from the budget in
Budget Amount Entry [bdent], not Chart of
Accounts Entry [glca].
NOTE:
Please email the budget file in Text/Tab delimited
(.txt) or (.dsc) format (or both formats to be sure)
to [email protected] should you
encounter any problems with the file import. The
Support Department is happy to assist in
troubleshooting and/or loading the file for you upon
request.
© 2011 Cast & Crew Entertainment Services, LLC.
BUDGET
277
Chapter 11.2 Create a Budget
A budget is a financial document that allocates a Production's financial transactions to a group of
accounts, each of which describes a component of film making and enables financial reporting. Use the
Create a Budget [bdgl] program to create a new budget by copying in the account number data from
your Chart of Accounts [glca]. Once the budget is created, use the Budget Amount Entry [bdent]
screen to add the budget amounts for each account. If the Chart of Accounts [glca] were added after
you created the budget, you can append those new account numbers to your existing budget with the
Create a Budget [bdgl] program as well. Please note Header Accounts are not included when copying
account number data into the budget.
NOTE:
Please note you must have a budget input in to
PSL3 in order to run the Estimated Final Cost
Report [efcrpt]. If you don't have a budget input
yet, you can create a Zero Dollar Budget here in
the Create a Budget [bdgl] screen.
Open:
To access the Create a Budget [bdgl] screen, click the 'Budget' module, then 'Maintenance'
sub-folder from the menu tree (see following screen shot).
You can also access this screen by typing the screen or acronym name in the blue prompt
bar located above the 'Setup' menu. Then, press Enter.
© 2011 Cast & Crew Entertainment Services, LLC.
278
PSL3 User Manual
The screen then appears.
© 2011 Cast & Crew Entertainment Services, LLC.
BUDGET
279
To select criteria, press the F2 Key or right click in most fields to mak e your selection. You can also
simply type in the criteria in the allotted fields. If you wish to include all criteria information, leave
all fields blank except for any white colored fields as white fields are required before proceeding
in PSL3.
Budget Information:
Budget Name - Input the name of the budget which can hold up to six alpha/numeric
characters. After entering the new Budget Name, PSL3 asks, "Budget is not in the database.
Do you wish to create it?". Select 'Yes'. Please note each Budget Name must be unique.
Immediately to the right of Budget Name, input the description of the budget which can hold
up to 50 alpha/numeric characters.
Production - Press the F2 Key or right click in this field if the Production Code for the budget
does not already default.
Add Budget Lines for Account Range:
From Account and To Account - First and Last Expense Account to create in the budget.
To create all account numbers, leave both fields blank.
Fill Budget Lines With:
Press the F2 Key or right click in any of these fields (Series, Location, Set, and Currency)
to choose the necessary codes if they don't already default. The codes selected will be
associated with the budget lines once created.
© 2011 Cast & Crew Entertainment Services, LLC.
280
PSL3 User Manual
*Make sure to input all white colored fields as white fields are required before proceeding in
PSL3.
Create:
To proceed with the creating process, press the F1 Key, then 'S' option or select 'Create'
located in the top right hand corner of the screen. After selecting 'Create', PSL3 provides a
confirmation prompt with how many budget lines were created depending on the Budget
Information input. PSL3 automatically saves the budget creation.
© 2011 Cast & Crew Entertainment Services, LLC.
BUDGET
281
Chapter 11.3 Delete a Budget
Use the Delete a Budget [bddel] program to delete an entire budget or parts of an existing budget.
WARNING:
Please be advised once a budget is deleted, it is
gone from the database. There is not an 'undo'
command. You can always re-enter a budget if
needed.
Open:
To access the Delete a Budget [bddel] screen, click the 'Budget' module, then 'Maintenance'
sub-folder from the menu tree (see following screen shot).
You can also access this screen by typing the screen or acronym name in the blue prompt
bar located above the 'Setup' menu. Then, press Enter.
© 2011 Cast & Crew Entertainment Services, LLC.
282
PSL3 User Manual
The screen then appears.
To select criteria, press the F2 Key or right click in most fields to mak e your selection. You can also
simply type in the criteria in the allotted fields. If you wish to include all criteria information, leave
© 2011 Cast & Crew Entertainment Services, LLC.
BUDGET
283
all fields blank.
Budget Information:
Budget Name - Input the name of the budget you want to delete.
Production - The Production Code defaults when the Budget Name is input. Please note you
are not able to access this field.
Start and End Account Range - First and Last Expense Account to delete from the budget.
To restrict the program to only delete information for a single account number, input the same
account in both the Start and End fields. To delete all account numbers, leave both fields
blank.
Series, Location, Set and Currency - Press the F2 Key or right click in any of these fields
to limit the budget lines that will be deleted to those that match these items. To delete all
codes pertaining to the Budget Name selected, leave these field blank.
Delete:
To proceed with the deleting process, press the F1 Key, then 'D' option or select 'Delete'
located in the top right hand corner of the screen. After selecting 'Delete', PSL3 provides a
confirmation prompt with how many budget lines were deleted or if the entire budget was
deleted depending on the Budget Information input. PSL3 automatically saves the budget
deletion.
© 2011 Cast & Crew Entertainment Services, LLC.
284
PSL3 User Manual
Chapter 11.4 Budget Amount Entry
Once you have created the framework of your budget with either the Create a Budget [bdgl] or Import
a Budget [bdint] programs, use Budget Amount Entry [bdent] to enter or modify amounts for each
budgeted expense account within your Chart of Accounts. These amounts will be the budgeted
amounts in the Estimated Final Cost Report [efcrpt]. Budget Amount Entry [bdent] also allows you
to look up budgeted items, add new budget lines, delete existing budget lines, and modify the Currency
and Amount fields.
Open:
To access the Budget Amount Entry [bdent] screen, click the 'Budget' module, then
'Maintenance' sub-folder from the menu tree (see following screen shot).
You can also access this screen by typing the screen or acronym name in the blue prompt
bar located above the 'Setup' menu. Then, press Enter.
The screen then appears.
© 2011 Cast & Crew Entertainment Services, LLC.
BUDGET
285
Budget Information:
Budget Code - Name of the budget whose data you want to review or modify. Press the F2
Key or right click to select the Budget Code. Once the Budget Code is selected, press
the F7 Key or 'Find' icon
located on the toolbar for the budget lines to appear.
Please note if you press the Enter Key after selecting the Budget Code, the budget
lines will not appear. In this screen, the Enter Key just takes you to next field.
Description - Description for the budget selected defaults. You are able to modify the
description of the budget here if needed.
Production - Production Code for the budget selected defaults.
Budget Total:
Currency - Currency Code for the budget selected defaults.
Total Budgeted - Total amount of the budgeted lines for the budget selected.
Account Selection:
© 2011 Cast & Crew Entertainment Services, LLC.
286
PSL3 User Manual
From and To - If you would like to look for a range of certain account numbers when selecting
a Budget Code, input the account numbers in these fields. To restrict PSL3 to only display
information for a single account number, input the same account in both the From and To
fields. Then, press the F7 Key or 'Find' icon
located on the toolbar for the budget lines
to appear. To display all account numbers, leave both fields blank.
Selection Criteria:
If you would like to look for certain Series, Location and/or Set Codes when selecting a
Budget Code, input the codes in these fields. You can also look for a certain budget amount
by check marking the Amount field and inputting an amount. Then, press the F7 Key or
'Find' icon
located on the toolbar for the budget lines to appear. To display all codes
and amounts, leave these fields blank.
Account Lines:
Account Number - Chart of Accounts Number for this budget line. Please note you are not
able to access this field.
Series - Series Code for this budget line. Please note you are not able to access this field.
Location - Location Code for this budget line. Please note you are not able to access this
field.
Set - Set Code for this budget line. Please note you are not able to access this field.
Currency - Currency Code for this budget line. Press the F2 Key or right click in this field to
change the Currency Code if needed.
Amount - Budget amount for this budget line. To change the amount, simply type in a new
amount. Please note if you press the F2 Key or right click in this field, a calculator displays
for your convenience.
© 2011 Cast & Crew Entertainment Services, LLC.
BUDGET
287
Helpful Hints:
Make sure to input all white colored fields as white fields are required before saving in PSL3.
To save this entry, select either 'Save' icon
located on the toolbar.
You can also press the F1 Key, then 'U' option to Update which saves and remains on screen
or press the F1 Key, then 'A' option to Accept which saves and clears the screen (most
common).
To add another budget line, press Enter or Tab where the last line was entered or scroll down
to the bottom of the screen and a blank line becomes available.
To insert a budget line in between already existing lines, place your cursor where you want to
add and press the F4 Key or select the 'Add' icon
. A new line is added beneath.
To delete an unused budget line, place your cursor in the line you want to delete and press
the F10 Key or select the 'Delete' icon
deleted upon saving.
© 2011 Cast & Crew Entertainment Services, LLC.
. A red strike-through line appears which is
288
PSL3 User Manual
Chapter 11.5 Budget Listing Report
The Budget Listing Report [bdentp] generates a listing of all fields in the Budget Amount Entry
[bdent] screen for the specified budget. The report includes budget details on the following fields:
Account Number, Description, Series, Location, Set, Currency and Budgeted Amount. At the
end of the report, the Grand Total of the selected budget is displayed. The Budget Listing Report
[bdentp] is helpful in reviewing all codes were entered in correctly. If changes need to be made to a
budget, this is done in the Budget Amount Entry [bdent] screen.
Open:
To access the Budget Listing Report [bdentp], click the 'Budget' module from the menu tree
(see following screen shot).
The Budget Listing Report [bdentp] is also located in the 'Report' folder under the
'Budgeting/Cost' sub-folder.
You can also access this report by typing the screen or acronym name in the blue prompt bar
located above the 'Setup' menu. Then, press Enter.
The screen then appears.
© 2011 Cast & Crew Entertainment Services, LLC.
BUDGET
289
Budget Information:
Budget Name - Name of the budget whose data you want to view and/or print. To select the
Budget Name, press the F2 Key or right click to make your selection. You can also simply
type in the Budget Name.
Print/Preview the Report: Located in the top right hand corner of the screen, you can choose the
following options to generate the report:
Print - Opens the Print Dialogue box and sends the report directly to the printer.
Preview - Generates a PDF format report and appears instantly on your screen. You are still
able to print from the PDF format.
© 2011 Cast & Crew Entertainment Services, LLC.
290
PSL3 User Manual
Chapter 11.6 Additional Budget Screens
PSL3 offers additional Budget Screens which are listed below.
Open:
To access the following Budget Screens, click the 'Budget' module, then 'Maintenance' subfolder from the menu tree (see following screen shot).
You can also access these screens by typing the screen or acronym name in the blue
prompt bar located above the 'Setup' menu. Then, press Enter.
To select criteria for the following screens, press the F2 Key or right click in most fields to mak e your
selection. You can also simply type in the criteria in the allotted fields.
Budget Name Entry [bdname] - Use [bdname] to add a new Budget Name, find existing
Budget Names, modify an exiting budget's Description and Production Code (the Production
Code can only be changed if no budget lines have been entered) and delete Budget Names (if
© 2011 Cast & Crew Entertainment Services, LLC.
BUDGET
291
no budget lines have been entered).
Copy/Merge Budgets [bdmove] - Use [bdmove] to copy an existing budget or merge two
budgets. This program also allows you to rename a budget by copying it to a new budget
with the new name or change all of the budget amounts by the same percentage. This screen
is also used to quickly create a budget for a new Series Code/Episode within one Production.
© 2011 Cast & Crew Entertainment Services, LLC.
292
PSL3 User Manual
Chapter 11.7 Additional Budget Inquiries and Reports
PSL3 offers additional Budget Inquiries and Reports which are listed below. These reports can also be
found in the section Additional Cost Report Screens/Reports.
Open:
To access the following Budget Reports, click the 'Budget' module from the menu tree (see
following screen shot).
These additional Budget Reports are also located in the 'Cost' module as well as 'Report'
module under the 'Budgeting/Cost' sub-folder.
You can also access these reports by typing the screen or acronym name in the blue prompt
bar located above the 'Setup' menu. Then, press Enter.
To select criteria for the following reporting screens, press the F2 Key or right click in most fields to
mak e your selection. You can also simply type in the criteria in the allotted fields. If you wish to
include all criteria information, leave all fields blank except for any white colored fields as white
fields are required before proceeding in PSL3.
Account Variance Report [bdvar] - Use [bdvar] to generate a Detailed or Summary list of
Variance transactions in your database. Detailed reporting can include every Variance entry
along with the transaction details for each depending on the Date Range input. The report can
be ran by Account Range, Start and End Dates, Multiple Currency, etc. as selection criteria.
Reference Variance Report [bdvep] - Use [bdvep] to print a list of Variances entries for one
day or for the entire reporting period, sorted by Account Order or Entry Order. The report can
be used in conjunction with the Bible Report [bdbr] to show how and why account balances
do not match the budgeted amounts.
© 2011 Cast & Crew Entertainment Services, LLC.
BUDGET
NOTE:
The reports are available in either Print, Preview
and/or Spreadsheet formats.
NOTE:
Please email [email protected] if you
don't see a specific PSL3 report currently listed as
an option in your database.
© 2011 Cast & Crew Entertainment Services, LLC.
293
COST
Section
XII
COST
Section 12 COST
This section will address the following programs:
EFC Entry
Variance Entry
Cost Report/EFC Worksheet
Estimated Final Cost Report
Additional Cost Report Screens/Reports
© 2011 Cast & Crew Entertainment Services, LLC.
297
298
PSL3 User Manual
Chapter 12.1 EFC Entry
Estimated Final Cost (EFC) is the projection of the anticipated costs to complete the Production, equal
to the sum of the estimate to complete and the actual costs to date for the Production. Use EFC Entry
[efcent] to make EFC changes. Once an EFC/Variance change has been created, PSL3 automatically
adjusts the Cost to Complete, Estimated Final Cost and Variance amounts on the Estimated Final
Cost Report [efcrpt].
Please note EFC's and Variances are created by one of three ways which are as follows:
1. By directly accessing the Variance Entry [bdve] screen and inputting the change(s) there.
2. By making the change(s) in the EFC Entry [efcent] screen. After making and saving the EFC
change(s), a Variance is created with the new Variance Entry [bdve] Reference Number
appearing directly in the EFC Entry [efcent] screen for your records.
3. By making the change(s) in the Cost Report/EFC Worksheet [efcws] screen. After making
and saving the EFC change(s), a Variance is created with the new Variance Entry [bdve]
Reference Number appearing directly in the Cost Report/EFC Worksheet [efcws] screen for
your records.
Although PSL3 allows you to select any of the three previously mentioned options, the result of
entering an EFC or Variance in either Variance Entry [bdve], EFC Entry [efcent] or in the Cost
Report/EFC Worksheet [efcws] screen is exactly the same.
Open:
To access the EFC Entry [efcent] screen, click the 'Budget' or 'Cost' module from the menu
tree (see following screen shot).
You can also access this screen by typing the screen or acronym name in the blue prompt
bar located above the 'Setup' menu. Then, press Enter.
© 2011 Cast & Crew Entertainment Services, LLC.
COST
The screen then appears.
© 2011 Cast & Crew Entertainment Services, LLC.
299
300
PSL3 User Manual
Budget Information:
Budget - Name of the budget in which the EFC changes will be made. To choose multiple
budgets, press the F2 Key or right click in this field and hold down the Control Key while
simultaneously using your mouse to select.
Production - Production Code for the Budget Name. The Production Code defaults when the
budget is input. Please note you are not able to access this field
Reference & Batch:
Press the F2 Key or right click in these fields (Batch and Company) to choose the
necessary codes if they don't already default. The codes selected will be associated with the
Variance Entry [bdve]transaction once created. To run EFC Entry [efcent] from a previous
Variance transaction created, use the Variance Reference field to input the Reference
Number.
Date Selection:
Effective Date - Date of the transaction that is recorded and affects the Estimated Final
Cost Report [efcrpt]; should default with today's date. You can always change the Effective
Date by typing over the defaulted date or by right clicking in that field for the calendar
selection to appear. Please note you can not input a date that is in a previously closed
© 2011 Cast & Crew Entertainment Services, LLC.
COST
301
period.
End Date - Cut-off date for this transaction to include up to. Please note many transactions
are created with future dates; therefore, the worksheet will only include information up to this
date, not past it.
*Please note the Effective Date and End Date are usually input with the same date for
consistency purposes.
Account Selection:
From and To - Account numbers to include in the worksheet. To restrict the worksheet to
only include information for a single account number, input the same account in both the
From and To fields. To multi-pick certain accounts, press the F2 Key or right click in either
field and hold down the Control Key while simultaneously using your mouse to select. To
select all account numbers, leave both fields blank.
Selection Criteria:
Press the F2 Key or right click in these fields (Series, Location and Set) to choose the
necessary codes. To select all Series, Location and Set Codes, leave these fields blank.
Check mark the 'Combine' option to combine all Series, Location and/or Set Codes into one
line on the worksheet.
Options:
Include Committed Costs - Check mark to include Committed Costs (items entered in the
database, but not yet paid) which consist of P/O's and Open Items.
Include Inactive Accounts - Check mark to include accounts that had no activity/
distributions posted to them during the date range selected or have a zero dollar balance.
© 2011 Cast & Crew Entertainment Services, LLC.
302
PSL3 User Manual
WARNING:
Please be advised if you are adding a new account
number to a budget, it must be added in both
Chart of Accounts Entry [glca] and Budget
Amount Entry [bdent] for it to appear in EFC
Entry [efcent]. If you have added the account
number only in Chart of Accounts Entry [glca], it
will not appear in this screen when check marking
'Include Inactive Accounts'.
Budget Amount as Activity - Check mark to include accounts that had no distributions
posted to them, but do have a non-zero amount budgeted.
Open Items as Actuals - Check mark to include Open Items (items posted but not yet paid).
Only P/O's will be treated as Commitments.
Over Budget as Negative - Check mark to show over budget amounts as negative numbers.
Multiple Currency:
Source - If you have more than one currency in your database, you can choose to include
only transactions denominated in one currency, two, three, etc., or all currencies. To choose
multiple Currency Codes, press the F2 Key or right click in the field and hold down the Control
Key while simultaneously using your mouse to select.
Target - Base currency set up in the System Control Information Entry [suctrl] screen
located in the 'Setup' module defaults. This Currency Code is what all transactions are
converted to on the worksheet.
Start to populate data:
To proceed with making the EFC changes, press the F1 Key, then 'S' option or select 'Start'
located in the top right hand corner of the screen. Make sure to input all white colored fields
as white fields are required before the 'Start' option is made available. Once you select 'Start',
the worksheet at the bottom of the screen becomes available. You are able to make changes
to the light blue colored fields which include: Cost to Complete, EFC, Variance and
Description. If you leave the Description field blank, PSL3 defaults the description to "EFC
Entry Variance" in Variance Entry [bdve]. Please note if you press the F2 Key or right click
in the light blue worksheet fields, a calculator displays for your convenience.
© 2011 Cast & Crew Entertainment Services, LLC.
COST
303
Once all EFC changes have been made, save the changes by pressing the F1 Key, then 'A'
option to Accept which saves and clears the screen or select the 'Accept' icon
located on
the toolbar. A Variance transaction is created and the Variance Entry [bdve] Reference
Number displays on the screen.
© 2011 Cast & Crew Entertainment Services, LLC.
304
PSL3 User Manual
Chapter 12.2 Variance Entry
A Variance is an estimate that deviates from the amount budgeted for that estimate, usually the
difference between the actual costs of Production and the budgeted costs. The Variance Entry [bdve]
program allows you to create or modify a Variance transaction. Once an EFC/Variance change has
been created, PSL3 automatically adjusts the Cost to Complete, Estimated Final Cost and Variance
amounts on the Estimated Final Cost Report [efcrpt]. Please note Variance transactions do not get
posted.
Please note Variances are created by one of three ways which are as follows:
1. By directly accessing the Variance Entry [bdve] screen and inputting the change(s) here.
2. By making the change(s) in the EFC Entry [efcent] screen. After making and saving the EFC
change(s), a Variance is created with the new Variance Entry [bdve] Reference Number
appearing directly in the EFC Entry [efcent] screen for your records.
3. By making the change(s) in the Cost Report/EFC Worksheet [efcws] screen. After making
and saving the EFC change(s), a Variance is created with the new Variance Entry [bdve]
Reference Number appearing directly in the Cost Report/EFC Worksheet [efcws] screen for
your records.
Although PSL3 allows you to select any of the three previously mentioned options, the result of
entering a Variance in either Variance Entry [bdve], EFC Entry [efcent] or in the Cost Report/
EFC Worksheet [efcws] screen is exactly the same.
Open:
To access the Variance Entry [bdve] screen, click the 'Budget' or 'Cost' module from the
menu tree (see following screen shot).
You can also access this screen by typing the screen or acronym name in the blue prompt
bar located above the 'Setup' menu. Then, press Enter.
© 2011 Cast & Crew Entertainment Services, LLC.
COST
The screen then appears.
© 2011 Cast & Crew Entertainment Services, LLC.
305
306
PSL3 User Manual
Reference Information:
Reference Number - System-assigned number that is also referred to as transaction
number. To generate the next sequential Reference Number, press the F4 Key or select the
'Add' icon
located on the toolbar. You can also right click outside a field (in which 'Add'
option appears) to add the next record. If the Variance was created in either the EFC Entry
[efcent] or Cost Report/EFC Worksheet [efcws] programs, type in the Reference Number
previously assigned in either screen and press Enter, the F7 Key or select the 'Find' icon
located on the toolbar; the transaction appears in which you can proceed with the
necessary modifications.
Effective Date - Date of the transaction that is recorded and affects the Estimated Final
Cost Report [efcrpt]; should default with today's date after generating the Reference Number.
You can always change the Effective Date by typing over the defaulted date or by right
clicking in that field for the calendar selection to appear. Please note you can not input a
date that is in a previously closed period. If the Variance was created in either the EFC Entry
[efcent] or Cost Report/EFC Worksheet [efcws] programs, the Effective Date defaults upon
entering the Reference Number with the date previously input in either screen.
© 2011 Cast & Crew Entertainment Services, LLC.
COST
307
NOTE:
Please email a request to support@castandcrew.
com if you need a transaction's Effective Date
changed and include the Reference Number(s).
Please be advised depending on your specific
studio's guidelines, the Support Department may
need to obtain approval from your Studio Finance
Executive before proceeding.
Description - Explanation of this Variance transaction as a whole which can hold up to 30
alpha/numeric characters. This Reference Description defaults in the distribution lines. If the
Variance was created in the EFC Entry [efcent] program, the description defaults to "EFC
Entry Variance" if none was entered. If the Variance was created in the Cost Report/EFC
Worksheet [efcws] program, the description defaults to "EFC Worksheet VA" if none was
entered.
Batch Information:
Codes that are attached to the transaction. These fields are pulled from the User Entry
[suuser] screen located in the 'Setup' module (if setup beforehand). To change the defaulted
codes, press the F2 Key or right click in any of these fields (Batch, Production, Company
and Currency) and make your selection. If the Variance was created in either the EFC Entry
[efcent] or Cost Report/EFC Worksheet [efcws] programs, the Batch Information defaults
upon inputting the Reference Number with the codes previously input in either screen.
Total Variance:
Sum of all Variance Amounts entered in the distribution lines that is automatically tallied by
© 2011 Cast & Crew Entertainment Services, LLC.
308
PSL3 User Manual
PSL3. Please note you are not able to access this field.
Distribution Lines:
If the Variance was created in either the EFC Entry [efcent] or Cost Report/EFC Worksheet [efcws]
programs, the distribution lines default upon inputting the Reference Number with the codes previously
input in either screen.
Account Number - Chart of Accounts number that will be debited or credited on this
distribution line. Press the F2 Key or right click to change the account number. If the
account number doesn't exist in PSL3, you can add it by pressing the F5 Key or selecting the
'Zoom' icon
located on the toolbar. This zooms into the Chart of Accounts Entry [glca]
screen in which you can add the account number immediately. Once saved, press the F1
Key, then 'F' option or select the 'Fetch' icon
Entry [bdve] screen.
to fetch the account back to the Variance
NOTE:
The Series, Location, Set and Free Field
Codes are brought over from the User Entry
[suuser] screen located in the 'Setup' module if
setup. Otherwise, press the F2 Key or right click
in these fields to make your selection.
Description - Explanation for this distribution line which can hold up to 30 alpha/numeric
characters.
Amount - Dollar or other currency amount for this distribution line. If you are entering a
negative amount, input the minus sign before the number. Please note if you press the F2
Key or right click in the Amount field, a calculator displays for your convenience.
© 2011 Cast & Crew Entertainment Services, LLC.
COST
309
NOTE:
Please note Variance Entry [bdve] transactions
do not get posted. Once the transaction is saved,
it is recorded in your database.
Helpful Hints:
Make sure to input all white colored fields as white fields are required before saving in PSL3.
To save this entry, select either 'Save' icon
located on the toolbar.
You can also press the F1 Key, then 'U' option to Update which saves and remains on screen
or press the F1 Key, then 'A' option to Accept which saves and clears the screen (most
common).
To add another distribution line, press Enter or Tab where the last line was entered.
To insert a distribution line in between already existing lines, place your cursor where you
want to add and press the F4 Key or select the 'Add' icon
. A new line is added beneath.
To delete a distribution line, place your cursor in the line you want to delete and press the F10
Key or select the 'Delete' icon
saving.
. A red strike-through line appears which is deleted upon
To search for an existing entry, press the F7 Key or select the 'Find' icon
when the
screen is clear. All records appear in which you can scroll through using the 'Arrow' icons
(First, Prior, Next and Last)
Down' Keys until you find the entry needed.
© 2011 Cast & Crew Entertainment Services, LLC.
or by pressing the 'Page Up' or 'Page
310
PSL3 User Manual
Chapter 12.3 Cost Report/EFC Worksheet
Estimated Final Cost (EFC) is the projection of the anticipated costs to complete the Production, equal
to the sum of the estimate to complete and the actual costs to date for the Production. The Cost
Report/EFC Worksheet [efcws] program allows you to modify EFC’s similar to the EFC Entry [efcent]
and Variance Entry [bdve] screens. However, it differs in the fact that it allows you to ‘Drill-Down’ to
see the related transaction details in addition to other new functions. The Cost Report/EFC Worksheet
[efcws] screen looks almost identical to the actual Estimated Final Cost Report [efcrpt] screen except
it includes a ‘Reference & Batch’ section that contains white required fields. In addition, whichever
report format type you are using in the Estimated Final Cost Report [efcrpt] screen, the same format(s)
is still available in this screen. Please note you are able to run the Cost Report/EFC Worksheet
[efcws] with selecting multiple budgets. Once an EFC/Variance change has been created, PSL3
automatically adjusts the Cost to Complete, Estimated Final Cost and Variance amounts on the
Estimated Final Cost Report [efcrpt].
Please note EFC's and Variances are created by one of three ways which are as follows:
1. By directly accessing the Variance Entry [bdve] screen and inputting the change(s) there.
2. By making the change(s) in the EFC Entry [efcent] screen. After making and saving the EFC
change(s), a Variance is created with the new Variance Entry [bdve] Reference Number
appearing directly in the EFC Entry [efcent] screen for your records.
3. By making the change(s) in the Cost Report/EFC Worksheet [efcws] screen. After making
and saving the EFC change(s), a Variance is created with the new Variance Entry [bdve]
Reference Number appearing directly in the Cost Report/EFC Worksheet [efcws] screen for
your records.
Although PSL3 allows you to select any of the three previously mentioned options, the result of
entering an EFC or Variance in either Variance Entry [bdve], EFC Entry [efcent] or in the Cost
Report/EFC Worksheet [efcws] screen is exactly the same.
Open:
To access the Cost Report/EFC Worksheet [efcws] click the 'Cost' module from the menu
tree (see following screen shot).
You can also access this report by typing the screen or acronym name in the blue prompt bar
located above the 'Setup' menu. Then, press Enter.
© 2011 Cast & Crew Entertainment Services, LLC.
COST
The screen then appears.
© 2011 Cast & Crew Entertainment Services, LLC.
311
312
PSL3 User Manual
To select criteria, press the F2 Key or right click in most fields to mak e your selection. You can also
simply type in the criteria in the allotted fields. If you wish to include all criteria information, leave
all fields blank except for any white colored fields as white fields are required before proceeding
in PSL3.
© 2011 Cast & Crew Entertainment Services, LLC.
COST
313
Budget Information:
Budget - Name of the budget in which the EFC changes will be made. For each account
number, the Estimated Final Cost will be compared to the Budget Amount to determine the
Variance. To choose multiple budgets, press the F2 Key or right click in this field and hold
down the Control Key while simultaneously using your mouse to select.
Production - Production Code for the Budget Name. The Production Code defaults when the
budget is input. Please note you are not able to access this field.
Overage - Name of the Overage Budget selected to compare against the original budget. If
an Overage Budget is selected, the report includes an 'Approved Overage' and 'Total Budget'
column in addition to the original 'Budgeted' column.
Period:
Period - System-assigned Period Number that indicates the Accounting Period in which
these costs were entered. If you chose to run the worksheet by Period Number, then the
Start Date and End Date fields default for the period chosen.
Start Date and End Date - Transaction Effective Dates to include in the worksheet as PSL3
is date-driven. Current Period Start and End Dates default. You can always change the date
by typing over the defaulted date or by right clicking in that field for the calendar selection to
appear. To restrict the worksheet to only include information for a single date, input the same
date in both the Start Date and End Date fields. To select all dates from inception to future,
leave both fields blank.
© 2011 Cast & Crew Entertainment Services, LLC.
314
PSL3 User Manual
Format:
Type - Report format type determining the worksheet columns and their order of appearance.
The default type for the majority of Independent Studios is the 'PSL Standard' format which
includes the following columns: Account Number, Account Description, Previous Cost To
Date, Actual Cost This Period, Committed, Total Cost To Date, Cost to Complete, Estimated
Final Cost, Budgeted and Variance. If the database is associated with a major studio, than
that studio's format type defaults instead. To view the list of additional format types (if any),
click the drop down arrow to select from the list. PSL3 also provides the option of a Detail,
Summary (or Both) worksheet.
Summary Sub-total Level - Indicate the account number detail level to include in the
Summary worksheet; the default is '1'. An example of this is if your database is setup with an
account mask of XXX-XXX-XXX-XXX, it has four levels. Please note this option only becomes
accessible when you select either the 'Summary' or 'Both' type option.
Include:
Inactive Accounts - Check mark to include accounts that had no activity/distributions posted
to them during the period or date range selected or have a zero dollar balance.
Budgeted Amount as Activity - Check mark to include accounts that had no distributions
posted to them, but do have a non-zero amount budgeted. If checked, the worksheet
displays these account numbers in the distribution lines.
© 2011 Cast & Crew Entertainment Services, LLC.
COST
315
Open Items as Actual Costs - Check mark to include Open Items (items posted but not yet
paid) displayed in the Actual Cost column. Only P/O's will be treated as Commitments.
Committed Costs - Check mark for the worksheet to display a column for Committed Costs
(items entered in the database, but not yet paid) which consist of P/O's and Open Items.
Sub-totals - Check mark to include Sub-total amounts.
Selections:
Press the F2 Key or right click in any of these fields (Company, Series, Location, Set,
Insurance and Free Field(s)) to choose the necessary codes if they don't already default.
To choose multiple codes for a particular field, press the F2 Key or right click in that field and
hold down the Control Key while simultaneously using your mouse to select. By making a
selection, this isolates the worksheet to only display items based on the code(s) selected.
To display an additional detail column on the worksheet for either the Company, Series,
Location and/or Set Code, leave these fields blank and check mark the 'Detail' option; PSL3
will print a separate line for each account number and code combination selection. Please
note if you enter in a Company, Series, Location and/or Set Code, you are not able to access
the Detail field.
Accounts:
From and To - Account numbers to include in the worksheet. To restrict the worksheet to
only include information for a single account number, input the same account in both the
From and To fields. To multi-pick certain accounts, press the F2 Key or right click in either
field and hold down the Control Key while simultaneously using your mouse to select. To
select all account numbers, leave both fields blank.
Multi-Currency:
Source - If you have more than one currency in your database, you can choose to include
only transactions denominated in one currency, two, three, etc., or all currencies. To choose
multiple Currency Codes, press the F2 Key or right click in the field and hold down the Control
Key while simultaneously using your mouse to select.
Target - Base currency set up in the System Control Information Entry [suctrl] screen
located in the 'Setup' module defaults. This Currency Code is what all transactions are
converted to on the worksheet.
Reference & Batch:
Press the F2 Key or right click in any of these fields (Batch, Company and Effective Date)
to choose the necessary codes if they don't already default. The codes selected will be
associated with the Variance Entry [bdve] transaction once created. To run the Cost
Report/EFC Worksheet [efcws] from a previous Variance transaction created, use the
Variance Reference field to input the Reference Number.
© 2011 Cast & Crew Entertainment Services, LLC.
316
PSL3 User Manual
Worksheet:
To proceed with the worksheet, press the F1 Key, then 'W' option or select 'Worksheet'
located in the top right hand corner of the screen. After selecting 'Worksheet', the interactive
Cost Report/EFC Worksheet [efcws] appears in which you can make the necessary EFC or
Variance change(s) directly on the screen.
The Cost Report/EFC Worksheet [efcws] columns and data exactly match the Estimated
Final Cost Report [efcrpt]. Similar to EFC Entry [efcent], the white-colored fields which include
‘Cost to Complete’ (CTC), ‘Estimated Final Cost’ (EFC) and ‘Variance’ columns are still editable
on the postable accounts. Also, the ‘Variance Description’ column remains editable as this is
where you enter the description after making the necessary changes. The Variance
Description field remains an optional field. If left blank, the default description will read ‘EFC
Worksheet VA’.
Data View Selection:
Upon right-clicking in the Cost Report/EFC Worksheet [efcws], PSL3 displays the list of
available options to view the worksheet based on your preference which are as follows:
© 2011 Cast & Crew Entertainment Services, LLC.
COST
317
The most popular feature, ‘Drill-Down’ brings up a listing of all transaction details that make up
that specific amount based on the criteria input on the Cost Report/EFC Worksheet [efcws].
The following screen shot is an example of the transaction Drill-Down detail columns. Please
note not pictured is the Reference Description, Currency Code and Amount columns.
Also, another popular feature is the ‘Relative’ or ‘Replace’ Variance Edit Mode. PSL3 defaults to
the Relative mode which adds or subtracts from the original amount shown whereas Replace
overrides the existing amount. You are able to switch between the two by right-clicking. The
bottom left-hand corner of the screen always display which mode you are currently in as shown
below:
or
In addition, the ‘Jump to Account’ function located in the bottom left-hand corner of the screen
allows the cursor to go directly to the indicated account number typed in.
Print/Save the worksheet: Located in the bottom right hand corner of the screen, you can choose
the following options:
© 2011 Cast & Crew Entertainment Services, LLC.
318
PSL3 User Manual
Print - Opens the Print Dialogue box and sends the report directly to the printer. No Variance
transaction is created.
Update - Saves the change(s) and remains on the screen. A Variance transaction is created
and the Variance Entry [bdve] Reference Number displays on the screen.
Accept - Saves the change(s) and exits the screen. A Variance transaction is created and
the Variance Entry [bdve] Reference Number displays on the screen.
Cancel - Discards any/all changes and exits the screen. No Variance transaction is created.
© 2011 Cast & Crew Entertainment Services, LLC.
COST
319
Chapter 12.4 Estimated Final Cost Report
The Estimated Final Cost Report [efcrpt] is a detailed analysis that identifies costs to date and weekly
costs, as well as estimates the final costs to complete the Production. The Estimated Final Cost
Report [efcrpt]summarizes all costs recorded in the General Ledger as of the date range you specify
listed by account number. The report can be ran by a range of Expense Accounts and combine or
display the balances separately for all Series, Location and/or Set Codes in addition to other selection
criteria to tailor the report based on your preference. Please note you are able to run the Estimated
Final Cost Report [efcrpt] with selecting multiple budgets.
Open:
To access the Estimated Final Cost Report [efcrpt], click on Tab #7 or press 'ALT' and the
number '7' Key simultaneously to open the screen.
The Estimated Final Cost Report [efcrpt] is also accessible if you click the 'Cost' module
from the menu tree (see following screen shot) as well as the 'Report' folder under the
'Budgeting/Cost' and 'Weekly' sub-folders.
You can also access this report by typing the screen or acronym name in the blue prompt bar
located above the 'Setup' menu. Then, press Enter.
© 2011 Cast & Crew Entertainment Services, LLC.
320
PSL3 User Manual
The screen then appears.
© 2011 Cast & Crew Entertainment Services, LLC.
COST
321
To select criteria, press the F2 Key or right click in most fields to mak e your selection. You can also
simply type in the criteria in the allotted fields. If you wish to include all criteria information, leave
all fields blank except for any white colored fields as white fields are required before proceeding
in PSL3.
© 2011 Cast & Crew Entertainment Services, LLC.
322
PSL3 User Manual
Budget Information:
Budget - Name of the budget. For each account number, the Estimated Final Cost will be
compared to the Budget Amount to determine the Variance. To choose multiple budgets,
press the F2 Key or right click in this field and hold down the Control Key while
simultaneously using your mouse to select. Please note you must select a Budget Name in
order to run the report as it is a white required field. If you don't have a budget input yet, you
can create a Zero dollar budget in the Create a Budget [bdgl] screen.
Production - Production Code for the Budget Name. The Production Code defaults when the
budget is input. Please note you are not able to access this field.
Overage - Name of the Overage Budget selected to compare against the original budget. If
an Overage Budget is selected, the report includes an 'Approved Overage' and 'Total Budget'
column in addition to the original 'Budgeted' column.
Period:
Period - System-assigned Period Number that indicates the Accounting Period in which
these costs were entered. If you chose to run the report by Period Number, then the Start
Date and End Date fields default for the period chosen.
Start Date and End Date - Transaction Effective Dates to include in the report as PSL3 is
date-driven. Current Period Start and End Dates default. You can always change the date by
typing over the defaulted date or by right clicking in that field for the calendar selection to
appear. To restrict the report to only include information for a single date, input the same date
in both the Start Date and End Date fields. To select all dates from inception to future, leave
both fields blank.
© 2011 Cast & Crew Entertainment Services, LLC.
COST
323
Format:
Type - Report format type determining the report columns and their order of appearance. The
default type for the majority of Independent Studios is the 'PSL Standard' format which
includes the following columns: Account Number, Account Description, Previous Cost To
Date, Actual Cost This Period, Committed, Total Cost To Date, Cost to Complete, Estimated
Final Cost, Budgeted and Variance. If the database is associated with a major studio, than
that studio's format type defaults instead. To view the list of additional format types (if any),
click the drop down arrow to select from the list. PSL3 also provides the option of a Detail,
Summary (or Both) Report.
Summary Sub-total Level - Indicate the account number detail level to include in the
Summary Report; the default is '1'. An example of this is if your database is setup with an
account mask of XXX-XXX-XXX-XXX, it has four levels. Please note this option only becomes
accessible when you select either the 'Summary' or 'Both' type option.
NOTE:
Please note PSL3 offers many different style
formats of the Estimated Final Cost Report
[efcrpt] besides the default type 'PSL Standard'.
Please email a request to support@castandcrew.
com if you would like the format type implemented
from a previous PSL3 database or would like to
implement another format from another accounting
software (an emailed or a scanned copy of the
report will suffice).
Include:
Inactive Accounts - Check mark to include accounts that had no activity/distributions posted
to them during the period or date range selected or have a zero dollar balance.
Budgeted Amount as Activity - Check mark to indicate if you want to display accounts that
had no distributions posted to them, but do have a non-zero amount budgeted. If checked,
the report displays these account numbers in the distribution lines.
© 2011 Cast & Crew Entertainment Services, LLC.
324
PSL3 User Manual
Open Items as Actual Costs - Check mark to indicate if you want Open Items (items posted
but not yet paid) displayed in the Actual Cost column. Only P/O's will be treated as
Commitments.
Committed Costs - Check mark for the report to display a column for Committed Costs
(items entered in the database, but not yet paid) which consist of P/O's and Open Items.
Sub-totals - Check mark this option for the report to display Sub-total amounts.
Selections:
Press the F2 Key or right click in any of these fields (Company, Series, Location, Set,
Insurance and Free Field(s)) to choose the necessary codes if they don't already default.
To choose multiple codes for a particular field, press the F2 Key or right click in that field and
hold down the Control Key while simultaneously using your mouse to select. By making a
selection, this isolates the report to only display items based on the code(s) selected. To
display an additional detail column on the report for either the Company, Series, Location and/
or Set Code, leave these fields blank and check mark the 'Detail' option; PSL3 will print a
separate line for each account number and code combination selection. Please note if you
enter in a Company, Series, Location and/or Set Code, you are not able to access the Detail
field.
Accounts:
From and To - Account numbers to include in the report. To restrict the report to only include
information for a single account number, input the same account in both the From and To
fields. To multi-pick certain accounts, press the F2 Key or right click in either field and hold
down the Control Key while simultaneously using your mouse to select. To select all account
numbers, leave both fields blank.
Additional Report for all Expenses - Check mark this option to generate a second report
that includes all Expense Accounts. Please note this option only becomes accessible when
an account number is input in either the From and/or To Account fields.
Printing:
Shading - Check mark this option to shade every other line on the report; this allows the
report to be easily read.
Multi-Currency:
Source - If you have more than one currency in your database, you can choose to include
only transactions denominated in one currency, two, three, etc., or all currencies. To choose
multiple Currency Codes, press the F2 Key or right click in the field and hold down the Control
Key while simultaneously using your mouse to select. Each currency in your database and
its conversion rate are listed in the report heading.
© 2011 Cast & Crew Entertainment Services, LLC.
COST
325
Target - Base currency set up in the System Control Information Entry [suctrl] screen
located in the 'Setup' module defaults. This Currency Code is what all transactions are
converted to on the report. Each currency in your database and its conversion rate are listed
in the report heading.
Print/Preview the Report: Located in the top right hand corner of the screen, you can choose the
following options to generate the report:
Print Combined Report - Opens the Print Dialogue box and sends the report (combining all
Series, Location and Set Codes onto one report) directly to the printer.
Print Individual Report - Opens the Print Dialogue box and sends the report (separating
each Series, Location and Set Codes into separate reports) directly to the printer.
Preview Combined Report - Generates a PDF format report (combining all Series, Location
and Set Codes onto one report) and appears instantly on your screen. You are still able to
print from the PDF format.
Preview Individual Report - Generates a PDF format report (separating each Series,
Location and Set Codes into separate reports) and appears instantly on your screen. You are
still able to print from the PDF format.
Spreadsheet - Generates an Excel format report and appears instantly on your screen. You
are still able to print from the Excel format. Please note if you select this option, you are able
to have additional sorting options within Excel.
*Below is a sample of the first page of a Combined Estimated Final Cost Report [efcrpt] in the
'PSL Standard' format.
© 2011 Cast & Crew Entertainment Services, LLC.
326
PSL3 User Manual
© 2011 Cast & Crew Entertainment Services, LLC.
COST
327
Chapter 12.5 Additional Cost Report Screens/Reports
PSL3 offers additional Cost Reporting Screens which are listed below. Some of these reports can also
be found in the section Additional Budget Inquiries and Reports.
Open:
To access the following Cost Reporting Screens, click the 'Cost' module from the menu tree
(see following screen shot).
These additional Cost Reporting Screens are also located in the 'Cost' module as well as
'Report' module under the 'Budgeting/Cost' sub-folder.
You can also access these screens/reports by typing the screen or acronym name in the
blue prompt bar located above the 'Setup' menu. Then, press Enter.
To select criteria for the following reporting screens, press the F2 Key or right click in most fields to
mak e your selection. You can also simply type in the criteria in the allotted fields. If you wish to
include all criteria information, leave all fields blank except for any white colored fields as white
fields are required before proceeding in PSL3.
Account Variance Report [bdvar] - Use [bdvar] to generate a Detailed or Summary list of
Variance entries in your database. Detailed reporting can include every Variance entry along
with the transaction details for each depending on the Date Range input. The report can be
ran by Account Range, Start and End Dates, Multiple Currency, etc. as selection criteria.
Average EFC Report [avgefc] - Use [avgefc] to generate a listing of account numbers along
with their descriptions and the Average EFC (Estimated Final Cost) spent on the show per
account on an episodic basis; used especially for budgeting purposes.
Cost Bible Report [efcrpt2] - Use [efcrpt2] to generate a cross report between the Estimated
© 2011 Cast & Crew Entertainment Services, LLC.
328
PSL3 User Manual
Final Cost Report [efcrpt] and Bible Report [bdbr]. This report can be ran by Start and End
Dates, a range of Accounts, Multiple Currency, etc. as selection criteria.
Cost Detail Report [costinff] - Use [costinff] to run costs by Insurance, Free Field(s), Series,
Location or Set Codes. This report can include P/O's and can be ran by a range of Accounts,
Start and End Dates, Multiple Currency, etc. as selection criteria.
EFC Summary Variance Report [efcdiff] - Use [efcdiff] to view the Estimated Final Costs
that have changed during the given period, summarized to the Header/Controlling Account
Level. This report includes the following columns: Account Number, Description, Previous
EFC, Variance, and Current EFC.
Episodic EFC Report [efcser] - Use [efcser] to generate a report of EFC's by episode, such
as a recurrent television show. This report can be ran by Series, Start and End Dates,
Multiple Currency, etc. as selection criteria.
Reference Variance Report [bdvep] - Use [bdvep] to print a list of Variances entries for one
date or for the entire reporting period, sorted by Account Order or Entry Order. This report
can be used in conjunction with the Bible Report [bdbr] to show how and why account
balances do not match the budgeted amounts.
NOTE:
The reports are available in either Print, Preview
and/or Spreadsheet formats.
NOTE:
Please email [email protected] if you
don't see a specific PSL3 report currently listed as
an option in your database.
© 2011 Cast & Crew Entertainment Services, LLC.
CLOSING
Section
XIII
CLOSING
Section 13 CLOSING
This section will address the following program:
Close Period
© 2011 Cast & Crew Entertainment Services, LLC.
331
332
PSL3 User Manual
Chapter 13.1 Close Period
The Close Period [glclose] program is used to close the Accounting Period. This program can be run
anytime - weekly, monthly, quarterly, etc. (depending on your specific studio's guidelines). Before you
can close the period, you must either post or delete all unposted transactions or change their Effective
Dates to a date past the Current Period End Date, falling in a future period (and in the instance of some
studios, all transactions may have to be paid). The Closing Report displays each postable account's
Account Number, Account Description, Beginning Balance, Debits, Credits, Net Change, Ending
Balance and Grand Totals for the period being closed.
Open:
To access the Close Period [glclose] screen, click the 'Closing' module from the menu tree
(see following screen shot).
Close Period [glclose] is also located in the 'Report' module under the 'G/L' sub-folder.
You can also access this screen by typing the screen or acronym name in the blue prompt
bar located above the 'Setup' menu. Then, press Enter.
The screen then appears.
© 2011 Cast & Crew Entertainment Services, LLC.
CLOSING
333
Current Period:
Start Date - First date of the Current Period before the closing process. Please note you
can not access this field.
End Date - Last date of the Current Period; should default to today's date, but you can
change it by typing over the defaulted date or by right clicking in that field for the calendar
selection to appear.
Next Period:
Start Date - First date of the Next Period before the closing process; should default to the
next date after the Current Period End Date. Please note you can not access this field.
End Date - Last date of the Next Period. This field can be left blank if you are not sure of the
© 2011 Cast & Crew Entertainment Services, LLC.
334
PSL3 User Manual
next time you are going to close the period.
WARNING:
Please be advised if you input an End Date in the
'Next Period' section, PSL3 does not allow you to
input any transactions past the date entered in
this field. However, if you need to remove this date
block, this can be done in the System Control
Information Entry [suctrl] screen located in the
'Setup' module, then 'Reports' sub-folder by
removing the Current Period End Date from there
and saving. Please note you may have to log out
and back into PSL3 for the update to take effect.
Report Type:
Defaults to Edit List to review the Current Period you are closing and check for any errors (e.
g., unposted transactions, etc.). If you have encountered any errors, they are listed on the
last page of the Edit List along with the Reference Numbers containing the errors. To correct
this, make the changes listed on the Edit List then review the Edit List again to make sure all
errors have been fixed. To move forward with closing, select 'Closing Register/Close Period'
followed by either the Print or Preview option.
Print/Preview the Report: Located in the top right hand corner of the screen, you can choose the
following options to generate the report:
Print - Opens the Print Dialogue box and sends the report directly to the printer.
Preview - Generates a PDF format report and appears instantly on your screen. You are still
able to print from the PDF format.
© 2011 Cast & Crew Entertainment Services, LLC.
CLOSING
335
Once you select 'Closing Register/Close Period' followed by either the Print or Preview option,
PSL3 displays the following message prompt:
If you select 'No', PSL3 asks "Would you like to reprint the register?". If you still select 'No',
you will receive a prompt notifying you the closing process is not done. If you select 'Yes', you
will receive a secondary prompt confirming the period is now closed. Upon selecting 'Yes', you
may also receive the following warning message if your Closing Edit List contained errors:
If you select 'No', the closing process is not done. If you select 'Yes', the Edit List prints out but
the closing process is not completed until the errors are corrected. Please note if you are
associated with a studio and depending on your specific studio's guidelines, there may be
additional processes with closing the period (e.g., saving the Closing Report and sending it to
your studio, etc.). Please refer to your studio for additional information regarding the closing
process.
© 2011 Cast & Crew Entertainment Services, LLC.
RECURRING BATCH
Section
XIV
RECURRING BATCH
Section 14 RECURRING BATCH
This section will address the following programs:
Create/Establish Recurring Batches
Process Recurring Batches
List of Batches
© 2011 Cast & Crew Entertainment Services, LLC.
339
340
PSL3 User Manual
Chapter 14.1 Create/Establish Recurring Batches
The Create/Establish Recurring Batches [rbcre] program allows you to create a recurring batch
transaction for transactions that you will use repeatedly on a daily, weekly, monthly or quarterly basis.
This program also allows you to modify an existing recurring batch transaction.
NOTE:
Please note prior to using the Create/Establish
Recurring Batches [rbcre] program, you must
have already created - but not posted the
'template' transaction in the transaction entry
screen you plan to use the recurring batch in.
This template transaction is used to create the
recurring batch transaction.
Open:
To access the Create/Establish Recurring Batches [rbcre] screen, click the 'Recurring
Batch' or 'Setup' module from the menu tree (see following screen shot).
You can also access this screen by typing the screen or acronym name in the blue prompt
bar located above the 'Setup' menu. Then, press Enter.
The screen then appears.
© 2011 Cast & Crew Entertainment Services, LLC.
RECURRING BATCH
341
Selection Criteria:
Batch Number - Batch Number assigned to the template transaction you wish to make into a
recurring batch. This Batch Number was entered in the transaction entry programs (P/O
Entry [poent], A/P Entry [apte], Journal Entry [jete], etc.) Batch field. Press the F2 key or
right click in this field to select the Batch Number. You can also manually type in the Batch
Number. This field can hold up to six alpha/numeric characters.
Description - Description of the Batch Number selected which can hold up to 30 alpha/
numeric characters. Enter the description if it doesn't already default once selecting the
recurring Batch Number.
Number of times to recur - Total Number of times you want the transaction(s) to recur which
can be a number up to five characters long. This number is automatically reduced by 1 each
time you run this batch in the Create/Establish Recurring Batches [rbcre] screen.
Frequency:
Select the schedule on which the recurring batch is run. The options are as follows: Daily,
Weekly, Monthly and Quarterly.
Start:
To proceed with the create/establish recurring batch process, press the F1 Key, then 'S'
option or select 'Start' located in the top right hand corner of the screen. Once successfully
created, you will receive the "Recurring batch created" message:
© 2011 Cast & Crew Entertainment Services, LLC.
342
PSL3 User Manual
© 2011 Cast & Crew Entertainment Services, LLC.
RECURRING BATCH
343
Chapter 14.2 Process Recurring Batches
The Process Recurring Batches [rbproc] screen processes the transactions that were set up as a
recurring batch in the Create/Establish Recurring Batches [rbcre] screen. The original recurring batch
transaction remains unposted. After you process a recurring batch, a new unposted transaction is
created in the original transaction entry screen. This newly created transaction can be posted or
deleted, just like any other unposted transaction.
NOTE:
Please note you must manually run the Process
Recurring Batches [rbproc] program to process
recurring batches. This process is not done
automatically.
Open:
To access the Process Recurring Batches [rbproc] screen, click the 'Recurring Batch'
module from the menu tree (see following screen shot).
You can also access this screen by typing the screen or acronym name in the blue prompt
bar located above the 'Setup' menu. Then, press Enter.
The screen then appears.
© 2011 Cast & Crew Entertainment Services, LLC.
344
PSL3 User Manual
Selection Criteria:
Batch Number - Batch Number assigned to the recurring batch. Press the F2 key or right
click in this field to select the Batch Number of the transactions you want to process. You
can also manually type in the Batch Number.
Frequency - Frequency Code assigned to the recurring batch (D = Daily, W = Weekly, M =
Monthly and Q = Quarterly). Upon selecting a batch in the Batch Number field, the
Frequency field defaults if you entered it in the Create/Establish Recurring Batches [rbcre]
screen.
Times - Number of times the recurring batch is set up to process. Upon selecting a batch in
the Batch Number field, the Times field defaults if you entered it in the Create/Establish
Recurring Batches [rbcre] screen.
Count - Number of times the recurring batch has actually been processed. PSL3
automatically calculates the Count field.
Process - Check mark this option to process the recurring batch in the transaction entry
screen in which it was originally created.
Process Batch:
To proceed with the recurring batch process, press the F1 Key, then 'P' option or select
'Process Batch' located in the top right hand corner of the screen. PSL3 then displays the
following prompt:
© 2011 Cast & Crew Entertainment Services, LLC.
RECURRING BATCH
345
Please note you can change the Batch Number here if desired by simply typing over the batch.
If the Batch Number does not exist, PSL3 asks, "Batch does not exist. Create it?". Select
'Yes'. Otherwise, select the 'OK' option to process the recurring batch. PSL3 then displays the
confirmation prompt "Recurring batch processed".
The transaction(s) is now available in the transaction entry screen in which the recurring batch
was originally created. The new transaction(s) is also created with an unposted status in which
you can still modify before posting.
© 2011 Cast & Crew Entertainment Services, LLC.
346
PSL3 User Manual
Chapter 14.3 List of Batches Report
The List of Batches Report [rblist] generates a listing a list of all batches (used and not used) in your
database. Recurring batches are identified on the report by the letter 'Y' in the Recurring column along
with the Frequency and Time Count (if any).
Open:
To access the List of Batches Report [rblist], click the 'Recurring Batch' module from the
menu tree (see following screen shot).
You can also access this screen by typing the screen or acronym name in the blue prompt
bar located above the 'Setup' menu. Then, press Enter.
The screen then appears.
© 2011 Cast & Crew Entertainment Services, LLC.
RECURRING BATCH
347
To select criteria, press the F2 Key or right click in most fields to mak e your selection. You can also
simply type in the criteria in the allotted fields. If you wish to include all criteria information, leave
all fields blank.
Batch Info:
Starting and Ending - Batch Numbers to include in the report. To restrict the report to only
include information for a single Batch Number, input the same batch in both the Starting and
Ending fields. To select all Batch Numbers, leave both fields blank.
Reference Info:
Include References - Check mark this option to include the list of Reference Numbers for
each Batch Number selected. By check marking this option, the report includes the
reference/header details for each transaction.
Print/Preview the Report: Located in the top right hand corner of the screen, you can choose the
following options to generate the report:
Print - Opens the Print Dialogue box and sends the report directly to the printer.
Preview - Generates a PDF format report and appears instantly on your screen. You are still
able to print from the PDF format.
© 2011 Cast & Crew Entertainment Services, LLC.
GLOSSARY
Section
XV
GLOSSARY
Section 15 GLOSSARY
The Glossary lists terms and their meanings, as used in this document.
© 2011 Cast & Crew Entertainment Services, LLC.
351
352
PSL3 User Manual
© 2011 Cast & Crew Entertainment Services, LLC.
GLOSSARY
© 2011 Cast & Crew Entertainment Services, LLC.
353
354
PSL3 User Manual
© 2011 Cast & Crew Entertainment Services, LLC.
Back Cover


![[U4.11.01] Procédure DEBUT](http://vs1.manualzilla.com/store/data/006354662_1-b8052baa2936933df83514cc39a887de-150x150.png)
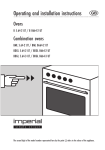
![[U4.11.01] Procédure DEBUT](http://vs1.manualzilla.com/store/data/006367180_1-35093d9458a1c4c412e3d5581c5a21ff-150x150.png)

![[U4.11.01] Procédure DEBUT](http://vs1.manualzilla.com/store/data/006353608_1-a314d896646d7b44d6da3cb9f2e4563a-150x150.png)