1
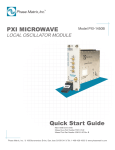
PXI MICROWAVE Model PXI-1430B RF DOWNCONVERTER MODULE Quick Start Guide PXI-1430B CCN 14501 Manual Assy Part Number 5585113-01 Manual Text Part Number 5580113-01 Rev C Phase Matrix, Inc. 4600 Patrick Henry Drive, Santa Clara CA 95054 Tel: 1-408-610-6810 www.phasematrix.com Notices © Phase Matrix, Inc. 2013 Warranty No part of this manual may be copied, duplicated, or reproduced in any form or by any means (including electronic storage and retrieval or translation into a foreign language) without prior agreement and written consent from Phase Matrix, Inc. as governed by United States and international copyright laws. Phase Matrix, Inc. warrants this product to be free from defects in material and workmanship for one year from the date of delivery. Damage due to accident, abuse, or improper signal level is not covered by the warranty. Removal, defacement, or alteration of any serial or inspection label, marking, or seal may void the warranty. Phase Matrix, Inc. will repair or replace, at its option, any components of this product which prove to be defective during the warranty period, provided the entire unit is returned to Phase Matrix, Inc. or an authorized service facility. In-warranty units will be returned freight prepaid; out-of-warranty units will be returned freight COLLECT. No warranty other than the above is expressed or implied. Phase Matrix, Inc. 4600 Patrick Henry Drive Santa Clara, CA 95054 Software Copyright Original Phase Matrix, Inc. software may be distributed without consent from Phase Matrix, Inc. only if all software and associated files are included in the distribution and remain unmodified. EIP® is a brand name used to refer to a line of traditional T&M instruments owned by Phase Matrix, Inc. National Instruments®, NI®, ni.com®, LabVIEW®, and LabWindows® are registered trademarks of National Instruments Corporation. Microsoft®, Windows®, Vista®, XP®, and 2000® are registered trademarks of Microsoft Corporation. Certification Phase Matrix, Inc. certifies this instrument to be in conformance with the specifications noted herein at time of shipment from the factory. Phase Matrix, Inc. further certifies that its calibration measurements are traceable to the United States National Institute of Standards and Technology. Manual Change Information As Phase Matrix, Inc. continually improves and updates its products, changes to the material covered by the manual will occur. When a part or assembly in a Phase Matrix, Inc. instrument is changed to the extent that it is no longer interchangeable with the earlier part, the configuration control number (CCN) of the instrument, shown on the title page of the manual, will change, and a new edition of the manual will be published. To maintain the technical accuracy of the manual, it may be necessary to provide new or additional information with the manual. In these cases, the manual is shipped with a Manual Update. Please be sure to incorporate the information as instructed in the Manual Update. Document created for Phase Matrix, Inc. 2010 by RLTechnical.com Safety Notices CAUTION A CAUTION notice denotes a hazard. It calls attention to an operating procedure, practice, or the like that, if not correctly performed or adhered to, could result in damage to the product or loss of important data. Do not proceed beyond a CAUTION notice until the indicated conditions are fully understood and met. WARNING A WARNING notice defines a hazard. It calls attention to an operating procedure or practice that if not correctly followed or adhered to, could result in either personal injury or death. Do not proceed beyond a WARNING notice until the indicated conditions are fully understood and met. Quick Start Guide Introducing the PXI-1430B RF Downconverter Module Congratulations on purchasing a Phase Matrix PXI-1430B RF Downconverter Module! To get the most out of your purchase, it is recommended that this Quick Start Guide be read carefully and completely. In this document... The scope of this document is to describe the installation process of the stand-alone hardware and software for the PXI-1430B and to confirm basic module operation. This document describes information for the PXI-1430B when used in a PXI system with an embedded controller or a PXI remote controller. “Step 1. Confirm Module Operating Requirements" on page 4 “" on page 5 “Step 3. Perform Software Installation/Configuration" on page 9 “Step 4. Review Hardware and Software Front Panels" on page 19 “Step 5. Confirm Basic Module Operation" on page 31 Phase Matrix PXI-1430B RF Downconverter Module 3 Quick Start Guide Step 1. Confirm Module Operating Requirements Table 1 Module Operating Requirements When Used in a PXI System Operating System • Windows 7 (32- and 64-bit versions) • Windows XP (32-bit version) • LabVIEW Real-Time (Version 8.2.1 and later) BIOS - computers manufactured prior to 2008 require NI MXI-Express BIOS Compatibility Software. This BIOS software is available on the Internet at: NI > Support > Drivers and Software > MXI-Express BIOS Compatibility Software - Windows 7 x86/XP RAM - minimum of 256 MB required by LabVIEW. CD Drive - used to install PXI device driver software and Soft Front Panel from an optional CD PXI device driver software and Soft Front Panels are available from an optional CD or from the Phase Matrix web site at: www.phasematrix.com Screen Resolution - at least 1024 × 768 pixels, recommended. Adobe Reader - 6.0.1 or later to view or search PDF versions of manuals. Interface/Controller - select either an embedded controller or a PXI remote controller. Embedded Controller NI PXI-8106 2.16 GHz Dual-Core PXI Embedded Controller or NI PXIe-8106 2.16 GHz Dual-Core PXI Express Embedded Controller or equivalent embedded controller running Windows 7/XP PXI Remote Controller NI PXI-CardBus8310 Laptop Control of PXI with PCMCIA CardBus or NI PXIe-ExpressCard8360 Laptop Control of PXI Express with ExpressCard or equivalent PXI remote controller running Windows 7/XP NOT E LabVIEW does not support Windows NT/Me/98/95, any of the Windows Server editions, or Windows XP x64. LabVIEW does support Windows 7 (64-bit version). LabVIEW or the LabVIEW Run-Time Engine does support Windows 2000 with Service Pack 3 or later. 4 Phase Matrix PXI-1430B RF Downconverter Module Quick Start Guide Step 2. Perform Hardware Installation/Configuration CAUTION PXI hardware does not support “hot-swap” capabilities! Before installing the PXI-1430B RF Downconverter Module, the PXI chassis must be powered off and unplugged to prevent damage to PXI modules. The PXI-1430B can be installed in any standard-PXI slot marked with a peripheral slot compatibility image (a circle containing the slot number). The PXI-1430B can also be installed in any hybrid-PXI slot marked with a peripheral slot compatibility image (the letter “H” and a solid circle containing the slot number). Do not install the PXI-1430B into a slot for PXI Express (PXIe) modules. NOT E A PXI-1430B can be used in a PXI or PXIe chassis, with either a PXI or PXIe remote controller, but the PXI-1430B must only be installed into a standard-PXI slot or a hybrid-PXI slot. Step 2-1. Unpack Hardware Each PXI-1430B ships in an antistatic package to prevent damage from electrostatic discharge (ESD). Because ESD can damage several components of a hardware module, store all modules in antistatic envelopes when not in use. CAUTION • To avoid damage when handling a module, do not touch exposed connector pins. • Before touching or handling a module, use a grounding strap or touch a grounded object to ground yourself. • Before touching or removing a module from its package, touch the antistatic package to a metal part of your computer chassis. • Remove each module from its package and inspect it for loose components or any signs of damage. Notify Phase Matrix if any module appears damaged in any way. • Do not install damaged modules into a system. Phase Matrix PXI-1430B RF Downconverter Module 5 Quick Start Guide Unpack the contents of the box and verify that everything is included: • PXI-1430B RF Downconverter Module • Optional CD (included if specifically ordered; otherwise PXI device driver software and Soft Front Panel are available from the Phase Matrix web site at: www.phasematrix.com). Step 2-2. Install PXI Modules into a PXI Chassis Figure 1 Install PXI Modules into a PXI Chassis Phase Matrix PXI modules are sensitive instruments that should be handled carefully. Do not expose modules to temperatures or humidity beyond their rated maximums. CAUTION • For information about the rated maximums, refer to each module’s specifications document available at: www.phasematrix.com • Keep the module free of dust by cleaning only with compressed air. • Do not clean the module with any solvents or liquids. • To prevent damage to the module caused by ESD or contamination, handle the module using the edges or the metal bracket. 6 Phase Matrix PXI-1430B RF Downconverter Module Quick Start Guide 1 Assure that the power switch is in the Off (Standby) position and unplug the PXI chassis. 2 If the chassis has multiple fan speed settings, ensure that the fans are set to automatic. Do not set the fan speed to low or turn it off. 3 Position the chassis so that there is ample space between the chassis fan intake and exhaust vents. Blockage by walls or obstructions affects the air flow needed for cooling. (Refer to the chassis documentation for more information about cooling.) 4 Holding the PXI-1430B by the injector/ejector handle, slide it into an available PXI (or hybrid) slot, as shown in Figure 1. a Install the PXI-1430B into the PXI (or hybrid) slot of the chassis by placing the module card edges into the front module guides (top and bottom). b Slide the PXI-1430B to the rear of the chassis and assure that the injector/ejector handle is pushed down in the unlatched (downward) position. c Slide the module completely into the chassis. When you begin to feel resistance, push up on the injector/ejector handle to fully inject the module into the chassis frame. 5 Latch the PXI-1430B by pulling up on the injector/ejector handle and secure the module front panel to the chassis using the module front-panel mounting screws. 6 Tighten the screws on the PXI-1430B front panel. Performance may suffer if the screws are not tightened properly. 7 Verify that the PXI chassis fans are operable and free of dust and other contaminants that may restrict airflow. 8 Install all chassis covers and filler panels after installing the PXI-1430B. Missing filler panels disrupt necessary air circulation in the chassis. NOT E Phase Matrix recommends installing slot blockers in adjacent vacant PXI slots to maximize cooling air flow to the PXI modules. A PXI Chassis Slot Blocker Kit (National Instruments part number 778678-01) is available for purchase at www.ni.com. 9 Plug-in and power-on the PXI chassis. Phase Matrix PXI-1430B RF Downconverter Module 7 Quick Start Guide Step 2-3. Connect to the Host Computer and Power Source Embedded Controller 1 Connect the keyboard, mouse, monitor and any other external devices to the PXI embedded controller. 2 Connect the chassis’ AC or DC inlet to the power source using an appropriate power cable. 3 When the power switch is in the ON position, observe that fans become operational. 4 If the power outlet does not have an appropriate ground connection, connect the premise safety ground to the chassis grounding screw. Refer to the chassis’ user manual at ni.com/manual for instructions. PXI Remote Controller PXI systems can be controlled from a PC or laptop computer through a software transparent link using National Instruments’ PXI Remote Controllers. - PC control of PXI consists of a PCI/PCI Express board in the computer and a PXI/PXI Express module in slot 1 of the PXI system, connected by a copper or fiber-optic cable. 1 Install the PCI/PCI Express board in a PC or insert the ExpressCard/PCMCIA CardBus card in a laptop computer. 2 Connect the chassis’ AC or DC inlet to the power source using an appropriate power cable. 3 When the power switch is in the ON position, observe that fans become operational. 4 If the power outlet does not have an appropriate ground connection, connect the premise safety ground to the chassis grounding screw. Refer to the chassis’ user manual at ni.com/manual for instructions. - Laptop computer control of PXI consists of an ExpressCard/PCMCIA CardBus card in the laptop and a PXI/PXI Express module in slot 1 of the PXI system, connected by a copper cable. (Step 2-4. Optional) Uninstall PXI Modules Before uninstalling PXI modules, power off the PXI chassis! When removing PXI modules from a chassis, ensure that you are grounded with a grounding strap or are touching a grounded metal surface. To avoid ESD, do not touch the exposed connector pins or any exposed circuitry on the device. When not in use, PXI modules should be stored in the original antistatic envelope to avoid damage. 8 Phase Matrix PXI-1430B RF Downconverter Module Quick Start Guide Step 3. Perform Software Installation/Configuration Complete the following steps to install the PXI device driver software and Soft Front Panel available from an optional CD or from the Phase Matrix web site at: www.phasematrix.com NOT E Any application development environment (ADE) that is to be used (such as LabVIEW, LabWindows/CVI, or a third-party program) must be installed prior to installing the PXI device driver software or its Soft Front Panel. Embedded Controller 1 Install the PXI device driver from the optional CD or from the Phase Matrix web site. See “Step 3-1. Installing the PXI-14XX Series Device Driver" on page 10. 2 Install the Soft Front Panel from the optional CD or from the Phase Matrix web site. See “Step 3-2. Installing the Soft Front Panel" on page 13. PXI Remote Controller PXI systems can be controlled from a PC or laptop computer through a software transparent link using National Instruments’ PXI Remote Controllers. - PC control of PXI consists of a PCI/PCI Express board in the computer and a PXI/PXI Express module in slot 1 of the PXI system, connected by a copper or fiber-optic cable. - Laptop computer control of PXI consists of an ExpressCard/PCMCIA CardBus card in the laptop and a PXI/PXI Express module in slot 1 of the PXI system, connected by a copper cable. 1 If the PXI remote controller (PC or laptop computer) being used is a Windows based operating system and was manufactured prior to 2008, install NI MXI-Express BIOS Compatibility Software: NI MXI-Express BIOS Compatibility Software 2 Install the NI PXI Platform Services Software that accompanies the PXI remote controller: NI PXI Platform Services Software 3 Install the PXI device driver from the optional CD or from the Phase Matrix web site. See “Step 3-1. Installing the PXI-14XX Series Device Driver" on page 10. 4 Install the Soft Front Panel from the optional CD or from the Phase Matrix web site. See “Step 3-2. Installing the Soft Front Panel" on page 13. 5 Connect the PXI remote controller, using the manufacture’s provided cable, to the expansion card in the PXI remote controller. 6 Reboot the PXI remote controller. Phase Matrix PXI-1430B RF Downconverter Module 9 Quick Start Guide Step 3-1. Installing the PXI-14XX Series Device Driver This procedure is used to install the PXI module’s device driver on an embedded controller or a PXI remote controller running Windows 7/XP. NOT E If the embedded controller or the PXI remote controller being used has previously had a device driver of the same type installed, it must be removed before installing a new device driver. Refer to “(Step 3-3. Optional) Uninstalling the PXI Device Driver" on page 17 for further details. NOT E Any application development environment (ADE) that is to be used (such as LabVIEW, LabWindows/CVI, or a third-party program) must be installed prior to installing the PXI device driver software or its Soft Front Panel. NOT E The following procedure is shown for systems running Windows 7 and may vary slightly for systems running Windows XP. NOT E Anti-virus software may prevent the PXI device driver installer from executing. 1 Install the PXI device driver using one of the following methods: • Insert the optional CD containing the device driver. • Download the latest available PXI device driver from the Phase Matrix web site and unzip it to a location on the embedded controller or the PXI remote controller. Device drivers are available at: www.phasematrix.com CAUTION PXI hardware does not support “hot-swap” capabilities! Before installing the PXI-1430B RF Downconverter Module, the PXI chassis must be powered off and unplugged to prevent damage to PXI modules. 10 Phase Matrix PXI-1430B RF Downconverter Module Quick Start Guide 2 Install PXI modules into the PXI chassis and turn on power. 3 Launch the PXI-14XX Series Device Driver Installer, PXI-14XX Driver (32 bit).exe or PXI-1400 Driver (64 bit).exe. The PXI-14XX Series Device Driver Installer will open with a welcome window similar to the one shown in Figure 2. Figure 2 Example Welcome Window 4 Select Next to continue. Windows will display the End User License Agreement (EULA) as shown in Figure 3. Figure 3 Example of Software License Agreement Phase Matrix PXI-1430B RF Downconverter Module 11 Quick Start Guide 5 Carefully read through the EULA. • If you accept the terms of the EULA, select “I accept this Agreement” and select Next to continue. • If you do not accept the agreement, you will not be able to insall the software. Figure 4 Example of Windows Security Window A Windows security window similar to the one shown in Figure 4 will appear. 6 Select Install to continue. Figure 5 Example of Completing the Installer Windows should display a message indicating that the installation was successful. 7 Select Finish to complete the device driver installation. 12 Phase Matrix PXI-1430B RF Downconverter Module Quick Start Guide Step 3-2. Installing the Soft Front Panel This procedure is used to install the PXI-1430B’s Soft Front Panel graphical user interface on an embedded controller or a PXI remote controller running Windows 7/XP. NOT E The device driver software must be installed before the Soft Front Panel can be used to control the PXI-1430B. Refer to “Step 3-1. Installing the PXI-14XX Series Device Driver" on page 10 for further details. NOT E Any application development environment (ADE) that is to be used (such as LabVIEW, LabWindows/CVI, or a third-party program) must be installed prior to installing the PXI device driver software or its Soft Front Panel. NOT E The following procedure is shown for systems running Windows XP and may vary slightly for systems running Windows 7. 1 Install the Soft Front Panel using one of the following methods: • Insert the optional CD containing the Soft Front Panel. • Download the latest available Soft Front Panel from the Phase Matrix web site and unzip it to a location on the embedded controller or the PXI remote controller. Soft Front Panels are available at: www.phasematrix.com 2 Start the installation process by selecting Start > Run > Browse, navigate to the "setup.exe" file and select Open to start the installation wizard. After a small delay, a screen similar to Figure 6 is displayed. The actual screen that appears will have the label of the module Soft Front Panel being installed, so instead of “PXI-14XX,” the label is displayed as either “PXI-1410,” “PXI-1420,” “PXI-1430B,” “PXI-1440,” or “PXI-1450B.” Phase Matrix PXI-1430B RF Downconverter Module 13 Quick Start Guide Figure 6 Example of Starting the Soft Front Panel Installation Wizard 3 Continue to the next screen. Figure 7 Example of Selecting Destination Directory for Executables 4 Enter the destination directory for the PXI-1430B’s Soft Front Panel executables or browse to a destination directory by selecting the Browse button. 5 Once the file path has been entered, select Next to continue to the Software License Agreement. 14 Phase Matrix PXI-1430B RF Downconverter Module Quick Start Guide Figure 8 Example Software License Agreement 6 Carefully read through the Software License Agreement. • If you agree to the terms of the software license agreement, select "I accept the License Agreement" and select Next to continue. • If you do not agree, you will not be able to install the software. Figure 9 Example Summary of Files Being Installed 7 Review the list of files to be installed and select Next to begin the installation. Phase Matrix PXI-1430B RF Downconverter Module 15 Quick Start Guide Figure 10 Example of Completing Soft Front Panel Installation Wizard 8 Select Finish to complete the Soft Front Panel installation. 16 Phase Matrix PXI-1430B RF Downconverter Module Quick Start Guide (Step 3-3. Optional) Uninstalling the PXI Device Driver This procedure is used to uninstall previous versions of the PXI-1430B’s device driver from an embedded controller or a PXI remote controller running Windows 7/XP. NOT E • If this is the first time that a PXI-1430B’s device driver is being installed, this procedure is optional and can be skipped. • If the embedded controller or the PXI remote controller has previously had a device driver of the same type installed, it must be removed before installing a new PXI-1430B’s device driver. NOT E The following procedure is shown for systems running Windows XP and may vary slightly for systems running Windows 7. Figure 11 Example of Device PX14XX Under “NI-VISA PXI Devices” 1 Open the Device Manager by selecting Start > Control Panel > Performance and Maintenance > System. 2 Select the Hardware tab and select Device Manger. 3 Select the View pull-down menu. 4 Select Devices by connection and the device should appear under "NI-VISA PXI Devices" with the label as "PM14XX."* * PM14XX will actually display as PXI-1430B RF Downconverter Module. Phase Matrix PXI-1430B RF Downconverter Module 17 Quick Start Guide 5 To uninstall the device driver for a selected module, right-click on the selected device and a popup menu is displayed with five selectable choices. 6 Select Uninstall and a popup window is displayed with a conformation to continue with the uninstall process. Figure 12 Example of Confirming Device Driver Removal 7 Select OK to confirm the prompt and uninstall the device driver. 18 Phase Matrix PXI-1430B RF Downconverter Module Quick Start Guide Step 4. Review Hardware and Software Front Panels Phase Matrix PXI-1430B RF Downconverter Module 19 Quick Start Guide Hardware Front Panel Figure 13 Hardware Front Panel of the PXI-1430B RF Downconverter Module CAUTION 20 The maximum power input to the input connector (RF B IN 100 kHz to 2.9 GHz) must not exceed +10 dBm! Phase Matrix PXI-1430B RF Downconverter Module Quick Start Guide STATUS LED This LED indicates the overall health of the PXI-1430B. This includes the power supplies and other hardware. The PXI-1430B has extensive built-in-test (BIT). Additional insight can be learned by reading the status section of the Soft Front Panel. The STATUS LED can have four possible conditions: • Green indicates that all power supplies are functioning within their tolerances and all hardware is functioning. • Amber indicates that all power supplies are functioning within their tolerances, but there is a hardware failure or no reference clock is present. • Red indicates a failure in the power supplies and module hardware. This can be a catastrophic failure. • Off indicates a failure in the power supplies, but module hardware seems to be functioning. Module hardware functioning indication can be erroneous in this mode since this circuitry can be compromised by a power supply failure. ACCESS LED This Solid AMBER LED blinks to indicate each time the module is written to or read from. CAUTION The maximum power input to the input connector (RF B IN 100 kHz to 2.9 GHz) must not exceed +10 dBm! CAUTION When using a PXI-1410 Preselector Module with a PXI-1430B RF Downconverter Module, caution must be used! Although a PXI-1410 Preselector Module can accept input power levels above +10 dBm, its step attenuator must be set to 20 dB or higher when operating at these levels; this attenuation is required so that the power coming out of the PXI-1410 Preselector Module does not exceed the maximum allowed power that can be applied to the RF B IN input connector of the PXI-1430B RF Downconverter Module. Damage can occur if power exceeds +10 dBm applied to the PXI-1430B RF Downconverter Module’s input connector! Phase Matrix PXI-1430B RF Downconverter Module 21 Quick Start Guide RF B IN 100 kHz to 2.9 GHz SMA (f) connector is used to input an RF signal that is to be downconverted. This RF signal can be supplied one of two ways: • directly to the RF B IN connector, in a range of 100 kHz to 2.9 GHz. The maximum operating power applied to the PXI-1430B’s input connector (RF B IN 100 kHz to 2.9 GHz) is -40 dBm! The PXI-1430B is designed to operate with signals below -40 dBm. Operation above -40 dBm is allowed with degraded performance. • (attenuated) through the PXI-1410 Preselector Module’s RF B IN connector, out of its RF B OUT connector, and in through the RF B IN connector of the PXI-1430B RF Downconverter Module. LO B IN SMA (f) connector is used to deliver the LO signal from the PXI-1450B Local Oscillator Module, into the front panel of the PXI-1430B RF Downconverter Module. This LO signal is used to down convert the RF signal that is input to the RF B IN connector and produce a 250 MHz IF OUT; see the description for the IF B OUT connector. REF B IN 100 MHzSMB (m) connector is used to deliver a 100 MHz reference signal into the front panel. This 100 MHz reference signal can be supplied by the PXI-1450B Local Oscillator Module from either the REF A OUT 100 MHz or REF B OUT 100 MHz. These 100 MHz reference signals are phase-coherent with the 10 MHz reference being used. VIDEO OUTSMB (m) connector is used to output the video output signal which is enabled at all times. The video output is a DC level which is representative of the total signal power contained within the IF passband of the system. CAUTION The maximum power output of the IF B OUT connector can exceed +20 dBm! Care should be used when connecting this IF B OUT to a digitizer or other equipment. When the IF B OUT normal operating range is exceeded, the overload indicator will be illuminated. (Refer to Table 2.) 22 Phase Matrix PXI-1430B RF Downconverter Module Quick Start Guide IF B OUT SMB (m) connector is used to output an IF signal. This IF signal can be 100 kHz to 425 MHz when an IF signal is supplied through the RF B IN connector and bypass mode is selected thereby bypassing the down conversion circuitry. When the down conversion circuitry is used, a 250 MHz IF signal is output. This IF signal can be used as an input signal to the IF B IN input connector of the PXI-1440B IF Downconverter Module. This IF signal can also be supplied through the AUX IN connector of the PXI-1420 MW Downconverter Module, thereby bypassing the down conversion circuitry, so that the IF signal is available at the IF A OUT of the PXI-1420 MW Downconverter Module; this allows switching of the IF output signals between the PXI-1420 MW Downconverter Module and the PXI-1430B RF Downconverter Module without the use of the PXI-1440B IF Downconverter Module. Phase Matrix PXI-1430B RF Downconverter Module 23 Quick Start Guide Soft Front Panel Control Tab Figure 14 Control Tab Serial Number, Soft Front Panel, Last Cal Date, and FPGA Date Code shown in the top-right corner of the Soft Front Panel display information about the PXI module being controlled with this Soft Front Panel. This information cannot be changed through the Soft Front Panel. Stop Button This button is used to stop the Soft Front Panel from reading and writing to the PXI module; it halts the program and is the preferred way to exit the program. 24 Phase Matrix PXI-1430B RF Downconverter Module Quick Start Guide NOT E System gain is a combination of the settings for IF ATTEN 1 and IF ATTEN 2. Using both attenuators will result in better system performance. For optimum performance, the factory recommends that when adjusting the IF attenuators of the PXI-1430B, the adjustment should be made so that no part of the IF chain is overloaded. To prevent overloading during an adjustment, first adjust IF ATTEN 2 from 0 to 20 dB, and then adjust IF ATTEN 1 until reaching the desired attenuation. IF ATTEN 1 (dB) This slide control (along with an entry box) is used to select the level of IF attenuation and may be changed by pointing to the slide control and dragging it up or down to select different levels of IF attenuation; the corresponding selected value of IF attenuation is displayed in the entry box below the slide control. The entry box value may be changed by highlighting the numbers and entering the change or by using the up/down buttons to the left of the entry box. Values can be entered from 0 dB to 31.5 dB in 0.5 dB steps. IF ATTEN 2 (dB) This slide control (along with an entry box) is used to select the level of IF attenuation and may be changed by pointing to the slide control and dragging it up or down to select different levels of IF attenuation; the corresponding selected value of IF attenuation is displayed in the entry box below the slide control. The entry box value may be changed by highlighting the numbers and entering the change or by using the up/down buttons to the left of the entry box. Values can be entered from 0 dB to 31.5 dB in 0.5 dB steps. NOT E When in BYPASS mode, all DOWNCONVERTER mode related active circuitry is shut down to conserve power and minimize unwanted interference. It is highly recommended that BYPASS mode be the default setting when the PXI-1430B is not in use. This setting will help prevent unwanted signals from entering other PXI modules in use. Select Signal Path These selection buttons are used to select between BYPASS or DOWNCONVERTER as the IF path. • When BYPASS mode is selected, the signal path bypasses the down conversion circuitry and outputs an IF signal, between 100 kHz to 425 MHz, to the IF B OUT connector. • When DOWNCONVERTER mode is selected, the signal path is processed by the down conversion circuitry and outputs an IF signal of 250 MHz to the IF B OUT connector. RF B IN Frequency When the “Select Signal Path” is set to DOWNCONVERTER, this entry box is used to select the RF input frequency of the PXI-1430B. The RF input frequency may be changed Phase Matrix PXI-1430B RF Downconverter Module 25 Quick Start Guide by highlighting the numbers and entering the change or by using the up/down buttons to the left of the entry box. Values can be entered from 0.1 MHz to 2,900 MHz. Status The Status LEDs described in Table 2 indicate the status of each of the indicators. Table 2 Soft Front Panel, Status LEDs Indicator Description +5Volts +5 V power supply displays green when functioning and is within tolerance. +12Volts +12 V power supply displays green when functioning and is within tolerance. +3Volts +3 V power supply displays green when functioning and is within tolerance. -12Volts -12 V power supply displays green when functioning and is within tolerance. LO B Sense Displays green to indicate that an LO signal is present at the LO B IN connector. LO 2 Sense Displays green to indicate that the internal 3.0 GHz synthesizer (LO 2) signal is present to drive the internal mixer. LO 2 Lock Displays green to indicate that the internal 3.0 GHz synthesizer (LO 2) is locked to the REF B IN 100 MHz. +4 dBm OVLD Displays green when an IF overload condition has been detected. Either the RF signal applied at RF B IN has exceeded maximum operating level or the IF attenuation setting is too low. BUSY Displays green when the PXI Interface is BUSY writing commands to the internal hardware. No other commands should be sent to this PXI module while BUSY is active. This number indicates the internal real-time ambient temperature of the module in degrees Celsius. Status Indicator The Status Indicator located at the bottom of the Soft Front Panel displays messages related to system configuration. Messages may be errors or warnings. 26 Phase Matrix PXI-1430B RF Downconverter Module Quick Start Guide Cal Data Tab Figure 15 Cal Data Tab The Cal Data tab displays data that is stored in the module hardware. This data is loaded at the factory during initialization and calibration. The upper portion of this tab displays unit information such as model number, serial number, configuration-control number, FPGA part number, EEPROM part number, and last calibration date. The bottom portion of this tab displays calibration points from the on-board memory of the unit. Although data values can be viewed from this tab, the Soft Front Panel cannot be used to modify or overwrite the data values. These stored data values are normally utilized by the driver in real-time correction applications. Phase Matrix PXI-1430B RF Downconverter Module 27 Quick Start Guide Unit Info: Each PXI module is identified by three sets of numbers: the model number, serial number (S/N), and a configuration-control number (CCN). See “PXI Module Identification" on page 36 for an example. Model displays the model along with any special configuration identifiers. These model and special configuration identifiers are assigned by the factory. Serial Number by the factory. displays the serial number that has been assigned CCN displays the configuration control number that has been assigned by the factory. As Phase Matrix, Inc. continually improves and updates its products, changes to materials occur. When a part or assembly in a Phase Matrix instrument is changed to the extent that it is no longer interchangeable with an earlier part, the configuration control number (CCN) of the instrument is changed. FPGA P/N displays the Phase Matrix part number associated with the Field Programmable Gate Array (FPGA). This FPGA controls all of the I/O functions of the PXI module. EEPROM P/N displays the Phase Matrix part number associated with the Electrically Erasable Programmable Read Only Memory (EEPROM). This EEPROM controls the PXI related configuration such as manufacture ID, etc. Last Cal Date displays the date that the last calibration was run and that the calibration file was created. FPGA Date 28 Displays the applicable FPGA version date. Phase Matrix PXI-1430B RF Downconverter Module Quick Start Guide PXI-1430 Corrections The following corrections were made to adjust the level of IF attenuation so that no part of the IF chain is overloaded for the given RF B IN Frequency. The values displayed here for IF ATTEN 1, IF ATTEN 2, and IF Fine Loss can be used to accurately set the system gain to 38 dB for a given RF B IN Frequency. Using this Soft Front Panel, the user can only change the RF B IN Frequency and view calibration data associated with that frequency. This Soft Front Panel cannot be used to change the actual value of IF ATTEN 1, IF ATTEN 2, or IF Fine; it is only used to view the values that should be set in order to obtain a system gain of 38 dB. This value can be set from the Control Tab. IF ATTEN 1 represents the setting of IF ATTEN 1 for a particular RF B IN frequency. This represents the correction value that needs to be set for IF ATTEN 1 of the unit. This value can be set from the Control Tab. IF ATTEN 2 represents the setting of IF ATTEN 2 for a particular RF B IN frequency. This represents the correction value that needs to be set for IF ATTEN 2 of the unit. This value can be set from the Control Tab. IF Fine Loss represents a residual error that exists after setting IF ATTEN 1 and IF ATTEN 2. This error cannot be corrected in the PXI module due to the 0.5 dB step limitation of IF ATTEN 1 and IF ATTEN 2. This residual error value cannot be set from the Control tab or this Cal Data tab, it can only be mathematically applied externally. Table 3 Bypass Response 230 240 250 260 MHz -2.02 -2.05 -2.06 -2.09 dB The Bypass Response table displays bypass port response data stored in the PXI-1430B’s memory during each measurement. These data values are displayed as port response over frequency. Use the Horizontal Slider Bar to view values to the left and right of the values currently being displayed. Phase Matrix PXI-1430B RF Downconverter Module 29 Quick Start Guide Table 4 IF Filter Response 248 249 250 251 MHz -0.1 -0.02 0 -0.02 dB The IF Filter Response table displays the correction data associated with the IF output frequency. This data can be used to mathematically improve (flatten) the IF filter response. The IF is centered at 250 MHz and has approximately 40 MHz of BW. Use the Horizontal Slider Bar to view correction values to the left and right of the values currently being displayed. 30 Phase Matrix PXI-1430B RF Downconverter Module Quick Start Guide Step 5. Confirm Basic Module Operation Purpose of Confirmation The purpose of this process is to confirm the basic module operation of the PXI-1430B. Confirmation Requirements The PXI-1430B is confirmed by measuring the IF center frequency and bandwidth with a 1.5 GHz input frequency. This process confirms that all connectors, switches, cables, and related circuitry used in these signal paths are functional. Equipment Requirements Figure 16 shows a block diagram of the equipment setup with the type of equipment (or equivalent performance) required to confirm basic module operation. Table 5 Equipment Requirements to Confirm Basic Module Operation Qty Equipment Description 1 Agilent 83650A Signal Generator, 26.5 GHz 1 Agilent 8566B Spectrum Analyzer 1 NI PXIe-1065 PXI chassis 1 NI PXI-8106 PXI Embedded Controller with Windows 7/XP 1 Phase Matrix PXI-1430B RF Downconverter Module Display 31 Quick Start Guide Equipment Settings Signal Generator CW 1.5 GHz Modulation OFF Level -40 dBm Spectrum Analyzer Frequency 250 MHz Span 100 MHz RBW 1 MHz VBW 3 MHz Attenuation 10 dB Scale 1 dB/Div Reference 0 dB PXI-1450B Local Oscillator Module Frequency 4.75 GHz PXI-1430B RF Downconverter Module Set IF Gain Control to provide 38 dB of gain. (Refer to the “IF Center Frequency and Bandwidth Check" on page 33.) 32 Phase Matrix PXI-1430B RF Downconverter Module Quick Start Guide Equipment Setup to Confirm Basic Module Operation Figure 16 Equipment Setup to Confirm Basic Module Operation The rain in Spain Falls mainly on the plains TO RF B IN FROM IF B OUT TO REF B IN TO LO B IN 1 2 3 4 5 6 7 8 9 10 11 12 13 14 15 LOCAL OSCILLATOR 16 17 18 PXI-1430% IF Center Frequency and Bandwidth Check 1 Connect the equipment as shown in Figure 16. • Connect the RF Output of the Signal Generator to RF B IN of the PXI-1430B. • Connect the LO OUT of the PXI-1450B Local Oscillator Module to LO B IN of the PXI-1430B. • Connect the REF B OUT of the PXI-1450B Local Oscillator Module to REF B IN of the PXI-1430B. • Connect the IF B OUT of the PXI-1430B to the RF Input of the Spectrum Analyzer. CAUTION The maximum power input to the input connector (RF B IN 100 kHz to 2.9 GHz) must not exceed +10 dBm! 2 Set the Signal Generator frequency to 1.5 GHz and the output power to -40 dBm. 3 Set the LO frequency to 4.75 GHz. Phase Matrix PXI-1430B RF Downconverter Module 33 Quick Start Guide 4 Using the Soft Front Panel of the PXI-1430B: • Set the Select IF Path to Downconverted. NOT E System gain is a combination of the settings for IF ATTEN 1 and IF ATTEN 2. Using both attenuators will result in better system performance. For optimum performance, the factory recommends that when adjusting the IF attenuators of the PXI-1430B, the adjustment should be made so that no part of the IF chain is overloaded. To prevent overloading during an adjustment, first adjust IF ATTEN 2 from 0 to 20 dB, and then adjust IF ATTEN 1 until reaching the desired attenuation. 5 Using the Soft Front Panel of the PXI-1430B, adjust the system IF Attenuation until the signal from the IF B OUT (as indicated on the Spectrum Analyzer) has reached -2 dBm; this power level is equivalent to +38 dB of gain through the PXI-1430B. 6 Set the Spectrum Analyzer to Max Hold. 7 Sweep the Signal Generator RF frequency from 1.45 to 1.55 GHz (200 to 300 MHz at IF OUT), keeping the output level constant. 8 Confirm that the maximum fluctuation, at the IF B OUT connector, between 230-270 MHz is less than or equal to 3 dB. 34 Phase Matrix PXI-1430B RF Downconverter Module Quick Start Guide SMA Connector Care Follow these recommendations to ensure the PXI module's SMA connectors remain stable and provide optimal conductivity. Connecting SMAs Always inspect connectors for crooked or bent pins and other visible damage. Also, check to ensure that connectors are clean before attaching mating connectors. To attach mating connector, align both connectors and lightly tighten nut by hand. Do not over tighten connection. Use an 8 inch-pound torque wrench to complete the connection. Cleaning SMAs Keep connectors clean. Use compressed air to remove debris of any type. After applying compressed air, use isopropyl alcohol on a cotton swab to wipe the connector's cavity, and use a dry cotton swab to absorb remaining alcohol. Never use abrasives to clean connectors. Storing PXI units that have SMAs Place a protective cap on connectors when not in use. Never set a PXI module connector-side down or forcibly next to another object such that the connectors contact the object. If a Problem Occurs If a problem occurs, perform the following checks before returning a PXI module for repair: 1 Check that all system components are powered on: • PXI mainframe • PXI-1430B RF Downconverter Module • PXI-1450B Local Oscillator Module • Signal Generator • Spectrum Analyzer 2 Check that all cable connections are properly made. (Refer to the “IF Center Frequency and Bandwidth Check" on page 33.) 3 Check that the STATUS LED is Green. (Refer to page 21.) 4 Check that the ACCESS LED switches each time that a path is selected. (Refer to page 21.) 5 Contact Phase Matrix Customer Support for additional help. Phase Matrix PXI-1430B RF Downconverter Module 35 Quick Start Guide Service Information Periodic Maintenance Phase Matrix recommends the PXI module be calibrated every 12 months from the time the module is initially powered on. The specific calibration interval depends on the accuracy required by the end user's application. Accuracy of the module is not affected by non-operation when the module is properly stored in its original packaging or equivalent. PXI Module Identification Each PXI module is identified by three sets of numbers: the model number (PXI-1450 is shown in this example), a configuration-control number (CCN), and a serial number (S/N). These numbers are located on a label affixed to the frame on the side of the PXI-1430B (some units may have separate CCN and serial-number labels). The model number, CCN, serial number, and the numbers of any options must be included in any correspondence regarding your PXI module. A typical serial-number label is shown in Figure 17. Figure 17 Example of a Label Affixed to the Side of the PXI Module Model Number Configuration Control Number Serial Number Factory Service If you are returning a PXI module to Phase Matrix for service or repair, be sure to include the following information with the shipment: • Name and address of owner. • Model, complete serial number, and CCN of the PXI module. • A complete description of the problem. Be sure to provide enough information so that the problem can be verified: • Under what conditions did the problem occur? • Did the unit work and then fail? • What other equipment was connected to the PXI module when the problem occurred? • The name and telephone number of someone familiar with the problem who can be contacted by Phase Matrix if any further information is required. • The shipping address to which the PXI module is to be returned. Include any special shipping instructions. 36 Phase Matrix PXI-1430B RF Downconverter Module Quick Start Guide Shipping Instructions 1 Place the PXI module in an antistatic bag or enclosure. 2 Wrap the PXI module in heavy plastic or kraft paper. 3 Repack the PXI module in the original container, if available. If the original container cannot be used, pack the PXI module in a heavy (275 pound test) double-walled carton with approximately four inches of packing material between the PXI module and the inner carton. 4 Seal the carton with strong filament tape or strapping. 5 Mark the carton to indicate that it contains a fragile electronic instrument. 6 Ship the PXI module to Phase Matrix at the following address: Phase Matrix, Inc. 4600 Patrick Henry Dr. Santa Clara CA 95054 Tel: 1-408-610-6810 www.phasematrix.com Phase Matrix PXI-1430B RF Downconverter Module 37