1
[UK]
189 801/10 – 2014/04
HLA SSP Typing
Typing Software
Version 1.2
Copyright (c) 2014 Bio-Rad Medical Diagnostics GmbH
All Rights Reserved
HLA SSP Typing 1.2 User Manual
Content
1 Installation and Preparation .......................................................................................................... 3 1.1 1.2 1.3 1.4 1.5 2 First Steps ....................................................................................................................................... 5 2.1 3 Introduction ............................................................................................................................... 3 Minimum system requirements ................................................................................................. 3 Update of an existing version .................................................................................................... 3 Adoption of typing data from an installed software version ..................................................... 3 Instructions for installation......................................................................................................... 4 User Manager ........................................................................................................................... 5 2.1.1 The Administrator............................................................................................................ 6 2.1.2 User management .......................................................................................................... 7 2.1.3 User log-in/log-out........................................................................................................... 9 Working with the software........................................................................................................... 10 3.1 Start program .......................................................................................................................... 10 3.1.1 Language selection ....................................................................................................... 10 3.2 Program Settings .................................................................................................................... 11 3.3 Import of Lot Data ................................................................................................................... 12 3.4 Design New Layout ................................................................................................................. 14 3.5 Evaluation ............................................................................................................................... 15 3.5.1 Input Amplification Patterns .......................................................................................... 15 3.5.2 Typing ........................................................................................................................... 17 3.5.3 Gel Image ..................................................................................................................... 18 3.6 Result Management ................................................................................................................ 19 3.6.1 Save Results ................................................................................................................. 19 3.6.2 Open Results ................................................................................................................ 19 3.6.3 Delete Results............................................................................................................... 19 3.7 Report...................................................................................................................................... 20 3.8 Archive function ....................................................................................................................... 21 3.9 Search function ....................................................................................................................... 22 3.10 References .............................................................................................................................. 22 4 Enclosure ...................................................................................................................................... 23 4.1 Bio-Rad Software License Agreement .................................................................................... 23 2
HLA SSP Typing 1.2 User Manual
1 Installation and Preparation
1.1 Introduction
The software Bio-Rad SSP typing enables depicting, evaluating and saving patients’
typing results from reaction patterns. This manual is a brief instruction on the
installation and use of the typing software.
1.2 Minimum system requirements
-
Standard PC with operating system Windows 7
A minimum of 100 MB free hard disk storage space, CD drive
Graphics resolution at least 256 colours, 640x480 pixel, preferably: True
Colour
1.3 Update of an existing version
To update a previously installed version of SSP 1.1, install the new version and then
adopt data of the previous version.
Should the uninstalling of an existing SSP software version not be necessary,
please copy the files \cfg, \date and \archive from the installation directory of the
SSP software into to a temporary directory. Uninstall the old version of the program
with the software tool from the Windows system control and then install the new
version.
Subsequently transfer the data from the temporary directory into the newly created
subdirectory \cfg, \date and \archive.
Please note that the two new language files ENGLISH.LNG and GERMAN.LNG
must not be overwritten by old files from the temporary directory!
1.4 Adoption of typing data from an installed software version
After installing the new software, you should adopt data from older installations.
Because the software does not include a data adopting feature, all data must be
copied with the operating system’s explorer. Please proceed as follows:
1. Open the explorer of your system
2. Copy the files from the directory \cfg from the old installation directory of the
SSP software into the directory \cfg of the new installation directory.
Please note that the two new language files ENGLISH.LNG and GERMAN.LNG
must not be overwritten by old files from the temporary directory!
3. Copy the files of the directory \data and \archive from the old installation
directory of the SSP software into the directory \data and \archive of the new
installation directory.
3
HLA SSP Typing 1.2 User Manual
1.5 Instructions for installation
Log into your system as administrator. Place the CD in the CD drive of your
computer. Should the installation not start automatically (AutoPlay of the CD) start
the program by selecting Setup.exe from the CD.
The installation program is dialogue based. The standard subdirectory is
C:\ProgramFiles\Bio-Rad\SSPxxxx\. (xxxx = recent version number)
Click on the yellow box in the start window and initiate the installation.
By clicking on <Next> the following windows will appear subsequently:
1. Welcome screen
2. License agreement
Select " I accept the terms in the license agreement"
3. Manufacturer's notes on the installation structure
4. PC user and organization
5. Proposed target files
"Change" – select other directory
In this screen changes can be selected or confirmed by clicking on
“OK”.
It is not recommended to install a new version in the same directory where a
previous version was installed because possibly not all data will be overwritten.
6. Pathway suggestion
Single user version: Use the automatically suggested pathway
Multi user version: Network pathway can be selected
7. Opportunity to check the pathway before definitive installation
Confirm by clicking on <Install>
8. Installation
9. Confirmation of successful installation
Confirm by clicking on <Finish>
After successful installation, the software should appear on your desktop window
and be listed in programs-start menu as „Bio-Rad HLA-SSP typing v1.2“ .
For the network operation a joint file path can be configured on all work stations on
the network. All users save their data on the joint network drive. The software will
automatically ensure that there is an unambiguous allocation of file names. It is
also possible to install a joint archiving path on the network. This path would need
to be set up in the INI file of each work station.
If the software is changed from a single user version to a multi user version, it is
important that files from the folders "Data" and "Archive" do not have identical file
names to avoid overwriting. By archiving data, the current time is added to the file
name and overwriting is thus impossible.
4
HLA SSP Typing 1.2 User Manual
2 First Steps
2.1 User Manager
It must be clearly traceable at any time which operator created a specific typing report.
This is why the SSP Typing Software features the user management function.
The software distinguishes between the Administrator, (who administers the users) and
the Users, who are authorized to create the reports.
The administrator assigns the user names and determines which requirements a
password must fulfill. He defines the rights for each user. An example: The confidence
principle can be ensured by defining the rights for the evaluation and release.
The user can change his password, but has no further access to the User Management
feature. He can, however, carry out all laboratory tasks within the scope of his
authorization (examples: import lots, type or release gels or print reports).
When leaving his work station, the user can log out with a mouse click without closing
the program.
While using the user management the following prompts may be displayed:
Do you really want to delete the user?
This appears if a user is accidentally about to be deleted from the list.
Password does not meet the criteria.
The password entered does not match the password criteria established by the system
administrator.
Password not confirmed!
The repeated password is incorrect.
User name already present!
Attempt to enter a new user whose name already exists.
Password expired! Please enter a new password.
This appears if the password has expired according to the criteria established by the
system administrator.
More than 3 failed attempts! Please inform the system administrator.
The system administrator has allowed a maximum of 3 failed attempts to enter a
password. This limit has been exceeded.
User language not selected.
Each user needs to enter his dialog language.
5
HLA SSP Typing 1.2 User Manual
2.1.1 The Administrator
The administrator assigns the user names and determines which requirements a password
must fulfill. He defines the rights for each user. An example: The confidence principle can be
ensured by defining the rights for the evaluation and release.
After logging in, the administrator has access to the user management:
The password for the first log-in is ADMIN - admin. The administrator should change the
password thereafter.
→ The user management dialog is displayed:
New:
A new user is created → see User Management
Change:
This is where the administrator can change his password.
Delete:
The administrator cannot be deleted!
General settings for all users are made in the right column:
Password criterion:
This is where you define how many characters a password must have and
whether it must include digits.
Password expires:
After a defined amount of time a new password must be entered upon logging in.
Password attempts:
If the defined number of attempts is exceeded, the user can no longer log in and
must see the administrator. (Are you the administrator? And you forgot your
password? Please contact Bio-Rad’s Technical Support!)
6
HLA SSP Typing 1.2 User Manual
2.1.2 User management
The user can change his password, but has no further access to the User
Management feature. He can, however, carry out all laboratory tasks within the
scope of his authorization (examples: import lots, type or release gels or print
reports).
User management is the administrator’s task, he is the only one who has
access to this feature.
•
Clicking on <User manager> displays the user management dialog:
•
General settings are made in the window to the right of the user list. They are described in
the chapter The Administrator.
7
HLA SSP Typing 1.2 User Manual
•
Click on <New> to create a new user:
User name:
The user must enter this name during login. It should therefore be easy
to memorize and not be too long.
Password:
When creating a new user, the user name in lower-case letters should
be used as the password. The user is then to change his password
upon his first log-in.
User language:
Please define for each user the language in which he works (currently
German or English).
Module authorization:
User rights may also be granted only for certain modules of the
software. In order to ensure the confidence principle, the rights for
typing and the rights for results release may be granted to different
users.
•
By clicking the right mouse button you can activate a context menu to select or deselect all
modules at the same time:
•
Click on <OK> to save the user data.
8
HLA SSP Typing 1.2 User Manual
2.1.3 User log-in/log-out
When leaving his work station, the user can log out with a mouse click without
closing the program: just click on the sad face
The new user clicks on the smiley face :
!
The log-in screen is displayed.
→ Enter your password, click on <OK> and start working!
After entering the user name and the password, you can change your password (for example
because it has expired). Do not click on <OK>, but on <Change password>. The following
window will be displayed and allows you to enter your new password:
•
Click on <OK> to get to the HLA Typing Software.
Notes:
You forgot your password? See your administrator for help!
9
HLA SSP Typing 1.2 User Manual
3 Working with the software
3.1 Start program
Start the software with a double click on the Bio-Rad HLA-SSP typing v1.2 icon:
Alternatively, the software can be started by choosing „Start/program files/BioRad/ Bio-Rad HLA-SSP typing 1.2".
Enter your user name and password for login.
Confirm with <OK>.
To change or log off an user without closing the software, use the function
„Extras – Change user“ or „Extras – Logoff user“ ort the buttons
and
.
3.1.1 Language selection
After successful registration or in demo mode, the SSP typing software is
started in English. The language is selected in the User Manager (see chapter
“first steps”). The software language (German or English) can be selected
individually for every user.
10
HLA SSP Typing 1.2 User Manual
3.2 Program Settings
When selecting “Extra – Options” or by clicking on the button
dialogue menu appears:
the following
Please select your options for the result protocol and for the path of the lot data
import.
11
HLA SSP Typing 1.2 User Manual
3.3 Import of Lot Data
The lot-specific software updates are provided in the internet as ZIP files and
have to be downloaded from there. You find the download service on
"http://www.medizinische-diagnostikdreieich.de//DownloadServiceGroup.aspx".
Select your country and "Transplantation SSP" and enter the download area.
Here, all product information like user manuals, worksheets, reaction pattern
charts and lot-specific software updates is provided. Select the appropriate
product and the corresponding lot.
12
HLA SSP Typing 1.2 User Manual
Start the download by clicking on the corresponding ZIP file in the "Software"
column of the table. Save the ZIP file in a designated folder on your PC. The
path to this folder should be defined as the lot data import path in the software
(see chapter 2).
Import data by selecting „Extra – Import new lot“ or start importing new data by
clicking on the button
.
Select test by clicking on it.
Confirm by clicking on
.
13
HLA SSP Typing 1.2 User Manual
Confirm with „OK“.
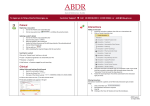
Note: For combination test ABDR SSPtray and ABC SSPtray each gene
loci must be selected individually!
3.4 Design New Layout
By selecting "Layout – new design" or by clicking on the button
, the layout
creator is started. With this feature new tray layouts can be defined by doubleclicking on a test from a list of available tests. For an ABDR test, first double
click on "A", then on "B" and finally "DR" of the resp. kit lot.
Store your layout by selecting “save” and entering a design name. It is
recommended to use the test name together with the lot number as layout
name, for example "ABDR6990803"
Of course, designs may also be deleted if desired.
14
HLA SSP Typing 1.2 User Manual
With „ Layout-Open “ or by clicking on the button
selected.
Confirm by clicking on
, stored layouts can be
.
The active layout will be displayed in the headline of the SSP typing software.
3.5 Evaluation
3.5.1 Input Amplification Patterns
Amplification patterns have to be entered carefully as incorrect entries can
cause incorrect typing results. If necessary the 4-eyes principle has to be used.
By clicking on the button
or by selecting “File - New“ an empty gel picture
with the selected layout will be shown.
15
HLA SSP Typing 1.2 User Manual
For each typing, the appropriate sample ID must be entered.
By clicking on the respective gel pocket with the left mouse button, amplification
patterns from the electrophoresis gel are transferred to the software. Renewed
clicking on the gel pocket cancels the activation.
By selecting the gel position with the right mouse button additional comments
on the amplification pattern can be entered.
Marking of
positive
reactions
Enter
additional
comments
Enter
sample ID
16
HLA SSP Typing 1.2 User Manual
3.5.2 Typing
After entering all reactions on the gel, selecting „Typing“ will activate the display
for the active sample or the active test.
The colour highlighted data fields can not be altered. Comments by the user
can be entered under “User comment”.
Selection of
result level
field for user
comments
Two result levels are available with different information content. They are
selected by activating or deactivating the field „Frequent alleles“:
- typing results considering only frequent allel combinations
- typing results considering all allel combinations.
„Frequent alleles” is based on two criteria:
1. Allelels described in the resp. literature as having a frequency higher than
1:1000 (>1‰) (Ref. 1 - 12).
2. 2. Alleles required to be detected in a high resolution system according to
the EFI
accreditation program.
Notes:
False positive or false negative reactions are not displayed.
Missing control bands should be documented in the gel image with a right mouse
button click. The software will automatically regard missing control bands as
“negative”. The user is obligated to verify whether a positive result of the missing
amplification would result in different typing result. In such a case the typing must
be repeated. Generally, if more than one control band are missing, the typing
should be repeated.
Some alleles might not be detected with Bio-Rad HLA-SSP Kits.
Therefore reaction pattern charts need to be consulted for result interpretation.
17
HLA SSP Typing 1.2 User Manual
3.5.3 Gel Image
The option „Gel image“ enables digitally integrating the image of an evaluated
gel into a result by importing a respective file or scanning it. For a file import the
formats "BMP", "IMG", "JPG" and "JPEG" are supported
The size of the picture will automatically adjust to the available space in the
print-out.
18
HLA SSP Typing 1.2 User Manual
3.6 Result Management
3.6.1 Save Results
After all data were entered, the gel can be saved by clicking on the button
or by
selecting „File - save“ and entering a file name.
The result is saved under yyyy/mm/dd-xxxx.
Note: In order to avoid data manipulation, saved data can no longer be
altered. Therefore please make sure that all relevant data were entered
prior to saving!
3.6.2 Open Results
To open a saved gel, select „File-Open“ or click on the button
. A dialogue
window will appear on your screen where a previously saved gel can be
selected. Confirm your selection with
this menu as well.
. The archive can be accessed from
3.6.3 Delete Results
By selecting „open gel“ saved results can be deleted. Select the result to be
deleted and click on the button
.
19
HLA SSP Typing 1.2 User Manual
Alternatively the result may be opened and deleted by selecting „File - Delete“
.
or clicking on the button
A gel image displayed on your screen can be closed by selecting “File – Close”
or by clicking on the button
open on your screen.
. It is not possible to have more than one gel
3.7 Report
To print results select „File – Print“ or click on the button
.
A list will appear on your screen including sample IDs, test names and gel
names as well as date of the last print-out of the respective test results.
Print preview
Switch to archive or
selection of unprinted
samples
•
It is possible to access the archive file or list unprinted results only.
•
Select the sample to be printed by clicking on it.
•
By pressing the "STRG" button it is possible to select a number of samples
for printing.
•
The count character in the typing report may be changed manually in file SSP.INI. If there is
a need to change the default count character please add a line to the "Options" section
"Countchar=<char>" (w/o the quotation marks where <char> is the new count character).
20
HLA SSP Typing 1.2 User Manual
3.8 Archive function
By selecting „Extra - Archive“ data can be transferred from the working data
base to the archive.
Select how old data for archiving shall be. Activate the button
respective files. Start archiving with
to display the
and confirm with „yes“.
Note:
By selecting “File - Open”, “File - Print”, or „Search“ data from the archive can be
re-opened.
21
HLA SSP Typing 1.2 User Manual
3.9 Search function
The search function is started by „Search – Start“ or by clicking on the button
.
An empty search window will be displayed. By clicking on “Sample ID”, “Test
name”, Gel name” or “Allele” the test results will be listed.
Tests are selected by clicking on them.
Alternatively, tests can be searched with any desired search phrase
(incremental search).
By pressing the "STRG" button it is possible to select a number of samples.
Confirm your selection and start the search with
.
The displayed search results can be opened or printed. A search may also be
performed in archived files.
3.10
References
1.
2.
3.
4.
5.
6.
7.
8.
9.
10.
11.
12.
M. Bunce et al., Tissue Antigens 48, 100-111 (1996)
V. K. N. Cereb and S. Y. Yang, Tissue Antigens 50, 74-76 (1997)
V.K. Prasad et al., Blood 93, 399-409 (1999)
D. Middleton et al., Human Immunology 61, 1048-1052 (2000)
F. Williams et al., Human Immunology 62, 645-650 (2001)
K.C. Cao et al., Human Immunology 62, 1009-1030 (2001)
C.K. Hurley et al., Tissue Antigens 50, 401-418 (1997)
D.M. Sintasath et al., Human Immunology 60, 1001-1010 (1999)
T.F. Tang et al., Human Immunology 61, 820-827(2000)
M.M. Collins et al., Tissue Antigens 55, 48-52 (2000)
T.F. Tang et al., Human Immunology 63, 221-228 (2002)
D. S. Chen et al., Human Immunology 63, 665-672 (2002)
For further questions please contact
Phone +49 (0) 6103 3130-807 or -540
Disclaimer: Two independent interpretations of primary reactions are recommended according to
the relevant tissue typing guidelines. Bio-Rad HLA typing software should not be used as a tool to
generate definitive results without verifying correctness but is designed to assist manual
interpretation by qualified personnel.
22
HLA SSP Typing 1.2 User Manual
4 Enclosure
4.1 Bio-Rad Software License Agreement
This is a legal agreement between you, the end user and
Bio-Rad Medical Diagnostics GmbH
Industriestraße 1
63303 Dreieich
Germany ("Bio-Rad").
By opening and/or using the sealed Bio-Rad software ("SOFTWARE") package, you are agreeing to
be bound by the terms of this agreement. If you do not agree to the terms of this agreement, please
return promptly the SOFTWARE package and the accompanying items including written material to
the place you obtained them for full refund.
1. Grant of License
The Bio-Rad License Agreement ("License") permits you to use one copy of the Bio-Rad
SOFTWARE product acquired with this License on any single computer, provided the SOFTWARE is
in use on only one computer at any time. If you have multiple Licenses for the SOFTWARE, you may
have as many copies of the SOFTWARE in use as you have Licenses. The SOFTWARE is "in use"
on a computer when it is loaded into the temporary memory or installed into the permanent memory
(e.g. hard disk, CD-ROM) of that computer.
2. Copyright
The SOFTWARE is owned by Bio-Rad and is protected by German copyright laws, international
treaty provisions and all other applicable national laws. Therefore the SOFTWARE may be copied
solely for backup or archival purposes or may be only transferred to a single hard disk provided you
keep the original solely for backup or archival purposes. You may not copy the product manual(s) or
written material accompanying the SOFTWARE.
3. Other restrictions
You may not rent or lease the SOFTWARE but you may transfer your rights under this License on a
permanent basis, after prior notice to Bio-Rad, provided you transfer all copies of the SOFTWARE
and all written materials and the recipient agrees to the terms of this agreement. You may not
reverse engineer, decompile or disassemble the SOFTWARE for other purposes than for the
determined use (e.g. for removal of defects). Any transfer must include the most recent update and
all prior versions.
LIMITED LIABILITY
1. Defects
If the SOFTWARE is defective (inclusive handbooks and written materials) your exclusive remedy
shall be within six months from the date of delivery - at Bio-Rad´s option - repair or replacement of
the SOFTWARE. If the repair or the replacement of the SOFTWARE is not successful you may claim
for reduction of the purchase price or rescission of the license agreement. This does not apply if
failure of the SOFTWARE has resulted from accident, abuse or misapplication.
2. Liability
Bio-Rad´s liability is limited to its, its representatives' and its employees' wrongful misconduct and
gross negligence except that Bio-Rad warranted explicitly characteristics of the SOFTWARE sold. In
no event Bio-Rad shall be liable for consequential damages which may arise of the use or the
inability to use the SOFTWARE. Bio-Rad shall not be liable either in the event that the SOFTWARE
is transferred to a third party without including the most recent update of the SOFTWARE.
These provisions do not affect Bio-Rad´s liability according to German Product Liability Laws and
other German mandatory legal provisions.
3. Applicable law
This License is governed by German law.
23
Bio-Rad Medical Diagnostics GmbH
Industriestraße 1
63303 Dreieich, Germany
Tel.
Fax
+49 (0) 6103 3130-0
+49 (0) 6103 3130-724
[email protected]
www.bio-rad.com
Bio-Rad Medical Diagnostics, 2014