1
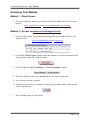
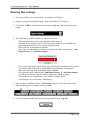
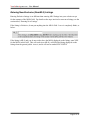
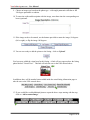
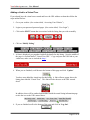
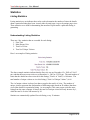
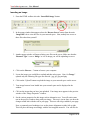
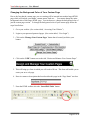
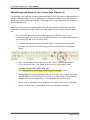
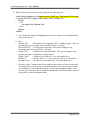
YourOnlineAgents.com User Manual Copyright 2007 YourOnlineAgents.com - User Manual Table of Contents: Accessing Your Website .....................................................................................................................3 Method 1 – Direct Access ...............................................................................................................3 Method 2 – Access via www.youronlineagents.com..........................................................................3 User Login .........................................................................................................................................4 Entering New Listings ........................................................................................................................5 Entering New Exclusive (Non-MLS) Listings ...................................................................................6 Edit Existing Listings ..........................................................................................................................7 Modify Listing Details ....................................................................................................................7 Example: How to Change a Listing Status to Sold ........................................................................8 Add Or Modify Listing Features......................................................................................................9 Add A Single Listing Image ..........................................................................................................10 Add Multiple Listing Images (up to 20 images at a time).................................................................12 Delete A Single Listing Image .......................................................................................................13 Delete All Listing Images..............................................................................................................14 Changing The Main Photo For A Listing........................................................................................15 Creating A Feature Listing ............................................................................................................16 Adding Custom Maps to your Listings ...........................................................................................18 Adding a Virtual Tour ...................................................................................................................20 Uploading a Virtual Tour Image ................................................................................................20 Adding a Link to a Virtual Tour .................................................................................................23 Delete A Listing ...........................................................................................................................24 Statistics .......................................................................................................................................... 25 Listing Statistics ...........................................................................................................................25 Understanding Listing Statistics.................................................................................................25 Checking Listing Statistics ........................................................................................................26 Printing Listing Statistics ..........................................................................................................27 Email Listing Statistics .............................................................................................................28 Website Statistics .........................................................................................................................29 Sending Branded Emails ................................................................................................................... 30 Sending a Standard Email .............................................................................................................30 Email Listings to Prospect Buyers .................................................................................................31 Prospects.......................................................................................................................................... 32 Sharing and Borrowing Listings ........................................................................................................ 33 Share Your Listings ......................................................................................................................33 Borrow Office Listings .................................................................................................................34 Customizing Your Website ............................................................................................................... 35 Create and Manage Custom Pages ..................................................................................................... 36 Create a New Custom Page ...........................................................................................................36 Displaying Custom Pages on Your Website....................................................................................37 Adding Submittal Forms to Your Custom Pages.............................................................................38 Using the HTML Editor ................................................................................................................39 Inserting an Image ....................................................................................................................41 Inserting PDF Documents .........................................................................................................43 Inserting Tables........................................................................................................................44 Changing the Background Color of Your Custom Page ...............................................................45 Add a Background Image to Your Custom Page (Advanced) .......................................................48 Page 2 of 49 YourOnlineAgents.com - User Manual Accessing Your Website Method 1 – Direct Access 1. Go to your website by entering your website URL into the address bar of your internet browser. www.yourdomain.com or www.youronlineagents.com/yourname Method 2 – Access via www.youronlineagents.com 1. Go to our main website, by entering the following URL into the address field of your internet browser. www.youronlineagents.com or www.yoa.ca 2. Click on the ‘Find An Agent’ button within in the banner, or scroll to the bottom of the page, and click on the link, “Find An Agent”. 3. Click on either the ‘Sort by Firstname ’ or ‘Sort by Lastname ’ buttons. 4. Proceed to find your name in the alphabetized list, and click on your name. 5. A new browser window is opened. 6. Maximize the new browser window by clicking on the maximize button in the top right corner of the browser. 7. This is the home page of your website. Page 3 of 49 YourOnlineAgents.com - User Manual User Login In order to access the password protected pages on your website, you first need to login. 1. Go to your website. (See section titled, “Accessing Your Website”) 2. Scroll down to the bottom of any page on your website, and click on the link ‘Agent Login’. 3. Enter your username and password into the corresponding text boxes, and click the ‘Login’ button. Note: If you do not recall, or have note been assigned a username and password to access the password protected pages on your website, send an email to [email protected] stating your name, and your desired system password. 4. If you enter an incorrect username and / or password, you will be returned back to the same login page, in order to try again. 5. If you enter the correct username and password, you will now be logged into the password protected area (“backend”) of your website. Here you will be able to view, modify, and delete any of your listings. In addition to the listings that the general public can visit at your website (For Sale, Sold, Conditional Sold, For Lease), you will also be able to see your “Expired” listings, when you log into your protected pages. “Expired” listings will not be visible to the general public; they will only be visible when you login to your protected pages using your personal username and password. Once logged in, you will see up to 10 of your listings. If you have additional listings, you will see navigational buttons that will enable you to move to the next 10 listings. Page 4 of 49 YourOnlineAgents.com - User Manual Entering New Listings 1. Go to your website. (See section titled, “Accessing Your Website”) 2. Login to your password protected pages. (See section titled, “User Login”) 3. Click on the ‘NEW’ button that is located at the top right side of the page, below your banner. 4. This will bring up a form in which you will need to fill out. - This form will enable you to create the listing within your site. - All fields are not required; however fill out as many details as you would like the general public to be able to view for this particular listing. - Work your way to the bottom of the form. - Once you are at the bottom you will see two boxes with check marks in them: ‘Add Home Features’ & ‘Add Home Images’. - If you want to add both Features and Images to this listing, keep these boxes checked. If you do not then click on the corresponding check mark and it will disappear. Once you have filled in the information click on ‘Insert’. If you keep the check marks in both ‘Add Home Features’ & ‘Add Home Images’ you will next be asked to add the features, followed by upload an image. To add features, see section titled, “Add / Modify Listing Features”. To add images, see section titled, “Add Images”. 5. Once you have completed click on ‘View Listings’ and you will be taken back to the page displaying up to 10 listings, where you started. 6. If you are finished scroll to the bottom of the page and click on ‘Log Out’. Page 5 of 49 YourOnlineAgents.com - User Manual Entering New Exclusive (Non-MLS) Listings Entering Exclusive listings is no different than entering MLS listings into your website except for the contents of the MLS# field. For details on the steps involved to enter new listings, see the section titled, “Entering New Listings”. If the listing is Exclusive, do not put anything into the MLS# field. Leave it completely blank, as below: If the listing is MLS, and you do not wish to have the MLS# displayed on the listing, enter XXX for the MLS# in this field. This will result in no MLS#, or MLS# label being displayed on the listing when the general public views it, and it will not be marked EXCLUSIVE. Page 6 of 49 YourOnlineAgents.com - User Manual Edit Existing Listings You can change absolutely anything that is related to a listing such as the listing price, listing descriptions, property type, listing date, property status and much more. To edit a particular listing follow the steps bellow: Modify Listing Details 1. Go to your website. (See section titled, “Accessing Your Website”) 2. Login to your password protected pages. (See section titled, “User Login”) 3. Click on the ‘EDIT’ button that is associated with the listing that you wish to modify. 4. Click on ‘Modify Listing’. 5. A form will be displayed, that is pre-populated with the information about this particular listing. Change any of the data for this listing. The changes will immediately be reflected on your web site, the main youronlineagents.com website, and if your office website is maintained by YourOnlineAgents.com, then your office website will also be automatically updated. 6. After making all the necessary changes on the form, scroll to bottom and click on the ‘Update’ button. 7. Once you have completed click on ‘View Listings’ and you will be taken back to the page displaying up to 10 listings, where you started. 8. If you are finished scroll to the bottom of the page and click on ‘Log Out’ Page 7 of 49 YourOnlineAgents.com - User Manual Example: How to Change a Listing Status to Sold 1. Go to your website. (See section titled, “Accessing Your Website”) 2. Login to your password protected pages. (See section titled, “User Login”) 3. Click on the ‘EDIT’ button that is associated with the listing that you wish to modify. 4. Click on ‘Modify Listing’. 5. Scroll down the page until you get to the section labeled “Status:” and click on the pull down box located next to it. Change the value from “For Sale” to “Sold” 6. Scroll to bottom and click on the ‘Update’ button. Page 8 of 49 YourOnlineAgents.com - User Manual Add Or Modify Listing Features Listing Features are the descriptions that describe the property such as: alarm system, built- in dishwasher, custom kitchen with granite counter tops, finished basement etc. All the features that you list for a particular property will appear in bullet form on the property listing. Example: To add or modify the features for a particular listing follow the steps bellow: 1. Go to your website. (See section titled, “Accessing Your Website”) 2. Login to your password protected pages. (See section titled, “User Login”) 3. Click on the ‘EDIT’ button that is associated with the listing that you wish to modify. 4. Click on ‘Modify Features’. 5. Check or uncheck the features you would like associated with this listing. 6. Once you’ve associated all the necessary features with the listing, scroll to bottom and click on the ‘Update’ button. 7. Click on ‘View Listings’ and you will be taken back to your main admin page. 8. If you are finished scroll to the bottom of the page and click on ‘Log Out’ Page 9 of 49 YourOnlineAgents.com - User Manual Add A Single Listing Image 1. Go to your website. (See section titled, “Accessing Your Website”) 2. Login to your password protected pages. (See section titled, “User Login”) 3. Click on the ‘EDIT’ button that is associated with the listing that you wish to modify. 4. Click on ‘Add a Custom Image’. 5. Click on ‘Browse’ and select the JPG picture from your computer that you wish to associate with this listing. 6. Select an image by clicking on the image name. 7. Select ‘Open’ to return to the upload image page. 8. To resize the image use the corresponding fields to change the image height and width. If you do not want to resize this image, select ‘Leave this image as its original dimensions ’. 9. Choose from one of three options to select the image type: Regular Still Shot, Wide Angle Panoramic Still Shot or 360 Panoramic Revolution. For more information on uploading panoramic images refer to the section labeled “Adding a Virtual Tour”. Page 10 of 49 YourOnlineAgents.com - User Manual 10. To associate a title and description with the image, enter them into the corresponding text boxes. The title will be displayed in the automated slide show, and the title & description will be displayed in the manual slide show. 11. If the image needs to be rotated, use the buttons provided to rotate the image, 90 degrees (left or right), or flip the image 180 degrees. 12. Once you are ready to add the picture to the listing - click on ‘Upload’. 13. If you would like to add an additional picture repeat the above steps starting with the step, click on ‘Add a custom Image’. 14. Continue this procedure until you have added all the pictures to this particular listing. 15. Click on ‘View Listings’ and you will be taken back to the page displaying up to 10 listings, where you started. 16. If you are finished scroll to the bottom of the page and click on ‘Log Out’ Page 11 of 49 YourOnlineAgents.com - User Manual Add Multiple Listing Images (up to 20 images at a time) 1. Go to your website. (See section titled, “Accessing Your Website”) 2. Login to your password protected pages. (See section titled, “User Login”) 3. Click on the ‘EDIT’ button that is associated with the listing that you wish to modify. 4. Click on ‘Add Multiple Images’ 5. For each image you would like to upload, click on the ‘Browse’ button and select the JPG picture from your computer that you wish to associate with this listing. 6. Once you have selected all the images you would like to upload press the ‘Upload Images’ button otherwise select the ‘Reset’ button to clear all of the fields. Page 12 of 49 YourOnlineAgents.com - User Manual Delete A Single Listing Image 1. Go to your website. (See section titled, “Accessing Your Website”) 2. Login to your password protected pages. (See section titled, “User Login”) 3. Click on the ‘EDIT’ button that is associated with the listing that you wish to modify. 4. Click on 'Delete Specific Images'. 5. All pictures associated with this listing will appear. To delete an image, click the ‘Delete ’ button immediately below the picture you want deleted, and that picture will be removed from the listing. 6. Once you are finished deleting images, click on ‘Return to Listing’ at the bottom of the thumbnail images to return the listing modification page. 7. Click on ‘View Listings’ and you will be taken back to the page displaying up to 10 listings, where you started. 8. If you are finished scroll to the bottom of the page and click on ‘Log Out’ Page 13 of 49 YourOnlineAgents.com - User Manual Delete All Listing Images 1. Go to your website. (See section titled, “Accessing Your Website”) 2. Login to your password protected pages. (See section titled, “User Login”) 3. Click on the ‘EDIT’ button that is associated with the listing that you wish to modify. 4. Click on ‘Delete All Images’. 5. Click on ‘View Listings’ and you will be taken back to the page displaying up to 10 listings, where you started. 6. If you are finished scroll to the bottom of the page and click on ‘Log Out’ Page 14 of 49 YourOnlineAgents.com - User Manual Changing The Main Photo For A Listing 1. Go to your website. (See section titled, “Accessing Your Website”) 2. Login to your password protected pages. (See section titled, “User Login”) 3. Click on the ‘EDIT’ button that is associated with the listing that you wish to modify. 4. Scroll to the bottom of the page, where you’ll see all the still photographs associated with the listing. 5. Click on the empty circle under the picture in which you would like to become the main picture; then scroll to the bottom of the page and click on the ‘Update Main Photo’ button. 6. Click on ‘View Listings’ and you will be taken back to the page displaying up to 10 listings, where you started. 7. If you are finished scroll to the bottom of the page and click on ‘Log Out’ Page 15 of 49 YourOnlineAgents.com - User Manual Creating A Feature Listing You can feature up to two listings on the front of your website. You can also add a title to each feature listing such as “Hot Property” or “Open House” for example. 1. Go to your website. (See section titled, “Accessing Your Website”) 2. Login to your password protected pages. (See section titled, “User Login”) 3. Click on the ‘EDIT’ button that is associated with the listing that you wish to modify. 4. Click on ‘Modify Listing’. 5. A form is displayed, prepopulated with all the details for this listing. Four lines down the label in the left column says ‘Featured Listing Title’. Put a check mark in the box to the right of the label. On the row immediately under the check mark box, there is a text input box labeled ‘Feature Listing Title’, where you can add a title. Before: Put a check mark in the box to the right of the ‘Featured Listing’ label, and add a title. After: 6. When you are finished, scroll down to the bottom of this page and click ‘Update’. Page 16 of 49 YourOnlineAgents.com - User Manual Note: You can feature up to 2 feature properties on your front page. If you already have 2 properties featured on your front page, you must “uncheck” one of them so that they are no longer a front page feature property, before attempting to add a third featured property. 7. Click on ‘View Listings’ and you will be taken back to the page displaying up to 10 listings, where you started. 8. If you are finished scroll to the bottom of the page and click on ‘Log Out’. Note: When you want to feature different properties on your front page be sure to go into the properties that are currently marked as featured and take the check mark out of the ‘Featured Listing’ box - then scroll to the bottom and click ‘Update’. Page 17 of 49 YourOnlineAgents.com - User Manual Adding Custom Maps to your Listings Once this feature is activated on your website, it is very simple to accurately plot all of your listings. If this feature has not been added to your site, contact us directly, and we will activate it for you. There are two ways to bring up the screen that allows you to select the listing location; both methods are shown below: 1. Go to your website. (See section titled, “Accessing Your Website”) 2. Login to your password protected pages. (See section titled, “User Login”) Option 1: 3. Click on the ‘MAP IT’ button that is associated with the listing that you wish to map. Option 2: 3. Click on the ‘EDIT’ button that is associated with the listing that you wish to modify. 3a. Click on ‘Map Listing Location’. This will now bring up a generic map of the area which you will have to manipulate manually to find the correct spot to map the listing. Page 18 of 49 YourOnlineAgents.com - User Manual In order to change the location of the map, simply click on the map, and holding the mouse button down, drag the map in the direction that you wish to move. By repeating this, you can drag the map in any direction, in order to find the exact location where the listing is located. To zoom in, click on the + and to zoom out, click on the - Once you find the exact location of the listing (by zooming in you can be very specific), simply click on the map, and release the mouse button. This automatically populates the longitude and latitude settings for that listing. 4. Scroll to the bottom of the map page, and click on the ‘Update’ button. You have now mapped this listing at its exact location. 5. If you are finished scroll to the bottom of the page and click on ‘Log Out’. Note: Any listings that do not have a map location assigned to it will be indicated by a flashing ‘MAP IT’ button on your main administrative page. Page 19 of 49 YourOnlineAgents.com - User Manual Adding a Virtual Tour There are two ways of adding virtual tours to your listings. One way is to take your own virtual tour photos and upload them to your listings, the other way is to link to the URL address of an already created virtual tour. Uploading a Virtual Tour Image You can upload either wide angle panoramic still shot or a 360 degree full panoramic picture. Follow the steps below: 1. Go to your website. (See section titled, “Accessing Your Website”) 2. Login to your password protected pages. (See section titled, “User Login”) 3. Click on the ‘EDIT’ button that is associated with the listing that you wish to modify. 4. Click on ‘Add a Custom Image’. 5. Click on ‘Browse’ and select the panoramic JPG picture from your computer that you wish to associate with this listing. 6. Select an image by clicking on the image name. 7. Select ‘Open’ to return to the upload image page. Do NOT click the upload button yet. 8. Leave the Image Resizing option as the default “Resize this image (height = 250 pixels)”. Page 20 of 49 YourOnlineAgents.com - User Manual 9. Choose an image type based on the photo type – wide angle panoramic still shot or full 360 degree panoramic revolution. 10. To associate a title and description with the image, enter them into the corresponding text boxes (optional). 11. If the image needs to be rotated, use the buttons provided to rotate the image, 90 degrees (left or right), or flip the image 180 degrees. 12. You are now ready to add the picture to the listing - click on ‘Upload’. You have now added the virtual tour for this listing. A link will now appear above the listing photo labeled “Virtual Tour”. This link will take the user to the URL entered above. In addition, there will be another button added inside the actual listing information page to take the user to the URL entered above. 13. If you would like to add additional pictures repeat the above steps starting with the step, click on ‘Add a custom Image’. Page 21 of 49 YourOnlineAgents.com - User Manual 14. Continue this procedure until you have added all the pano ramic pictures to this particular listing. 15. Click on ‘View Listings’ and you will be taken back to the page displaying up to 10 listings, where you started. 16. If you are finished scroll to the bottom of the page and click on ‘Log Out’ Page 22 of 49 YourOnlineAgents.com - User Manual Adding a Link to a Virtual Tour If you already have the virtual tours created and have the URL address to them then follow the steps outlined below: 1. Go to your website. (See section titled, “Accessing Your Website”) 2. Login to your password protected pages. (See section titled, “User Login”) 3. Click on the ‘EDIT’ button that is associated with the listing that you wish to modify. 4. Click on ‘Modify Listing’. 5. A form is displayed, pre-populated with all the details for this listing. Near the middle of the page is a section labeled “Virtual Tour URL”. Copy and paste the URL link to your virtual tour, make sure to include the http://. 6. When you are finished, scroll down to the bottom of this page and click ‘Update’. You have now added the virtual tour for this listing. A link will now appear above the listing photo labeled “Virtual Tour”. This link will take the user to the URL entered above. In addition, there will be another button added inside the actual listing information page to take the user to the URL entered above. 6. If you are finished scroll to the bottom of the page and click on ‘Log Out’. Page 23 of 49 YourOnlineAgents.com - User Manual Delete A Listing There are two ways to delete a listing; both methods are shown below: 7. Go to your website. (See section titled, “Accessing Your Website”) 8. Login to your password protected pages. (See section titled, “User Login”) Option 1: 9. Click on the ‘DEL’ button that is associated with the listing that you wish to map. Option 2: 3. Click on the ‘EDIT’ button that is associated with the listing that you wish to modify. 3a. Click on ‘Delete Listing’. 10. A confirmation page is displayed to verify that you do want to delete this listing. 11. If you do want to delete the listing click on the DELETE button. If you DO NOT wish to delete this listing, then click on the browser BACK button to return back to the previous page. 1. If you are finished scroll to the bottom of the page and click on ‘Log Out’. Page 24 of 49 YourOnlineAgents.com - User Manual Statistics Listing Statistics Listing statistics are an indicator that can be used to determine the number of times the details about a particular listing have been viewed, either by total page views or by unique page views. These statistics are a useful in determining the amount of repeat traffic a particular listing is generating. Understanding Listing Statistics There are 4 key statistics that are recorded for each listing: 1. First Visit. 2. Most Recent Visit. 3. Total # of Visits. 4. Total # of Unique Visitors. Here’s an example of listing statistics: The above sample statistics indicate that the first visit was on November 15th , 2003 at 5:36:05 pm, and that the most recent visit was on December 1st , 2003 at 5:52:54 pm. The total number of times that the details have been viewed for this listing (“Total # of Visits”) is 106 times. The total number of unique visitors to view this listing (“Total # of Unique Visitors”) is 66. The # of unique visitors is always less than or equal to the total # of visits. The number of unique visitors represents the total number of different people (based on IP address) that have viewed the details for a particular listing. As an example, if the same person visits the same listing from the same computer 10 times, the total # of unique visitors will only increase by 1, while the total # of visits will increase by 10. Statistics are automatically updated for each listing, every 30 minutes. Page 25 of 49 YourOnlineAgents.com - User Manual Checking Listing Statistics In order to access the viewing statistics for a particular listing, you must first login, then click on the STATS button that is associated with the listing that you wish to view statistics for. 1. Go to your website. (See section titled, “Accessing Your Website”) 2. Login to your password protected pages. (See section titled, “User Login”) 3. Click on the ‘STATS ’ button that is associated with the listing that you wish to view the statistics for. Note: If the listing that you wish to view statistics for is not on the first page because you have more than 10 listings, click on the “Next” button to get to the next 10 listings. The buttons below, from left to right, are ‘First’, ‘Previous ’, ‘Next’, ‘Last’. 4. After clicking on the ‘STATS’ button a new browser window will be launched that contains the details of that particular listing, in addition to the listing statistics for that listing. Within this popup browser window, the statistics are displayed immediately below the main photograph for the listing. 5. To return to your other listings, close the Listing Statistics popup browser window by clicking on the X in the top right corner of the browser. Page 26 of 49 YourOnlineAgents.com - User Manual Printing Listing Statistics Listing statistics can be printed in order to provide you with a hard-copy of the online statistics for each particular listing. To print the listing statistics for a particular listing, you must be currently viewing the statistics online. (See section titled, “Checking Listing Statistics”) 1. With the statistics displayed in the current browser window, go to the browser window menu, ‘File’, then from the drop-down menu, select ‘Print…’. Note: Some of the newer versions of Internet Explorer no longer have a text based menu bar. They do however have an icon bar, in which case there will be an image of a printer click on this printer image to print the page. 2. After clicking ‘Print ’ from the menu, a dialog window will pop- up, confirming that you wish to print the current page. Click on the ‘Print ’ button. Page 27 of 49 YourOnlineAgents.com - User Manual Email Listing Statistics Listing statistics can be easily emailed. To email the listing statistics for a particular listing, you must be currently viewing the statistics online. (See section titled, “Checking Listing Statistics”) 1. With the statistics displayed in the current browser window, go to the browser window menu, ‘File’, then from the drop-down menu, select ‘Send Link…’ Note: Some of the newer versions of Internet Explorer no longer have a text based menu bar. They do however have an icon bar, in which case click on ‘Page’ icon and select ‘Send Page by E-mail…’ Page 28 of 49 YourOnlineAgents.com - User Manual Website Statistics If you would like more statistics on your website we can integrate your website at no additional cost with the free Google Analytics software. Screenshot of sample analytics from Google Analytics With Google Analytics you can learn how visitors interact with your website; learn what keywords attract your most desirable prospects, pinpoint where your best customers come from, what advertising copy pulled the most responses, and what landing pages and content make the most money for you. To sign up for a free Google Analytic account go to: www.google.com/analytics Once you have signed up with Google Analytics, you will need to contact YourOnlineAgents.com and send us the code snippet that Google provides. Page 29 of 49 YourOnlineAgents.com - User Manual Sending Branded Emails Send a branded email to anyone. There are currently two different methods of sending emails to clients, standard emails and emails sent with links to listings that match a client’s criteria. Note, you will automatically be sent a copy of all emails sent to clients. If you would like a customized banner that shows up at the top and/or bottom of each of your emails, be sure to call or email. YourOnlineAgents.com can customize your “Branded Email” the way you want it. Phone: (705) 749-0360 or Email : [email protected] Sending a Standard Email 1. Go to your website. (See section titled, “Accessing Your Website”) 2. Login to your password protected pages. (See section titled, “User Login”) 3. Click on the ‘Branded Email’ button that is located just below your banner. 4. Enter the name and email address of the individual that you would like to email, followed by a subject and message. 5. Click on the ‘Send’ button at the bottom of the page and the message will be emailed to the recipient. You will also receive a copy in your own inbox to file and save your messages. 6. If you are finished scroll to the bottom of the page and click on ‘Log Out’. Page 30 of 49 YourOnlineAgents.com - User Manual Email Listings to Prospect Buyers Send a branded email to all your buyer prospects for each listing. You can also use this functionality to send listing information to a specific client. Note, you will automatically be sent a copy of all emails sent to clients. 1. Go to your website. (See section titled, “Accessing Your Website”) 2. Login to your password protected pages. (See section titled, “User Login”) 3. Click on the ‘Email Buyer Prospects’ button that is associated with the listing that you wish to email. 4. All the buyers whose criteria fit this listing are automatically added to the email recipients section. You can add or remove emails to this ‘Buyer Prospects’ textbox. 5. Fill out the subject and message textbox’s and click on the ‘Send’ button at the bottom of the page and the message will be emailed to the recipient s. You will also receive a copy in your own inbox to file and save your messages. 6. If you are finished scroll to the bottom of the page and click on ‘Log Out’. Page 31 of 49 YourOnlineAgents.com - User Manual Prospects When a visitor completes a Buyer or Feedback form on your website, the responses are emailed directly to yourself, and now those inquiries are also saved under the corresponding, Buyer Prospects, Property Inquiries, and Other Inquiries sectio ns. Check these sections often, as your email filters may be blocking your leads and inquiries, but now they will be saved here for you to see. If a potential client selects ‘Buyer Form’ from your website an email with all the information that they included about themselves and their search criteria will be sent directly to you; a copy of this information is also stored in ‘Buyer Prospects’ If a potential client selects ‘Email the Agent’ or ‘Request Further Information’ from your website an email with the information of the particular listing they were looking at will be sent to you directly; a copy of this email will also be stored in ‘Property Inquiries’. If a potential client selects ‘Feedback’ within your website, an email will be emailed to you directly with all the information that the client provided; a copy of this email will also be stored in ‘Other Inquiries’. To access ‘Buyer Prospects’, ‘Property Inquiries’ or ‘Other Inquiries’ select the corresponding button from the main administrative page. If you are finished, scroll to the bottom of the page and click on ‘Log Out’. Page 32 of 49 YourOnlineAgents.com - User Manual Sharing and Borrowing Listings To help increase the amount of traffic to your website you can share or borrow listings with other agents in your office. If you borrow a listing from another agent in your office, their listing will appear on your website. In order to borrow a listing from other agents in your office those agents first need to go into their sites and allow their listings to be shared. Note you will not be able to edit or modify any listings that you are borrowing from other agents. These shared listings will not be visible from your logged in administrative section but will be visible in your main listings section open to the general public. Share Your Listings 1. Go to your website. (See section titled, “Accessing Your Website”) 2. Login to your password protected pages. (See section titled, “User Login”) 3. Click on the ‘Share Your Listings’ button that is located just below your banner. 4. After clicking on ‘Share your Listings’ a new page is displayed showing all your property listings. To share a listing, simply click on the check box next to the listing that you would like to share. You can share as many listings as you would like. 5. After selecting all the listing that you want shared click on the ‘Update’ button to save your changes. 2. If you are finished scroll to the bottom of the page and click on ‘Log Out’. Page 33 of 49 YourOnlineAgents.com - User Manual Borrow Office Listings 1. Go to your website. (See section titled, “Accessing Your Website”) 2. Login to your password protected pages. (See section titled, “User Login”) 3. Click on the ‘Borrow Office Listings’ button that is located just below your banner. 4. After clicking on ‘Borrow Office Listings’ a new page is displayed showing all of the listings that are available to be borrowed. To borrow a listing, simply click on the check box next to the listing that you would like to borrow. You can borrow as many listings as you would like. 5. After selecting all the listings that you want to borrow click on the ‘Update’ button to save your changes. 3. If you are finished scroll to the bottom of the page and click on ‘Log Out’. Page 34 of 49 YourOnlineAgents.com - User Manual Customizing Your Website You can completely modify your website. Some of the features that you can modify are: Turn on/off the mortgage calculator, Turn on/off the mapping features, Set the order of how listings are displayed (ascending or descending), Turn on/off whether sold listing are displayed, turn on/off whether the mls number is displayed, Turn on/off whether to display the listing street addresses and much more. To customize your website, follow the steps below: 1. Go to your website. (See section titled, “Accessing Your Website”) 2. Login to your password protected pages. (See section titled, “User Login”) 3. Click on the ‘Customization’ button that is located just below your banner. 4. The customization page has a table of prepopulated fields which can be modified. 5. Once you have gone through the various options to customize your website, select ‘Update Record’ to save your changes. 4. If you are finished scroll to the bottom of the page and click on ‘Log Out’. Page 35 of 49 YourOnlineAgents.com - User Manual Create and Manage Custom Pages If you need additional pages in your website, you can create and manage as many custom web pages as you need. What your pages look like and what you put in them is totally up to you, such as “Agent Bio” or “10 Biggest Mistakes Sellers make”, etc., etc. Create a New Custom Page 1. Go to your website. (See section titled, “Accessing Your Website”) 2. Login to your password protected pages. (See section titled, “User Login”) 3. Click on the ‘Manage Your Custom Pages’ button that is located just below your banner. 4. Click on the ‘NEW’ button next to the title “Design and Manage Your Custom Pages”. 5. This will bring up a form in which you will need to fill out. This form will enable you to create your new web page. 6. Enter in a name or description that best describes this page in the “Page Name” text box. 7. Using the HTML editor provided you can now create your new webpage. When finished click on the ‘Update’ button to save your changes. For more information on how to use the HTML editor refer to the section in this manual titled “Using the HTML Editor”. 8. Your new webpage that you have just created will now be listed in the section labeled “Design and Manage Your Custom Pages” Page 36 of 49 YourOnlineAgents.com - User Manual Displaying Custom Pages on Your Website Once you've created a custom webpage as detailed in the section above, you must add that page to a custom menu button, in order for that page to be available to your visitors. 1. Go to your website. (See section titled, “Accessing Your Website”) 2. Login to your password protected pages. (See section titled, “User Login”) 3. Click on the ‘Manage Your Custom Pages’ button that is located just below your banner. 4. Near the bottom of the page you will see a section labeled “Manage Your Custom Menu”. In this section you are able to create up to four rows of menu buttons. Depending on where in the four rows you would like your menu button added, select the corresponding ‘EDIT’ button. 5. Type in the button text that best describes the page you will be linking too. 6. Select the custom page that you would like the button to link too. 7. When finished click on the ‘Update’ button to save your changes. You will now see a new button added under your banner. Page 37 of 49 YourOnlineAgents.com - User Manual Adding Submittal Forms to Your Custom Pages You can add 6 different types of submittal forms to the bottom of your custom page. These submittal forms allow the user to contact you for additional information. The results of these forms get emailed to you directly. The different types of submittal forms to choose from are: Name and email Name and email with security code Name, email and additional information Name, email and additional information with security code Name, email, address and additional information Name, email, address and additional information with security code To add a submittal form to your custom page, simply select one of the 6 form options from the “Form to include” pull down box located near the bottom of the page used for editing content. If you are finding you are getting a lot of email spam from these forms, select the options “with security code” – this will require people to retype a security code in order to submit the page. Page 38 of 49 YourOnlineAgents.com - User Manual Using the HTML Editor Even though the HTML editor is simple and easy to use it still provides many powerful functionalities such as: ? ? ? ? ? ? ? ? ? ? ? Font formatting : type, size, color, style, bold, italic, etc Text formatting : alignment, indentation, bullets list, etc Cut, Paste and Paste as Plain Text, Undo and Redo Paste from Word cleanup with auto detection Link and anchors support Image insertion, with upload and server browsing support File links upload and server browsing support (such as pdf’s) Table creation and editing (add, delete rows, etc) - one of the best systems in the market. Table cells editing (size, colors, etc) Form fields Spell checker (currently Internet Explorer only) Refer to the table below for detailed descriptions of the each individual icon used in the editor. Icon What it Does View or edit document source code (for advanced users). Preview what the HTML page will look like for users. Select a layout template. See "Templates" for details. Remove the highlighted text... (You must select the text first) Copy the highlighted text... (You must select the text first) Paste the text you copied (with or without formatting) Copy content from Microsoft Word, then paste it into the HTML editor using the pop-up accessed from this icon. Print the HTML page. Spell check the HTML page. Undo or redo the mo st recent action taken. Find a word or phrase within the text of the HTML page. Find and replace a word or phrase within the text. Select all of the text in the HTML page (usually used before copy or cut or to apply a style or format to the who le page). Remove the formatting from highlighted text... (You must select the text first) Bold, italic, underscore or strikethrough highlighted text. Superscript or subscript the highlighted text. Change the color of the highlighted text. Change the background color behind the highlighted text. Add numbering or bullets to highlighted text lines. Page 39 of 49 YourOnlineAgents.com - User Manual Increase or decrease the highlighted text's indentation. Alignment of highlighted text (left, centered, right, justified). Add or remove hyperlink from highlighted text. Also used to manage file uploads and links to files on the web server. Upload or insert your own or other's images into the HTML page. Insert table. Number of columns or rows, and table width, height, borders, & alignment can also be set. Insert divider line (horizontal rule). Insert emoticons (e.g. smiley faces, email icon, lightbulb). Insert symbols & special characters (trademarks, currency, etc.) . Insert page break. Only impacts printed version. Online keyboard for certain non-roman character languages. Styles & formatting determine the appearance of HTML text. You may also use the drop down boxes to style specific elements (such as headings), or set overrides for font face, font size, etc. Page 40 of 49 YourOnlineAgents.com - User Manual Inserting an Image 1. From the HTML toolbar select the ‘Insert/Edit image’ button. 2. In the popup window that appears select the ‘Browse Server’ button from the main ‘Image Info’ tab to view the files in your network space. Note, nobody has access to these files other than yourself. 3. Another popup window will appear listing your files on the server. Make sure that the ‘Resource Type ’ is set to ‘Image’ as it is an image you will be uploading to server. 4. Click on the ‘Browse…’ button to browse your computer. 5. Locate the image you would like to upload and then select open. Note, for "Image " uploads only the following file types are allowed: jpg, gif, jpeg and png. 6. Click on the ‘Upload’ button to upload the image to your network space on the server. 7. Your image has now been loaded into your network space and is displayed in the window. 8. Click on the image that you have just uploaded. Your image now appears in the preview window of the “Image Properties” window. 9. Set the various properties for this image such as alternative text. You will notice some text in the preview window along with your image. This text is just to show you how the changes would look with the text in your page. This text will not get added to your page. Note, a commonly used technique is to set the picture alignment to either left or right. This will place the image accordingly with the text wrapped around it. You will also be Page 41 of 49 YourOnlineAgents.com - User Manual able to drag the image up and down to get it into the desired location within your text. Play around with the settings – have fun! 10. Click on the ‘OK’ button. Your image has now been inserted into the HTML editor. Page 42 of 49 YourOnlineAgents.com - User Manual Inserting PDF Documents 1. In the editor area highlight some text that you want to become the link to your document. 2. From the HTML toolbar select the ‘Insert/Edit Link’ button. 3. In the popup window that appears select the ‘Browse Server’ button from the main ‘Link Info’ tab to view the files in your network space. Note, nobody has access to these files other than yourself. 4. Another popup window will appear listing your files on server. Make sure that the ‘Resource Type ’ is set to ‘File’ as it is a file you will be uploading to server. 5. Click on the ‘Browse…’ button to browse your computer. 6. Locate the PDF you would like to upload and then select open. Note, for "File" uploads the following extensions are denied: html, htm, php, php2, php3, php4, php5, phtml, pwml, inc, asp, aspx, ascx, jsp, cfm, cfc, pl, bat, exe, com, dll, vbs, js, reg, cgi, htaccess, asis 7. Click on the ‘Upload’ button to upload the PDF to your network space on the server. 8. Click on the PDF file that you just uploaded to server. 9. Click on the ‘OK’ button. Your PDF document has been uploaded to the sever and is now properly linked in your HTML page. Page 43 of 49 YourOnlineAgents.com - User Manual Inserting Tables 1. From the HTML toolbar select the ‘Insert/Edit Table’ button. 2. In the popup window that appears select the table properties for the table you are creating such as number of rows, columns etc. When done click on the ‘OK’ button. 3. Your table has now been added to your HTML page. 4. To modify an individual cell or cells, select or highlight the cell(s) you want to modify and “right click” (click the right mouse button on highlighted cells) to bring up an options box, click on cell -> cell properties. Note: Within the “Cell Properties” you can change the cell background color and border color. Page 44 of 49 YourOnlineAgents.com - User Manual Changing the Background Color of Your Custom Page Due to the fact that the custom page you are creating will be inserted into another larger HTML page which will include your banner, custom menus, links etc… You cannot change the entire background color of this larger HTML page. You can however, change the background color of just the custom page section. To change the background color of your custom page follow the steps listed below: 1. Go to your website. (See section titled, “Accessing Your Website”) 2. Login to your password protected pages. (See section titled, “User Login”) 3. Click on the ‘Manage Your Custom Pages’ button that is located just below your banner. 4. Click on the ‘NEW’ button next to the title “Design and Manage Your Custom Pages”. 5. This will bring up a form in which you will need to fill out. This form will enable you to create your new web page. 6. Enter in a name or description that best describes this page in the “Page Name” text box. 7. From the HTML toolbar select the ‘Insert/Edit Table’ button. Page 45 of 49 YourOnlineAgents.com - User Manual 8. In the popup window that appears set the following values: Rows = 1 Columns = 1 Border Size = 0 Alignment = Center Width = 716 pixels Height = 400 pixels When done click on the ‘OK’ button. Note: if you want a border around your table set “Border Size” to 1. 9. Your table has now been added to your HTML page. 10. “Right” click on the newly created table and select Cell -> Cell Properties. Page 46 of 49 YourOnlineAgents.com - User Manual 11. In the popup window that appears set the following values: Word Wrap = Yes Horizontal Alignment = Left Vertical Alignment = Top Choose the Background color and Border Color of your choice. When done click on the ‘OK’ button. 12. The background color has now been changed. Note: Even though your new custom page is using a table, you can still create your custom page as you would any other page with links and images. Page 47 of 49 YourOnlineAgents.com - User Manual Add a Background Image to Your Custom Page (Advanced) It is generally not a good idea to use a background image in your web pages as different browser may give different results. If you are going to use a background image, it is a good idea to test how the page looks in different browsers. That being said, the steps that follow should work in most internet browsers. Note, if you want to insert an image and have the text wrap around it, follow the steps in the section titled “Inserting an Image” and set the image alignment in the image properties dialog box. 1. You will need to know the location of the image you would like to use as your background image. The easiest way to get this information is to simply add the picture to your custom page and review its source code. a. To insert an image click on the “insert/edit image” button located in the toolbar. If you are not sure how to insert an image follow the section titled “Inserting an Image”. b. Once you have inserted the image click on the “source” button in the toolbar to review the source code. You should, at this point, see code similar to this: <p><img height="300" width="439" alt="" src="/mark/custom_WebPage_Files/image/lift locks.jpg" /></p> The highlighted text is the information that you will need. Note, your image source (src) information will be different obviously as you will be using a different image than the one I have mentioned above. You can ignore the rest of the code. c. Once you have copied the exact information, select all the code and hit your delete key on your keyboard. You should now have no code below the toolbar. Page 48 of 49 YourOnlineAgents.com - User Manual 2. While still in source code mode, copy and paste the following code: <table style="background: url(/mark/custom_WebPage_Files/image/lift locks.jpg) no-repeat 50% 50%" height="500" width="100%" border="0"> <tbody> <tr> <td valign="top"> </td> </tr> </tbody> </table> a. You will need to change the highlighted text to be the image source information that you noted in step 1b. b. Note: The first 50% = Horizontal picture alignment (50% = middle of page). This can be changed to any percentage between 0 and 100 (0% = left edge). The second 50% = Vertical picture alignment. This can be changed to any percentage between 0 and 100 (0% = top edge). Height=”500” = height of your work area (table). This can be changed to any number, just need to remember to keep the quotes. Width=”100%” = Width of your work area. Leave this number as is. Border=”0” = Set this value to “1” if you want to be able to see the borders. td valign="top" = Sets the text to start at the top. Leave this number as is. c. Click the “source” button located in the toolbar to take you out of source code mode. You should now see your image set in the background. You can now enter text and do everything else you would normally do on top of this background image. Note, however, you will not be able to change the background color of this table as you will not be able to see the background image. Page 49 of 49