1
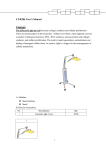
Cube YY-0420/0430
Technical
Instruction
I. INTRODUCTION
1. This Cabinet
YY-0420/0430 is a server cabinet configured on redundant power supply
Contact Information
which takes using as a Server/Raid system. And more, the excellent
YEONG YANG Technology Co., Ltd.
thermal solution, compatibility of full size AT, Baby AT, ATX motherboard
Address
and Xeon CPU makes it strongly supports the most complicated server
Telephone
Fax
Email:
12F, 778-1, Chung Cheng Road, Chung-Ho City,
Taipei, Taiwan, R.O.C.
+886-2-3234-0020
+886-2-3234-0014
[email protected]
tasks.
2. Component Checklist
If assembling this chassis by yourself, it is important to prepare all the
USA Contact:
chassis components before starting. This will save a great deal of time
GIGACASE Corp.
by not having to hunt down components. The following checklist provides
Address
a guideline as to the necessary components for a chassis.
Telephone
Fax
Email
18459 E. Railroad St., City of Industry,
CA 91748, U.S.A.
+1-626-854-9289
+1-626-854-1896
[email protected]
Eruope Branch:
YEONG YANG Technology GmbH
Address:
Telephone
Fax
Email
Mühlenhagen 130, 20539 Hamburg
Germany
+49-040-780461-0
+49-040-780461-11
[email protected]
-1-
Standard Components
Chassis
YY-0420/0430
Power Supply
Redundant or ATX PSII Single P’su
Cables
LED, Power/Reset, and audio speaker cable
Speaker
2.25” Audio speaker
User’s Manuals
Hardware Reference Guide and Power Supply
User’s Manual
Optional Components (you may purchase from YEONG YANG)
Cooling Fan
9cm cooling fan, 1pce
-2-
Cooling Fan
12cm cooling fan, supports up to 3pcs
Power Supply
Redundant or ATX PSII Single P’su
HDD Frame w/9cm cooling fan
Occupy 3*5.25” device for 5*
HDD use
SCA2, ATA or SATA RAID module with back plane
EMI Filter
EMI filter for tail gates
3. Features
disconnecting devices to this cabinet.
WARNING: An electrical outlet that is not correctly wired could place
hazardous voltage on metal parts of the system or the devices that
attach to the system. It is the responsibility of the customer to ensure
that the outlet is correctly wired and grounded to prevent an electrical
shock.
Before installing or removing signal cables, ensure that the power cables
The followings are highlight to this cabinet ‘s many features. For additional
for the system unit and all attached devices are unplugged.
features and details, please contact with us directly or visit our updated
When adding or removing any additional devices to or from the system,
web site with this cabinet package.
ensure that the power cables for those devices are unplugged before the
Processor: Available for Intel PentiumIVand Xeon CPU
Motherboard: Supports Full size AT and ATX/ATX extended form
signal cables are connected. If possible, disconnect all power cables from
the existing system before you add a device.
factor.
Use one hand, when possible, to connect or disconnect signal cables to
Raid Solution: Supply flexible and expandable configurations of
prevent a possible shock from touching two surfaces with different
electrical potentials.
Server/Raid system.
Device Bays: Supports up to 8 drive bay
Thermal Solution: Provides up to 1 set of 9cm and 3 sets of 12cm
cooling fans
Front Panel Control: Snap in front bezel for quick accessibility, with
Power switch, Reset switch, Power LED, Power error LED, HDD LEDs
To prevent electrical shock hazard, disconnect to power cable from the
electrical outlet before relocating the system.
WARNING: This product is equipped with a three-wire power cable
and plug for the user’s safety. Use the power cable in conjunction
with a properly grounded electrical outlet to avoid electrical shock.
and Key lock.
Security: Security by 100 key combinations.
4. Safety and Warning
5. Tools Required
A few items are needed to install or remove the components in this
Observe the following safety instructions any time you are connecting or
-3-
chassis.
-4-
n Phillips (cross) screwdriver
outlet. To reduce the risk of electrical shock or damage to your
n Standard (flat) screwdriver
chassis, do not bypass the grounding plug.
n Anti-static wrist strap
6. Preparation
1. Unpack your chassis, do not connect the power cord.
IMPORTANT: Most chassis use an AT power supply that has a fixed
ON and OFF switch located on the front. This chassis uses an ATX
power supply that is normally OFF until an electrical signal is given to
the power supply through a momentary switch located on the front of
the chassis. There is always a standby power in the power supply in
order for ATX power supply features to work, and therefore removing
the power cord is necessary to prevent electrical shocks when working
on the chassis components.
2. Unlock the padlock if one is used. This chassis is equipped with a
lockable front door to prevent unauthorized access. Open the side
panel.
3. Set the power supply input voltage to either 115V for 110-120V areas or
130V for 120-140V.
L CAUTION: The voltage must be set correctly or damage may occur.
4. Connect the included power cords to the chassis power supply.
5. Connect the chassis to a grounded (three pronged) AC power source
such as an UPS or power strip (preferably with surge protection).
WARNING: This chassis is designed for connection to a grounded
-5-
-6-
2. Side Panels
II. System Assembly and Disassembly
1. Front Panel
There are two screws in each side.
The
chassis
security
function
is
guaranteed by the key lock and the
front panel. To disassembly the front
panel, we should ensure the key lock is
placed in ON position.
Use one hand on the bottom of front
panel, hold up, and the other hand on
the top, pull out. The front panel will
be open from top, toward your body.
Release the screws, pull out the side
panel from rear side to front side.
To install the side panel, slide in the
side panel firmly into the track and
tighten the screws.
3. Fixed Storage Devices
To assembly the front panel, plug the
three hooks in the bottom of front panel,
into the chassis body and snap the
springs of front panel in.
To install 3.5” FDD drive or HDD Drive,
it should release the 3.5” device cage
from the cabinet body first. The 3.5"
device cage is held by two screws on
each front side, release the screws by
screwdriver.
-7-
-8-
Fitted the 3.5” FDD or HDD drive
with 3.5" device cage by screws on
both sides. If there is any drive space
empty, the spacer is available and
used to cover.
Press the device inward, to take the
slides in along the rail of left side.
Fasten by one screw on front side.
Fasten right side of the device by two
screws.
To install 5.25” HDD or CD-ROM, it
should release the 5.25” device frame
from
the
cabinet
body
first.
The
5.25"device frame is held by three
screws, one on front side and the other
two on right side
4. Cooling Fan mounting
Take
the
metal
slide
out
from
Fasten fans from outside of chassis by screws.
5.25"device frame, and ensure the
metal slide should be fitted with device
in position.
5. Power Supply Mounting
-9-
- 10 -
III. System Components
Mounting and unmounting the
1. Cabinet Front Side
power supply must be done from
the inside as shown left. Four
1.1 Chassis Security
screws are used to secure the
To protect the chassis from
power supply to the cabinet back
unauthorized intrusion, the
side.
cabinet front panel can be
locked with the built-in key
lock.
7. Rolling Wheel Constructed
1.2 Chassis Panels
There are four rolling wheels
There are two identical side panels on this cabinet, one on each side.
could be used in this cabinet,
Each panel is secured by four screws on the front of the cabinet.
each wheel could be and must
to be fastened tightly by two
1.3 Message LED Description
screws.
There are 16 LEDs show on the middle of front panel. The first LED
represents the power on message of system active (connect to
motherboard), the second LED shows power supply status (connect to
To
avoid
moving
and
the
unexpected
vibrating,
two
redundant power supply), the other 14's are represented the HDD
situation.
lockable wheels could be set on
by pushing the locking pad.
2. Cabinet Back Side
The back side of the cabinet is provided to show the back exterior
components of this cabinet. That will be including,
- 11 -
- 12 -
2 x DB25 Port
2 x DB9 Port
2 x SCSI (68 pin)
7 x ID Ports
Redundant Power Supply
System Fans
3. Cabinet Inside
When the left panel removed, you
should see the space of motherboard
and 12 cm cooling fans, 3.5" drive
frame. Right side provides space for
redundant power supply and 8x5.25”
drive bays.
4. POWER SUPPLY
Please read its individual manual
- 13 -