1
User Manual LMS
1
User Manual LMS
Contents
Introduction…………………………………………………………………………………...3
Hardware……….……………………………………………………………………………...4
Installation……………………………………………………………………………………..5
Tutorial……………………………………………………………………………………………6
Troubleshoot………………………………………………………………………………….17
Final Words…………………………………………………………………………………...18
2
User Manual LMS
Introduction
Welcome to the LMS user manual! Thank you for purchasing a copy of our
innovative Library Management System software. Create your own library! Use
the existing book and member profiles to get started! Create book and
member profiles that you can also update or delete later. After that it’s as
simple as a few clicks and a card scan to borrow or return a book!
Main functions of the LMS:
Borrowing Books
Returning Books
Searching Book & Member Profiles
Creating/Updating/Deleting Book & Member Profiles
Features:
High-tech card reading technology
Professional management system
Efficient and fast software
Virtually error and bug free software
Visit us @ http://librarymanagementsystem.weebly.com
Do you have what it takes to manage your own library? Find out today!
3
User Manual LMS
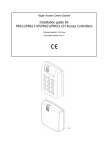
Hardware
Our LMS provides a very high-tech and enjoyable card reading experience. The following
hardware has been included in your package.
Hardware
Windows Card Reader 2.0
Details
• USB Interface
• Read RFID / Proximity Card
• Can Read First 10 digits of the RFID /
Proximity Cards
• No driver needed for Windows
• Plug and Play
• Material: Hard Plastic
• Diagnostic Power LED
• Built-in operating buzzer
• Powered directly from USB (no need for
external power supply)
• Dimension: 104 x 68 x 10 mm
10 Smart Cards
(L x W x H)
• Pre-programmed with unique 10-digit ID
number in each card
• Operation Frequency : 125Khz
• Standard : EM4100 compatible
• Compatible with all ID door access devices
or ID reader
• Contactless transmission of data and supply
energy
• Ideal for use in ID and access control
• With card ID printing
• Size : 85 x 55 x 0.8 mm
• Colour : White
• Quantity : 10
• Material : PVC
• Operation Temperature : -40°C to 85°C
• Waterproof
4
User Manual LMS
Installation
This is it! Aren’t you excited? You are? Great! Let’s get started.
Step 1: Insert your LMS CD into your computer’s CD drive.
Step 2: Open the CD. You will find a read me file, but if you’re reading this then
just follow these instructions and leave it be.
Step 3: Copy the ‘LMS Database’ folder to your computer’s default documents
folder. It is crucial to do so as it is going to be your program’s storage space.
Without it, the program will not function properly. Additionally, do NOT
rename the folder or the file within it.
Step 4: Navigate back to your CD’s contents and you will also see a file named
‘setup’. Click it to begin your LMS program setup.
Step 5: A message will appear. Choose to ‘install’.
Step 6: The installer will do the rest of the work for you.
Step 7: Once the installer has finished installing the program, the program will
launch. You will also find a new LMS shortcut button that has appeared on
your desktop.
Step 8: You’re all done!
Note: When using the program, connect your card reader to your computer via
a USB port. As it acts as a hidden HID device, please remove it only once you
have finished using the program and shut down your computer.
Now, skip to our tutorial to learn how to use your new LMS!
5
User Manual LMS
Tutorial
Step 0: Connect your card reader to your computer via a USB port. If this is the first time using the
program, you may need to wait a few seconds for the device to install. Once again, remember to
only remove this device after you have exited the program and shut down your computer.
Step 1: Double click the new shortcut button that should have appeared on your desktop after
installation. The Splash Screen should display for 3 seconds before the login page appears.
Step 2: If it is your first time using the program, you will need to register your copy. If this is not your
first time using the program, skip to step 6. Click on the register button to be taken to the register
page.
6
User Manual LMS
Step 3: You will need to verify your product key. Locate your product key that you will have received
on a sticker inside your physical copy of the program. Enter your product key and click verify product
key.
Step 4: Now you will be able to enter details to create an account in the four previously disabled
textboxes. Enter your details and remember to choose a username and password that you can
remember. Click create. You will see a message stating “Account Created” and it will redirect you to
the login page.
Step 5: Enter your username and password and click login to gain secure access to the system.
7
User Manual LMS
Step 6: You can now choose from a variety of processes to carry out. You will now need to jump to
the step that corresponds to your favoured process.
Borrow Book: Step 7
Return Book: Step 13
Search: Step 15
Create/Update/Delete Profiles: Step 21
About: Step 27
Help: Step 28
Exit: I’ll tell you right now, when you click the exit button, the program ends. Simple isn’t it?
Step 7: So you’ve chosen to borrow a book. Click the borrow book button to go on an adventure.
8
User Manual LMS
Step 8: Enter the number of the book to be borrowed. Ideally you will find the book number in a
sticker on the book, but if you have not marked your books with stickers, simply choose from the list.
Use the navigation buttons (arrow heads) to navigate through book records.
Step 9: This is the fun part. Choose the smart card of the member you wish to borrow the book on
behalf of and simply scan it by hovering it over the card reader for a second or two.
Note: The program will only continue once an existing card number has been entered.
9
User Manual LMS
Step 10: You should have quickly been redirected to the borrow book page. The default return date
is set for 2 weeks from the current date, however, you can change it to your desired date if need be.
When the return date is set, all you will need to do is click borrow.
Step 11: Congratulations! You’ve borrowed your first book. You can now click view record to view a
personal page of the selected record.
10
User Manual LMS
Step 12: You can now return to the borrowed books page. Once there you may choose to return the
book, but for now let’s return to the main menu. Click on main menu to go back to the LMS menu.
Step 13: Returning a book? Are you sure? Ok, let’s do it. Click on the return book button from the
menu to be directed to the borrowed books page.
Step 14: Once here, returning a book is as simple as clicking the return book button and clicking yes
when asked to confirm your action. The record will now disappear from the list. Click on main menu
to go back to the LMS menu.
11
User Manual LMS
Step 15: Are you a windows explorer? Cause it’s time to search! Click on the search button on the
main menu. A choose search type page will appear. Click the book image to search for books.
Step 16: If all is well, the book search page will have appeared. You can now search for the book by
entering a book number or you can change your book search type by changing the ‘search by’ option
and search by author or title instead. Use the navigation buttons (arrow heads) to navigate through
12
User Manual LMS
the records. You can also view a personal page of the book record by clicking the view profile button
or double clicking on a record.
Step 17: Once you’ve checked out the view profile feature, click return to book search and then click
the main menu button to return to the LMS menu.
Step 18: Now let’s try searching/stalking members. Click on search once again, but this time click on
the faceless human icon when prompted to choose search type. You should be directed to the
member search page.
13
User Manual LMS
Step 19: You can now search for members by entering their surname or you can change your
member search type by changing the ‘search by’ option and search by first name instead. Use the
navigation buttons (arrow heads) to navigate through the records. You can also view a personal page
of the member’s record by clicking the view profile button or double clicking on an account.
Step 20: Once you’ve checked out the view profile feature, click return to member search and then
click the main menu button to return to the LMS menu.
Step 21: Ever wished to have a superhuman ability? Well, you now have the chance to play god. Just
remember to use your powers for the greater good. Click on the Create/Update/Delete Profiles
button to begin.
Step 22: A choose profile type page will appear. Click the book image to create/update/delete book
profiles to be directed to the book profiles page.
14
User Manual LMS
Step 23: Creating, updating and deleting book records is made easy:
Create: To create records click clear boxes if you had previously selected a record from the
list, then simply enter valid information in all input boxes and click create record.
Update: To update an existing record, choose a record from the list, alter information and
click update record.
Delete: To delete an existing record, choose a record from the list, click the delete record
button and confirm you action.
Once you’ve finished playing god on the book profiles page, click the main menu button to return
the LMS menu.
Step 24: This time let’s try altering member profiles. Once again, click on the Create/Update/Delete
Profiles button on the main menu.
Step 25: this time click on the faceless human icon when prompted to choose profile type. You
should be directed to the member profiles page.
15
User Manual LMS
Step 26: Once again, creating, updating and deleting member accounts is made easy:
Create: To create accounts click clear boxes if you had previously selected a record from the
list, then simply enter valid information in all input and click create account. Remember to
choose a unique card number that does not already exist.
Update: To update an existing account, choose an account from the list, alter information
and click update account.
Delete: To delete an existing account, choose an account from the list, click the delete
account button and confirm you action.
Once finished, click the main menu button to return the LMS menu.
Step 27: Want to learn more about us and the LMS program? Click About to be taken to our website!
Step 28: If you need help with the program you can click help from the main menu to be directed to
the downloadable user manual from our LMS website. But if you’re reading this, chances are you’ve
already done just that. So why are you still here? Class just ended.
You are now a full-fledged librarian!
16
User Manual LMS
Troubleshooting
Avoiding Hardware Malfunctions
When using the program, connect your card reader to your computer via a USB port. As
it acts as a hidden HID device, please remove it only once you have finished using the
program and shut down your computer.
Avoiding Database Connection Issues
Make sure the folder named ‘LMS Database’ in the program’s CD is located in your
computer’s default document’s folder. It is crucial to do so as it is going to be your
program’s storage space. Without it, the program will not function properly.
Additionally, do NOT rename the folder or the file within it.
Avoiding Errors
Do Not enter apostrophes (') within textboxes throughout the program as they can
disrupt the queries within the program's code and result in an error.
Although all other possible errors found, including unexpected inputs within textboxes,
have been accounted for and dealt with for your convenience, we have a little advice on
avoiding ‘potential’ problems (read on below).
Play it safe: A message from Ojdeha Productions
Just in case, avoid potential problems throughout the program by entering the 'right'
kind of input in any textbox. For example, if you are told to enter your name, you do not
need to enter numbers (although this will not give you an error). It is also best not to
repeatedly click on buttons, although we do not believe doing so will give you errors, it
may or may not freeze the program (depending on your computer’s processing power
and other programs you may be running simultaneously with the LMS program).
Found any other problems?
If you find any errors please contact us about it immediately through our website so that
we can resolve the issue.
Also, feel free to also contact us for any other issues you may be having.
Many Thanks!
#folks@OjdehaProductions
17
User Manual LMS
Final Words
We would like to take this moment to thank you for using our product. Like us
on facebook, tweet us, email us or contact us from our website
@ http://librarymanagementsystem.weebly.com/
Have fun managing your own library!
Sincerely, the Bill Gates of Ojdeha productions,
Farbod Nabavieh
18