1
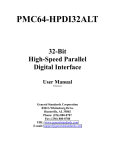
Car Navigation and Multimedia Systems
User’s Manual
Please take the time to read this instruction manual carefully before starting to operate.
1
Preface
Thank you for purchasing our car navigation and multimedia systems products. We believe you
will enjoy the many benefits provided by this car navigation and multimedia systems. This
manual has been carefully prepared, but we do not warrant it is error-free. Please contact us if
you discover a mistake. All the information in this manual is subject to change without notice.
You may refer the updated and upgraded information to our website.
Safety Precautions and Warnings
It is the user’s responsibility to use the car navigation and multimedia systems with care. To
reduce the risk of unsafe operation, please read through all the instructions carefully and make
sure you understand all instructions for the first time operation. Familiarity with installation and
operation procedures will assist you to obtain the best possible performance from the unit.
z
The illustrations in this manual are for reference only. We recommend you to backup the
important data in advance, and our company assumes no responsibility for any loss of data.
z
This unit is designed to operate on 12V DC, negative ground electrical systems. Mounting
and wiring this product require skills and experience. Leave the mounting and wiring work to
professionals to prevent electric shock or other risks.
z
The data of the navigation software may not be consistent with the actual traffic conditions
due to accidents, road construction or other unforeseen developments. When in actual use,
please comply with the actual road conditions and obey all traffic rules and laws.
z
Start the car engine before using this unit, otherwise the unit will run out of the car battery.
z
Do not expose the unit to direct sunlight or install the unit at an environment of excessive
heat or humidity. Also avoid places with too much dust or the possibility of water splashing.
z
You are not supposed to watch the monitor or operate your car navigation and multimedia
systems while manipulating the steering wheel as you might be involved in an accident, for
which we disclaim all liability.
z
For your safety, you should not install the unit or wire any cable in a spot where it might
obstruct the driver’s view or manipulation or distract your attention. Besides, do not raise
the volume level too high, because this will block outside sounds, leading to a traffic
accident.
z
Limited warranty: To avoid unexpected damages, you are persuaded to use the original
accessories provided by our company. The warranty does not cover any failure due to the
misuse, the installation of incompatible accessories or programs, the accidents or
unauthorized repair.
z
In some countries it is illegal to watch TV while driving. Therefore when you are driving for
any extended period, do not watch any video or fix your eyes on the unit’s display.
2
Table of Contents
PREFACE .....................................................................................................................................................................2
SAFETY PRECAUTIONS AND WARNINGS...............................................................................................................2
TABLE OF CONTENTS ...............................................................................................................................................3
INTRODUCTION ..........................................................................................................................................................5
FEATURES ...................................................................................................................................................................5
PRODUCT PACKAGING: ................................................................................................................................................5
SPECIFICATIONS ..........................................................................................................................................................6
CONNECTOR ILLUSTRATION..........................................................................................................................................7
AV Input/ Output ....................................................................................................................................................7
Multi-functional connector .....................................................................................................................................7
BEFORE USE...............................................................................................................................................................8
OPERATING VOLTAGE ..................................................................................................................................................8
SYSTEM UPGRADE ......................................................................................................................................................8
POWER ON .................................................................................................................................................................8
POWER OFF ................................................................................................................................................................8
TF MEMORY CARD ......................................................................................................................................................9
USB CABLE ................................................................................................................................................................9
BASIC OPERATIONS ................................................................................................................................................10
MAIN MENU...............................................................................................................................................................10
NAVIGATION ..............................................................................................................................................................11
MUSIC PLAYER ..........................................................................................................................................................11
VIDEO PLAYER ..........................................................................................................................................................13
E-BOOK READER .......................................................................................................................................................14
PICTURE BROWSER ...................................................................................................................................................16
FLASH PLAYER ..........................................................................................................................................................17
SETTINGS .................................................................................................................................................................18
Note.....................................................................................................................................................................19
Calculator ............................................................................................................................................................20
Calendar..............................................................................................................................................................21
FM/ AM Radio .....................................................................................................................................................21
Volume ................................................................................................................................................................23
Backlight Settings................................................................................................................................................23
Date Time............................................................................................................................................................24
Language ............................................................................................................................................................25
System Info .........................................................................................................................................................25
Calibration ...........................................................................................................................................................26
Factory Reset ......................................................................................................................................................26
MCU Upgrade .....................................................................................................................................................26
GPS Info..............................................................................................................................................................27
Wallpaper ............................................................................................................................................................27
Games.................................................................................................................................................................28
Screensaver ........................................................................................................................................................28
3
NAV. SETUP ..............................................................................................................................................................29
BLUETOOTH ..............................................................................................................................................................30
ASP SOUND EFFECTS SETTINGS ..........................................................................................................................35
STEERING WHEEL CONTROL SETTINGS..............................................................................................................36
MAINTENANCES .......................................................................................................................................................37
4
Introduction
Your new car navigation and multimedia systems will allow you to determine your exact position
and navigate to and from your destinations, as well as support such multi-functions as audio/
video playing, e-book reading, picture browsing, FM/ AM, Analog TV/ ISDB-T, Bluetooth
hands-free, AVIN, AV-out etc.
Features
z
7.0” 800x480 HD Digital LCD touch screen
z
SiRF Atlas-Ⅳ, dual-core, ARM11 CPU, 533MHz+264MHz DSP: High-performance, power
consumption
z
Operating system: WinCE 6.0
z
Internal/ External memory support up to 32GB
z
User friendly interface, outstanding graphics: simple and easy to operate
z
Built-in GPS navigation system: Excellent signal reception enables to accurately pinpoint
position and to navigate you efficiently to the destination
z
Built-in Bluetooth CSR chipset: Connect to the Bluetooth cell phone to make and receive
hands-free calls
z
Advanced FM/ AM radio system (sensitive PHILIPS CHIPSET)
z
AV-IN/ OUT: Rear view camera (optional)
z
Built-in Analog TV/ ISDB-T (optional)
z
Support RDS, CAN BUS protocol decoder function (optional)
z
Support USB host for data transmitting, TF (Micro SD) & iPod
z
Built-in 4.1 channel subwoofer output: 4x50W
z
Multimedia player: Multi format music & movie player
z
Support original car steering wheel control
Product Packaging:
Please check the following accessories included in the gift box:
1、Main unit * 1pc
2、Multifunctional connecting cable * 1pc
3、GPS antenna * 1pc (optional)
4、USB cable* 1pc
5、User’s Manual * 1pc
6、Analog/ ISDB TV antenna * 1pc (optional)
The above items are subject to the real objects. The pictures in the manual are reference only
and may vary from the actual model purchased. Should you find any problem, please contact
your dealer or distributor.
5
Specifications
CPU
SIRF ATLAS IV 533MHz+ 264MHz DSP
Flash
128/256/512MB/1G/2G/4G/8G/16G/32GBytes
RAM
128Mbytes DDR
LCD
7”TFT LCD with the resolution of 800*480 pixels
Touch panel
High-precision and wear-resisting touch panel
USB
USB Client 2.0, MINI USB 5PIN port
TF
TF TF card slot, support up to 32GB TF card
Buttons
[Sleep/On/Off] [Vol+/ Vol-] [Mode] [Mute]
Bluetooth
Built-in Bluetooth ver2.0 certified
FM/AM
FM/ AM frequency range: 76~108MHZ
Cold start: <42S/ Hot start: <9S (in the open area)/
GPS
Warm start: <18S
Power
12V
Operating system
Microsoft Windows CE 6.0
Navigation
software
TF card
storage
Support playing the video files of WMV9, MPEG4, Divx 5.0/
Video player
4.0/ 3.11, Xvid, MPEG2, ASF, AVI and WMV format
Support playing the audio files of WMA9, MP3 和 WAV format
Audio player
and display synchronic lyrics
E-album, support browsing the pictures of JPG, GIF, BMP,
Picture browser
PNG format
E-book reader
Support reading the text of TXT format
[Language setting] [Backlight setting] [Date setting] [Volume
System settings
setting] [Power setting] [System setting] [ASP setting] etc.
System upgrade
Through TF card
Applications upgrade
Through TF card
Start-up screen upgrade
Through TF card
6
Connector Illustration
AV Input/ Output
Multi-functional connector
Connector Function
Connector Function
1
Ground lead
9
12V Power cord
2
ACC
10
Car light control
3
AV I/O cord
11
Car boot control
4
Steering wheel button+
12
Antenna power
5
Right speaker (front) -
13
Left speaker (rear) -
6
Right speaker (front) +
14
Left speaker (rear) +
7
Left speaker (front) -
15
Right speaker (rear) +
8
Left speaker (front) +
16
Right speaker (rear) -
7
Before Use
Operating Voltage
Make sure to ground the unit to a negative 12V DC power supply.
[Notes] To prevent malfunction or damage, do not let this unit work for too long at extreme
environments such as high temperature, intense moisture.
Use the navigation system (as well as the optional rear view camera) only as a navigational aid
rather than being distracted or careless by the navigation system while driving.
Always operate the vehicle in a safe manner. Should you be affected by operating this unit while
driving, stop the operation immediately to observe the current traffic rules.
Be aware of all driving conditions as the navigation system is designed to provide you with route
suggestions that might fail to reflect the latest route information or traffic restrictions.
You’d better not put on the earphone while driving. Keep the system volume at a low enough
level to enable to hear outside noises otherwise you may be unable to react adequately to the
outside traffic situation.
This unit is designed to operate through touch panel. The touch screen may be scratched or
damaged by harsh or sharp objects thus please use the stylus with intact stylus point.
Mounting and wiring this unit require skills and experience. Leave the mounting and wiring work
to professionals in case of electric shock or other risks. If you are unsure how to install this unit
correctly, have it installed by a qualified technician.
In some countries it is illegal to watch TV while driving. For your and others’ safety, do not watch
any video or fix your eyes on your unit’s display while driving. We disclaim any responsibility
that results from this.
The optional rear view camera function is provided only as an aid for backing a car. We assume
no responsibility for any accidents arising from this.
System Upgrade
You should follow the technician’s instructions to upgrade and update the systems software.
Power On
Press the power button on the faceplate to turn on the power.
Power Off
To have this unit stop working, press the power button on the faceplate and the systems will
enter sleep mode. When the power button is pressed and held down for 1 second or more, the
power is turned off.
8
[Note] Please cut off the power before turning off your car ignition switch.
If no response to any operation please try to restart the systems by the following way:
Pressing the power button on the faceplate to cut off the power supply and then pressing it
again to restart.
There may be no response in the following situations:
1. The process of switching between different pictures is prolonged or suspended, which leads
to unsuccessful screen switch.
2. The time to execute certain instruction(s) by clicking the functional icons on the screen is too
long, which results of failure to activate.
3. If the power button cannot work properly, please restart your unit by pressing the reset
button.
This operation may cause data loss so please backup your data and information in advance.
TF Memory Card
This unit supports TF (Micro SD) card in which allows you to install the navigation software and
data and other documents. Insert the TF card into the TF card slot to start the use.
[Note] Do not take out the TF card when the unit is running the navigation software or others in
the TF card.
Never press hard on nor bend the TF card. Avoid the drop and impact to it.
Do not expose the TF card to direct sunlight. Do not use or storage it in a humid or corrosive
environment. Keep away from liquid, heat sources and extreme temperature.
Take note of the right direction for inserting the TF card into the slot in case the slot or TF card is
damaged due to carelessness.
USB Cable
Connect this unit to USB flash disk or USB-HDD through the MINI USB cable so that you can
copy files between each other.
[Note] Please make sure that the unit is turned on.
Plug the MINI USB terminal
of the USB cable into MINI USB port on the right side of the
unit’s faceplate and standard USB terminal
into the USB port of USB flash disk or
USB-HDD.
The USB flash disk or USB-HDD to be connected must be FAT32 format. But for USB-HDD,
it need exFAT format.
Data security: Please backup the data to other storage device in advance. We shall not be liable
for any loss of data. In the process of connection, you should not pull out the MINI USB cable or
turn off the unit, which will break off the connection and probably cause data loss.
9
Basic Operations
Main Menu
Navigation
Provide the navigation for reference
Radio
Receive FM/ AM radio channels
Bluetooth
Connect with a Bluetooth mobile phone to make and receive the
hands-free calls
Music
Support playing the audio files in WMA9, MP3 and WAV format
Video
Support playing the video files in WMV, ASF, AVI format
E-book
Support reading the text in TXT format
Picture
Support browsing the picture in JPG, GIF, BMP and PNG format
Flash
Support playing the flash in SWF format
Include the settings of volume, power, backlight, date time, language,
Settings
system info., note, calculator, calendar, games, nav.setup, AVIN,
screensaver, wallpaper, ASP, steering, MCU, AUX etc.
10
Navigation
This car navigation system is compatible with many kinds of licensed navigation software.
According to the navigation software chosen, the GPS receiver will quickly pinpoint your
position and upon input of your destination, the optimal route will be calculated, helping you
reach your destination fast and safely.
[Note] Please refer the specific navigation operations to your “Navigation software manual”.
The unit must be connected to external GPS antenna otherwise the navigation system will be
unable to pinpoint the position.
The data provided by your navigation software may not be consistent with the actual traffic
conditions because of accidents, road construction or other unforeseen developments. When in
actual use, please do comply with the actual road condition and obey the traffic rules and laws.
Many factors, such as being between high and dense buildings, in a tunnel or underground
parking structure, under the viaduct, a sharp change of weather, or the closure of the satellite
signal may affect the reception of the GPS satellite signal. This can result in an inaccurate
position reading or even malfunction of the navigation system.
Music Player
The music player supports playing audio files in WMA9, MP3 and WAV format, you can set up
the playing order as you like.
[Note] Before using the audio player, please copy your audio files to any folder of the memory
card in advance.
Operation
1. Click
to open the audio folder shown as the following picture:
Close
Exit the current folder
Last page
Show the last page of the files
11
2. Click
Next page
Show the next page of the files
Return
Return to the previous folder
Folder name
The name of the current folder
to enter the audio player interface shown as the picture below:
Close
Close the audio player
Play
Go on to play the paused or stopped audio
Pause
Pause playing the current audio
Stop
Stop playing the current audio
Playing order
Support playing in a random, sequential or circular way
Last item
Play the previous item
Next item
Play the next item
Volume adjustment
Go left to turn down, go right to turn up
Progress
Use the stylus to adjust the playing progress by sliding
adjustment
the progress bar, go left to back up, go right to advance
Folder
Open the audio folder
Display mode
Switch to display the lyrics or not
Display area
Display the synchronic lyrics in LRC format
12
Video Player
The video player supports playing video files in WMV, ASF and AVI format. It also supports the
full-screen playing, progress adjusting and file choosing.
[Note] Before using the video player, please copy your video files to any folder of the memory
card in advance.
Operation
1. Click
to enter the video folder interface seen as the picture below:
Close
Close the current folder
Last page
Show the last page of the video files
Next page
Show the next page of the video files
Return
Go back to the previous folder
File title. format
Show the file title and format
2. Click the video file icon
to open the video player shown as below picture:
13
Close
Close the video player
Play
Go on to play the paused or stopped video
Pause
Pause playing the video
Stop
Stop playing the video
Progress
Use the stylus to adjust the progress by dragging the
adjustment
progress bar, go left to back up, go right to advance
Full-screen
Click the screen to realize the full screen playing;
playing
Double click the screen to return to the normal playing
Folder
Open the video folder
E-book Reader
The e-book reader supports reading the file in TXT format. It also supports the page turning and
skipping and folder choosing as well.
[Note] Before using e-book reader, please copy your files to any folder of the memory card.
Operation
1. Click
to open the e-book folder shown as the picture below:
Close
Exit the current folder
Last page
Turn to the last page of text files
Next page
Turn to the next page of text files
Return
Return to the previous folder
Text title. format
Show the text title and format
14
2. Click
to open the e-book reader shown as the following picture:
Close
Close the e-book reader
Last page
Turn to the last page of text
Next page
Turn to the next page of text
Enter the page-choosing interface which
Page skipping
3. Click
allows you to skip to any page to read
Folder
Return to the e-book folder
Current page/ Total pages
Show the current page No./ total pages
to enter the page choosing interface shown as the picture below:
Close
Numeric keyboard
Exit the page choosing interface
Consist of 10 figures from 0 to 9, compose all
numbers from 0 to 99999999
Numeric display area
Show the input page number
Delete
Delete the last digit
Cancel
Cancel all the numbers
Skip
Skip to and browse the selected page
15
Picture Browser
The picture browser supports viewing the pictures in JPG, GIF, BMP and PNG format. It also
supports the picture rotating, zooming and auto playback.
Operation
1. Click
2. Click
to enter the picture browser interface shown as the following picture:
Close
Exit the current folder
Last page
Show the last page of the pictures
Next page
Show the next page of the pictures
Return
Return to the previous folder
Picture title. format
Show the picture title and format
to open the picture browser shown as the following picture:
Close
Close the picture browser
Zoom in
Zoom in the current picture on proportion
16
Zoom out
Zoom out the current picture on proportion
Rotate
Rotate the current picture clockwise by 90 degrees
Auto playback
Playback all the pictures of this folder circularly on full screen
Last item
Display the previous picture of the same folder
Next item
Display the next picture of the same folder
Folder
Return to the picture folder
Flash player
The flash player supports playing the flashes in SWF format.
[Note] Before using the flash player function, please copy your flash files to the memory card.
Operation
1. Click
2. Click
to enter the flash player interface shown as the following picture:
Close
Close the flash player
Last page
Show the last page of flashes
Next page
Show the next page of flashes
Return
Return to the previous folder
Flash title. format
Show the flash title and format
to open the flash player shown as the picture below:
17
Close
Back to the upper menu
Play
Go on to play the paused or stopped flash
Pause
Pause playing the flash
Stop
Stop playing the flash
Volume adjustment
Go left to turn down, go right to turn up
Progress adjustment
Full-screen playing
Open the folder
Use the stylus to adjust the progress by dragging the
progress bar, go left to back up, go right to advance
1. Click the screen to realize the full screen playing
2. Double click the screen to return to the normal playing
Open the video folder
Settings
The system setup include the settings of volume, power, backlight, date time, language, system
info., note, calculator, calendar, games, nav.setup, AVIN, screensaver, wallpaper, ASP, steering,
MCU, AUX etc. Click
to enter system setup interface seen as the picture below:
18
Note
The note function supports text writing, saving and deleting. And it’s convenient to make
records.
Operation
Click
to open the Note interface shown as the pictures below:
Close
Back to the upper menu
Last record
Show the last record
19
Next record
Show the next record
Recorded events
Display the recorded events
New
Write new record
Move
Move the keyboard to the top so as to input
words at the bottom
Hide
Hide the keyboard
Save
Save the words
Delete
Delete the record
Last page
Show the last page of a record
Next page
Show the next page of a record
Last character
Display the last characters
Next character
Display the next characters
Words display
Show the input letters
Delete
Delete the input words
Linefeed
Shift to a new line
Calculator
The calculator supports ordinary and scientific calculation. It also supports the hexadecimal,
decimal, octal and binary system, and angle, radian, grads calculation as well.
Operation
Click
to enter the calculator interface shown as the following picture:
The operation of this calculator is the same as the ordinary calculator.
20
Calendar
Besides showing the current date, the calendar also supports date searching as well as the
solar and lunar calendars.
Operation
Click
to enter the calendar interface shown as the picture below:
Close
Back to the upper menu
Year
Click the left or right icon to choose the right year
Month
Click the left or right icon to choose the right year
OK
Reset and confirm the day, month and year of system
Cancel
Cancel the setup
FM/ AM Radio
Click
to enter the interface of FM/ AM shown as the picture below:
21
Close
Exit the radio interface
Main Menu
Return to the main menu
Leftwards
Choose the saved radio channels leftwards
Rightwards
Choose the saved radio channels rightwards
Saved channels
Display the saved radio channels
FM
channel
Search the FM radio channels
searching
Search
the
radio
channels
and
save
Channel
automatically, but you should delete your prior
searching/ saving
saved channels at first
Channel saving
Channel locked
Channel Deletion
Save the current radio channel automatically
Switch between three modes of locking the radio
channel: Strong, moderate, weak
Delete the current channel
Frequency Setting Input the frequency directly to set the channel
Channel
searching
Search the radio channels leftwards/ rightwards
Frequency setup
Each click will increase the frequency by 0.1 MHz
Frequency setup
Each click will increase the frequency by 0.1 MHz
Volume setup
Include the setups of mute, volume increased and
decreased
Mode switching
Shift to your desired radio channel
Signal indicator
Indicate the strength or weakness of the signal
22
Close
Exit the channel input interface
Numeric keyboard and decimal point
Input the radio frequency
Delete
Delete the last digit of input frequency
OK
Confirm the input frequency
Volume
Click
to enter the volume setup interface shown as the picture below, which includes:
1. Speaker volume adjustment
2. Enable the sound for taps or not
3. Enable the special voice for opening an interface or not
Close
Volume Volume +
Enable sounds for taps
Current volume
Exit the volume adjustment interface
There are 10 levels for the system volume (from
loudest to mute), each click will decrease a level
There are 10 levels for the system volume (from
mute to loudest), each click will increase a level
Select to turn on the sound, vice versa
Blue grids show the current volume level, a grid
for a level
Backlight Settings
Click
to enter the backlight setup interface shown as the following picture:
23
Close
Exit the backlight setup interface
Backlight-
Decrease the brightness of the backlight
Backlight+
Increase the brightness of the backlight
Current backlight The grids represent the degree of current backlight
Date Time
Date time setups include the settings of date, time and time zone.
1. Click
Click
to enter the date time setup interface shown as the picture below:
to enter the time setup interface shown as the following picture, then click
to set up the hour and minute, and click
to save and exit at last.
24
or
2. Click
to enter the date setup interface shown as the following picture, then click
to setup the year, month and date, and click
3. Click
or
to save and exit at last.
to enter the time zone setup interface shown as the following picture, then click
or
to set up the time zone, and click
to save and exit at last.
1
Language
Click
Click
to enter the language setup interface shown as the picture below:
or
to choose the system language. Meanwhile the screen will display the
national flag above the language bar accordingly, click
System Info
System info settings include calibration, GPS reset, factory reset.
25
to save and exit at last.
Calibration
Click
to enter the screen calibration interface shown as the following picture. Use
the stylus to click the center of each cross cursor from ① to ⑥, i.e. from center, upper left, lower
left, lower right, upper right and finally to the center again till the calibration is successful, and
then the system will exit the screen calibration interface automatically to the system info setup
interface.
Factory Reset
Click
the system will recover the factory (default) setup.
MCU Upgrade
Click
in settings interface to enter the MCU upgrade interface seen as the picture below:
Copy the to be upgraded MCU documents to the root directory of SD/ TF card, and insert this
26
card to the unit then the MCU documents will be read as well as the version number.
GPS Info
Wallpaper
Click
in the settings interface to enter the wallpaper setup interface shown as the
following pictures. This wallpaper is similar with that of the computer.
Close
Exit the current interface
Last page
Show the last page of pictures
Next page
Show the next page of pictures
27
Open the folder
Enter the picture folder interface
Delete
Delete the selected wallpaper picture
Confirm
Confirm to set up the currently selected picture as
wallpaper, but this will malfunction in default display mode
Return
Return to the previous folder
Folder name
Show the name of the current folder
Games
Click
in the settings interface to enter the game interface shown as the following picture.
You can choose different games to play, click the relevant game icon to start.
Screensaver
Click
in the settings interface to enter the screensaver setup interface shown as the
following picture. This screensaver is similar with that of the computer.
Close
Exit the current interface
28
Screensaver on/ off
Choose to turn on or off the screensaver function
Picture folder
Enter the picture folder interface
Confirm
Confirm to set up the currently selected picture as wallpaper
Last item
Display the previous picture of the same folder
Next item
Display the next picture of the same folder
Click
to enter the picture folder interface shown as the following picture.
Close
Exit the current interface
Last page
Show the last page
Next page
Show the next page
Folder name
Show the name of current folder
Nav. Setup
Click
in the settings interface to enter the navigation setup interface shown as the
following pictures:
[Note] You are allowed to set up different navigation paths, but you should always plan your
route beforehand since it is dangerous to operate your unit while driving.
29
Close
Exit and save the setup of navigation path
Path of navigation Choose the path of navigation software from
software
Apply
TF card
this
path
to
run
setting
Select this option to apply the chosen
navigation software for actual use, vice versa
navigation program
Last page
Show the last page of the navigation software
Show the next page of the navigation
Next page
software
Bluetooth
Please note that after entering the Bluetooth setup interface, you must wait for 10 seconds
before clicking the “Pair” icon to pair your unit with a Bluetooth device.
Operation
1. Click
below:
in the main menu to enter the Bluetooth setup interface shown as the picture
Close
Exit the current
Phone keyboard
Dial the phone number
Phone records
Speed dial
Pair
Record all outgoing, received, missed calls of this unit with
at most 20 records for each item
Record the last call you dialed if any, which enables you to
dial the number directly
Pair the unit with a Bluetooth mobile phone
30
Attribute
2. Click
Set up the Bluetooth pin code, incoming call ring, cut off
the Bluetooth function or not
Pair device
Display all the ever paired and matched Bluetooth devices
Status
Show the current pair status
in the Bluetooth interface to set up the Bluetooth shown as the picture below:
Close
Exit the current interface
Bluetooth name
Bluetooth name: GPS (unchangeable)
Pin code
Show the already set pin code
Numeric keyboard
Set up the Bluetooth pin code
It is default that the Bluetooth function
Keep
Bluetooth
run
when interface closed
is still on when the Bluetooth interface
is closed. If you ignore this option, the
Bluetooth function will be closed
accordingly.
Auto
pick
up
the
coming call
3. Click
By choosing this option, the incoming
call will be answered automatically,
vice versa.
in the Bluetooth setup interface to set up the pin code shown as the following
picture:
31
Close
Exit the current interface
Number display area
Display the pin code
Numeric keyboard
Consist of 10 figures from 0 to 9, input
and display 16 digits at most
Clear
Delete the last digit
Enter
Confirm the input of the pin code
[Note] After resetting the pin code, you should input the renewed pin code rather than the
default “8888” to pair another Bluetooth cell phone, otherwise they can not be successfully
connected.
4. Click
in the Bluetooth interface to enter the pair interface shown as the picture below:
Close
Exit the current interface
Pair time
The automatic timing lasts 60S
Pair pin code
Display the pin code for pair
Put the Bluetooth cell phone near this car navigation and multimedia
systems, and then select the phone’s menu “Tools” - “Bluetooth” - “Pair
device”, click “Options” and select “newly paired device”. After a few while
the cell phone will find the new Bluetooth device “XXXX”, i.e. your unit. Click
“Options” again, you will be prompted to input the pin code of the Bluetooth
Pair
instruction
devices XXXX. Input “8888” and confirm, then the cell phone will show that
the pairing is completed.
For the third time to click “Option”, select “Connect”. There will be a
loudspeaker icon displayed on the cell phone screen after successful
connection and the unit will exit the pair interface automatically. The status
bar in the Bluetooth interface indicates “Mobile phone connected”, the cell
phone icon in the status bar will become red and the blue LED will turn from
glittery to alight.
32
[Note] 1. The above instruction is in line with the Nokia 3280 mobile phone only, for other
models please refer to the relevant cell phone instruction manual to pair.
2. This unit will automatically connect the ever paired device when entering the Bluetooth
interface later, and the ever paired Bluetooth cell phone will prompt you “Whether to accept the
connection request of XXXX”, click “Yes” and no need to input the pin code and search the
Bluetooth device again.
5. Click
in the Bluetooth interface to enter the phone keyboard interface shown as the
following picture:
Close
Exit the current folder
Numeric display area
Show the input number
Consist of 10 figures from 0 to 9 and “*” “#”, input
Numeric keyboard
20 items of phone numbers and display 16
characters at most
Back space
Delete the last digit
Calling
Make a phone call
Hang up
Finish the call
6. If there is an incoming call, the screen will display “Incoming call” as well as the relevant
phone number shown as the picture below:
33
7. Click
Minimize
Minimize the current interface
Volume+
Increase the volume (also available on calling )
Volume-
Decrease the volume (also available on calling)
Numeric display area
Display the incoming phone number
Answer
Answer the call
Ignore
Hang up
in the Bluetooth interface enter the call record interface shown as the picture
below:
Close
Exit the current folder
Outgoing call records
Display the outgoing calls
Received call records
Display the received calls
Missed call records
Display the missed calls
Phone number display area
Display the records of phone number items
Last Page
View the call records of last page
Next Page
View the call records of next page
Delete the selected call record Delete the selected call record
Delete the selected series of
Delete the selected series of call records
call records
Dial the selected call record
Dial the selected call record
34
[Note] Only the most recently 20 outgoing, incoming or missed calls can be recorded for the
GPS navigator, which includes the phone number, incoming and lasting time of the call.
8. Click
in the Bluetooth interface to enter the management interface of paired Bluetooth
devices shown as the picture below:
Close
Exit the current folder
Display
area
of
Bluetooth devices
Display the number of the ever paired Bluetooth devices
Upward
Display the number of the previous Bluetooth device
Downward
Display the number of the next Bluetooth device
Connect
Send the connection request to the selected Bluetooth device
Disconnect
Disconnect the current connected device
Delete all
Click to delete all the paired Bluetooth device
[Note] You should cut off the current connection before pairing your unit with another Bluetooth
device, then click
to search the target one. If you fail to find the desirable Bluetooth
device, please turn back to the main interface and click the icon “pair” to pair and connect again.
ASP Sound Effects Settings
Click the ASP
in the system settings menu to enter sound effects settings interface:
35
Close
Exit the ASP setting
Leftwards/ Rightwards
Shift the sound effects area towards the
left/ right
Upwards/ Downwards
Shift the sound effects area towards the
front/ back
Default
Resume the default settings
Sound effect settings
Set the sound effect as you like.
Steering Wheel Control Settings
Click the steering
in the system settings menu to enter steering wheel settings interface:
Close
Analog GPS
software
Exist the steering wheel settings
navigation Open the
software
analog
GPS
Analog functions
Select the analog functions
Analog play
Analog play
Analog mute
Analog mute
36
navigation
Analog volume increased
Analog volume increased
Analog volume decreased
Analog volume decreased
Analog fast backwards
Analog fast backwards
Analog fast forwards
Analog fast forwards
Analog dial
Dial the analog numeric keyboard
Analog close
Analog close
Clear button
Delete all the input settings
Maintenances
The car navigation and multimedia systems will be a reliable navigator and good pastime
companion as long as you protect and maintain it appropriately. Please adopt the following
methods to keep your unit in top work condition. Any accidental damage will void the warranty.
Do not operate the touch panel using a ball-point pen or similar tool with the sharp tip. You are
advised to tap carefully on the screen to operate as the screen might be damaged if pressed
hard on the touch panel.
If you need to clean the faceplate of this unit, wipe it slightly with a dry soft cloth or with a cloth
moistened with neutral cleaner. Do not apply spray cleaner directly to the screen or wipe the
faceplate with a hard cloth.
Do turn off the unit before cleaning the faceplate.
Avoid drop because dropping from a high place or a harsh strike may damage precision parts,
such as the screen.
If you need to transport by air, we suggest you run the unit through the conveyor X-ray with your
carry-on luggage when passing through the security checkpoint. The magnetic metal detector
you walk through, as well as the hand-held detectors used by inspectors, will damage the
system data of the car navigation and multimedia systems, and our company will not be reliable
for any system damage or data loss if the unit has been subjected to the magnetic detectors.
Avoid strong direct light: Do not expose this unit under strong light or ultraviolet directly so as to
prolong its service life.
37