1
BONDING PROCEDURE
I. PREPARING THE MOUNTING SURFACES :
o
Make sure that the surface on which
the sensor will be bonded (referred to
as “mounting surface”) is flat. Remove
all burrs and unevenness (paint drops,
soldering drops etc...).
Caution: Never bond the sensor to a
painted surface. Always scrape the paint off
beforehand.
o
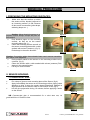
Rub abrasive paper on the mounting
surface, as well as on the sensor
mounting plates (fig. 1).
o
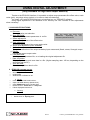
Clean the mounting surface as well as
the sensor mounting plates with a cloth
soaked with solvent (acetone). (fig. 2).
Rub always in the same direction.
Figure 1.
Figure 2.
Caution: If mounting plates have already been used, remove remaining
glue tracks, then degrease.
o
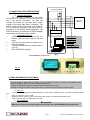
Draw position marks for the sensor on the mounting surface using
a scriber. (fig. 3).
o
Clean this surface with a cloth soaked with solvent (acetone) Rub
always in the same direction.
o
Let dry for some minutes.
Figure 3.
II. SENSOR BONDING:
1. CYANOACRYLAT GLUE.:
o
o
o
Put a drop of glue on each mounting plate of the Sensor (fig 4).
Apply immediately the sensor on the mounting surface, paying close
attention to align it along the marks drawn beforehand. Maintain a
slight pressure on the sensor ends for one minute or two (fig 5).
Let the glue polymerize during 10 minutes, before applying a strain
on the sensor.
Figure 4.
NB: Cyanoacrylat glue is recommended for a short term use, its
good behaviour is limited in time.
Figure 5.
3/13
173700-C_NU-EPSIMETAL-E-1010_006076