1
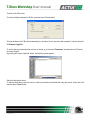
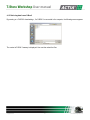
T-Store Workshop User manual
Product
Version
SmarTach T-Store Workshop V1.1
1.1 / EN
Date
June 2011
User manual
SmarTach T-Store Workshop
Copyright® Actia
1
www.actiatachographs.com
T-Store Workshop User manual
SUMMARY
1. T-STORE WORKSHOP SOFTWARE PRESENTATION .................................................................................................................... 4
1.1
1.2
1.3
1.4
1.5
1.6
PRINCIPLE OF THE SOFTWARE .................................................................................................................................................. 4
FUNCTIONS OF THE SOFTWARE ................................................................................................................................................. 4
DATA DOWNLOAD ................................................................................................................................................................... 4
TYPES OF TRANSFERRED DATA ................................................................................................................................................. 4
MULTI BASE .......................................................................................................................................................................... 4
MULTI LANGUAGES ................................................................................................................................................................. 4
2. T-STORE WORKSHOP INSTALLATION.......................................................................................................................................... 5
3. T-STORE WORKSHOP ACTIVATION.............................................................................................................................................. 8
3.1 AUTOMATIC ACTIVATION ............................................................................................................................................................... 8
3.2 MANUAL ACTIVATION .................................................................................................................................................................... 8
4. USE OF T-STORE WORKSHOP SOFTWARE ................................................................................................................................ 10
4.1 DATA DOWNLOAD...................................................................................................................................................................... 12
4.1.1 Download data from the Tachograph .............................................................................................................................................. 12
4.1.2 Read a Driver card or a Workshop card .......................................................................................................................................... 13
4.1.3 Retrieving data from a D-Box and Configuring a D-Box ................................................................................................................. 14
4.1.4 Import a legal file ............................................................................................................................................................................. 15
4.1.5 Retrieving data from a D-Box 2 ....................................................................................................................................................... 16
4.2 CONFIGURATION ....................................................................................................................................................................... 17
Configure colours for triggers alerts of Driver cards download ................................................................................................................ 17
Configure colours for triggers alerts of vehicle cards download ............................................................................................................... 17
Configure colours for triggers alerts of workshop cards download........................................................................................................... 17
Configuration of the back up directory in order to safeguard the archives data base .............................................................................. 17
Configuration of the directory for archives to import................................................................................................................................. 17
Configuration of the SMTP server ............................................................................................................................................................ 17
Configuration parameters of the e-mail sender ........................................................................................................................................ 18
Setting background pictures ..................................................................................................................................................................... 18
Configuration of the database location ..................................................................................................................................................... 18
Creation of a new company ..................................................................................................................................................................... 18
Creation of a new vehicle type ................................................................................................................................................................. 18
Make a backup of the content of the database ........................................................................................................................................ 18
Regulatory files name format extracted from the database ..................................................................................................................... 18
Creation of a new workshop ..................................................................................................................................................................... 18
Margin setting for operation printouts ....................................................................................................................................................... 18
4.3 DRIVERS MANAGEMENT .............................................................................................................................................................. 20
4.3.1 Access to the drivers management by the driver button ................................................................................................................. 20
4.3.2 Access to the drivers management by the archive button .............................................................................................................. 22
4.4 VEHICLES MANAGEMENT ............................................................................................................................................................. 23
4.4.1 Access to the vehicles management by the vehicles button ........................................................................................................... 23
4.4.2 Access to the vehicles management by the archive button ............................................................................................................ 25
4.5 WORKSHOPS MANAGEMENT ........................................................................................................................................................ 27
4.5.1 Access to the workshops management by the workshops button .................................................................................................. 27
4.5.2 Access to the workshops management by the archive button ........................................................................................................ 29
4.6 DETAILED EXPLORATION OF THE AVAILABLE ARCHIVES ...................................................................................................................... 30
4.7 OPERATIONS MANAGEMENT ........................................................................................................................................................ 37
4.7.1 Global visualization of operations in the existing database ............................................................................................................. 37
4.7.2 Detailed visualization and printing of existing operations in the database ...................................................................................... 43
4.7.3 New operation manual creation ...................................................................................................................................................... 47
4.8 PRINTING MANAGEMENT ............................................................................................................................................................. 48
4.8.1 Viewing and printing predefined reports .......................................................................................................................................... 48
Copyright® Actia
2
www.actiatachographs.com
T-Store Workshop User manual
4.8.2 Viewing and printing certificates and presets (predefined templates) ............................................................................................. 50
4.8.3 Creating, viewing and printing custom models ................................................................................................................................ 51
4.8.4 Saving and sending reports by e-mail ............................................................................................................................................. 53
Copyright® Actia
3
www.actiatachographs.com
T-Store Workshop User manual
1. T-STORE WORKSHOP software presentation
1.1 Principle of the software
The software T-STORE WORKSHOP has been designed to allow Tachograph authorized workshops to manage all
realized operations in their workshop as well on vehicles equipped with a Digital Tachograph than those equipped
with an Analogue Tachograph. This software meets the ISO / IEC 17020 standard.
1.2 Functions of the software
The software T-STORE WORKSHOP allows to:
• Retrieve and archive data from Digital Tachograph,
• Retrieve and archive data of Drivers and Workshops cards,
• Manage all realized operations on vehicles in the workshop,
• Store all information in a database and on a removable media,
• Perform edits and prints reports made on the operations of the workshop and vehicle management
1.3 Data download
It is possible to transfer data from Digital Tachographs using 2 ways:
• Directly between the Tachograph and the computer by an RS 232,
• Via the D-BOX or D-BOX 2.
It is possible to transfer data from a Driver or Workshop card using 2 ways:
• Using a card reader connected to the computer,
• Via the D-BOX or D-BOX 2.
1.4 Types of transferred data
The downloaded data are legal data from Digital Tachographs and Driver or Workshop cards.
1.5 Multi base
The software allows managing several different databases.
1.6 Multi languages
The software allows the user to log in its origin language. 26 languages are supported:
French, English, Dutch, German, Swedish, Spanish, Italian, Polish, Danish, Greek, Portuguese, Finnish, Czech,
Norwegian, Hungarian, Estonian, Latvian, Russian, Lithuanian, Slovenian, Ukrainian, Slovak, Bulgarian, Romanian,
Croatian, Turkish
Copyright® Actia
4
www.actiatachographs.com
T-Store Workshop User manual
2. T-STORE WORKSHOP installation
In order to activate the software in an automatic way, a connection Internet must be launched at the starting of the
installation (see chapter 3.1 Automatic activation )
If the PC is already in function, leave Windows, then start it again
If the antivirus are active on your PC, deactivate them
•
•
T-STORE WORKSHOP is compliant with Windows 98se/Me/2000/XP/VISTA/Seven
In order to install the software, please proceed as follow:
1. Insert the CD-ROM in the driver.
2. Click on « Start »
3. Click on « Run »
4. In the command line enter « D:\ SmarTachTStore-Workshop Vx.x.exe »
The D letter represents CD-ROM driver of the computer.
Then click on OK.
Select the language of the installation and start the installation by clicking "OK".
Copyright® Actia
5
www.actiatachographs.com
T-Store Workshop User manual
Click « Next » to continue the installation.
By default, the installation proposes to automatically create the directory where the files T-STORE WORKSHOP will
be saved in « C: \ Program Files \ T-Store SmarTach Workshop ». You can rename it differently, by giving another
directory name or selecting a different drive, then confirm with « Next » button.
Copyright® Actia
6
www.actiatachographs.com
T-Store Workshop User manual
At the end of the installation, the software will automatically start, if the checkbox is checked. An icon is created on
the desktop if the choice was validated during the installation.
Copyright® Actia
7
www.actiatachographs.com
T-Store Workshop User manual
3. T-Store Workshop activation
The software is protected by a user license.
It is possible to activate it manually or automatically.
3.1 Automatic activation
An Internet connection must be initiated on the computer during the installation, so that activation can be done
correctly.
Enter the software serial number like TSWxxxxxx (the number is printed on the back side of the CDROM box)
Click on “Automatic” in order to launch the automatic activation.
The software sends the following information directly to the Actia server: the serial number and identification code of
the computer. In return, the Actia server automatically records and sends activation code of the software.
Each serial number allows single software activation.
After installation, thank you kindly complete the registration form to have access to customer service on the
software. Registration is online and is communicated directly to our services.
3.2 Manual activation
The manual activation must be used where no Internet connection exists for the computer where the software is
installed.
Enter the serial number of the software like TSWxxxxxx (number printed on the back side of the CDROM box) in
order to achieve a correct activation.
By clicking the “manual” button, the registration form opens. Information about the software and computer are
automatically filled by the application. All company information must be completed, otherwise the activation code
could not be sent.
This form must be sent by mail to [email protected]
Copyright® Actia
8
www.actiatachographs.com
T-Store Workshop User manual
The activation code is sent back to the customer, who must manually enter it in the dedicated activation window. Do
not forget to enter also the serial number of the software like TSWxxxxxx (number printed on the back side of the
CDROM box)
Click on « Activate » in order to activate the software.
Copyright® Actia
9
www.actiatachographs.com
T-Store Workshop User manual
4. Use of T-Store Workshop software
In order to use the software after its activation, click on the icon “SMARTACH T-STORE WORKSHOP” on the
desktop of the computer:
The start window on the product opens the following screen:
Select the profile (Administrator or User) and the desired language, type the password associated with the selected
profile and click "OK" to launch the software.
The profile "Administrator" can perform all operations offered by the software.
The profile "User" restricts the execution of certain transactions:
- Then, modification of certificates and presets (predefined templates) and custom models is not allowed (see
4.4 Vehicles management et 4.8.3)
- In Parameter folder, only creation functions of a new company, a new vehicle type or a new workshop are
allowed (see 4.4 Vehicles management)
If the password entered for the profile is incorrect, the following window appears to specify the error. A click on the
“OK” button takes you back to the start window.
Copyright® Actia
10
www.actiatachographs.com
T-Store Workshop User manual
This screen allows you to edit the password for the selected profile. To perform this operation, click on the button
"Change password".
The window asks you to enter the current password and new password twice. To finish, click “OK”.
If the current password entered is not correct, the following window appears to specify the error. A click on the “OK”
button takes you back to the change password screen.
If an input error occurs for the new password the next window appears to specify the error. A click on the “OK” button
takes you back to the change password screen.
If the two entered passwords are identical, the following window appears to confirm the change of password. A click
on the « OK » button takes you back to the start window.
Copyright® Actia
11
www.actiatachographs.com
T-Store Workshop User manual
4.1 Data Download
The software opens the following window:
1
2
3
4
5
No.
1
2
3
4
5
Function
Direct Download from the Tachograph
Read Driver or Workshop Card from a card reader or from the D-Box
in card reader mode (F2)
Retrieve data from a D-Box.
D-Box Configuration
Import a legal file from the computer
Retrieve data from a D-Box 2.
4.1.1 Download data from the Tachograph
Select download options:
• Select the communication port where the download cable is installed,
• Select download period. For approved workshops, we recommend a "Total" download.
The workshops must provide to the company that owns the vehicle, only the data belonging to this company.
For this reason, when the "Total" download is performed, the file of the downloaded vehicle contains only the
range of activities belonging to owner (see chapter 4.4 Vehicles management)
Copyright® Actia
12
www.actiatachographs.com
T-Store Workshop User manual
•
Select files to download. For approved workshops, we recommend downloading all the files (Driver card
excluded)
At the end of the selection, start the download by pressing the "Finish" button.
4.1.2 Read a Driver card or a Workshop card
Reading a driver card or a workshop card with a card reader
To start reading the card, connect the smart card reader and insert the card into the reader. The reading of the card
starts automatically.
Reading a driver card or a workshop card with a D-Box
To use the card reader mode of the D-Box (function F2), press button Read card with D-Box.
First of all, select the communication port on which the D-Box is connected.
To check the communication port number on which the serial cable or USB cable of the D-Box is installed, open the
Windows Control Panel:
• System,
• Hardware,
• Device Manager,
• Ports (COM & LPT).
The name of the D-Box USB cable is Xiring USB COM Port: check the number of the port.
If you use a serial cable, the communication port used is generally COM 1 or COM 2 depending on the number of
serial ports available on the computer.
Copyright® Actia
13
www.actiatachographs.com
T-Store Workshop User manual
4.1.3 Retrieving data from a D-Box and Configuring a D-Box
First of all, select the communication port on which the D-Box is connected.
To check the communication port number on which the serial cable or USB cable of the D-Box is installed, open the
Windows Control Panel:
• System,
• Hardware,
• Device Manager,
• Ports (COM & LPT).
The name of the D-Box USB cable is Xiring USB COM Port: check the number of the port.
If you use a serial cable, the communication port used is generally COM 1 or COM 2 depending on the number of
serial ports available on the computer.
D-Box Configuration:
•
Select the files to download
•
Select the D-Box language
•
Select the download period
(recommendation: total)
•
Select date & time to update the
DBOX real time clock
Start the D-Box configuration by pressing the “OK” button (the D-Box must be switched on her default screen).
Copyright® Actia
14
www.actiatachographs.com
T-Store Workshop User manual
Transfer of the D-Box data:
To retrieve all data contained in a D-Box, press the button "Downloading".
To keep the data in the D-Box after downloading, the checkbox "do not clear data after completion” must be selected.
4.1.4 Import a legal file
To set the directory where imported archives are stored, go to the menu "Parameters" and determine the "Directory
for archives import”.
By pressing the “import a legal file” button, the following screen appears:
Select the data import format.
To select multiple files, press the control or shift key and select the desired files using the mouse. At the end of the
selection press "Open" button.
Copyright® Actia
15
www.actiatachographs.com
T-Store Workshop User manual
4.1.5 Retrieving data from a D-Box 2
By pressing on « D-BOX 2 downloading », if a D-BOX 2 is connected to the computer, the following screen appears:
The content of D-BOX 2 memory is displayed. User can then select the files.
Copyright® Actia
16
www.actiatachographs.com
T-Store Workshop User manual
4.2 Configuration
All the configurable settings of the software are accessible from the button
The following screen appears:
1
4
5
2
6
7
8
3
9
12
10
11
14
15
13
No.
Function
1
Configure colours for triggers alerts of Driver cards download.
2
Configure colours for triggers alerts of vehicle cards download.
3
Configure colours for triggers alerts of workshop cards download.
4
Configuration of the back up directory in order to safeguard the archives data base
5
Configuration of the directory for archives to import
6
Configuration of the SMTP server
(For sending printed documents by e-mail)
Copyright® Actia
17
www.actiatachographs.com
T-Store Workshop User manual
7
8
9
10
11
12
13
14
15
Copyright® Actia
Configuration parameters of the e-mail sender
(For sending printed documents by e-mail)
Setting background pictures
- On first line, user can select the background picture for reports (Default logo "T-Store
SmarTach WorkShop" is selected. The user can remove the logo or affect another logo
of his choice, BMP format)
- On second line, user can select the background picture for installation plate (The user
can remove this logo or affect another logo of his choice, with BMP format. This image
must be first rotated of 90° left to be correctly located on the sticker)
Configuration of the database location
Creation of a new company. To add a new company, click on + and to cancel one
company, click on -.
According to the downloading vehicles, the list is automatically updated with name of
company that has put the last company lock.
The filter function, allows displaying only drivers and vehicles belonging to the selected
company.
Creation of a new vehicle type. To add a new vehicle type, click on + and to cancel a
vehicle type, click on -.
Make a backup of the content of the database (zip of the whole database) and to plan a
regular automatic backup.
Regulatory files name format extracted from the database (Choice of extensions DDD,
TGD, ESM, V1B & C1B)
Creation of a new workshop
To add a new workshop, click on + and to cancel one workshop, click on -.
According to the downloading workshop cards, the list is automatically updated.
Margin setting for operation printouts
This function is designed to define the top margin, in order to position the texts on the
A4 sheet, according to the printer used. The left margin will be defined by using the
parameter menu of the printer used.
This is used to correctly position text especially on sticker used for installation plate
18
www.actiatachographs.com
T-Store Workshop User manual
Clarification on creating a new company: Principle of Vehicles, Drivers and Workshops cards data management.
The creation of a new company in the software generates the creation of a directory named with the name of the
company in which all files will be stored for drivers and vehicles associated to this company.
Until there is no established company, archives are saved in a default directory "Unknown".
When several companies have been created, the operator can assign each archive to the company to which it
belongs.
Each file is then assigned to the corresponding directory:
• Drivers for files coming from the card Driver
• Vehicles for data files coming from Vehicle
All workshop files are stored in directory “Workshop”
Copyright® Actia
19
www.actiatachographs.com
T-Store Workshop User manual
4.3 Drivers management
The driver’s management can be made from two places:
4.3.1 Access to the drivers management by the driver button
The following screen appears:
Copyright® Actia
20
www.actiatachographs.com
T-Store Workshop User manual
The left side of the window contains the list of existing drivers:
• Name and Surname of drivers,
• Date of latest data archiving performed for each card. One colour indicates the status of the card regarding to
the supposed date of the next download. The download time is adjustable in the menu "Configuration" (see
chapter 4.2 Configuration ) :
Colour
black
green
yellow
red
•
•
Function
Deadline before next downloading date is inferior to the minimum
interval
Deadline before next downloading date is OK (Exceeded minimum
interval)
Deadline before next downloading date is inferior to the Alert level
Deadline before next downloading date is exceeded (Max. interval)
Driver card number,
Date of next downloading of the card.
Sorting functions are available for each column. So, click once on the column heading for a descending sort of the
column and a second to change the sort order.
Click on
button to cancel a driver from the data base
The right side of the window contains information about the driver:
• Information with a blue background are automatically retrieved from the driver card and are not modifiable,
• The driver can be assigned to a company (see "Configuration" menu to create a company).
Printings related to drivers:
Pressing this button will print the list of driver cards to be downloaded or renewed (see chapter 4.8 Printing
management)
Copyright® Actia
21
www.actiatachographs.com
T-Store Workshop User manual
4.3.2 Access to the drivers management by the archive button
The archive button allows viewing all files uploaded into the database.
A double click from the Drivers menu brings directly on the concerned archive.
A sort function allows to display:
• all archives of Drivers,
• all archives of Vehicle,
• all archives of Workshops,
• all archives of a selected driver
• all archives of a selected vehicle
• all archives of a selected workshop
Sorting functions are available for each column. So, click once on the column heading for a descending sort of the
column and a second to change the sort order.
To view the path where the downloaded file is located, select a beginning of a driver line and right click on the mouse.
Selecting a current driver:
1
2
3
Copyright® Actia
22
www.actiatachographs.com
T-Store Workshop User manual
You can find the following information:
No.
1
2
3
Function
The list of available drivers
The list of available archives for this driver (with the dates of activity
for each file)
The graphical representation of the available archives : This feature
allows to view the range of activity days not downloaded
4.4 Vehicles management
The vehicles management can be made from two places:
4.4.1 Access to the vehicles management by the vehicles button
The following screen appears:
Copyright® Actia
23
www.actiatachographs.com
T-Store Workshop User manual
The left side of the window contains the list of existing vehicles, with the following information:
• Vehicle Registration Number (VRN),
• Date of latest data archiving performed for each vehicle. One colour indicates the status of the vehicle
regarding to the supposed date of the next download. The download time is adjustable in the menu
"Configuration" (see chapter 4.2 Configuration ) :
Colour
black
green
yellow
red
•
•
Function
Deadline before next downloading date is inferior to the minimum
interval
Deadline before next downloading date is OK (Exceeded minimum
interval)
Deadline before next downloading date is inferior to the Alert level
Deadline before next downloading date is exceeded (Max. interval)
Date of next downloading of the vehicle,
Vehicle Identification Number (VIN).
Sorting functions are available for each column. So, click once on the column heading for a descending sort of the
column and a second to change the sort order.
Click on
button to cancel a vehicle from the data base
button to add manually a vehicle on the data base. This function is designed to create manually
Click on
a vehicle from which downloading is not possible, in order to edit associated reports (mainly the certificate of non
downloading)
The right side of the window contains information about the vehicle:
• Information with a blue background are automatically retrieved from the vehicle archive and are not
modifiable,
• Free input fields could be fulfilled for operating assistance purpose :
o Reference of the Tachograph,
o Date of acquisition and exit of the vehicle,
o Type of vehicle (see “Configuration” menu to create a type of vehicle),
o The vehicle may be assigned to a company (see “Configuration” menu to create a company),
o The vehicle may be assigned to a workshop that downloaded it,
o Date of next Tachograph inspection visit.
Printings related to vehicles:
Pressing this button will print the list of Tachograph to download (see chapter 4.8 Printing management)
Copyright® Actia
24
www.actiatachographs.com
T-Store Workshop User manual
But this button also allows editing and printing all actions associated with a vehicle archive:
• The data downloading certificates,
• The certificates of non downloading,
• The certificates of availability of downloaded data,
• The notifications of availability of downloaded data,
• The notifications of data recovery,
• Also all the templates defined by the user.
(For more details, see chapter4.8 )
4.4.2 Access to the vehicles management by the archive button
The archive button allows viewing all files uploaded into the database.
A double click from the Vehicles menu brings directly on the concerned archive.
A sort function allows to display:
• all archives of Drivers,
• all archives of Vehicle,
• all archives of Workshops,
• all archives of a selected driver
• all archives of a selected vehicle
• all archives of a selected workshop
Sorting functions are available for each column. So, click once on the column heading for a descending sort of the
column and a second to change the sort order.
To view the path where the downloaded file is located, select a beginning of a vehicle line and right click on the
mouse.
Copyright® Actia
25
www.actiatachographs.com
T-Store Workshop User manual
Selecting a current vehicle:
1
2
3
You can find the following information:
No.
1
2
3
Function
The list of available vehicles
The list of available archives for this vehicle (with the dates of activity
for each file)
The graphical representation of the available archives : This feature
allows to view the range of activity days not downloaded
The range of activity dates for each saved file is corresponding to the available period of
activity of the company that create the last company lock
Copyright® Actia
26
www.actiatachographs.com
T-Store Workshop User manual
4.5 Workshops management
The vehicles management can be made from two places:
4.5.1 Access to the workshops management by the workshops button
The following screen appears:
Copyright® Actia
27
www.actiatachographs.com
T-Store Workshop User manual
The left side of the window contains the list of existing drivers, with the following information:
• Name and Surname of the workshop's technician,
• Date of latest data archiving performed for each card. One colour indicates the status of the card regarding to
the supposed date of the next download. The download time is adjustable in the menu "Configuration" (see
chapter 4.2 Configuration ) :
Colour
black
green
yellow
red
•
Function
Deadline before next downloading date is inferior to the minimum
interval
Deadline before next downloading date is OK (Exceeded minimum
interval)
Deadline before next downloading date is inferior to the Alert level
Deadline before next downloading date is exceeded (Max. interval)
Card serial number.
Sorting functions are available for each column. So, click once on the column heading for a descending sort of the
column and a second to change the sort order.
Click on
button to cancel a workshop from the data base
The right side of the window contains information about the technician:
• Information with a blue background are automatically retrieved from the workshop card archive and are not
modifiable,
Printings related to workshops:
Pressing this button will print the list of workshop cards to be downloaded or renewed, and the list of the speed
limiters (already calibrated in the workshop) to be controlled again (see chapter 4.8 Printing management).
But this button also allows editing and printing all actions associated with a workshop archive. This information is
contained in the "Workshops Data”:
(For more details, see chapter 4.8 Printing management)
Copyright® Actia
28
www.actiatachographs.com
T-Store Workshop User manual
4.5.2 Access to the workshops management by the archive button
The archive button allows viewing all files uploaded into the database.
A double click from the workshop menu brings directly on the concerned archive.
A sort function allows to display:
• all archives of Drivers,
• all archives of Vehicle,
• all archives of Workshops,
• all archives of a selected driver
• all archives of a selected vehicle
• all archives of a selected workshop
Sorting functions are available for each column. So, click once on the column heading for a descending sort of the
column and a second to change the sort order.
To view the path where the downloaded file is located, select a beginning of a workshop line and right click on the
mouse.
Selecting a current technician:
1
2
3
You can find the following information:
No.
1
2
3
Copyright® Actia
Function
The list of available technicians
The list of available files for this technician (with the dates of activity
for each file)
The graphical representation of the available archives : This feature
allows you to view the range of periods covered by the workshop
archives
29
www.actiatachographs.com
T-Store Workshop User manual
4.6 Detailed exploration of the available archives
These functions allow having a graphic and textual content of downloaded files.
These functions are accessible via the archive button (menu Archives)
The archive button allows viewing all files uploaded into the database.
For regulatory issues, access to Drivers and Vehicles activity data cards records is
restricted.
The application archives all data, but offers only limited view of data from these archives.
With a double click on an archive the following information are available:
1) For an archive of Driver type: no detail is available.
2) For an archive of Vehicle type :
• Company locks list,
• Events list,
• Faults list,
• Technical data.
3) For an archive of Technician type :
• Activity details,
• Activity changes list,
• Vehicles used list,
• Events list,
• Faults list,
• Calibration data.
Copyright® Actia
30
www.actiatachographs.com
T-Store Workshop User manual
Archive of vehicle type:
Companies locks list:
Events list:
Copyright® Actia
31
www.actiatachographs.com
T-Store Workshop User manual
Faults list:
Technical data:
Copyright® Actia
32
www.actiatachographs.com
T-Store Workshop User manual
Archive of technician type:
Activity details:
Activity changes list:
Copyright® Actia
33
www.actiatachographs.com
T-Store Workshop User manual
Vehicles used list:
Events list:
Copyright® Actia
34
www.actiatachographs.com
T-Store Workshop User manual
Faults list:
Calibrations list:
Copyright® Actia
35
www.actiatachographs.com
T-Store Workshop User manual
The following information is displayed for each calibration performed by the workshop:
• The type of calibration,
• Name and address of the workshop,
• The workshop cards number and its expiry date,
• Vehicle Identification Number, Vehicle Registration Number and the country's vehicle
• Calibration values:
o K,
o W,
o L,
o Tires size,
o Speed limit,
o Old and new values of the odometer
o Old and new values of the date and time
o Date of next calibration.
Copyright® Actia
36
www.actiatachographs.com
T-Store Workshop User manual
4.7 Operations Management
4.7.1 Global visualization of operations in the existing database
The following screen appears:
2 different folders show operations done on Digital Tachographs and operations done on Analog Tachographs
Copyright® Actia
37
www.actiatachographs.com
T-Store Workshop User manual
The left side of the window contains the list of existing operations:
• Active: If this information is selected, the corresponding operation will be taken into account when publishing
and printing,
• Number: This number reference operations. It is used to have ascending or descending order filtering
• Order Number: unique number referencing operations; two separate lists are managed :
o Ascending order (from 1) operations on the Digital Tachographs (xxxxD)
o Descending order (from 1) operations on the Analogue Tachographs (xxxxA),
• The Vehicle Identification Number (VIN) on which the operation was effected,
• The date of the intervention,
• The type of intervention. The different possible types of interventions are :
o For Digital Tachographs :
1 - Activation operation,
2- First calibration after activation operation
3 - First calibration on the vehicle operation
4 - Periodical inspection operation
5 - Software upgrade control operation
6 - Speed limiter control operation
7 - Other operation type
o For Analogue Tachographs :
1 - Installation operation
2 - Periodic verification operation
3 - Speed limiter control operation
• The Vehicle Registration Number (VRN) on which the operation was effected.
Operations on Digital Tachographs (1 to 4) are automatically included in the database, based on calibrations
contained in the corresponding downloaded workshops cards.
Operations on Digital Tachographs (5 to 7) and all operations on Analogue Tachographs (1 to 3) are entered
manually by the operator (see chapter Notification of speed limiter control
(*) During printouts, a specific paper support must be used for printing the following reports:
• Notification of Digital Tachograph installation,
• Periodical inspection notification,
• Notification of Analogue Tachograph installation,
• Periodic verification notification
Copyright® Actia
38
www.actiatachographs.com
T-Store Workshop User manual
This specific paper support contains on his right side two stickers in which are respectively printed the installation
plate and the value of K parameter. These two stickers are then glued on vehicle and protected by specifics plastics
covers.
The remaining part of this sheet will contain information corresponding to the operation done:
Copyright® Actia
39
www.actiatachographs.com
T-Store Workshop User manual
When printout contains 2 pages, user could insert a standard A4 sheet on printer as support for the second page.
Copyright® Actia
40
www.actiatachographs.com
T-Store Workshop User manual
(**) During « plate only » printouts user will used a specific Brother printer (PC labelling machine), that allow
printing the content of the plate on an 18mm width label:
4.7.3 New operation manual creation
Sorting functions are available for each column. So, click once on the column heading for a descending sort of the
column and a second to change the sort order.
The right side of the window contains information about the workshop:
• Information with a blue background are automatically retrieved from the Tachograph and are not modifiable,
• Free input fields may be supplemented for operating assistance purpose :
o Type of vehicle (see “Configuration” menu to create a type of vehicle),
o The vehicle may be assigned to a company (see “Configuration” menu to create a company),
o Tachograph certification number,
o Motion sensor certification number.
The management of the order number could be defining in 2 different ways by the operator.
If an operation is modified (elements added for instance), for this operation, the order number could be the same or
take an index (in order to get history of modification).
Copyright® Actia
41
www.actiatachographs.com
T-Store Workshop User manual
For instance, each modification of operation number 100D will create a new operation 100D-01, then 100D-02 and so
on.
This choice is simply done by a system file, named « Config.ini », located under « Program Files\SmarTach T-Store
Workshop\ »
In this file, the element [ORDER NUMBER]/INDEX could take the value « YES » if operator wants perform an
indexation on order number, or « NO » on the opposite.
Specificity on operations for Digital Tachographs (1 to 4), automatically included in the database, based on
calibrations contained in the corresponding downloaded workshops cards.
On this kind of operations, there is a folder reserved for operator manual entries, designed to enter checking
items on Tachographs:
The 3 speed thresholds are configurable by a system file, named « Config.ini », located under « Program
Files\SmarTach T-Store Workshop\ »
In this file, the element [VERIFICATION] is designed to configure the 3 speed thresholds:
MIN_VALUE=20
MEDIUM_VALUE=100
MAX_VALUE=180
Copyright® Actia
42
www.actiatachographs.com
T-Store Workshop User manual
Total distance is configurable too:
DISTANCE=30
All calculation for speed errors (Landmark A, B and C) are based on the 3 speed values, define on the file.
Calculation for distance error (Landmark D) is based on the distance value, define on the file.
4.7.2 Detailed visualization and printing of existing operations in the database
For full details of an operation, the user has to double click on an existing operation. The window that appears
contains the details of this operation. The displayed screen depends on the type of edited operation.
All Information on blue background is automatically retrieved from the technical data of Tachograph and is not
modifiable.
Free input fields may be fulfilled for operating assistance purpose in order to complete all available information for an
operation.
However, any change in a field will result in the publication of an incident statement that will allow the user to justify
the changes brought to the data of this operation.
The filling of this form of incident is not mandatory but is strongly recommended. Just click on the « Cancel » button to
erase the incident statement.
In all cases, in the bottom part of the operation editing screen, three buttons allow you to:
• Save all changes made on the operation issued,
• Cancel any changes and return to the previous screen without altering the original data,
• Start the printing of various reports based on the type of operation:
o For Digital Tachographs :
Speed limiter control operation type
• Certification of speed limiter control
Software upgrade control operation
• Notification of software upgrade
Other operation type
• Control
Activation / First Installation / Complete Installation operation
• Notification of Digital Tachograph installation (*),
• Plate (**),
• Technical Information
Periodical inspection operation
• Periodical inspection notification (*),
• Plate (**),
• Technical Information
Copyright® Actia
43
www.actiatachographs.com
T-Store Workshop User manual
o For analogue Tachographs :
Installation operation
• Notification of Analogue Tachograph installation (*),
• Plate (**),
• Technical Information
Periodic verification operation
• Periodic verification notification (*),
• Plate (**),
• Technical Information
Speed limiter control operation
• Notification of speed limiter control
(*) During printouts, a specific paper support must be used for printing the following reports:
• Notification of Digital Tachograph installation,
• Periodical inspection notification,
• Notification of Analogue Tachograph installation,
• Periodic verification notification
Copyright® Actia
44
www.actiatachographs.com
T-Store Workshop User manual
This specific paper support contains on his right side two stickers in which are respectively printed the installation
plate and the value of K parameter. These two stickers are then glued on vehicle and protected by specifics plastics
covers.
The remaining part of this sheet will contain information corresponding to the operation done:
Copyright® Actia
45
www.actiatachographs.com
T-Store Workshop User manual
When printout contains 2 pages, user could insert a standard A4 sheet on printer as support for the second page.
Copyright® Actia
46
www.actiatachographs.com
T-Store Workshop User manual
(**) During « plate only » printouts user will used a specific Brother printer (PC labelling machine), that allow
printing the content of the plate on an 18mm width label:
4.7.3 New operation manual creation
In the bottom right of the existing operations screen, a "New" button creates a new operation.
Using the window that appears (see below), the type of tachograph desired is selected. Once the choice is made,
click on "Next" to proceed to the definition screen of the operation or click "Cancel" button to return to the global
existing operations screen.
Depending on the type of tachograph selected, the following types of operations can be created:
• analogue Tachographs :
o Installation
o Periodic inspection
o Speed limiter
• Digital Tachographs :
o Software upgrade control
o Speed limiter control
o Other control
The operation date and order number are automatically created by the application:
• The date is the current date,
• The order number is calculated according to the latest issue existing in the database and depending on the
type of tachograph previously selected.
Apart from these two fields imposed and non-modifiable, all other data relating to a new operation are at the
discretion of the user.
Copyright® Actia
47
www.actiatachographs.com
T-Store Workshop User manual
4.8 Printing management
The following screen appears:
Print-outs can also be edited and saved in file types: txt, rtf, cvs, htm.
4.8.1 Viewing and printing predefined reports
There are 4 reports that can be either printed or sent by e-mail, or saved:
•
•
•
•
•
The list of driver or workshop cards to be download within X days. The variable X can be modified by the user
when using cursors and .
The list of driver or workshop cards to be renew within X days. The variable X can be modified by the user
when using cursors and .
The list of Tachographs to be download within X days. The variable X can be modified by the user when
using cursors and .
The list of Tachographs to be calibrate within X days. The variable X can be modified by the user when using
cursors and .
The list of speed limiters to be controlled in the within X days. The variable X can be modified by the user
when using cursors and .
This set of registers is displayed via Excel sheets. User can modify the paging before printing
Copyright® Actia
48
www.actiatachographs.com
T-Store Workshop User manual
These reports allow the workshop to manage customers by offering downloads of vehicles and cards in the right time.
They also manage technician cards belonging to the workshop.
There are 5 other reports related directly to the workshop. They can either be printed or saved.
These reports are based on workshops data:
To print the different reports, select the date range to print, then the desired report from:
• Software upgrade register : This register contains details of all operations of software upgrade type made by
the workshop on Tachographs
•
Speed limiter controls register : This register contains details of all operations of speed limiter control type
made by the workshop on vehicle
•
Periodic verifications register : This register contains details of all operations of periodic verifications type
made by the workshop on analogue Tachographs
•
Periodic Inspections register : This register contains details of all operations of periodic inspections type
made by the workshop on digital Tachographs
•
Downloading register : This register contains details of all operations of downloading type made by the
workshop on vehicles
Copyright® Actia
49
www.actiatachographs.com
T-Store Workshop User manual
•
The annual report of activities of the workshop: This register contains the summary of operations done for
each workshop and each technician for a given period. The following information are summarized in this
report :
o The number of "first calibration" of digital Tachographs made after installation and activation by
vehicle manufacturer (E1)
o The number of complete installations, including operations with simultaneous VU + Motion Sensor
change (CI)
o The number of periodic inspections in response to an intervention on the installation - VU or motion
sensor change, or cable, or variation of parameters (L, W), or setting the time (IPAI)
o The number of periodic inspections that do not respond to an intervention on the installation (IP)
o The number of certificates of non downloading (CIT)
o The number of analogue Tachographs replacements by digital Tachographs (RAN)
o The number of replacements of defective VU (RUEV)
o The number of replacements of motion sensors (RC)
o The number of replacements of complete measurement chain, that is to say, "VU + motion sensor"
(RCH)
4.8.2 Viewing and printing certificates and presets (predefined templates)
Access to these reports is only possible if you use the print button available in the vehicles management screen.
These reports are automatically filled regarding to the selected vehicle in the vehicle management screen.
The application offers the ability to print a certain number of notifications and certifications:
• Data downloading certificate,
• Certificate of non downloading ,
• Certificate of availability of downloaded data,
• Notification of availability of downloaded data,
• Notification of data recovery,
• Technical data,
Copyright® Actia
50
www.actiatachographs.com
T-Store Workshop User manual
4.8.3 Creating, viewing and printing custom models
In addition to predefined templates, users can create theirs custom templates.
If the user wishes to use one of the templates he has designed, he must just check the box "Custom Templates".
In all cases, to print, use the button "Edit".
All predefined and custom templates are stored in the directory "Models" which is in the
installation directory of the application.
These predefined templates are editable by the user and stored by language in a
subdirectory XX.
XX is the language code of the concerned country. The predefined templates are TXT files
whose name begins with "MD_XX_.
XX is the language code of the concerned country, following the name is the name of the
model.
Custom templates are stored by language in a subdirectory XX.
XX is the language code of the concerned country. These templates are TXT files whose
name is set by the user at the creation of the template.
On the print screen, just click on the “Change” button to access the changes window of some predefined templates or
create custom templates.
A window pops up to warn the user that a certain amount of information must necessarily be part of reports for
regulatory reasons.
If the user confirms his choice, the screen of templates management appears. Otherwise the application returns to
the printing screen.
Copyright® Actia
51
www.actiatachographs.com
T-Store Workshop User manual
The principle of this screen is to allow the user to customize the template of listed reports. To do this, he must select
the report to modify. Automatically, the application will display the content of the report at the top of the screen.
The user can modify the contents of the report by adding static text to be printed as is, or add keywords whose actual
value will be added automatically by the software at the time of printing. To do this, a simple right click of the mouse
brings up a menu containing a list of keywords available. You must select the desired keyword to be inserted where
the cursor is. These keywords represent the information from the archive vehicle previously selected.
To create or delete a custom template, select the option "Custom templates". The list of custom available templates
becomes active. The user can select a template to edit or delete. It can also use the add button to create a new
model.
Once all changes to the model completed, simply click on the “Save” button. A screen asking for confirmation of the
saving appears.
Copyright® Actia
52
www.actiatachographs.com
T-Store Workshop User manual
4.8.4 Saving and sending reports by e-mail
To send a printed document by an e-mail, push e-mail option and select the tab "E-Mail”, enter the options for printing
and completing the window sending e-mail:
Address of the
recipient of the
e-mail.
Option:
contact Secure
SMTP Server
E-mail subject
Free text
Send Button
Password
attachment
(must be
entered by the
recipient to
open the zip
file)
In order to save a printed document locally in a ZIP file, press the Option e-mail and select the "Files" tab. Select
where the compressed file will be saved and indicate, if necessary, a password for the created archive.
Directory to
save the
created
archive using
the printing
report
Optional
password for
the archive
Send Button
Copyright® Actia
53
www.actiatachographs.com