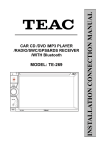
Download Car DVD Navigation User Manual
Transcript
Before to operate the unit
2
Use and Maintain DVD Rom
5
Panel Functions
Remote control functions
7
Basic operation
32
Touch operation
15
Trouble shooting
29
Function Specs
30
Diagram Guidence
31
Wiring connection diagram
32
1
2
31
30
3
4
29
directore
songs
directore
files
Repeat playing
28
5
6
27
Can adjust video’s “brightness”, “contrast” “Hues” “Saturation”
and “Sharpness”
Click “
” on the remote control to select “ Dobby Digital settings”
Dolby digital
Output mode
Dynamic range
Left add right
Can adjust Dobby surround’s “output mode”, “dynamic range”
and “Left + Right”
14, Click “
” to enter “Time counter” screen as the
following photo:
26
Click “
” to start counting seconds.
Click “
” to stop counting seconds
Click “
’ to reset counting seconds.
7
To set up system’s “picture ratio”, “password” and “default”.
Click “
” button on remote control to select “language
options” where you can set up “display
Language setting
Display language
Audio language
Subtitles language
Menu language
FW
VERSION
language”, “Voice language”, “Menu language” and “FW version”.
Click “
” button on remote control to select “Sound setup” to
change the settings of “Digital output” and “Tone”.
Audio Settings
Password output
tones
Click “
” button on remote control to select “Video settings”
Video Settings
brightness
contrast
tonal
saturation
sharpness
8
25
Click “
” to select title to play
Click “
” to select Menu to play
Click “
” to enlarge/decrease the playing image
1/4 enlargex2 – x3 –x4- Reduce x1/2 –x1/3 –x1/4
Click “
” to enter multi-angle playback
Click “
’ to shut down screen
Click “
” to mute sound while playing
Click “
” to bring back the last song.
Click “
’ to play/pause
Click “
” to the next song.
Click “
” to select different sound channels.
Left vocal
Right sound channel
stereo
Click “
’ to change the play language
Click “
” to return main menu
Operate DVD via remote control
When DVD is playing, Press “setup” button on remote control as
the following photo,
System setup
Picture proportion
password
level
The default value
24
9
Click “
” to browse next or previous page.
Click song to enter play music screen
Click “
” to forward/backward songs
Click “
” to play next/previous song
Click “
13,Click “
Click “
” to play/pause song.
’ to enter DVD play screen as the following photo
” to play DVD/CD disc, the music information is shown
on the top of the screen
Click “
” to repeat play, can select single part, chapter or
whole disc repeat
Click “
” to forward/backward mode one time to have different
speed mode for this function, as the following information
forward x2 – x4 – x8 –x20- Normal
Backward x2 – x4 –x8 –x20- Normal
10
23
Click “setup” to change sound affect settings between
Classic, Pop, Jazz and Personalised modes.
Click “
” to adjust “sound” and “Bass”
Click “
” to adjust “Sound balance”
Click “ Loud
等 响 ” to turn on/off Bass.
11, Click “
” to enter “background selection” interface
After entering background interface, the “background image”
can be changed.
” to select different background
For example, click “
images, find the favourite one then click “
12, Click “
” to make the change.
” to enter IPOD interface,
as the following photo
playing
christmas in my heart
valder fields
because of you
far away from home
apologize
all rise
blue
god is a girl
playlist
performers
album
songs
style
writer
After entering IPOD interface, you will see the music list such
as “Playlist, Album, Songs, Styles, Artist etc.
22
11
Click “
” to pick up calls
Click “
VOL+
” to increase volume
Click “
VOL-
” to decrease volume
8,Click “
” to enter Time setup screen as the
following picture:
Click “
” to 24H mode
Click “
” to 12H mode
Click “
Under the normal operational status, you should enter Main Menu
” to adjust time
Click “
” to enter Display setup screen:
which includes: Radio, DVD, AUX, GPS, TV, IPOD, Bluetooth, SD,
USB, CDC, Calibration, Steering Control, Bluetooth Music,
Phonebook, Clock, Video, Sound, Background, Navipath, Games,
System, Version No, Time, Calendar and Destination (TV, GPS and
IPOD is optional)
Display can change the settings of “brightness, Softness” ,
“contrast” and “Normal”.
Click “
” to adjust “Brightness”, “Softness” and “Contrast”
10,Click “
” to enter sound setup screen,
as the following photo:
12
21
6, Click “
” to enter CDC mode
DVD/VCD/CD/MP4
Click “
” to back the previous song
Click “
” to the next song
Click “
” to back the previous disc
Click “
” to the next Disc
Click “
” to play/pause.
Click “
” to exit CDC mode.
7,Click “ ” to enter Steering control mode as
the following picture indicates:
Click “
” to turn off the unit
Click “
” to the next song
Click “
Click “
MUTE
Click “
BAND
Click “
MODE
Click “
20
” to the previous song
” to mute
” to switch Band
” to change Mode.
” to hang up calls
13
Click “
Received
” to check all received phone calls.
Click “ Missed ” to check unanswered calls
Click “
” to next/previous page.
4,Click “
” to enter Phonebook as the following picture
Click “
” to show all phone numbers saved
in your mobile phone.
Click “
Click “
5,Click “
” to show all phone numbers saved on Phone SIM card.
” to next\previous page.
” to enter Bluetooth Music mode as the
following picture shows.
14
Click “
” to back the previous song.
Click “
” to the next song
Click “
” to play song.
Click “
” to stop playing.
19
After entering Bluetooth function, please let your mobile to
search new Bluetooth device then connect to the unit,
which pin code is 0000. When a call is coming, click “
”
1,Menu
Under the normal operational status, you should enter Main Menu
which includes: Radio, DVD, AUX, GPS, TV, IPOD, Bluetooth, SD,
USB, CDC, Calibration, Steering Control, Bluetooth Music,
to accept the call. When the call is over, the system will
Phonebook, Clock, Video, Sound, Background, Navipath, Games,
System, Version No, Time, Calendar and Destination (TV, GPS and
automatically resume back to the previous music play mode
IPOD is optional)
or Radio mode.
(When the Bluetooth pairing is turned off, the unit can be paired with
another mobile phone after 30 seconds, in which time the unit still
searches for the previous paired mobile phone.)
Click “
” to clear the record.
2,System Settings
Click “
Click “
replay
” to enter System Setup screen, as the following picture:
” to reset the phone.
Click “disconnect ” to cut off Bluetooth connection
Click “ connection ” to connect the phone.
Click “
” to make calls.
Click “
” to swap between mobile Bluetooth and unit.
Click “
” to hang up the calls
Click “
Latest
” to enter Phone book setup screen as the following picture
enter “888888” as the pin code to access “system setup screen
You can choose the correct language from multi-languages.
“Break Control” and “Button Sound” can be set up.
Car Logo can be selected.
Radio Operation
Click “ Dialed
18
” to check all dialled phone numbers.
15
4,TV (Optional)
Click”
” or “
” to forward or backward to select
your preferred channels.
Click “
” to auto scan and save the channels.
Click “
” to select different TV format
Click “
” to swap between “soft”, “Color”, “Normal”,
3, Browser/automatically save radio stations
4, Sound
Click “
affect adjustment
sound
” to swap between Classic, Pop, Rock, Jazz and
“User” and “Bright”.
Click “
” to exit TV screen.
customer etc sound effects.
When the TV tuner is the digital TV tuner, click right top
Click “ stereo ” to swap between Mono and Stereo.
screen to exit.
Click “
” to turn on/off “loud”
Click “ MUTE ” to turn/off “Mute”
3,Click “
” to enter AUX interface
5, Click “
” to enter Bluetooth screen
Click “
” to swap between Classic, Pop, Jazz, Rock and
customer etc sound effects.
Click “
Click “
16
” to swap between “soft”, “Color”, “Normal” and “User”.
” to exit AUX interface.
17


