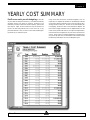
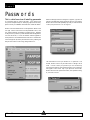
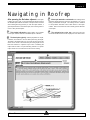
1
user’s manual
Version 2.0
user’s manual
Version 2.0
©copyright 1997, 1999 Professional Roof Consultants, Inc. All Rights Reserved.
Professional Roof Consultants, Inc.
4035 NE Sandy Blvd., Suite 240
Portland, OR 97212
Technical Support: (503) 280-8759
RoofPro is a trademark of Professional Roof Consultants, Inc.
Leakman is a trademark of Professional Roof Consultants, Inc.
All persons and companies listed in the examples are purely fictitious and any resemblance to existing
persons or companies is purely coincidental.
This book, or parts thereof, may not be reproduced in any form including photocopying, without prior written
permission from Professional Roof Consultants, Inc.
R o of P r o
U s e r ’s M a n ua l
TABLE OF CONTENTS
CHAPTER 1
A Brief Description of RoofPro as an Application
and an Overview of Database Functions ................................................... 1
•
•
•
•
About RoofPro ............................................................................................. 2
What is a Database ...................................................................................... 2
Basic FileMaker Functions ........................................................................... 4
RoofPro as an Application ........................................................................... 5
CHAPTER 2
Learning How to Navigate Through RoofPro ............................................. 7
•
•
•
•
•
Navigator ..................................................................................................... 8
Reports ........................................................................................................ 9
Choosing a Building ................................................................................... 10
Choosing a Roof Area ................................................................................ 11
Other Navigation Tools .............................................................................. 12
CHAPTER 3
Getting Familiar with the Details of the
Specific Data Layouts and the Backbone of RoofPro ............................. 13
•
•
•
•
•
•
•
Roof Evaluation ......................................................................................... 14
Management/ Maintenance/ Repair (M/M/R) ............................................. 16
Design Options .......................................................................................... 19
Roof Inspection ......................................................................................... 22
Roof Action Form ...................................................................................... 24
Roof Plan ................................................................................................... 25
Photo Page ................................................................................................ 26
CHAPTER 4
Getting the Most from the Information in
RoofPro From Charts and Summary Data Layouts ................................. 27
•
•
•
•
•
•
•
•
R o of P r o
Building Summary ..................................................................................... 28
Summary Chart ......................................................................................... 29
Yearly Cost Summary ................................................................................ 31
Action Schedule ......................................................................................... 32
Roof Areas by Priority ............................................................................... 33
Roof Areas to be Replaced ........................................................................ 34
Roof Areas to be Repaired ......................................................................... 35
Roof Area Calculations .............................................................................. 36
U s e r ’s M a n ua l
CHAPTER 5
Advanced Functions of RoofPro............................................................... 37
•
•
•
•
•
•
•
•
Printing ...................................................................................................... 38
Saving ....................................................................................................... 39
Undoing ..................................................................................................... 39
Passwords ................................................................................................. 40
Creating Records ....................................................................................... 41
Deleting Records ....................................................................................... 41
Networking RoofPro .................................................................................. 42
When RoofPro gets Damaged ................................................................... 44
CHAPTER 6
Navigating Through and Using
the Roof Repair Module of RoofPro ......................................................... 45
•
•
•
•
About the Repair Module ........................................................................... 46
Accessing Repair Methods ........................................................................ 46
Navigating in Roofrep ................................................................................ 47
Navigation Bar ........................................................................................... 48
CHAPTER 7
Repair and Leak Management as a Module of RoofPro .......................... 49
•
•
•
•
•
•
R o of P r o
Repair and Leak Management Overview .................................................... 50
Accessing Repair and Leak Management .................................................. 50
Opening Layout ......................................................................................... 51
Recording a New M/M/R Procedure .......................................................... 52
Printing the Repair Log .............................................................................. 53
Leak Report ............................................................................................... 54
U s e r ’s M a n ua l
1
CHAPTER 1
A Brief Description of RoofPro as an Application
and an Overview of Database Functions.
R o of P r o
1
U s e r ’s M a n ua l
Chapter 1
Introduction:
About RoofPro
What is a Database?
RoofPro is a Copyrighted software application that has been written
on FileMaker, a database program by Claris, to provide you with
an easy way to store, manipulate, and manage roof system
information. RoofPro allows you to, at the touch of a few buttons,
view all of the important roof assembly information, system
expiration dates along with associated budgets, summary charts,
and next required actions on each individual roof area. The original
information has been entered into the program when you receive
it, but it can all be changed or updated as new roofs are installed
and as repairs are performed. This program, if updated in timely
fashion, will provide you with current roof system information at
your computer, including roof plans and photographs, so that
referencing any information regarding any roof area can be
performed without having to physically see the asset.
A database is a specific type of environment designed to operate
with large amounts of repetitive data that is stored in such a way
that operations such as Sorts, Finds, calculations, tabulations, etc.
can be performed to easily organize specific amounts of data within
the database. A simple example of an application written on a
database is an address book. An address book can hold unlimited
addresses, phone numbers, fax numbers, etc. The information in
the address book can then be organized, for example, alphabetically
by last name, first name, or what ever is desired. RoofPro is simply
a very detailed address book. The address book example will be
continued throughout the remainder of this explanation and will
be italicized for recognition.
In order to continue, a few basic database terms need to be
discussed so that all the levels of specifics are understood. The
following few terms are used throughout the remainder of the user
manual, so please pay attention here so you are not lost later on.
Since there should be a good understanding of what a database
is, the following terms are organized from the smallest piece of a
database up to the global functions of the database.
RoofPro also offers powerful management tools to the financial
decision maker in several ways. RoofPro is able to calculate
current, projected, and future life cycle costs, which when
compared, provides you with a cost based decision when an action
is required. Projected and future life cycle costs are based on a
twenty year model of an average roof system, providing the
decision maker with critical comparative life cycle costs when
weighing the option of implementing a large repair versus a
complete reroofing project.
A Field is a specific container for data. A field is the basic building
block of a database, when many fields exist at one time. A typical
address book has only a few fields, such as locations for first name,
last name, and phone number. A field is the specific location where
the data for the first name is to be stored.
This user guide has been written primarily to explain the functions
of RoofPro, which is an application which operates on the
foreground of the database program, FileMaker. In this Chapter
we will briefly discuss only the primary database functions and
terms required to operate the RoofPro software application. For
users that require a more in depth understanding of the operating
properties of a database type program, we encourage you to thumb
through the User Manual which is included in the FileMaker
program information provided with that program.
Data is what the information is called that is entered into the field
that is to be stored in the database. Data can be in many forms,
such as alphabetic, numeric, graphic, formula, etc. A simple
example of data would be “John”.
A Layout is a way of viewing, on your monitor and in printed form,
specific data fields. There can be an unlimited number of layouts
in a database. Layouts are one of the primary defining
characteristics of an application on a database. A layout is the
organization of data for, viewing, printing or input purposes. When
you look at the form where information is entered in an address
book, what you are seeing is a layout.
A Record is one repetition of all defined fields which are stored in
the database, whether they contain data or are empty. When there
is more than one record, there are an equal number of repeated
fields and layouts. Each record also contains all defined layouts
for the application. If you were to enter Jack Smith in your address
book including all of the other related information about him, you
would have just created a record. If you then entered Jill Simpson,
R O OF P R O
2
U s e r ’s M a n ua l
Chapter 1
1
2
you would have just created another record
and you would have all of the same
information storing possibilities and
layouts available as with Jack Smith.
3
An Application is the sum of all layouts,
field definitions, scripts, and functions
created on the database.
Found Set refers to the group of records
which have been filtered from all records
contained within the program. A Find is
when you choose to view a group of records
based on similar data contained within
specific fields. Once a Found Set is
established all other remaining records
exist in the background. If you wanted to
just have a list of all of the last names that
had the value “Smith”, all Smiths would be
contained within the found set, leaving all
other names omitted.
2
C
Records can then be Sorted so that they may be viewed in a non
random order. A Sort can be performed by assigning a specific
field by which to organize the found set of records. An address
book is typically sorted in alphabetical order by last name. Sorting
is not required by the user unless an unconventional sort is desired.
For more information on this topic, reference the FileMaker User
Manual.
Find Mode is used when a single or a number of records is
required to be found based on a specific piece of information, or
field value. Entering Find Mode presents the layout currently being
viewed with all blank fields. Choosing the field you wish, type or
use the pop up menu, if present, to enter the data that you wish to
filter all records by. Multiple fields can be used to narrow the find
parameters of the find. If you wanted to find Jill in your address
book, you would enter find mode, locate the first name field and
enter the name “Jill”, and all records containing “Jill” will be found.
Once a record or set of records are found, you are sent back to
Browse Mode so normal operating functions can be performed.
A Mode is a specific way of viewing a selected layout.
The Application can be viewed in three Modes:
1A
Browse Mode is the primary mode that you want to be in to
perform functions, use buttons to Navigate through RoofPro, and
enter or modify data. When in Browse Mode, the pull down menu
provides you with the ability to create new records or duplicate
records. Creating a new record adds a new record to RoofPro that
has ALL BLANK records. Duplicating a record adds a new record
to RoofPro, while copying ALL of the data in EVERY field from the
current record. Deleting records is typically greyed out as a level
of protection of existing data which is controlled by a password
hierarchy. Passwords are discussed in Chapter Five.
R o of P r o
3B
Preview Mode is used when you want to view a layout in the
form that it will be printed. Many layouts print much differently
than they appear in Browse Mode. Headers, Sub headers, Sub
summaries, Grand Totals, and other layout divisions are performed
when a group of records is printed or viewed. Functions, or data
manipulation cannot be performed in Preview Mode.
3
U s e r ’s M a n ua l
Chapter 1
Basic FileMaker
Functions
SIDE BAR
The side bar presents you with information regarding the
application status, and the ability to navigate directly from layout
to layout.
The basic functions of the FileMaker database are only briefly
discussed here as RoofPro has the ability to perform virtually all
functions required by the average user. The FileMaker user manual
describes these same functions in greater detail, however it is
useful to summarize them to provide a general understanding of
the environment. Some functions shown on the menus are not
discussed in this section as they are not critical to the
operation of RoofPro.
1A
By clicking on the button at the top of the side bar, a
menu pops up showing all of the possible layouts that can be
viewed. Navigation throughout the RoofPro Application can be
accomplished this way, however it is not recommended as many
layouts require certain automated or predetermined sort routines,
finds, and modes to provide you with the correct presentation of
information. Several of these layouts are not intended to be
viewed, but if they are, no harm will be done to the program or
the information contained within.
2
The Index Cards represent records
within the application. By clicking on the
cards you are able to page through the
current Found Set of records. By grabbing
and sliding the tab at the right of the cards
you can rapidly page through numerous
records without the data loading for each
record. The number at the bottom right
indicates the number of the current record
in relation to the total number of records in
the found set.
1
2
3
This section indicates the total
number of records contained within the
RoofPro Program.
3
4
This number shows the total number
of records which comprise the found set.
4
5
This section provides you with the
Sort status of the found set only. Options here
are Sorted, Semi-Sorted, and Unsorted. When
navigating via RoofPro Navigation buttons,
records are continually sorted as required by
the current layout.
5
At the bottom of the Side Bar...
6
By pressing this button, the side bar is either activated or
deactivated depending on the current status of the side bar.
6
7
7
8
In order from left to right, the buttons provide you with
the current zoom percentage, the ability to zoom out, and the ability
to zoom in.
8
This button shows the current Mode status, and is a short
cut to changing modes when pressed.
R O OF P R O
4
U s e r ’s M a n ua l
Chapter 1
RoofPro as an
Application
RoofPro is a Copyrighted software application that has been written
by Professional Roof Consultants, Inc. on FileMaker, a database
program by Claris. When viewed through a file browser, RoofPro
will appear as a File Folder. When the folder is opened, several
Files are stored here, depending on the Modules that have been
provided. RoofPro requires the interaction, storing, and sorting
capabilities of related database files, or modules to function
properly. RoofPro is constantly referencing these related files for
data, and on occasion will send you to specific layouts within these
related files. Navigation to related files outside of RoofPro is not
necessary, or recommended.
Several fields have Lists that pop up when the field is activated.
The list is generally used during the data entry process and
functions as a list of repetitive data or a guideline for entry. The
list can be turned off and any data can be entered by simply clicking
in the field again.
On the three Primary layouts, which are discussed in Chapter 3,
there are several fields that are highlighted ORANGE. It is VITAL
that there is data entered in all ORANGE fields, as RoofPro performs
numerous calculations based on the information they contain.
It is important to understand that with any database, you are
working in real time with the application. Saving is performed
automatically as you proceed. Changes are recorded when they
happen, and not at the end of your work session or when you
choose. If you delete data, it is gone, and there is no bail out
because you are not able to quit without saving. Always bear this
in mind when planning on experimentation.
Sometimes, a field’s data possibilities are limited by pop up Menus.
When a menu pops up when a field is activated for data entry,
data choices are restricted to menu options only. The choices are
restricted for many reasons that are critical to the performance of
the Application.
R o of P r o
5
U s e r ’s M a n ua l
R O OF P R O
6
U s e r ’s M a n ua l
2
CHAPTER 2
Learning How to Navigate Through RoofPro
R o of P r o
7
U s e r ’s M a n ua l
Chapter 2
NAVIGATOR
Finding your way around
RoofPro starts with the Navigator
layout. When you open RoofPro,
the Navigator screen is displayed
and ready to use. This layout is
intended to guide you to all
information contained in the
database via specific roof area
detail layouts, building summary
information, and other interesting
and valuable data. All other
Layouts in the program are
equipped with a button that will
bring you back to this layout if
required. The buttons on the left
are utilized to filter information as
required to view reports or data
sheets, prior to any navigation
through RoofPro. The buttons on
the right are then used to move
within the program to specific
layouts, to perform functions.
1
4
5
2
6
3
7
8
9
1A
Prior to navigation, select
Choose a Building to find a
specific building for which to view
or enter data. This button will
send you to a layout where you
are able to select only one
building.
the Choose a Building layout, and, after selection, directly to the
Building Summary Layout where life cycle costs are summarized.
(Refer to Chapter Four for additional information on this layout.)
2B
Prior to navigation, select Choose a Roof Area to find a
specific building and roof area for which to view or enter data.
This button will send you to a layout where you are able to select
any number of roof areas for any number of buildings.
6F
Pressing this button brings you to the Leak Management
module where costs, frequencies, and other pertinent data associated
with roof leaks can be recorded by building and roof area.
3C
Prior to navigation, select Find All to choose ALL buildings
and roof areas within the program. This button also sorts all
records alphabetically, in descending order first by building name
and then by roof area for logical viewing during navigation through
data sheets.
4D
7G
Pressing this button brings you to the Repair Management
module where costs, frequencies, and other pertinent data
associated with roof repairs can be recorded by building and
roof area.
8H
The Current Roof Area Plaque provides you with
identifying characteristics of the current record being viewed.
To navigate to the numerous reports, data sheets, and
other information press the Reports button. This button will send
you to a layout where individual reports, etc. can be easily accessed.
5E
9I
The Summary Data Plaque is critical to the outcome of
the decision making data calculated on the Summary Chart report.
The specific functions and requirements of the plaque is described
in detail in Chapter 4.
The Building Summary button has been located on the
Navigation screen to provide rapid links to the most vital and
commonly accessed layouts in RoofPro. This button sends you to
R O OF P R O
8
U s e r ’s M a n ua l
Chapter 2
REPORTS
Once the Reports button is pressed on the Navigator
Take some time to familiarize yourself with the types of forms and
reports which are available. Chapter 3 and Chapter 4 describe in
depth the characteristics of each layout that can be reached from
the reports layout.
screen you are transported to this layout. From the Reports layout,
you can navigate to all other layouts in RoofPro. Before selecting
a specific report to go to, be sure that you have specified a building,
group of buildings, or roof areas, as the data presented in the report
will only apply to the found set. If you have not specified a found
set, or an individual biulding, use the Navigator button to return
so that you can choose a building.
It is highly recommended that all navigation to other layouts are
performed from this screen, as many of these layouts require
certain automated sort routines, finds, and calculations to be
performed, and modes changed, to provide you with the correct
presentation of information.
The buttons are labeled as to which report or type of information
can be viewed, so an in-depth description is not required here.
R o of P r o
9
U s e r ’s M a n ua l
Chapter 2
CHOOSING A BUILDING
When you press the Choose a Building button on the
Navigator screen, you are sent to this layout. From this layout,
finds are performed for all records associated with the building
names shown.
1A
2B
When the Choose a Building layout appears, a list of
Use the Press To Continue button when you have made
your selection to find all records with that building name. After
pressing the button, RoofPro brings you back to the Navigator so
that you may then proceed to any form or chart that you wish.
all the buildings contained within RoofPro is shown. By pointing
and clicking on a building of your choice, the radio button will fill
in indicating the building for which all existing records will be
found. You can change your selection if you wish, but only
ONE building can be chosen at a time. If you wish to find
more than one building at a time, select the Choose A Roof
Area button, which is described on the following page.
3C
If for any reason the Press To Continue button does not
work or you pressed Choose a Building in error, press this button
to go back to the Navigator. Pressing this button will send you
back to the Navigator in Browse Mode with the existing found set.
2
3
1
R O OF P R O
10
U s e r ’s M a n ua l
Chapter 2
CHOOSING A ROOF AREA
When you press the Choose a Roof Area button on the
Navigator screen, you are transported to this layout. From this
layout, finds are performed for all records associated with your
personal selection. From this screen you may choose any
combination of individual records you wish. Each time this layout
is accessed, all previous selections are wiped clean, leaving you
with no selected records.
1A
3C
If you have more individual records to find than not,
use the Select All button to have RoofPro automatically check ALL
check boxes for all records. After this function, proceed down the
list and uncheck the records you do not want to be found. This
button is intended to be used as a time saver feature when there
are a large number of records contained within RoofPro. All records
can also be chosen here if desired.
When the Choose a Roof Area layout appears, a list of all
the records contained within RoofPro sorted by building number,
building name, and roof area so that specific records may be located
easily. By pointing and clicking on a roof area of your choice, the
check box will fill in indicating the building and roof area which
will be filtered from all records contained in RoofPro. You can
change your selection if you wish, by simply selecting the check
box again, which will clear the selection. If you wish to find more
than one roof area at a time, continue selecting the check boxes
that correspond to the building name and roof area that you wish.
4D
If for any reason the Find button does not work or you
pressed Choose a Record in error, press this button to go back to
the Navigator. Pressing this button will send you back to the
Navigator in Browse Mode with the existing found set.
2B
Next, use the Find button after you have made your
selection to find all records selected. After pressing the button,
RoofPro brings you back to the Navigator so that you may then
proceed to any form or chart that you wish.
2
4
3
1
R o of P r o
11
U s e r ’s M a n ua l
Chapter 2
OTHER NAVIGATION TOOLS
CRITICAL NAVIGATION BAR
The Critical Navigation bar is
used for high speed
navigation to closely related
specific data layouts that are
frequently referenced within
a found set. The bar is found
on any layout that can be
accessed by the use of the
bar on any other given layout
for easy returning. The
buttons on the bar change as
you proceed from layout to layout essentially omitting layouts that
do not need to be accessed. The look of the bar and organization
of the buttons also change.
RETURN BUTTON
This button is your friend. If you happen to get lost, go to the
wrong place, or need to abort an operation, pressing this button
will return you to the Navigator, where you can restart. This button
is located at the top of all layouts.
OTHER BUTTONS
Other navigation buttons are located throughout RoofPro where
required to perform tasks or just to make life easier. All buttons
are labeled as to the function they perform, so don’t be shy.
If a button is labeled PRINT, use it, as some special sort or find
will be required to print the document properly. Printing is covered
more in depth in Chapter 5.
TROUBLE SHOOTING
If you find that buttons do not work when pressed, you are probably
in Preview Mode. Select Browse Mode to get buttons to work
again. Many Reports require RoofPro to be in Preview Mode for
proper display of data. RoofPro usually notifies you that you are
entering preview mode, but sometimes you end up there without
realizing it. Buttons do not work in Find Mode either.
R O OF P R O
12
U s e r ’s M a n ua l
3
CHAPTER 3
Getting Familiar with the Details of the Specific
Data Layouts and the Backbone of RoofPro
R o of P r o
13
U s e r ’s M a n ua l
Chapter 3
ROOF EVALUATION
The Roof Evaluation is the first of the three primary
4D
Insulation data, when applicable, is recorded in this area
through pull down menus and keyed in fields. The type of insulation
material, and the method of construction of the assembly, is
important to assist in determining how a roof system will perform
and function. The type utilized is presented within this section,
along with a written description of material and installation. Wet
insulation will affect roof system and building performance.
Evidence of wet insulation is documented if suspected or tested.
The method of ventilation, when deemed relevant, is also noted
within this section.
specific data input layouts which construct the back bone of
RoofPro. This layout outlines all existing conditions and
information which makes up the roof system, and related systems,
covering a particular roof area. Each Roof Evaluation documents
conditions observed and recorded at one particular roof area as
designated on the roof plan. The evaluations are usually categorized
by Building Name, but can be sorted in a number of different ways
to suit your needs. Once you enter this layout, you will notice the
Critical Navigation Bar at the top of the screen. This allows you
quick access to other primary specific data layouts, such as; the
Roof Plan, Photo Pages, Management/ Maintenance/ Repair layout,
and Design Options.
5E
Drainage information confirms how this particular roof
area evacuates water from the surface of the roof. The general
method utilized is checked via radio buttons, with a written
description detailing the type used. Ponding water conditions,
where water does not adequately leave the surface of the roof, are
also noted. Overflow drainage systems are required by code, and
are also described within this section. Sizes of leaders, pipes, and
gutters are verified, and, when suspected, calculations can be
performed to determine if the system is adequate to drain the roof
under extreme conditions.
1A
The top portion of this document records the specific
Roof Area evaluated. The building Owner, Building Name, and,
when applicable, the Building # is identified here, along with the
general location or address. The Roof Area designation is recorded
at the upper right corner of the form; this designates a particular
section of the roof when more than one roof area exists over the
building evaluated. Lastly, the date of the evaluation is recorded,
along with the weather conditions present at the time of the survey.
All data is keyed into fields.
2B
6F
Counterflashings, by definition, are considered formed
metal sheeting (or other material) attached to walls, edges,
penetrations, and other structural components, and cover and
protect the leading edges of the roof membrane. A series of pull
down lists and menus assists with selection of the type of flashing
utilized, along with the material, and the way the material is joined
or seamed, is itemized. A written description supplements the
listings to document all conditions and construction, and to identify
current or potential problem areas.
General information with regard to the building
construction is recorded here. Statistics such as the square footage
of the roof area, roof deck composition, roof supporting structure,
and the building construction date are researched and recorded.
The function of the building is logged for purposes of recording
design criteria. Identifying the last year of roof replacement, when
applicable, is considered a valuable tool for determining life
expectancy and performance. When available, the cost is inputted,
or, estimated, for purposes of building a life cycle cost benchmark
for cost analysis. Most information is keyed in, with some fields
requiring selection from a predetermined pull down menu or list.
7G
Penetrations confirm the type, and method of flashing,
of objects which penetrate through the roof area. Special
considerations, such as roof expansion joints and HVAC equipment
on the roof, are also recorded within this section. The quantity of
penetrations, along with the type, directly relate to the performance
and duration of the roof system. Penetration types can be selected
via an on screen list, or customized by selecting “other” and keying
in customized descriptions within the on-screen dialogue box.
3C
Membrane data includes a written description of the
existing roof system(s) covering the area evaluated, along with a
generic description obtained from a pre-determined pull down
menu. The type of membrane is determined by visual and physical
observations, and, when permissible, a 1-1/2" diameter core cut
is taken to sample the existing roof construction. Coring also helps
to determine how many roof systems are currently in place, and,
along with selective sampling, can assist in determining if asbestos
containing materials were used for construction of the system.
Performance data, such as past repair and leak activity, is obtained
through assistance and interviewing of building owners and
occupants. The roof system is then categorized by it’s general
type for later reference and cataloguing via pull down menu located
at the far left of the section.
R O OF P R O
8H
Notes: This section elaborates, in detail, all of the
conditions found during the survey of the roof area. A general
condition assessment is found here, as well as a detailed summary
of areas in need of attention with regard to repairs. The history of
repairs may be found within this section, along with notes
pertaining to special and / or urgent circumstances. When
applicable, and when directly related to the performance of the
system, other building functions, such as cornices, bldg. joints,
roof top equipment, etc., will be found within the Notes section.
This information is simply keyed into the field.
14
U s e r ’s M a n ua l
Critical
Navigation Bar
Chapter 3
1
2
3
4
5
6
7
8
9
10
9I
Estimated Life of each major component of the roof
system is applied here. Membrane includes the overall
uninterrupted field of the roof system. Base Flashings are
horizontal to vertical transitions, such as parapet walls or curbed
roof penetrations. Counterflashings include all flashings which
are incorporated into the system, and overlap the edges or
R o of P r o
terminations of the roof membrane. A general range of life
expectancy is given based on historical system performance, and
the conditions found and observed during the evaluation.
10
J.
Your technical specialist primarily responsible for the detailed
field survey and evaluation of this particular roof area, is named here.
15
U s e r ’s M a n ua l
Chapter 3
MANAGEMENT/
MAINTENANCE/REPAIR
Knowing how to keep your existing roof systems
will differ from roof area to roof area depending on the roof’s
proximity to trees and vegetation, use of the roof area for rooftop
equipment maintenance, and other activities which may have an
impact on the roof.
in peak condition starts here. A roof system can demand a lot of
attention over the course of it’s life cycle. This section explains
what is considered priority, from a management and maintenance
point of view, in order to take the roof through it’s maximum
estimated life. This layout, also referred to as the MMR form, is
the second of the three primary specific data input layouts. Once
familiar with this form, it will let you know what to do from a
Management (Owner / Consultant) perspective, a Maintenance
(Owner’s personnel) perspective, and a Repair (Owner / Contractor)
perspective.
•
Cost: This is an estimated annual cost, given for each roof
area, which should be budgeted for performing the actions, per
the schedules, as recommended. This value is estimated by PRC
based on current hourly billing rates obtained from the owner. The
complexity and access to the roof will significantly impact
maintenance costs.
1A
At the top of this layout, the Owner is identified along the
bar at the far left, with the name of the building and the particular
roof area specified at the far right.
•
Action: This part of the table identifies and documents the
general tasks recommended to be performed at each scheduled
visit to the roof. In most cases, along with general duties outlined
in detail within the report, actions will only include house keeping
tasks such as keeping the roof clean, and performing emergency
leak repairs when required.
2B
The Management table outlines specific items
recommended for observance when per forming roof top
inspections. The table includes the following information:
4D
The Repair table serves as the general outline for current
and / or future repairs recommended for each particular roof area.
This table holds a variety of information regarding repairs to the
existing roof systems, including the following :
•
Schedule: A recommendation is given here, regarding the
frequency in which the particular roof area should be inspected,
and management files updated.
•
Cost: An estimated annual cost, given for each roof area,
which should be budgeted for thorough, updating inspections. This
value, under most conditions, is automatically calculated on a
square footage basis, with a minimum value given for small roof
areas. This number can be adjusted by entering a whole or decimal
number within the “Complexity” field located within the
Management bar. The value can be adjusted up or down, with
conditions for adjustment relating to roof complexity, special or
complex building use, and other criteria which significantly impact
inspection time.
•
Method : This letter and number combination is an
abbreviated repair method code , and is identified on specific repair
method layouts for quick reference. It relates specifically to the
type of repair listed.
•
Type of Repair indicates briefly the basic type and general
nature of the repair recommended for the specific roof area. To
add or change a repair method to the table , you simply move your
cursor to a blank row , or the repair you want to change, & click
on the row. At this point, you will have activated a menu of repairs
to select from. Choose the repair desired, and then click once
again on your choice to place the repair method within the table.
The schedule for the selected repair will automatically be placed
within the schedule column of the table. A year must then be
keyed into the highlighted Start Date to complete your data entry.
•
Action: This part of the table identifies and documents high
priority items which, along with more general inspection tasks,
should be considered urgent, or should take precedence. Usually,
weaknesses in the roof system are identified here.
3C
The Maintenance table outlines the basic activities in which
the building Owner’s maintenance personnel, or maintenance
contractor, should perform at this particular roof area. Detailed
objectives are outlined further within your report. This table
includes the following information:
•
Schedule relates directly to the type of repair listed with
regard to the longevity of the repair. Once implemented the
scheduled offers an average life span of the completed repair so
that the program can automatically schedule the next repair period.
Schedules are automatically entered into this field when a repair
is entered. Start Date indicates the year in which the
recommended repair should be implemented in order to prove
effective. This date is keyed into the field in the form of a year.
•
Schedule: Like the Management table, a recommendation is
given here, regarding the frequency in which the particular roof
area should be maintained by maintenance personnel. Frequencies
R O OF P R O
16
U s e r ’s M a n ua l
Chapter 3
Critical
Navigation Bar
1
2
3
4
5
6
7
R o of P r o
8
17
U s e r ’s M a n ua l
Chapter 3
5E
•
Complete Date is generally left blank when you initially
receive your program. Once the repair has been completed,
management personnel enters the year in which the repair has
been completed. After Complete Date is entered, the start date is
automatically updated to the lower number shown on the schedule
corresponding to the repair method, automatically scheduling your
next repair.
This field holds general budgeting information which
does not appear on this particular form when printed. It is shown
here for quick reference, and is generated based on the cost
obtained for the existing roof, when entered onto the Evaluation
Form. The cost shown on this layout is escalated by a percentage
as determined on the Summary Data Plaque within the Navigator
layout (reference Chapter 2). The time frame escalated is from
the existing roof installation date to the current year date shown
on the Navigation layout. This number is utilized under certain
circumstances, for estimating future replacement costs for each
particular roof area.
The repairs listed on the table are stored within a linked module of
Roof Pro. You can view each listed repair by moving your cursor
to the Repairs bar and clicking. At this point in time, you have
entered a separate module in order to view the repairs selected for
this particular roof area (reference Chapter 6).
6F
Referencing your repair methods can also be achieved by
referencing the Repair Procedures section within your Roof
Management Program Report. To learn more about the types of
roof repairs recommended within this part of the layout, it is
advisable to review that section of your report thoroughly. It
contains detailed and valuable information regarding properly
implemented repair procedures.
7G
Similar to your Estimated Cost of New Roof Today, the
Replacement Unit Cost is shown here for quick informational
reference, and used as a tool for future budgeting and evaluation.
This number is generated via calculations from Estimated Cost of
New Roof Today, the square footage of the roof area, and the
entered inflation rate. This particular field does not appear once
printed, as well.
Recommended Repair automatically displays the year
in which the next repair, or repairs, should be performed. This
number is generated by searching the Repair Table for repairs
required in the year nearest, or at, the current year.
At the bottom of the table, general notes with regard to repairs
may be added, and, if your roof is nearing expiration, a repair
warning will indicate that repairs should only be performed on an
as needed basis, as this particular roof area is scheduled for
replacement in the near future.
8H
Recommended Reroof is boldly shown here to quickly
indicate to you when to expect a major roof replacement. The year
is generated based on predictions made for the existing systems,
and the year of replacement entered within the detailed Design
Options layout.
Again, the year shown within this field is
automatically entered.
4
5
6
7
R O OF P R O
8
18
U s e r ’s M a n ua l
Chapter 3
DESIGN OPTIONS
The third of the three primary specific data input
layouts, the Design Options form presents you with criteria
established for the roof, recommendations for the next actions
pertaining to your roof, and a detailed cost analysis of options
presented. In most cases, one or two options are submitted for each
roof area evaluation. On occasion, when several choices can
realistically be considered, up to four Design Options can be presented
to display system variations and further cost analysis and comparison.
Critical
Navigation Bar
1
2
3
5
4
6
1A
At the top of this layout, the Owner is identified along the
bar at the far left, with the name of the building and the particular
roof area specified at the far right.
next action shown above. When recommended to Maintain, the
option items are relatively simple, referencing the MMR form.
Repair and Replace actions require an itemized scope of work to
be entered within this field. The scope includes specifics directly
related to some or all of the listed Design Criteria, in an effort to
provide an option which will perform with the least amount of
maintenance and repairs required in the future.
2B
Each roof area over each and every building evaluated owns
specific functions and uses. Design Criteria identifies the specific
conditions which directly or indirectly relate to how the roof system
performs, both short term and long term. These Design Criteria
items assist in defining the next action required at your roof, as
well as system selection when roof replacement is required. Two
fields are available for listing and keying in criteria determined for
each particular roof area.
3C
While it is important to address all items considered priority, it should
be realized that this form, or section, should not be intended to be
used as a substitution for a properly prepared project specification.
5E
Design Option Two identifies a second action or system
considered for this particular roof area. Data is entered within
this section the same method as with Design Option One. While
Design Option One is primarily the recommended option, Design
Option Two may offer a less expensive, more expensive, or more
creative alternative, and may be considered over Option One if so desired.
However, as stated previously, the action presented within Option One
should always be considered the primary action to be selected.
Design Option One describes what your first action should
be for the particular roof area being evaluated. Generally, three
options can be considered for the next action; Maintain, Repair, or
Replace. The selected action is identified at the top of this table,
and is entered by picking on a menu located within the field at the
top of the table.
Under the next action, a brief description of the next action, or it’s
intent, is keyed in.
4D
6F
Just like Design Option One, this space is reserved for
keying in a more detailed and itemized list of objectives relating to
Design Option Two.
This space is reserved for keying in a delineated list of
items considered important when implementing the recommended
R o of P r o
19
U s e r ’s M a n ua l
Chapter 3
7G
A recommendation, based on predictions made within the
evaluation, is made here with regard to the year of implementation
of roof replacement, regardless of the next action. A year must be
keyed into the highlighted field. If the next action happens to be
Replace, then a field below the Next Reroof Date appears which
determines the estimated longevity of the Option. This number is
keyed into this field as well.
•
Estimated Life: Based primarily on the selected action, scope
of work, and specific criteria addressed, a probable life expectancy
of the recommended action is automatically entered into this field
based on previously entered values.
•
Annual Cost: This is an average yearly cost automatically
calculated and entered by taking the Budgetary Cost, adding in
Repair Cost Allowance, adding Mngt. / Maint. Costs (multiplied by
the number indicated within Estimated Life), and the sum divided
by the value indicated within Estimated Life. It is important to
understand that this cost is developed without an escalating factor
(inflation rate), and is intended to be used as a tool for simplified
decision making when design decisions are being determined.
8H.
This section of the table outlines a budgetary cost analysis
of Design Option One, and includes the following:
•
Budgetary Cost: A budgetary cost estimate based on direct
construction cost with regard to scope and system outlined within
Design Option One. This number is automatically calculated based
on other entered values; no manual input is required within this
field. If Design Option One indicates Maintain, then “N/A”
automatically appears within this field.
9I.
The Advantages portion of the Design Option table simply
states a select group of considerations which prove advantageous
with regard to Design Option One. Weighing advantages and
disadvantages aids in determining and selecting a recommended
action.
These items are inputted via a pull down menu, or manual input
for customization.
•
Unit Cost: A cost per square foot of roof area is entered into
this field when Design Option One indicates Repair of Replace.
The unit cost is then multiplied by the square footage of the roof
area to calculate Budgetary Cost for the Option.
When the Option indicates Maintain, this field automatically shows
“N/A”, with no data input required.
10
J.
Disadvantages are listed within the last section of the
table, and, converse to the Advantages section, state potential
negative aspects of the recommended action.
These items are inputted via a pull down menu, or manual input
for customization.
•
Mngt. / Maint. Cost: As you will recall, Management and
Maintenance costs, per roof area, have been assigned at the top of
the two tables located within the MMR form. Those two costs are
combined and automatically entered into this field.
1K.
1
This field receives keyed in year dates corresponding
to the predicted replacements, repairs, and future expiration dates
directly relating to the action stated and recommended within
Design Option Two.
•
Repair Cost Allowance: All systems installed will ultimately
require at least one minor or major repair cycle to keep the system
in shape and performing properly, or, to simply extend the system
beyond it’s expected life cycle. Depending on the type of
replacement system, a dollar figure is estimated here and keyed
into this field.
R O OF P R O
20
U s e r ’s M a n ua l
Chapter 3
12
L.
15
O.
The budgetary information within this section relates
A final, keyed in recommendation is inputted within this
field as a final statement, or punctuation, with regard to the future
of the particular roof area evaluated. Recommendations weigh
heavily on existing roof system performance (past and present),
current roof use, future roof and building use, and other important
Design Criteria which significantly impact roof system
performance.
directly to Design Option Two, and is keyed in, or auto-entered in
the same fashion as Design Option One.
1M.
3
Like Design Option One, Design Option Two advantages
are inputted into these fields.
14
N.
Again, similar to Design Option One, Design Option Two
disadvantages are inputted into these fields.
Critical
Navigation Bar
1
2
3
5
4
6
7
11
8
12
9
13
10
14
15
R o of P r o
21
U s e r ’s M a n ua l
Chapter 3
ROOF INSPECTION
The Roof Inspection form is an abbreviated layout which
combines many important existing conditions found on the Roof
Evaluation form, along with condensed recommendations with
regard to immediate and future maintenance and repair activities.
The form is primarily used for simplified management and
maintenance programs, and can also be utilized for simplified
updating of existing programs.
11
55
The top right portion of this document records General
information including the specific Building and Roof Area inspected.
The building Owner is identified here, along with the general
location or address. The date of the inspection is keyed into the
field beneath the Roof Inspection title.
Estimated Life of each major component of the roof
system is applied here. Membrane includes the overall
uninterrupted field of the roof system. Base Flashings are
horizontal to vertical transitions, such as parapet walls or curbed
roof penetrations. Counter flashings include all flashings which
are incorporated into the system, and overlap the edges or
terminations of the roof membrane. A general range of life
expectancy is given based on historical system performance, and
the conditions found and observed during the evaluation. Life
expectancies are keyed into each of the fields here.
22
Roof System data includes a generic system title
generated from a pull down menu, written description of the
existing roof system(s) covering the area evaluated, and the square
footage of the roof area evaluated. General roof deck and insulation
information is also listed by selecting from a pull down list. The
leak history is recorded via radio buttons and keyed in information.
Warranties, if applicable, are keyed in as well.
66
The Notes section elaborates , in detail, all of the
conditions found during the inspection of the roof area. A general
condition assessment is found here, as well as a detailed summary
of areas in need of attention with regard to repairs. The history of
repairs may be found within this section, along with notes
pertaining to special and / or urgent circumstances. When
applicable, and when directly related to the performance of the
system, other building functions, such as cornices, bldg. joints,
roof top equipment, etc., will be found within the Notes section.
33
The Inspection category receives data, keyed into fields,
which references method of access gained to the roof area, notes
of recent maintenance activity, along with a rating of the quality of
the past repairs performed in the past, via radio buttons. High
priority items observed during the inspection, which should be
monitored during future inspections and maintenance, are keyed
into the fields at the end of this section.
44
77
Your technical specialist primarily responsible for the
detailed field survey and inspection of this particular roof area, is
named here.
Maintenance and Repair items are considered high
priority, and, itemizing these tasks can be considered the sole
purpose of this form. When an inspection of your roof reveals
immediate or potential problems, these items are keyed into this
field, and, along with the recommended date of implementation of
repairs listed, a budgetary cost estimate is provided. All data within
this section is keyed into individual fields.
R O OF P R O
22
U s e r ’s M a n ua l
Chapter 3
1
2
3
4
5
6
7
R o of P r o
23
U s e r ’s M a n ua l
Chapter 3
ROOF ACTION FORM
The Roof Action Form is an abbreviated combination
of the Evaluation Form and the MMR form, and is intended to
quickly reference immediate actions required and recommended
for each individual roof area. The majority of the information found
on this layout is generated from data entered on the primary specific
data layouts, and automatically entered here. If information is
entered within this layout, it is entered in the same manner as
referenced on the Roof Evaluation form and the MMR form.
11
66
Maintenance is considered to be a high priority item when
it comes to extending roof life. Descriptions of key tasks are stated
within this table, and either entered here or within the MMR form.
The notes column is intended to be used to document additional
information found, or other related items found, when the work
was being performed. The Complete Date can then be keyed in to
finalize the data entry with regard to updating maintenance
activities.
The location of the building , the building name, and
specific roof area evaluated are shown here. The building number,
when applicable, is referenced at the far right.
22
Generic system type, along with the surface type, is shown
within this area.
33
If the roof system happens to be covered under an
existing warranty, a radio button will be used to indicate yes or no,
and the manufacturer’s name is keyed
into the field beneath the radio
buttons.
Critical
Navigation Bar
44
The date which appears on
the original evaluation found on the
Roof Evaluation form is shown within
this field.
55
1
2
3
Just like the MMR form, this
layout contains a Repair table. This
table lists repairs recommended for
the current year, or next year of
repair. If desired, the table can list
repairs for a year manually entered
into the field following the “Repairs
For” field, and then pressing the
Refresh button at the left of the table.
If no repairs are scheduled for the
year entered, a message will appear
which reads “No Repairs Required At
This Time”. Repairs within this table
are shown as entered within the MMR
form, with two fields to the right of
the Type of Repair for entering data
with regard to actions taken. The
Notes field can be used to key in any
information which may relate to the
repair performed, and the Comp.
Date is intended to be used to key in
the year in which the recommended
repairs were actually performed.
R O OF P R O
4
5
6
24
U s e r ’s M a n ua l
Chapter 3
ROOF PLAN
Roof plans are prepared for the purpose of providing
When printing this layout, use the print button provided. Directions
will be displayed via on-screen dialogue boxes intended to assist
you in formatting larger drawings to scaled down 8x11 size in the
event that an 11x17 printer is not available. Follow the directions
offered within the dialogue boxes for proper printing of your roof plan.
an accurate plan drawing of the roofs covering your building or
buildings. Penetrations are accurately shown, along with roof
slopes, drainage types, parapets, edge conditions, and other roof
related items. All roof plans generated for your roof management
program are originally created using AutoCAD software. Once
completed, the drawings are then converted into a non-editable
file and imported into this layout for viewing and printing.
Critical
Navigation Bar
R o of P r o
25
U s e r ’s M a n ua l
Chapter 3
PHOTO PAGE
The photo page simply documents
benchmark
conditions of each individual roof area evaluated. Two digitally
produced photos are imported into the photo page fields for a
general view of your roof. The building name and roof area code
are identified at the bottom of this layout.
Critical
Navigation Bar
R O OF P R O
26
U s e r ’s M a n ua l
4
CHAPTER 4
Getting the Most from the Information in RoofPro
From Charts and Summary Data Layouts
R o of P r o
27
U s e r ’s M a n ua l
Chapter 4
BUILDING SUMMARY
The Building Summary Layout is a critical financial
management tool used to evaluate costs associated with the
existing roof systems on a per building basis. The Building
Summary also presents you with a Life Cycle Cost Analysis on a
per roof area basis so that informed decisions can be made
regarding the Next Action required on the roof area.
major repair work is performed often. If this number does not get
smaller, this is an indication that funds are being exhausted on
this roof system, possibly triggering an inquiry as to the reasons
for high costs.
Projected Life Cycle Cost calculates, based on real cost
information, or estimated costs if actual expenditures are not
available, a target for where the Life Cycle Cost to Date should be
close to when the roof system is at or near expiration.
1A
General Data provides you with the building number if
applicable, the date of the last roof installation of the current roof
area, and the total square footage of all combined roof areas. The
date of the last roof installation can be viewed on a per roof area
basis by paging through the records via the index cards in the
Side Bar Feature.
Life Cycle Cost to Replace is a financial management benchmark
for basing Repair versus Replacement decisions. This number is
not intended to be the only criteria to be used when faced with
making the decision between a costly repair to extend the life of
the existing roof area, or choosing total replacement. The
benchmark number is based on a 20 year model of an average
roof system and is only accurate when being compared to a
comparable roof system in service. If this number is used in
conjunction with a 40 year roof system it will always be high, and
vis versa if compared to a roof system that is only 10 years old.
2B
Costs to Date tabulates all related Management/
Maintenance/Repair activities for the building chosen that have
been recorded in the Roof Repair and Leak Management Module of
RoofPro (reference Chapter 6 and 7). If there are no costs recorded
for these activities, or the Module is not available, “N/A” will appear
in this location. As the costs are entered into the Repair and Leak
Management Module throughout the years, RoofPro will have the
capability to provide you with a more true and accurate estimated
Life Cycle Cost on a per building
and per roof area basis.
3
Anticipated Costs is a
summary of all costs, on a per
building basis, associated
with estimated Management/
Maintenance/Repair activities
as indicated on the M/M/R
Layouts and Design Options
Layouts for the selected
building.
2
1
3
4
The Lower half of the
Building Summary is a Life
Cycle Costs Analysis on a per
roof area basis.
4
Life Cycle Cost to Date
calculates the current life
cycle cost. This cost changes
as the current year changes
and as new costs are incurred
on the roof area. This number,
should always move in a
downward fashion unless
R O OF P R O
28
U s e r ’s M a n ua l
Chapter 4
SUMMARY CHART
This chart can be considered the king of RoofPro’s
33
The next Action for the particular roof area is identified
here. The data inputted within Design Option One is interpreted
in terms of three basic next actions: Maintain, Repair, or Replace.
The selection’s estimated cost is shown under the action, along
with a prediction of the life span of the action or existing roof
system if the action is implemented (in the case of Repair and
Maintain). You will notice that, when Maintain is selected, a cost
does not appear, as there are no direct construction costs related
to maintaining a roof system.
summary data layouts. The information contained within it is
summarized from data entered throughout the program, specifically
the Navigator layout, and the three primary specific data input
layouts. The table configuration, with five different categories
labeled, can disclose a generous amount of information in a
simplified format.
11
The Designation section discloses general information
such as the building name (highlighted), number, roof area code,
and the total square footage of the roof area.
22
Now, what you will also find within this part of the layout, is a
priority field for inputting a rating of each and every roof area.
The priority ratings typically consist of 1w, 1, 2, 3, 4, and 5, and
are inputted via a pull down list activated by clicking in the field.
Definitions of these ratings are individually defined within your
roof management report.
Existing Conditions recaps, in general terms, all of the
roof system information currently in place, including insulation
and substrate. The year the last roof was installed is listed here,
as well as the predicted year of expiration (Life).
1
R o of P r o
3
2
29
U s e r ’s M a n ua l
Chapter 4
44
The Budget column. This section serves as a quick reference
to budgetary costs for now, and on into the future. The contents
here can be defined as follows:
•
Replace indicates the estimated direct construction cost to
replace the roof in the current year (first number), and the year
highlighted. Generally, if the first action is recommended to
Replace, the replacement cost is generated from Design Option
One. Now, if the first action is not a replacement, but rather a
Maintain or Repair, then the budgetary cost automatically inputted
into this field originates from estimated, or obtained, first roofed
costs entered into the Roof Evaluation form. It is important to
note that, when this number is used, it is based on replacement
using a system and scope matching the existing conditions,
not necessarily including any improvements or addressing any
design criteria.
•
Code: Typically reserved for inputting a budget code, or
source, but can include any type of sorting data desired. This data
is keyed into the Summary Chart here.
•
Along side the Code field, you will see two years; the first
being the current year, and the second a number as determined by
data entered within the Summary Data Plaque on the Navigator
layout. This means that the second number (highlighted) can be
either the current year, any arbitrary year selected by the user, or
the year of roof replacement as determined within Design Option
One on the Design Option layout. The point here is to be able to
compare costs for roof replacement, whether you desire to replace
as recommended, or would like to what it may cost in a year as
arbitrarily selected.
The second number (highlighted) is the cost, based on the same
principles as stated above, except it is adjusted by automatically
escalating the inflation rate to match the year entered, shown
highlighted at the top of the section.
55
Warranty information, along with priority ratings, is the
only other information manually keyed into the Summary Chart.
Typically, the roof membrane materials manufacturer is inputted
here, along with the year of implementation, and the year of the
warranty’s expiration. The contractor originally responsible for
installation of the system can also be entered into this field, if desired.
•
Life Cycle is the number generated from the Annual Cost
presented within the budget section of Design Option One. It is
here to show you how much you would disburse for the investment
if it were divided into equal payments divided by the number of
years predicted for the life cycle of the roof. Remember:
management, maintenance, and repair costs are also calculated
into this budgetary number.
•
Mngt. / Maint.; as
stated within the Design
Option form on Design
Option One, and detailed
within the MMR form,
these are management
and maintenance costs
predicted
and
recommended to be
budgeted for the roof area.
R O OF P R O
4
30
5
U s e r ’s M a n ua l
Chapter 4
YEARLY COST SUMMARY
RoofPro can assist you with budgeting for the next
Using resourceful calculations, estimated budgetary costs for
repairs and roof replacement activities for the buildings evaluated
are recorded showing estimated costs for the next twenty years,
starting with the current year. The first column indicates the year
for budgeting; the second shows costs estimated for Repairs; the
third column displays estimated costs for Replacements; and the
fourth column presents the total cost, for repairs and replacements,
recommended to be budgeted for the year shown within the first
column. Costs shown are actually escalated by an inflation rate,
on a percent per year basis, via the inflation rate as entered within
the Summary Data Plaque found on the Navigator layout.
20 years with the Yearly Cost Summary. This table automatically
generates annual costs based on numbers, predictions, and
estimates previously entered into the three primary specific data
input layouts. Again, as with all other summary information and
layouts, the chart will generate costs for the found set, so pay
particular attention to how you find and sort within the Navigator
layout before you select this layout.
R o of P r o
31
U s e r ’s M a n ua l
Chapter 4
ACTION SCHEDULE
RoofPro offers the Action Schedule
as a graphic
representation of future activities for all of your roof areas covering
your buildings. This schedule sorts and lists the buildings by
location and roof area in order of roof replacement, starting with
areas in need of replacement soonest, and descending to roof
replacements scheduled further in the future.
future. Two different symbols are located within the grid; one
indicating recommended first repair, the other indicating
recommended next replacement. The replacement date is displayed
at the far right of the table as well.
This chart is generated from data inputted into the three primary
specific data input layouts.
The table uses symbols, as shown within the key at the top of the
layout, placed within the grid spaces represented by years. The
grid starts with the current year, and extends 20 years into the
R O OF P R O
32
U s e r ’s M a n ua l
Chapter 4
ROOF AREAS BY PRIORITY
When entering this layout from the Navigator,
RoofPro sends you to a find screen where you are able to select
the priority number, and find associated roof areas with a matching
priority. This is helpful when you want to determine which roof
areas require immediate attention, and which do not when grappling
with budget issues.
After selecting the priority, you have the option of choosing a
location if your buildings are spread out, if not, use the Press to
Continue button.
R o of P r o
RoofPro then finds all records contained within the application
that meet the search criteria, and then produces a finished report
with all roof areas meeting the search criteria. In the Priority List
Layout, information regarding the building, roof area, square
footage, roof system type, Next Action, and costs are presented.
33
U s e r ’s M a n ua l
Chapter 4
ROOF AREAS TO BE REPLACED
1A
When entering this layout from the Navigator,
RoofPro automatically finds all roof areas that require replacement
in the near future and sorts them according to the recommended
year that replacement should take place. This layout is intended
to “boil down” the information in RoofPro and present you with a
manageable format for showing recommended roof replacement
activities in the next few years.
The first column indicates the building name, roof area,
and the amount of square feet which require replacement.
2B
The second column indicates the Next Action, which when
this layout is entered as intended should always be Replace, and
the cost associated with that action. The costs are the same as is
tabulated on the Design Options Layout discussed in Chapter 3.
3C
The last column identifies the priority of the roof area, as
explained in the Summary Chart in Chapter 4, and the year of
recommended replacement.
1
R O OF P R O
2
3
34
U s e r ’s M a n ua l
Chapter 4
ROOF AREAS TO BE REPAIRED
1A
When entering this layout from the Navigator,
RoofPro automatically finds all roof areas that require repair in
the near future and sorts them according to the recommended
year that repair should take place. This layout is intended to “boil
down” the information in RoofPro and present you with a
manageable format for showing recommended roof repair activities
in the next few years.
The first column indicates the building name, roof area,
and the amount of square feet of that roof area.
2B
The second column indicates the Next Action, which when
this layout is entered as intended should always be Rapair, and
the cost associated with that action. The costs are the same as is
tabulated on the Design Options Layout discussed in Chapter 3.
3C
The last column identifies the priority of the roof area, as
explained in the Summary Chart in Chapter 4, and the year of
recommended repair.
1
R o of P r o
2
3
35
U s e r ’s M a n ua l
Chapter 4
ROOF AREA CALCULATIONS
The Roof Area Calculations layout is an informational
As with all other layouts and charts within this program, it is
important to remember that the chart will produce calculations
only for the found set of records. Be sure to select and sort within
the Navigator layout before choosing and operating all summary
functions.
table which simply tabulates and summarizes, in general terms,
what you have covering your buildings on a square footage basis.
The first section, or table, lists the generic roof system categories
as classified within the membrane section of the Roof Evaluation
form. To the right of the table is a listing of the total square footage
of roofs covered by that particular roof system type.
R O OF P R O
The remainder of this layout lists, sorted by building and location,
all roof areas, their general roof system type, and individual roof
area totals with regard to square footage. The total square footage
covering the building follows each individual building listing.
36
U s e r ’s M a n ua l
5
CHAPTER 5
Advanced Functions of RoofPro
R o of P r o
37
U s e r ’s M a n ua l
Chapter 5
Printing
There two methods of printing specific layouts
When the print dialogue box appears, you are presented with
several different printing options.
of records contained within RoofPro. When required, a PRINT
button is provided on the specific layout which requires automated
sorts, specific printer setups, or functions in order to print the
layout correctly. When this is the case, you will see on the layout
the typical PRINT button.
1A
Records Being Browsed is selected when you prefer to
have all of the records in the found set printed in the layout that is
being viewed. Typically, you would choose this print option if you
wanted to print all of the Roof Evaluation Forms for one building,
or all records. For instance, if you found all the “Smiths” in your
address book and you chose print records being browsed, all of
the Smiths would be printed.
2B
Current Record refers to the record that is currently being
viewed. Only the record that is shown on the screen in the layout
that is being viewed will be printed. If after you found all the
“Smiths” in your address book and you only wanted to print Sarah
Smith, you would page through the found set by using the Side
Bar notebook until you reached Sarah, after which print current
record would be selected.
When a print button is not provided on the layout, select the
File pull down menu on the functions bar, and choose Print... or
simply hold down control and press “P”. The pull down menu
also gives you the option to setup your printer, but this is not
required for printing RoofPro records as any setup changes are
performed by PRINT buttons within the layouts.
3C
Blank Records, Showing Fields is chosen when you wish
to print the layout without any data in it. This can be done from
any record, just choose the layout that you wish to print. Only one
copy of the layout is printed when this selection is chosen.
RoofPro remembers the last format for data printing and sets that
choice as a default for the next time you print.
1
2
3
R O OF P R O
38
U s e r ’s M a n ua l
Chapter 5
Saving
After deciding the data which you want to print, the print dialogue
box also allows you to capture the printer device. A list is created
of all printers available to your computer. Once you have chosen a
printer, and actually performed a print job, RoofPro remembers
this and sets that printer as the default. The default printer is
used for all printing functions performed by buttons in RoofPro.
Other print dialogue box functions are similar to various other
programs and if you have difficulties beyond this point please
consult your FileMaker User Manual.
There never a need to save changes to RoofPro as it is a real time
application which saves changes during idle times. This property
is sometimes a challenge to grasp, but is valuable as the program
contains a vast amount of data manipulation capabilities, where
tragedy could strike if changes were not saved. The down side to
this is if you were to delete numerous records or data in fields
there is no safety in quitting without saving, as your changes are
saved immediately after they are performed.
Undoing
RoofPro has an extremely limited undoing
capability. Extreme caution should always be
exercised when using this program as data can
easily be changed. RoofPro can only undo
copies, last keyed entries, pastes, and last data
deletions. RoofPro can only undo the last
operation. If you modify data in a field in any
way, and then leave that field or do anything else,
it is no longer possible to undo those changes.
Undoing can be achieved immediately after your
error by selecting the Edit pull down menu and
picking Undo. If RoofPro is not able to undo
what you have done, Can’t Undo will appear
greyed out.
WARNING: RoofPro can not undo the deletions
of a record or records.
R o of P r o
39
U s e r ’s M a n ua l
Chapter 5
Passwords
This is a brief overview of installing passwords
When the Change Password dialogue box appears, type the old
password and then enter the new password twice for conformation.
RoofPro does not have the capability to provide you with a reminder
of what your password is so do not forget it.
for controlling levels of access to RoofPro. If this section does
not provide complete clarity for developing a password hierarchy,
please consult your FileMaker User Manual for additional details.
RoofPro can have different levels of data protection based on the
user type. Various user functions can be prohibited such as, view
only, data modification, and deleting or creating records. The intent
of the password system is to protect the data within the application
from the casual user, or a user not familiar with the application.
Initial passwords are established before RoofPro is installed but
can be changed as required by the individual user by selecting the
File pull down menu and choosing, Change Password...
The initial Password set up for RoofPro is if a password is not
entered, RoofPro can be only be viewed and no changes can be
made. In order to enter your password you must continuously
hold down the Shift key while opening RoofPro until a password
box appears on the screen. Key in your password and click OK.
RoofPro will now show specific information, and operate according
to your level of access.
R O OF P R O
40
U s e r ’s M a n ua l
Chapter 5
Creating
Records
Deleting
Records
In most instances RoofPro will create any records
Deleting records can be achieved by
selecting the
Mode pull down menu and choosing Delete Record or Delete All.
When records are deleted from RoofPro, all records that related to
the deleted record in other Modules of RoofPro will also be deleted.
A dialogue box will appear verifying the characteristics of the delete
request to help prevent accidental deletions. RoofPro is unable to
undelete.
that are required to be added to the database automatically, based
on your needs. RoofPro is set up to add new buildings or roof
areas to the application. If a new building needs to be added, or
there has been an addition to an existing building, Select the Mode
pull down menu and choose New Record or Duplicate Record.
1A
New Record selection will create a new record and add
it to RoofPro. The new record will have all layouts and fields
available as the existing records but there will not be any data, or
all fields will be blank.
2B
3A
Delete Record selection will delete the current record
from RoofPro.
4B
Delete All selection will delete all records in the found
set. Refer to side bar to view the number of records in the found set.
Duplicate Record selection will create a new record and
add it to RoofPro. The new record will have all layouts and fields
available as the existing records but every field will have duplicated
data for every field as the current record. This is not a
recommended method of creating a new record, as many values
will not be unique to the new record.
1
2
R o of P r o
3
4
41
U s e r ’s M a n ua l
Chapter 5
Networking RoofPro
Click on the General tab of the dialogue box and choose between
IPX/SPX or TCP/IP. All users protocols must match for users to
participate in the network. Once the protocols are set, RoofPro
must be shared for more than one user at a time to have
simultaneous access. Select the File pull down menu and Choose
Sharing...
RoofPro has networking capabilities which will allow multiple users
to access the application at one time. The user which opens the
application first becomes the host for all other users that open the
application. The host user is not notified when guests come and
go, but if the host wishes to close the file, all guests must close
also. Messages appear on all guests screens requesting them to
close the application, after which they may reopen as the new host
or a guest of another host.
In order for multiple users to access RoofPro all installations of
FileMaker must be set to the same network protocol. Select the
Edit pull down menu and choose Preferences from the menu. To
set protocols, go to Application... to bring up the dialogue box.
R O OF P R O
42
U s e r ’s M a n ua l
Chapter 5
The sharing options are Single User, which will allow multiple users
to access the file, just not at the same time, or Multi-User which
will allow multiple users access to the file at the same time.
IMPORTANT: Your FileMaker licensing agreement requires that you
purchase an equal number of copies of Filemaker as there are users
accessing the program at the same time. There are no requirements
for additional copies for multiple users according to the RoofPro
licensing agreement, and it is not recommended to have more than
one working copy of RoofPro.
R o of P r o
43
U s e r ’s M a n ua l
Chapter 5
When RoofPro Gets
Damaged
Several conditions can occur which will cause RoofPro
to get damaged. Typical factors are system lock ups, power
failures, or hardware problems. You will be notified that RoofPro
is damaged when you are opening and you will be instructed to
use the recover command to restore the File. From the File pull
down menu, select Recover...
The Open Damaged File dialogue box will appear, with several
files shown. Select the “RoofPro.fp3” and Open. Use the default
file name suggested and select Save. FileMaker will rebuild the
damaged file. After RoofPro is recovered, go to your desktop file
manager and move the damaged file to another folder, such as a
Temp folder. Go back and rename the Recovered file “RoofPro.fp3”
and open it. This file is now the new RoofPro if everything is
working properly. Deleting the old RoofPro file is recommended
at this point. If any problems are experienced during this process,
do not delete any files and contact your RoofPro vendor for
technical assistance.
R O OF P R O
44
U s e r ’s M a n ua l
6
CHAPTER 6
Navigating Through and Using the
Roof Repair Module of RoofPro
R o of P r o
45
U s e r ’s M a n ua l
Chapter 6
About the Repair Module
The Repair Module is comprised of two files which
are related to RoofPro and are utilized to store various repair
requirements for each record contained in RoofPro. As described
in Chapter 3, the Go To Repairs button located at the center of the
M/M/R layout, if this module has been plugged into RoofPro, will
bring up a window with a listing of recommended repairs for the
current roof area. The Repair module provides you with an easy
way to organize required repairs into a project by building, view
and print general repair methods with drawings and simple
guidelines for repair, and track frequency of repairs performed to
specific roof area.
Accessing Repair Methods
To access the individual repair methods designated for the current
roof area on the M/M/R layout, use the Go To Repairs button
located directly above the specified repairs
.
When the Go button is pressed, you are transported to another file
related to RoofPro which stores various general repair methods
for numerous types of roof systems. Data is never entered into
this module as it is a reference and viewing file for predetermined
repair methods. This related file is named Roofrep.
When this button is pressed, a window is opened listing the
recommended repairs for the current roof area, sorted in order of
recommended repair dates. The window is a separate database
file related to RoofPro which is used to store all of the repair records
associated with the current roof area. The related file is named
Repman and is only used when navigating to repair methods. All
data entry into Repman
occurs through the M/M/R
layout, and is viewed there
also. To view or print a
recommended repair press
the Go button which
correlates to the repair
method desired.
R O OF P R O
46
U s e r ’s M a n ua l
Chapter 6
Navigating in Roofrep
After pressing the Go button adjacent
3C
1A
4D
Most repair methods are enhanced with a drawing which
identifies critical dimensions that must be adhered to for a long
lasting, maintenance free repair. The drawings are also intended
to clarify details described in the written section of the repair
method. Text in this section are used to identify specific elements
of the repair.
to the repair
method you wish to view, you are transported into Roofrep, where
all viewable repair methods are located. The layout which is viewed
when entering Roofrep provides you with the repair method, a
general specification to execute the repair, and a drawing which is
used to clarify the description.
This window indicated the repair method, and correlates
The navigation bar at the top of the layout performs
several automated functions which simplify the use of this module.
to the repair method selected in the M/M/R layout in RoofPro.
2B
The description typically outlines preparation for repair,
materials, and methods to be used while performing the repair.
The intent of the repair method, is to provide you with a document
which can be issued to the Contractor performing repairs which
binds the contractor to a specific scope of work. Combining the
repair methods with a roof plan indicating locations for specific
repairs results in a document that can be used for bidding.
4
1
2
3
R o of P r o
47
U s e r ’s M a n ua l
Chapter 6
Navigation bar
Print Button: Use this button to print the current repair method
or the found set. The button is necessary as the current layout
has been formatted for viewing on a monitor. Pressing the print
button allows you to choose printing parameters and then formats
your printer, and prints the document(s).
Find:
Pressing this button sends you directly to the Find
Screen where you may choose other repair methods to view or print
Repman :
To view another repair method, select the Go button adjacent to
the repair method you wish and Roofrep will display the
Navigational Screen with the repair methods selected in the original
layout. If the repair methods that you desire do not appear on the
screen press the Re-Find button or go back to RoofPro using the
corresponding button at the top of the screen.
Nav:
The Nav button is used if you want to view another
repair method.
This button transports you to Repman for viewing
purposes only.
RoofPro:
This button transports you back to RoofPro, to
the M/M/R layout from which you were originally launched into
Roofrep. RoofPro remembers the last current record which the
repair methods relate to.
1
1
The Re-Find button will bring you to the layout below, which
lists all of the repair methods contained within Roofrep. Check
the box adjacent to the repair that you want to view and press the
Find button at the top of the layout, and Roofrep will display the
repair method selected in the original layout.
R O OF P R O
48
U s e r ’s M a n ua l
7
CHAPTER 7
Repair and Leak Management as a Module of RoofPro
R o of P r o
49
U s e r ’s M a n ua l
Chapter 7
Repair and Leak
Management Overview
The Repair and Leak Management Module is
be utilized by RoofPro and included into the Life Cycle Costs
calculated on the Building Summary Layout. As the costs are
entered throughout the years, RoofPro will have the capability to
provide you with a more true and less estimated Life Cycle Cost.
This Module is the living record of activity on the specific roof
area. If the true costs of a new roof installation are tracked on
RoofPro in conjunction with this Module tracking repair,
maintenance, and management costs and activities, a true Life
Cycle Cost will be presented on the Building Summary Layout.
a file which is related to RoofPro and is utilized to store various
repair and leak data for each record contained in RoofPro. As
described in Chapter 2, the buttons on the Navigator will access
this module if it has been plugged into RoofPro. This module
provides you with an easy way to track repair work and leak calls,
including costs, contractors, response times, and frequencies as
they relate to each specific roof area contained in RoofPro. This
Module requires the most user interaction to perform as intended.
If all repairs and costs are entered into this module, the data will
Accessing Repair and Leak
Management
To access the Repair and Leak Management data from
RoofPro is accomplished from the Navigator in RoofPro. By
selecting the Leak Management or Repair Management buttons,
RoofPro will allow access to the Module, which is named Leakman.
R O OF P R O
50
U s e r ’s M a n ua l
Chapter 7
Opening Layout
3C
When you enter Leakman,
The Search For Existing Records button group assists
you in finding records based on the most common search criteria.
Each button opens a corresponding search layout which will guide
you through required search criteria required.
you are presented with the
Opening Layout from which all navigation throughout the module
is begun. As with all layouts in RoofPro, there is a return button
typically located at the top of each layout, which will bring you
back to the Opening Layout.
1
4D
The To Leak Report button opens the Leak Report Form
with all records in the module found. Some of these records are
not leaks, but are repair, management, or maintenance activities.
Sort buttons have been provided to omit the records that are not
leaks. This layout will be discussed in detail later in this Chapter.
Press the Record a New Leak button to do just that.
When this button is pressed, Leakman will create an new record
and open the Leak Report Layout, where data entry for a specific
building can begin. This layout will be discussed in detail later in
this Chapter.
5E
2
The To RoofPro button is the only way back to RoofPro
Press the Record a New Maintenance or Repair
Procedure to enter data regarding new activities on a specific
from this module.
roof area. This button opens the Repair/Maintenance Log where
data entry is performed. This layout will be discussed in detail
later in this Chapter.
NOTE: Occasionally when returning to RoofPro, the current found
set is lost and when the Navigator layout is viewed it appears blank.
Do not panic. Press the Choose a Building button and select the
building which you were previously working in.
5
4
1
2
3
R o of P r o
51
U s e r ’s M a n ua l
Chapter 7
Recording a New
Management/Maintenance
/Repair Procedure
After pressing the Record a New Maintenance
1A
or Repair Procedure button, a new record is created and the
The first column requires the building name and the roof
area. The building name is entered from a pull down menu listing
all of the buildings within RoofPro. The roof area is manually
entered. The roof area designation must match the roof area
designation for the related record in RoofPro. These items are
critical for this activity to be included in the Life Cycle Cost correctly.
Repair / Maintenance Log Layout is accessed where specific
information is recorded regarding the activity. Most field in this
layout require data for the Module to function properly for RoofPro,
and it is a good idea to input data in all the fields simply for
documentation puposes.
B2
The second column
requires that a date,
classification of activity,
contractor, and repair comments
be entered. The date and
classification are critical for this
activity to be included in the Life
Cycle Cost correctly.
C3 In the third column ,
entry of the repair description
and the cost is required. The cost
of the activity is critical for this
activity to be included in the Life
Cycle Cost correctly.
2
3
1
R O OF P R O
52
U s e r ’s M a n ua l
Chapter 7
Printing the Repair Log
To print the repair log return to the Opening Layout and
choose a Search button which suits your criteria. After selecting
the button and entering the search criteria you are sent to a
navigation layout where you may choose several different reports
to be viewed and printed. Press the Repair / Maintenance Log
button to view the layout in Preview Mode and to print the
summary. Other buttons on the navigator provide you with
summary data regarding leaks. The summary data presented
relates only to the records which were found by the search criteria
which was specified. If the report does not look right, go into
Browse Mode and return to the Opening Layout to redefine you
search criteria.
R o of P r o
53
U s e r ’s M a n ua l
Chapter 7
Leak Report
repair status and costs associated with repair. This form, if
intended to be used, must be tailored to suit your specific
requirements. Please contact your Vendor if you wish to use
this form.
The Leak Report is designed to be used
as a work
order to initiate a leak repair, track leak locations and frequencies,
R O OF P R O
54
U s e r ’s M a n ua l