1
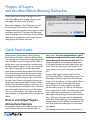
®
Buena Depth Cue v2
User Manual
Contents
3 Installation
4 After Effects Warning Dialog Box
4 Quick Start Guide
6 Atmosphere
8 Camera Mapper
11 Depth
13 Falloff Lighting
15 Flipside
16 Rack Focus
19 Featured Products
20 Support
®
Buena Depth Cue v2
Innovative approaches
for creating visual
depth.
Buena Depth Cue v2 provides
After Effects artists with an innovative workflow for creating
visual depth in their projects.
Using composition-based
effects, such as Rack Focus,
Falloff Lighting or Atmosphere,
digital media artists can mimic
Z depth in a unique way that
cannot be replicated using
After Effects depth of field. Buena Depth Cue V2 includes 6 powerful
plug-ins for creating depth.
Resources
Video Tutorials
Check out project techniques
from DigiUsers just like you.
View video tutorials
The Reviews
See what others are saying about
DE’s latest releases, plugin effects,
and more.
Installation
System Requirements:
Buena Depth Cue v2 is a plugin for Adobe After Effects.
It has been tested with Snow Leopard and Windows 7.
Read the reviews
Project Gallery
DE software and plugins in action.
Installing
1 Locate the Install file.
2 Double-click the installation program and follow the instructions.
3 The first time that you run the installer you will be asked to
enter the serial.
For more information visit:
Search, view, and download the latest
presets and videos or submit your own.
Visit project gallery
http://www.digieffects.com/support/installation_guide
23
®
Plugins, 3D Layers,
and the After Effects Warning Dialog Box
Often, when you’re using 3D plugins on a 2D
layer, After Effects will complain that you can
only apply 2D effects onto 3D layers.
When that happens, select “Once per session”
from the drop- down menu of After Effects’
dialog window to keep these messages to a bare
minimum, and click OK to make the dialog go
away. The plugin name itself may show a yellow
cube with an exclamation mark inside. You can
safely ignore all of these warnings.
Quick Start Guide
Some plugins (Atmosphere, Falloff Lighting,
Rack Focus and Depth) inside the Buena Depth
Cue package also come with a helper plugin that
does the tedious work of applying the effect to
all the layers in your composition and hooking
all the parameters up to a master set of controls.
This allows the plugins to render their effect
even when you aren’t playing back the composition, but merely moving the camera or layers
around, for example. You should always apply
the effects using the helper plugins and never
by hand, even if you’re only applying them to a
single layer because the effects contain hidden
controls that the helper plugins connect to various layer properties using expressions. However,
you don’t need to know how to use the expressions to use the plugins. Let’s look at the Atmosphere plugin as an example of how to apply the
effects.
How to use Helper Plugins –
Atmosphere Example
First, create a composition which contains multiple 3D layers. You can use colored solids or
®
video layers. If you’re using text layers, you’ll
need to precompose them because text layers
always have their transforms collapsed. That
means that effects can’t properly locate them
in 3D space like they can with video layers and
solids. Once you have your layers placed in 3D
space, you can set up a 3D camera if you’d like,
too.
Finally, select “Apply Atmosphere To All Layers” from After Effects’ “Composition” menu. The
Atmosphere Helper plugin does the following
things: First, it creates a null layer called “Master
Atmosphere Control” and applies the Atmosphere effect to it. Next, it applies the Atmosphere effect to every 3D video or solid layer in
your composition. Finally, it connects each of the
layers’ Atmosphere parameters to the “Master
Atmosphere Control” layer’s Atmosphere parameters. That way, when you want to change the
look of the Atmosphere, you can simply change
the parameters on the “Master Atmosphere Control” layer and all the other layers in that comp
will update.
If the background color of your composition is
different from the color of the Atmosphere, you’ll
be prompted to make them match as shown on
the next page. Unfortunately, at this time, there
is no way for a plugin to set the composition’s
background color automatically. If you add a
layer later and want to have the Atmosphere
effect applied to it, simply choose “Apply Atmosphere To All Layers” again, and it will be added
to the new layer and its controls connected to
the “Master Atmosphere Control” layers’. Layers which already have the Atmosphere effect
applied will not have it applied again. The other
plugins in the set work in the same manner. To
apply them, choose “Apply To All Layers.
45
Layer Effect Controls vs
Master Controls
You may notice that if you choose the master
control layer and show its Effect Control Window,
that it shows one set of parameters, but if you
show the Effect Control Window of a video layer,
it has a different set of parameters for the same
effect. Parameters that apply to all layers show
up in the master control layer’s list of parameters. Parameters that only apply to a single layer
show up in that layer’s list of parameters. For
example, both the Atmosphere and Rack Focus
plugins require you to set the input gamma of
the video. Since each layer may have different
initial gamma, you can set each layer’s gamma
parameter separately. As stated previously, all
layers probably need to have the same atmosphere color or the effect won’t look right. So the
atmosphere color parameter is only available on
the Master Atmosphere Control layer, and not on
the individual layers.
®
Atmosphere
The Atmosphere plugin for After Effects simulates atmospheric conditions such as haze and fog
in your composition. Atmosphere allows you to set the depth which the atmosphere is visible in
your scene, so that you may make layers further away from the camera appear to be more deeply
immersed in the Atmosphere then layers closer to the camera (or the other way around). This also
applies to parts of layers: If part of a layer is near the camera and part of it is far away, the pixels near
the camera will appear less immersed in the haze/fog than the pixels far away from the camera. You
can simulate very realistic or very unrealistic types of atmospheric effects.
Reset
Resets the parameters to their factory default.
Options
Use this link to bring up the registration dialog
and enter your key code. After you’re registered,
this shows information about Digieffects and the
Atmosphere plugin version.
About
Shows information about Digieffects and the
Atmosphere plugin version.
Animation Presets
Contain groups of parameter settings you would
like to keep for future use. The list is empty until
you save a group of parameters as a Preset.
Parameters
Color - This changes the color of the atmosphere. In the real world, a haze is almost
transparent white, while atmosphere tends to
be white or light gray, so the default setting is
white. Smog and other types of atmospheric
junk can cause other colors to appear, such as
oranges and reds.
Note: If you change the color of the atmospheric environment, you’ll probably want to change the background color of your composition to match. Otherwise you’ll have layers with one color of atmosphere
applied to them against a backdrop of a different
color of the atmospheric effect.
®
Start Depth - This sets the distance (in pixels)
from the camera where the atmosphere begins.
Pixels closer than this distance remain unchanged. Pixels at or beyond this distance have
some amount of fog applied to them. How much
depends on the other settings you choose.
End Depth - If you set the Rolloff parameter to
“Linear,” then the End Depth is the distance from
the camera where the fog becomes opaque.
Anything at or beyond this point is completely
covered by the fog and cannot be seen. Pixels
between the Start Depth and End Depth have
proportionally more fog as their distance from
the camera approaches the End Depth. If you set
the Rolloff parameter to either “Exponential” or
“Exponential Squared,” then any pixels beyond
this distance from the camera have the same
amount of fog as pixels at this distance.
Rolloff - There are 3 different types of fog you
can apply:
1 Linear: The amount of fog that covers a pixel is
directly proportional to the distance of that pixel
from the camera.
2 Exponential: The amount of fog that covers
a pixel varies not only with the distance of the
pixel from the camera, but also with the value of
the “Density” parameter.
Exponential Squared: This works in the same
manner as the Exponential version, but increases
more slowly at near distances and more quickly
at farther distances. See Figure 1.0
3 Density: This parameter is only valid if the
Rolloff parameter is set to “Exponential” or “Exponential Squared.” It determines the rate at which
the fog increases as the distance from the camera increases. Larger values will increase the fog’s
opacity more quickly as you move away from the
camera.
Input Gamma - This parameter is only available
on the individual layers’ effect and won’t display
on the Master Atmosphere Control Layer’s list
of parameters. This should be set to the gamma
of your video footage. If you’re using video in a
broadcast format, such as DV, MPEG, MJPEG, etc.
it should be set to 2.2.
If your footage is compressed with Apple’s “Animation” codec for QuickTime, it should be set to
1.8 (even on Windows). If your footage is from a
3D application that does not apply gamma correction, it should be set to 1.0. If you’re unsure
of the value, 2.2 is a safe setting to use. Setting
this value correctly will make the fog look more
realistic.
effect. See Figure 2.0
Option 2
1 Create your layers & convert them to 3D layers.
2 Apply Atmosphere to one or several layers
either by selecting Effect > Atmosphere or by
dragging the Atmosphere plugin from the Digieffects Atmosphere folder into the Effects and
Presets panel.
Note: To apply the Atmosphere plugin to new 3D layers, use
Composition > Apply Atmosphere to All Layers.
Please be aware that project files from older versions of Atmosphere that use expressions may
not work correctly. Please contact support if you
encounter this problem.
For More Information:
Watch Atmosphere tutorials at digieffects.com
Application
Option 1 - 1 Select “Apply Atmosphere To All
Layers” from the Composition menu in order to
apply Atmosphere to all currently created layers.
2 Set the Color, Start Depth, End Depth, Rolloff
and Gamma as required.
Note: When you apply the Atmosphere effect using the
command from the Composition menu, a Master
Atmosphere layer will appear at the top of your layers in the Timeline. All the layers below this Master
Atmosphere layer will inherit the same Atmosphere
67
®
Camera Mapper
The Camera Mapper plugin allows you to simulate a 3D scene from 2D footage. It enables you to
isolate one or several objects in your footage, project these objects on a separate layer and pull that
layer out of the background, creating the visual illusion of the object floating in front of the original
footage. Camera mapping is a key part of compositing applications such as Nuke, and while you
could do this natively in After Effects, it would be only at the expense of some complicated work
arounds that cost time and lack important capabilities.
When applied, you can move a camera around the scene with objects from the scene at varying
depths and angles.
Reset
Resets the parameters to their factory default.
Options
Use this link to bring up the registration dialog
and enter your key code. After you’re registered,
this shows information about Digieffects and the
Camera Mapper plugin version.
About
Shows information about Digieffects and the
Camera Mapper plugin version.
What you need
A background scene - you want to convert to
3D. This typically is a still image or a locked off /
stabilized shot.
Two cameras - a render camera to render the
and move around in the 3D scene and a projection camera that looks directly at your scene.
One or more After Effects Solid Layer(s).
Parameters
Projection Camera – The Camera used to line
up the original image or footage with the Solid
Layers that act as a projection screen.
®
Projection Layer – The Layer being projected.
Once you’ve applied the Camera Mapper effect,
the 3D solid will seem to disappear, but when
panning around with the active camera, you will
see the solid hav- ing taken over what’s behind
it.
Alpha Handling – The way masks on the projection layer will be handled. You can use the alpha
layers of the original footage to reveal exactly
what you want to project (normal), or use masks
in After Effects.
Tips:
You can have dozens of solids in a scene, so label
them with meaningful names. Each solid should
be positioned in front of the scene component
that you want to call to the front. If you’re working with objects that demand accurate positioning, create your solids to measured sizes and
locations. For example, if you’re going to project
a porch of a house, you should either create a
solid that has the exact size of the porch in the
footage and parts that need not be called out
should be masked.
If part of the scene is perpendicular to the camera, like a sloping rooftop, there is nothing to
map onto the solid. In that case, you’ll have to
fake it. You can do so by opening the original
image in an image editor like Photoshop, copy
the part of the scene that is perpendicular to
the camera and drop it into the composition,
aligned with the area that you want to appear as
3D.
3. Create one or more solid layers from the Layers > Solid menu.
4. Turn the original footage and the Solid layers
into 3D layers by clicking the 3D layer icon in the
Timeline or selecting 3D Layer from the Layers
menu.
The Camera Mapper plug-in’s results depend on
After Effects’ model of the world. After Effects
does not know real 3D. Instead, it uses projection planes that it positions one on top of the
other (or one in front of the other) so that you
get a result that looks like 3D but really isn’t.
This restricts you in what you can do with the
Camera Mapper plug-in. You won’t be capable
of modeling objects with round edges. You can
also not use curbed surfaces, because you can’t
bend objects in 3D space. And of course, you
can’t move the camera 360 degrees around the
objects, because we don’t have any data of the
back of the objects.
5. Select the first solid layer you want to use for
the Camera Mapper effect.
6. Select Camera Mapper from the Effects menu.
7. From the Projection Camera drop-down menu
in the Effects panel, select the camera you designated as projection camera in step 2.
Step-by-step Tutorial
Imagine you want to break out an object from its
background. These are the basics steps.
1. Open After Effects and import your footage.
2. Create a Render and a Projection Camera from
the Layers > Camera menu. Make sure both cameras have the same settings.
8. From the Projection Layer drop-down menu in
the Effects panel, select the original footage you
want to use as projection map.
89
®
9. Adjust the solid so it stands separate from the
original footage layer and move the active camera around to see the effect.
10. Select the Alpha Channel you want to use.
11. Freely animate the Render Camera to create
a new 3D animation.
Note: For dozens of incredibly useful (and free!) scripts to
help you make shapes and objects, be sure to check
out NAB Scripts at www.nabscripts.com.
For More Information:
Watch Camera Mapper tutorials at digieffects.
com
®
Depth
The Depth plugin creates grayscale depth maps from your footage. You can also ‘precomposite depth’
allowing for more manipulation with your 3D camera.
Reset
Resets the parameters to their factory default.
Options
Use this link to bring up the registration dialog
and enter your key code. After you’re registered,
this shows information about Digieffects and the
Depth plugin version.
About
Shows information about Digieffects and the
Depth plugin version.
can be useful for simulating lighting and other effects
that exhibit an inverse square falloff property.
Logarithmic - Output depth values are scaled so that objects
near the viewer have depths closer together than
those farther away from the viewer.
Parameters
Minimum Input Depth - The minimum distance
from the camera to record. Any objects closer
than this distance will be set to this distance
when output.
Maximum Input Depth - The maximum distance
from the camera to record. Any objects farther
than this distance will be set to this distance
when output.
Minimum Output Depth - The minimum value
to display in the output.
Maximum Output Depth - The maximum value
to display in the output.
Curve - How to scale the output brightness values. You can choose from 4 values:
Linear - The output depth values are written out exactly as
they are calculated.
Squared - The square of the depth values are written out. This
®
Exponential - Output depth values are scaled so that objects
near the viewer have depths farther apart than those
farther away from the viewer.
Channels - Which channels should have the
depth value put into them. You can put it into all 4
(red, green, blue, and alpha), just RGB, or just the
alpha channel.
*hint: when planes are only a few hundred points apart in z
space try using minimum and maximum input values
around 4500 apart combined with a Squared Curve.
For More Information:
Watch Depth tutorials at digieffects.com
Precompose Depth
The Depth Helper plugin works like the other
helper plugins, but includes one extra feature.
If you’re using After Effects 6.5 or later, in the
Composition menu, you’ll see there is also a
“Precompose Depth” option. If you select a comp
that does not yet have the Depth plugin applied
and choose “Precompose Depth,” that comp will
be duplicated, the Depth plugin will be applied
to the duplicate, and both the original and the
duplicate will be put into a new comp.
Why Does Depth Turn Off the
“High Quality” Setting?
You may have noticed that when you apply the
Depth plugin, all of your layers have their “High
Quality” setting turned off. This is done because
you generally don’t want the depth of the pixels
in your layers to be antialiased at the edges. The
antialiasing will cause the depth value of the
edges to be incorrect if the pixels are later premultiplied by their alpha channels. This can cause
any number of bizarre artifacts when using the
resulting depth, such as fringing. If you’re sure
you won’t run into that situation, you may want to
turn the high quality flag back on for those layers
where you’re sure it’s safe.
12
11
This allows you to create a complicated composition, and immediately generate a depth map
for it. You can then apply an effect to the original comp contained within the new comp, and
choose the duplicate comp with the Depth applied to it as a gradient map, track matte, or anything else that requires another layer for input.
*hint: to create realistic depth of field and rack focus effects
in video footage; create solids over the fore, mid, and
back ground planes, place them at different z-positions in 3D space and apply “pre-compose depth.” Next
add a lens blur effect to the first layer in the Depth
Comp and adjust the values. You can view the results
in the depth comp by soloing the source video in your
original comp.
®
Falloff Lighting
The Falloff Lighting plugin for After Effects provides a lighting system that mimics the way objects
appear dimmer the further away they are from the lights illuminating them. With After Effects’ builtin lights, it doesn’t matter how far away a layer is from a light, it is still illuminated the same amount
by that light.
Reset
Resets the parameters to their factory default.
Options
Use this link to bring up the registration dialog
and enter your key code. After you’re registered,
this shows information about Digieffects and the
Falloff Lighting plugin version.
About
Shows information about Digieffects and the
Falloff Lighting plugin version.
Parameters
Falloff Lighting has 3 controls and one check box
to switch on/off the display of distances.
Distance Scale - Because the plugin doesn’t
know the scale of objects in your scene (are they
in centimetres, inches, feet?), you can adjust the
Distance Scale parameter to account for this.
Higher values will cause objects that are farther
away from lights to be illuminated, whereas
lower values will cause only nearby objects to
get illuminated.
Falloff Type:
Natural (1/r2) - The intensity of light reflecting
off of an object is inversely proportional to the
square of the distance of that object from the
light. When you set the Falloff Type parameter to
“Natural,” it uses that model for calculations.
®
Distance (1/r) - However, sometimes you want
to use a different method to get a different look.
Setting this parameter to “Distance” will give a
much more gradual falloff as the distance from
the light increases.
Constant - Setting it to “Constant” will provide
behaviour similar to After Effects’ built-in lighting. However, you can increase or decrease
the constant for different looks. The “Constant”
setting is also useful as a way to check that all
your layers are in the proper place after making
changes. You can then set it back to “Natural” or
“Distance” for your final render.
When the Falloff Type is set to “Constant,” this
value controls how lights are weighted. A value
of 1.0 produces results similar to After Effects’
built-in settings. Larger values produce brighter
results, while smaller values produce darker
results.
Step by step Falloff Lighting
Option 1 - 1. Create your layers and convert
them to 3D layers.
plied Falloff Lighting to any of the layers before —if
2. Apply Falloff Lighting to one or several layyou do, the “Accepts Lighting” flag will not be turned
ers either by selecting Falloff Lighting > Falloff
off, creating unexpected results.
Lighting from the Effects menu, or by dragging
the Falloff Lighting plugin from the DigiEffects
Falloff Lighting folder in the Effects & Presets
For More Information:
panel.
Watch Falloff Lighting tutorials at digieffects.
OR
com
Option 2 - 1. Select “Apply Falloff Lighting To All
Layers” from the Composition menu in order to
apply Fallof Lighting to all currently created layers.
2. Set the Distance Scale and Falloff Type as
required.
Applying Falloff Lighting To All Layers
When you apply the Falloff Lighting effect using the command from the Composition menu,
a Master Falloff Lighting layer will appear at the
top of your layers in the Timeline. All the layers below this Master Falloff Lighting layer will
inherit the same Falloff Lighting effect.
You’ll notice that all of your 3D layers have their
“Accepts Lighting” flag turned off. This allows
only the lighting applied by the Falloff Lighting
plugin to show, and not the default lighting.
You can still change the material properties of
the layer and the Falloff Lighting plugin will
render them correctly. For example, specular
highlights still work the way you expect, as do
shadows and light transmission.
If you add layers after you’ve applied Falloff
Lighting using the Composition menu, and the
new layer appears above the Master layer, you
can apply the same Falloff Lighting effect to
these new layers by dragging them to a slot below the Master layer. Choose “Apply Falloff Lighting To All Layers” again from the “Composition”
menu, and layers that already have it applied will
be left alone, while any new layers will have it
applied correctly.
Alternatively, apply the Falloff Lighting plugin
with different parameters to the new 3D layers
for different effects.
Note that if you apply Falloff Lighting to layers using the
Composition menu method, you should not have ap-
14
13
®
Flipside
The Flipside plug-in does one simple thing: it maps one layer onto the back side of another layer.
This allows you to flip the front layer over to reveal the back layer. It does this without creating any
gap between the 2 layers, and without the occlusion problems that sometimes show up when trying to put 2 layers very close together in a composition.
You can choose the orientation of the back layer, as well, allowing it to have the correct orientation
whether it’s flipped horizontally, vertically, or both. The orientation parameters are keyframable, too,
which allows you to change the orientation of the back layer when it’s not showing, for smooth transitions that fool the eye.
In addition, the 2 layers don’t need to be the same size or even have the same pixel aspect ratio.
You can have a tiny layer flip over to reveal a huge layer. Or you can use DV footage on one side, and
anamorphic footage on the other. It just works.
You can even choose not to have a back layer, so that when the layer is turned around, it simply
disappears. .
Reset
Resets the parameters to their factory default.
Options
Use this link to bring up the registration dialog
and enter your key code. After you’re registered,
this shows information about Digieffects and the
Flipside plugin version.
About
Shows information about Digieffects and the
Flipside plugin version.
Parameters
Flip Vertical – Flips the image vertically.
Flipside has 3 controls
Backside Layer – The layer which is mapped to
the “flip-side” of the layer which the effect is applied to.
Flip Horizontal - Flips the image horizontally.
®
Rack Focus
The Rack Focus plugin allows you to simulate depth of field effects. When applied, layers (or parts of
layers) that are near or far from the camera are blurred, while layers (or pixels) in the mid ground are
in focus. This allows you to create nice focus pulls and other related effects.
Reset
Resets the parameters to their factory default.
Options
Use this link to bring up the registration dialog
and enter your key code. After you’re registered,
this shows information about Digieffects and the
Rack Focus plugin version.
About
Shows information about Digieffects and the
Rack Focus plugin version.
distance are blurred less and less the closer you
get to the near in-focus plane.
Near In-Focus Plane - Pixels closer to the camera than this distance are blurred by varying
amounts. Pixels between this distance and the
Parameters
Far In-Focus Plane are not blurred at all.
Traditional UI - When checked, the Focal Plane
and Focal Plane Thickness parameters are visible. Far In-Focus Plane - Pixels between the Near InWhen not checked, the Near Out-Of-Focus Plane, Focus Plane and this plane are not blurred. Pixels
Near In-Focus Plane, Far In- Focus Plane, and Far between this plane and the Far Out-Of-Focus
Out-Of-Focus Plane are visible. Each of those
Plane are blurred by an amount proportional to
parameters is described below.
their distance from this plane. So pixels farther
Focal Plane - The distance from the camera that away from this plane are blurred more than
those near this plane.
is in focus. This option is only available when
Traditional UI is selected.
Far Out-Of-Focus Plane - Pixels beyond this
point are blurred the maximum amount.
Focal Plane Thickness - The depth of the infocus area in the composition. This option is only Blur Amount - The maximum amount of bluravailable when Traditional UI is selected.
ring to apply to pixels that are either beyond the
Near Out-Of-Focus Plane - Pixels up to this dis- far out-of-focus plane, or are closer than the near
outof-focus plane.
tance are blurred the maximum amount, specified in the Blur Amount parameter. Pixels beFocal Bias - Controls how quickly the blurring intween this distance and the Near In-Focus Plane
®
creases between the focal plane (or planes) and
the out-of-focus areas. Increasing the amount
causes the focus to ramp up more slowly in areas
closer to the focal plane and more quickly in
areas closer to the out-of-focus planes.
Circle-of-Confusion - In a real camera, when far
away objects that are out of focus are extremely
bright, such as street lights in a night scene or reflections of the sun off of shiny objects, the camera produces artifacts where those objects end
up on the film. The artifacts are usually the same
shape as the aperture of the camera. This effect
is often referred to as “Circle-of-Confusion” or by
its Japanese name “boke” (sometimes spelled
“bokeh”). The parameters in this section control
whether those effects appear in your scene, and
if they do, what they look like.
Threshold - Only objects with a luminance
greater than this threshold will produce the effect.
Diameter - The size of the circles or polygons
that are produced. If you set this value to 0, no
circles or polygons are rendered.
Number of Aperture Blades - The number of
blades in the aperture of the simulated camera.
You can choose “Circular” to produce perfect
circles, or choose a value from 3 to 9. If you’re
mixing the results with scenes fi lmed with a real
camera, you should try to match this to the same
number of blades as the camera used to fi lm the
other scenes.
Aperture Blade Angle - When the Number of
Aperture Blades parameter is set to a numerical
value, it will produce polygons for the effect. You
can use this parameter to rotate the polygons
that are produced.
Edge Softness - Determines how hard or soft
the edges of the circles or polygons are.
Simulate Anamorphic Lens - When checked,
the circles or polygons are stretched out in
the same way they would be if your scene was
filmed with an anamorphic lens.
Anamorphic Breathing - These parameters
simulate the breathing effects of anamorphic
17
16
lenses. When the focus is pulled from an object
far away to a nearer object, objects in the background stretch out slightly. When the lens used
to shoot the scene is anamorphic, the stretching
is very pronounced in the vertical direction.
Simulate Anamorphic Breathing - Turns the
anamorphic breathing effect on or off. Note that
this effect is most realistic when the layers being
stretched are parallel to the camera’s plane. For
layers that cross both an out-of-focus plane and
an in-focus plane, the results may be less realistic
looking.
Maximum Scale Amount - The maximum
amount of vertical scaling you want to happen
to objects in the background. Objects between
the in-focus planes and out-of-focus planes will
be stretched proportionally to their distance
from the in-focus planes. Objects beyond the
out-of- focus planes will be stretched the maximum amount.
Input Gamma - This parameter only shows up
in the individual layers’ list of parameters, and
not in the Master Rack Focus Control layer’s list.
As with the Fog plugin, this value should be the
gamma that your footage has applied before
applying any effects. If you’re using video in a
broadcast format, such as DV, MPEG, MJPEG,
etc. it should be set to 2.2. If your footage is
compressed with Apple’s “Animation” codec for
QuickTime, it should be set to 1.8 (even on Windows). If your footage is from a 3D application
that does not apply gamma correction, it should
be set to 1.0. If you’re unsure of the value, 2.2 is
a safe setting to use. Setting this value correctly
will make the blur look more realistic.
®
Featured Products
Delirium v2
Digieffects flagship plugin gets an upgrade!
We’re keeping only the best effects from the original Delirium
package. And, we’re adding some new ones.
Learn More
Try It Free (Trial Version)
Order Now - US$299.00
Studio Daily Reviews Delirium v2 ..it’s “Hot”!
<<read the review
®
Support
Check out the our online Video Tutorials section for more product resources and tips.
Need Assistance ?
Address
Or visit us online at:
Business Hours
Take a moment and fill out our online
Email Support Form and we’ll get back to you as
soon as possible.
www.digieffects.com
User Forum
Have questions? Get the answers on our expert
User Forum, where you’ll find the latest user tips
product update info, software sales and more.
19
18
27 N. Front Street, Ste. 200
Wilmington, NC 28401
9 AM - 5 PM EST
Toll Free
(910) 473-5169
Email
[email protected]
®