1
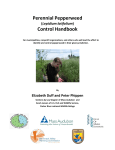
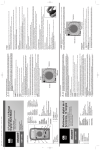
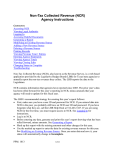
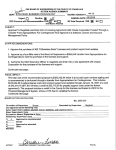
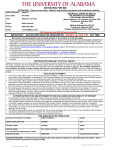
The Community Preservation Projects Report (CP-3)
Instruction Manual – Version 1, August 2014
WHAT IS THE CP-3?
Each year, all CPA communities are required by the state’s Department of Revenue (DOR) to complete the Community Preservation Projects Report
(CP-3), accessed through an online application at http://maps.massgis.state.ma.us/MassGIS_CPC. Completion of the CP-3 is required for
communities to receive their annual distribution from the statewide CPA Trust Fund. Since many projects take years to complete, communities
should review and update past projects at the same time they use the application to enter new projects.
The CP-3 provides a web-based form to collect information about your CPA projects, including a description, current status, permanent restrictions,
funding, timeline and location information. Data collected from the CP-3 provides important information to help municipal governments, the state
legislature and the general public understand how CPA funds have been invested to achieve the goals of the Community Preservation Act (CPA).
The CP-3 also serves as an ongoing record of all CPA funded projects appropriated by your municipality and helps the Commonwealth account for
the millions in matching funds distributed annually.
Below is an excerpt from Section 13 of the Act explaining that it is the CPC at the local level that is officially charged with recordkeeping:
The community preservation committee shall keep a full and accurate account of all of its actions, including its recommendations and the
action taken on them and records of all appropriations or expenditures made from the Community Preservation Fund. The committee shall
also keep records of any real property interests acquired, disposed of or improved by the city or town upon its recommendation, including
the names and addresses of the grantors or grantees and the nature of the consideration. The records and accounts shall be public records. .
As of August 2014, the CP-3 has been updated to address technological issues and provide a more user-friendly interface. Click the following link to
access the new CP-3: http://maps.massgis.state.ma.us/MassGIS_CPC.
HOW TO USE THE CP-3?
Tips & Tools for Success
BROWSERS: Before beginning the CP-3, make sure your browser (Internet Explorer, Mozilla Firefox, Chrome or Safari) has been updated to the
most recent version. If your computer has an older version, you can update it by clicking on the corresponding browser link below and
downloading/installing the newest version.
-
Internet Explorer: http://windows.microsoft.com/en-us/internet-explorer/download-ie
Mozilla Firefox: https://www.mozilla.org/en-US/firefox/new/
Chrome: https://www.google.com/intl/en_us/chrome/browser/desktop/index.html
Safari: http://support.apple.com/downloads/#safari
LOGGING OUT: Each time you close your browser window or tab, you will be logged out from the application and must enter your community and
password again. After you are finished (submitting a new project, updating previously entered projects, or notifying DOR that you have completed
the CP-3 for a fiscal year), simply close the browser. There is no specific “log out” button, but you will be automatically logged out after closing the
window.
NAVIGATION: To navigate forward or back while using the CP-3, use your browser’s arrow keys (often found on the top left side of your browser’s
navigation bar). The Main Menu of options also appears on each page after you submit or update a project. You can also use those links to navigate
the application.
SPREADSHEET DOWNLOAD: To view the entire list of CP-3 projects collected via the CP-3 for your community, first log in to the CP-3 and then go to
the Edit or view previously entered projects page and click “Export” in the top left corner of the page. It will download a spreadsheet with all your
project data to date.
2
General Navigation and Guidance
VERIFY YOUR RESPONSES: As you progress through the CP-3 form, you will have to click Continue at several junctures and Submit at the end of the
form. At each of these junctures, the application will do a “check” to make sure all fields have been satisfactorily completed. If required information
is missing or has not been filled in correctly, that field(s) will turn yellow and an error message will appear in red with the name of the problem
field(s). You will need to correct those field(s) before continuing. See the specific section-by-section descriptions below to help you problem-solve
for specific fields.
POP-UP HELP WINDOWS: Most fields throughout the CP-3 form contain a “hover” or “mouse over” option. When you place your cursor over the
title of the field, a pop up window will appear with an explanation on what that field is looking for. When you move your cursor to a different part
of the screen, the description will disappear.
OPTIONAL FIELDS: Although most fields require an answer (and you are encouraged to respond to all questions), a few fields are optional. If you do
not know the information to fill into those fields, you will be allowed to leave them blank. You can return to the CP-3 at any point to update the
missing information on the optional fields.
Help
Questions should be directed to the Community Preservation Coalition (Contact: http://communitypreservation.org/content/contact-us / 617367-8998)
3
HOW TO INPUT PROJECTS INTO THE CP-3
Login
To ensure that information is entered into the proper file, the CP-3 form utilizes a username and password system. The username is the name of
your town or city. Enter your username and password to access the database and select a user.
Image 1:
4
User Information
The first time a new user accesses the CP-3, the user information will be recorded and saved in a drop down list titled “User name.” On subsequent
visits to the website, the user’s unique name will appear in the dropdown list and it will not be necessary to reenter this information (unless
updates are needed). Please note: The user information from past users has not been copied over to the new CP-3 application, so all past users
will have to re-register the first time they use the new system.
Image 2:
5
Menu of Options
After logging in and selecting your user name, click Continue and scroll down to view a menu of four options.
1) User Manual: You may download a copy of this manual
2) Edit or view previously entered projects: You should continuously review previously entered projects to see if they need updating. For
example, if the project status has changed or funding amounts have been altered, use the option Edit or view previously entered projects to
view a list of your community’s CPA projects. It is strongly recommended that you first verify and, if necessary, edit the information on each of
these projects so that an accurate CPA project history will exist for your community.
3) Enter a new project: To create a record for a new project, click Enter a new project.
4) Notification: This is a new feature. Once you have finished entering all new projects for the past fiscal year, and you have updated all
previously entered projects, select Notify DOR that all projects for a fiscal year have been entered. This option will allow you to notify DOR
that you have complied with the reporting requirement for the previous fiscal year. Communities should also use this option if they did not
approve any new CPA projects during the past fiscal year.
Are you using the CP-3 Application for the first time?
If your community recently adopted CPA, you may not have any previously entered projects to view or edit. If you click the option labeled
Edit or view previously entered projects you will be taken to a blank page. If you do this by accident, simply hit the back arrow to go to the
main menu.
Image 3:
Depending on which option you select from the Main Menu, skip to the corresponding header in subsequent sections of this instruction manual.
Edit or view previously entered projects
6
You will see a four-column list including all previously entered CPA projects, their description, status, and approval date. You can sort the projects
by Project Name, Status or Approval Date by clicking on the underlined header. (Note, this function only sorts alphabetically A to Z or
chronologically oldest to newest, and not Z to A or newest to oldest).
Image 4:
7
* If your community recently adopted CPA, you may not have any projects listed in this section. If you see a blank page, hit the back arrow button
and select a different option from the Main Menu.
To view, edit or update a project, click any text on that project’s line. A screen with the previously entered project information will populate. You
can edit or update any of the information listed on the screen by clicking Continue throughout the form and Submit at the bottom of the form.
Only hit Submit once. It may take up to one minute for the project to submit. Once the project has been successfully submitted, a message in red
with a project record ID will appear. You are now free to select a different action from the Main Menu or close the application.
If a project has been canceled, select that option beside the Project Status label. Note: project records cannot be deleted. But, by selecting Project
canceled, you ensure that the information regarding this project will not be included in any CPA fund totals or statistics for your town.
When updating projects entered before August 2014, there may be a few new fields that you will need to fill out. Please update those fields to the
best of your ability. To better understand what is required by any field, mouse over the field title and/or see the full descriptions in the next section
of the instruction manual entitled Enter a new project.
Note : You may not change the name of a previously entered project.
8
Enter a new project
This option will take you to a page with a series of sequential questions about your CPA-funded project. As you click through the form by pressing
Continue at the end of each section, the form will verify that you have filled out all required fields. Please find a description of each field below, listed
in the order it appears in the application.
Section: PROJECT INFO
Image 5:
Project Name: If this is a new project, select “Create New Project” and enter a simple, descriptive title. If this appropriation is another phase of a
9
project that has received funding in the past, please select the original project name from the list. This will ensure that each year’s appropriation
for a particular project will appear together in alphabetical order on your master list of CPA projects. Appropriations from the CPA Administrative
Account should not be entered in this database.
Approval Date: This is the date that the legislative body (Town Meeting or City Council) voted to appropriate the funding, not the date of the CPC
vote to recommend the project nor the date that the project was actually completed.
Project Status: Indicate the current status of this project. If this project has been canceled, please explain why. Please return to the database and
update the status of this project if there is a change in the future.
Description: In a few sentences, please explain the subject, purpose and plan for this project. Please be specific, so that readers who are not
familiar with the project will understand the purpose.
Section: PROJECT TYPE
Is this appropriation to a fund/trust?: If this is a transfer of CPA funds to a Housing Trust or a Municipal Conservation Fund, please select “Yes” and
then select which fund/trust the money is going to. When the Housing Trust or Conservation Fund spends the money on a project in the future,
please return to the database and enter that expenditure as a new project. When entering those projects in the future, be sure to choose “From a
Fund/Trust” as the source of funds in the Funding Section of this form. This prevents the money from being counted twice.
Image 6:
10
Does this phase of the project include acquiring real property (such as ownership of land or buildings) or acquiring a real property interest (a legal
interest in land such as a Conservation Restriction, Agricultural Preservation Restriction, etc.)?: If CPA funds are being used to acquire real property
(such as land or buildings), or to acquire a restriction (such as a Conservation, Agricultural, Historic or other restriction), select yes. Note, if this
project includes a restriction, you will be asked to fill out details about the restriction in a subsequent section.
Image 7:
11
Project type: Please select the one category that best describes this project. You are limited to one category, unless you are acquiring real property.
If this project involves the purchase of real property (land or buildings), you may select multiple categories, but please only select the categories
that truly apply to the project.
Image 8:
Housing Units Anticipated or Created: (will only appear if you selected “Community Housing” under Project Type) Please estimate the number of
new units to be created by this project, or the number of previously built units that will be supported in some way by this expenditure. If the
number of units is unclear at this time, leave this section blank. In the future when the number of units is clear, please return to the database and
update the units. If this expenditure will not result in the creation or support of housing units, leave this section blank.
If you know or can estimate the number of acres acquired for each CPA category, complete the appropriate boxes. Otherwise complete the To-BeDetermined (TBD) Category Acres.: (Will only appear if you selected Yes under the question “Does this phase of the project include acquiring real
property…) Indicate how many acres will be used for each CPA category (ie: if this land was purchased for soccer fields and an affordable housing
complex, you would fill in appropriate acres for “Recreation Acres” and “Community Housing Acres”). If the CPA category for all or a portion of the
land has not yet been determined, list the acreage that is undetermined at this time under “TBD Acres.” In the future when the exact breakdown
of acreage is clear, please return to the database and put the proper acres in each category.
12
Section: PROJECT RESTRICTIONS
Has a permanent restriction been recorded on this property?: (This section will only appear if you are acquiring real property). A restriction must
be filed at the registry of deeds on all real property acquired with CPA funds. If the restriction for this property has already been filed at the
registry, please select “Yes.” If the project involved the purchase of only the restriction, and the land will remain privately owned, also select “Yes.”
If the restriction has not yet been filed, select “No” and return to the database when the restriction is complete to enter the information.
Restriction Type: (Will only appear if you select “Yes” to the permanent restrictions question) Please indicate the type of restriction(s) that pertain
to this project. After selecting the type of restriction, additional fields will pop up requesting the details on the restriction.
Image 9:
13
Please explain why there are no restrictions: (Will only appear if you selected “No” to the permanent restrictions question) Explain why no
restriction has been recorded on this property and whether restrictions will be recorded in the future.
Image 10:
Section: PROJECT FUNDING
Two Important Notes
1. DO NOT ENTER any commas, decimals or money signs in this section. The funding amounts will not be submitted with this formatting. For
example, if the project cost $100,000.00, enter 100000 not 100,000 or $100000.00. If the amount was $40,555.63, round up and enter 40556.
2. When you arrive at the funding section, there will be a zero (0) in all fields. If a funding source was not used for this project, leave the zero in that
field. For some fields an integer is required, so it is advisable to leave the zeroes if you are not replacing them with another amount.
This section includes a series of fields for you to specify this project’s funding sources. Be sure to fill in the correct amounts in each of the relevant
fields. You must enter funding in either or both of the fields (Direct CPA Appropriation or CPA Bonded Funds) under CPA Funding, EXCEPT if this
project was paid for using CPA funds that had already been transferred to a Trust or Fund (Housing Trust or Conservation Fund).
14
Image 11:
15
Direct CPA Appropriation: Enter the total amount of CPA funds appropriated for this project. You do not have to identify which CPA account was
used (such as the open space reserve account, budgeted reserve, fund balance, etc). Only enter the amount of the total appropriation, no matter
which CPA account was used.
CPA Bonded Funds: If the project is being funded partially or fully by a bond against future CPA revenues, the full dollar value of the bond should be
entered here. Please note that bonded projects are entered in the database only once (at the time the project is approved at the legislative body).
Annual debt service payments over the loan period are not entered into the database.
CPA Bonded Term (yrs.): Enter the length of the bond term in years.
From a Trust/Fund (Housing Trust, Conservation Fund, Land Acquisition Fund or other such fund): Did the funding for this project come from CPA
funds that were previously transferred to a Housing Trust Fund or a Conservation Fund? If yes, please enter the amount that was spent on the
project by the Housing Trust or Conservation Fund here. If you enter funds in this field, do not enter any funds in the “Direct CPA Appropriation” or
the “CPA Bonded Funds” fields.
16
Image 12:
17
Other Town Funds (Non-CPA): Did the town appropriate additional municipal funds to this project, over and above the CPA funds that were
appropriated? If yes, enter the amount of non-CPA town funds here.
Private Donations: Did a private donor or group of donors contribute to this project, over and above the CPA funds that were appropriated? If yes,
please specify the amount here.
State Funds (LAND grant, PARC grant, APR program, etc): Did this project receive funding from a state grant program, such as LAND grants, PARC
grants, APR programs, etc.? If yes, please specify the amount here.
Federal Funds: Did this project receive funding from a federal grant program? If yes, please specify the amount here.
Other Funds: In additional to all the above funding sources, were any additional funds used for this project? If yes, please specify the total amount
of “other” funds here.
Please describe other funding: If you entered an amount in the “Other funds” field above, please list the source of these funds here.
Section: PROJECT LOCATION
Image 13:
If this project has a street address, please enter it below. Not all projects have a geographic component. But if the subject of this project has a
street address, enter the address details here. If you fill in a street number, street name and zip code in this section, a button labeled “Show Map”
will pop up. If you click it, a new tab on your browser will open with the location you entered on a map. When you are finished, simply close the tab
and return to the CP-3 for to finalize your project entry.
18
Section: SUBMIT PROJECT
Click the Submit button to save your project. Be sure to check over your entries and verify all data before hitting submit.
Only hit Submit once. It may take up to one minute for the project to submit. Once the project has been successfully submitted a message in red
with a project record ID will appear. You are now free to select a different action from the Main Menu or close the application.
Image 14:
If you missed a required field you will receive an error message in red next to the Submit button explaining where you need to make a correction.
For example, if you did not enter the project funding correctly, you would get a message like this:
Image 15:
19
Notify DOR that all projects for a fiscal year have been entered
Select this option if:
A. You have finished entering all new projects and updating/editing all previously entered projects for your community, or….
B. Your community’s legislative body did not approve any new CPA projects during the past fiscal year.
You will return to the original log in screen. Scroll down to see the Main Menu. On the Main Menu, click “Notify DOR that all projects for this fiscal
year have been entered.” You will then see the following field pop up:
Image 16:
Select the correct fiscal year. You will then see a list of all project names that have been entered into the CP-3 for that fiscal year.
20
Image 17:
Confirm that this list is correct and you have not missed any projects. After you have done this, check the first box “I certify that the projects listed
above comprise the complete list of CPA project…” Then click “Notify.”
Note: if you have not entered any projects for the fiscal year selected, you will see a message stating that in place of a list of project names. If you
have no projects to enter for that fiscal year, then select the second box: “I certify that the legislative body did not vote to approve any new CPA
projects during FY…” and then click “Notify.” An email will pop up with an automated message to DOR. Click send to complete the notification. You
are now finished with the CP-3 for this fiscal year!
You may now close the browser window to log out.
21