1
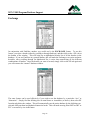
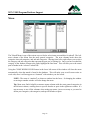
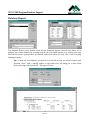
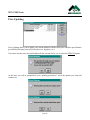
Win T-Bill
User’s
Manual
Version 1.0
Page 1
User’s Manual Note
This Manual has been prepared
to
provide instruction for our
Windows
Time and Material Billing
product.
Page 2
Overview of McCormick Time & Material Billing
Wizard:
The Wizard is used for the first time system setup.
Offices:
A user may set up a number of offices. A Company could use the different offices to separate divisions
IE: Residential, Commercial, Industrial, etc. Another use would be if the main office were in New
York City, with branch offices on Long Island and in Albany, Syracuse, and Newark, New Jersey. All
the time and material billing could be done from the main office in New York City.
The office defaults (tax, markup, etc.) will be used each time an account is setup.
Accounts:
Accounts are the individual customers or jobs that each office services. The office defaults for tax,
markup, etc. may be modified for each account.
Work Orders:
Work order forms may be created by adding Items manually, or by copying Items or Assemblies from
the McCormick database. They can then be printed and used by the workers in the field.
Invoices:
Invoices may be created using the labor defaults created for that account. Material may be added by
entering the Item or Assembly number, or inserting it from the list of Items or Assemblies in the
database. When the list of items is used, “Find/Sort” and “Menu” may be used as in the estimating
system. Additional Items such as Lifts, Rental Tools, of specials may also be added.
Reports:
A Customer Invoice and/or a Confidential report may be generated and printed based on Time and
Material, Time and Material Not To Exceed, Quote, and Call Back.
Page 3
WIN T-Bill Table of Contents
Topic
Getting Started with the Window Time and Material Billing System
Introduction
Using This Manual
Before Installing Your Software
Protecting Your Investment
Installation Instructions and Notes
WinT-Bill Documentation
Notes
SECTION I – TIME AND MATERIAL BILLING
System Log-in
User Name
Password
T-Bill Database File
Wizard
Wizard Opening Screen
Wizard Taxes
Wizard Office
Wizard Craftsmen
Wizard Estimators
Wizard Specs
Wizard Labor
Wizard Completion
Accounts
Opening Screen
Completed Account
Invoices
Opening Screen
Cover Sheet
Cover Sheet – Fields
Cover Sheet – Dates
Details – Labor
Details – Material Database
Details – Material Database Review
Details – Material Find/Sort
Details – Material Exchange
Details – Material Menu
Details – Material Transfer
Details – Material Completed
Details – Special
Details – Comment
Details – Comment Editor
Page 4
Page No.
8
8
8
9
9
11
12
13
14
15
15
15
16
17
17
18
22
24
25
26
28
29
30
30
31
33
33
34
35
37
38
39
40
41
42
43
44
45
47
48
49
WIN T-Bill Table of Contents
Topic
Details – Comment as Invoiced
Printing – Customer Invoice
Printing – Office Invoice
Work Order
Opening Screen
Edit – Parts List Form
Edit – Header Line
Edit – Import Parts Database
Edit – Creating Items/Assemblies
Edit – Completed Items/Assemblies
Edit – Work Order Header Information/Run Editor
Icons
Office
Preferences
Labor and Craftsmen/Estimator
Invoice Status
Pulldowns
File and Edit
Tools
Security and Reports
Window and Help
Notes
SECTION II – PROGRAM/DATABASE SUPPORT
Database
Item List
Item Review
Assembly List and Assembly Review
Help
Find/Sort
Exchange
Menu
Menu Setup
Database Reports
Notes
SECTION III – TOOLS
Price Updating
Pricing Configuration
Hot Link
Security
Notes
Page 5
Page No.
50
51
52
53
53
54
55
56
57
58
59
60
60
61
63
64
65
65
66
67
68
69
70
71
71
72
73
75
77
78
79
80
81
82
83
84
86
88
92
95
WIN T-Bill Table of Contents
Topic
Page No.
96
97
Appendix
Technical Support Information
Page 6
WIN T-Bill Table of Contents
Notes:
Page 7
Getting Started with the Win T-Bill
Getting Started with the Win T-Bill
Introduction
Welcome to the McCormick System Win T-Bill Program, designed by McCormick Systems
especially for businesses like yours. The purpose of the software is to simplify the Time and Material
Billing process helping you to control your billing and shorten Account Receivable time.
The software products of McCormick Systems are constantly improving. Many improvements start
with the comments and suggestions from users like yourself. We value your comments and advice. If
you have any creative suggestions or concerns, we want to hear from you. Just contact McCormick
Systems using one of the methods listed in the Appendix under Technical Support.
Using This Manual
This manual for the McCormick Win T-Bill software is arranged in three main sections:
“Getting started with Win T-Bill” – Installation tips for the hardware and software.
“Users Manual” – Detailed explanations of every Windows command, arranged in the order
of the Billing flow. Program/Database Support and Billing Tools are also included.
“Appendixes” – Special sections for troubleshooting advice, technical assistance information,
and a comprehensive index for this manual.
Notes:
Page 8
Getting Started with the Win T-Bill
Before Installing your Software
While we at McCormick would like each user to read this manual cover-to-cover before billing
a job, we recognize that most users don’t have that kind of time. The best way to use the McCormick
Win T-Bill software is to complete a Full Configuration, starting with establishing default settings for
your company and working through the Set up Wizard step-by-step until you’ve created your first
Office. Then create other Offices and Accounts as needed. We do provide a “Tutorial” to help with
your first invoices.
Protecting Your Investment
Handling Media – The weakest links in any computer system is the media you use to store
data. You need to take good care of the media, and that means keep them away from liquids, heat,
cold, static electricity, or magnetic equipment (including the speaker on the telephone).
Backup Your Files – The McCormick Win T-Bill software uses your hard drive to store active
jobs. That can mean trouble if you have a problem with your hard drive. To avoid losing valuable
data, make frequent backups of the jobs and databases you store on the hard drive. It’s a good idea to
backup and store a current copy off site. (See section “Backup and Restore Jobs” for more information
on performing backups.)
System Maintenance – Repair and Compact should be run on a weekly basis or more or less
often based on usage. It’s also a good idea to use DOS/Windows utilities like ScanDisk and Defrag on
a regular basis. See your DOS or Windows manual for more information on these utilities.
Taking Care of Your Equipment – One of the best investments in time you can make is the
time it takes to take good care of your computer.
Surge Protector – Buy a good surge protector. A voltage surge or spike can destroy all
the data on your hard drive and even physically damage the drive. Try to buy a surge
protector which also guards against voltage surges and EMI/RFI. If you have a modem,
be sure it is surge protected as well. The phone lines can deliver spikes, which may
damage your equipment.
Uninterruptible Power Supply (UPS) – A surge protector guards your hard drive
against power fluctuations but doesn’t guard against problems when the power is
interrupted. McCormick Systems strongly recommends that you have a UPS installed
on your system. This will keep your computer running even if all power in your office
is knocked out. UPS systems usually incorporate a surge protector so if you have to
choose between one and the other, choose the UPS.
Page 9
Getting Started with the Win T-Bill
Protecting Your Investment Continued
Exit Software – Make sure your computer is ready to be turned off by exiting all
software and using the Windows Shut Down procedure.
Dusting Off Your Monitor – The screen of your monitor is a magnet for dust and fingerprints.
If screen visibility is poor, dampen a cloth with water and wipe the screen clean. (Do not spray
directly on the screen).
Other Environmental Issues – Before you set up your computer, think about where exactly to
place it in your office. Check your computer manual to see what it suggests. Here are some
environmental issues to think about.
Ventilation – Computers, display monitors, and printers all generate heat, so be sure
your computer has adequate ventilation.
Temperature – Too much heat impairs your system’s ability to function. The display
monitor is usually the most susceptible to “hardware heat stroke.” Most computer
systems work well in a temperature range between 55 and 85 degrees Fahrenheit.
Direct Sunlight – Placing your computer in direct sunlight is not a good idea, it
increases the temperature on your system and creates screen glare. If glare is an
unavoidable problem, buy an anti-glare screen at your local computer store.
Smoke and Dust – Keeping your computer free from dust and smoke residue is another
way of protecting your investment. Smoke and dust interfere with your systems cooling.
For dusty environments, clean the vents of your system with a vacuum cleaner.
Vibrations – No vibrations are good vibrations as far as your computer is concerned.
Set your computer on a stable, steady work surface out of the path of foot traffic. Make
sure that all cables are secured and out of foot traffic areas.
Static Electricity – A sudden jolt of static electricity is enough to knock out your
system and all your data. If you have trouble with static electricity in your office,
ground yourself by touching the edge of your desk before you touch the computer.
Anti-static floor mats are available for extreme cases. There is also anti-static rug spray
to reduce static in particularly dry climates.
Page 10
Getting Started with the Win T-Bill
Installation Instructions
Follow the installation instructions that came with your McCormick T-Bill
Software.
Notes:
Page 11
Win T-Bill
Documentation
Page 12
Notes:
Page 13
Section I
Time and Material
Billing
Page 14
WIN T-Bill Documentation
System Login
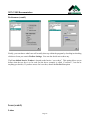
This is the First Dialog box you see when you enter the application. At this time you are required to
enter an existing Users Name & Password to gain access to the program.
User Name
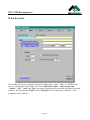
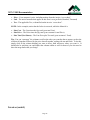
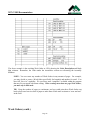
First time users should Login as “Admin” as the password is the EXACT SAME AS THE USER
NAME. This makes it easier to copy and insert in the password field. Either “Est1 (800*600
monitor)” or “Est2 (640*480 monitor)” can also be used, the password being just the “Est*” part of
the user name. The remainder of the user name referring to the monitor configuration has no real
bearing with today’s monitors, the majority being SVGA, so it makes no difference which user you
use.
Tip: Some users will find that some areas described in this manual may not be completely
available on your screen. We recommend running at 800x600 resolution or greater as this will
give you more Screen Space. ***See your Windows manual for directions on changing Screen
Resolution.
Password
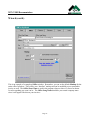
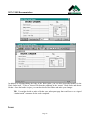
The Login window also requires a password. For your first login, your password is
the same as your user name (Admin, Est1 and Est2.) To change your password &
set up a new User *See Security.
Tip: It’s important to note that passwords are case-sensitive. For example, capital letters must
always be entered as capitals in your password. Numbers are also allowed in the passwords.
Tip: You have the option of choosing “Save Password”. This will enable the user to skip this
step the next time they log in.
Page 15
WIN T-Bill Documentation
T-Bill Database File
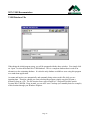
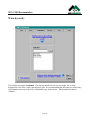
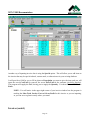
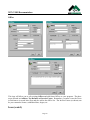
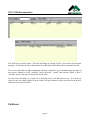
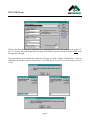
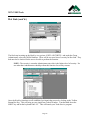
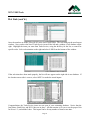
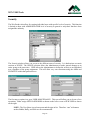
When doing the initial program setup, you will be prompted with the above window. You simply click
on “Open” to select the default Win T-Bill database. This is a complete database that is used as an
alternative to the estimating database. It is also the only database available to users using this program
as a stand-alone application.
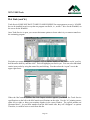
Accounts and invoices are automatically and constantly being written to this file while you are
inputting data. Therefore, should you want to backup the program, simply copy this file onto a
diskette or burn to a CD. The file location from a typical install is C:\Program Files\McCormick
Systems\Win T-Bill\Db. Keep in mind, you can also “store” backups (on a monthly basis for example)
at this location through your Windows Explorer.
Page 16
WIN T-Bill Documentation
Wizard
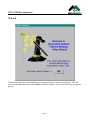
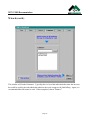
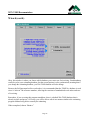
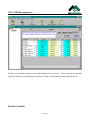
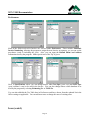
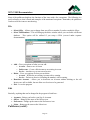
The first time login after initial installation will automatically activate the Setup Wizard. This will
guide you through setting up an initial Office within the program. Click on the OK button to begin the
process.
Page 17
WIN T-Bill Documentation
Wizard (contd.)
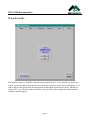
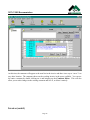
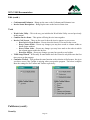
This window requires a “Yes/No” response to the question of taxes. It is a good idea to choose yes,
even if you are currently not paying any taxes, since there may be a need to do so in the future. You
will be able to select payment or non-payment on an individual account/invoice basis. Should you
choose “No”, you will not see the next window, but you will be able to adjust the situation later on
within the actual program.
Page 18
WIN T-Bill Documentation
Wizard (contd.)
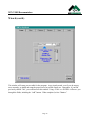
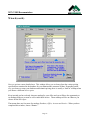
This window will setup your tax table for the program. As previously noted, even if you do not pay
taxes currently, go ahead and setup the proper taxes for possible future use. Remember, if you had
previously chosen “No”, you would not see this window. Using <TAB> or <ENTER> will move you
through the fields, including the “Add” button. When completed, select “Next>>”.
Page 19
WIN T-Bill Documentation
Wizard (contd.)
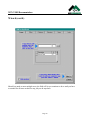
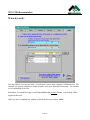
Should you need to enter multiple taxes, the field will let you continue to do so until you have
accounted for all taxes needed for any job you do anywhere.
Page 20
WIN T-Bill Documentation
Wizard (contd.)
As you enter taxes, you will be prompted with the above windows for both taxes on labor and material.
This will enter the taxes in their proper fields within the accounts and invoices.
Page 21
WIN T-Bill Documentation
Wizard (contd.)
This window allows you to setup the initial office information. Again, <TAB> or <ENTER> will
move you through the various fields. The fields “Office Short Name”, “Office Long Name”,
“Address”, “City”, “State” and “Zip” are required fields and will be indicated as such on the prompt
windows. Moving from the “Email” field to “Markup” has to be done using <ENTER>. Once
completed, choose “Next>>”.
Page 22
WIN T-Bill Documentation
Wizard (contd.)
This is an example of a completed Office window. Remember, you can set the default Markup for the
entire office from here. This will be your “baseline” markup and can be modified per account and/or
invoice as well. The Office Short Name is used in the program wherever there is a list to be shown.
It can be anything you want it to be. The Office Long Name should be your actual company name
since it will appear like this on your invoices.
Page 23
WIN T-Bill Documentation
Wizard (contd.)
This window sets up the Craftsmen. This list can include all your service people, but is really
designed for a list of the “leads” that supervise jobs. It is recommended that full names be used as they
will ultimately show up on the office confidential copy of the invoice. When completed, choose
“Next>>”.
Page 24
WIN T-Bill Documentation
Wizard (contd.)
This window will list the Estimators. Typically this is a list of the individuals that enter the invoices,
but could be used for the individuals that authorize the work or approve the final billing. Again, it is
recommended that full names be used. When completed, choose “Next>>”
Page 25
WIN T-Bill Documentation
Wizard (contd.)
Okay, this window is where you choose which database you want to use for invoicing. Both databases
can be keyed to your estimating database, but the second options is also synchronized, meaning that if
you change the estimating database, you Win T-Bill database will also change.
Because the field personnel utilize work orders, it is recommended that the T-Bill No. database is used
since it “locks in” the reference numbers, allowing the creations of standardized work orders and ease
of invoicing.
Remember, if you are using this program standalone, there is a default Win T-Bill database that is
already in place and preset. Of course, you will be able to edit it in a manner similar to the estimating
program without being able to actually do estimating.
When completed, choose “Next>>”
Page 26
WIN T-Bill Documentation
Wizard (contd.)
Now we get into a more detailed area. This window allows you to choose from the various pricing
specifications contained in the database for your Cost and the customers’ Price. Depending on the
way you choose to setup your database and maintain pricing, there is usually a “built in” markup when
you choose a different cost vs. price.
Keep in mind you have already chosen a markup for your office and you will have the opportunity to
set markups both per account as well as individual invoice. These markups will be on whatever you
choose for the Price Spec.
That means there are four areas for markup; Database, Office, Account and Invoice. When you have
completed this window, choose “Next>>”.
Page 27
WIN T-Bill Documentation
Wizard (contd.)
Use this window to set up your labor. As indicated, it can be done a number of different ways. For
example, use generic categories as in the example, or list your individual electricians. You can also
use a combination of the two.
Remember, you should be using a total Cost and Price that includes burden. Any markup will be
applied to the Price.
When you have completed this window (which is the last one), choose “Done”
Page 28
WIN T-Bill Documentation
Wizard (contd.)
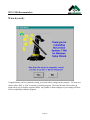
Congratulations, you have finished creating your initial office settings for the program. You may now
choose either “Yes” or “No” to actually go into the program. The Setup Wizard will not show up
again unless you do another complete install. Any further or future changes to your settings will have
to be accomplished within the program.
Page 29
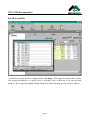
WIN T-Bill Documentation
Accounts
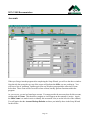
When you first go into the program after completing the Setup Wizard, you will see the above window.
Note the title bar across the very top of the screen will indicate the Office you are working in. You
will have a line of “pulldown” options typical for any Windows program and a collection of icons
below that. These icons will be covered in a later section, but they perform functions within the
program.
As you can see, you are in a brand new account. You must provide the necessary data for this account,
starting with the Name. This should be complete as it will appear on the customer’s invoice. Again,
the Short Name is to make it easier to identify this account in a list (as on the left side of the window).
You will notice that the Account Markup Defaults are those you initially chose in the Setup Wizard
for this Office.
Page 30
WIN T-Bill Documentation
Accounts (contd.)
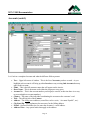
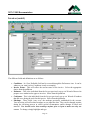
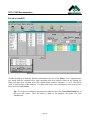
Let’s look at a completed account and what the different fields represent.
•
•
•
•
•
•
•
•
•
•
Tree – Upper left corner of window. This is the list of Accounts you have created. As you
highlight each account it will bring up either Invoices or any existing Sub-Accounts that may
apply to this account.
Name – This is the full customer name that will appear on the invoice.
Short Name – This is the name used within the program to save space.
Account No. – This is the account number you assign (be careful, at this time there is no way
to prevent duplicate account numbers).
Contact – The name of the individual coordinating the account on the customer’s end.
Title – The official title of the Contact.
Address – The billing street address (second line can be a suite, “Accounts Payable”, etc.).
City/State/Zip – Self-explanatory but necessary for the billing address.
E Mail – Optional field that lets you enter the customer’s e-mail address.
Address Notes – Any special notes that apply to the address.
Page 31
WIN T-Bill Documentation
Accounts (contd.)
•
•
•
•
•
•
•
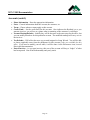
Phone Information – Enter the appropriate information.
Notes – General information about the account, the customer, etc.
Terms – Choose whatever terms apply to this account.
Credit Limit – Set the credit limit for this account. Also indicates the Residual, so as you
generate invoices, you will see at a glance what is remaining of the customer’s credit limit.
Account Markup Defaults – Initially they will be the same as the ones setup for the office, but
you can modify them here for this particular account. The modified markups will carry over to
the invoices.
Tax Defaults – Will reflect the taxes you created/assigned in Setup Wizard. You will be able
to choose applicable taxes from the pulldowns for this account if they are available for this
office. If you need to modify your tax table, it will be done via the Preferences icon, covered
later in this documentation.
Posted Invoices – As you post invoices, this area of the account will keep a “ledger” of what
has been posted. Note it has both monthly and yearly totals.
Page 32
WIN T-Bill Documentation
Invoices
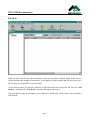
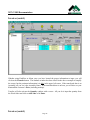
When you select Invoices from the account tree, you will see the above window listing all the invoices
for this account (this example is brand new). It will indicate all the pertinent data for each invoice as a
line for easy review including its current status.
If you want to start a new invoice, either do a right click on Invoice in the tree and click on “Add
Invoice”, or click on the “New Invoice” button in the upper right corner.
If you are here to open an existing invoice, simply do a double click on the invoice you want and it
will open up.
Page 33
WIN T-Bill Documentation
Invoices (contd.)
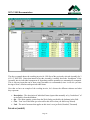
The above window is the initial invoice window. Note there are no Dates, Estimator, Craftsman or Job
Site information. You will provide this information. Also note there is an Invoice Status, Markups
and Type of Invoice. You can and will change this information as needed.
Page 34
WIN T-Bill Documentation
Invoices (contd.)
The different fields and definitions are as follows:
•
•
•
•
•
Conditions – Is a User Definable field and is accessed through the Preferences icon. It can be
whatever you want it to be (Conditions is only an example).
Invoice Status – This will reflect the current status of the invoice. Select the appropriate
choice from the pulldown.
Estimator – This is the individual from the list you previously set-up via Wizard of those who
prepare or are authorized to approve invoices. Select from the pulldown.
Craftsman – This is the individual from the list you previously set-up via Wizard of leadmen
that did or are doing the work for this invoice. Select from the pulldown.
Markups – These fields “carry over” the markups previously established for the account.
Your invoicing will reflect these markups as you input the data. They can be changed anytime
during the invoicing process to reflect special circumstances and/or changes in labor and
material. You should review these markups anytime prior to input to make sure they are
correct. To change, simply highlight and type.
Page 35
WIN T-Bill Documentation
Invoices (contd.)
•
•
•
Type of Invoice – This field allows one of four choices; Time & Material, Not To Exceed,
Quote, and Call Back. Select from the pulldown.
Job Site – This is the information for where the work is actually being done. If different from
the Account, it must be input manually. If it is the same location as the Account, simply
choose the Auto Fill button and the information will automatically be transferred.
Applicable Taxes – These fields contain the taxes previously set-up in Wizard. By default the
list will include all available taxes. If you decide not to use a specific tax, double click on it in
the list and you will be prompted whether you want to delete it or not (this is invoice specific
and can be reversed). If the entire invoice is not-taxable, you have the option of choosing the
No taxes are applicable to this invoice box and it will disable any taxes (this can be turned on
and off during the input process to tax or not tax your input).
Page 36
WIN T-Bill Documentation
Invoices (contd.)
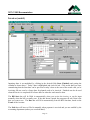
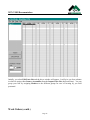
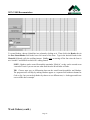
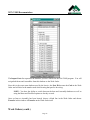
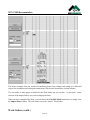
Inputting dates is accomplished by clicking in the desired field (Start, Finished) and getting the
calendar as shown above. Today’s date is highlighted and circled in red. Click on the date you want,
remembering that the Start date can be previous to today’s date as the start of the actual work you’re
invoicing OR can even be a future date for planned work to be invoiced. Finished can also be used
when the invoice is completed OR a future date for when the work must be done.
The Bill Sent date will be filled in automatically when you review the invoice, or can be input
manually when the bill is actually sent. If the date doesn’t match, the program will ask if that is the
date you want to use. The Due date will fill in automatically from the Bill Sent date, based on the
Terms of the Account.
The Paid date will have to filled in manually when payment is received and you are notified by the
accounting department (unless you wear both hats!).
Page 37
WIN T-Bill Documentation
Invoices (contd.)
Once the “cover sheet” for the invoice is completed, proceed to the next area of invoice, data input.
This is accomplished by clicking on the companion tab at the top of the invoice labeled Details. There
are four (4) areas of data input; Labor, Material, Special, Comment.
The first area, Labor, will be brought up automatically. Input is accomplished by selecting the correct
labor category from the list, i.e., Foreman, Journeyman or Apprentice.
NOTE: When not active, the background will appear yellow. When a category is selected, it
will appear white and the Hour field will be active with a cursor.
Type in the total number of hours that apply for this category, then either click on the Add Line button
or simply hit Enter. It will then appear in the invoice area. Check the results.
Page 38
WIN T-Bill Documentation
Invoices (contd.)
Once you have completed Labor (you can go back anytime), the next area of input is Material. Click
on the button and you will see the above window. It will automatically bring up a database window
for Item or Assembly. The database window will be determined by the database you chose during the
Set-up Wizard.
The first column in the window is the reference number, which should match the Work Order (covered
later) number used in the field by the leadman. The second column is the Item/Assembly Name, which
should also match the Work Order.
At the bottom of the window are the tabs for manipulating this particular window. The Item/Assembly
tabs will toggle back and forth between the two different databases.
Page 39
WIN T-Bill Documentation
Invoices (contd.)
If you are using Assemblies for invoicing, you can use the Review tab to see what individual items
make up that particular Assembly. The information includes the Item #, the ByProducts (same as the
Item name), and the Qty of those ByProducts for a SINGLE Assembly. Typically, our Assemblies are
put together as either one each or one foot, leaving it up to you to provide the count or length.
Page 40
WIN T-Bill Documentation
Invoices (contd.)
The first method for locating information in the database is Find/Sort. This feature will allow you to
simply type in the reference number from the Work Order and go directly to the corresponding number
in the database. You then click on the Transfer button.
Page 41
WIN T-Bill Documentation
Invoices (contd.)
A method very closely related to using Find/Sort is Exchange. When you have located either a header
(the section descriptions) or a specific Item or Assembly, click on EX and it will sort the entire
database. This can greatly simplify finding similar data without knowing specific reference numbers.
Page 42
WIN T-Bill Documentation
Invoices (contd.)
Another method of locating the database information is the use of the Menu. In it’s simplest form,
you would work the columns left to right, choosing what areas indicate what you are looking for.
When you make your selection in the last column (which could be columns 2, 3, or 4), you will be
“sent” to that location in the database. You then scroll to the exact information, click on it to focus
there, then click on Transfer.
Tip: To keep your workspace somewhat less cluttered, check the Close When Found box in
the lower left corner. Once the match is made to the database, the Menu will close
automatically.
Page 43
WIN T-Bill Documentation
Invoices (contd.)
Whether using Find/Sort or Menu, once you have located the proper information to input, you will
click on the Transfer button. The database window has been closed in the above example to simplify
the screen, but the pertinent information is in blue in the upper left corner. If the transferred data is an
Assembly, all you see is the Assembly Name. If the transferred data is an Item, you will also see your
Cost and the customer’s Price (including markup).
Transfer will also activate the Quantity window with a cursor. All you do is input the quantity from
the Work Order and click on Add Line or hit Enter.
Invoices (contd.)
Page 44
WIN T-Bill Documentation
The above example shows the resulting invoice for 1200 feet of the previously selected Assembly for 3
#12 1/2" EMT D/S. Notice that instead of just the Assembly, it actually shows the “breakdown” of the
Assembly into its individual components or byproducts and the quantities are automatically computed.
This is why any input that can be done using Assemblies is recommended, since it will save you time
having to locate, calculate and input individual items.
Now that we have an example of the working invoice, let’s discuss the different columns and what
they represent:
•
•
•
•
Description – The description of individual Items (input either manually or by “breakdown” of
an Assembly) from the database.
Qty – The input quantity, gotten from the Work Order provided by the leadman in the field.
Cost – Your cost of this item (pre-selected for this office when you did Set-up Wizard).
Unit – The unit of measure that applies to this item’s cost (per Each, Hundred, Thousand)
Invoices (contd.)
Page 45
WIN T-Bill Documentation
•
•
•
Price – Your customer’s price, including markup from the invoice “cover sheet”.
Unit – The unit of measure that applies to this item’s cost (per Each, Hundred, Thousand)
Tax – The applicable Tax, as identified on the invoice “cover sheet”.
NOTE: In the example, notice that the Labor is not taxed, while the Material is.
•
•
•
Line Cost – The Cost times the Qty total (your total Cost).
Line Price – The Price times the Qty total (your customer’s total Price).
Line Total (Not Shown) – The Line Price plus Tax total (your customer’s Total).
Tip: You can “rearrange” the columns to reflect the order you want the data to appear, such as the
cost data all together followed by the price data all together, ending with tax and totals. To do this,
simply click on the column heading you want to move, hold and move where you want it. It
should also be said that you could adjust the column widths as well for those of you who need to
show the mega bucks that you charge.
Invoices (contd.)
Page 46
WIN T-Bill Documentation
Another way of inputting invoice data is using the Special option. This will allow you to add items to
the invoice that may be special ordered, custom made, or otherwise not in your existing database.
It will provide a field for you to fill in whatever Description you want to give the item, and you will
input the actual Cost/Unit for yourself, the actual Price/Unit for the customer (including markup).
The program will supply the Tax, leaving you to supply the Quantity. You then click on Add Line or
Enter.
NOTE: You will notice in the upper right corner of your invoice window how the program is
tracking the Sales Total, Invoice Cost and Gross Profit for this invoice as you are inputting,
so you can see at a glance exactly where you stand.
Invoices (contd.)
Page 47
WIN T-Bill Documentation
Finally, you can input comments at any time during the invoice process. These comments can precede
specific work done, such as during a weekend, or clarify an action that has already been invoiced.
Invoices (contd.)
Page 48
WIN T-Bill Documentation
At this time, the comment will appear as the next line in the invoice and there is no way to “move” it to
any other location. The comment shows on the working invoice in the space available. You can see
the entire comment by double clicking on it and bringing up the Comment Editor. This will also
allow you to make changes to the existing comment and save it, or delete it entirely.
Invoices (contd.)
Page 49
WIN T-Bill Documentation
Okay, at some point you will either complete the invoice or want to review what you have done as a
printed document. Clicking on the Printer icon in the very top right corner will bring up your print
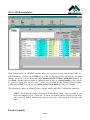
choices. As review, you can choose either the Customer Invoice or Office Confidential separately or
view Both. Another option available is sending finished invoices to a Batch Printing so they can all
be printed at a later time and all at once. Again, you can batch just the Customer Invoice, Office
Confidential or Both. You can also see a Batch List and Clear Batch the entire list if desired.
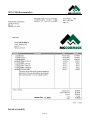
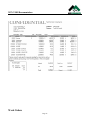
The following two pages are examples of the Customer Invoice and Office Confidential respectively.
NOTE: The following example of Customer Invoice shows a logo. This is possible if you
have your company logo as a *.bmp file. If you do, let us know and we will help you set it up.
This is the only default location of the logo in our invoice, allowing the use of plain bond
paper.
Invoices (contd.)
Page 50
WIN T-Bill Documentation
Invoices (contd.)
Page 51
WIN T-Bill Documentation
Work Orders
Page 52
WIN T-Bill Documentation
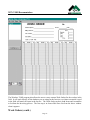
The Windows T-Bill program also allows the user to create custom Work Orders for the workers in the
field. It will work directly off the database you are using for the Invoices, so whatever material is used
in the field will match for input in the Invoice. The Work Order can have both Items and Assemblies
to facilitate the Invoicing process. The first step is to choose Edit Parts List from the above window
when it appears.
Work Orders (contd.)
Page 53
WIN T-Bill Documentation
Initially, you select Edit Parts List and the above window will appear. It will give you four columns
in which to assign either Items or Assemblies from the Import Parts List (discussed later). You can
group your lists by assigning Headers to the different groups for ease of locating by you field
personnel.
Work Orders (contd.)
Page 54
WIN T-Bill Documentation
To create Headers, choose a blank line in a column by clicking on it. Then click in the Header box in
the Part Name/Header field in the lower left corner of the form. Type in the desired Header in the
Material field and verify the spelling/content. Verify prior to moving off the line since the form is
not “sizeable” and difficult to read in it’s editing format.
NOTE: Headers can be created first and the remainder “filled in”, or they can be created on an
“as needed” basis if you are not sure what final form the Work Order will take.
TIP: Choose some way to differentiate between the actual Items/Assemblies and Headers.
The program itself will help by making Headers appear as a separate field without columns for
Code or Qty, but you can help further by choose to use different text, i.e. both upper and lower
case as in the above example.
Work Orders (contd.)
Page 55
WIN T-Bill Documentation
The Import Parts list represents the database you have chosen for the Win T-Bill program. You will
assign both Items and Assemblies from this database to the Work Order.
Since this is the exact same database used by the Invoice, the Part ID becomes the Code in the Work
Order and will also be the number used when locating that part for Invoicing.
NOTE: You have the ability to switch between the Item and Assembly databases as well as
using the Menu and Find/Sort options as already covered.
Once an Item or Assembly has been located, choose a blank line in the Work Order and choose
Transfer in this window or Transfer on the Work Order itself.
Work Orders (contd.)
Page 56
WIN T-Bill Documentation
The above examples show the results of transferring Items (first column) and setting up a dedicated
section for Assemblies and subsequent transferring of the desired Assemblies (second column).
You can create as many pages as needed for the Work Order and you can also “cut and paste” entire
sections of the Import Parts to save time setting up the form.
When you have completed the form, you can choose the Exit Edit Mode button here or simply close
the Import Parts window. This will return you to the “master” Work Order.
Work Orders (contd.)
Page 57
WIN T-Bill Documentation
The above example is the resulting Work Order at 150% showing the Code, Description and blank
Qty columns. Remember, the Codes under the Assemblies section are referencing the Assembly
database.
NOTE: You can create any number of Work Orders in any amount of pages. For example,
you may decide to create a Work Order specifically for hospitals and another for retail. You
have full “Save As” capability. We even have some “templates” available within the program
that may fit your needs with minor editing. When creating more than one page Work Orders,
you must stay in Edit mode.
TIP: Keep the number of pages to a minimum, and you could print these Work Orders out
back to back on a heavier stock of paper to make them a little more resistant to “wear and tear”
in the field
Work Orders (contd.)
Page 58
WIN T-Bill Documentation
In addition to creating/editing the body of the Work Order, you can also create/edit headers for the
Work Order itself. To do so, choose Edit from the pulldown in the “master” Work Order and choose
Header. Once the header is open, you can then choose Run Editor and make your changes.
TIP: You might decide to make a Header on a subsequent page that would serve as a signed
“Authorization” statement for the work completed.
Icons
Page 59
WIN T-Bill Documentation
Office
This icon will allow you to edit existing Offices and add future Offices to your program. The three
areas affected are Address, Tax Defaults and Invoice Footer. Remember, you must create the Taxes
in Preferences (covered later) first and then add to the Office list. The Invoice Footer (as shown) can
be your contractor license, established date, slogan, etc.
Icons (contd.)
Page 60
WIN T-Bill Documentation
Preferences
Most of the fields involved in Invoices are covered under Preferences. These include Automatic
Invoice Numbering, allowing the program to assign the next Invoice in sequence, yet you can set the
precedence (such as including the year). Also, you can input the Default Phone and Address
information used by the program. Make special note of the Tip: if given.
Next, is Specifications where you can change/choose what Cost Spec (your cost) and Price Spec
(your customer’s cost) to be used in the Invoice. You can also change/choose which database to be
used by the program by selecting Estimating No. or T-Bill No.
You can also add/edit the Tax Table here in Preferences and later, choose from the updated list in the
Office settings as applicable. You can add new taxes or change the rates of existing taxes.
Icons (contd.)
Page 61
WIN T-Bill Documentation
Preferences (contd.)
Finally, you can choose what Icons will actually show up within the program by checking/un-checking
whichever Icons you want in Toolbar Settings. You can also decide not to show any.
The User-defined Invoice Textbox is located on the Invoice “cover sheet”. This setting allows you to
define what the text box is to be used for (the above example is called “Conditions”, but can be
anything you decide). If you have no use for a text box, choose the Do Not Use option.
Icons (contd.)
Labor
Page 62
WIN T-Bill Documentation
Use this Icon to add/edit your Labor settings. You can change the Cost/Price and also decide if a
particular labor is either Active (checked) or Inactive (un-checked). You can modify these settings per
Office by choosing the correct Office from the pulldown in the upper right corner.
Craftsman/Estimator
You can perform similar editing to the Craftsmen/Estimators from their own Icon and it is edited per
Office as well. Notice they also has the ability to be either Active or Inactive by checking the box or
not.
Icons (contd.)
Invoice Status
Page 63
WIN T-Bill Documentation
The final Icon is Invoice Status. This Icon will bring up a listing of ALL your invoices for the entire
program. It will show the above information in a table form and list the Invoices in numerical order.
You can see that with very little imagination, this Icon would allow you to instantly know the status of
any invoice, whether it is still “working”, being “invoiced”, “posted” and sent out “billed” with it’s
“due date” preset, and can even showed it’s been “paid”.
You also have the ability to “search” for a particular invoice for dedicated review. To review any
Invoice in the list, simply double-click on it and it will go to whatever screen was last seen in Invoice,
either the cover sheet or details.
Pulldowns
Page 64
WIN T-Bill Documentation
Most of the pulldowns duplicate the functions of the icons with a few exceptions. The following is a
quick reference to what is listed and examples of the mentioned exceptions. Remember, the pulldowns
can be used if the icons are not showing.
File
•
•
Select Office – Allows you to change from one office to another if you have multiple offices.
Select Tbill Database – This will bring up the below window where you can choose a different
database. This option will be utilized if you setup a PDA (covered under separate
documentation).
•
Add – Gives you options of what you can add:
o Account – Starts a new Account.
o SubAccount – Create a SubAccount to an existing Account.
o Invoice – Another way to start a new Invoice.
Delete – Gives you options of what you can delete:
o Account – Will delete an existing Account with a warning.
o Invoice – Deletes an Invoice (including the number) with a warning.
Deactivate Account – Allows you to deactivate an Account without deleting so the old
Invoices are still available, but not allow new Invoices to be generated.
Exit – Leave the program.
•
•
•
Edit
Basically, anything that can be changed in the program is listed here:
•
•
•
•
Accounts – Brings you back to your list of Accounts.
Offices – Brings up the same as the Offices icon.
Preferences – Brings up the same as the Preferences icon.
Labor – Brings up the same as the Labor icon.
Pulldowns (contd.)
Page 65
WIN T-Bill Documentation
Edit (contd.)
•
•
Craftsman and Estimator – Brings up the same as the Craftsman and Estimator icon.
Invoice Status Descriptions – Brings up the same as the Invoice Status icon.
Tools
•
•
•
•
•
Work Order Utility – This is the way you initialize the Work Order Utility covered previously
in this manual.
Combine Invoice Items – This option will bring Invoice items together.
Invoice Grid Layout – These are the reset for how the invoice appears on you screen:
o Reset Invoice Form Position – Resets where the Invoice is located on the screen.
o Reset Column Width – Resets any changes you may have made to column widths to
handle larger numbers.
o Reset Column Order – Resets any changes you may have made to the order in which
the columns appear within the Invoice.
o Reset Row Height – Resets any changes you may have made to row heights.
T-Bill Setup Wizard – Will usually be unavailable since the Wizard is only done once the first
time you set up the program.
Customize Toolbar – Will perform the same function as the selection in Preferences, but gives
you direct access if the Toolbar is missing when you open the program. The below examples
show the settings for No Toolbar and Toolbar respectively:
Pulldowns (contd.)
Security
Page 66
WIN T-Bill Documentation
This option will allow you to setup Security for individual/multiple users of the program. This can be
accomplished individually or by copying existing Security from another user.
Reports
•
Summary Reports – This option allows you to print reports based on Accounts, Estimators or
Craftsmen and break it down further by Month, Year, Quarters or a specific date range.
•
•
•
•
Print Customer Invoice – Prints the current Customer Invoice.
Print Office Confidential – Prints the current Office Confidential Invoice.
Print Both Invoice and Confidential – Prints both the current Invoices.
Batch Printing – Will print whatever is in the Batch list:
o Print Customer Invoice Batch – Prints only the Customer Invoices.
Pulldowns (contd.)
Reports (contd.)
Page 67
WIN T-Bill Documentation
o Print Office Confidential Batch – Prints only the Office Confidential Invoices.
o Print Both Invoice and Confidential Batch – Prints all the Invoices.
o Clear Batch – Clears the entire Batch list.
Window
•
•
•
•
Cascade – Minimal window setup on screen to allow multiple windows.
Tile Horizontal – Maximum window setup to cover screen horizontally (default).
Tile Vertical – Maximum window setup to cover screen horizontally (default).
Active – List of invoices active.
Help
The following Help screens give you data on the program and your system.
Notes:
Page 68
WIN T-Bill Documentation
Page 69
Section II
Program/Database Support
Page 70
WIN T-Bill Program/Database Support
Database
Whether you use the T-Bill program along with the WinProducts estimating program or as a stand
alone, you will have the ability to edit the database and customize it to your specific needs.
The following sections will assist you in these procedures.
Items List
All Invoicing is accomplished by using either an Item or Assembly list. From here you may select and
invoice your required materials. Pricing information is saved with the individual parts and may be
viewed or modified using the Review tab.
The fundamental component of the database is an item. An item is an individual unit of material used
for invoicing. Everything in the database is composed of items. Even the assemblies are made from
items, although they are called by-products when used in an assembly.
It will help you to understand the database if you think of it as two parts:
• Item List – Contains price and labor specifications for individual items.
• Assembly List – Contains by-products, prices and labor information about assemblies. (A byproduct is an item that is used as part of an assembly.)
Page 71
WIN T-Bill Program/Database Support
Item Review
You will be spending a lot of time looking at the “Review” screen for your item and assembly lists as
you arrange your items and assemblies in their proper positions within your database. While in
Review mode you still retain all of the functionality of the original takeoff list. (For example: You
may still access the Menu)
The names that appear in the review screen for item and assembly specifications and the order they
appear in are not permanent. Some specs like Item #, Assembly Name, and some others may be
descriptive enough the way they are. The best spec names are ones that are descriptive of your
operation; they are the ones you will remember most easily. A description of some of the most
common specs used for invoicing are listed below:
•
•
•
•
•
•
•
Book Price – Can be changed manually (also updated by pricing services such as Trade
Service® ,EPIC® or a specific supplier).
Price 1/Price 2/Price 3 – Multiples of Book Price (which can be set by the user). These
specs CANNOT be changed manually.
DCI Code – The code that pricing services use to match changes to be made to our
database. It is an 11-digit number, the first six indicating the source of manufacture and the
last five indicating the product. Most pricing utilizes this system, even if it is a supplier.
Header – This indicates if the item is an actual item or to be used as a header. YES will
allow the header to appear in an alphabetical listing of headers, NO will allow sorting by
item.
P/Adj1, P/Adj2, P/Adj3 – The multipliers applied to Book Price to create Price1, Price2,
and Price3.
Last Update – This is the date/time that this item was last updated by a pricing program of
some kind (TRASER®, EPIC®, or a supplier).
Item # - The reference number of this item within the database. If this item is moved, due
to inserting lines or moved to another part of the database, the Item # will change
automatically and any assemblies using this item will also be updated automatically.
Page 72
WIN T-Bill Program/Database Support
Assembly List
An assembly is a collection of items (called by-products) that are frequently used together in the
same fixed proportions. Exactly which items constitute an assembly varies with the construction
trade, differences in the practice of that trade, variations in the building codes from area to area and
your own preferences.
Everything in the database is either an item or an assembly. The advantage of using assemblies is
that during the invoicing process, using one assembly results in invoicing all of the items the
assembly is made of. In other words, assemblies group items together for invoicing, saving the
time required to create an invoice item-by-item. Your assembly list can hold up to 60,000
assemblies. Each assembly can hold up to 256 by-products.
Assembly Review
There are actually two different review screens for Assemblies (By-products and Specifications).
You may toggle between the two screens by clicking on the Review tab again. When you first
select the “Assembly Review” tab you are brought to the by-product screen. From here you may
view or edit the individual items that make up an assembly.
Page 73
WIN T-Bill Program/Database Support
Assembly Review (contd.)
To build an assembly, you’ll need at least two takeoff windows open. The first window must display
the by-products for the assembly you’re building. In the second takeoff window, you must select the
item or assembly you want to add to the assembly you’re building. Clicking on the AddMode button
in the first window will cause a Transfer button to appear in the second.
Tip: you can build assemblies with items or with other assemblies. To save time, consider
starting a new assembly by copying a similar assembly and editing it to meet your own needs.
You will be spending a lot of time looking at the Review screen for your item and assembly lists as
you arrange your items and assemblies in their proper positions within your database. While in
Review mode you still retain all of the functionality of the original takeoff list. (For example – You
may still access the Menu)
The names that appear in the review screen for item and assembly specifications and the order they
appear in are not permanent. Some labels, like Item #, Assembly Name, and some others, may be
descriptive enough the way they are. If so leave them as they are. The best labels are ones that are
descriptive of your operation; they are the ones you will remember most easily. A description of some
of the most common specs for invoicing are listed below:
•
•
•
•
•
Header – This indicates if the item is an actual assembly or to be used as a header. YES will
allow the header to appear in an alphabetical listing of headers, NO will allow sorting by
assembly.
Last Update – This is the last date the assembly by-product pricing was modified.
Assm # - This is the reference number currently being used by this assembly. If this assembly
is moved, due to inserting lines or moved to another part of the database, the Assm # will
change automatically and will be updated automatically.
Composition Last Changed – The date the last time the by-products for this assembly were
modified.
Composition Last Changed By – The user doing the changes to this assembly.
Help
Page 74
WIN T-Bill Program/Database Support
The basic Help screen, as shown above, is the typical “menu” style that most of us are familiar with
from most Windows programs. The drawback with this style is you must know where the information
is contained that you are looking for. The breakdown is pretty self-explanatory and shouldn’t create
too many problems, but we have provided a much more “user friendly” method of using Help.
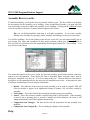
This alternative method is what we call “context sensitive”. In other words it goes where you are in
the program (this example is an Assembly takeoff window). To use this feature, put focus on the area
in question; i.e., a takeoff window, menu, audit trail, etc. Then hit the <F1> key on your keyboard. It
will bring up the help window for that area.
Help (cont’d.)
Page 75
WIN T-Bill Program/Database Support
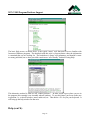
You will notice it also has the accompanying text describing the help topic and the green highlights
that will lead to related information.
The note at the top of the window directs you to “Click on the Area you would like Help With”.
Moving the cursor around the image will produce a pointing finger. Point to the area you have a
question on and do a single left click, such as menu below. This will then prompt the Help screen to
go to that area.
You can continue this process up to the point that a link to the actual database is necessary, at which
point you will get a final text box with help information. The below example shows going to the
SETUP button, then choosing AddMode from the available buttons. To get out of Help, simply hit
<ESC> until out. Remember, you can print any information on the screen and make your own
reference manual for those areas you use frequently.
Page 76
WIN T-Bill Program/Database Support
Find/Sort
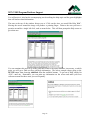
Use this screen to search the item and assembly databases that match the specified criteria. This is the
quickest way to search for an unknown part. Please note that the Title Bar “Takeoff Find/Sort” lets
you know which list you are going to be performing your search in (Items or Assemblies). To toggle
between items or assemblies simply click on the tab of the current Takeoff window.
It is permissible to use a “wild card” (an asterisk) in the search. This will “replace” any characters
currently before the description you are looking for, including spaces. There are also a number of
different methods to match your search:
1. Name by Item Number – Will find matches by number in the database.
2. Name by Name – Will find matches alphabetically in the database.
3. Item # - Will go directly to the item/assembly number listed in the What field.
4. DCI Code by DCI Code – Will find matches to DCI Codes numerically.
5. DCI Code by Item # - Will find matches by item number in the database.
You can also “Setup” your own find/sort by choosing the SETUP button on the main window. Select
NEW, add your own DESCRIPTION, a FIELD to find/sort by and SORT ORDER to find/sort by.
Then click on the SAVE button and you have a new way to find/sort the database.
Page 77
WIN T-Bill Program/Database Support
Exchange
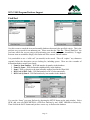
In conjunction with Find/Sort, another very useful tool is the EXCHANGE feature. To use this
feature, you select a header (either by scrolling or through find/sort), and then click on the <EX> tab at
the bottom of the window. This will bring up an alphabetical header list of all the headers in the
database. If you use Find/Sort in a general manner, this will make the Exchange even easier and more
desirable, since scrolling through an alphabetical list is easier than memorizing all the different
combinations of headers. Once the header you want is located, simply click on the EX tab again and
you will return to the “normal” database window.
The same feature can be used effectively if you wish to sort the database by a particular “size” or
“dimension”. Simply find the defining size in actual Items or Assemblies (as above), then select EX
from the tabs below the window. This will automatically sort the entire database by the definition you
selected AND put them in alphabetical/numerical order. This will make moving from EMT to GRC or
PVC even easier by size in the future.
Page 78
WIN T-Bill Program/Database Support
Menu
The Takeoff Menu is one of the easiest ways to find or select items or assemblies for takeoff. The leftmost column of the Menu lists the most general categories. The next columns break down the
categories into sub-categories, and sub-sub-categories. Moving from left to right allows you to select
the category and sub-categories that represent the part you’re looking for. Once you have reached the
category in the farthest column to the right, highlight the final item. This will take you to the actual
part or header in the “selected” takeoff list.
Using the CLOSE WHEN FOUND feature in the lower left corner of the window will close the menu
automatically when the match is found in the database. This will make your overall screen easier to
work with, since it will not appear so “cluttered” with windows you don’t need.
NOTE: The menu is “attached” to whatever window has the focus. So changing the window
to moving to another window will also change the menu.
Tip: Most users find it helpful to structure menu columns with the most general categories in
the left-most column, working down to specific headers or parts in the right-most column. It’s
not necessary to use all the columns when setting up menus, just use as many as you need to
define your categories, sub-categories, and specific headers or parts.
Page 79
WIN T-Bill Program/Database Support
Menu Setup
This screen allow you to add or customize the categories & sub-categories that make up the “Menu”
window allowing you to setup new menu lists. To change any existing entry, double click on it; this
will allow you to rename or edit the entry in the box above the list. To add a new category or actual
part, click on the AddMode button.
AddMode
Once you enter “AddMode” any takeoff lists you have open will now show a “Transfer” button located
just above the tab bar along the bottom of the Takeoff window. To transfer parts or headers into your
menu system follow these steps.
•
•
•
Select the column where you would like the part or header to appear in the Takeoff Menu.
Highlight the part or header in the takeoff list and click on transfer.
You can keep transferring headers or parts until your menu lists are complete.
Page 80
WIN T-Bill Program/Database Support
Database Reports
The Database Report screen operates much like the Extension Reports, however this allows you to
printout your current database by selecting from the list of available reports, or by creating your own.
McCormick Systems provides three pre-defined reports with which you may view, create or modify
additional reports.
Tip: To print out your Database, you must be in a job with at least one takeoff window open.
Selecting “Print” while a takeoff window is open and active will bring you to this screen.
Select your range and click on OK. The report is below.
Page 81
WIN T-Bill Program/Database Support
Notes:
Page 82
Section III
Tools
Page 83
WIN T-Bill Tools
Price Updating
Price Updating allows you to update your current database with the latest price and labor specifications
provided by third party sources (Pricing Services, Suppliers, etc.).
If you have already run a successful update all that is needed is for you to select the UPDATE option.
At this time you will be prompted for your “printing preferences” select the options you want and
continue on.
Page 84
WIN T-Bill Tools
Price Updating (cont’d.)
When you receive the message “Start your update application now” Minimize the McCormick
WinProduct and start your third party application as you normally would. Once your application has
completed its update, control will be returned to the Win Product.
Before updating the database prices, read the bulletin that the pricing service sends with each price
update diskette. The bulletin contains information n changes in vendor number (UPC/EDP/DCI code),
prices, new items, discounted items, etc.
McCormick Systems supports many different Price Updating services with more being added all the
time.
Tip: If you would like a specific vendor added to the list of supported formats, contact your
vendor and let them know. We will be happy to work with them directly. Just have them call
us.
Pricing Configuration
Page 85
WIN T-Bill Tools
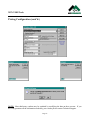
If this is the first time you are running the price updating function you will need to create a new CU
file. To do this, select the format that your data is in from the previous screen and select EDIT from
the buttons to the right.
This screen allows you to define the parameters of a new or current “Update Configuration.” Keep in
mind that you will only need to create a new CU or UPD file the first time you run an update for each
vendor.
Page 86
WIN T-Bill Tools
Pricing Configuration (cont’d.)
NOTE: Most third party vendors may be emulated by modifying the data on these screens. If you
have any questions on the information needed by your vendor please contact Technical Support.
Page 87
WIN T-Bill Tools
Hot Link
The Hot Key process allows the user to “switch” between the McCormick estimating program and the
Trade Service database, “collect” data on pricing for any number of items and “import” the
information back into the estimating program to be used for estimating purposes. You will have to
create a button on your toolbar for this purpose. First, do a right click on a blank button and name it
Hot Key. Then, bring up one (1) Item Takeoff window. Do another right click on your new Hot Key
button and do a snapshot, repeat and select 1 Window Takeoff.
You will then select <EDIT><KEYBOARD> to open up the Keyboard Mapping window above.
Make sure 1 Window Takeoff is selected in the Description field in the upper left corner of the
window. Choose SHIFT in the upper right corner by using the pull-down in the Shift field, and “H” by
using the pull-down in the Key field. Next, using the pull-down in the Pre-Defined Action field, select
<TSP_HOT_LINK>. Finally select the SAVE button in the lower right corner, then CLOSE.
Page 88
WIN T-Bill Tools
Hot Link (cont’d.)
The final step in setting up the Hot Key is to go into <EDIT><SECURITY> and under the Group
Administrator, select the AREA Database. There will be two new lines of security for Hot Link. They
both need to be checked for the user to be able to perform the function.
NOTE: The security is set under Administrator since this is the highest level of security. No
one other than Administrators should perform this function for security reasons.
Once the Hot Key functions are all established you launch the process by clicking on the Toolbar
Button Hot Key. This will bring up your single Item Takeoff window. You then hold down the
SHIFT key and hit the keyboard letter “H”. This will launch your Trade Service program.
Page 89
WIN T-Bill Tools
Hot Link (cont’d.)
Trade Service DOES NOT HAVE TO BE UP AND RUNNING for our program to access it. It DOES
have to be installed in such a way that our program can find it, i.e., on the C: drive for the Win6000, on
the server for the Win8000.
Once Trade Service is open, you can use their menu options to locate what it is you want to transfer to
the estimating program.
Find what you want (as long as it’s together), click on the first item in the list, find the end of your list,
hold down the shift key and then click. This will highlight your list for you. You can select individual
entries in any order by using the control key and clicking. You then select the “export” icon in the
upper right corner.
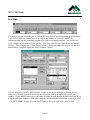
When the McCormick Systems Hot Link Import window appears, you match the Trade Service
specifications on the left to the McCormick specifications on the right. Use the “in” pointing arrows,
either left or right, to bring your matches together in the center window. The typical matches are
illustrated above. As you make matches from the McCormick side, they will “disappear” as options.
Therefore, it would be easier to work from this list.
Page 90
WIN T-Bill Tools
Hot Link (cont’d.)
Once the matches are made, select NEXT in the lower right corner. This will bring up the next Import
window. Now you have the list of Trade Service items on the left and a window of our database on the
right. Highlight the items you want from Trade Service, using the shift key for the list, or control for
specific order. Select a destination on the right and select LINK from the bottom of the window.
If the selections have been made properly, the list will now appear on the right side in our database. If
the location on our side is correct, select APPLY to make the actual import.
Congratulations, the Trade Service items are now part of your estimating database. Notice that the
Item Name, Book Price and DCI Codes are in place. All that remains is for you to set the proper Unit
for Prices 1-3, and add the Labor. This import can be for any number of items at one time.
Page 91
WIN T-Bill Tools
Security
The Win Product also allow for creating individual users with specific levels of security. This function
is limited to those with ADMINISTRATOR level of security in general or only those that have been
assigned the authority.
The Security window allows you access to the different areas of security. It is broken into two main
sections or SCOPE. The GROUP selection allows the Administrator to make general changes to an
entire group at the same time. USER allows the Administrator to define the security to an individual
user, regardless of the group assignment. This will allow very exact functions using the AREA and
ELEMENTS within that particular area.
The first step or option is to go to USER MAINTENANCE. This area will allow you to do one of two
operations. Either assign NEW PASSWORDS as shown on the left or create a NEW USER as shown
on the right.
NOTE: The User Name is used on reports and the sign-in list. Therefore “cute” nicknames
such as Bubba, Buffy, and Slick are not recommended.
Page 92
WIN T-Bill Tools
Security (cont’d.)
Once the New User is assigned a name and password, the next step is to assign the DEFAULT
settings. These create the TOOLBAR buttons and the WORKSPACES the user will work with inside
the program. This also provides KEYBOARD MAPPING for utilizing the same keyboard commands
that were used in the original DOS application.
The new user is the DESTINATION in the above right window. Choose an existing user that has the
defaults needed for the new user as the SOURCE and highlight the first default in the list. Use the
right pointing arrow between the two windows to “transfer” the desired defaults to the new user. The
list will automatically advance to the next choice and continue to transfer as you click on the right
pointing arrow. It will also notify you if everything has been sent or a duplicate exists.
NOTE: All three types of defaults MUST be created for every user, regardless of final level of
security.
The next step in the procedure for creating a new user is to assign the user to a GROUP. We have
three (3) levels of security already in the program. Each level of security has its own distinct
capabilities as follows:
Page 93
WIN T-Bill Tools
Security (cont’d.)
•
•
GUEST – Has no “rights” to speak of. Every new user is automatically assigned this level of
security. It is basically a “look but don’t touch” function.
ESTIMATOR – Has limited rights within the program. There are two very specific
restrictions on an Estimator that need to be considered when assigning this level;
1. An Estimator is NOT ALLOWED TO EDIT THE PERMANENT DATABASE! This
is probably the single most important restriction on the Estimator level of security. This
is critical to maintaining the pricing and labor correctly and not compromising the
integrity of the database.
2. An Estimator CANNOT open another job unless the Lead Estimator on that job has
assigned them to it. An Estimator CAN start their own job and see it through to
completion.
•
ADMINISTRATOR – This is the highest level of security in the system. Has unlimited rights
to any and all areas of the program, unless previously curtailed by a designated “SYSTEM
ADMINISTRATOR” that has overall control of security. In those situations, the System
Administrator will disable certain functions of security per group or user, and also prevent any
other user, regardless of level of security, from accessing SECURITY at all.
NOTE: Only one level of security should be chosen for any user. Multiple selection of security
will cause a conflict in certain areas of the program, resulting in the program opting for the
LESSER of the securities.
It is possible to create new GROUPS of security with customized functions, but that is an advanced
function and should be discussed with a qualified tech at McCormick Systems Inc. before attempting.
The final step in creating the new user is somewhat “hidden”. On the initial Security window, select
the New User in the SCOPE window under USER. Once the user is active, select the RESET TO
GROUPS button in the lower left corner of the window. This button will not be active unless a
specific user is chosen.
When the above message appears, verify its assignment and select YES. The user is now complete and
can be accessed from the sign-in screen.
Page 94
WIN T-Bill Tools
Notes:
Page 95
Appendix
Page 96
WIN T-Bill Appendix
Technical Support
If you have any questions or you would like more information please contact us at:
On the Web: www.mccormicksys.com
Email:
[email protected]
Telephone:
Toll Free:
Voice:
FAX:
1-800-444-4890
1-480-831-8914
1-480-820-2422 Sales/R&D
1-480-820-5243 Support
Postal Mail: McCormick Systems Inc.
149 W. Boston St.
Chandler, Arizona 85225
Our Hours are:
Monday through Friday 6:00am to 5:00pm Arizona Time –
MST (Winter), PST (Summer)
If you are able to use the Internet from your current position, simply select one of the links above.
Should you need to update your Internet browser, here are the sites of the two most popular browser’s.
Microsoft home page:
Netscape home page:
McCormick Systems ©
http://www.microsoft.com/ie * recommended
http://home.netscape.com/
Win T-Bill ©
Page 97