1
Operating Instructions
OP294-V05
selec
TC544A / TC244AX / TC344AX /
DTC204A-2 / DTC324A-2
HEAT COOL PID
Control Method
PID
Proportional Band-Cool
0.0 to 400.0°
Cycle Time-Cool
0.1 to 99.9 sec
Dead Band
SPLL to SPHL (Programmable)
OUTPUT
Control Output (Relay or SSR user selectable) :
Relay Contact (SPDT)
05 A resistive@250V AC / 30V DC (TC544A : SPST RLY)
10 A resistive*@250V AC / 30V DC
(*For DTC204A-2 / DTC324A-2 )
SSR Drive Output (Voltage Pulse)
12V DC, 50 mA
Auxiliary Output :
Relay Contact (SPDT)
05 A resistive@250V AC / 30V DC(TC544A : SPST RLY)
SSR Drive Output (Voltage Pulse)
12V DC, 50 mA
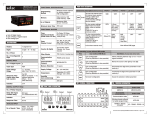
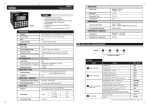
SPECIFICATIONS
Display
4 + 4 digit, 7 segment digital display
4 digit for DTC204A-2 / DTC324A-2
LED Indications
1 : Output 1 ON
2 : Output 2 ON
T : Auto tune
S : Dwell timer* (Applicable for TCX44A/AX)
Keys
3 keys for digital setting
INPUT SPECIFICATIONS
Input Signal
Thermocouple (J,K,T,R,S) / RTD (Pt100)
Sampling time
250 ms
Input Filter (FTC)
0.2 to 10.0 sec
Resolution
0.1/1° for TC/RTD input ( Fixed 1° for R & S type TC input )
Temperature Unit
o
C / °F selectable
Indication Accuracy
For TC inputs : 0.25% of F.S ±1°
For R & S inputs : 0.5% of F.S ± 2°
(20 min of warm up time for TC input)
POWER SUPPLY
Supply Voltage
85 to 270V AC/DC (AC: 50 or 60 Hz )
Optional - 24V AC/DC
Power Consumption
6 VA max@230V AC
Temperature
Operating : 0 to 50°C
Storage : -20 to 75°C
Humidity (non-condensing)
95% RH
Weight
TC544A
: 142 gms
TC244AX / DTC204A-2 : 200 gms
TC344AX / DTC324A-2 : 252 gms
SAFETY PRECAUTIONS
All safety related codifications, symbols and instructions
that appear in this operating manual or on the equipment must
be strictly followed to ensure the safety of the operating
personnel as well as the instrument.
If the equipment is not handled in a manner specified by
the manufacturer it might impair the protection provided by the
equipment.
Read complete instructions prior to installation and
operation of the unit.
A better anti-noise effect can be expected by using
standard power supply cable for the instrument.
MAINTENANCE
1.
The equipment should be cleaned regularly to avoid
blockage of ventilating parts.
2. Clean the equipment with a clean soft cloth. Do not use
Isopropyl alcohol or any other cleaning agent.
INSTALLATION GUIDELINES
1.
This equipment, being built-in-type, normally becomes a
part of main control panel and in such case the terminals do
not remain accessible to the end user after installation and
Internal wiring.
2. Do not allow pieces of metal, wire clippings, or fine
metallic fillings from installation to enter the product or else
it may lead to a safety hazard that may in turn endanger life
or cause electrical shock to the operator.
3. Circuit breaker or mains switch must be installed between
power source and supply terminals to facilitate power 'ON'
or ‘OFF’ function. However this switch or breaker must be
installed in a convenient position normally accessible to the
operator.
4. Use and store the temperature controller within the
specified ambient temperature and humidity ranges as
mentioned in this manual.
CAUTION
1.
When powering up for the first time, disconnect the
output connections.
2. Fuse Protection: The unit is normally supplied without a
power switch and fuses. Make wiring so that the fuse is
placed between the mains power supply switch and the
controller. (2 pole breaker fuse- rating: 275V AC,1A for
1.
2.
3.
4.
WARNING:
To prevent the risk of electric shock power supply to the
equipment must be kept OFF while doing the wiring
arrangement. Do not touch the terminals while power is
being supplied.
To eliminate electromagnetic interference use short wire
with adequate ratings; twists of the same in equal size shall
be made. For the input and output signal lines, be sure to
use shielded wires and keep them away from each other.
Cable used for connection to power source, must have a
cross section of 1mm2 or greater. These wires shall have
insulation capacity made of at least 1.5kV.
When extending the thermocouple lead wires, always
use thermocouple compensation wires for wiring. For the
RTD type, use a wiring material with a small lead resistance
(5Ω max per line) and no resistance differentials among
three wires.
The equipment in its installed state must not come in
close proximity to any heating sources, caustic vapors,
oils, steam, or other unwanted process by-products.
4. Use the specified size of crimp terminals (M3.5 screws)
to wire the terminal block. Tighten the screws on the
terminal block using the tightening torque within the
range of 1.2 N.m.
5. Do not connect anything to unused terminals.
EMC GUIDELINES
1. Use proper input power cables with shortest
connections and twisted type.
2. Layout of connecting cables shall be away from any
internal EMI source.
LOAD CONNECTIONS
1. The service life of the output relays depends on the
switching capacity and switching conditions. Consider
the actual application conditions and use the product
within the rated load and electrical service life.
2. Although the relay output is rated at 5/10 amps it is
always necessary to use an interposing relay or
contactor that will switch the load. This avoids damage to
the controller in the event of a fault short developing on
the power output circuit.
3. Always use a separate fused supply for the “power
load circuit”and do not take this from the live and neutral
terminals supplying power to the controller.
For load current less than 0.5A
Since this is a built-in-type equipment (finds place in main
control panel), its output terminals get connected to host
equipment. Such equipment shall also comply with basic
EMI/EMC and other safety requirements like BSEN61326-1
and BSEN 61010 respectively.
4. Thermal dissipation of equipment is met through
ventilation holes provided on chassis of equipment. Such
ventilation holes shall not be obstructed else it can lead to a
safety hazard.
5. The output terminals shall be strictly loaded to the
Manufacturer specified values / range.
NEW
TC
TC
C
Panel Cutout
D
DIM
For bigger loads, use interposing relay / contactor
N
L
TC
TC
Contactor
NO
MOV
C
Snubber
LOAD
F
2 S
MODELS
Snubber
C
G
C
E
C
MOV
R
Outline Dimensions
1 T
LOAD
NO
R
C
A
B
N
L
electrical circuitry is highly recommended)
WARNING : Risk of electric shock.
WIRING GUIDELINES
3.
3.
MECHANICAL INSTALLATION
For RTD inputs : 0.1% of F.S ±1°
( F.S = Full Scale )
FUNCTIONAL SPECIFICATIONS
Control Method
1) PID control with auto tuning
2) ON-OFF control
3) Heat-Cool (with auto-tuning)
Proportional Band (P)
1.0 to 400.0°
Integral Time (I)
0 to 9999 sec
Derivative Time (D)
0 to 9999 sec
Cycle Time
0.1 to 99.9 sec
Hysteresis Width
0.1 to 99.9°
Dwell Timer
0 to 9999 min ( only for TCX44A/AX )
Manual Reset Value
-19.9 to 19.9°
5.
A
B
C
D
E
F
G
TC544A
52
52
94
45
4
46
46
TC244AX /
DTC204A-2
72
72
83.7
67
4.5
69
69
TC344AX /
DTC324A-2
96
96
73
90.5
5
92
92
1. Prepare the panel cutout with proper dimensions as shown
above.
2. Fit the unit into the panel with the help of clamp given.
ELECTRICAL PRECAUTIONS DURING USE
Electrical noise generated by switching of inductive
loads can create momentary disruption, erratic
display, latch up, data loss or permanent damage to
the instrument.
To reduce noise:
a) Use of snubber circuits across loads as shown
above, is recommended.
b) Use separate shielded wires for inputs.
Document name : Operating / 1105 / TC544A/TC244AX/TC344AX/
DTC204A-2/DTC324A-2
OP294-V05 (Page 1 of 3)
TERMINAL CONNECTIONS
FRONT PANEL DESCRIPTION
TCX44A/AX
INPUT RANGES (Table 1)
Programming online parameters
FOR RTD
TC +/RTD1
+
L ( )
SSR1 +
N( )
3
4
TC /RTD2
NO2
+
RTD3
SSR2
1
T
2
S
Resolution
1
0.1
°C
-150 to 850
-150 to 850
°F
-238 to 1562
-199 to 999
6
value.
1
Process-value (PV) /
Parameter name
display
1) Displays a process value (PV).
2) Displays the parameter symbols
at configuration mode/online menu.
3) Displays PV error conditions.
Parameter setting
display
1) Displays the parameter settings
at configuration mode/online menu.
Input
Ranges
Resolution
1
0.1
°C
-199 to 750
-199 to 750
°F
-328 to 1382
-199 to 999
(refer Table 2 on page 2)
1
8
-
2
9
10
3
Control output 1
indication
The LED is lit when the control
output 1 is ON
TC / RTD2
4
Control output 2
indication
The LED is lit when the control
output 2 is ON
RTD3
5
Tune
Auto tune : Blinking
6
Dwell timer
Blinking: Dwell timer is in progress.
Continuous ON : Time over.
11
NC2
5
12 +
NO1
6
13
COM1
7
14
-
4
-
COM2
(Not applicable for DTC204A-2 / DTC324A-2)
NC1
* SSR2 Not applicable for DTC204A-2
-
2
11
3
12
4 +
13
COM2
5
TC + /RTD1
FUNCTIONS
T
TC /RTD2
RTD3
°C
-199 to 1350
-199 to 999
°F
-328 to 2462
-199 to 999
°C
-199 to 400
-199 to 400
°F
-328 to 750
-199 to 750
°C
0 to 1750
N/A
°F
32 to 3182
N/A
R&S
Press
key for 3 seconds.
To view Level 2
Press
key for 3 seconds.
To view Protection Level Press
+
keys for 3 seconds.
Lower display selectable between
SET1/SET2/TIME using key.
To view online
parameters
NOTE : Elapsed time / Remaining time dependent on the
selection of ONL parameter in level1.
When an error has occured, the upper display indicates error
codes as given below.
Error
Meaning
Control Output
Status
Sensor break / over
range condition
OFF
Sensor reverse /
under range condition
OFF
Default : 0
Range : SPLL to SPHL
If upper display is selected as
/
then,
Pressing key will show on Upper display :
/
Lower display: <0>
Press + / keys to increment/decrement
value.
Dwell Timer
ERROR DISPLAY (Table 2)
To view Level 1
Setpoint 2 / Dead band
/
KEY PRESS
TCX44A/AX
Default : OFF
Range : OFF, 1 to 9999 min
If upper display is selected as
/
then,
Pressing key will show on Upper display :
Lower display : <OFF>
Press + / keys to increment/decrement
time value.
DTC204A-2 / DTC324A-2
Programming online parameters
(Not applicable for DTC204A-2 / DTC324A-2)
DTC204A-2 / DTC324A-2
14
6
15
NO1
7
16 +
COM1
8
17
NC1
9
18
-
NC2
SSR1
NO2
-
TC344AX / DTC324A-2
N( )
SSR2
10
-
1
K
FRONT KEYS DESCRIPTION
ONLINE
L (+)
J
(Not applicable for DTC204A-2 / DTC324A-2)
TC + / RTD1
SSR1
NO2
SSR2
L (+)
-
TC244AX / DTC204A-2
2
+
3
Default : 50
Range : SPLL to SPHL
If upper display is selected as
then,
Pressing key will show on Upper display :
Lower display : <50>
Press + / keys to increment/decrement
FOR THERMOCOUPLE
COM1
N( )
Setpoint 1
Pt100
SSR1
COM2
NO1
Ranges
2
5
-
TC544A
1
Input
To view online
parameters
Display selectable between SET1/
SET2 using key.
Note : Display shows parameter
SET1/ SET2 for 1sec.
To change online
parameter values
Press + / to change
parameter value.
PROGRAMMING MODE
To view parameters on
the same level.
* SSR2 Not applicable for DTC324A-2
Use only the correct thermocouple wire or
compensating cable from the probe to
instrument terminals avoiding joints in the
cable if possible.
Failure to use the correct wire type will lead to
inaccurate readings.
To increase or decrease
the value of a particular
parameter.
+ to increase and
+ to
decrease the function value.
Note: Parameter value will not alter
when respective level is locked.
NOTE : The unit will auto exit programming mode after 30
seconds of inactivity.
OR By pressing the
Ensure that the input sensor connected at the
terminals and the input type set in the
temperature controller configuration are the
same.
or key once to view the next
or previous function in operational
menu.
or
or
+
keys for 3 seconds.
Setpoint 1
CALIBRATION CERTIFICATE
Product is tested & calibrated by automatic technique.
The calibration of this instrument is done as per
following accuracy :
Default : 50
Range : SPLL to SPHL
If online parameter is selected as
then,
Pressing key will show on display :
& then <50>
Press + / keys to increment / decrement
value.
For TC inputs : 0.25% of F.S ±1°
For R & S inputs : 0.5% of F.S ± 2°
(20 min of warm up time for TC input)
For RTD inputs : 0.1% of F.S ±1°
Sources calibrated against:
Kusam-meco, model 405, Sr.No.:104446
Initial calibration is valid for 18 months after the
Month/Year of manufacturing which is mentioned
on order code label.
Setpoint 2 / Dead band
Default : 0
Range : SPLL to SPHL
If upper display is selected as
/
then,
Pressing key will show on display :
/
& then <0>
Press + / keys to increment/decrement
/
value.
Document name : Operating / 1105 / TC544A/TC244AX/TC344AX/
DTC204A-2/DTC324A-2
OP294-V05 (Page 2 of 3)
KEY FUNCTIONS
CONFIGURATION INSTRUCTIONS
+
or
Press once to view next parameter in configuration menu
Press once to view online parameters
Press for 3 sec to enter Level 2
Press for 3 sec to enter Level 1
Press once to view previous parameter in configuration menu
+
Allows the user to increase or decrease associated parameter value
or
+
Press for 3 sec to enter protection Level
+
or
To exit configuration menu press any of these keys for 3 sec
OPERATIONAL MENU
POWER ON
Note : At power ON lower display shows (momentary) input type selected in Level 1.
*Lower display not applicable for DTC204A-2/DTC324A-2
Press
1
T
2
S
key for 3sec.
Press
Press
key for 3sec.
Display
Description
Level 1
Display Description
Default Range
Value
Input type
(Refer Table 1)
J/K/T/R/S/RTD
Display Resolution
1/0.1
Temperature unit
Level 2
Display
Condition
Default Range
Value
+
keys for 3sec.
Protection Level
Display
Condition
Display Description
Default Range
Value
Tune
OFF/ON
For CNTL=PID
Lock setpoint 1
UNLK/LOCK
Proportional band
1.0 to 400.0°
For CNTL=PID
Lock setpoint 2
UNLK/LOCK
°C/°F
Integral time
0 to 9999 sec
For CNTL=PID
Lock level 1
UNLK/LOCK
Set point low limit
Min range of sensor
selected to SPHL
Derivative time
0 to 9999 sec
For CNTL=PID
Lock level 2
UNLK/LOCK
Set point high limit
SPLL to Max range
of sensor selected
Cycle time mode
AUTO/USR.F
For CNTL=PID
Lock dwell time
UNLK/LOCK
Cycle time
0.1 to 99.9 sec
For CNTL=PID
Hysteresis 1
0.1 to 99.9°
For CNTL=ONF
Manual reset
-19.9 to +19.9°
For CNTL=PID
& I=0
Filter time constant
Not prompted
for R & S type
0.2 to10.0 sec
Control action for
relay 1
RE/FD
Control logic
PID/ONF
Control Output selection
RELAY/SSR
Dwell mode enable
NO/YES
Proportional
band-cool
1.0 to 400.0°
For CNTL=PID
& HC=YES
Heat-cool mode
selection
NO/YES
Cycle time-cool
0.1 to 99.9 sec
For CNTL=PID
& HC=YES
Control action for
relay 2
RE/FD/TIME
Relay 2 type
DEV/ABS
Online menu for timer
REMN/ELPS
Anti-reset windup %
1.0 to 100.0%
Factory default
(Reset all)
NO/YES
Not prompted
for HC=YES
When HC=NO.
TIME prompted
when DWEL
=YES
When
ACT2=RE/FD
When DWEL
=YES
When CNTL
=PID
Hysteresis 2
0.1 to 99.9°
Dwell time
OFF, 1 to 9999 min
Display bias
-19.9 to 19.9°
For HC=NO or
HC=YES &
CNTL=ONF
Display
Condition
Prompted when
DWEL=YES
Note
1. Locking parameters (LVL1 or LVL2 or SP or DWEL) will not permit
change in the value of respective level parameters.
Time value (online) can be altered only when DWEL is not locked
in protection level.
2. Continuous operation of + / keys for SP or other parameters
makes update speed faster in 3 stages after 3 sec.
( Specifications are subject to change, since development is a
continuous process )
When DWEL
=YES
Selec Controls Pvt. Ltd.
Tel. No. : +91-22-40394200 / 40394202
Fax No. : +91-22-28471733 Toll free : 1800 227 353
Website: www.selec.com Email: [email protected]
Parameter marked not applicable for DTC204A-2 & DTC324A-2
Default value of
=
for DTC204A-2 & DTC324A-2
Document name : Operating / 1105 / TC544A/TC244AX/TC344AX/
DTC204A-2/DTC324A-2
OP294-V05 (Page 3 of 3)