1
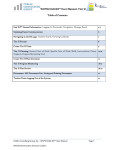
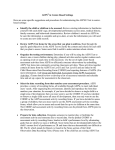
™ Illinois Cooperatives and Districts EasyIEP™ User Manual 0 Table of Contents GENERAL INFORMATION Title • Getting Started • Logging into the System • Basic Information • User Types and Security • Main Menu Screen • Question/Bug Report / Comments/Suggestions • Change Password / Update Personal Information ACCESSING STUDENT/PARENT INFORMATION • View Students • Selecting a Student • Symbols on Student Page • Student Personal Information • Parent / Guardian Contact Information • Communications REFERRAL PROCESS • Create Parent Notification (34-57A) • Parent / Guardian Consent • Create Parent Notification of Conference (34-57D) • Create Conference Report • Evaluation Consent • Create Informed Consent Form • Parent / Guardian Consent for Initial Evaluation • Consent for Evaluation • Meeting Participants • Create Notification of Conference Recommendations EVALUATION PROCESS • Review IEP Team • Create Parent Notification of Conference (34-57D) • Evaluation Components • Team Member Excusal Page # 3 4 5-6 7 8 9 10 11 12 13 14 15-16 17-18 20-25 26-27 28-29 30 31-32 33 34 35 36 37 39 40-43 44 45-47 1 Table of Contents ELIGIBILITY PROCESS • Create Conference Report • Domain Documentation • Disabilities Determination • Eligibility Determination • Meeting Participants • Create Eligibility Documents • Create Conference Recommendations IEP PROCESS • Review IEP Team • Create Parent Notification of Conference (34-57D) • Team Member Excusal • Create Conference Report • Student Information • Behavior Intervention Plan • Transition • Annual Goals • Assessments • Services, Supplemental Aids & Services, and Placement • Transportation • Extended School Year • Meeting Participants • Review Conference Notes • Create IEP Document • Create Conference Recommendations • Parent / Guardian Consent for Initial Provisions ISP Process STATE REPORTING SUMMARY OF PERFORMANCE PROCESS LOG OUT & EXIT EASYIEP™ 49 50-51 52-53 54 55 56 57 59 60-65 66-68 69-71 72-74 75-77 78-85 86-94 95-99 100-105 106-108 109-116 117 118 119 120 121 122 123 124-132 133 2 Getting Started Accessing EasyIEP™ To access EasyIEP™, you must have a username and password. EasyIEP™ is a secure website. 1. Access the Internet from your computer and proceed to the EasyIEP™ website for your district. It is important to note the “s” in “https”. This indicates a secure website, and you must include it in the address. 2. In order to make accessing EasyIEP™ easier in the future, use the ―Bookmark‖ or ―Favorites‖ function in your Internet browser to store your EasyIEP™ web address. TOLL FREE SUPPORT If at any time you need help with EasyIEP™, please feel free to contact an EasyIEP™ Client Service Representative. Phone support is available Monday-Friday, 8:30 a.m. – 5:00 p.m., CST, excluding holidays. (866) 506-2947 3 Logging Into the System To Log into EasyIEP™ • Enter Name • Enter Password (Your password is case-sensitive) • Click the Login Button Note: NEVER share your login information with anyone! Trouble Shooting • Do not use a search feature (like Google Search) to get to the login screen. • Be sure the address is exact—the most common mistake is to forget the ―s‖ in the ―https‖ portion of the address. • Username is always First name <space> Last name (i.e. John Smith). • Make certain your keyboard’s Caps Lock and Num Lock keys are turned off— they can interfere with lowercase passwords. • For an easy way to return to the login screen from your office/desk computer, make sure to Bookmark or Save to Favorites the login screen. Note: If you forget your password, please click the “Forgot Your Password?” link on the login screen or contact your district’s EasyIEP™ coordinator to help you reset it 4 Basic Information Don’t forget the ―s‖ after ―http‖ in the EasyIEP™ web address. For more information on the secure website, click on the Verisign symbol on the login screen. All actions in Easy IEP™ are single clicks of the mouse. A help link for the text field Drop-down menu - only one selection can be made. Click once on the gray box and select an option. Check box - more than one selection can be made Check box - To add a check, click once on the box. To delete a check, click once on the box. Calendar icon - To add a date, click on the calendar and scroll through the screens to find the appropriate date. Spell Check button 5 Basic Information Any font in blue is an action link (hyperlink). Click on the link and you will automatically be brought to the screen, (ex. Student Personal & Demographic Information section). Del: Delete - allows you to delete this item. Simply click on the box and then “Update the Database”. Pos: Position - the numerical order the item appears on the screen in a list format. New Pos: New Position – you may change the position of your items by numbering the items in the order you would like them to appear on the program and on the IEP document. Click Update the Database After a change is made to a page, this button CAN be clicked to only save the information. Please save your updates regularly, EasyIEP does NOT have an auto-save function. After a change is made to a page, this button CAN be clicked to save the information, run it against the list of error checks, and continue to the next screen. Once the Update the Database or Save & Continue button has been selected, a progress bar will appear signifying the system is processing the newly input information. 6 User Types and Security Access and Permissions (User Types) Access to the various areas of EasyIEP™ and the permission to execute various functions are controlled by the User Type (Special Education Teacher, School Administrator, IT Administrator, etc.). For example, if you have view access to a student’s personal information, you will only see the information, but will not be allowed to edit. If you have edit access to a student’s goals and objectives, you will be allowed to edit that information. View and edit pages will look different. Permissions control what you are allowed to do on the screens of EasyIEP™. For example, if you have permission to add a student, you will see the Add Student button. If you do not have the permission to add a student, this button will not appear on the Student screen. Security All EasyIEP™ information is confidential. The server uses Secure Socket Layer (SSL) to encrypt the information as it flows across the internet. This is the same technology that is used to protect your credit card number and other sensitive information that is sent over the internet. Please adhere to the following procedures to ensure security: – – – – Do not give your account name or password to anyone. Do not write your password down where it can be seen by anyone. Do not save documents or reports to an unsecured computer. Always log off of EasyIEP™ and close your browser when you are finished using the system. 7 Main Menu Screen • • • • This is the Main Menu Screen of EasyIEP™. There will be a navigation toolbar located at the top of the screen. Send us a Message is where you, the user, can ask questions or submit suggestions to PCG. We will respond to you through email. Check the EasyIEP™ announcements section periodically for important messages. Files available for printing/viewing are posted by your Special Education Director and EasyIEP™ Project Manager. 8 Question/Bug Report/ Comment/Suggestion To Send a Question / Bug Report / Comment / Suggestion • On the Main Menu screen, click on Send us a Message. • From the Message Type drop-down, select which type of message you would like to send. • Type the subject of your message in the Subject box. • Enter your email address in the Your e-mail address box so that we can respond to you. This will automatically populate IF your email is entered under My Info. • Enter the Page Title or Student if applicable. • Add your message to the text box. • Click once on the Send Message Button. When sending a Bug Report, please fill in the Page Title box and also the Student box if the error appeared when working with a particular student. 9 Change Password/Update Personal Information To Change Your Password • My Info tab on Main Menu • Enter current password • Type new password in both text boxes • Update the Database button To Update Personal Information • My Info Tab on Main Menu • Enter current password • Type new information into the appropriate boxes • Update the Database button You will only be able to change this information if you have been given the permission to do so. Please consult with district personnel if you do not have permission to change your personal information and would like to. If you have problems choosing a password, click on the How to choose a good password link on the site for some tips. 10 View Students • Main Menu tab • Click on Students tab If you are an Administrator: • Select the criteria you want, such as School, Student Last Name, First Name, Student ID, State ID Number, etc. • Select the View Students button. • The student’s record will appear if only the student fits the entered criteria OR a list of students fit the criteria. If you are a Special Education Teacher/Itinerant Staff: • The students on your Caseload will appear. 11 Selecting a Student • • • • A compliance symbol will appear to the left of the student’s name. The symbol gives the student’s eligibility information (click on CP for definitions). Note: Clicking on the compliance symbol will direct you to the student’s history page which includes important events and documents that have been created in their record. The student’s name will be hyperlinked so you can click on the student’s name and access the record. When you click on a student’s name, you will be redirected to the student’s personal information page. 12 Symbols on Student Page Compliance Symbol Definitions General Education Student is not eligible for any type of special education. This compliance symbol displays for any student for which a discontinuation of referral or parent consent denial occurred. The student has returned to the general education population. Special Education The student in fully compliant with all IEP / ISP / IFSP and Eligibility requirements. The student has a new Proposed IEP / ISP / IFSP or SPED / IFSP Eligibility and the system is waiting for the parent's response to be entered. The student's new IEP / ISP / IFSP or SPED / IFSP Eligibility has been Rejected and a new one must be Proposed. The student has a Rejected IEP / ISP / IFSP or SPED / IFSP Eligibility and it has been over a set period of time after the rejection. The student is Eligible and has an IEP / ISP / IFSP and will soon require that a new IEP / ISP / IFSP be written. The student is Eligible and has an IEP / ISP / IFSP, but is now past due to have a new one written and is now out of compliance. The student has recently transferred into this school system and will soon require that a new IEP / ISP / IFSP be written. The student has recently been re-activated in this school system and will soon require that a new IEP / ISP / IFSP be written. The student has been determined Eligible for Special Education and will soon require their 3 year re-evaluation. The student has been determined Eligible for Special Education but is past due for their 3 year re-evaluation, and is out of compliance. Student has been referred (and may have Parental Consent to Evaluate). The student will soon need their initial Eligibility determination completed. Student has been referred (and may have Parental Consent to Evaluate). The student is now past due to receive their initial Eligibility determination and is out of compliance. Student has been referred or is eligible, but will soon require Parental Consent to Evaluate. Student has been referred or is eligible, but is past due to receive Parental Consent to Evaluate. The student is now out of compliance. Student has been referred to special education, but has not yet been determined eligible. The student has not received necessary action and is now out of compliance. Student has been referred to special education, but has not yet been determined eligible. The student is coming close to requiring further action (i.e. they are in a 'warning' state.). Student has been referred to special education, but has not yet been determined eligible. 13 Student Personal Information • • • Verify that you have selected the correct student by checking the demographic information for that student. If this information is not correct, you must contact your system administrator (Support Staff, Director) to have the data corrected in your Student Information System (SIS) first. Click the Referral Process, Evaluation Process, Eligibility Process or IEP Process button to begin inputting information for the student depending upon their status within special education. 14 Parent/Guardian Contact Information •You will need to enter parent/guardian information for each of your students if parental information was not provided by your districts. •To access parent/guardian information for your student you will need to go to the student and then click on the Contact Info button at the top of your screen. • You will need to click on the Add new parent/guardian button to add information for the student. • You will need to click Update the Database in order to save the parent I information that you have just entered. • Once parent information is listed in the system you will need to click on the Details button. 15 Parent/Guardian Contact Information, cont’d. • You will need to enter and/or verify the parent/guardian’s mailing address as all forms will be printed with that information. • You will need to check the box titled Guardian Responsibility for that contact who holds the student’s rights. •It is also recommended to enter the parent/guardian’s phone number information. •You will again have to click Update the database to save the information that you have entered. 16 Communications • You have the ability to keep a running log of all parent/guardian/other source communications. In order to track this information you will need to click on the Communications link in the blue menu bar. • If there are no contacts currently listed for your student you will need to select Add a Contact or Add a Non Parent Contact. 17 Communications, cont’d. • • • • Your name will automatically populate in the Person making contact field. You will need to select the Person Contacted from the drop-down menu. You will need to select the Contact Method from the drop-down menu. Enter the date of the contact in the text box. You can click on the calendar icon which will pull up a calendar for you. • Select the Contact Result from the drop-down menu. • You can also type in any notes in reference to the communication in the text box below. •Make sure to click Update the database to save all of the information that you have entered. 18 Referral Process • • • When you click on each one of the processes within EasyIEP, a menu will appear displaying each of the steps within that particular process. The last two sections (Meeting Participants and Create Notification of Conference Recommendations) in the Referral Process are optional. Click on Receive Request and Create Parent Notification 34-57A to begin. 19 Create Parent Notification (34-57A) • • Check whether or not this is an initial Evaluation and enter in the date of the referral and the source of the request. If source of the request is Other, document the referring party and indicate whether the district has an authorization to release information to an outside agency. 20 Create Parent Notification (34-57A), cont’d. • • • Document the reason for the request, district decision and relevant factors for the decision. If Other was chosen for the Source of Request, click on the Add Parent(s) icon and type in the parent information. Click on the Save and Continue button 21 Create Parent Notification (34-57A), cont’d. • • • • • Indicate when the notice will be sent. Choose the Signer of Notification from the drop-down. To create a draft of the form, click on Create Draft 34-57A Form. Creating a draft will allow you to preview you the document and check for any errors prior to creating a final form. Click Save and Continue. 22 Create Parent Notification (34-57A), cont’d. • • Click on the link to view the document. Below is an example of ICAD 34-57A – Cover Letter 23 Create Parent Notification (34-57A), cont’d. • • Example of ICAD 34-57A - Document The Notice of Procedural Safeguards For Parents/Guardians of Students with Disabilities (As of January 2008) automatically prints with the ICAD 34-57A form. 24 Create Parent Notification (34-57A), cont’d. • • • • Once you have reviewed the draft for errors, you can go ahead and create the final document. To create the final document, click on Create Final ICAD 34-57A Form. Click on the link to view and/or print the document. Click Save & Continue. 25 Create Parent Notification of Conference (34-57D) • Choose the purpose of the meeting. • More than one box may be checked. • If selecting Other, manually enter the purpose in the text box. 26 Create Parent Notification of Conference (34-57D), cont’d. • Enter the Date of the Conference, Time of the Conference, Conference Location and Room if applicable. If the Parent has waived the ten day notice requirement, check the box. • Click on the box next to the individuals who you want to invite to the conference. If you would like to include Additional Invited Individuals, enter in their Name, Title, and Phone. 27 Create Parent Notification of Conference (34-57D), cont’d. • • • • • Enter the date the Notice will be sent by manually entering the date or clicking on the calendar icon. Indicate who will sign the document. If the signee is other, type in the person’s name and title. If you do not want the team members’ names to print on the document, click on the button Do not include team member names. Create a draft to review - view the document by clicking on it. Create a final document – view the document by clicking on it. Click on Save and Continue. 28 Create Parent Notification of Conference (34-57D), cont’d. • Example of ICAD-34-57D – Parent Guardian Notification of Conference 29 Create Conference Report • • • • • Enter in the Conference Date. Check the box next to all that apply for the Purpose of Meeting. Select the Mode and Language of Communication for the Parent and the Student from the drop-down menus. Create either a Draft or a Final Conference Report. Click Save and Continue. 30 Evaluation Consent • Click on the drop-down menu for Reply was received. If Yes is chosen, you must enter in the parent/guardian response in the new text box. • Click on the drop-down menu for What is the method of Contact. • For each domain, determine if it is relevant and click Yes or No from the drop-down box and enter information in the Existing Information About the Child. • If relevant, determine if there is a need for additional information and the source for that information. 31 Evaluation Consent, cont’d. • • • • • If Yes is selected for Relevant, the screen will automatically update and add the Additional Evaluation Data Needed and Sources From Which Data Will Be Obtained boxes. All three of these boxes must contain information. A minimum of 20 characters must be added to each of the three boxes. You will need to complete the information for each domain following the same process as listed above. It is recommended that you click Save after entering information for each domain. Once all information is entered, click Save and Continue. 32 Create Informed Consent for Evaluation Form • Click on Create Draft or Final 34-57B Form button. • Click on Create Draft or Final 34-57BC Form button. • Click on Parent / Guardian Consent For Initial Evaluation to view the form. • Click on ICAD-34-57BC – Consent For Evaluation to view the form. • Click Save and Continue. 33 Parent / Guardian Consent for Initial Evaluation Form • Example of Parent / Guardian Consent for Initial Evaluation 34 Consent For Evaluation • Example of ICAD-34-57BC – Consent For Evaluation 35 Meeting Participants • This page is optional. • Select meeting participants and check whether or not the participant(s) attended the referral conference. • To add in additional Participants, click Add Additional Participant . 36 Create Notification of Conference Recommendations (34-57E) • • • • • This page is optional. Enter the date and time of conference. Check the relevant determination(s) made. Indicate the signer of the notification. Click on Create Draft or Final 34-57E Form button. Click Save and Continue. 37 Evaluation Process Evaluation Process • To access this screen, first click on the Evaluation Process in the blue navigation bar. • A menu will appear displaying each of the steps within this process. M • Begin by selecting Review IEP Team. 38 Review IEP Team Team Review IEP • Click on the drop-down menu and choose the Current Case Manager. This is a mandatory field. • • If the IEP team needs to be changed, click on the Change IEP Team button, make appropriate changes, and click Save and Continue . Only certain user types will have the ability to change the IEP team assigned to each student. 39 Create Parent Notification of Conference (34-57D) • This step is similar to the one you created in the Referral Process. • Insert the Date of Conference, Time of Conference and Conference Location and Room (optional). • Check the box if the Parent has waived the ten day notice requirement. 40 Create Parent Create ParentNotification Notificationofof Conference Conference(34-57D), (34-57D)cont’d. Cont. • Check the boxes that apply to the purpose of the meeting. If none apply, check Other and manually type in the purpose of the meeting. • Check the individuals that were invited. • If certain individuals are invited but do not appear on the Invited Individuals list, you can add them in the space allotted for Additional Invited Individuals; enter in their Name, select Title from the drop-down, and enter in their phone number. • Indicate who will sign the document. 41 Create Parent Notification of Conference (34-57D), cont’d. • If you would like to create the document without including the team member iiiiiiinames, check this box: • To create a draft of 34-57D, simply click on the Create Draft 34-57D Form button. • The document will now appear and be available to view by clicking on it. iiiiiAfter viewing, it will be available to print as well. • To delete the document, simply check the Del box and click Save. If the iiiiiiiDel box does not appear, you do not have permission to perform this iiiiiiifunction, and must contact your project manager. • To create the final 34-57D document, simply follow the same steps, but click iiion the Create Final 34-57D Form. • After completing the page, click Save & Continue. 42 Create Parent Notification of Conference (34-57D), cont’d. • Example of 34-57D – Parent/Guardian Notification of Conference 43 Evaluation Components Evaluation Components • Enter the Date that written parent consent was received. This date will become hard-coded. Be sure to enter the correct date. •Select Yes from the drop-down menu if consent was granted. • Check this box if the report for evaluation components will not be included. • Enter the date the Academic Achievement Evaluation was completed. • Enter the Evaluation Summary and Evaluation Report for each domain. • When the data is entered correctly click Save and Continue at the bottom of the page. 44 Team Member Excusal (34-57H) Team Member Excusal • Click on the drop-down menu and choose Yes or No to whether any iiiiiiimembers are excused from the meeting. • If No is selected, there is no need to create form 34-57H. • If Yes is selected, check off the excused team members. A drop-down menu will appear asking if the content area was discussed. • Answer Yes or No and click Save and Continue. 45 Team Member Excusal (34-57H), cont’d. Team Member Excusal Cont. • Indicate the Date the Notice will be sent and the method of contact. • Then indicate the Signer of Notification from the drop-down menu. • You can create a draft of the Parent/Guardian Excusal of an IEP Team Member document by clicking on the Create Draft 34-57H Form button. • The document is viewable and printable by clicking on it. • To create a Final 34-57H form, simply follow the same steps as creating the draft. • Click Save and Continue. 46 Team Member Excusal (34-57H), cont’d. • Example of 34-57H – Parent/Guardian Excusal of an Individual Education iiiiiiiiProgram Team Member 47 Eligibility Process 48 • This menu screen is used to start and complete the Eligibility Process. Note: If there are no green check-marks, this means you have not entered any information in that particular link. Green check-marks mean you have entered all the necessary information in that particular section that is needed for a compliant IEP. Red “X” marks mean there is information missing in that particular section that is necessary for a compliant IEP. • Begin by clicking the Create Conference Report link. 48 Create Conference Report • Enter the Conference Date, whether the IEP will be completed at the meeting, whether it is an Initial Eligibility Determination, and the purpose(s) of it. • Enter Mode/Language of Communication. • To reset the eligibility, evaluation, and referral process select the option and Save & Continue. CAUTION: Select this check box ONLY if you want to reset the IEP process at midnight. This will erase virtually all of your data in the IEP Process. • Click Create Final Conference Report to create a final document. • Click Save & Continue to return to the Eligibility Process menu. 49 Domain Documentation • Enter evaluation results in all domain areas for each respective field. • The option to Save is provided after each domain box. Please Save after entering information in each text box to ensure that all of your data is retained. 50 Domain Documentation, cont’d. • Enter hearing/vision screening dates and other applicable information. • Select from the dropdown menu whether or not determinant factors apply. • Please remember to Save & Continue. 51 Disabilities Determination • Select the Disabilities for Consideration for the student. • Inclusionary Criteria will appear for each disability area selected for the student. 52 Disabilities Determination, cont’d. • Check applicable Inclusionary Criteria. Selections will determine if student meets/does not meet criteria for the disability area(s). • If Specific Learning Disability (SLD) is considered, the IEP page must be printed and signed after eligibility is determined. 53 Eligibility Determination • For the disability area considered, describe Adverse Effects, Educational Needs, and determine if student is Eligible for Special Education Services. • Enter any additional information into the Conference Notes section. • Please remember to Save & Continue. 54 Meeting Participants • Select meeting participants and check whether or not participant(s) attended the eligibility conference and/or attended the IEP conference. • To add in additional Participants, click Add Additional Participant. 55 Create Eligibility Documents • Select a drop-down option stating whether or not the parent(s) have been given a copy of one or more of the following: •IEP, Eligibility Determination, District’s Behavioral Intervention Policy, and District’s Behavioral Intervention Procedures (if an initial IEP) • Select from the dropdown whether the student has an initial eligibility determination that was completed beyond the 60 school day timeline. •If Yes, select the reason for the delay. • Click either Create Draft Eligibility Doc or Create Final Eligibility Doc (depending on which type of document is desired). • Click Save & Continue to return to the Eligibility Process menu. 56 Create Notification of Conference Recommendations • Create Notification of Conference Recommendations (34-57E) for student. • Enter in the date and time of the conference • Indicate what was determined at the conference by selecting the appropriate check-boxes next to the statement’s above. • Indicate who Signed the notification. •Click Save & Continue to return to the Eligibility Process Menu. 57 IEP Process • • • • From this screen, you can access everything involved in the IEP Process. Note: If there are no green check-marks, this means you have not entered any information in that particular link. Green check-marks mean you have entered all the necessary information in that particular section that is needed for a compliant IEP. Red “X” marks mean there is information missing in that particular section that is necessary for a compliant IEP. 58 Review IEP Team Team Review IEP • Click on the drop-down menu and choose the Current Case Manager. This is a iiiiiiiimandatory field. • • • • If the IEP team needs to be changed, click on the Change IEP Team button, make appropriate changes, and click Save and Continue. When selecting the IEP team, select View Only to allow a user to have access to a student but not the ability to make any changes. Note: Only certain user types will have the ability to change the IEP team allocated to each student. When the data is correct and you would like to move to the next step, click Save and Continue. 59 Create Parent Notification of Conference (34-57D) • If you have completed the eligibility meeting at the same time as the IEP, then you have already created the 34-57D form during the Eligibility process. The system will notify you of this in the sentence above the conference notes text box. • You do not need to recreate the form, however you can add conference notes at this time. • You will need to click Save & Continue to continue through the IEP process. 60 Create Parent Notification of Conference, (34-57D), cont’d. • Insert the Date of Conference, Time of Conference, and Conference Location. • The Room is requested but not a mandatory field. • Check off the Parent has waived the ten day notice requirement if applicable. • Provide the date that the notice will be sent. 61 Create Parent Create ParentNotification Notificationofof Conference Conference(34-57D), (34-57D)cont’d. Cont. • Check the boxes that apply to the Purpose of the Meeting. If none apply, check Other and manually type in the purpose of the meeting. • Please proceed to select the team members who are invited to the meeting. 62 Create Parent Notification of Conference (34-57D), cont’d. • Add individuals from the drop down who were invited. These additional invited individuals have user titles within the system. To select more individuals click on Add Additional Invited Individual. • If certain individuals are invited, but do not appear on the list, simply click on Add Additional Invited Individual in the Additional Invited Individuals 2 location. Additional Invited Individuals 2 provides a space for you to manually enter individuals who do not have user titles within the system. Proceed by adding the appropriate individuals’ names. • Indicate who will sign the document. 63 Create Parent Notification of Conference (34-57D), cont’d. • Prior to creating a document, enter in any additional information into the Conference Notes section. • If you would like to create the document without including the team member names, check this box. • To create a draft of the 34-57D, simply click on the Create Draft 34-57D Form tab. • The document will now appear and be available to view by clicking on it. After viewing, it will be available to print as well. • To delete the document, simply check the Del box and click Save. If the Del box does not appear, you do not have permission to perform this function and should contact your system administrator or special education director. • To create the final 34-57D document, simply follow the same steps, but click on the Create Final 34-57D Form tab. • After completing the page, click Save & Continue. 64 Create Parent Notification of Conference (34-57D), cont’d. • Example of the 34-57D – Parent/Guardian Notification of Conference 65 Team Member Excusal Team Member Excusal • Click on the drop-down menu and choose yes or no to whether any iiiiiiimembers are excused from the meeting. • If no is selected, there is no need to create form 34-57H. • If yes is selected, check off the excused team members. A drop-down iiiiiiiwill appear asking if that team member’s content area was discussed. • Answer Yes or No and click Save &Continue. 66 Create Team Member Excusal Form (34-57H) Team Member Excusal Cont. • Indicate the Method of Contact by clicking the appropriate check box. • Indicate the Signer of Notification from the drop-down menu. • You can create a draft of the Parent/Guardian Excusal of an IEP Team Member document by clicking on the Create Draft 34-57H Form button. • To Create a Final 34-57H form, simply click on the tab with that title. • The document is viewable by clicking on the blue link. It will be printable while viewing the document preview in Adobe. 67 Create Team Member Excusal (3457H), cont’d. • Example of the 34-57H – Parent/Guardian Excusal of an Individual Education Program Team Member. 68 Create Conference Report • You will need to indicate the conference date and purpose of the meeting. • CAUTION: Select this check box and Save & Continue ONLY if you want to reset the IEP process at midnight. This will erase virtually all of your data in the IEP Process. • You can create a draft or final of the conference report by clicking on either button. • Any additional information can be entered in the Conference Notes section. 69 Create Conference Report cont’d. • Example of a draft Conference Report: 70 Create Conference Report, cont’d. • If you are completing an evaluation with the IEP meeting and you have already created the Conference Report, you will receive the following message: • You will not need to recreate this form since you generated it previously during your joint meeting. • The option to add in Conference Notes is available. • Once you are finished, click Save & Continue to move forward in the IEP process for your student. 71 Student Information • You will need to give the appropriate information for each outlined section under the Student Information header. • Please Note: You will need to provide at least 20 characters worth of information for each of the text boxes. • Each of the text boxes has a spell check button located at the bottom right hand corner. This is an quick and easy way to check your spelling. 72 Student Information, cont’d. • Please indicate if the student requires Special Factors. Select yes or no to indicate if a special factor is needed for the student. Then you will need to indicate the requirements and follow-up in the corresponding text box. • If yes is selected in the drop-down indicating that the student has limited English proficiency and language –related needs, then the severity of the disability will later be addressed in the State Reporting tab. • To view the complete form, please select Show Complete Form. • You will have the opportunity to include any conference notes specific to this section at the bottom of the Student Information page. Please click Save & Continue to move onto the next section. 73 Student Information, cont’d. • An example of the Student Information page on the IEP document: 74 Behavior Intervention Plan • Select if the student’s behavior impedes his or her learning or the learning of others (Yes or No). • • Indicate if a behavior intervention plan is required. A behavior plan can either be initiated in the system or attached at a later point. If a behavior intervention plan is required and is attached, indicate whether a Functional Assessment or a Behavioral Intervention Plan will be created in the system. 75 Behavior Intervention Plan, cont’d. • If you select Yes that a Functional Behavior Assessment will be created, you will need to enter all aspects of the assessment in the appropriate text boxes. • Please note: Text boxes must contain at least 20 characters in order to be accepted by the system. • If you select Yes that a Behavior Intervention Plan will be created, you will need to enter all aspects of the Behavior Intervention Plan in the appropriate text boxes. • Please note: Text boxes must contain at least 20 characters in order to be accepted by the system. 76 Behavior Intervention Plan, cont’d. • • • • Click on Show Complete Form to view the document. Review the IEP Behavior Intervention Plan. Type in your Conference Notes. Save will update data on this page. When you have completed all data entry and are ready to move to the next link, click on Save & Continue. 77 Transition • If a student requires a Transition Plan, click the Create Transition Plan button to begin. • Please proceed to add the Projected Graduation / Exit Date and Date of Transfer of Rights for the student. • Click on Details tab for each section of the Transition plan to fill in required information. • Note that Home-Based Support Services for Mentally Disabled Adults will only display for students 17 years of age or older. • Click on Show Section to preview the Transition Plan. 78 Transition, cont’d. • Click on the Add/Edit Outcomes button for the appropriate sections and complete the information requested: 79 Transition, cont’d. • Click Add Anticipated Service for each applicable section. • Click on Show Section to preview the Transition Plan. • Please select Save & Continue to move to the next page. 80 Transition, cont’d. • Check off the Type of Assessment that was completed. • Type in the date it was conducted, who it was administered by, and answer yes or no to whether the report is attached • Add the Summary of Results and Describe the student’s strengths, preferences, interests in relation to post-secondary outcomes. • Select Show Section to view an example of the form. Then select Save & Continue to move forward. 81 Transition, cont’d. • Please click the appropriate check boxes to indicate Relevant Areas for your student’s transition needs and fill-in information into the text boxes. • Based on your selection, text boxes for additional information will appear. Please fill in the information accordingly. • Select Show Section to view an example of the form. • You must create at least one transition goal before the system will allow you to Save & Continue. 82 Transition, cont’d. • Enter Present Level of Academic Achievement and Functional Performance in the first text box. • To add a goal from the provided goal bank, click on the hyperlink. • If you would like to enter a custom goal, enter the goal in the text box. You also have the ability to create a Custom Goal Bank to be used on future IEP’s with this student. • Please select Save & Continue after you are finished entering information. 83 Transition, cont’d. • Please indicate the Course of Study for the student by age 14½. To add additional Transition Years please select the applicable button. 84 Transition, cont’d. • Please select Yes or No to provide a response to the first question. • If the answer is No, you do not need to provide any more information. However, if the answer is Yes, please enter in the applicable information into the text boxes. • Please proceed by clicking Save & Continue. 85 Annual Goals • Click on Add Goals. • Please enter the student’s Present Level of Academic Achievement and Functional Performance in the text box. • To add a goal from the provided goal bank, click on the hyperlink. • If you would like to enter your own custom goal, enter the goal in the text box. 86 Annual Goals, cont’d. • To add goals from the provided goal bank, click on Click here to select the goal from the provided goal bank link as shown on the previous page. • A goal bank box will appear with a dropdown menu. • Select the goal from the dropdown menu. • Selections for possible goals will appear. • Save will update data on this page. When you have completed all data entry and are ready to move to the next link, click on Save & Continue. 87 Annual Goals cont’d. • This screen provides an overview of the goal position, goal area, present level and the annual goal. • Select the Goal Area(s) that pertain to the goal. • The student’s Present Level of Academic Achievement and Functional Performance will populate with the information you entered in the previous screen. 88 • Select the ILS#. Annual Goals, cont’d. • • • • Check the box that indicates how the parent will be regularly informed of student progress. If you need to choose Other, specify a progress review in the text box. Indicate who is implementing this goal in the Title(s) of Implementer(s) text box. Click on the Add Objectives button to add objectives for this goal. 89 Annual Goals, cont’d. • Click here to select the objective from provided objective bank • Click here to select the objective from custom objective bank • Follow the same steps as adding a goal from the goal bank. • IMPORTANT TIP: You need 2 objectives for each goal. The system will give you an error message and ultimately prevent you from finalizing an IEP if you have less than 2 objectives for each goal. 90 Annual Goals, cont’d. • • • Indicate how the parents will be informed of student progress. Select the Procedure from the drop-down menu. Enter the Schedule from the drop-down menu. • If you need to add more objectives click on the tab labeled Add Objectives. 91 Annual Goals, cont’d. • If you want to add a Progress Monitoring Assessment , you can add in an assessment from a provided list or add a custom assessment. • If adding an assessment From List, please select a Subject Area from the drop-down. • If adding a Custom assessment, please provide a Subject Area in the text box. • Proceed to select Attach Assessment. You may then enter another assessment for a student. • After each assessment is added it will appear on the page above where you add the assessments. You should then select the Details tab for the Assessment. 92 Annual Goals, cont’d. • Please proceed to select the Score Type and then Just Save. This will allow the Target Scores field to open up so you can enter in a value. In this instance shown in the example above, that would be a target percentage. • Please then review the Target Dates; if a date is not entered here, the IEP end date will default. • Proceed to Save & Continue. • IMPORTANT TIP: Please note that once a Progress Monitoring Wizard Assessment is added, it will not appear in the Progress Monitoring Wizard until the IEP is finalized. No progress can be documented until the assessment appears in the Wizard. 93 Annual Goals, cont’d. • This page provides a brief over-view of the goals that are entered into the Annual Goals page. •To review a goal after it is entered, select the Annual Goals tab from the IEP Process Menu, and then select Details. 94 Classroom and District Assessments • Select the appropriate Participation level for Classroom-Based Assessments and District-Wide Assessments. • If you select the student Will participate WITH accommodations ,the system will refresh and show a button to Add Accommodations. • Select yes or no from the Will the child be considered for the Illinois Alternate Assessment (IAA) drop-down menu. 95 Classroom and District Assessments, cont’d. • If you select the student Will participate in alternative classroom-based assessments, the system will refresh and insert a Rationale text box under Requirements. • If you select the student Will participate in district-wide assessments with accommodations, you must add appropriate accommodations. • If you select the student Will NOT participate in the district-wide assessment, the system will refresh and prompt you to enter your Rationale. • If you select the student Will participate in the following alternative assessments, the system will address the appropriate assessments on a future page. 96 IAA Assessments • • • Indicate if the student will be considered for the Illinois Alternate Assessment (IAA) from the drop-down menu. This question is found on the Classroom and District Assessments page. If you select no, you will be taken to the IAA Assessments page where it will indicate The student is not being considered for IAA. Click Save & Continue. If you select yes, you must add the relevant information in the IAA Assessments. page: 97 IAA Assessments Cont. • • • Based on the information entered, the system will indicate if the student meets the IAA participation criteria. Enter the IAA Accommodations to be included in the IEP. Please proceed to click Save & Continue. 98 State Assessments • • • • • • Based on the student’s grade level, the relevant state assessments will appear on the State Assessments page. For each assessment, select whether the student will participate with or without accommodations. If the student will not be participating in the assessment, select Will NOT participate. Enter in any additional information into the Conference Notes section. To view a preview of the document, select Show Section. Click Save & Continue. 99 Services, Supplemental Aids & Services, and Placement (SSSP) Services, Supplemental Aids & Services, and Placement • Choose whether to split classes and programs across school years. Example: Classes can be split if a student is moving from 8 th grade to high school over the course of the IEP. • Enter information for Additional Information and/or Supports Needed, Program Modifications, and Supports for School Personnel. • If the student requires supplemental aids for all classes, click Supplemental Aids For All Classes. 100 Services, Supplemental Aids & Services, and Placement (SSSP), cont’d. • Next, click on Add Supplemental Aids For All Classes, and select the relevant aids required: **Click Save & Continue twice to return to the main SSSP page. • If the student requires supplemental aids for only certain classes (Gen Ed or Special Ed), this can be done after clicking the Classes and Programs tab. • Click on the Classes and Programs tab. For General Education Classes, Services, Supplemental Aids & Services, and Placement indicate Class, Minutes per Day, Classes per Week, Begin & End Dates, and Class Type (A, B, or C – a legend for these classes is included in the chart). •If you need to add additional classes for the student, click on the tab for Add Additional Class. •Follow the same procedure for entering general education classes when splitting the school year. •Click Save. 101 Services, Supplemental Aids & Services, and Placement (SSSP), cont’d. • If you labeled the Class Type as “B” or “C”, click on the Details tab for that General Education Class. • For your “C” classes, select Yes or No from the drop-down if modifications and/or aids are needed • Click Add Supplemental Aids if required . • Select the necessary aids for this class. • When finished selecting the aids, click Add Supplemental Aids. • Click Save and Continue. 102 Services, Supplemental Aids & Services, and Placement (SSSP), cont’d. • Enter Special Education Programs. Select Class from the drop-down, then indicate Minutes per Day, Classes per Week, and Begin & End Dates. • Under the Supplemental Aids and Related Services columns, a green check = completed section, and a red ―x‖ = incomplete section. • Click Add Special Education Program or Class if necessary. • Click Details to enter Supplemental Aids and Related Services. • Select Yes or No from the drop downs, then click Add Supplemental Aids and/or Add Related Services if applicable. • IMPORTANT TIP: Enter your related services in this section (meaning within the Details tab) only if these service minutes should be deducted from the total minutes in that particular Special Ed class. • Click Save & Continue. 103 Services, Supplemental Aids & Services, and Placement (SSSP), cont’d. • Below the Special Ed Program section, enter additional Instructional Services and additional Related Services, if applicable. Enter the type of service, provider (optional), initiation/end dates, minutes, & consult (optional). • IMPORTANT TIP: Add your related services in this section (below the Special Ed Program section) only if these service minutes are separate from and in addition to the minutes within Special Ed classes. • In the Calculations section, the Total Minutes Outside of the General Education Classroom and the Bell to Bell Minutes will automatically populate. • Enter the Instructional Minutes. • The Percent Inside of General Education Classroom will automatically calculate for you. (Bell to Bell Min – Time Outside Gen. Ed. Class) / Bell to Bell Min • Click Save and Continue to save your information and return to the main SSSP page. 104 Services, Supplemental Aids & Services, and Placement (SSSP), cont’d. • Enter Educational Placement Considerations • Add 2 Placement Options, Possible Harmful Effects, your Decision & Rationale for this decision • Choose Final Placement for State Reporting • Click Save and Continue Services, Supplemental Aids & Services, and Placement 105 Transportation • You will need to indicate if the student requires transportation services. If you indicate that the student does not require transportation or will use general education transportation, you are finished with this section. • You can add any Conference Notes regarding transportation at this point. You will then need to click Save & Continue to move on to the next steps in the IEP process. 106 Transportation, cont’d. • If you indicate that the student does require special transportation, you will be required to create the individual Transportation Plan. Don’t forget to enter an Emergency Contact name and phone number. • You will need to go through a list of Specific Conditions to create the transportation plan. You will select Yes or No from the drop-down boxes. A comment section appears to the right of each condition where you may enter all of the pertinent information regarding that condition. 107 Transportation, cont’d. • After you have entered all relevant factors and/or conditions for the student’s transportation plan, you can enter Additional Information and Conference Notes in the text boxes provided. • Your completed transportation plan will appear on your IEP document. • If you would like to print out this transportation plan for your bus driver, simply click on Show Section. A new screen will appear that shows the transportation plan viewed as a PDF document. Print that page. • Click Save & Continue to save your transportation plan and move forward in the IEP process. 108 Extended School Year (ESY) • • • • • • Select whether or not Extended School Year is required for this student. Give a Rationale for your selection. If extended school year is required for the student, you will be asked to add ESY Goals and ESY Services. Select the type of ESY Transportation required from the drop-down menu. Type in Conference Notes if necessary. Click Save & Continue. 109 Extended School Year (ESY), cont’d. • If adding an ESY Goal, enter Present Level of Academic Achievement and Functional Performance in the text box. • To add a goal from the provided goal bank, click on the hyperlink . • If you would like to enter a custom goal, enter the goal in the text box. • Once you enter a custom goal for a student, you can later use that same custom goal bank on future IEPs for this student. • You can also use your custom goal bank on other students on your caseload. Just make sure to then tailor your goal so it becomes unique for each student’s needs. 110 Extended School Year (ESY), cont’d. • • • If you choose to add ESY Goals from the provided goal bank, a Generic Goal Bank box will appear with a drop-down menu. Select the goal from the dropdown menu. Options for possible goals will automatically populate. Select the relevant goal for your student. When you have completed all relevant data entry, click on Save & Continue. 111 Extended School Year (ESY), cont’d. • • • • • After adding goals, you will be directed to a Goal Details screen. This page provides an overview of the goal position, goal area, present level and the annual goal. The Goal Area will automatically populate as an ESY goal. The student’s Present Level of Academic Achievement and Functional Performance will populate with the information you entered in the previous screen. You will have an option to add goals from the goal bank. 112 Extended School Year (ESY), cont’d. • • • After reviewing the goal information, you must select an ILS# for the goal. Check the box that indicates how the Parent will be regularly informed of student progress. If Other, specify a progress review. Click on Add Objectives button to add objectives for this goal. 113 Extended School Year (ESY), cont’d. • If you are selecting an objective from the provided objective bank, a Generic Objective Bank will appear. Select the category for the objective from its drop-down menu. • Once you have selected a category, a list of objectives that pertain to the goal will appear—select one. • If you are clicking the link to enter a Custom Objective, a blank text box will appear where you can type the objective. • Click Save & Continue. 114 Extended School Year (ESY), cont’d. • • • • After entering an objective for your goal, enter relevant Criteria Select Procedures from the drop-down menu Enter Schedule from the drop-down menu If you need to add more objectives click on Add Objectives. PROGRESS MONITORING • If you would like to add Progress Monitoring for your goal, complete that section next. This is the same Progress Monitoring functionality that was included in the Annual Goals page earlier. • Click Save and Continue. 115 Extended School Year (ESY), cont’d. • The last section of the Extended School Year page will allow you to Add ESY Instructional Service or Add ESY Related Service. • After you have made your selection, you will be taken to a new screen where you may enter the ESY Service for the student. • Enter the Initiation Date and End Date for the service. • Select a General Location from the drop-down menu. • Enter the Total Minutes for this service. • Click Add ESY Service. 116 Meeting Participants • • • • • Check the box to the right for the individuals that Attended IEP Conference. Select the LEA Representative from the drop-down menu Select the Special Ed Teacher from the drop-down menu Click on Add Additional Participant to add other Participants Note: If you cannot find certain individuals in the drop-down menu for a specific role, go back to the Team tab and add them to the student’s IEP team. Enter Conference Notes if applicable. • • Click Save & Continue. 117 Review Conference Notes • • • All notes that have been entered thus far should pre-populate on this page. Notes can also be added or edited on this page. Click Show Section to preview the Conference Notes section as it will appear on the IEP document. • • Review for accuracy. Click Save & Continue. 118 Create IEP Document • Enter the IEP begin and end dates • Select which contacts were made regarding this IEP • Select Yes or N/A for each statement below: • Click on Create Draft IEP Document to create a draft IEP. • Note: Draft IEPs will be saved for a limited time (30 days). Creating additional “Drafts” will replace the most recent “Draft” IEP. • Click on Create Final IEP Document to create a final IEP. • If the system indicates that there are errors to fix first, you can click on Display IEP Errors to view what sections still need to be completed. 119 Create Notification of Conference Recommendations • Create Notification of Conference Recommendations (34-57E) for your student by entering the relevant information on the page. • Create a draft or final document. • Click Save & Continue. • Note: If you created the 34-57E I form n Eligibility Process, you do not need to create another form here. Parent / GuardianProcess Consent for Evaluation Initial Provisions • Indicate who signed the document, then click the appropriate tab to create the draft or final 34-57F form . • Click on the document to view it in Adobe. It will be printable from Adobe. • Click Save & Continue. • The remaining pages within the IEP Process are available for you to use when applicable: 121 Notification of Conference ISP Process Recommendations • If you need to create an ISP, click on the ISP Process tab in your blue tool bar and complete each page, just as you would in the IEP Process. • IMPORTANT TIP: In order for EasyIEP™ to recognize an ISP as the valid and current educational plan for your student (which ultimately drives the compliance status for your student), make sure to click on the student’s Personal Info tab and select from the Enrollment Type: “Parentally-placed into private school”. Then scroll to the bottom of the page and click Update the Database. 122 State Reporting • • • • • • • Click on State Reporting from the menu in the blue toolbar. Choose a drop-down choice for: Fund Code and Reason for Exit (if applicable) – Drop-down choices are based on ISBE codes Enter Indicator 13 – State Performance Plan information by selecting Yes, No, or N/A in the radio buttons to the right of each question. Choose Yes or No if the student meets Indicator 13 criteria. To view a preview of the document, click Show Page. When this section is completed, click Save . If you are ready to create a Final IEP, after selecting Save, a tab will appear that can easily take you back to the Create IEP Document page. 123 Evaluation Process Summary of Performance Process • Click on Summary of Performance in the blue toolbar to begin this process. • This section may be completed for a student at any time, especially when the student is exiting special education due to graduation or reaching the maximum age limit . 124 Summary of Performance Review IEP TeamProcess, cont’d. • Click on Summary of Academic Achievement and Functional Performance • Summarize the student’s current academic achievement and functional performance in the areas indicated as pertaining to post-secondary goals. • Click on Show Section to preview as a PDF document. • Click Save & Continue to move to the next page in the process. 125 Summary of Performance Process, cont’d. • The Student Perspective page should be completed by the student; assistance from another adult is optional. • Student should state the strengths/needs that a professional should know about him/her, effects of disability on schoolwork & activities, helpful accommodations/services, and who completed this section. • Click Show Section to preview as a PDF document. • Click Save & Continue to move to the next page in the process. 126 Create Parent Notification of Summary of Performance Process, Conference (34-57D) Cont. cont’d. • This page is titled Recommendations to Assist the Student in Meeting PostSecondary Goals • Enter Recommendations and Contact Information for each of the areas listed: Post-Secondary Education / Training Employment Living Community Participation • Enter Additional Comments/Information (optional). • Click Save & Continue to move to the next page in the process. 127 Summary of Performance Process, cont’d. • Indicate whether or not this is the one year prior notice of anticipated transfer of rights to the student, or the actual notice of transfer of all educational rights to the student. • Choose the document signer from the drop-down. • Click Create Draft or Create Final to generate & view the 34-57I document. • Click Save & Continue to move to the next page in the process. 128 Summary of Performance Process, cont’d. • Example of 34-57I – Transfer of Rights Document: 129 Summary of Performance Process, cont’d. • This page is labeled Create Delegation of Rights Document 34-57K. • Indicate the date the notice will be sent to the parents by either typing into the date text box, or clicking on the calendar icon to the right of that to choose your date from a calendar. • Click Create Draft or Create Final to generate and view the 34-57K, Delegation of Rights document. • Click Save & Continue to move to the next page in the process. 130 Summary of Performance Process, cont’d. • The final page in this process allows you to create a summary of performance document. This document will pull in all of the information that has been entered previously within this process. • Click Create Draft or Create Final to generate and view the Summary of Performance document. • Click Save & Continue to complete this process. 131 Summary of Performance Process, cont’d. • Example of a Summary of Performance document. 132 Log Out & Exit EasyIEP™ • To log out, click on the Log Out tab toward the left of the green menu bar. • You can log out of the system at any time. You do not have to go back to the main menu first. • After you log out, close your browser by either choosing FileExit, or Macs - Click on the square in the upper left hand corner PCs - Click on the ―X ―in the upper right hand corner • You should log out of EasyIEP™™ and close your browser if: • You step away from your computer • You are finished using the system • You are leaving for the day If you do not log out and close your browser, anyone could access information in EasyIEP™™ or enter information under your user name. It is crucial that all users commit to keeping the data in EasyIEP™™ secure. Whenever you need help beyond this User Manual, please feel free to call us on the ICAD Support Phone number at: 866-506-2947 You may also send us an email via our Message Board, located at the top of the Main Menu. We are always here to help. Good luck! 133