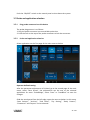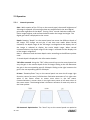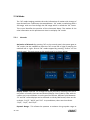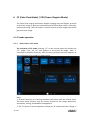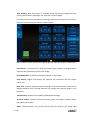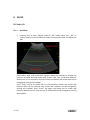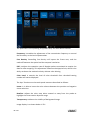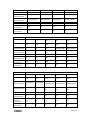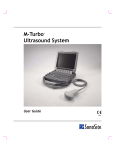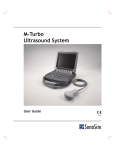
1
VINNO 6 Basic User Manual VINNO 6 Revision 1 Copyright 2014 by VINNO Technology (Suzhou) Co., Ltd. Intellectual Property Statement Intellectual Property Rights All copyright, trademark, domain name, patent, trade secret and other intellectual property rights existing in our product and this Manual will remain the sole property of VINNO Technology (Suzhou) Co., Ltd.(hereinafter referred to as “VINNO”). is the trademark of VINNO, and it is duly registered in the People’s Republic of China and other countries. All rights reserved. Without prior written consent by VINNO, any reproduction, modification, storage in a retrieval system or retransmission or otherwise in any form or by any means, regarding any part of intellectual property rights herein, are illegal and strictly prohibited. Any infringement of the intellectual property rights will be pursued vigorously and VINNO may seek injunction, relief and indemnifications available under all applicable laws and regulations. Confidential Information All or part of the materials and information contained in this Manual, which are created or developed on the basis of VINNO’s intellectual property rights, are strictly confidential and privileged. You should keep the Manual confidential until all such confidential information becomes available to the public. Disclosure of the information in this Manual in any manner or by any means without prior written permission of VINNO is strictly forbidden. Without prior written consent by VINNO, any reproduction, modification, storage in a retrieval system or retransmission of the information or otherwise making it available to the public in any form or by any means is illegal and strictly prohibited. I 8000098 Disclaimer VINNO assumes no liability for use of this document if any unauthorized changes to the content or format have been made. Every care has been taken to ensure the accuracy of the information in this document. However, VINNO assumes no responsibility or liability for errors, inaccuracies, or omissions that may appear in this document. VINNO reserves the right to modify the product without further notice to improve reliability, function or design. This manual is provided without warranty of any kind, implied or expressed, including, but not limited to, the implied warranties of merchantability and fitness for a particular purpose. In the United States, Federal law restricts this device to sale, distribution, and use by or on order of a licensed physician. II 8000098 Content 1 GENERAL ............................................................................................................... 1 1.1 Introduction ...................................................................................................................... 1 1.2 Contact Information .......................................................................................................... 1 1.3 About this document ....................................................................................................... 1 1.4 Product description .......................................................................................................... 2 1.5 Mechanical system ........................................................................................................... 3 1.5.1 System layout ....................................................................................................... 3 1.5.2 Mechanical adjustment ........................................................................................ 3 1.5.3 Keyboard .............................................................................................................. 3 1.6 Optional peripheral devices ............................................................................................. 5 1.7 Display annotation ........................................................................................................... 6 1.7.1 Parameter term explanation ................................................................................ 7 1.8 On line manual ................................................................................................................. 7 2 SAFETY ................................................................................................................... 8 2.1 Introduction ..................................................................................................................... 8 2.2 Owner responsibility ........................................................................................................ 9 2.3 Regulatory Notice ............................................................................................................ 9 2.4 Label Icon description ...................................................................................................... 9 2.5 Safety and Warning notices ............................................................................................ 12 2.5.1 Acoustic output .................................................................................................. 12 2.5.2 Patient Safety ..................................................................................................... 13 2.5.3 Probe Safety ....................................................................................................... 14 2.5.4 Personnel and equipment safety ........................................................................ 14 2.5.5 Electrical Safety .................................................................................................. 16 3 START THE SYSTEM ......................................................................................... 22 3.1 General .......................................................................................................................... 22 3.2 Safety warnings .............................................................................................................. 22 III 8000098 3.3 Power on / Boot up ........................................................................................................ 22 3.4 Power off / Shutdown .................................................................................................... 22 3.5 Probe and application selection ..................................................................................... 23 3.5.1 Plug probe connector into this device ................................................................ 23 3.5.2 Probe and application selection ......................................................................... 23 3.6 Image Storage ................................................................................................................ 24 3.7 Freeze image .................................................................................................................. 25 3.8 Patient data ................................................................................................................... 25 3.9 Image Annotation .......................................................................................................... 25 3.9.1 Character Annotation ......................................................................................... 25 3.9.2 Arrow Indicator .................................................................................................. 27 3.9.3 Body Pattern ....................................................................................................... 27 3.10 Cine Mode ..................................................................................................................... 28 3.11 Zoom function ................................................................................................................ 29 3.12 ECG Trace ....................................................................................................................... 29 3.12.1 ECG trace operation ......................................................................................... 30 3.13 Multiple display formats ................................................................................................ 32 3.14 2D Image size change ..................................................................................................... 34 3.15 Environment .................................................................................................................. 34 4 PREPARE FOR AN EXAMINATION AND PATIENT DATA ARCHIVE .... 35 4.1 Beginning a New Patient ................................................................................................ 35 4.1.1 General data section .......................................................................................... 37 4.1.2 Application data information section ................................................................. 37 4.2 Archive ........................................................................................................................... 39 4.2.1 Initial Archive Menu ........................................................................................... 39 4.2.2 New Examination from Archive menu ................................................................ 41 4.2.3 Export patient or examination data ................................................................... 41 4.2.4 Import patient or examination data ................................................................... 42 4.2.5 Report ................................................................................................................. 43 4.2.6 Bluetooth ............................................................................................................ 44 4.2.7 Email ................................................................................................................... 45 4.2.8 View menu .......................................................................................................... 46 IV 8000098 4.2.9 Worklist .............................................................................................................. 47 5 2D B MODE, M MODE ....................................................................................... 48 5.1 2D Mode ........................................................................................................................ 48 5.1.1 Main B mode menu ............................................................................................ 48 5.1.2 Freeze mode ....................................................................................................... 50 5.2 Operation ...................................................................................................................... 52 5.2.1 General operation .............................................................................................. 52 5.2.2 Trapezoid View ................................................................................................... 54 5.2.3 PView .................................................................................................................. 54 5.2.4 Map .................................................................................................................... 55 5.3 M Mode ......................................................................................................................... 56 5.3.1 M mode .............................................................................................................. 56 5.3.2 Freeze in M mode ............................................................................................... 57 6 CF (COLOR FLOW MODE) / PDI (POWER-‐DOPPLER MODE) ............... 58 6.1 CF mode operation ......................................................................................................... 58 6.1.1 Main menus of CF mode ..................................................................................... 58 6.1.2 CF box position and size ..................................................................................... 61 6.1.3 CF mode gain control .......................................................................................... 62 6.2 Power Doppler (PDI) ...................................................................................................... 62 7 PW AND CW MODE (SPECTRAL DOPPLER MODE) ................................. 63 7.1 PW mode (Pulsed Wave Doppler) ................................................................................... 63 7.1.1 Operation of PW mode (main menu) ................................................................. 63 7.1.2 Operation of PW mode sub menu ...................................................................... 67 7.2 CW mode (Continuous Wave Doppler) ........................................................................... 68 7.3 Freeze in PW/CW ........................................................................................................... 69 8 3D/4D ................................................................................................................... 70 8.1 Static 3D ........................................................................................................................ 70 8.1.1 Workflow ............................................................................................................ 70 8.1.2 3D MCut .............................................................................................................. 76 8.1.3 Free View ............................................................................................................ 77 8.1.4 MagicCut ............................................................................................................. 77 8.2 4D (real time) ................................................................................................................. 79 V 8000098 8.2.1 Workflow ............................................................................................................ 79 8.2.2 4D Cine Mode ..................................................................................................... 81 8.2.3 3D MCut of Cine Mode ....................................................................................... 82 8.3 MCut .............................................................................................................................. 84 8.3.1 Workflow ............................................................................................................ 84 8.4 STIC ................................................................................................................................ 86 9 OTHER MODES ................................................................................................... 87 9.1 Tissue Doppler Imaging (TD) ........................................................................................... 87 9.2 Tissue Velocity Imaging (TVI) .......................................................................................... 87 9.2.1 TVI overview ....................................................................................................... 87 9.2.2 TVI Workflow ...................................................................................................... 87 9.3 Elastography .................................................................................................................. 90 10 MEASUREMENT AND CALCULATION .......................................................... 92 10.1 Introduction ................................................................................................................... 92 10.1.1 Measurement Workflow .................................................................................. 92 10.1.2 Positions of the measurement keys ................................................................. 94 10.1.3 Measurement system setting ........................................................................... 94 10.1.4 Basic introduction in measurement function ................................................... 98 10.1.5 Generic measurement list in each mode ....................................................... 101 10.1.6 Measurement setting in each mode .............................................................. 119 10.2 Abdominal measurements ............................................................................................ 127 10.2.1 B mode measurements .................................................................................. 127 10.2.2 M mode measurements ................................................................................. 129 10.2.3 PW mode measurements ............................................................................... 129 10.3 Small organ measurements ........................................................................................... 131 10.3.1 B mode measurements .................................................................................. 131 10.3.2 M mode measurements ................................................................................. 132 10.3.3 PW mode measurements ............................................................................... 133 10.4 Vessel measurements ................................................................................................... 135 10.4.1 B mode measurements .................................................................................. 135 10.4.2 M mode measurements ................................................................................. 139 10.4.3 PW mode measurements ............................................................................... 139 10.5 Gynecology Measurements ........................................................................................... 143 10.5.1 B Mode measurements .................................................................................. 143 VI 8000098 10.5.2 PW mode measurements ............................................................................... 144 10.6 Urology Measurements ................................................................................................. 147 10.6.1 B Mode measurements .................................................................................. 147 10.6.2 PW Mode measurements ............................................................................... 152 10.7 Pediatric Measurements ............................................................................................... 153 10.7.1 B Mode measurements .................................................................................. 153 10.7.2 PW mode measurements ............................................................................... 155 10.8 Obstetrics Measurements ............................................................................................. 157 10.8.1 B Mode measurements .................................................................................. 158 10.8.2 M Mode measurements ................................................................................. 180 10.8.3 PW mode measurements ............................................................................... 180 10.9 Cardiac Measurements ................................................................................................. 182 11 PROBES AND BIOPSY .................................................................................... 222 11.1 Probe overview ............................................................................................................. 222 11.2 Probes ........................................................................................................................... 222 11.3 Probe connection and disconnection ............................................................................. 226 11.4 Maintenance ................................................................................................................. 226 11.4.1 Inspecting the probe: ..................................................................................... 226 11.4.2 Special handling instructions: ......................................................................... 227 11.5 Probe Safety ................................................................................................................. 229 11.6 Biopsy ........................................................................................................................... 230 12 SYSTEM SETTING ........................................................................................... 231 12.1 General ......................................................................................................................... 231 12.2 LCD Tests ...................................................................................................................... 233 12.3 Measurement ............................................................................................................... 233 12.4 Extended key ................................................................................................................ 237 12.5 Network ........................................................................................................................ 238 12.5.1 General ........................................................................................................... 238 12.5.2 File Server ....................................................................................................... 239 12.5.3 Email Setting ................................................................................................... 239 VII 8000098 12.5.4 FTP .................................................................................................................. 239 12.6 DICOM .......................................................................................................................... 240 12.6.1 General ........................................................................................................... 240 12.6.2 Storage ........................................................................................................... 240 12.6.3 Worklist .......................................................................................................... 240 12.6.4 Print ................................................................................................................ 241 12.7 Service Tool ................................................................................................................... 241 12.7.1 Demo mode .................................................................................................... 241 12.7.2 Electrical parts auto diagnostic tools ............................................................. 241 12.7.3 Display Backlight Config ................................................................................. 242 12.7.4 S-‐Video Output ............................................................................................... 242 12.7.5 Power ............................................................................................................. 242 12.7.6 Software log file download ............................................................................ 242 12.7.7 Export/Import UserDefine Configuration ....................................................... 242 12.7.8 System Upgrade ............................................................................................. 243 12.8 Features ........................................................................................................................ 243 12.9 User Management ........................................................................................................ 243 12.10 About ............................................................................................................................ 244 13 ACCESSORIES AND PERIPHERALS ............................................................ 245 13.1 Introduction .................................................................................................................. 245 13.2 Printing ......................................................................................................................... 245 13.3 Approved printers ......................................................................................................... 246 14 OPERATOR MAINTENANCE AND TECHNICAL DATA .......................... 247 14.1 System maintenance ..................................................................................................... 247 14.1.1 Inspecting this device ..................................................................................... 247 14.1.2 Virus protection .............................................................................................. 248 14.1.3 Cleaning this device ........................................................................................ 248 14.1.4 Battery ............................................................................................................ 249 14.2 Technical Data ............................................................................................................... 253 14.2.1 General ........................................................................................................... 253 14.2.2 Power supply .................................................................................................. 254 14.2.3 Operator panel ............................................................................................... 254 14.2.4 Console Design ............................................................................................... 255 14.2.5 Transmitter ..................................................................................................... 255 VIII 8000098 14.2.6 Receiver .......................................................................................................... 255 14.2.7 Scan Converter ............................................................................................... 255 14.2.8 Cine Loop Memory ......................................................................................... 255 14.2.9 Basic Measurement Accuracy ........................................................................ 255 14.2.10 Basic Performance Specification .................................................................. 256 IX 8000098 1 General 1.1 Introduction VINNO 6 (hereinafter referred to as "this device") is a professional digital color ultrasonic diagnostic apparatus. It transmits ultrasound waves into the body tissues and displays the echo images of the tissues and blood flow accordingly. 1.2 Contact Information This device is developed and manufactured by VINNO Technology (Suzhou) Co., Ltd, China. Contact information is as follows: Telephone: +86 512 62873806 Fax: + 86 512 62873801 Address: 4F-‐5F, C8 Building, No.218 Xinghu Rd, Suzhou Industrial Park, Jiangsu 215123 China Authorized European Representative: Wellkang Ltd (www.CE-‐marking.eu) Address: 29 Harley St., London W1G 9QR, UK Tel: +44 (20)30869438, 32876300 Fax: +44(20)76811874 1.3 About this document l l l l Before attempting to use this device, read and fully understand all contents in the document to properly operate this device, paying particular attention to all: Warnings, Cautions, Notes, and Notices. Due to space limitations, this manual does not make perfect, any problem please contact VINNO technical staff. In order to use the device correctly, keep this manual with the device at all times. This manual accompanies the VINNO 6 only. The most extensive configuration is described within this manual, including the maximum number of the options and the accessories. Not every function, option or accessory described may have been purchased or licensed on your device. 1 / 265 8000098 l This manual forms part of the accompanying documentation for this product. The remaining documents in the set are listed: Advanced Technical Manual, Service Manual. 1.4 Product description This device is a professional, premium performance real-‐time scanning system. The various probes make many applications possible. This device provides the following diagnostic possibilities: l B mode, M mode l CF and PDI mode l Spectral Doppler: pulsed wave and continuous wave (PW and CW) l Tissue Doppler (TD) l Volume mode: 3D and 4D (real time 3D) Intended use: This device is intended for use by a qualified physician for the following ultrasound evaluation clinical applications. l Abdomen l Obstetrics/Fetal l Gynecology l Small parts (including thyroid, breast, testes, etc.) l Cardiac (Adult and pediatric) l Vascular l Urology (including prostate) l TCD Intraoperative l Pediatrics l Small Joints 2 / 265 8000098 1.5 Mechanical system 1.5.1 System layout 1. Monitor 2. Touch Panel 3. Control Panel 4. Probe Port 5. ECG Port 1.5.2 Mechanical adjustment The image screen panel allows to move forward and backward and tilted to different degrees. It can also be laid down into a flat position in order to be convenient and protected during transportation. 1.5.3 Keyboard 1.5.3.1 Touch panel Except for the functions triggered by the control panel, the touch panel represents the main operator interface for operation. The touch panel is highly sensitive and consists of a flat monitor. It is easy to 3 / 265 8000098 operate even under dim light conditions and allows for comfortable access to the control menu. Notes: This touch panel can be blocked by a strong magnetic field. Avoid magnetic field interference. The touch panel may be impacted by any foreign body lying on it. To guarantee maximum performance, it is recommended to clean the touch panel regularly. 1.5.3.2 Control Panel (1) TGC: these 6 section slides can adjust TGC (Time Gain Control) in 6 different positions. (2) Gain: adjust the gain in every mode. (3) M: press this key to enter M mode. (4) TD: press this key to enter TD mode. (5) PW: press this key to enter PW mode. (6) CW: press this key to enter CW mode. (7) TVI: press this key to enter TVI mode. (8) CF: press this key to enter CF mode. (9) PDI: press this key to enter PDI mode. (10) 4D: press this key to enter 3D/4D mode (11) B: press this key to enter B mode. (12) HAR: press this key to enter Harmonic imaging. 4 / 265 8000098 (13) Cursor: once pressing this key, the cursor will be displayed on the screen. It can be moved using the trackball. (14) M/D line: push this key to display the desired line in M mode or PW/CW mode. Moving the trackball can change the line position. (15) ROI size: ROI stands for range of interest. Pushing this key allows the operator to change the size of ROI by operating the trackball -‐ up or down movement allows to enlarge or reduce the ROI size vertically, right or left movement to enlarge or reduce the ROI size horizontally). (16) Auto: automatically optimizes the relevant image such as B mode image, color and pulse wave. (17) Measure: to view the image measurements. The measurement items can be selected in the measurement menu. (18) Clear: to erase the annotation, body pattern or measurement result on the display. Pushed once, it will erase the last one. If held for a longer period (minimum 2 seconds), it will erase all results. (19) Enter: to confirm the action identified by an arrow. (20) Rotation/Steer: in 3D/4D mode, this key allows operator to rotate the rendering images. In 2D mode, this key can steer an interest box such as the color interest box and the 2D linear image. (21) Depth: changes scanning depth. (22) Freeze: freezing and unfreezing scanning. (23) Print: the function of this key can be defined during system set-‐up . By default it is set as the print function. However, it can also be set to save to USB or save to HDD. (24) Save to USB: the function of this key can be defined during system set-‐up. By default set to store images to the U disk through the USB port. (25) Save to HDD: the function of this key can be defined during system set-‐up session. By default set to store images on the clipboard to the Hard disk. After this key is pressed before the image is frozen (by pressing “Freeze” key), it will store the cine loop from the most recent session (the cine loop time can be changed in the system settings). After the image is frozen, it will store the last frame single image. (26) Left: this key can generate a dual image display. The left image is the active one and the right image is the static one. (27) Right: this key can generate a dual image display. The right image is the active one and the left image is the static one. (28) Power key: switches the device on and off. (29) Trackball: operator can use the trackball to move the cursor, or the line, or the ROI box, etc. 1.6 Optional peripheral devices Black/white video printer (USB) 5 / 265 8000098 Digital color printer (USB) LAN printer / Wireless printer 1.7 Display annotation (1) VINNO: manufacturer’s trade mark. (2) Hospital Name: it can be modified by the operator to enter a particular name. The default is empty. (3) Depth: indicates how deep the scan image is reaching. (4) MI, TI: indicate the size of Acoustic Mechanical and Thermal Index. (5) Probe and application: show what the current probe and application are selected and used. (6) Clip board images: this field displays the batch of the temporarily stored images, which are stored in HDD. (7) This field indicates some of the parameters such as digital gain, frequency, frame rate, acoustic output power. The displayed parameters are different in different modes. (8) Image area: it is the field where the image is displayed, including all mode images such as B, CF/PDI, M, and PW/CW. (9) Date, Time: this field indicates the current date and time. This date and time can be modified in the system setting menu. (10) Perf. Physician: this field shows the performing physician’s name. (11) Patient information: this field shows the current patient name and ID. If there is some information of OB input when new the patient, display “GA” too. (12) USB/Network status: If one USB device is plugged in, the left icon appears. If connect with the network, the right icon appears. If connect with one server, the middle icon appears. 6 / 265 8000098 1.7.1 Parameter term explanation All parameters in the parameter field are abbreviated and stand for the following meanings. AP: Acoustic Power DG: Digital Gain Fq: Frequency WF: Wall Filter DR: Dynamic Range FR: Frame Rate SD: Sample Depth 1.8 On line manual In the system setting menu of the touch panel, there is a “Show Manual” key. By selecting this key, the operator manual will be displayed for operator to refer to. 7 / 265 8000098 2 Safety 2.1 Introduction This device is designed for the safety of the patient and operator. Before operating the device, read this chapter thoroughly with care please. The manufacturer guarantees the safety and reliability of the device only if all cautions and warnings are followed. Strictly observe all Warnings, Cautions, Notes and Safety markings within this document and on the machine. Intended use: This device is intended for use by a qualified physician for the following ultrasound evaluation clinical applications. l Abdomen l Obstetrics/Fetal l Gynecology l Small parts (including thyroid, breast, testes, etc.) l Cardiac (Adult and pediatric) l Vascular l Urology (including prostate) l TCD Intraoperative l Pediatrics l Small Joints Icon description: Several levels of safety precautions may be found in this manual. Different levels of concern are identified by one of the following icons with signal words. Indicates a hazard which, if not avoided, could result in death or serious injury. Indicates a hazard which, if not avoided, could result in moderate or minor injury and property damage. 8 / 265 8000098 2.2 Owner responsibility Notice against operator modification: Never modify this device, including the system components, the software, the cables and any other device components or accessories. A safety hazard may occur resulting from unauthorized modification. Do not attempt to disassemble the device if you are not trained and authorized by the manufacturer. The operator must familiarize themselves with these safety measures and avoid situations that can result in injury or damage. 2.3 Regulatory Notice This device has been tested to meet all applicable requirements. According to 93/42 EEC, it is a class IIa medical device. Conformity to Standards: The following standards have been used and the product is therefore certified in compliance with: IEC 60601-‐1 E3:2005+Corr1:2006+Corr2:2007 Medical electrical equipment -‐ Part 1: General requirements for basic safety and essential performance IEC 60601-‐1-‐2:2007 Electromagnetic compatibility -‐ Requirements and tests IEC 60601-‐1-‐6:2010 Usability IEC 60601-‐2-‐37:2007 Medical electrical equipment -‐ Particular requirements for the safety of ultrasonic medical diagnostic and monitoring equipment IEC 61157:2007 Declaration of acoustic output parameters ISO 10993-‐1:2009 Biological evaluation of medical devices IEC 62304:2006 Medical device software –Software life cycle processes IEC 62366:2007 Medical devices -‐ Application of usability engineering to medical devices Council Directive 93/42/EEC on Medical Device Directive 2002/96/EC on Waste Electrical and Electronic Equipment 2.4 Label Icon description Label Description Location 9 / 265 8000098 This is the indicator for company address. Rear of unit This is the indicator for part number. Rear of unit This is the serial number indicator. Rear of unit This indicates manufacture time. Rear of unit General Warning Sign. Rear of unit MUST read the document accompanying the device! This is type BF equipment, in which protection against the electric shock does not rely on the basic insulation only. (The operator shall) Provide additional safety precautions such as double insulation or reinforced insulation for protective earthing or reliance upon installation conditions. Equipment Type CF, indicates the equipment which has a floating applied part, possessing a degree of protection suitable for direct cardiac contact. This symbol indicates that the waste of electrical and the electronic equipment must not be disposed as unsorted municipal waste and must be collected separately. Contact an authorized representative of the manufacturer for information concerning the decommissioning of your equipment. On/off button Warning: system shutdown using the “On/off” button does not disconnect the ultrasound unit from the main voltage. To disconnect the ultrasound unit from the main voltage after the system shutdown, set the circuit breaker close to the main inlet to OFF as described in 3.3. Warning: dangerous voltage. This is a warning mark for an electric shock hazard to indicate there is a potential electric shock risk. Rear of unit Rear of unit Rear of unit Rear of unit Control panel Rear of unit This is the mark for no-‐line bound during Rear of LCD packing. 10 / 265 8000098 This is the warning mark indicating risk of hand Rear of console injuries. This is the equipotential connection mark. The operator needs to connect the equipotential Rear of unit points of the device in order to reach the same potential. This is the protective earthing mark to indicate Inside of unit which device or part is protected by earthing. Authorized European Representative Address. Operator Manual Indicates the presence of hazardous substance(s) above the maximum concentration value. The maximum concentration values for electronic information products are set by the People’s Republic of China Electronic Industry Standard SJ/T11364-‐2006, including the hazardous substances such as lead, mercury, hexavalent chromium, cadmium, poly Probe connector brominated biphenyl (PBB), and poly brominated diphenyl ether (PBDE). “10” indicates the number of years during which the hazardous substance(s) will not leak or mutate so that the use of this product will not result in any severe environment pollution, personal injury, or damage to any assets.(Only for China) Indicates the presence of the hazardous substance(s) above the maximum concentration value. The maximum concentration values for electronic information products are set by the People’s Republic of China Electronic Industry Standard SJ/T11364-‐2006, including the hazardous substances such as lead, mercury, hexavalent chromium, cadmium, poly Rear of unit brominated biphenyl (PBB), and poly brominated diphenyl ether (PBDE). “20” indicates the number of years during which the hazardous substance(s) will not leak or mutate so that the use of this product will not result in any severe environmental pollution, personal injury, or damage to any assets.(Only for China) This product carries the CE Mark. 0197 for Rear of unit VINNO. 11 / 265 8000098 GOST Symbol. Russia Regulatory Country Rear of unit Clearance. 2.5 Safety and Warning notices 2.5.1 Acoustic output Definition of the acoustic output parameters: Thermal Index: TI is an estimate of the temperature increase of the soft tissue or bone. There are three thermal index categories: • TIS: soft tissue thermal index, the main TI category. Used for the applications that does not image (or visualize) bones. • TIB: bone thermal index (bone located in a focal region). Used for the fetal application. • TIC: cranial bone thermal index (bone located close to the surface). Used for the transcranial application. Mechanical Index: MI is the estimated likelihood of tissue damage due to the cavitations. Safety statement: Although no harmful biological effects have been demonstrated for ultrasound frequencies, intensities and exposure times, we recommend the operator to use the lowest acoustic output settings producing acceptable diagnostic information. System controls affecting acoustic output: The TI and MI show the highest possible acoustic intensity for a given mode, obtainable only when the combination of control settings that results in maximum output is selected. Most settings result in a much lower output. There are several notes as follows: • The duration of an ultrasound examination is as important as the acoustic output, since the patient exposure to output is directly relevant to the ultrasound scanning time. • The better image quality can accelerate the clinical result, reducing the 12 / 265 8000098 overall duration of an examination. Therefore, any image quality improvement can help to reduce patient exposure. Probe selection: As long as the appropriate application is available, any probe of this device can be used and meet the limitation of the acoustic output requirement. Application selection: Selecting the probe and application will provide the acoustic output within the limitation of the acoustic output requirement. Changing imaging modes: Acoustic output depends on the imaging mode selected. The choice of mode will greatly affect the energy absorbed by the tissue. After a combined mode is completed, such as 2D and CF mode, the total acoustic output comprises contributions from each individual mode. Concerning surrounding fetal exposure: Always be aware of the acoustic output level by observing the acoustic output display. The operator is recommended to become familiar with this device’s controls affecting the acoustic output. OB examination: Prior to an ultrasound examination, the patient should be informed of the clinical applications which include specific benefits, potential risks and alternatives. In addition, if the patient requires information about the exposure time and intensity, they should be provided. An ultrasound examination should not be performed to satisfy the family’s desire to know the fetal sex: according to several countries’ laws, which include China, using an ultrasound examination to detecting the fetal sex (gender) is prohibited. 2.5.2 Patient Safety The concerns listed in this section can seriously affect the safety of the patient undergoing a diagnostic ultrasound examination. Patient Identification: Always include proper identification with all patient data and verify the accuracy of the patient’s name and/or the identity number after entering the data. Ensure 13 / 265 8000098 all recorded data has the correct patient ID. Identification errors can result in an incorrect diagnosis. Diagnostic Information: The images and calculations provided by this device are intended for use by the competent the operator, as a diagnostic tool. They are explicitly not to be regarded as the sole basis for the clinical diagnosis. The operator is encouraged to study the literature and reach their own professional conclusions regarding the clinical utility of this device. Special care is required to ensure the maximum privacy of the patient information. 2.5.3 Probe Safety Mechanical hazards: Damaged probes or the improper use of probes may result in injury or increased the risk of infection. The operator needs to frequently inspect the probe for damage, in particular looking for sharp or rough surface damage. Never use intensive force when manipulating the intra cavity probes. The operator is required to be familiar with all instructions and precautions provided with probes. Electrical Hazard: Probes are powered by electricity and can injure the patient or operator when exposed to contact with the conductive solution. A damaged probe may increase the risk of electric shock. Inspect probes frequently for cracks or openings in the housing and holes in and around the acoustic lens, or other damage. 2.5.4 Personnel and equipment safety Explosion hazard: 14 / 265 8000098 Never operate this device in the presence of flammable or explosive liquids, vapors or gases. The operator should be aware of the points to prevent such explosion hazards as follows: • If flammable substances are detected in the environment, do not plug in or turn on this device. In addition, do not unplug or turn the device off if it has been turned on before. • If flammable substances are detected, evacuate and ventilate the area before turning off this device. Electrical Hazard: • Internal circuits of this device use high voltages, capable of causing serious injury or death by the electric shock. • The OPERATOR MUST NOT touch accessible LIVE parts of USB, DVI, Audio ports and the PATIENT simultaneously. • USB, DVI and Audio ports: ONLY connect the PARTS or DEVICES which DO NOT have the external electrical hazard risk. Any configurations by such connection must comply with the requirements of the IEC60601-‐1. It is the responsibility of the person who connects the parts or devices and configures a medical system to verify that this device complies with the requirements of the IEC60601-‐1. If you have any questions, contact your service representative for information. To avoid injury: • • • • • • Do not remove this device's protective covers. No operator-‐serviceable parts are inside. If servicing is required, contact a qualified technician. Connect the attachment plug to a hospital-‐grade earthing socket to ensure adequate earthing. To avoid the risk of electric shock, this equipment must only be connected to a supply main with protective earth. Never use any adaptor or converter of a three-‐prong-‐to two-‐prong type to connect with a main power plug. The protective earth connection will be lost. Do not place liquids on or above this device. Conductive fluids seeping into the active circuit components may cause a short circuit, which can result in an electrical fire. An electrical hazard may exist if any light, monitor or visual indicator remains on after this device is turned off. 15 / 265 8000098 Do not use this device if a safety problem is known to exist. This device needs to be verified by qualified service personnel before returning to use. Biological hazard: Beware of biological hazards after performing trans-‐vaginal procedures. To avoid the risk of disease transmission: • Use protective barriers such as probe glove and follow sterilization procedures as required. • Thoroughly clean the probes after each patient examination and disinfect or sterilize as needed. • Follow all in-‐house infection control policies as they apply to the personnel and equipment. Pacemaker hazard: The possibility of this device interfering with pacemakers is minimal. However, as this device generates high frequency electrical signals, the operator should be aware of the potential hazard. LCD Monitor: • • • To avoid injuries or system damage, NEVER place any object or liquid on the monitor. DO NOT place any object on the ventilation slots. Blocking the ventilation slots obstructs proper airflow and may result in fire, electric shock, or equipment damage. DO NOT scratch or press on the panel with any sharp objects, such as a pencil or pen, as this may result in damage to the monitor. 2.5.5 Electrical Safety Internally connected peripheral devices: This device, together with the internal connected peripheral devices, such as the printers or the DVDRW, meets all the standards listed in chapter 2.1. This statement is applicable only when tested peripherals listed in 16 / 265 8000098 chapter 13 are plugged into the AC outlets provided in this device. External connection of other peripheral devices: Other external devices, such as laser cameras, printers and external monitors, usually exceed the medical standard allowable current leakage. If they are plugged into separate AC outlets and then connected to this device, it represents a violation of patient safety standards. Suitable electrical isolation of such external AC outlets may be required to meet the electrical leakage limit requirement. Device movement: When moving this device, rotate the control panel to be in the middle from the left and right view, and also push the control panel as far back as possible then move it to the lowest position. ECG Use: Do not use this device’s ECG wave for diagnosis and monitoring. Only use an ECG cable which is approved by VINNO. Defibrillator Use: Do not use this device with a defibrillator. Use of Electrosurgical unit: Keep the Electrosurgical unit away from ECG leads to avoid the potential interference to the ECG wave. Electromagnetic Compatibility (EMC): This device can produce and use the radiation RF energy. All types of electronic equipment may characteristically cause the electromagnetic interference with other equipment, either transmitted through air or connecting cables. The term EMC indicates the capability of this device to curb the electromagnetic influence from other equipment and at the same time not affect other equipment with the similar electromagnetic radiation from itself. 17 / 265 8000098 This product is designed to fully comply with the EN60601-‐1-‐2 (IEC60601-‐1-‐2), Class A, in medical electric equipment EMC regulations. Proper installation following the service manual is required in order to achieve the full EMC performance of the product. In the event of issues relevant to EMC, (turning on/off this device is able to evaluate whether an EMC-‐relevant problem has occurred), the operator (or qualified service personnel) should try the measures (one or more) to address and solve the problem as follows: • Determine the identity of the affected equipment and replace the affected equipment (one or more). • Relocate this device or the affected equipment to increase the distance in between. • Use a different power supply source from the affected equipment for this device’s power supply. • Call your service personnel for more advice please. General Information 1. Products equipped with a power source plug should be plugged into a fixed power socket that features the protective earthing conductor. Never use any adaptor or converter to connect with a power source plug (i.e. three prong–to–two prong converter). 2. Locate this device as far away as possible from other electronic equipment. 3. Be sure to use only the cables provided by or designated by VINNO company. Connect these cables following the installation procedures (i.e. wire power cables separately from signal cables). 4. For designation of the Peripheral Equipment Connectable to this Product, refer to the operator manual. These Peripherals can be connected to the product without compromising its EMC performance. 5. Avoid using equipment not designated for this device. Failure to comply with this instruction may result in poor EMC performance of the product. 6. Notice against Operator Modification: Never modify this product. Unilateral operator modification may cause the degradation in EMC performance and may lead to the serious hazards for the patient and the operator. Modification of the product includes: a. Changes in the cables (length, material, wiring etc.) b. Changes in the system insulation/layout. c. Changes in the system configuration/components. d. Changes in the securing system parts (cover open/close). 7. Operate this device with all covers closed. If a cover is opened for any reason, ensure that is shut before starting/resuming operation. NOTE: Operating this device with any cover open may affect EMC performance. 18 / 265 8000098 Do not use the following devices near this VINNO Ultrasonic system: Devices which transmit radio waves such as cellular phones, radio transceivers, mobile radio transmitter, radio–controlled toy, etc. Use of these devices can cause this VINNO Ultrasonic system to perform outside the certified specifications. Keep these devices powered off when kept near this device. Medical staff in charge of this device is required to instruct technicians, patients and other people who may be around this device to fully comply with the above regulations. Electromagnetic immunity: Guidance and manufacturer’s declaration – electromagnetic immunity This device is intended for use in the electromagnetic environment specified below. The customer or the operator of this device should ensure that it is used in such an environment. Immunity test IEC 60601 Compliance level Electromagnetic test level environment -‐-‐guidance Electrostatic discharge (ESD) IEC 61000-‐4-‐2 ±6 kV contact ±8 kV air ±6 kV contact ±8 kV air Electrical fast transient/burst IEC 61000-‐4-‐4 Surge IEC 61000-‐4-‐5 ±1 kV for power supply lines ±1 kV line(s) and neutral ±1 kV for power supply lines ±1 kV line(s) and neutral Voltage dips, short interruptions and voltage variations on power supply input lines IEC 61000-‐4-‐11 <5 % UT (>95 % dip in UT) for 0,5 cycle 40 % UT (60 % dip in UT) for 5 cycles 70 % UT (30 % dip in UT) for 25 cycles <5 % UT (>95 % dip in UT) for 5s 3 A/m <5 % UT (>95 % dip in UT) for 0,5 cycle 40 % UT (60 % dip in UT) for 5 cycles 70 % UT (30 % dip in UT) for 25 cycles) <5 % UT (>95 % dip in UT) for 5s Power frequency (50/60 Hz) magnetic field IEC 61000-‐4-‐8 Not applicable Floors should be wood, concrete or ceramic tile. If floors are covered with synthetic material, the relative humidity should be at least 30 %. Mains power supply quality should be that of a typical commercial or hospital environment. Mains power supply quality should be that of a typical commercial or hospital environment. Mains power supply quality should be that of a typical commercial or hospital environment. If a dip or an interruption of mains power supply occurs, the current of this device may drop from the normal level, and it may be necessary to use uninterruptible power supply (UPS). Not applicable NOTE UT is the a.c. main voltage prior to application of the test level. 19 / 265 8000098 Electromagnetic immunity: Guidance and manufacturer’s declaration – electromagnetic immunity This device is intended for use in the electromagnetic environment specified below. The customer or the operator of this device should ensure that it is used in such an environment. Immunity IEC 60601 Compliance Electromagnetic environment – guidance test test level level Conducted RF IEC 61000-‐4-‐6 Radiated RF IEC 61000-‐4-‐3 3 Vrms 3 Vrms 150 kHz to 80 MHz 3 V/m 3 V/m 80 MHz to 2.5 GHz Portable and mobile RF communications equipment should be used no closer to any part of this device, including cables, than the recommended separation distance calculated from the equation applicable to the frequency of the transmitter. Recommended separation distance: where P is the maximum output power rating of the transmitter in watts (W) according to the transmitter manufacturer and d is the recommended separation Distance in meters (m). Field strengths from fixed RF transmitters, as determined by an electro-‐magnetic site survey, should be less than the compliance level in each frequency range. Interference may occur in the proximity of equipment marked with the following symbol: NOTE 1 At 80 MHz and 800 MHz, the higher frequency range applies. NOTE 2 These guidelines may not apply in all situations. Electromagnetic propagation is affected by absorption and reflection from structures, objects and people. a. Field strengths from fixed transmitters, such as base stations for radio (cellular/cordless) telephones and land mobile radios, amateur radio, AM and FM radio broadcast and TV broadcast cannot be predicted theoretically with accuracy. To assess the electromagnetic environment due to fixed RF transmitters, an electromagnetic site survey should be considered. If the measured field strength in the location in which this device is used exceeds the applicable RF compliance level above, this device should be observed to verify normal operation. If abnormal performance is observed, additional measures may be necessary, such as re-‐orienting or relocating this device b. Over the frequency range 150 kHz to 80 MHz, field strengths should be less than 3 V/m. 20 / 265 8000098 Recommended separation distances: Recommended separation distances between portable and mobile RF communications equipment and this device This device is intended for use in an electromagnetic environment in which radiated RF disturbances are controlled. The customer or the operator of this device can help prevent electromagnetic interference by maintaining a minimum distance between portable and mobile RF communications equipment (transmitters) and this device as recommended below, according to the maximum output power of the communications equipment. Rated maximum Separation distance according to frequency of transmitter output power m of transmitter 150 kHz to 80 MHz 80 MHz to 800 MHz 800 MHz to 2.5 GHz W 0.01 0.1 1 10 100 0.12 0.38 1.2 3.8 12 0.12 0.38 1.2 3.8 12 0.23 0.73 2.3 7.3 23 For transmitters rated at a maximum output power not listed above, the recommended separation distanced in meters (m) can be estimated using the equation for the frequency of the transmitter, where P is the maximum output power rating of the transmitter in watts (W) according to the transmitter manufacturer. NOTE 1 At 80 MHz and 800 MHz, the separation distance for the higher frequency range applies. NOTE 2 These guidelines may not apply in all situations. Electromagnetic propagation is affected by absorption and reflection from structures, objects and people. 21 / 265 8000098 3 Start the system 3.1 General The first installation must only be performed by authorized personnel. The system has a default setting which is applicable for most cases. Experienced operator can change the default setting and store it as an operator-‐defined setting. 3.2 Safety warnings When this device is moved from a cold environment such as the stock room into a warm room, it is necessary to wait several hours for the machine to dehumidify before starting the machine due to the temperature change of the environment. 3.3 Power on / Boot up 1. Connect the power cable to this device. Plug the power cable into a hospital grade power socket with the proper rated voltage. 2. Or use the battery. 3. Push the “ON/OFF” switch on the control panel. After the system is switched on and booted up for a couple of minutes, the 2D image for the previously selected transducer is displayed. If no probe is connected in the previous selected transducer, the “Probe & App” menu will appear the touch panel screen so that select probes operator. All peripherals which are connected to the outlets of this device can be switched on only after the system is switched on. 3.4 Power off / Shutdown To avoid loss of the current patient data as well as all the measurement data, it is necessary to save the data to one patient in any mode menu of the touch panel screen before switching off this device. If not saved, this device will display a warning after re-‐booting. 22 / 265 8000098 Push the “ON/OFF” switch on the control panel to shut down the system. 3.5 Probe and application selection 3.5.1 Plug probe connector into this device The probe plug process is as follows: 1. Plug the probe connector into an available probe slot. 2. Push the lock on the top of the probe connector to lock the connector. 3.5.2 Probe and application selection Select application on the first page of the main menu as below. Operator defined setting: After the parameter adjustments is finished, go to the second page of the main menu, select “Save Preset”, the adjustments can be save to the selected application. Or enter “Probe&App”, select “Save” or “Save&Exit” to save the changes. Slide the touch panel from the left edge, open the menu as below. In this menu, “New Patient”, “Archive”, “End Exam”, “Sys Setting”, “Body Pattern”, “Comments” and “Report” can be selected. 23 / 265 8000098 Select “Probe&App”, the operator can rename the application, set one application as default, and reset all changes. And also add one user-‐defined application, or delete one user-‐defined application. 3.6 Image Storage Select “Store to HDD” to save VRD, DICOM or AVI image to the system hardisk, select “Store to USB” to save VRD, DICOM or AVI image to the connected USB device. In system setting, the image format can be changed, please refer 13.4.1. 24 / 265 8000098 In 3D/4D mode, the operation of image storage is similar. The image saved in the hardisk will be displayed in the clipboard. The operator can select the saved images after enable “Cursor” to replay. Save the image during scanning, it will be cine. Save the image after freeze the system, it will be one frame. When replay one cine image saved in 3D/4D mode, the operator needs to select “Auto Rotate” or “Auto Cine”. 3.7 Freeze image Select “Freeze” on the bottom right of the control panel enables the system to switch from the scan mode to the frozen mode. When the key is orange backlit, it is in frozen mode which means the image is static. When the key is green backlit, it is real scan mode in which the scan image is in real time. Select “New Patient”, “Archive”, “Probe & App”, “Sys Setting” or “Body Pattern”, the system will switch to frozen mode. 3.8 Patient data Normally the operator needs to input a new patient’s information before scanning the new patient. Alternatively, pull up an old patient’s data from the archive for a new examination of the old patient. Read chapter 4 for reference. 3.9 Image Annotation 3.9.1 Character Annotation Select “Comments” button. 25 / 265 8000098 After the “Comments” is selected, the touch screen will display as above. On the left side there are some frequent terms to be selectable in order to quickly add those comments to the image screen by dragging those terms. Those words will be different based on different applications and probes. Select and hold a certain section of the image area, and after that an alphanumeric keyboard will appear for adding annotations. By selecting and holding the previous comment, it can be edited, with the back blank of the edit field turned grey. After the other field is selected, the previous annotation will become a confirmed annotation. The operator can add their own terms in the first open box. After entering the words, select “Enter” key on the alphanumeric keyboard and the terms will be stored. After the “Delete” is selected, this button will be highlighted and there will be a delete sign appearing beside each comment, the comment can be deleted by selecting the delete sign. After the “Delete” is selected again, this key will return to normal and the delete sign for each comment will disappear. Select “Delete All” to delete all the comments. Alphanumeric keyboard shown as shown below 26 / 265 8000098 Notes: 1. Select “CapsLock”, operator can input capitals. 2. Select “ ”, operator can input symbols. 3. Select , the alphanumeric keyboard will be closed. 3.9.2 Arrow Indicator Drag arrow indicators on the comment screen to move them to the image area to indicate the nidus. Arrow can be rotated after it is selected. 3.9.3 Body Pattern After the “Body Pattern” is selected, all body patterns will display on the touch panel for the operator to select. After one of those patterns is selected, the body pattern box will turn green and the body pattern will appear on the bottom-‐right side of the image screen for reference. Now, rotate “Rotation/Steer” key on the control panel to change the probe indicator’s orientation in the body pattern. Use the trackball to move the probe indicator in the different position of the body pattern symbol. The touch panel will go back to the previous menu by selecting “Exit”. Note that after returning to the basic UI, the body pattern and probe indicator cannot be changed. By selecting “Body Pattern” again, the probe indicator’s direction and position can be changed. The touch panel screen after entering the body pattern status is as shown below: 27 / 265 8000098 Select different applications can show different body patterns. Select “Import” to import body patterns from a USB memory stick. After the “Import” key is selected, the operator can follow the procedure to import body patterns. In this case, the operator has to copy a body pattern from his own PC in JPEG format. In system setting, the size of body pattern can be adjusted, please refer 13.1. If enable “Use BodyPattern key” in system setting, the operator can enter “Body Pattern” by pressing “Zoom” key. Rotate “Zoom” key to rotate probe icon even after exit Body Pattern, move the trackball to change the icon’s position. Enable “Cursor” key, and put the cursor on the body pattern, then move the trackball to change the body pattern’s position. Press “Enter” to fix the body pattern’s position. 3.10 Cine Mode While scanning a certain number of frames, the most recent examination images sequence will be stored in the cineloop memory after “Freeze” key is pressed. The sequence will be replayed continuously. By moving the trackball horizontally the sequence can be reviewed frame by frame. The length of the cine can be more than 1 min in the standard setting. This length depends on the number of the scan lines, the scan depth and other parameters. In freeze mode, the touch panel UI is as shown below. Adjusting the parameters on the touch panel UI can manage the image. 28 / 265 8000098 Note: 1. Cine/Single: can switch the display image from the cine mode to the single image mode. Highlighted button means cine mode and non-‐highlighted button means single mode. 2. Start Frame, End Frame: control which frame to start from and which to end in order to display continuously as a loop. 3. Speed: controls cine speed as 400%, 200%, 100%, 60%, 50%, 40%, 20%. 3.11 Zoom function After “Zoom” is pressed on the control panel, the system will enter zoom mode. In zoom mode, there are two image displays. The normal image with ROI is on the left. The zoomed image is on the right. Use the trackball to move the ROI position. Rotating the “Zoom” key can make the amplification smaller or larger. Clockwise makes the ROI size smaller, but a larger amplification can be achieved. Alternatively, a counterclockwise rotation makes the ROI larger, but the amplification is smaller. If enable “Use BodyPattern key” in system setting, the operator can enter zoom mode by pressing “Depth” key. Rotate “Depth” key to zoom in/out. 3.12 ECG Trace The ECG module consists of a single connector into which a set of electrode cables can be inserted. The scanning image is synchronized with the ECG traces. 29 / 265 8000098 In M or PW/CW mode, the trace is synchronized to the particular scanning. Adjust parameters such as the gain, position and scanning rate of the trace using the relevant keys in the main menu of each mode. Do not use the ECG waveform of this device for diagnosis or monitoring. It is only to be used for reference purposes in normal ultrasound scanning. Connecting the internal ECG: The ECG cable is a modular cable consisting of two different cable parts: • The Trunk: a single cable connecting to this device is at one end with a six-‐pin plug, and a cable splitter device at the other end. • A triple color-‐coded electrode cable: each electrode cable is attached to the corresponding electrode by a color-‐coded press-‐on type connector. The electrode complies with IEC standards. Names and color codings refer to the following description: Yellow (L): p/n 412680-‐106 Red (R): p/n 412680-‐108 Black (N): p/n 412680-‐107 Connect the ECG trunk cable into the circular socket marked “ECG” on the I/O panel on the front of the device, as shown below: 3.12.1 ECG trace operation ECG: There is an ECG button in the menu of every mode. The operator can enable or disable it. After it is enabled, the button is highlighted and ECG menu will display. It is enabled by default in Cardiac applications. 30 / 265 8000098 In ECG menu, adjust several parameters by up/down buttons, such as the ECG Gain, the ECG position, the ECG Sweep, and the ECG Lead#. ECG Gain: The amplitude of the ECG wave can be changed by pushing the up/down key. ECG Sweep: To change lateral scan, adjust the speed of the ECG wave. This function is available only in 2D and CF mode. This parameter is adjusted by selecting the “ECG sweep” button on the touch panel. ECG sweep speed is the same as M mode and PW lateral scan sweep speed. Alternatively, sweep speed can be adjusted in M and PW mode. ECG Position: This can be moved up and down in order to position the ECG of the relevant imaging as desired. ECG Lead #: This allows the operator to select which lead’s ECG wave to display on the screen. The ECG wave of different leads can be selected as follows: Lead I: Record ECG between the right arm and the right leg. Lead II: Record ECG between the right arm and the left leg. Lead III: Record ECG between the left arm and the left leg. The ECG signal input can be either from an internal or external ECG device. The internal input is to connect the standard electrode leads to this device, so that the operator can access the ECG wave in the system. The external input means that connect one special cable to connect with an external ECG device which inputs the ECG signal to this device. Note: To connect an external ECG device, a special cable is available. Please 31 / 265 8000098 contact VINNO to obtain. The ECG trace image displays in the screen as shown below: 3.13 Multiple display formats This operation which described hereby is only for B mode, CF/PDI mode, PW/CW mode and M mode. 3D and 4D mode operations are different from these operations; the operator can refer to the 3D and 4D chapters accordingly. There are two approaches to have multiple display formats. One is to press “L” and “R” keys. The other is to select buttons on the touch panel (“Dual”, “Quad”, and “A”, “B”, “C” and “D”). “Left” and “Right” key to be dual display: If the initial format is single image display, after “Left” on the control panel is pressed, the system will display two images. The left side image is real time and the right side image is the last frame static image at the same mode. By pressing “Left” again, the system returns to the single image display. Pressing “Right”, the right side image will be real time and the left side image will be the last frame static image. If the initial format is single image display, after “Right “on the control panel is pressed, the system will display two images. The right side image will be real time and the left side image will be the last frame static image at the same mode. If “Right” is pressed again, the system will go back to the single image display. If “Left” is pressed, the left side image will be real time and the right side image 32 / 265 8000098 will be the last frame static image. Use “Dual” button on the touch panel to go into dual display format: (The first button is single display, the second is dual and the third one is quarter.) After “Dual” on the touch panel is selected, the system will have dual image display. “A” position image will be real time and “A” button will be highlighted by default. “B” position image will be last frame static image at the same mode. Select “B” button to active the “B” position image. The “B” button will be highlighted. Selecting the single display format button will go back to the normal one image display. Use “Quad” button on the touch panel to go into quarter display format: (The first button is single display, the second is dual and the third one is quarter.) “A”, “B”, “C” and “D” button are as shown below: After “Quarter” on the touch panel is selected, the system will have quarter image display. “A” position image will be real time and “A” button will be 33 / 265 8000098 highlighted by default, and the “A” button is highlighted. The “B”, “C” and “D” are the last frame static image. Select the “B”, “C” or “D” button to activate “B”, “C” or “D” position image. Only one image can be activated at one time. 3.14 2D Image size change In B mode, slide the touch panel to the left. There is a parameter “Image Angle”. These parameters are used to adjust the image size. 3.15 Environment This device must be in the proper environment. This applies to in the operation, storage and transport. Requirements of the environments are listed as shown below: Requirement Temperature Humidity Air pressure Transport/shipping -‐10 -‐ 50°C 0 -‐ 90% 700 -‐ 1060 hPa Storage -‐10 – 50°C 0 -‐ 90% 700 -‐ 1060 hPa Operation 10 -‐ 40°C 30 -‐ 75% 700 -‐ 1060 hPa 34 / 265 8000098 4 Prepare for an examination and Patient data archive Before starting an examination, it is recommended to enter a new patient’s information before begin to scan. The patient information can also be entered while scanning, but the operator has to determine whether the corresponding image belongs to the patient or not before storing. The operator can pull out the patient’s information from the archive and start a new examination. The patient information is the same as before. For new patient information, the recommendations are as follows: 1. Patient ID. 2. Patient name. 3. Birth date/age, gender. This is stored together with the patient’s images and will be transferred with the images of the corresponding patient to the archive. The information and application data below may differ in different examinations and we recommend that it should also be entered. 1. Physician, operator. 2. Basic data in relevant application category. 4.1 Beginning a New Patient After “New Patient” on the touch panel is selected, the system will be in frozen status and the “Freeze” key on the control panel is highlighted to show this. The patient screen will be displayed as shown below. Press “Freeze” on the control panel or select “Exit” on the touch panel to go back to the main menu without saving the information. If the operator inputs some information on this page, and select “Save&Exit” the system will create a “new patient” record and store this information to start scanning. When enter “New Patient” page, there will be an auto ID in “Patient ID”, the operator can use this ID or input her/his own one. If set “prefix” in system setting, the prefix will be added. 35 / 265 8000098 Note: 1. BSA is body’s surface area, and will be automatically calculated when the data above (weight and height) is filled in. 2. The empty box is the data input field. After the relevant place is selected, the alphanumeric keyboard will appear and the alphanumeric keyboard can be selected to input data or characters. 3. Either birth date or age needs to be keyed in, the other one will be automatically calculated based on the time of the system. For this reason it is very important that the system time be correct. There are three gender options: N/A, male or female. 4. If the inputted ID is the same with the exited one, the system will give one warning message: There're some patient records match the creating patient, do you want to view details? The operator selects different options to continue: “Yes, review and select exist record”, “No, create new record”, “Go back new patient”. If there is no patient ID or name, select “Save & Exit” on the touch panel and the system will display a message for three options to select from. The options are: “Exit without new patient”, “New patient with auto ID’’ and “Go back to patient page”. Select “New patient with auto ID” and the system will automatically give a number for new patient ID. Select “Exit without new patient” and the system will go back to real scan mode without patient ID. If “Go back to patient page” is selected, the system will go back to the new patient page. 36 / 265 8000098 4.1.1 General data section Patient ID: ID number, max 30 characters. Second ID: ID number, max 15 characters. Family Name: patient’s family name, max 20 characters. Middle Name: patient’s last name, max 20 characters. First Name: patient’s first name, max 20 characters. Birth Day: patient’s date of birth. Age: patient’s age (the age is calculated and displayed automatically after entering birth date). Sex: N/A, female, male (pull down menu). Perf. Physician: Name of the performing physician, max 30 characters. Ref. Physician: Name of the referring physician, max 30 characters. Operator: Name of the operator, max input is 30 characters. 4.1.2 Application data information section General: This category has the basic patient information for many applications which include Abdomen, Cardiology, Vascular, Neurology, Small parts, Pediatrics and Orthopedics. In this section, enter height and weight, and then BSA (body surface area) will be calculated automatically. OB: patient information for obstetrics. GYN: patient information for gynecology. UR: patient information for urology. The OB application patient information section is as shown below: 37 / 265 8000098 Note: 1. LMP: last menstrual period, enter the first day of the last menstrual period. 2. BBT: basal body temperature, enter the date of the most recently recorded basal body temperature before the last menstrual period. Data cannot be entered in this field if LMP data was entered before. It is possible to enter data for either LMP or BBT. Then the EDD and GA will be calculated based on the LMP or BBT. 3. EDD: Physician should either enter the estimated date of delivery, or this can be automatically calculated after entering the LMP or BBT. If “EDD” is entered, the “LMP” and “GA” can be calculated. 4. GA: gestational age, automatically calculated after entering the LMP or BBT. 5. Gravida: enter the patient’s history of pregnancies. 6. Para: enter the patient’s history of live births. 7. AB: enter the patient’s history of abortions. 8. Ectopic: enter the patient’s history of ectopic pregnancies. 9. Fetus: select the number of fetus(es) (1 to 4). GYN application patient information section is as shown below: UR application patient information field is as shown below: 38 / 265 8000098 Note: 1. PSA: prostate specific antigen, enter the value of it. 2. PPSA Coefficient: enter the value of the predicted PSA coefficient. If the operator does not want to enter all the data, the examination can be started by selecting “B” or “Freeze” on the control panel or selecting “Save & Exit” on the touch panel. Note: If there is a temporary measurement and the image without entering any patient’s information and without storage, after a new patient is created, an information dialog for option will appear. If select “OK”, the current image and the measurement will be stored in the new patient’s archive. If select “Cancel”, the image and the measurement will be deleted. 4.2 Archive After “Archive” on the touch panel is selected, the system will go to the “Archive” mode. The touch panel UI will be as shown below and the image screen is in the frozen status. Pressing “Freeze” at any time in this mode, the system will go back to the scan mode and the touch panel UI will go to the relevant scan mode accordingly. 4.2.1 Initial Archive Menu 39 / 265 8000098 Note: Patient/Exam: 1. After “New Exam” in “Archive” menu is selected, the probe and application screen will appear (see 4.2.2), and then select probe and application. After the application is selected, select “Exit” to go to the normal scan UI. 2. After “End Exam” in main menu is selected, the current patient’s examination will cease the progress, at this moment there is no any patient is selected. The report of this examination cannot be stored, but can be printed, the information of this exam can’t be edited in Archive, and the button “Edit” in worksheet will be gone. New exam can be added in “Archive”, or new a patient to do examination. 3. Select “View/Edit”, all patient information can be edited if the selected exam is not ended and the patient is added in 24 hours. But only relevant application category’s data can be edited if the patient is added 24 hours ago. 4. After selecting one file name, it means it is selected. If selecting more files, select other files for selection. If want to remove the selection, select that file again. 5. In the initial entering, the latest patient’s information will be displayed. In order to search certain files, input the information in the search input field, and then select “Search” on alphanumeric keyboard to search according to the input data. Touch “Patient ID”, “Name”, “Last Scan” or other tabs, all patients in the list will be ordered as ascending or descending. 6. “Easy Compare”: During live scanning or select one image on the clipboard, enter “Archive”, select one image of one patient, select “Easy Compare”, the system exit “Archive” and enter dual display format: on the right display live scanning image or the image selected on the clipboard, on the left display the image selected in “Archive”. Management: 1. After save to “USB” or “DVD” on the touch panel is selected, the selected file will be stored to those media directly. After save to “Server” on the touch panel is selected, the selected files will be stored to the relevant servers. If the server IP hasn’t been set, the server setting dialogue will appear to ask the operator to set the server IP and folder. Then press the “Enter” key to store directly. 2. Delete the selected patient file or files by selecting “Delete Patient” on the touch panel. 3. Delete the selected examination file or files by selecting “Delete Examination” on the touch panel. 40 / 265 8000098 4.2.2 New Examination from Archive menu After “New Exam” in “Archive” menu is selected, the touch panel UI will be shown as shown below. Note: 1. After “Back” is selected, the system will go back to the “Archive” menu. 2. After the application is selected (select the detail application button) and then “Exit” is selected, the system will go back to the normal scan screen. The system will start the scanning mode using the selected probe and application. 3. At any time after “Freeze” on the control panel is pressed, the system will go to the scan mode in the original examination (not the new examination). 4. The previous information about the “Examination Physician”, the “Ref Physician” and the “Operator” data will display in the relevant areas by default. The operator can also change it by selecting this field. After this field is selected, the alphanumeric keyboard will appear for data input. 4.2.3 Export patient or examination data If this device is connected to a USB, DVD device, or a server, the relevant button will be highlighted. Select one or more patients’ files in the “Archive”, and then select the USB, DVD or Server button. Then the data will be stored to the selected device. The button “VRD”, “DICOM” or “AVI” needs to be selected if the 41 / 265 8000098 operator wants to export the images of relevant format. After the operator want to save the data of some examinations, select the examination, and select “View”, then select a device to save. There are 3 different formats for saving the data: VRD, DICOM and Image, only VRD and DICOM format data can be imported to the system again. 4.2.4 Import patient or examination data After “Import” in the” Archive” is selected, the system changes to be the menu shown as below. The operator can import the data and the information of the patients from the outside media. However, those data should only be VRD or DICOM format. Otherwise, they cannot be imported. The operator can adjust that data once they are imported to the system. Selecting the importing media (USB, DVD or Server) and can also use the search function to find the specific information about the corresponding patient in the importing media. By selecting the file name, select the file, or by selecting “Select All” on the touch panel to select all files. Pressing “Start Import” to starts the import process. Go back to the “Archive” menu by selecting “Back” and can go back to the scan mode by selecting “Exit”. Touch the arrow on the right side of the touch panel to obtain the examination 42 / 265 8000098 file list. Then import one particular examination file from this menu. 4.2.5 Report After “Report” in “Archive” is selected, or select “Report” on main menu, the touch panel screen goes to the menu as shown below. Note: 1. The measurement worksheet will be generated automatically without operator’s operation. 2. The patient and the physician information will come from the database automatically. The information revised manually. After the relevant blank box is selected, the alphanumeric keyboard will appear in the bottom right to input the data. After edit the patient data, select “Preview”, the updated data will display in the report. 3. In “Image Zone”, select one or more images, select “Preview”, the selected images will appear in the report. 4. In “OB Graph”, select “Save” to save the current graph, and this graph will appear in “OB Graph” in Report. Select “Preview”, the graph will appear in the report. 5. In “Worksheet” select one probe/application, all results will be displayed. Select “Preview”, the results will appear in the report. If the current patient’s fetus number is 2 or more, and do some measurements with every fetus, then enable “Fetus Compare”, all measurement results in every 43 / 265 8000098 fetus will be listed in column. 6. In “Comments”, the operator can input some comments here. Select “Preview”, the comments will appear in the report. 7. In “Template”, the operator can select “General”, “OB” template, or different formats for multi images. Select “OB” template, in report there is some information of GA and EDD if do the related measurements. 8. Select “Store”, this report can be saved. 9. Select “Store to USB”, save the report to one USB device. 10. Printer can be selected on the top left corner. 4.2.6 Bluetooth Plug in one Bluetooth dongle, select one patient in “Archive”, touch “Bluetooth Send” button to enter Bluetooth page. 44 / 265 8000098 After scanning, list all nearby Bluetooth devices. Select one device, and select one or more images, touch “Send” to send the images to the selected device. Before send the images, the system will pair with the remote device first. If power saving mode of the system is on, the operator need to restart the system. 4.2.7 Email Before use Email, the operator need to enable the network and set email settings in “Sys Setting”. Select one patient in “Archive”, touch “Email Send” button to enter Email page. Input one or more addressees, then select images, touch “Send” to send the images by email. 45 / 265 8000098 After send successfully, the addressee(s) will be saved in the list. 4.2.8 View menu After “View” in the “Archive” is selected, the system goes to the view function and menu as shown below. Note: 1. After entering the view mode, select the images, and then select “Single”, or “Dual”, or “Quad” to display the images in the different formats. Select the other images and the different view modes to be displayed. “Single” means that the image screen will display the first selected image. “Dual” means that the image screen will display the last two selected images as the dual image display format. “Quad” means that the image screen will display the last four selected images as the quarter image display format. Only VRD images can be displayed in dual or quad formats 2. After small images are selected, the image box will be highlighted. If “Multi selection” is enabled, the first select in the relevant image means selection, the second select means un-‐selection. 3. Select button “More” to enter “More” page, the operator can send images via Bluetooth/Email or save images to DVD. Touch these buttons to enter relevant pages. 4. By selecting “Back”, go back to the “Archive”. 5. By selecting “Exit” on the touch panel or pressing “Freeze” on the control 46 / 265 8000098 panel, go back to the previous scan mode. 4.2.9 Worklist After enable “Worklist” in system setting, there is a “Worklist” tab in “Archive”. And there is another tab “Local Data”, display all patients created on the local machine. The system get the patients from worklist server automatically when enter “Archive” if enable “Auto Load Worklist”. Choose one patient, select “Select Current” to start the exam. If capture some images, do some measurements or add some comments, the current patient will be saved to local data. Choose the start and end date, then select “Search” to load all patients in this period. If select “Reset”, only load the patients of the day. If input patient ID or name then select “Search”, download the searched patient(s) from the worklist server. 47 / 265 8000098 5 2D B mode, M mode 5.1 2D Mode 5.1.1 Main B mode menu Pressing “B” on the control panel will change from any mode to the “B” mode display, except HAR mode. The operation of HAR is similar to B. The “B” mode menu on the touch panel is as shown below. The parameters can be adjusted, such as “Frequency”, “Focus Position”, and slide the touch panel to the second and third page, more parameters can be adjusted. Note: 1. All the scanning operations should be performed through the control panel, while all the image optimizing operations such as the image adjustment, annotation, settings, and data base management should be performed through the touch panel. 2. The numbers indicate the adjustable parameter. The default number depends on the application setting. 3. Enable “TView”, the image will be wider in the bottom than the top to obtain a wider vision. 4. “L/R” means to fold image from the left to the right or the right to the left. U/D means to fold image from the up to the down or the down to the up. 48 / 265 8000098 5. “Full Screen” can make the image to be zoomed as full screen size in order to enlarge the image. The image size is from the top to the bottom of the screen and the width is enlarged accordingly. 6. “VTissue” can automatically calculate the best acoustic velocity in tissue on the basis of the scanning data to improve the image quality. After this button is selected, it will be highlighted to show this function is active. Touch it again to remove this function and the echo speed will return to pre-‐set one. 7. No “VTissue” in HAR mode. All available parameters are as follows: Frequency: By regulating this parameter, the operator can strike a balance between resolution and penetration. High frequency generally means a better resolution at the cost of a worse penetration. Focus Position: It is to select the depth of current focus or foci. The focus position is indicated on the right hand side. Focus #: This allows the operator to select the number of foci. The number of foci depends on the probe selected. VFusion: This function enhances the contrast resolution with better tissue differentiation and clear organ borders. When the level is 0, this function is switched off. VSpeckle: This function reduces the speckle noise in the ultrasound image. Notes: This process smoothes the image, so potentially some structures can be smeared out. Dynamic Range: This allows the operator to enhance the grayscale to make the image easier to display. Line density: This helps to keep a balance between the image resolution and the frame rate. A higher line density means a better resolution, but a slower frame rate. VSharpen: By this function, the edge of the image can be more easily observed with the naked eye. The higher the level of VSharpen, the better the edge of the image can be. 49 / 265 8000098 Image Angle: This function can be used to change the scanning angle. A small angle can provide a faster frame rate, but the scanning area is smaller. Persistence: Frame averaging can eliminate the image speckle of the 2D images. Several frame averaging levels can be set in this menu. Gray Filter: Certain echo signals can be filtered by this function to avoid noise. Smooth: This smoothens out the image by reducing the number of pixels. Focus Width: Using this key changes the focus zone width. Acoustic Power: This allows the operator to change the transmitted acoustic power. Biopsy: After this button is selected, the biopsy guide line will display on the image screen. Some biopsies have different angles to be selected. If this is the case, the system will display the selectable angles for the operator to select from. Different probes feature different biopsy guide lines. VNear: In the 2D touch panel menu, use the arrow in the “VNear” key to increase or decrease or switch off the level of compounding. When the level is 0, this function is switched off. When the level is 1, 2, 3, one more focus will be added if the position of the current focus(es) is >5 cm. If there are the most focuses, this function doesn’t work. NeedleEnhance: Only works with linear probes. To enhance the needle image when do biopsy. When this function is enabled, a red boundary line will be displayed to show the effective border which should not be crossed, rotating key “Rotation/Steer” changes its angle to match the needle, make sure the angle between the red line and the needle is 90°. Pressing key “Rotation/Steer” changes the direction. EdgeEnhance: Improving image quality and contrast by enhancing its edge and detail information and decreasing noise to improve SNR by diffusion filter. SGC (Scanline gain compensation): Gain compensation for tissue image scan line. 5.1.2 Freeze mode In freeze mode, the touch panel UI appears as shown below. The stored image can be optimized by adjusting the parameters or changing the maps when needed. 50 / 265 8000098 Note: 1. In Freeze mode, no adjustment is available for the “Frequency”, “Focus Position”, “Focus #”, “Line Density”, “VSharpen”, unlike the live B image. 2. Cine/Single: allows images to be switched to display as either cine mode or single-‐image mode. The highlighted button means the cine mode and non-‐highlighted button means the single-‐image mode. 3. Start Frame, End Frame: controls which frame to start from and which to end in order to display continuously as a loop. 4. Speed: controls the cine speed as 400%, 200%, 100%, 60%, 50%, 40%, 20%. 5. In freeze mode, switch to CF/PDI or PW/CW freeze mode (if available) for adjustment by selecting mode buttons on the upper section of the screen. 51 / 265 8000098 5.2 Operation 5.2.1 General operation Gain: With rotation of the “B” key on the control panel, the overall brightness of 2D image is adjusted. All incoming echoes are amplified with the same digital gain value regardless of the depth. Turning “Gain” control clockwise makes the entire image brighter, and counterclockwise makes the image less bright. The digital gain value is displayed on the screen. Depth: Rotating “Depth” on the control panel can move the different depth of the image. This change can only be in real time scan mode. When turned clockwise, the depth range of the 2D image is enlarged and the display size of the image is reduced to display the entire depth range. When turned counterclockwise, the depth range of the image is reduced and the display size of the image is magnified. Note: 1. Maximum and minimum depth varies according to the different probes used. 2. Actual depth is displayed in the information header. TGC slides controls: Using the “TGC” slides control keys on the control panel can vary the gain in the certain depth of the 2D image. Sliding to the left decreases the gain in the corresponding specific 2D depth. Sliding to the right increases the gain in the corresponding specific 2D depth. B Steer: “Rotation/Steer” key on the control panel can steer the B image right direction, center (no steer), left direction. Clockwise movement of it is right steer when in the center status or center steer when in the left status. Counterclockwise is center when in the right steer status or left steer when in the center status. The drawing below is shown as reference. B steer only exists in the linear probes. 2D Automatic Optimization: The “Auto” key on the control panel can optimize 52 / 265 8000098 the contrast resolution according to the histogram of the scan area. After “Auto” is pressed, this causes the automatic optimization of the gray scale to enhance the contrast. After “Auto” is pressed again, the automatic optimization function is switched off. When the auto function is active, the key is highlighted. Harmonic Imaging: The harmonic imaging reflects the harmonic of the nominal transmitted frequency, such as double, threefold and fourfold. It gives the better grayscale contrast compared to the standard ultrasound imaging. Pressing “HAR” leads harmonic imaging. After switched on, this key is highlighted. If not, it means that the selected probe does not support this function. L/R and U/D: They allow the operator to fold the image from left to right or right to left and up to down or down to up as shown below for reference. Indicator of orientation Left/Right Up/Down 53 / 265 8000098 5.2.2 Trapezoid View Trapezoid view will enlarge the scanning area in order to let the operator see more. For example, the linear probe scanning image is a rectangle, but after this function works, the scanning image will change to a trapezoid which has a larger scanning view in the bottom. After “TView” on “B” mode menu is selected, this button will be highlighted and the scanning image will be trapezoid shape to have a wider view in the bottom. 5.2.3 PView Panoramic view function provides the ability to construct and view a static 2D image which is wider than the field of view of the selected probe. It constructs an extended image from the individual image frames as the operator moves the probe along the surface of the skin. 5.2.3.1 Operation 1. Select “PView” on the touch panel to enter “PView” mode. 2. To start acquiring the image, select “Start” on the control panel. Then move the probe slowly, steadily and in uniform motion lengthwise. Make sure that the probe stays in one plane throughout the scan. The image is stored as you perform the scan and can be monitored during acquisition. 3. To complete the scan, select “Stop”. 4. Press “Reacquisition” to clear the extended image and return to the normal image, and the operator can start again. Selecting the “Exit” on the touch panel goes back to the normal image scan. The quality and usefulness of the extended images is impacted by the probe motion. The incorrect technique can generate a defective image. A good quality extended image is characterized by the smooth edges and a clear direction. All structures visible in properly scanned 2D images can be easily identified. A poor quality extended image can be recognized by its rough and curved edges. Also, it may contain sections showing noise and defects next to sections of clear structures. If any poor quality extended image has been generated, the scan has to be 54 / 265 8000098 repeated and the poor image considered as useless. Any measurement based on a poor image is to be considered not correct. Note that the accuracy of measurement in the extended images is limited and can be lower than measurement on the B images. It is not recommended to use this measurement: be aware that any diagnostic conclusion must not be made based on panoramic image alone and needs to be checked with other diagnostic procedures. Precaution for uniform motions as follows: l Make sure that there is enough gel along the scan path. l Move the probe slowly and steadily. l It must be ensured that the probe during the acquisition of the extended image always remains in contact with the skin. l Keep the motion within the same scan plane and do not change the direction of movement during the scan. l Deeper scanning needs slower motion of the probe due to more data acquisition needed. 5.2.4 Map The gray map determines the displayed brightness of an echo. With a different gray map, a harder or softer image can be obtained. Image gray can be adjusted both in the freeze and scan mode. After a gray map is selected, the relevant button is highlighted. Select “……” to enter configuration page, all maps are displayed here. Select one map, the operator can delete it from map list, or added it to the map list. 8 maps can be added at most. 55 / 265 8000098 5.3 M Mode The “M” mode imaging provides the echo information of motion with change of time derived from a stationary ultrasound beam. “M” mode is used along with a 2D image, with one line through the 2D image which is called the “M” cursor. This cursor identifies the position of the ultrasound beam. The motion of the echo information at this position over time is to display “M” mode. 5.3.1 M mode Activation of M mode: By pressing “M” on the control panel, the system goes to “M” mode. Use the trackball to move the “M” cursor left or right by moving the trackball left or right. 2D and “M” mode stopped by pressing “Freeze” on the control panel. The main menu on the touch panel is as shown below: Display format: Operator can change the display format by selecting it on the to uch panel. In format, there are two kinds of display. One is side by side, while th e other one is up and down. In each type of the format, different splits between “B” and “M” traces displays can be selected. In side by side format, there are thr ee kinds: “H 1/2”, “H3/4” and “Full”. In up and down, there are three kinds: “V2/3”, “V1/2”, and “V1/3”. Dynamic Range: This allows the operator to enhance the grayscale range to 56 / 265 8000098 make it easier to display pathology. Selecting the up/down key can change the different dynamic control curves. Acoustic Power: This can adjust the transmit power by selecting the up/down key. Sweep Speed: This can adjust the different sweep speeds by selecting the up/down key on the control panel which matches the relevant touch panel indicator. Gray Filter: It determines the threshold above which the ultrasound echoes are displayed on the screen in order to suppress the smaller echoes. The Gray Filter value is displayed in the relevant information area on the touch panel. VSharpen: This allows the existing information easily visible through the digitally processing. Gain: This can adjust the overall brightness of the “M” mode trace. The adjustment of the “Gain” control determines the amplified amount which applied to the received echoes. “M” gain function only influences the M trace. With clockwise, the entire image becomes brighter. With counterclockwise, the entire image becomes less bright. 5.3.2 Freeze in M mode After “Freeze” on the control panel is pressed, the image will be in the single frame display status. The operator can move the trackball horizontally to recall the stored M sequence. By selecting “Single/Cine” on the touch panel can be changed to the Cine mode. After this button is selected, this button will be highlighted. The 2D image will be automatically replayed. The start frame and end one can be changed in the “B” menu. By moving the trackball, the 2D image can be reviewed frame by frame. After “Enter” on the control panel is pressed, the “M” mode will be active, and then the operator can move the trackball horizontally to recall the stored M sequence. Pressing “Enter” again, the system will go to 2D mode control. 57 / 265 8000098 6 CF (Color Flow Mode) / PDI (Power-‐Doppler Mode) The Color Flow imaging and Power Doppler imaging uses the Doppler principle to build the image. It gives the information about blood flow velocity, direction, quality and timing. This information is used to overlay a color image onto the 2D grayscale scan image. 6.1 CF mode operation 6.1.1 Main menus of CF mode The activation of CF mode: Pressing “CF” on the control panel will activate the “CF” mode. Then, the “CF” box appears in the active 2D image. “Gain” is controlled by rotation of this key. After this key is pressed, the menu appears on the touch panel (scan mode) as shown below. Note: 1. All main functions for scanning operations will come from the control panel. The touch panel function keys are mainly focused on the image adjustment, annotation, setting, and database management. 2. The “B” button is for the operator to switch to “B” mode parameter change. If 58 / 265 8000098 “PW” or “CW” is on, the “PW/CW” button on the touch panel can let the operator switch to “PW/CW” screen for parameter change. 3. The “PDI” mode does not have an “Invert” button. 4. Slide the touch panel to the left to obtain more parameters. Frequency: This setting controls the transmit frequency. With a higher frequency, the lower flow velocities are displayed better at the given PRF, but the penetration depth is reduced. With a lower frequency, the sensitivity in depth will be increased. PRF: The Pulse Repetition Frequency (PRF) governs the displayed velocity range. Increasing the PRF will increase the range of velocity. High PRF will avoid aliasing of blood. However, higher PRF will have a loss of sensitivity to low flow velocities. Wall Filter: Wall motion filters are used to eliminate the vessel wall motion and the cardiac motion noise that is low in the velocity and high in the intensity. Packet Size: It controls the number of samples gathered for a single color flow vector. This allows the operator to improve the color sensitivity and accuracy of color averaging if increasing the packet size or increase the frame rate if decreasing the packet size. Color Level: This function eliminates the small color noise or motion artifact signals. L/R: After this button is selected, the image will be folded from left to right and right to left. U/D: After this button is selected, the image will be folded from up to down and down to up. Invert: This function inverts the color display in relation to the direction of the flow. Normally the red color represents flow to the probe and the blue color represents away from the probe. After inverting, the color will represent different. Color map: Those allow the operator to select different color-‐coding for blood flow display (similar to the post-‐processing curves with gray scale of B image). Select “……” to enter configuration page, all maps are displayed here. Select one map, the operator can delete it from map list, or added it to the map list. 8 maps can be added at most. Line density: It determines the line density within the “CF” box. 59 / 265 8000098 Sync Display: After this button is selected, there will be two images on main screen, the left one is 2D image, the right one is 2D+CF image. In order to have more parameters to change, slide the touch panel to the left to enter the more parameter menu as shown below: Note: Slide the touch panel to the right to go back normal “CF/PDI” mode menu. Persistence: It smoothes the image by performing a temporal averaging which improves the appearance of the color image. Flash Reduction: It reduces movement artifacts in the image. Line density: Higher line density will improve the resolution and the reduce frame rate. Base Line: It can be used to prevent aliasing in one flow direction similar to the Doppler baseline shift. Shifting baseline will enlarge the velocity range in one direction. Transparency: Indicates the visibility of background image. Acoustic Power: It adjusts transmit acoustic power. The higher acoustic power has better penetration. Steer: “Rotation/Steer” key on the control panel can steer the CF image right 60 / 265 8000098 direction, center (no steer), left direction. After “Freeze” on the control panel is pressed, the system enters frozen mode and the touch panel UI will change to the one below. Using the trackball reviews the image frame by frame similar to the “B” mode no matter whether it is in the cine or single mode. The image in the cine mode or single frame mode can be reviewed by selecting “Cine/Single” on the touch panel. In single mode, the last frame is displayed in the initial entrance. Note: 1. In Frozen mode, there will be no panoramic view function. 2. Start Frame, End Frame: control which frame to start from and which to end in order to display continuously as a loop. 3. Speed: control cine speed as 400%, 200%, 100%, 60%, 50%, 40%, 20%. 4. In frozen mode, “B” or “PW/CW” mode (if available) can be switched, for adjustment by selecting the mode buttons on the top left. 6.1.2 CF box position and size The ability to change the “CF” mode box size and the position can provide the flexibility in imaging. After “ROI” highlighted (pressed from the normal status), trackball movement will change the box size. Right/left movement will increase/decrease the box size from side by side view. Up/down movement of the trackball will increase/decrease the box size from up and down view. When “ROI” on the control panel is not highlighted (default status), the trackball movement will change the position of the color box. 61 / 265 8000098 6.1.3 CF mode gain control Rotating “CF” can adjust the “CF” mode digital gain in order to change the sensitivity. If “CF” gain control is too low, it will be difficult to detect the small abnormalities in flow and will possibly result in an underestimation of the large flow disturbances. If “CF” gain control is too high, the noise will be introduced and disturb normal flow detection. So “CF” gain needs to be adjusted properly to ensure continuous flow display, and also be set as high as possible unless the random color speckle appears. Similar to the other gain key, clockwise increases and counterclockwise decreases gain. 6.2 Power Doppler (PDI) Power Doppler is intended to compensate some deficit of the Color Doppler. Its advantages comparing Color Doppler are less dependent on the incident angle, no aliasing, less dependent on the direction, and sensitive to slow flow. After “PDI” on the control panel is pressed, the system will enter “PDI” mode. The “CF” rotation key will impact gain of “PDI” by clockwise or counterclockwise rotation. Similar to the other rotators, clockwise increases the gain and counterclockwise decreases the gain. The layout is similar with the color mode. However, the color bar will have a difference; in the color mode, the color bar has two colors to indicate the flow direction (To probe is red, away from probe is blue). “PDI” color bar does not have the direction information and it indicates the power of flow. “PDI” menu is similar with the color mode. However, all velocity-‐determined functions are not available in “PDI”; for example, there is no “Invert” button. The operation of “PDI” is similar to Color Doppler too and can refer to “CF” mode operation. 62 / 265 8000098 7 PW and CW mode (Spectral Doppler Mode) The spectral Doppler describes the Doppler shift signal within a sample volume. It displays scroll from left to right and displays the spectral distribution of Doppler shift frequency over time. The frequency or velocity values appear on the vertical axis and time along the horizontal axis. The strong or weak signal is displayed as varying shades of gray. The strong signals are displayed as bright while the weaker signals are less bright. 7.1 PW mode (Pulsed Wave Doppler) A sample volume cursor is located on the “PW” cursor and it indicates where, along the ultrasound beam, the spectral analysis is being performed. 7.1.1 Operation of PW mode (main menu) After “PW” on the control panel is pressed, the system will enter “PW” mode. “PW” rotation key will increase or decrease the gain by clockwise and counterclockwise. The main menu is as shown below: 63 / 265 8000098 Note: 1. If “CF” or “PDI” mode is inactive, the relevant “CF/PDI” button will not be displayed. Only when “CF” or “PDI” is on, “CF/PDI” and “B” buttons on the top left are in active mode for ready to switch. 2. In three key group buttons ( “Auto Trace”, “Mode”, “Direction”), only one of the three button keys (such as “Off” or “Frozen” or “Live”, “Off” or “Mean” or “Max”, “Above” or “Both” or “Below”) can be activated and highlighted. 3. In the “Angle Correct” up/down key, if up or down is held, the angle will be adjusted by a large amount continuously. Duplex and Triplex: When the system is in “2D+ CF + PW” mode, it will have “Duplex” and “Triplex” scanning mode. “Duplex” mode means that the system only activates “2D + CF” or “2D + PW”. If “2D+ CF” mode is active and real time scanning, the “PW” will be a static image. In this time, the touch panel will go to the “CF” mode. By selecting the top left side mode keys can switch menu mode. If “2D + PW” mode is active and real time scanning mode, “CF” mode will be a static image. In this time, the touch panel will go to the “PW” mode. The operator can press “Enter” on the control panel to switch between one of them. “Triplex” mode means that the system will have real time scanning for both “2D+CF” and “PW”. The operator can select “Duplex” or “Triplex” button on the touch panel to activate the mode accordingly. Only one of “Triplex” and “Duplex” mode can be activated and highlighted in one time. The default setting (“Duplex” or “Triplex”) depends on the application. Sample volume position and width: In “PW”, a specific area along the ultrasound beam is sampled. This is called the sample volume, which is located on the ultrasound beam and is displayed as two lines perpendicular to the beam line. The location and the size of the volume can be changed. The location can be adjusted by the trackball. Moving the trackball up, the sample volume will move up, and moving the trackball down, the sample volume will move down. Moving the trackball left or right will move the PW cursor left or right. PW automatic optimization: To perform the auto optimization by pressing “Auto” on the control panel. After this key is pressed, the system will automatically detect the highest flow velocity and adjust the velocity scale (PRF) accordingly in order to display the velocity in full scale properly. At the same time, the baseline will be shifted in order to display the full spectrum. Display format: 64 / 265 8000098 Display format: Operator can change the display format by selecting it on the to uch panel. In format, there are two kinds of display. One is side by side, while th e other one is up and down. In each type of the format, different splits between “B” and “PW” traces displays can be selected. In side by side format, there are th ree kinds:”H 1/2”,”H3/4” and “Full”. In up and down, there are three kinds: “V2/ 3”,”V1/2” and “V1/3”. The “V2/3” display format is as shown below. Invert: This function inverts the “PW” spectrum display in relation to the direction of flow. The displayed spectrum is inverted around the baseline. The velocity or frequency scale changes accordingly. After “Invert” on the touch panel is selected, this function will work. Spectrum above baseline is the blood flow towards the transducer and spectrum below baseline is the blood flow away from the transducer in normal orientation. In invert status, the orientation will be opposite. Auto Trace: After “Live” or “Frozen” on the “Auto Trace” category of the touch panel is selected, the auto trace function will start to work. The auto trace function can be switched off by selecting “Off”. Only one of them is available and highlighted at one time. After auto trace function is switched off, the operator can trace the curves manually. Trace Direction: The operator can also select different trace directions to be “Above”, “Both” or “Below”. “Above” means that the trace will be the top of the curve of the spectrum. “Both” means that the trace will be the mean between the top curve and the bottom curve of the spectrum. “Below” means that the trace will be along the bottom curve of the spectrum. The corresponding evaluation is automatically displayed on the monitor and updated in every heart cycle. 65 / 265 8000098 Trace Mode: Operator can select trace mode to be “Max”, “Mean”, or “Off”. Trace Sensitivity: Select the trace sensitivity to balance the sensitivity and artifacts. The high sensitivity settings may cause artifacts. The low sensitivity may cause smoothing to some incident events. Acoustic Power: By pressing “Acoustic Power” on the touch panel can change the transmit power. The high acoustic power output has better penetration. PRF: The velocity range on display is controlled by the pulse repetition frequency (PRF). As the PRF increases, the velocity measurable range is increased too. As the display scale increases, the maximum Doppler shift information can be increased. The relevant up/down key increases or reduces PRF. Possible the maximum sampling frequency can be automatically adapted based on the sample volume depth. After the certain level of PRF is exceeded, the system is activated into “HPRF” (high PRF mode) mode which can increase the maximum measurable flow velocity further. The normal maximum measurable flow velocity is determined by the measuring 66 / 265 8000098 depth of the sample volume. In order to further increase measurable flow velocity to reach the normal limitation, one or more additional sample volumes is added along with the ultrasound beam cursor as the virtual sample volume. The blood flows recorded by the virtual sample volume are overlaying the actual Doppler signal of the main sample volume. Baseline: The change of “PW” spectrum baseline can enlarge the velocity range in one direction. The displayed velocities or the frequencies on the upper and lower edge of the screen show the maximum measuring velocity range. The up/down key corresponding to baseline can change it up or down. Steer: PW line can be steered. Only works with linear probes. Angle Correct: To obtain the optimum resolution and the accuracy from the Doppler measurements, the angle which is between the ultrasound beam and the blood flow should be maintained between 0 and 20 degrees in order to display the vessel in longitudinal section and the angle cursor must be positioned parallel to the vessel axis. Rotating key “Rotation/Steer” or pressing it the angle changes. Sweep Speed: By pushing the relevant up/down key can adjust speed. The faster sweep speed may be useful to analyze flow curves. Others: “Frequency” and “Wall Filter” can be adjusted the same as color mode. 7.1.2 Operation of PW mode sub menu Sliding the touch panel to the left, the submenu will display as shown below: 67 / 265 8000098 Audio Volume: This allows to change the volume of the audio signal for the “PW” spectrum. Gray Filter: In order to eliminate low level echoes caused by noise, the operator can adjust this value to remove the certain level of echoes before processing. Dynamic Range: The “Dynamic range” refers to the compression of the grayscale information into suitable range for the display. It can enhance a certain grayscale range which makes it easier to display pathology. When increasing dynamic range, this will decrease the brightness to more gray shades and less contrast. When decreasing the dynamic range, it will increase the brightness to be less gray shades and more contrast. Spectrum Optimize: It processes several near-‐by spectra to optimize spectrum display. The identified number indicates a number of spectra to be processed. 7.2 CW mode (Continuous Wave Doppler) “CW” mode operation is same as “PW” mode, which can refer “PW” mode operation steps. The main difference between “CW” and “PW” is that “CW” can detect much faster flood shifts. 68 / 265 8000098 7.3 Freeze in PW/CW After “Freeze” on the control panel is pressed, the image will be in single frame display status. To recall stored “PW/CW” sequence by moving the trackball horizontally. If selecting “Duplex”, and pressing “Freeze”, both the 2D and “PW” image will freeze. At this moment, selecting “B” on the top of the touch panel to switch to B menu, the “B” image loop can be recalled. 69 / 265 8000098 8 3D/4D 8.1 Static 3D 8.1.1 l Workflow Pressing “4D” to enter “3D/4D” mode. In “4D” mode, select “3D”, “4D”, or “MCut” button to switch different modes. Entering one mode can adjust the ROI. Pre3D ROI is blue, and render ROI is green. Move the trackball to change the position of pre3D ROI and render ROI. Enable “ROI” key, pre3D ROI becomes dotted line, at this moment, the sizes of both pre3D ROI and render ROI can be changed by moving the trackball. Press “Enter” key to fix pre3D ROI, its color becomes yellow, and render ROI becomes blue. At this moment only render ROI’s position can be changed by moving the trackball. Press “Enter” key again, the below line of render ROI becomes dotted line too, and the size of render ROI can be changed by moving the trackball. 70 / 265 8000098 Notes: 1. Slide the touch panel from the left edge, more parameters can be adjusted. 2. VSpeckle: Speckle noise reduction level. 3. Quality: Resolution level – “high”, “good”, “mid”, “low”, the default setting is “good”. “Low” means a fast sweep speed and low scan density. High means a slow sweep speed and a high scan density, with have the best volume resolution. 4. Threshold: This means the minimum level of gray displayed. The scan echo which is lower than the threshold will be suppressed in order to make the volume image cleaner and with less noise. 5. Transparency: This can adjust the transparency in detail during the surface rendering mode. 6. Volume Angle: This means 4D probe scanning angle in traditional 4D probe; it will control the overall scan area or thickness; if there is a very small angle with high quality, then it will have a high contrast volume image. 7. After “Comments” on the touch panel is selected, the touch screen will go to the “Comments” menu. At this time, the touch panel image format is same as image screen. After finished, select “Exit” to go back to the previous menu. 8. After “Body pattern” on the touch panel is selected, the touch screen will go to the “Body Pattern” menu in order for the operator to select the body pattern and move the probe indicator direction in the body pattern. 71 / 265 8000098 9. Category: Different categories can be selected in the pull-‐down menu, the available categories are different with different applications. 10. Curve: Enable “Curve” to change the shape of render ROI by moving the trackball. After data acquisition finished, render ROI’s shape can be changed as the same. Enable “ROI” key, change the size of render ROI by moving the trackball. But if “3D” is selected for “Image Reference”, neither render ROI nor curve ROI can be changed. 11. Fix ROI: Enable it, ROI can’t be edited ROI again, but the center point of the image can be moved. 12. Flip: The image can be flipped 90,180 or 270 degree. 13. The data acquisition mode can be selected. There are two rendering modes, one is “General” and the other is “HQSurface”. In “HQSurface” mode, the system has the capability to enter HQ surface rendering mode after the data acquisition. l The 3D display format can be changed. One is the full screen image display mode, and the other consists of two or four image displays -‐-‐-‐-‐ A, B, C plane and 3D rendering. l The rendering view angle can be selected, from front to back, or from back to front, or from right to left, or from left to right, or from up to down, or from down to up. This selection button will be on the touch panel. l Select “Start3D” on the touch panel to start 3D data acquisition or press “4D” on the control panel to start data acquisition. During data acquisition, the touch panel will show a status bar to indicate the progress of data acquisition. The image screen will only display the scanned images continuously at the same speed as the 4D probe sweep. The operator needs to hold the probe well in order to obtain a good data acquisition. l Select a gray map by touching the relevant gray map button. l Select a 3D map by touching the relevant 3D map button. 72 / 265 8000098 l After data acquisition has finished, the 3D image display format is based on the one which was selected before data acquisition. Notes: 1. After selected in “HQSurface” acquisition mode, the touch panel menu is displayed as above. There is one adjustment button “HQ Light” to adjust the rendering light position for a different rendering appearance. 2. In this mode, “HQSurface” rendering or the other rendering mode can be selected. 73 / 265 8000098 3. In the general acquisition mode, there is no “HQSurface” rendering mode, and the time for data acquisition and the processing will be short. If general acquisition mode is selected, the touch panel menu is displayed as shown below: Notes: 1. Slide the touch panel from the left edge, more parameters can be adjusted. 2. Movement step: It will impact the rotation angle step in 3D image when enable “Auto Rotate”. By selecting a high number, the movement will be faster. 3. After the 3D image is activated and highlighted, one of the X, Y and Z directions will be active, while the others are inactive. The active one is highlighted and the “Rotation/Steer” key on the control panel can only rotate the 3D image in the corresponding direction accordingly (X, Y, or Z direction). The operator can select X, Y or Z direction by selecting the corresponding key. After “A”, “B” or “C” plane is activated and highlighted, the “Rotation/Steer” key can shift “A”, “B”, “C” plane and rotate 3D image. 4. The highlighted image position reference key (“A”, “B” or “C” plane, or “3D”) indicates which image is active for adjustment. Select the image on the main screen, the image reference on the touch panel will jump to the relevant plane. 5. The “Threshold” and “Transparency” can be changed after 3D data acquisition. 74 / 265 8000098 6. Speed: This controls playback speed; 100 will be same as a real scan, and then 75, 50, 25. 7. Slice position: allows a displacement of the center along the intersection lines of the sectional planes A, B or C. Reference image A: The sectional plane migrates from the front to the rear through the volume body. Reference image B: The sectional plane migrates from the left to the right through the volume body. Reference image C: The sectional plane migrates from the top to the bottom through the volume body. 8. View: These define the rendering orientation from which to view 3D. 9. Auto Rotate: It lets the 3D image continuously rotate along the rotation direction. After selected, this button will be highlighted. If it is selected again, it will be inactive. Speeding up/down key will change the rotation speed in order to give the operator more time to see the images. 10. After data acquisition, the system is in frozen status. After “Freeze” is pressed at this time, the system will go back to the 3D initial status. 11. HQSurface: Touch this button to obtain a high quality rendering image. 12. There are two render types: Gray and GrayInv. The "Gray" type is rendering echogenic tissue structure. On the contrary, "GrayInv" rendering type intends to display hypoecho structures, bladder, uterus tec. Rendering approaches: In the rendering group keys, there are two different rendering methods. One is “Surface mode”, the other is “Perspective mode”. Each method has several approaches. Only one of the approaches can be selected at one time. Each approach’s explanation is as follows: -‐SurfTexture: Surface rendering mode based on Marc Levoy’s research, which displays the surface of the object. -‐SurfSmooth: Apply smooth filter to the volume date, which displays a smoothed surface of the object. -‐GradLight: Surface rendering with the Phone light model, which displays the surface of the object with light on it. -‐TranspMax: Displays only voxels with high echo response. -‐X-‐ray: Displays all voxels with equal probability. -‐TranspMin: Displays only voxels with low echo response. -‐Light: Displays the object by its distance to the observer. 13. Gray map: Select a gray map by touching the relevant gray map button. 75 / 265 8000098 14. 3D map: Select a 3D map by touching the relevant 3D map button. 15. Rotate Reset: Reset the image if it is rotated. 16. Save Preset: Save current parameter settings into the application. l The image position can be changed by moving the trackball, the direction is same as the trackball. l To change the ROI size the same as other modes by using the “ROI” key on the control panel and trackball. l In two or four image display format, there are rotation axes on image “A”,” B”, “C”. l In single image display format, only 3D rendering image displays on the image screen l “Rotation/Steer” key will rotate the 3D image by X, Y or Z axis. X, Y and Z can be selected on the touch panel. l There is a direction indicator in each plane image in order to identify the direction match with probe orientation. In A Plane, one mark indicates the scan start point against the probe mark. l In 3D mode, “Comments” and “Body Pattern” can be activated. l Slide the touch panel to the next page, select “Single” display format, drag the 3D image, it will rotate along the finger. Touch 3D image once, come out axis Z guide, drag the 3D image along the circle, it will rotate along Z axis. If select “Dual” or “Quad”, drag the 2D image, it can be moved, drag the 3D image, it will rotate as in single mode. The 2D image and 3D image both can be zoomed in/out by two fingers. 8.1.2 l l l l l l l l 3D MCut Touching “3D MCut” to go to multi-‐slices display. Interval: Adjusts the interval distance between each slice. Slice Number: Different slice number can be selected: 4x4, 3x3, 2x2. Cut Plane: Smaller image size due to display screen limitation. The operator can select which plane (A, B or C) is to be cut by “Cut Plane” group keys. The first displayed image is the selected plane with slice line. Rotation direction: “Rotation/Steer” key will rotate the MCut image by X, Y or Z axis. X, Y and Z can be selected on the touch panel. Rotate M, PW, CF keys can also rotate the images, M is corresponding X direction, PW is corresponding Y direction, CF is corresponding Z direction. Pressing “Freeze” on the control panel to go back to the initial 3D mode status. After data acquisition, the system is in the frozen status as all operations are based on already acquired data. Pressing “B” on the control panel to go back to the normal 2D mode. 76 / 265 8000098 8.1.3 Free View Touching “FreeView” to go to Freeview mode. l Direction: Adjusts the direction in which Freeview unfolds the slice. l Route: Different kinds of slice route control. - Line: straight line pattern, start by mouse click, end by mouse click. - Polyline: polyline pattern, start by mouse click, end by mouse double-‐click. - Curve: curve pattern, start by mouse click, end by mouse double-‐click. l Clear: Undo the slice route by press “clear” button on keyboard. For Polyline pattern and Curve Pattern it will undo the last segment of polyline or curve. l Image Refernece: Change the referece image at the left side of the screen. - Press “A” will show sagittal plane; - Press “B” will show coronal plane; - Press “C” will show transverse plane. l Slice Thickness: Freeview is not only able to do different regular or irregular plane, but also able to dissect the volume with variable plane thickness by adjusting “Slice Thickness”. l Rotate M, PW, CF keys can also rotate the images, M is corresponding X direction, PW is corresponding Y direction, CF is corresponding Z direction. l 3D Map: Map configure for plane image at right side. l Gray Map: Map configure for reference image at left side. l Pressing “Freeze” on the control panel to go back to the initial 3D mode status. After data acquisition, the system is in the frozen status as all operations are based on already acquired data. Pressing “B” on the control panel to go back to the normal 2D mode. l 8.1.4 l l l l MagicCut Touching “MagicCut” to go to MagicCut mode. Erase Mode: Adjusts the way to edit the volume. There are four edit methods. - Small Circle: small rubber to erase finely. - Big Circle: big rubber to erase coarsely. - Inside Lasso: edit volume by Lasso, inside the Lasso will be erased. - Outside Lasso: edit volume by Lasso, inside the lasso will be kept, while others will be erased. Undo: Undo the last edit operation. Support multiple “Undo” operations until the whole volume is recovered, no edit left. Redo: Retrieve the edit undid by “Undo” operations. 77 / 265 8000098 l Reset: Reset the volume to original state. 78 / 265 8000098 8.2 4D (real time) 8.2.1 l l Workflow After “4D” key on the control panel in B is pressed, the system will enter “3D/4D” mode. At the same time the image screen will display one image with the active “ROI”. The touch panel menu will display as the “4D” touch panel below (before the scan). Notes: 1. Select the 4D setting in this UI before starting the 4D real time scan. Select the “Display Format”, “Render”, “View”, “Comments”, “Body Pattern” and other buttons which can refer to the 3D UI description. After selecting finish, The operator can select “Start 4D” on the touch panel or press “4D” on the control panel to start the 4D real time scan. 2. During this time, the image screen displays the normal image similar as the status before selecting the “4D” button. The only difference is that the image will have an ROI appear in order for the operator to change position and size. 3. In dual display format, it will be “A” or “B” or “C” plane + 4D image display. 4. In single image display format, only 4D rendering image displays on the image screen. 79 / 265 8000098 l Select all settings and change the ROI size in this time. To change the ROI position the same as other modes by using the “ROI” key on the control panel and trackball. l The “VSpeckle”, “Quality”, “Threshold”, “Transparency”, “Volume Angle” can be changed, and plane size. Refer to chapter 8.1.1. l Selecting “Start 4D” button on the touch panel or pressing “4D” on the control panel to start 4D real time scan mode. The UI will be changed to below. The image screen will display the images, depending on what display format is selected. Notes: 1. During the real time scanning, the parameter can also be changed. The 4D rendering image can be rotated by rotating “Rotation/Steer” on the control panel (need to select 4D active image reference and which “X”, “Y”, or “Z” axis). After “A”, “B” or “C” plane is activated and highlighted, the “Rotation/Steer” key can shift “A”, “B”, “C” plane and rotate 3D image 2. Rotate M, PW, CF keys can also rotate the images, M is corresponding X direction, PW is corresponding Y direction, CF is corresponding Z direction. 3. At this time, the “Start/End 4D” button is highlighted. If the operator select this button on the touch panel or press “Freeze” (unfreeze status in this time) on the control panel, 4D real time scanning will end and the 4D cine mode will start. 80 / 265 8000098 l l l 8.2.2 l Four images and single image formats’ image display are the same as 3D. During scanning, All parameters can be changed as same as before scan. Also The ROI size and position can be changed by pressing “ROI” on the control panel and moving the trackball. In the meantime, if the 4D reference image position is active, the 4D image can be rotated by rotating “Rotation/Steer” on the control panel on “X”, “Y” or “Z” axis, which depends on which axis is active and highlighted. If other reference image position is active, all images can be rotated. In the four image display format, there are rotation axes on image “A”, “B”, “C”. 4D Cine Mode After “End 4D” on the touch panel is selected or “Freeze” on the control panel is pressed, the system will switch automatically to freeze mode/4D Cine mode. The Cine mode menu is displayed as shown below. The selected format and last acquired volume will be presented on the image screen. Notes: 1. After “Auto Cine” is selected on the touch panel, the image screen will automatically display volume by volume. The “Speed” can be adjusted to play back slowly. The available “Speed” is 100, 75, 50 and25. After “Auto Cine” is selected, this button will be highlighted. Selected again, this will end the auto cine function. Auto cine sequence will be from start volume to end volume, and then it starts from the first volume again. 2. Pushing the “Vol by Vol” up/down key, can view the volumes one by one. 81 / 265 8000098 3. When pressing “Freeze” on the control panel or selecting “Start 4D” on the touch panel, the UI will go back to the 4D touch panel (during scan). l All images and volumes can be reviewed during this time. This allows the operator to concentrate 4D data acquisition during real time and afterwards review all volume in detail: “Vol by Vol”, slice by slice in cine mode. After “Auto Cine” is selected on the touch panel, the system will play back continuously. 8.2.3 3D MCut of Cine Mode Go to multi-‐slice cut in Cine mode by selecting “3D MCut” on the touch panel. Then the touch panel will go to UI as shown below in order for the operator to see slices. Notes: 1. Vol by Vol: View the volume one by one, the default setting is the last volume. 2. Speed: Defines what speed cine will be. They are 100, 75, 50 and 25. It is only active after the “Auto Cine” key is highlighted. 3. Interval: Adjusts the interval distance between each slice. 4. Slice Number: Different slice number can be selected: 4x4, 3x3, 2x2. 5. Cut Plane: Smaller image size due to display screen limitation. The operator can select which plane (A, B or C) is to be cut by “Cut Plane” group keys. The first displayed image is the selected plane with slice line. 6. Rotation direction: “Rotation/Steer” key will rotate the MCut image by X, Y or Z axis. X, Y and Z can be selected on the touch panel. 82 / 265 8000098 7. Rotate M, PW, CF keys can also rotate the images, M is corresponding X direction, PW is corresponding Y direction, CF is corresponding Z direction. 8. Select “Auto Cine” for play back. 9. In all modes, by selecting the top buttons such as “3D”, “4D” or “MCut”, the system will return to the beginning of that mode. l Press “B” on the control panel to return to normal 2D mode. 83 / 265 8000098 8.3 MCut Workflow 8.3.1 After “4D” on the touch panel is selected, the system goes into “4D” mode. Select “MCut” on the top to enter 4D multi-‐cut mode. l Notes: 1. In the “Cut Plane” group, if the operator selects “A” that means the cut plane is A plane. In this time, the initial image and the first image of the multi display is the B plane image in order to show the slice position, and the slice line is vertical. If “B” is selected, the cut plane is B plane. In this time, the initial image and the first image of the multi display is the A plane image in order to show the slice position, and the slice line is vertical. If “C”, is selected, the cut plane is C plane. In this time, the initial image and the first image of the multi display is the A plane image in order to show the slice position, and the slice line is horizontal. l Before starting 4D data acquisition, the initial image display will only be a 2D image. The “View Slice”, “Slice Number”, Cut Plane” (“A”, “B” or “C”) and other parameter can be adjusted as UI indicated. l Select “Start MCut” on the touch panel to start real time data acquisition. Real time data acquisition and the display will stop after “End MCut” is selected. The image displays real time slices image. How many slices are 84 / 265 8000098 displayed depends on how many slice numbers are selected on the touch panel. Notes: 1. Slice Number: Smaller image size. Different slice numbers can be selected: 4x4, 3x3, 2x2. 2. In real time 4D and play back of “MCut” mode, all slices are live and active. In 3D multi cut, slices are single frame, not live display. l During real time parameters on the touch panel can be adjusted. Also the “Slice Number” and “Cut Plane” can be changed. l Touch “End MCut” on the touch panel or press “Freeze” on the control panel to go into frozen mode and the following touch panel UI appears. Image screen displays the last frame before frozen. Notes: 1. Vol by Vol: To view the volume one by one; the default is the last volume. 2. Speed: To define what speed cine will be. They are 100, 75, 50 and 25. It is only active after the “Auto Cine” button is highlighted. 3. Select “Auto Cine” for play back. The default is “Auto Cine”. l Pressing “Freeze” on the control panel or selecting “Start MCut” on the touch panel, the system will go to 4D multi-‐cut real time again to be initial status. If go to “3D”, “4D” “MCut” mode, those buttons on the top of the touch panel can be selected. l Anytime during “3D” or “4D” mode, press “B” and the system will go back to 2D mode. 85 / 265 8000098 8.4 STIC l Press “Start STIC” to enter into STIC mode. If STIC algorithm failed because of incorrect data acquisition or parameter configuration, there will be a warning info on the screen and the system will be automatically back at Pre3D state. If STIC succeeds, system will enter into 4D Cine Mode as a normal rendering. 3D Mcut: STIC provides MCut display mode. Refer to MCut section. Display Format: Render,MCut,MPR( Multi Planar reconstruct: display Axial, Coronal and Sagittal planes). 86 / 265 8000098 9 Other Modes 9.1 Tissue Doppler Imaging (TD) Tissue Doppler Imaging uses the Doppler principle to provide information about tissue motion direction and velocity. The motion will be shown as a wave profile. Select the “TD” on the control panel, and the system goes into Tissue Doppler mode. Image display format and the touch panel menu will be similar to “PW/CW”. But the “PW/CW” key changes to “TD” key. The operation workflow is similar to “PW/CW”. Refer to “PW/CW” session for operation please. 9.2 Tissue Velocity Imaging (TVI) 9.2.1 TVI overview TVI calculates and color codes velocities in tissue. The velocity information is acquired by the sampling of tissue Doppler velocity values. 9.2.2 TVI Workflow TVI function is only available in cardiac application of the sector probe. If the right application and probe is not selected before entering this mode, the system gives a warning to remind the operator to change accordingly. The ECG needs to be connected before proceeding with the TVI procedure. 1. Select the “TVI” on the control panel and the system will enter “TVI” mode. In the “TVI” mode, new operator menu displays on the touch panel as shown below. 2. TVI’s ROI size and position can be changed by pressing “ROI” on the control panel and moving the trackball combination. The operation is the same as the other ROI adjustment (such as color ROI). 3. Adjust parameters on the touch panel menu. 87 / 265 8000098 The parameters corresponding to up/down keys are described as follows: Frequency: It enables the adjustment of the transmission frequency to control the sensitivity or the level of penetration. Line Density: Controlling line density will impact the frame rate, and the trade-‐off between the spatial and the temporal resolution. PRF: It adjusts the repetition rate of Doppler pulses transmitted to acquire the data for color mapping. This adjustment influences the Nyquist limit, which is the ability to detect the maximal velocity without color-‐aliasing. Color Level: It controls the level of color threshold. Over threshold setting number will not be displayed. The keys’ functions on the touch panel menu are described as follows: Invert: It is able to invert the color scheme between the positive and negative tissue velocities. Baseline: Adjusts the color map either toward or away from the probe to highlight the tissue motion dynamic range. Transparency: Indicates the visibility of background image. Image display is as shown below in TVI. 88 / 265 8000098 89 / 265 8000098 9.3 Elastography Workflow: Select the probe and application and scan in B or Harmonic mode to determine the field of view, then activate the EI mode by touching the El button on the touch panel and determine the region of interest (ROI), the region of interest can be moved and zoomed through the ROI button and track ball on the keyboard. Continuously press the tissue through the probe and there will be a strength bar displayed on the screen, if the pressure is too small or too large, the EI mode will not work. If the pressure is appropriate, the EI mode will work normally and display the strain image together with the gray image of B or Harmonic mode. For the strain image, different color indicate different stiffness, usually blue indicate hard tissue and red indicate soft tissue. The strain and strain ratio can be measured to diagnose pathologic tissues. The EI quality can be optimized by adjusting the parameters. WinSize and OverLap: determine the resolution and smooth of the image. Sensitivity: indicates the burst number of the transmit wave. Smooth: indicates the spatial filtering of the image. Transparency: indicates the visibility of background image. Persistence: indicates the frame averaging of the continuous images 90 / 265 8000098 Map: indicates the mapping of strain value and the display color. There is one measurement item only working in EI mode: StrainRatio. It is a ratio of two values of strain. Fix these two values of strain in ROI box, then the system will get the ratio. 91 / 265 8000098 10 Measurement and calculation The measurement and calculation results from the ultrasound image can be used to supplement other clinical approaches. Its measurement accuracy depends not only on the system accuracy, but also on the impact of different medical approaches. If necessary, indicate the medical approach relevant to the measurement and calculation. In the meantime, record the details of the researcher and calculation method and database in the system. Refer to the relevant original article as some clinical operation approaches are recommended by researchers. Note: Before starting an examination, it is normally necessary to input new patient information. Refer to chapter 4. Any measurement can be repeated as long as the measurement is selected again. Note: The following measurement methods are normally carried out by using the trackball and “enter” button. All the calculation formulas are listed in the Advanced Technical Manual. 10.1 Introduction This chapter provides system set-‐up information relevant with measurement. It also introduces what generic measurements are possible and how to make those measurements in each mode. Topics are as follows: l Measurement workflow l Position of the measurement key l Measurement system settings l General introduction to measurement l The list of generic measurements in each mode l How to configure measurement in each mode. 10.1.1 Measurement Workflow For a patient, the system classifies information according to type of examination, category and measurement. These terms are defined as follows: 92 / 265 8000098 1. Examination application types which include: l Abdominal l Obstetrics l Gynecology l Urology l Pediatrics l Cardiac l Vessel l Small organs (e.g. breast, testes, thyroid) l Trans-‐cranial Doppler 2. Category After an application is selected, the system allows the operator to select a certain category. For example, the following examination categories can be selected in the pediatrics application. l Early l Mid l Late l Fetal heart 3. Measurement This is measurement and calculation for analysis of anatomy, for example, of kidney length. Measurement includes several categories of data. For instance, in order to measure kidney volume, the length, width and height need to be measured. 93 / 265 8000098 10.1.2 Positions of the measurement keys 1. 2. 3. 4. 5. 6. Measure: activates measurement caliper and current measurement and calculation setting. Clear: during measurement, press this key to clear measured caliper and relevant results. Holding this key down will clear all annotations, body pattern, measurement results and cursor. Trackball: use this to move the caliper. By pressing “enter”, the caliper will remain fixed. Move the trackball again to fix a new point with the caliper and press “enter”. This enables the operator to measure straight and curved lines and shapes of many kinds. Enter: confirms the measurement. Cursor key: after this key is pressed, the cursor will appear on the screen. Touch panel: all measurement function can be selected on the panel. 10.1.3 Measurement system setting On the touch panel, enter “Sys Setting” menu, and select “Measure”, then display setting items as follows: Cursor Type: “+” is the default factory setting for cursor type. Other cursor types can also be selected to replace the factory setting. Cursor Size: “8x8” is the factory setting. Other size can also be selected for cursor size. Cursor Size When Measure: “5x5” is factory setting. Other size can be also selected for shape cursor size. Use Arrow Cursor for indication on image: Enable it and enable “Cursor”, there is an arrow on the image. Show Result Window: During measurement, results are displayed in the results window with measurement number, and are updated 94 / 265 8000098 simultaneously until complete. All results are displayed in the measurement results window. If necessary, this window can be deleted. To delete the window, select “Show Result Window" again. Window Position: The position of the measurement result window can be changed. To move the window, select the option from the list below: l LT (Left, Top) l LB (Left, Bottom) l RT (Right, Top) l RB (Right, Bottom) Font Size: To change the font size in the results window, select the size from the “Font Size” pull-‐down menu: l 10 l 12 l 14 l 16 l 18 l 20 Retain measure results after unfreeze: Unfreeze the system in measure, enter measure again, if select “Retain”, all measurements results of unfinished items are retained, if select “Clear”, all measurement results are cleared. Show Cursor line: During measurement, the system will display one dotted line to indicate measurement. After the position is selected when using touch panel measurement, the system will display measurement line “Enable” is selected for “Show cursor line”. If “Disable” is selected, the system will erase the dotted line and only display the caliper with a number. Hold Measure on Image: During measurement, the system will display one dotted line to indicate measurement. If “Hold Measure on Image” is selected and enabled (by pressing “Enable”), all measurement items on the image will be saved. If “Disable” is pressed, the system will erase the dotted line of all measurement when replay one image which contains measurements. 95 / 265 8000098 Show depth guideline: Display a dotted line when do the measurement of “Depth”. If the probe is linear and “TView” is disabled, the dotted is not needed. Show brief annotation: Enable it, display brief annotations when do the measurements. Auto adjust cursor size for tiny distance (px): If the distance is shorter than 10, 20, 30 or 50 pixels, the cursor size will becomes very small. This function is disabled if select “off”. Auto snap range setting (px): If the measurement method is “Trace”, “Polygon” or “Spline”, when the distance between the end point and the start point is shorter than 10, 20, 30 or 50 pixels, the measurement will finish automatically, and the last cursor back to the start point. This function is disabled if select “off”. Annotation font size: To change the font size of the annotation, select the size from the “Annotation font size” pull-‐down menu: l 10 l 12 l 14 l 16 l 18 l 20 l 22 Show result of protocol items in worksheet: If the current measurement is multi-‐step (like “Volume-‐L&W&H”), before finish the measurement, enter “Worksheet”, this measurement item will be displayed. This function is disabled if select “off”. Show comment of measure item: Explain the measurement item in local language. Unit for normal distance related measurement: cm, mm. Select different unit for normal distance measurement. Show GA(LMP/BBT) on status bar: If there is GA(LMP/BBT) for the current patient, display it on the status bar. Show GA after Measure: During measurement, select whether or not to display the estimated fetal age automatically. If the fetal age is selected to be displayed in system set-‐up, the measurement results window will display 96 / 265 8000098 estimated age after a measurement. If not, the estimated age will not be displayed in the results window. Add 1 week to EDD Calac: If this item is selected, delivery time will be increased by 1 additional week. Show EDD after Measure: During measurement, select whether or not the estimated delivery time is displayed automatically after measurement. If estimated delivery time display is selected in the system setting, the estimated delivery time will appear in the results window after measurement. If not, estimated delivery time will not appear in the results window. Show Percentile after Measure: Enable it, after finish the OB related measurement, show the percentile according to the OB table. Auto Select EFW Method: Enable it, the system will select EFW method automatically when do EFW related measurements. GA Display Format: To change the display format for “GA” after enable “Show GA after measure”. EFW GP Table: According to different areas, different “OB Table Type” -‐> “EFW GP Table” (estimated fetal weight table) can be selected. After the pull down menu is selected, the system displays items for selection as follows: l Hadlock l JSUM l Osaka l Shinozuka OB Table Type: According to different area, different “OB Table Type” (Fetal age and fetal growth table) can be selected. Selecting the “OB Table Type” pull down menu, the system can display items as follows for global setting: l ASUM l ASUM2000 l Chitty l FCFU_CFEF l Hadlock l Hansmann l Jeanty l JSUM l Merz l Shinozuka.1 97 / 265 8000098 l l l l l l l l l l l l l l l l l l l Shinozuka.2 Berkowitz Eik-‐Nes Kurtz Osaka Paris Rempen Tokyo Yarkoni ASUM2001 Nelson Robinson Mercer Hellman Mayden Bertagnoli Eriksen Goldstein Hill OB Measure Item GA Table Config: To config GA table for every measurement item. Heart Cycle: To set the default value for heart cycle. 10.1.4 Basic introduction in measurement function Press “Measure”, and the system will enter measurement mode. 98 / 265 8000098 Notes: To stop image acquisition before measurement, press “Freeze”. l To adjust accuracy of caliper, move the trackball. l To delete the caliper and measurement data before complete sequence measurement, press “Clear”. l To repeat the measurement, select the relevant measurement item on the touch panel. Notes: After “Measure” is pressed and it enters the measurement status, the system will go to the default measurement setting in the relevant application. For example, in “B”/ “M” mode, the default measurement is “Distance”. Default measurement is “Velocity” in the PW mode. Measurement erasing Measurement results can be deleted from system memory as follows: l After the image is unfreeze, the system will erase all displayed completed measurement results, calculation results and result window. However, measurement and calculation results will be kept in the worksheet. l After “Clear” is pressed, the system will erase the latest measurement result. Holding “Clear” will erase all measurement and calculation results. l If “New Patient” is selected, the system will erase all measurement results, calculation results, and worksheet. l To clear the second caliper which is activated and activate the first one, press “Clear”. Measurement results worksheet After the measurement is completed, all effective measurement results will be entered on the worksheet automatically. In measure page, touch “Worksheet”, then select different applications, the system will display all measurement results as shown below l 99 / 265 8000098 1/2/3: This is for repeating measurements of the same item. The maximum is 5 times. If the number of repeated measurements exceeds 5, the worksheet will only save the last 5 measurement results. Avg: This is for post-‐processing method of measurement results. The options are: Average, Minimum, Maximum and Last. The desired method is selected from the pull-‐down menu by selecting the relevant position. 1 is for all items, 2 is for the related item. Unit: The unit of measurement value and displayed result. The operator can select different units by touching the uint. Print: Print the worksheet by the selected printer. Edit: Button “Edit” is selected, the operator can change the unit and statistics, and change the method of EFW. If the data is highlighted, it is selected for calculating Average, Minimum and etc., and it will appear in the report. The first three items “LMP”, “GA(LMP)” and “EDD(LMP)” are from patient information, and the rest items are calculated by the measurement results. If there is more than one fetus, other fetuses’ information will be listed here too. 100 / 265 8000098 10.1.5 Generic measurement list in each mode 10.1.5.1 B mode generic measurement There are 8 generic measurements in “B” mode l Depth l Distance l Perimeter n Length and width method n Ellipse method n Polygon method n Spline method n Tracing method l Area n Length and width method n Ellipse method n Polygon method n Spline method n Tracing method l Volume n Single line method n Dual line method n Triple line method n Single ellipse method n Single ellipse and single line method l Angle l Stenosis n Diameter method n Squaremeter method l A and B ratio n Diameter ratio n Squaremeter ratio Note: Press “Measure” and the system will enter frozen mode automatically. Depth measurement: The steps are as follows: 1. Press “Measure”: one caliper will be displayed on the image screen. 2. Move the cursor to measurement menu to select “Depth” category. 3. To move the caliper position, use the trackball. 4. After moving the trackball to the position for measurement, press “Enter” for confirmation. 5. The system will display depth in the measurement results window. 101 / 265 8000098 The notes can help operator for depth measurement as follows: Notes: l To delete current result and start next measurement, press “Clear” once. l To activate and edit relevant measurement, select relevant items to display submenu. l To delete all measurement results, press and hold down “Clear”. Distance Measurement: The steps are as follows: 1. Press “Measure”. 2. Select the “Distance” measurement category if current measurement is not. 3. Move caliper to the measurement start point with the trackball. 4. Press “Enter” to confirm start point. The system will fix one caliper and a second caliper appears. 5. Move the second caliper to the end point with the trackball. 6. Press “ROI” before fix the second point, the first point is re-‐activated, then move the caliper if needed. 7. Press “Enter” to complete the distance measurement. Notes: l To delete the current result and start the next measurement, press “Clear” once. l To activate and edit relevant measurement after one measurement is complete, the operator can select relevant items to display submenu. l To delete all measurement results, press and hold down “Clear”. Perimeter: Length and width method Perimeter can be measured by two distances (length and width). The steps are the process of the measurement as follows: 1. Press “Measure”. 2. Select “Perimeter” in the measurement menu. 3. Select “L&W” approach in the perimeter menu. Caliper will display on the image screen 4. Measure the two distances separately. 5. After the two distance measurements are complete, the system will display perimeter in the measurement results window. Notes: l To delete the current result and start the next measurement, press “Clear” once. l To exit measurement function, press “Measure” again. Perimeter: Ellipse method Perimeter can be measured by ellipse. The steps are the process of the measurement as follows: 1. Press “Measure”. 102 / 265 8000098 2. Select “Perimeter” in the measurement menu. 3. Select “Ellipse” approach in the perimeter menu. A caliper will display on the image screen 4. Position the first point and press “Enter”. The system will fix the first caliper and display the second caliper. 5. Position the second point and press “Enter” to confirm. The system will display the third caliper and trace the ellipse shape. 6. Finalize the third caliper and ellipse by moving the trackball. Press “Enter”. The system will fix the third caliper and ellipse. 7. Measurement results window will display perimeter result. Notes: l Before completing the measurement, press “Clear” and the current measurement data will be deleted. The system will display the previous caliper and start the relevant measurement step again. l To exit measurement before measurement is complete, press “Measure”. Perimeter: Polygon method Perimeter can be measured by a polygon. The steps are the process of the measurement as follows: 1. Press “Measure”. 2. Select “Perimeter” in the measurement menu. 3. Select “Polygon” approach in the perimeter menu. Caliper will display on the image screen 4. Position the first point and press “Enter”. The system will fix first caliper and display second caliper. 5. Position the second point and press “Enter” to confirm. The system will fix the second caliper and display the third caliper and trilateral trace. 6. To position third caliper, move trackball and press “Enter” for confirmation. The system will fix the third caliper and display the fourth caliper and quadrilateral. 7. To position the fourth caliper, move the trackball and press “Enter” for confirmation. The system will fix the fourth caliper and display the fifth caliper and pentagon. 8. The rest can be done in the same manner in order to complete measurement in any polygon method. After the measurement is completed by pressing “Enter” twice, the results window will display the result. Notes: l Before completing the measurement, press “Clear” to delete the current measurement data. The system will display previous caliper and start relevant measurement step again. l To exit measurement before measurement is complete, press “Measure”. Perimeter: Spline method Perimeter can be measured by spline. The steps are the process of the 103 / 265 8000098 measurement as follows: 1. Press “Measure”. 2. Select “Perimeter” in measurement menu. 3. Select “Spline” approach in the perimeter menu. Caliper will display on the image screen. 4. To move the first caliper to the start point, move the trackball. 5. Press “Enter” to fix the start point. The first caliper will be fixed and the second caliper appears in the same position as the first caliper position. Note: Press “Clear” once to delete the second caliper and the first caliper will be activated. If “Clear” is pressed again, the first caliper and spline line will disappear. 6. To fix the second caliper, move the trackball and press “Enter”. The third caliper will appear in the same position. Note: Same function of “Clear” key as above. At least three points are needed to trace a spline curve. Continuously set the trace point until all required points are set. 7. Fix the final caliper and press “Enter” in order to finalize spline curve. Note: Press “Enter” twice to complete trace measurement. Before completing the measurement, delete the calipers one by one by pressing “Clear”. 8. After measurement is completed by pressing “Enter” twice, the results window will display the result. Perimeter: Tracing method Perimeter can be measured by tracing method. The steps are the process of the measurement as follows: 1. Press “Measure”. 2. Select “Perimeter” in the measurement menu. 3. Select “Tracing” approach in the perimeter menu. Caliper will display on the image screen 4. To move the first caliper in the start point, move the trackball 5. To fix the start point, press “Enter”. Tracing caliper will change to an activated caliper. 6. The trackball can be used to trace the anatomical structure of the measurement field. The tracing curve will change to a dotted line. 7. To complete measurement, press “Enter” twice and the results window will display the perimeter result. Notes: l Before completing the measurement, press “Clear” once to clear a segment of the trace line. l To clear the tracing caliper and the current measurement data, press “Clear” for at least 2 seconds. Area measurement: Length and width method Area can be measured by length and width. The steps are as follows: 104 / 265 8000098 1. Press “Measure”. 2. Select “Area” in the measurement menu. 3. Select “L&W” method in the area measurement menu. The active caliper will display on the image screen 4. Measure the two distances in sequence: press “Enter” to fix the start point; then move the trackball and press “Enter” to confirm the second point for distance measurement. 5. After the two distance measurements is completed, the area result will display in the result window. Note: Before completing the area measurement l To clear the current measurement data, press “Clear” once. The system will display the original caliper to restart measurement. l To exit measurement function before completing measurement, press “Measure” again. Area measurement: Ellipse method Area can be measured by ellipse. The steps are as follows: 1. Press “Measure”. 2. Select “Area” in the measurement menu. 3. Select “Ellipse” method in the area measurement menu. The active caliper will display on the image screen 4. Press “Enter” to fix the start point; then the second caliper is displayed. 5. Move the trackball to the second position and press “Enter” for confirmation. The system will fix the second point and third caliper and ellipse shape display. 6. To position the third caliper and ellipse, move the trackball and press “Enter” for confirmation. 7. Results will display in the results window. Notes: Before completing ellipse measurement l To clear ellipse and the current measurement data, press “Clear” once. The system will display the original caliper and restart measurement. l To exit measurement function before completing measurement, press “Measure” again. Area measurement: Polygon method Area can be measured by polygon. The steps are as follows: 1. Press “Measure”. 2. Select “Area” in the measurement menu. 3. Select “polygon” method in the area measurement menu. The active caliper will display on the image screen 4. Press “Enter” to fix the start point, then the second caliper is displayed. 5. Move the trackball to the second position and press “Enter” for confirmation. The system will fix the second point and third caliper and triangular shape 105 / 265 8000098 display. 6. To position third caliper, move the trackball and press “Enter”. The system will fix the third point and the fourth caliper and quadrilateral display 7. To position fourth caliper, move the trackball and press “Enter”. The system will fix the fourth point and the fourth caliper and pentagon display. 8. The rest can be done in the same manner, and any polygon can be used to measure area. After measurement is complete, the system will display the results in the results window. Notes: Before completing ellipse measurement l To clear ellipse and the current measurement data, press “Clear” once. The system will display the original caliper and restart measurement. l To exit measurement function before completing measurement, press “Measure” again. Area measurement: Spline method Area can be measured by spline. The steps are as follows: 1. Press “Measure”. 2. Select “Area” in the measurement menu. 3. Select “Spline” method in the area the measurement menu. The live caliper will display on the image screen 4. To fix the trackball into the start point after positioned, press “Enter”. After the first caliper is fixed, the second active caliper is displayed in the same position as the first caliper. Notes: Press “Clear” once, the second caliper disappears and the first caliper is activated. If the “Clear” key is pressed again, the first caliper disappears and the spline curve is canceled. 5. To position the second caliper, move the trackball and press “Enter” to confirm. The third active caliper will display in the same position as the second caliper. Notes: The spline curve needs at least 3 points to make it. Continuously set trace points until all needed points are set. 6. To confirm the last caliper, press “Enter” again in order to confirm the final spline curve. Notes: Press “Enter” twice to complete trace measurement. Before completing the measurement, the points can be erased one by one by pressing “Clear”. 7. After the measurement is completed, the results window will display the result. Area measurement: Tracing method Area can be measured by tracing. The steps are as follows: 1. Press “Measure”. 2. Select “Area” in the measurement menu. 3. Select “Tracing” method in the area measurement menu. The active caliper 106 / 265 8000098 will display on the image screen 4. To move caliper to the start point, move the trackball. 5. Press “Enter” to fix the start point. The active caliper will display in the screen. 6. Trace the measurement dotted line along which the anatomy needs to be measured. 7. After the tracing is completed, and the “Enter” is pressed. Then the result will display in the results window. Notes: Before complete the tracing measurement: l Press “Clear” once to clear a segment of the trace line. l To clear caliper and current measurement data, press “Clear” for at least 2 seconds Volume measurement Volume can be measured by one of the approaches as follows: - Single line (L), i.e. single distance method - Dual line (L&W), i.e. dual distance method - Triple line (L&W&H), i.e. triple distance method - Single ellipse - Single ellipse and single line method Refer to “Distance” measurement to know how to measure distance for details. Refer to “Perimeter” and “Area” measurement to know how to measure ellipse for details. To measure volume through single or dual distance method, the steps are as follows: 1. Press “Measure”. 2. Select “Volume” in the measurement menu. 3. Select “L” or “L&W” method in the volume measurement menu. The active caliper will display on the image screen 4. Proceed with single or dual distance measurement. 5. The result will display in the results window. Notes: Use “Clear” to delete measurement and calculation result. To measure volume by triple distance method, the steps are as follows: 1. Press “Measure”. 2. Select “Volume” in the measurement menu. 3. Select “L&W&H” method in the volume measurement menu. The active caliper will display on the image screen Notes: Triple distance can complete in dual image display format. First measurement normally is done in midsagittal plane. 4. Proceed with single distance and dual distance measurement. 5. Volume result is displayed in the results window. 107 / 265 8000098 To measure volume by ellipse method, the steps are as follows: 1. Press “Measure”. 2. Select “Volume” in the measurement menu. 3. Select “Ellipse” method in the volume measurement menu. The active caliper will display on the image screen 4. Proceed with ellipse measurement 5. Volume result is displayed in the results window. To measure volume by ellipse and single distance method, the steps are as follows: 1. Press “Measure” 2. Select “Volume” in the measurement menu. 3. Select “Ellipse&H” method in the volume measurement menu. The active caliper will display on the image screen Note: Single ellipse and distance can be measured in dual display format. The first measurement normally proceeds in midsagittal plane. The second measurement proceeds in the axial plane normally. Press “Left “or “Right” to activate dual display format. 4. Proceed with single distance and ellipse measurement. 5. Volume result is displayed in the results window. Notes: To change parameters during volume measurement, the steps are as follows before restarting measurement. 1. Check every item’s measurement result in the results window. 2. If data is not accurate or blank, select editing of relevant measurement or relevant menu in the bottom, then measure and calculate again. Reminders: l Result is most accurate in midsagittal plane and axial plane measurement. l To display midsagittal plane and axial plane simultaneously, use dual display format. Angle Measurement The steps are as follows: 1. Press “Measure”. 2. Select “Angle” in the measurement menu. The active caliper will display on the image screen 3. Use the trackball to move the caliper. 4. Press “Enter” to fix the first caliper and the second caliper will display. 5. Use the trackball to move the second caliper to desired position. 6. Press “Enter” to fix the second caliper and third caliper will display. 7. Use the trackball to move the third caliper to the desired position. 8. Press “Enter” to fix the fourth caliper. The result is displayed in results 108 / 265 8000098 window. Stenosis Diameter stenosis can be calculated by diameter or area approaches. Diameter Note: After using diameter approach to calculate stenosis, do not measure distance in vertical angle. It can result in inaccurate estimation of stenosis. It is better to measure vessel diameter in the cross-‐sectional perspective. The steps are to calculate stenosis by diameter approach as follows: 1. Press “Measure”. 2. Select “Stenosis” in the measurement menu. 3. In the stenosis measurement menu, after the “Diam” approach is selected, an active tracing caliper will display on the image screen 4. Measure the inter-‐vascular distance. The system will display another caliper for second distance measurement. 5. Measure the distance of exterior vessels. 6. The results window will display each measured distance and stenosis percentage. Refer to the distance measurement to know how to measure distance. Area The steps are to calculate stenosis by area approach as follows: 1. Press “Measure”. 2. Select “Stenosis” in measurement menu. 3. In “Stenosis” measurement menu, after “Area” approach is selected, an active tracing caliper will display on the image screen Notes: Different area measurement approaches can be selected (such as length & width, ellipse, polygon, spline, and tracing method) 4. Measure the area of inter vascular. The system will display another active caliper for second area measurement. 5. Measure the area of the exterior vessel. 6. Results window displays two area results and stenosis percentage. Refer to the area measurement to know how to measure area. A and B rate In B mode, A and B ratio can be calculated by diameter or area measurement. Diameter The steps are to calculate A and B ratio by diameter measurement as follows: 1. Press “Measure”. 109 / 265 8000098 2. Select “A/B ratio” in the measurement menu. 3. In the “A/B ratio” measurement menu, select the “Diam” approach and an active tracing caliper will display on the image screen 4. Measure the first diameter distance. The system displays another caliper for the second distance measurement. 5. Proceed with the second distance measurement. 6. The system will display two distance measurement results, A and B ratio. First diameter is A and second diameter is B. Refer to the distance measurement for details on the distance measurement approach. Area The steps are to calculate A and B ratio by area measurement as follows: 1. Press “Measure”. 2. Select “A/B ratio” in the measurement menu. 3. In the “A/B ratio” measurement menu, select the “Area” approach and an active caliper will display on the image screen Note: Here, different area measurement methods (length & width, ellipse, polygon, spline, and tracing method) can be selected. 4. Proceed with area A measurement. The system will display another active caliper for second area measurement. 5. Proceed with area B measurement. 6. The system will display two area measurement results and the A/B ratio in result window. Refer to the area measurement section for details on the area measurement approach. 10.1.5.2 M mode measurement There are 7 generic measurements in “M” mode: l Depth l Distance l Time l Speed l Heart rate l Stenosis l A and B ratio - Diameter ratio - Time ratio - Speed ratio Note: 110 / 265 8000098 There are the following assumptions before proceeding with measurement: 1. The image screen is displaying anatomy to be measured. 2. System is in M mode. (If not, enter M mode). 3. The system is in “Frozen" state. (If not, press “Freeze”). Anatomic depth measurement M mode anatomic depth measurement is the same as B mode. It measures the depth between the measured point and the top of image, the steps are as follows: 1. Press “Measure” once: A vertical and horizontal dotted line and an active tracing caliper will display on the image. 2. Use the trackball to position the depth to be measured. 3. Use the “Enter” to finalize the position. 4. The depth result will be displayed in the results window. Distance measurement The same as “B” mode in distance measurement. It measures the distance between two calipers. The steps are as follows: 1. Press “Measure”. 2. Select “Distance” in the measurement menu. A vertical and horizontal dotted line and an active tracing caliper will display on the image screen. 3. Use the trackball to move the caliper in measurement start point. 4. Press “Enter” to finalize the start point. The system will display the second active caliper. 5. Use the trackball to position the second measurement point. 6. Press “Enter” to complete measurement. 7. The distance result will be displayed in the results window. Time interval measurement M mode time interval measurement is to measure horizontal interval between two calipers. The steps are as follows: 1. Press “Measure”. 2. Select “Time” in the measurement menu. A vertical and horizontal dotted line and an active caliper will display on the image screen 3. Use the trackball to move caliper in the measurement start point. 4. Press “Enter” to finalize start point. The system will display a second active caliper. 5. Use trackball to position the second measurement point. 6. Press “Enter” to complete measurement. The time interval result will be displayed in the results window. Speed measurement In “M” mode, use the slope between two points to gain the speed of the two points. The steps are as follows: 111 / 265 8000098 1. Press “Measure”. 2. Select “Slope” in the measurement menu. A vertical and horizontal dotted line and an active caliper will display on the image screen 3. Use the trackball to move the caliper in measurement start point. 4. Press “Enter” to finalize the start point. The system will display a second active caliper. 5. Use the trackball to position the second measurement point. 6. Press “Enter” to complete measurement. The system will display the speed between the two points. Heart Rate measurement Heart rate can be calculated in “M” mode. The steps are as follows: 1. Press “Measure” in the desired image. 2. Select “HR” in the measurement menu. A vertical and horizontal dotted line and an active caliper will display on the image screen 3. Position one identifiable point in one heart cycle by moving the trackball. 4. Press “Enter” to fix the first point. The system will display the second caliper. 5. Move the trackball to the same position as the first one in the second cycle. Note: - The number of measured cycles can be selected in the HR menu, from 1 to 5. - The number of required measurement cycles is displayed in the information bar at the bottom of the screen. 6. Press “Enter” to complete measurement and transfer the calculation into the worksheet. The system will display heart rate in the results window. Stenosis measurement The stenosis measurement in “M” mode is the same as diameter measurement method in “B” mode. It measures the percentage between two distances. The steps are as follows: 1. Press “Measure”. 2. Select “Stenosis” in the measurement menu. A vertical and horizontal dotted line and an active caliper will display on the image screen 3. Measure the distance in the inter-‐vessel area. The system will display another active caliper. 4. Proceed with the distance in the exterior vessel area. 5. The system will display each distance and stenosis percentage in the results window. Refer to the distance measurement for details. A and B ratio In “M” mode, A and B ratio can be measured through diameter, time and speed measurement. 112 / 265 8000098 Diameter Calculate A and B ratio through diameter approach, the steps are as follows: 1. Press “Measure”. 2. Select “A/B ratio” in the measurement menu. 3. Select “Diam” measurement approach in the A/B ratio menu. A vertical and horizontal dotted line and an active caliper will display on the image screen 4. Proceed with the first distance measurement. The system will display another vertical and horizontal dotted line caliper for second measurement. 5. Proceed with the second distance measurement 6. The system will display each distance, and the A/B ratio. Note: The first distance is A and the second distance is B. Refer to the distance measurement for details. Time Calculate A and B ratio through time, the steps are as follows: 1. Press “Measure”. 2. Select “A/B ratio” in the measurement menu. 3. Select “Time” measurement approach in A/B ratio menu. A vertical and horizontal dotted line and an active caliper will display on the image screen 4. Move the trackball to position the caliper in point A. 5. Press “Enter” to fix the measurement point. The system will display the second caliper. 6. Move the trackball to position the point B. 7. Press “Enter” to complete measurement. The system will display two measured time results, A and B ratio. Speed The steps are as follows: 1. Press “Measure”. 2. Select “A/B ratio” in the measurement menu. 3. Select “Velocity” measurement approach in A/B ratio menu. A vertical and horizontal dotted line and an active caliper will display on the image screen 4. Move the trackball to position the caliper in A point. 5. Press “Enter” to fix measurement point. The system will display the second caliper. 6. Move the trackball to position point B. 7. Press “Enter” to complete measurement. The system will display two measured time results, A and B ratio. 113 / 265 8000098 10.1.5.3 PW mode measurement There are 19 types of measurement in “PW” mode: - Speed (include PV (Peak Velocity)) - Time (include AT (Accelerate Time)) - Acceleration - PS (Peak Speed in systole period) - ED (The speed in the end of diastole period) - MD (Minimum speed in diastole period) - TAMAX (maximum speed in time average) - TAMEAN (mean speed in time average) - TAMIN (minimum speed in time average) - PI (Pulsatility Index) - RI (Resistance Index) - PS and ED ratio - ED and PS ratio - A and B ratio (A/B ratio) n Speed ratio n Time ratio n Acceleration ratio - FLOWVOL (Flow Volume) - MaxPG ( maximum pressure gradient) - MeanPG (Mean pressure gradient) - SV ( Stroke Volume) n Each volume diameter cardiac n Time mean speed in each stroke volume n Cardiac output - Heart rate Note: To carry out this operation: 1. Scan vessel to be measured in B or B plus CF mode. 2. Turn to “PW” image. 3. Press “Freeze” key. Speed, Time Interval and Acceleration Measurement Speed (cm/s or m/s) In PW mode, the steps of proceeds with speed measurement are as follows: 1. Press “Measure”. 2. Select “Velocity” in the measurement menu. A vertical and horizontal dotted line and a caliper will display on the image screen 3. Move the trackball to position the speed measurement point 4. Once position is fixed, press “Enter”. 114 / 265 8000098 5. The result will be displayed in the results window. Time interval The steps are as follows: 1. Press “Measure”. 2. Select “Time” in the measurement menu. A vertical and horizontal dotted line as and an active tracing caliper will display on the image screen 3. Move trackball to position the first measurement point. 4. After position is fixed, press “Enter”. The system will display the second caliper. 5. Move the trackball to position the second measurement point. 6. Press “Enter” to complete the measurement. The system will display time interval between two calipers in the results window. Acceleration (m/s2) The steps are as follows: 1. Press “Measure”. 2. Select “Acceleration” in the measurement menu. A vertical and horizontal dotted line and an active caliper will display on the image screen 3. Move the trackball to position the first measurement point. 4. Once position is fixed, press “Enter”. The system will display the second caliper. 5. Move the trackball to position the second measurement point. 6. Press “Enter” to complete the measurement. The system will display the acceleration between two points and the time interval result in the results window. PS (Peak speed in systole period), ED (The speed in the end of diastole period) and MD (Minimum speed in diastole period) measurement The steps are as follows: 1. Press “Measure”. 2. Select PS, ED or MD in the measurement menu. A vertical and horizontal dotted line as an active tracing caliper will display on the image screen. 3. Move the trackball to position the measurement point 4. Press “Enter” to complete measurement. The system will display peak speed in systole period, the speed in the end of diastole period and the minimum speed in diastole period. TAMAX, TAMEAN and TAMIN measurement The steps are as follows: 1. Press “Measure”. 2. Select TAMAX, TAMEAN or TAMIN in the measurement menu. A live tracing caliper will display on the image screen. 115 / 265 8000098 3. Move the trackball to position the start measurement point. 4. Press “Enter” to fix the start point. 5. Move the trackball to trace spectrum in maximum, mean or minimum. 6. Press “Enter” to complete the measurement. The result will be displayed in the results window. Note: To remove trace line during tracing, press the “Clear” or “Freeze” key. PI (Pulsatility Index) measurement The steps are as follows: 1. Press “Measure”. 2. Select “PI” in the measurement menu. A vertical and horizontal dotted line as an active tracing caliper will display on the image screen. 3. Move the trackball to position the start measurement point. 4. Press “Enter” key to fix the start point. The second caliper will display in the system. 5. Move the trackball to trace the whole wave. 6. Press “Enter” to complete the measurement. The system will display results of peak speed in systole period, minimum speed of diastole period, the speed of the end of diastole period, TAMAX and PI in results window. Resistance index (RI) measurement In “PW” mode, PI can be calculated by ED or MD measurement. By ED measurement The steps are as follows: 1. Press “Measure”. 2. Select “RI” in the measurement menu. 3. In the “RI” setting menu, select “ED” method. A vertical and horizontal dotted line as an active tracing caliper will display on the image screen 4. Move the trackball to position the start measurement point in peak speed of systole period. 5. Press “Enter” to fix the start point. Second caliper will display in the system. 6. Move the trackball to position the second caliper in the speed of the end of diastole period. 7. Press “Enter” to complete the measurement. The system will display PS, ED and RI in the results window. Through MD measurement The steps are as follows: 1. Press “Measure”. 2. Select “RI” in the measurement menu. 3. In the “RI” setting menu, select “MD” method. A vertical and horizontal dotted line as an active tracing caliper will display on the image screen. 4. Move the trackball to position the start measurement point in peak speed of 116 / 265 8000098 systole period. 5. Press “Enter” to fix the start point. Second caliper will display in the system. 6. Move trackball to position the second caliper in the minimum diastole speed. 7. Press “Enter” to complete the measurement. The system will display PS, ED and RI in the results window. PS and ED or ED and PS ratio To calculate PS and ED or ED and PS ratio, the steps are as follows: 1. Press “Measure”. 2. Select “PS/ED” or “ED/PS” in the measurement menu. A vertical and horizontal dotted line as an active tracing caliper will display on the image screen. 3. Move the trackball to position the caliper in systole peak speed (PS) or diastole end speed (ED). 4. Press “Enter” to fix point. Second caliper will display. 5. Move the trackball to position the second caliper in diastole end speed (ED) or systole peak speed (PS). 6. Press “Enter” to complete the measurement. The system will display PS, ED and PS/ED or ED/PS ratio in results window. A and B ratio In PW mode, A and B ratio can be measured through speed, time or acceleration. Speed Calculate A and B ratio through speed, the steps are as follows: 1. Press “Measure”. 2. Select “A/B ratio” in measurement menu. 3. In the “A/B ratio” setting menu, select “Velocity” method. A vertical and horizontal dotted line as an active tracing caliper will display on the image screen. 4. Move trackball to position the caliper in speed A. 5. Press “Enter” to fix the measurement point. Second caliper will display in the system. 6. Move the trackball to position the second caliper in B speed. 7. Press “Enter” to complete the measurement. The system will display two speed results and A/B ratio in the results window. Time Calculate A and B ratio through time, the steps are as follows: 1. Press “Measure”. 2. Select “A/B ratio” in the measurement menu. 3. In the “A/B ratio” setting menu, select “Time” method. A vertical and horizontal dotted line as an active tracing caliper will display on the image screen. 117 / 265 8000098 4. Move the caliper to position A. 5. Press “Enter” to fix the measurement point. Second caliper will display in the system. 6. Move the caliper to position B. 7. Press “Enter” to complete the measurement. The system will display two time results and A/B ratio in the results window. Acceleration Calculate A and B ratio through acceleration, the steps are as follows 1. Press “Measure”. 2. Select “A/B ratio" in the measurement menu. 3. In the “A/B ratio” setting menu, select “Acceleration" method. A vertical and horizontal dotted line as an active tracing caliper will display on the image screen. 4. Proceed with the position A acceleration measurement: l Move the trackball to position the caliper in start point. l Press “Enter” to fix the start point. The second caliper will display. l Move the trackball to position the caliper in end point. l Press “Enter” to complete the measurement. The system will display acceleration in the results window and second acceleration caliper will display. 5. Proceed with B acceleration measurement using the same as above steps. The system will display two acceleration results and A/B ratio in the results window. FLOW VOL (Flow volume) The steps are as follows: 1. Press “Measure”. 2. In the normal Doppler measurement menu, select “FLOWVOL”. Max PG (maximum pressure gradient) The steps are as follows: 1. Press “Measure”. 2. In the normal Doppler measurement menu, select “Max PG”. Mean PG (mean pressure gradient) The steps are as follows: 1. Press “Measure”. 2. In the normal Doppler measurement menu, select “Mean PG”. SV Diam( Stroke volume diameter) The steps are as follows: 1. Press “Measure”. 2. In the normal Doppler measurement menu, select “SV”. 3. Select “SV Diam” in the SV menu. 118 / 265 8000098 SV TAMEAN (stroke volume TAMEAN) The steps are as follows: 1. Press “Measure”. 2. In the normal Doppler measurement menu, select “SV”. 3. Select “SV TAMEAN” in the SV menu. CO (Cardiac output) The steps are as follows: 1. In the normal Doppler measurement menu, select “SV”. 2. Proceed SV measurement first. 3. Select “CO HR” to measure the heart rate. Heart rate measurement In PW mode, heart rate can be calculated, the steps are as follows 1. Press “Measure” after gain image. 2. Select “HR” in the measurement menu. A vertical and horizontal dotted line and an active tracing caliper will display on the image. 3. Move the trackball to position an identifiable point in the first heart cycle. 4. Press “Enter” to fix the first caliper. The system will display the second caliper. 5. Move the second caliper to be the same position as the first one in the second heart cycle. Note: - Set required heart cycles for measurement in the “HR” menu. Heart cycle range from 1 to 5. - In the bottom information bar of the image screen, the system will display the number of heart rate which needs to be measured. 6. Press “Enter” to complete measurement and transfer to worksheet in the meantime. The system will display “HR” in the result window. 10.1.5.4 3D/4D mode measurement After 3D data acquisition, press Measure key to enter measurement, but only support 3 measurements: Distance, Perimeter and Area. In 4D/MCut mode, after select “Start 4D/MCut”, press Measure key, stop scanning and enter measurement, only support 3 measurements: Distance, Perimeter and Area. 10.1.6 Measurement setting in each mode 10.1.6.1 B mode measurement setting In B mode, there are 8 generic and relevant specific measurements. The relevant 119 / 265 8000098 measurement settings can be made in the setting menu. Select “Config” on the touch panel to enter setting menu. l Config Folders: Display all folders, different applications or modes have different folders. Select one or more folders, select “Save&Exit”, the selected folders will added to measurement menu. Unselect one or more folders, they will be removed from measurement menu. There is only one folder in some applications, it will be “General”. 120 / 265 8000098 l Config Items: Select one item, if it has more than one method, the system will enter change method page, the operator can select different methods or target items here. Selected methods will be used after back to measurement menu, and selected target items will display in the result window. Select and hold on one item, move it to the first position, then this item is set to be the default one. 121 / 265 8000098 l Add/Remove: Select the desired measurement items, select “Save” or “Save&Exit”, the system returns to the measurement menu and all selected items are displayed. The unselected items will be removed. Note: “Distance” is default setting in “B” mode. Different examination application has factory default setting in “B” mode measurement. The operator can enter the setting menu to change. Perimeter setting in B mode The steps are as follows: 1. Select “Perimeter” button in configuration page. The system will display all 122 / 265 8000098 approaches of perimeter measurement: length and width, ellipse, polygon, spline and trace. 2. Select the required measurement item. After settings are finished, select “Save” on the touch panel. Note: Different applications have factory default settings in “B” mode measurement. The operator can enter the setting menu to change. Area setting in B mode The steps are as follows: 1. Select “Area” button in configuration page. The system will display all approaches of area measurement: length and width, ellipse, polygon, spline and trace. 2. Select the required measurement item. After settings are finished, select “Save” on the touch panel. Volume setting in B mode The steps are as follows: 1. Select “Volume” button in configuration page. The system will display all approaches of area measurement: single line, double line, triple line, single ellipse, single ellipse and single line. 2. Select the required measurement item. After settings are finished, select “Save” on the touch panel. Stenosis setting in B mode The steps are as follows: 1. Select “Stenosis” button in configuration page. The system will display all approaches of area measurement: diameter and area. 2. Select the required measurement item. After settings are finished, select “Save” on the touch panel. A and B ratio setting in B mode The steps are as follows: 1. Select “A/B ratio” button in configuration page. The system will display all approaches of area measurement: diameter and area approaches. 2. Select the required measurement item. After settings are finished, select “Save” on the touch panel. 10.1.6.2 M mode measurement setting In “M” mode there are 7 types of generic measurements and specific measurements relevant with application. All measurements can be set in the setting menu. 123 / 265 8000098 Select “Config” on the touch panel to enter setting menu. Please refer to 11.1.6.1, the configuration operation is the same as it in B mode. A and B ratio measurement setting The steps are as follows: 1. Select “A/B ratio” button in configuration page. The system will display all measurement methods: Diameter, time and acceleration methods. 2. Select the desired measurement method on the touch panel. After settings are finished, select “Save” on the touch panel. 10.1.6.3 PW mode measurement setting General measurement folder setting in PW mode In the general measurement folder, there are 19 types of generic measurements and specific measurements with relevant applications. The system will display the measurement options as shown below: 124 / 265 8000098 Please refer to 11.1.6.1, the configuration operation is the same as it in B mode. Resistance index setting in PW mode The steps are as follows: 1. Select “RI” button in configuration page. The system displays all measurement methods for “RI” measurement: ED (diastole end speed) and MD (minimum systole speed). 2. Select the desired measurement method on the touch panel. After settings are finished, select “Save” on the touch panel. 125 / 265 8000098 A and B ratio measurement setting in PW mode The steps are as follows: 1. Select “A/B ratio” button in configuration page. The system will display all measurement methods for A/B ratio measurement: speed, time and acceleration methods. 2. Select the desired measurement method on the touch panel. After settings are finished, select “Save” on the touch panel. Flow volume measurement setting in PW mode The steps are as follows: 1. Select “FLOW VOL” button in configuration page. The system will display all measurement methods for FLOW VOL measurement: TAMEAN and TAMAX methods. 2. Select the desired measurement method on the touch panel. After settings are finished, select “Save” on the touch panel. Note: If TAMAX measurement method is selected, the final calculation result is considered one compensation factor between 0.5 and 1.0. Other measurement setting folder in PW mode Other measurement setting folders use the same approach as the “General” measurement setting. Refer to the “General” measurement folder setting. 126 / 265 8000098 10.2 Abdominal measurements Brief introduction: Based on different applications, abdominal measurement provides several different types of measurement options: l General abdomen l Difficult abdomen l Kidney l Renal vessel l Abdominal trauma 10.2.1 B mode measurements The measurement menu in the “Abdominal” application includes generic measurement and specific measurement, such as aorta diameter, renal length, and renal volume. In “B” mode, generic measurement in abdominal application covers the following criteria: l Depth l Distance l Volume l Angle l Stenosis l A and B ratio Refer to the “General” measurement for more detail on those measurements. In “B” mode, specific measurements in the abdominal application include the following items: Aorta diameter Aorta diameter can be measured by single distance measurement. The steps are as follows: 1. Press “Measure”. 2. Select “Aorta Diameter”, then a caliper will display on the image screen 3. Move the trackball to position the caliper in the start point. 4. Press “Enter” to fix the start point. The second active caliper will display. 5. Move the trackball to position the second caliper in the end point. 6. Press “Enter” to complete the measurement. The system will display the aorta diameter result in the results window. Renal Length 127 / 265 8000098 Renal length can be measured by single distance measurement. The steps are as follows: 1. Press “Measure”. 2. Select certain direction of Renal Length (left or right), then a caliper will display on the image screen 3. Move the trackball to position the caliper in start point. 4. Press “Enter” to fix the start point. The second active caliper will display. 5. Move the trackball to position the second caliper in the end point. 6. Press “Enter” to complete the measurement. The system will display the renal length result in the results window. Renal Volume Renal volume is normally measured by the three-‐distance method. The steps are as follows: 1. Press “Measure”. 2. Select a certain direction of Renal Volume (left or right), and then a caliper will display on the image screen Note: Three distances can be measured in the dual image display format. The first measurement can be processed in the midsagittal plane, and the second measurement can be processed in the axial plane. To use dual image display format, press “Left” or “Right”. 3. Proceed with the single and dual distance measurement. 4. The system will display three distances and the renal volume result in the results window. Spleen volume Spleen volume is normally measured by the three distance method. The steps are as follows: 1. Press “Measure”. 2. Three distances can be measured in the dual image display format. The first measurement can be processed in the midsagittal plane, and the second measurement can be processed in the axial plane. To use the dual image display format, press “Left” or “Right”. 3. Proceed with the single and dual distance measurement. 4. The system will display three distances and the spleen volume result in the results window. Bladder volume Spleen volume is normally measured by the three distance method. The steps are as follows: 1. Press “Measure” key. 2. Select “Bladder Volume”, and then a caliper will display on the image screen Note: Three distances can be measured in the dual image display format. The first measurement can be processed in the midsagittal plane, and the second 128 / 265 8000098 measurement can be processed in the axial plane. To use the dual image display format, press “Left” or “Right”. 3. Proceed with the single and dual distance measurement. 4. The system will display three distances and the bladder volume result in the results window. Prostate volume Prostate volume is normally measured by the three distance method. The steps are as follows: 1. Press “Measure”. 2. Select Prostate, and then a caliper will display on the image screen. Note: Three distances can be measured in dual image display format. The first measurement can be processed in the midsagittal plane, and the second measurement can be the processed in axial plane. To use the dual image display format, press “Left” or “Right”. 3. Proceed with the single and dual distance measurement. 4. The system will display three distances and the prostate volume result in the results window. The number of measurement items in “B” mode can be added to or reduced based on each operator’s measurement requirements. Refer to the measurement setting for how to set measurements in detail. 10.2.2 M mode measurements In “M” mode, the measurement menu includes these measurement items: l Stenosis l A and B ratio l Heart Rate Refer to the Generic measurement in detail for those measurements. Measurement items in the measurement setting menu can be added to or reduced based the operator’s requirements. Refer to “M” mode measurement setting information in detail. 10.2.3 PW mode measurements In “PW” mode, the measurement menu includes these measurement folders: l Generic measurement folder l Aorta measurement folder 129 / 265 8000098 l l l l l Common hepatic artery measurement folder Renal artery measurement folder Renal vein measurement folder Postcava measurement folder Superior mesentery artery measurement folder Increase or reduce measurement items in the measurement setting menu based on their own requirement. Refer to “PW” mode measurement setting information in detail. Generic measurement folder In “PW” mode, the generic measurement folder includes items as follows: l Velocity l PS (systole peak speed) l ED (diastole end speed) l MD (Minimum speed in diastole period) l TAMAX (maximum speed in time average) l PI (Pulsatility index) l RI (resistance index) l PS/ED l ED/PS l A/B ratio n Velocity n Time n Acceleration l HR Refer to the Generic measurement in detail for those measurements. Increase or reduce measurement items in the measurement setting menu based on their own requirement. Refer to “M” mode measurement setting information in detail. Measurement folder for other anatomic structure In “PW” mode, other measurement folders based on an atomic structure include measurement items as follows: l Velocity l PS (systole peak speed) l ED (Diastole end speed) l PI (Pulsatility index) l RI (Resistance index) Increase or reduce measurement items in the measurement setting menu based on requirements. Refer to “PW” mode measurement setting information in detail. 130 / 265 8000098 10.3 Small organ measurements Brief introduction Based on different applications, small organ measurement provides several different measurement options: l Thyroid l Breast l Testis l Musculoskeletal l Upper and lower extremity joint l Nerve block 10.3.1 B mode measurements The small organ application measurement menu includes generic measurement and specific measurement, such as length of thyroid isthmus, thyroid, volume, testis volume, etc. In “B” mode, generic measurement in small part application includes measurement items as follows: l Distance l Volume l Stenosis Refer to the generic measurement for more details. In “B” mode, the specific measurement in small part application includes measurement items as follows: Length of thyroid isthmus Length of thyroid isthmus can be measured by a single distance. The steps are as follows: 1. Press “Measure”. 2. Select “AP” (Length of thyroid isthmus), and an active tracing caliper will display on the image screen. 3. Move the trackball to position the caliper at the start point. 4. Press “Enter” to fix the start point. The second caliper will display on the image screen. 5. Move the trackball to position the end point. If it has a relevant system measurement preset, a dotted line connects the two measurement points. 6. Press “Enter” to complete the measurement. The system will display length of thyroid isthmus in the results window. 131 / 265 8000098 Thyroid volume Thyroid volume is normally measured by the three distances method. The steps are as follows 1. Press “Measure”. 2. Select proper direction (left or right) Thyroid Volume. An active tracing caliper will display on the image screen Note: The three distances can be measured in the dual image display format. First measurement can be processed in the midsagittal plane, and the second measurement can be processed in axial plane. To use dual image display format, press “Left” or “Right” . 3. Proceed with the single and dual distance measurement. 4. The system will display distance and thyroid volume in the results window. Testicle Volume Testicle volume is normally measured by the three distances method. The steps are as follows 1. Press “Measure”. 2. Select proper direction (left or right) Testicle Volume. An active tracing caliper will display on the image screen Note: The three distances can be measured in dual image display format. First measurement can proceed in the midsagittal plane, and the second measurement can proceed in axial plane. To use dual image display format, press “Left” or “Right” 3. Proceed with the single and dual distance measurement. 4. The system will display distance and thyroid volume in the results window. Increase or reduce measurement items in the measurement setting menu based on their own requirements. Refer to “B” mode measurement setting information in detail. 10.3.2 M mode measurements In “M” mode, the measurement menu includes these measurement items: l Depth l Distance Refer to the Generic measurement in detail for those measurements. Increase or reduce measurement items in the measurement setting menu based on their own requirements. Refer to “M” mode measurement setting information in detail. 132 / 265 8000098 10.3.3 PW mode measurements In PW mode, measurements include these measurement folders: l Generic measurement folder l Vessel measurement folder Increase or reduce measurement items in the measurement setting menu based on their own requirement. Refer to “PW” mode measurement setting information in detail. Generic measurement folder In “PW” mode, the general measurement folder includes these measurement items: l Velocity l PS (systole peak speed) l ED (diastole end speed) l MD (Minimum speed in diastole period) l TAMAX (maximum speed in time average) l PI (Pulsatility index) l RI (resistance index) l PS/ED l ED/PS l A/B ratio n Velocity n Time n Acceleration l FLOWVOL (flow volume) l Max PG (Maximum pressure gradient) l Mean PG (Mean pressure gradient) l SV-‐D (Stroke Volume) n SV Diam (stroke volume diameter) n SVTAMAX (stroke volume maximum speed in time average) n CO (caridac output) Refer to the Generic measurement in detail for “PW” measurements. Vessel measurement folder In “PW” mode, the vessel measurement folder normally includes these items: l Velocity l PS (systole peak speed) l ED (diastole end speed) 133 / 265 8000098 l l l l l l MD (Minimum speed in diastole period) TAMAX (maximum speed in time average) PI (Pulsatility index) RI (resistance index) PS/ED ED/PS Increase or reduce measurement items in the measurement setting menu based on their own requirements. Refer to the “PW” mode measurement setting information in detail. 134 / 265 8000098 10.4 Vessel measurements Brief introduction Based on different applications, vessel measurement provides several different measurement items: l Carotid artery l Upper artery l Upper vein l Lower artery l Lower vein l Vessel puncture l Trans-‐cranial Doppler 10.4.1 B mode measurements In the vascular application measurement menu includes generic measurement and specific measurements, such as vessel wall intima-‐media thickness etc. In “B” mode, generic measurements in the vessel application include measurements as follows: l Depth l Distance l Stenosis l A and B ratio In “B” mode, specific measurements in the vessel application include measurement items as follows: IMT (intima-‐media thickness) measurement Intima-‐media average thickness can be measured to be the index of arteriosclerosis. Note: Due to the character of the ultrasound image principle, the rear wall IMT measurement is more accurate than antetheca. Manual IMT measurement The steps are as follows 1. Scan the carotid artery to gain relevant good image quality and press “Freeze”. 2. Press “Zoom” once, to amplify the image in order to identify vessel intima, 135 / 265 8000098 media, and extima. 3. Press “Measure”. 4. Select the proper direction (left or right and rear wall or antetheca) “CCAIMT”. 5. Select “CCAIMT” (carotid artery intima-‐media thickness) setting menu. 6. Select “Manual” measurement approach. An active tracing caliper will display on the image screen 7. Use the trackball to move caliper and trace extima inter-‐side of carotid artery. Press “Enter” to fix the first caliper and the system display another operating caliper. 8. Use the trackball to move the caliper and trace intima inter-‐side of carotid artery. 9. Press “Enter” to complete the measurement. The system will automatically calculate vessel wall intima-‐media average thickness for tracing part. Auto IMT measurement Auto IMT measurement means to measure the intima thickness of far field and near field vessel wall. Intima thickness of near field means the distance between extima and intima. Intima thickness of far field means the distance between extima and intima in far field. The steps are as follows: 1. Scan carotid artery to gain relevant good image quality and press “Freeze”. 2. Press “Zoom” once, to amplify the image in order to identify the vessel intima, media, and extima. 3. Press “Measure”. 4. Select the proper direction (left or right and rear wall or antetheca) CCAIMT. 5. Select “CCAIMT” (carotid artery intima-‐media thickness) setting menu. 6. Select “Auto” measurement approach. An active tracing caliper displays on the image screen 7. Move the trackball to draw one line inside the vessel which is parallel with the vessel wall in order to set the measurement length. Note: To erase painted line and activate the active caliper, press “Clear”. 8. Press “Enter”. Another caliper will display on the image screen 9. Move the trackball to draw one line outside the vessel which is parallel with the vessel wall in order to set the measurement length. Note: To erase the painted line and activate an active tracing caliper, press “Clear”. 10. Press “Enter” to complete the measurement. The system will display the measurement result about intima-‐media thickness as follows: l Average l Max l Min l Standard Deviation l Successful Points 136 / 265 8000098 P value Vas Plaque (Vascular sclerosis atheromatous plaque grade) The steps are as follows: 1. Scan carotid artery to gain a good image quality and then press “Freeze”. 2. Press “Zoom” once, to amplify the image in order to identify vessel intima, media, and extima. 3. Press “Measure”. 4. Select “Vas Plaque”. 5. Input and select Vas Plaque measurement parameter: l Change the assigned area number and vascular wall limited thickness. Factory default setting is 3 and limited thickness is 1.0 cm l Select displayed measurement result parameter in configuration page: n Maximum value in each area n Average value in each area n Variance yield in each area n Maximum value in all measurements n Average value in all measurements n Variance yield in all measurements 6. After complete the setting, press “Back” to return to the measurement menu. The system will display a horizontal line and several vertical lines. The number of vertical lines is determined by assigned areas. The interval line divides the whole image area equally. l 7. Use the trackball and “Rotation/Steer” key to adjust the horizontal line in order to be parallel with vascular wall. Press “Enter” to complete the adjustment. The system will display another caliper. 137 / 265 8000098 8. Use the trackball to move the caliper and press “Enter” in order to measure the thickness in any place as required. 9. The system displays the following measurement and calculation results: l All measurement results l Display all parameters which are set in setting menu n Maximum value in each area n Average value in each area n Variance yield in each area n Maximum value in all measurements n Average value in all measurements n Variance yield in all measurements The number of all measurement points which exceed vascular wall limitation and the number of all areas which exceed vascular wall limitation. 138 / 265 8000098 10.4.2 M mode measurements In “M” mode, measurement menu includes measurement items as follows: l Depth l Distance l Stenosis l A and B ratio l Heart rate Refer to the Generic measurement in detail for those measurements. Increase or reduce measurement items in the measurement setting menu based on their own requirements. Refer to “M” mode measurement setting information in detail. 10.4.3 PW mode measurements In “PW” mode, measurement menu include measurement folders as follows: l Generic measurement folder l Arteria carotid communis measurement folder l Internal carotid measurement folder l External carotid measurement folder l VA measurement folder l BULB measurement folder l BIF measurement folder l STA measurement folder l InnomA measurement folder l Middle cerebral artery measurement folder l Posterior cerebral artery measurement folder Increase or reduce measurement items in the measurement setting menu based on their own requirements. Refer to “PW” mode measurement setting information in detail. Generic measurement folder In “PW” mode, the general measurement folder includes items as follows: l Velocity l Time l Acceleration l PS (systole peak speed) l ED (diastole end speed) l MD (Minimum speed in diastole period) l TAMAX (maximum speed in time average) 139 / 265 8000098 l l l l l l n n n l l TAMEAN (mean speed in time average) PI (Pulsatility index) RI (resistance index) PS/ED ED/PS A/B ratio Velocity Time Acceleration FLOWVOL (flow volume) HR Other vascular measurement folder: In “PW” mode, the vascular measurement folder includes measurement items as follows: l Velocity l Time l Acceleration l PS (systole peak speed) l ED (diastole end speed) l MD (Minimum speed in diastole period) l TAMAX (maximum speed in time average) l TAMEAN (mean speed in time average) l PI (Pulsatility index) l RI (resistance index) l PS/ED l ED/PS l A/B ratio n Velocity n Time n Acceleration l FLOWVOL (flow volume) l HR Increase or reduce measurement items in the measurement setting menu based on their own requirement. Refer to the “PW” mode measurement setting information in detail. Vessel automatically tracing and measurement The vessel auto tracing and measurement function can automatically detect and identify the heart cycles. For artery flow, it can automatically identify the “PS” (peak speed in systole period), “MD” (minimum speed in diastole) and “ED” (end speed in diastole), and then automatically calculate the “PI” (pulsatility index) and “RI” (resistance index). For vein flow, it can automatically detect the peak 140 / 265 8000098 velocity (PV). Activate vessel auto tracing and measurement The system supports auto tracing and measurement during live scanning, freeze and cine loop. To activate auto tracing and measurement function, select the Live option in the “Auto Trace” menu of the touch panel in “PW” mode (automatically display auto tracing and measurement in real scanning image) or the “Frozen” option (automatically display auto tracing and measurement in frozen image). To stop vascular auto tracing and measurement, select “Off”. Auto tracing menu on the touch panel: Set vascular auto tracing and measurement parameter l Select vascular auto tracing method. l Select maximum or average speed continuous trace. l Select Max or Mean in “Trace Method” menu on the touch panel l Select tracing direction. l Tracing detection can be used in above baseline, below baseline or combination (above, below) peak velocity data. Select “Above”, “Below” or “Both” in the “Trace Direction” menu in order to set peak velocity data. Set vascular auto tracing and measurement result After selecting the Dynamic or Static option in the “Auto trace” menu in “PW” mode, the operator can set which measurement and calculation results will be displayed in the vascular auto tracing and measurement result window. The following parameters can be selected: PS, MW, TAMAX, TAMEAN, TAMIN, PI, RI, PS/ED, ED/PS, PV and HR. Note: PV is to detect peak velocity in vein flow. So it is mutually exclusive from other measurements. In other words, if PV is selected, other measurements will be isolated. The following steps are to execute auto tracing and measurement 1. Reboot system. 2. Proceed with scanning. 3. Activate the auto vascular tracing and measurement function (Dynamic or Static). The system will automatically execute tracing, measurement and calculation. 141 / 265 8000098 Note: Select in real time which measurement and calculation will be displayed in the auto vascular tracing and measurement result window through vascular auto tracing and measurement setting menu. Selectable parameters are PS, ED, MD, TAMAX, TAMEAN, TAMIN, PI, RI, PS/ED, ED/PS, PV and HR. PV is to detect peak velocity of vein flow. It is mutually exclusive of other measurements; that is, once PV is selected, other measurements are automatically isolated. 4. Press “Freeze”, all vascular measurement and calculation results will display in the results window. 142 / 265 8000098 10.5 Gynecology Measurements Introduction: Gynecology measurements provide several types of measurement items: l Uterus and Pelvis l Follicle 10.5.1 B Mode measurements For Gynecology measurements, it includes general measurement items and some typical measurement items, such as Uterus Volume (Uterus), Ovary Volume(OV), Follicle Volume and Endometriosis Thickness(En.). For general measurements of 2D mode, it mainly includes “Depth” and “Distance” measurement items. Refer to chapter “General Measurements” in detail. l Depth l Distance The typical measurement items of Gynecology application are as follows: UT(Uterus Volume) To calculate Uterus Volume, make three distance measurements. The steps are as follows: 1. Press “Measure”. 2. Select UT, and an active tracing caliper displays. 3. Perform a standard distance measurement. The system displays the distance value in the results window. 4. Repeat Step 3 to make the second and third distance measurement. Note: Make three distance measurements in the dual display format by pressing the “Left”/ “Right” on the control panel. 5. After the third distance measurement is completed, the system displays the uterus volume in the results window. OV(Ovary Volume) To calculate Ovary Volume, make three distance measurements as normal. The steps are as follows: 1. Press “Measure”. 2. Select OV(L) or OV(R), and an active tracing caliper displays. 3. Perform a standard distance measurement. The system displays the distance value in the results window. 4. Repeat Step 3 to make the second and third distance measurement. Note: Three distance measurements can be made in the dual display format by 143 / 265 8000098 pressing “Left”/ “Right” on the control panel. 5. After the third distance measurement is completed, the system displays the ovary volume in the results window. Follicle (Follicle Volume) To measure Follicle Volume, the steps are as follows: 1. Press “Measure”. 2. Select “Follicle (L)” or “Follicle(R)”. 3. Select the measurement method as shown below menu or use the default one and an active tracing caliper displays. 4. Perform a standard distance measurement. The system displays the distance value in the results window. 5. Repeat Step 3 to make the second and third distance measurement. Notes: Refer to chapter “General Measurements” for the single distance, dual distance and three distance measurement methods. As for “Mean” measurement method, three distance measurements are needed to calculate the follicle volume. Three distance measurements can be made in the dual display format by pressing “Left”/ “Right” on the control panel. 6. After the third distance measurement is completed, the system displays the follicle volume in the results window. En. (Endometriosis Thickness) To measure Endometriosis Thickness, the steps are as follows: 1. Press “Measure”. 2. Select “En.", and an active tracing caliper displays on the image screen 3. Perform a standard distance measurement. The system displays the endometriosis thickness in the results window. The measurement menu of Gynecology application can be configured by adding or removing the measurement items in “B” mode. Refer to “Measurement Menu Configuration” in the chapter “General Measurements” for how to configure of the measurement menu. 10.5.2 PW mode measurements In “PW” mode of Gynecology application, it includes measurement folders as follows: l General Measurement Folder l Ao (Aorta) Measurement Folder l Desc. Aorta Measurement Folder l Umbilical Measurement Folder l Placenta Measurement Folder l Uterus Measurement Folder 144 / 265 8000098 l l Follicle Measurement Folder MCA Measurement Folder Configure the measurement menu of Gynecology application by adding or removing the measurement folders in “PW” mode. Refer to the “Measurement Menu Configuration” in the chapter “General Measurements” for how to make the configuration of the measurement menu. General Measurement Folder In the General Measurement Folder, it includes measurement items as follows: l Velocity l PS l ED l MD l TAMAX l PI l RI l PS/ED l ED/PS l A/B Ratio n Velocity n Time n Acceleration l HR Other Measurement Folders In the other Measurement Folders, they include the measurement items as follows. It might have minor differences depending on the different factory settings. l Velocity l PS l ED l MD l TAMAX l PI l RI l PS/ED l ED/PS l A/B Ratio n Velocity n Time n Acceleration l HR 145 / 265 8000098 Configure the measurement menu of all measurement folders by adding or removing the measurement items in the measurement folders. Refer to the “Measurement Menu Configuration” in the chapter “General Measurements” for how to make the configuration of the measurement menu. 146 / 265 8000098 10.6 Urology Measurements Introduction Urology measurements provide several types of measurement items: l Bladder l Prostate l Renal l Kidney and ureter l Pelvic Floor dysfunction 10.6.1 B Mode measurements Urology measurements include general measurement items and some typical measurement items, such as Bladder Volume, Renal Length, Renal Volume and Prostate Volume. General measurements in 2D mode include measurement items as follows. Refer to the chapter “General Measurements” in detail. l Depth l Distance l Volume l Angle l Stenosis l A/B Ratio The typical measurement items of Urology application are as follows: Bladder Volume To calculate Bladder Volume, make three distance measurements. The steps are as follows: 1. Press “Measure”. 2. Select “Bladder”, and an active tracing caliper displays on the image screen 3. Perform a standard distance measurement. The system displays the distance value in the results window. 4. Repeat Step 3 to make the second and third distance measurement. Note: Three distance measurements can be made in the dual display format by pressing “Left”/ “Right” on the control panel. 5. After the third distance measurement is completed, the system displays the bladder volume in the results window. Renal Length 147 / 265 8000098 To measure Renal Length, the steps are as follows: 1. Press “Measure”. 2. Select “Renal Len.(L)” or “Renal Len.(R)”, and an active tracing caliper displays. 3. Perform a standard distance measurement. The system displays the renal length in the results window. Renal Volume To calculate Renal Volume, make three distance measurements. The steps are as follows: 1. Press “Measure”. 2. Select “Renal Vol.(L)” or “Renal Vol.(R)”, and an active tracing caliper displays. 3. Perform a standard distance measurement. The system displays the distance value in the results window. 4. Repeat Step 3 to make the second and third distance measurement. Note: Three distance measurements can be made in the dual display format by pressing “Left”/ “Right”. 5. After the third distance measurement is completed, the system displays the renal volume in the results window. Prostate Volume To calculate Prostate Volume, make three distance measurements. The steps are as follows: 1. Press “Measure”. 2. Select “Prostate Vol.”, and an active tracing caliper displays on the image screen 3. Perform a standard distance measurement. The system displays the distance value in the results window. 4. Repeat Step 3 to make the second and third distance measurement. Note: Three distance measurements can be made in the dual display format by pressing “Left” / “Right”. 5. After the third distance measurement is completed, the system displays the prostate volume in the results window. PSAD and PPSA Measurement “PSAD” and “PPSA” measurements can be made after Prostate Volume measurement. The definition of PSAD and PPSA is as follows. PSAD: Prostatic Specific Antigen (PSA) Density – defined as: PSAD = PSA/Volume PPSA: Predicted Prostate Specific Antigen – defined as: PPSA= Volume x PPSA Coefficient To measure PSAD and PPSA, the steps are as follows: 1. Press “Measure”. 2. Measure “Prostate Volume”. 3. Select “PSA” and “PPSA Coefficient”, edit the coefficients: 148 / 265 8000098 4. Enter the value of “PSA” and “PPSA Coefficient” in the above coefficient window. Note: The value of “PSA” and “PPSA Coefficient” can be entered at the urology patient screen also. 5. PSAD and PPSA are automatically calculated, and the system displays the value in the results window. Pelvic Floor Dysfunction Measurement BNR (Bladder Neck Rest) Measurement To take the Bladder Neck Rest Measurement, the steps are as follows: 1. Acquire the bladder image when the patient is in the rest status and press “Freeze”. 2. Press “Measure”. 3. Select “BNR”, and a horizontal baseline displays on the image screen 4. Move the trackball to adjust the position of the baseline at the trailing edge of the symphysisosslum pubis, and press “Enter”. Note: It shows positive values below the baseline and negative values above the baseline. 5. When the baseline is fixed, an active tracing caliper displays on the image screen. Move the trackball to position the caliper at the leading edge of the bladder neck. 6. Perform a standard distance measurement, and the system displays the value in the results window. BNS (Bladder Neck Stress) Measurement To take the Bladder Neck Stress Measurement, the steps are as follows: 1. Acquire the bladder image after the patient finishes the “Valsalva” and press “Freeze”. 2. Press “Measure”. 3. Select “BNS”, and a horizontal baseline displays on the image screen 4. Move the trackball to adjust the position of the baseline at the trailing edge of the symphysisosslum pubis, and press “Enter”. Note: It shows positive values below the baseline and negative values above the baseline. 5. When the baseline is fixed, an active tracing caliper displays. Move the trackball to put the caliper at the leading edge of the bladder neck. 6. Perform standard distance measurement, and the system displays the value in the results window. 149 / 265 8000098 BND (Bladder Neck Down) Measurement To take the Bladder Neck Down Measurement. The steps are as follows: 1. Measure “BNR” and “BNS”. 2. Select “BND”, and the system displays the BND value in the results window. Note: BND = BNR – BNS DWT (Detrusor Wall Thickness) Measurement To measure Detrusor Wall Thickness, make three distance measurements on the wall of the bladder. The steps are as follows: 1. Press “Measure”. 2. Select “DWT”, and an active tracing caliper displays on the image screen 3. Perform a standard distance measurement. The system displays the distance value in the results window. 4. Repeat Step 3 to make the second and third distance measurement. 5. After the third distance measurement is completed, the system displays the average detrusor wall thickness in the results window. RUV(Residual Urine) Measurement To calculate Residual Urine, make two distance measurements. The steps are as follows: 1. Press “Measure”. 2. Select “RUV”, and an active tracing caliper displays on the image screen 3. Perform a standard distance measurement. The system displays the distance value in the results window. 4. Repeat Step 3 to make the second distance measurement. 5. When the second distance measurement is completed, the system calculates the residual urine automatically and displays the value in the Results Window. Note: RUV(ml) = D1(cm) x D2(cm) x 5.9 – 14.9. UTDMAX(Maximum Uterine Down Position) Measurement To measure the maximum position of uterine down. The steps are as follows: 1. Acquire the uterine image when the patient is on the stress status and click the Freeze button. 2. Press “Measure”. 3. Select “UTDMAX”, and a horizontal baseline displays on the image screen 4. Move the trackball to adjust the position of the baseline at the trailing edge of the symphysisosslum pubis, and press “Enter”. Note: Positive values are shown below the baseline and negative values above the baseline. 5. When the baseline is fixed, an active tracing caliper displays. Move the trackball to put the caliper at the bottom position of the uterus. 6. Perform a standard distance measurement, and the system displays the value 150 / 265 8000098 in the results window. RADMAX (Maximum Ampulla Recti Down Position) Measurement To measure the maximum position of ampulla recti down, the steps are as follows: 1. Acquire the image of ampulla recti when the patient is in the stress status and press “Freeze”. 2. Press “Measure”. 3. Select “RADMAX”, and a horizontal baseline displays on the image screen. 4. Move the trackball to adjust the position of the baseline at the trailing edge of the symphysisosslum pubis, and press “Enter”. Note: Positive values are shown below the baseline and negative values above the baseline. 5. When the baseline is fixed, an active tracing caliper displays. Move the trackball to position the caliper at the bottom of the ampulla recti. 6. Perform a standard distance measurement, and the system displays the value in the results window. Rectocele Depth and Width Measurement To measure Rectocele Depth and Width, make two distance measurements. The steps are as follows: 1. Press “Measure”. 2. Select “Rectocele”, and an active tracing caliper displays on the image screen 3. Perform one standard distance measurement, and the system displays the rectocele depth in the results window. 4. Perform another standard distance measurement, and the system displays the rectocele width in the results window. Levator Hiatus Stress Measurement To measure Lavator Hiatus Stress, make two distance measurements and the system calculates the area automatically. The steps are as follows 1. Press “Measure”. 2. Select “Levator Hiatus Stress”, and an active tracing caliper displays on the image screen 3. Perform the first standard distance measurement. 4. Perform the second standard distance measurement. 5. Calculate the area of levator hiatus automatically, and the system displays the values in the results window. The measurement menu of Urology application can be configured by adding or removing the measurement items in “B” mode. Refer to the “Measurement Menu Configuration” in the chapter “General Measurements” for how to make the configuration of the measurement menu. 151 / 265 8000098 10.6.2 PW Mode measurements The “PW” mode of Gynecology application includes the following measurement folder: l General Measurement Folder General Measurement Folder The General Measurement Folder includes the following measurement items: l Velocity l PS l ED l MD l TAMAX l PI l RI l PS/ED l ED/PS l FLOW VOL The measurement menu of Urology application can be configured by adding or removing the measurement items in “PW” mode. Refer to “Measurement Menu Configuration” in the chapter “General Measurements” for how to make the configuration of the measurement menu. 152 / 265 8000098 10.7 Pediatric Measurements Introduction Pediatric measurements provide several types of measurement items: l Neonatal Head l Neonatal Abdomen l Pediatric Abdomen l Pediatric Hip l FAST 10.7.1 B Mode measurements Pediatric measurements include general measurement items and some typical measurement items, such as HIP(α), HIP(αβ), and acetabular cartilage thickness. General measurements of 2D mode mainly consist of the following measurement items. Refer to the chapter “General Measurements” for more detailed information. l Distance l Area l Volume l Angle l Stenosis l A/B Ratio The typical measurement items of Pediatric application are as follows: Pediatric Hip Dysplasia Measurement It is helpful to evaluate children’s hip dysplasia by calculating the HIP(α) and HIP(αβ). To calculate HIP(α) and HIP(αβ), three lines are defined as follows: 1. Baseline, a line connected acetabular convexity and the cross point among the joint capsule, perichondrium and ilium. 2. Acetabular roof line (Lineα), a line connected acetabular convexity and inferior to hip. 3. Inclination line (Lineβ), a line connected acetabular convexity and acetabular labrum. Angle α is the angle between baseline and line α, and angle β is the angle between baseline and line β. 153 / 265 8000098 βline a /b: IIlium c: Acetabular labrum Baseline d: Many strands of top e: Acetabular roof f: Caput Femoris α line HIP(α) To measure HIP(α). The steps are as follows: 1. Press “Measure”. 2. Select “HIP(α)(L)” or “HIP(α)(R)”, and a horizontal line displays on the image screen. 3. Adjust the baseline to align with the acetabular convexity using the trackball. 4. Adjust the inclination of the baseline by the “Rotation/Steer” key. 5. Fix the baseline with the Enter key, and the system displays the line. 6. Adjust the inclination of the lineα by the “Rotation/Steer” key. 7. Fix the lineα with the “Enter” key, and the system displays the angleα in the results window. HIP(αβ) To measure HIP(αβ). The steps are as follows: 1. Press “Measure”. 2. Select “HIP(αβ)(L)” or “HIP(αβ)(R)”, and a horizontal line displays on the image screen 3. Adjust the baseline to align with the acetabular convexity by the trackball. 4. Adjust the inclination of the baseline by the “Rotation/Steer” key. 5. Fix the baseline with the “Enter” key, and the system displays the lineα. 6. Adjust the inclination of the lineα by the “Rotation/Steer” key. 7. Fix the lineα with the “Enter” key, and the system displays the lineβ. 8. Adjust the inclination of the lineβ by the “Rotation/Steer” key. 9. Fix the lineβ with the “Enter” key, and the system displays the angleα and angleβ in the results window. Measurement configuration of HIP(αβ) The steps are as follows: 1. Select the configuration menu of “HIP(αβ)” measurement, and the system shows its measurement method as shown below: 2. Select the measurement method “Group” or “Ungroup” to complete the measurement setting. 154 / 265 8000098 Note: Baseline, lineα and lineβ always intersect at the acetabular convexity. Therefore, the operator should keep the three lines intersect at one point when using either the Group method or Ungroup method. Pediatric Hip Dysplasia Classification on the HIP(αβ) measurements The steps are as follows: 1. Select “Hip Growth Type Definition” after the “HIP(αβ)” measurements, and the system shows the pediatric hip dysplasia classification as shown below: 2. The pediatric hip dysplasia type can be rated based on the result of the HIP(αβ) measurements. Acetabular Cartilage Thickness To measure Acetabular Cartilage Thickness, make a single distance measurement. The steps are as follows: 1. Press “Measure”. 2. Select “ACT”, and an active tracing caliper displays on the image screen 3. Perform one standard distance measurement, and the system displays the acetabular cartilage thickness in the results window. 10.7.2 PW mode measurements The “PW” mode of Pediatric application includes the following measurement folder: • • • • General Measurement Folder Anterior cerebral artery measurement folder Middle cerebral artery measurement folder Posterior cerebral artery measurement folder 155 / 265 8000098 Configure the measurement menu of Pediatric application by adding or removing the measurement folders in “PW” mode. Refer to the “Measurement Menu Configuration” in the chapter “General Measurements” for how to make the configuration of the measurement menu. General Measurement Folder In the General Measurement Folder, it includes measurement items as follows: • • • • • • • • • • Velocity PS ED MD TAMAX PI RI PS/ED ED/PS Flow VOL The measurement menu of Urology application can be configured by adding or removing the measurement items in “PW” mode. Refer to “Measurement Menu Configuration” in the chapter “General Measurements” for how to make the configuration of the measurement menu. 156 / 265 8000098 10.8 Obstetrics Measurements Examination Preparation: Prior to an ultrasound examination, the patient should be informed of the clinical indication, specific benefits, potential risks, and alternatives, if any. In addition, if the patient requests information about the exposure time and intensity, it should be provided. Patient access to educational materials regarding ultrasound is strongly encouraged to supplement the information communicated directly to the patient. Furthermore, these examinations should be conducted in a manner and take place in a setting which assures patient dignity and privacy. - Prior material knowledge and approval of the presence of nonessential personnel with the number of such personnel kept to a minimum. - An intent to share the information obtained with the parents per the physician’s judgment, either during the examination or shortly thereafter. - An offer of choice about viewing the fetus. - An offer of choice about learning the sex of the fetus, if such information becomes available. However, an ultrasound examination should not be carried out for the sole purpose of identifying the sex of the fetus. - Ultrasound examination performed solely to satisfy the family's desire to know the sex of the fetus, to view the fetus, or to obtain a picture of the fetus should be discouraged. Acoustic Output Considerations General warning This device is a multi-‐use device which is capable of exceeding FDA pre-‐enactment acoustic output (spatial peak temporal average) intensity limits for fetal applications. CAUTION It is prudent to conduct an examination with the minimum amount and duration of acoustic output necessary to optimize the image's diagnostic value. Concerns surrounding fetal exposure Always be aware of the acoustic output level by observing the Acoustic Output Display. In addition, become thoroughly familiar with the Acoustic Output Display and equipment controls affecting output. Training It is recommended that all operators receive proper training in fetal Doppler applications before performing them in a clinical setting. Contact a local sales representative for training assistance please. 157 / 265 8000098 Introduction Obstetrics measurements provide several types of measurement items: l OB Early l OB Mid l OB Late l Fetal Heart 10.8.1 B Mode measurements Obstetrics measurements include general measurement items and some typical measurement items, such as GS, CRL, NT, OB Ratio, Estimated Fetal Weight, OB Curve and OB Table. General measurements of 2D mode mainly consist of the measurement items below. Refer to the chapter “General Measurements” for more detailed information. l Depth l Distance l A/B Ratio The typical measurement items of Obstetrics application are as shown below: Gestational Sac (GS) To measure the size of gestational sac, the method of measurement can be configured: 1. Press “Measure”. 2. Select “GS” with the measurement method “Max”, and an active tracing caliper displays. 3. Perform a standard distance measurement, and the system displays the maximum diameter of the gestational sac in the results window. To calculate the size of gestational sac with the “Mean” measurement method, make three distance measurements. The steps are as follows: 1. Press “Measure”. 2. Select “GS” with the measurement method “Mean”, and an active tracing caliper displays on the image screen. 3. Perform a standard distance measurement. The system displays the distance value in the results window. 4. Repeat Step 3 to make the second and third distance measurement. Note: Three distance measurements can be made in the dual display format by pressing “Left” / “Right”. 5. After the third distance measurement is completed, the system displays the average diameter of the gestational sac in the results window. Yolk Sac (YS) 158 / 265 8000098 To measure the size of Yolk Sac, the steps are as follows: 1. Press “Measure”. 2. Select “YS”, and an active tracing caliper displays on the image screen. 3. Perform a standard distance measurement. The system displays the size of yolk sac in the results window. Crown-‐rump Length (CRL) To measure the Crown-‐rump Length, the steps are as follows: 1. Press “Measure”. 2. Select “CRL”, and an active tracing caliper displays on the image screen. 3. Perform a standard distance measurement. The system displays the crown-‐rump length in the results window. Nuchal Translucency Thickness To measure the Nuchal Translucency Thickness, if select the method “Manual”, the steps are as follows: 1. Press “Measure”. 2. Select “NT”, and an active tracing caliper displays on the image screen. 3. Perform a standard distance measurement. The system displays the nuchal translucency thickness in the results window. If select the method “Auto”, the steps are as follows: 1. Press “Measure”. 2. Select “NT”, and an active tracing caliper displays on the image screen. 3. Fix one dotted box in the interest area, the system will provide the measurement value automatically. Uterus Volume (UT) To calculate Uterus Volume, make three distance measurements. The steps are as follows: 1. Press “Measure”. 2. Select “UT”, and an active tracing caliper displays on the image screen. 3. Perform a standard distance measurement. The system displays the distance value in the results window. 4. Repeat Step 3 to make the second and third distance measurement. Note: Three distance measurements can be made in the dual display format by pressing “Left” / “Right”. 5. After the third distance measurement is completed, the system displays the uterus volume in the results window. Endometriosis Thickness (En.) To measure Endometriosis Thickness, the steps are as follows: 1. Press “Measure”. 2. Select “En.”, and an active tracing caliper displays on the image screen 159 / 265 8000098 3. Perform a standard distance measurement. The system displays the endometriosis thickness in the results window. Ovary Volume (OV) To calculate Ovary Volume, make three distance measurements normally. The steps are as follows: 1. Press “Measure”. 2. Select “OV (L)” or “OV(R)”, and an active tracing caliper displays on the image screen 3. Perform a standard distance measurement. The system displays the distance value in the results window. 4. Repeat Step 3 to make the second and third distance measurement. Note: Three distance measurements can be made in the dual display format by pressing “Left” / “Right”. 5. After the third distance measurement is completed, the system displays the ovary volume in the results window. Biparietal Diameter (BPD) To measure Biparietal Diameter, the steps are as follows: 1. Press “Measure”. 2. Select “BPD”, and an active tracing caliper displays on the image screen 3. Perform a standard distance measurement. The system displays the biparietal diameter in the results window. Occipito-‐frontal Diameter (OFD) To measure Occipito-‐frontal Diameter, the steps are as follows: 1. Press “Measure”. 2. Select “OFD”, and an active tracing caliper displays on the image screen 3. Perform a standard distance measurement. The system displays the occipito-‐frontal diameter in the results window. Head Circumference (HC) To calculate Head Circumference, there are five measurement methods: BPD&OFD, Ellipse, Polygon, Spine and Trace. Ellipse and BPD&OFD method are the most common settings. To measure Head Circumference with the “BPD&OFD” method, make two distance measurements. The steps are as follows: 1. Press “Measure”. 2. Select “HC”. 3. Select the measurement method “BPD&OFD” as the default setting from the configuration menu, and an active tracing caliper displays on the image screen 4. Perform a standard distance measurement. The system displays the distance value in the results window. 160 / 265 8000098 5. Repeat Step 3 to make the second distance measurement. 6. After the second distance measurement is completed, the system displays the head circumference in the results window. To measure Head Circumference with the “Ellipse” method, make an ellipse measurement. The steps are as follows: 1. Press “Measure”. 2. Select “HC”. 3. Select the measurement method “Ellipse” as the default setting from the configuration menu, and an active ellipse displays on the image screen 4. To position the active caliper of the ellipse, move the trackball. 5. To fix the start point, press “Enter”. The system fixes the first caliper and displays a second active caliper. 6. To position the second caliper, move the trackball. 7. Adjust the “Ellipse” control and an ellipse with an initial circle shape displays. Note: To position the ellipse and to size the measured axes (move the calipers), move trackball. 8. To complete the measurement, press “Enter”. The system displays the head circumference in the results window. To measure Head Circumference with the “Polygon” method, make a polygon trace measurement. The steps are as follows: 1. Press “Measure”. 2. Select “HC”. 3. Select the measurement method “Polygon” as the default setting from the configuration menu, and an active tracing caliper displays on the image screen 4. To position the active caliper of the polygon, move the trackball. 5. To fix the start point, press “Enter”. The system fixes the first caliper and displays a second active caliper. 6. To position the second caliper, move the trackball. 7. To fix the second point, press “Enter”. The system fixes the second caliper and displays a third active caliper. 8. To position the third caliper, move the trackball. 9. To fix the third point, press “Enter”. The system fixes the third caliper and displays a next active caliper. Note: At least three calipers are needed to form a polygon. 10. Repeat Steps 8-‐9 to add more caliper of the polygon. 11. To complete the measurement, press “Enter”. The system displays the head circumference in the results window. Note: Before completing the polygon measurement, l To erase the line (little by little) back from its current point, press “Clear” once; l To clear the trace caliper and the current data measured, press “Clear” 161 / 265 8000098 for at least 2 seconds. To measure Head Circumference with the “Spline” method, make a spline trace measurement. The steps are as follows: 1. Press “Measure”. 2. Select “HC”. 3. Select the measurement method “Spline” as the default setting from the configuration menu, and an active tracing caliper displays on the image screen 4. To position the active caliper of the spline, move the trackball. 5. To fix the start point, press “Enter”. The system fixes the first caliper and displays a second active caliper. 6. To position the second caliper, move the trackball. 7. To fix the second point, press “Enter”. The system fixes the second caliper and displays a third active caliper. 8. To position the third caliper, move the trackball. 9. To fix the third point, press “Enter”. The system fixes the third caliper and displays a next active caliper. Note: At least three calipers are needed to form a spline. 10. Repeat Steps 8-‐9 to add more calipers to the spline. 11. To complete the measurement, press “Enter”. The system displays the head circumference in the results window. Note: Before completing the spline measurement, l To erase the line (little by little) back from its current point, press “Clear” once; l To clear the trace caliper and the current data measured, press “Clear” for at least 2 seconds. To measure Head Circumference with the “Trace” method, the steps are as follows: 1. Press “Measure”. 2. Select “HC”. 3. Select the measurement method “Trace” as the default setting from the configuration menu, and an active tracing caliper displays on the image screen 4. To position the trace caliper, move the trackball. 5. To fix the trace start point, press “Enter”. The system fixes the first caliper and the trace caliper changes to an active tracing caliper. 6. To trace the measurement area, move the trackball around the anatomy. 7. To complete the measurement, press “Enter”. The system displays the head circumference in the results window. Note: Before completing the spline measurement, l To erase the line (Before completing little by little) back from its current point, press “Clear” k once; 162 / 265 8000098 l To clear the trace caliper and the current data measured, press “Clear” for at least 2 seconds. Cerebellar Diameter (CD) To measure Cerebellar Diameter, the steps are as follows: 1. Press “Measure”. 2. Select “CD”, and an active tracing caliper displays on the image screen 3. Perform a standard distance measurement. The system displays the cerebellar diameter in the results window. Transverse Cerebellar Diameter (TCD) To measure Transverse Cerebellar Diameter, the steps are as follows: 1. Press “Measure”. 2. Select “TCD”, and an active tracing caliper displays on the image screen 3. Perform a standard distance measurement. The system displays the transverse cerebellar diameter in the results window. Binocular Diameter (BD) To measure Binocular Diameter, the steps are as follows: 1. Press “Measure”. 2. Select “BD”, and an active tracing caliper displays on the image screen 3. Perform a standard distance measurement. The system displays the binocular diameter in the results window. Outer Orbital Diameter (OOD) To measure Outer Orbital Diameter, the steps are as follows: 1. Press “Measure”. 2. Select “OOD”, and an active tracing caliper displays on the image screen 3. Perform a standard distance measurement. The system displays the outer orbital diameter in the results window. Inter Orbital Diameter (IOD) To measure Inter Orbital Diameter, the steps are as follows: 1. Press “Measure”. 2. Select “IOD”, and an active tracing caliper displays on the image screen 3. Perform a standard distance measurement. The system displays the inter-‐orbital diameter in the results window. Humerus Length (HL) To measure Humerus Length, the steps are as follows: 1. Press “Measure”. 2. Select “HL”, and an active tracing caliper displays on the image screen 3. Perform a standard distance measurement. The system displays the humerus length in the results window. 163 / 265 8000098 Anter-‐posterior Abdominal Diameter (APAD) To measure Anter-‐posterior Abdominal Diameter, the steps are as follows: 1. Press “Measure”. 2. Select “APAD”, and an active tracing caliper displays on the image screen 3. Perform a standard distance measurement. The system displays the anter-‐posterior abdominal diameter in the results window. Transverse Abdominal Diameter To measure Transverse Abdominal Diameter, the steps are as follows: 1. Press “Measure”. 2. Select “TAD”, and an active tracing caliper displays on the image screen 3. Perform a standard distance measurement. The system displays the transverse abdominal diameter in the results window. Abdominal Circumference To calculate Abdominal Circumference, there are five measurement methods: APAD&TAD, Ellipse, Polygon, Spine and Trace. Ellipse and APAD&TAD method are the default settings. To measure Abdominal Circumference with the “APAD&TAD” method, make two distance measurements. The steps are as follows: 1. Press “Measure”. 2. Select “AC”. 3. Select the measurement method “APAD&TAD” as the default setting from the configuration menu, and an active tracing caliper displays on the image screen 4. Perform a standard distance measurement. The system displays the distance value in the results window. 5. Repeat Step 3 to make the second distance measurement. 6. After the second distance measurement is completed, the system displays the abdominal circumference in the results window. To measure Abdominal Circumference with the “Ellipse” method, make an ellipse measurement. The steps are as follows: 1. Press “Measure”. 2. Select “AC”. 3. Select the measurement method “Ellipse” as the default setting from the configuration menu, and an active ellipse displays on the image screen 4. To position the active caliper of the ellipse, move the trackball. 5. To fix the start point, press “Enter”. The system fixes the first caliper and displays a second active caliper. 6. To position the second caliper, move the trackball. 7. Adjust the “Ellipse” control and an ellipse with an initial circle shape displays. Note: To position the ellipse and to size the measured axes (move the calipers), 164 / 265 8000098 move the trackball. 8. To complete the measurement, press “Enter”. The system displays the abdominal circumference in the results window. To measure Abdominal Circumference with the “Polygon” method, make a polygon trace measurement. The steps are as follows: 1. Press “Measure”. 2. Select “AC”. 3. Select the measurement method “Polygon” as the default setting from the configuration menu, and an active tracing caliper displays on the image screen 4. To position the active caliper of the polygon, move the trackball. 5. To fix the start point, press “Enter”. The system fixes the first caliper and displays a second active caliper. 6. To position the second caliper, move the trackball. 7. To fix the second point, press “Enter”. The system fixes the second caliper and displays a third active caliper. 8. To position the third caliper, move the trackball. 9. To fix the third point, press “Enter”. The system fixes the third caliper and displays a next active caliper. Note: At least three calipers are needed to form a polygon. 10. Repeat Steps 8-‐9 to add more calipers to the polygon. 11. To complete the measurement, press “Enter”. The system displays the abdominal circumference in the results window. Note: Before completing the polygon measurement, l To erase the line (little by little) back from its current point, press “Clear” once; l To clear the trace caliper and the current data measured, press “Clear” for at least 2 seconds. To measure Abdominal Circumference with the “Spline” method, make a spline trace measurement. The steps are as follows: 1. Press “Measure”. 2. Select “AC”. 3. Select the measurement method “Spline” as the default setting from the configuration menu, and an active tracing caliper displays on the image screen 4. To position the active caliper of the spline, move the trackball. 5. To fix the start point, press “Enter”. The system fixes the first caliper and displays a second active caliper. 6. To position the second caliper, move the trackball. 7. To fix the second point, press “Enter”. The system fixes the second caliper and displays a third active caliper. 8. To position the third caliper, move the trackball. 9. To fix the third point, press “Enter”. The system fixes the third caliper and 165 / 265 8000098 displays a next active caliper. Note: At least three calipers are needed to form a spline. 10. Repeat Steps 8-‐9 to add more caliper of the spline. 11. To complete the measurement, press “Enter”. The system displays the abdominal circumference in the results window. Note: Before completing the spline measurement, l To erase the line (little by little) back from its current point, press “Clear” key once; l To clear the trace caliper and the current data measured, press “Clear” for at least 2 seconds. To measure Abdominal Circumference with the “Trace” method, the steps are as follows: 1. Press “Measure”. 2. Select “AC”. 3. Select the measurement method “Trace” as the default setting from the configuration menu, and an active tracing caliper displays on the image screen 4. To position the trace caliper, move the trackball. 5. To fix the trace start point, press “Enter”. The system fixes the first caliper and the trace caliper changes to an active tracing caliper. 6. To trace the measurement area, move the trackball around the anatomy. 7. To complete the measurement, press “Enter”. The system displays the abdominal circumference in the results window. Note: Before completing the spline measurement, l To erase the line (little by little) back from its current point, press “Clear” key once; l To clear the trace caliper and the current data measured, press “Clear” for at least 2 seconds. Anter-‐posterior Trunk Diameter (APTD) To measure Anter-‐posterior Trunk Diameter, the steps are as follows: 1. Press “Measure”. 2. Select APTD, and an active tracing caliper displays on the image screen 3. Perform a standard distance measurement. The system displays the anter-‐posterior trunk diameter in the results window. Transverse Trunk Diameter To measure Transverse Trunk Diameter: 1. Press “Measure”. 2. Select “TTD”, and an active tracing caliper displays on the image screen 3. Perform a standard distance measurement. The system displays the transverse trunk diameter in the results window. 166 / 265 8000098 Trunk Cross-‐sectional Area (AxT) To calculate Trunk Cross-‐sectional Area, there are five measurement methods: APAD&TAD, Ellipse, Polygon, Spine and Trace. Ellipse and APTD&TTD method are the most common settings. To measure Trunk Cross-‐sectional Area with the “APTD&TTD” method, make two distance measurements. 1. Press “Measure”. 2. Select “AxT”. 3. Select the measurement method “APTD&TTD” as the default setting from the configuration menu, and an active tracing caliper displays on the image screen 4. Perform a standard distance measurement. The system displays the distance value in the results window. 5. Repeat Step 3 to make the second distance measurement. 6. After the second distance measurement is completed, the system displays the trunk cross-‐sectional area in the results window. To measure Trunk Cross-‐sectional Area with the Ellipse method, make an ellipse measurement. The steps are as follows: 1. Press “Measure”. 2. Select “AxT”. 3. Select the measurement method “Ellipse” as the default setting from the configuration menu, and an active ellipse displays on the image screen 4. To position the active caliper of the ellipse, move the trackball. 5. To fix the start point, press “Enter”. The system fixes the first caliper and displays a second active caliper. 6. To position the second caliper, move the trackball. 7. Adjust the “Ellipse” control and an ellipse with an initial circle shape displays. Note: To position the ellipse and to size the measured axes (move the calipers), move the trackball. 8. To complete the measurement, press “Enter”. The system displays the trunk cross-‐sectional area in the results window. To measure Trunk Cross-‐sectional Area with the “Polygon” method, make a polygon trace measurement. The steps are as follows: 1. Press “Measure”. 2. Select “AxT”. 3. Select the measurement method “Polygon” as the default setting from the configuration menu, and an active tracing caliper displays on the image screen 4. To position the active caliper of the polygon, move the trackball. 5. To fix the start point, press “Enter”. The system fixes the first caliper and displays a second active caliper. 6. To position the second caliper, move the trackball. 167 / 265 8000098 7. To fix the second point, press “Enter”. The system fixes the second caliper and displays a third active caliper. 8. To position the third caliper, move the trackball. 9. To fix the third point, press “Enter”. The system fixes the third caliper and displays a next active caliper. Note: At least three calipers are needed to form a polygon. 10. Repeat Steps 8-‐9 to add more calipers to the polygon. 11. To complete the measurement, press “Enter”. The system displays the trunk cross-‐sectional area in the results window. Note: Before completing the polygon measurement, l To erase the line (little by little) back from its current point, press “Clear” key once; l To clear the trace caliper and the current data measured, press “Clear” for at least 2 seconds. To measure Trunk Cross-‐sectional Area with the “Spline” method, make a spline trace measurement. The steps are as follows: 1. Press “Measure”. 2. Select “AxT”. 3. Select the measurement method “Spline” as the default setting from the configuration menu, and an active tracing caliper displays on the image screen 4. To position the active caliper of the spline, move the trackball. 5. To fix the start point, press “Enter”. The system fixes the first caliper and displays a second active caliper. 6. To position the second caliper, move the trackball. 7. To fix the second point, press “Enter”. The system fixes the second caliper and displays a third active caliper. 8. To position the third caliper, move the trackball. 9. To fix the third point, press “Enter”. The system fixes the third caliper and displays a next active caliper. Note: At least three calipers are needed to form a spline. 10. Repeat Steps 8-‐9 to add more caliper of the spline. 11. To complete the measurement, press “Enter”. The system displays the trunk cross-‐sectional area in the results window. Note: Before completing the spline measurement, l To erase the line (little by little) back from its current point, press “Clear” once; l To clear the trace caliper and the current data measured, press “Clear” for at least 2 seconds. To measure Trunk Cross-‐sectional Area with the “Trace” method, the steps are as follows: 168 / 265 8000098 1. Press “Measure”. 2. Select “AxT”. 3. Select the measurement method Trace as the default setting from the configuration menu, and an active tracing caliper displays on the image screen 4. To position the trace caliper, move the trackball. 5. To fix the trace start point, press “Enter”. The system fixes the first caliper and the trace caliper changes to an active tracing caliper. 6. To trace the measurement area, move the trackball around the anatomy. 7. To complete the measurement, press “Enter”. The system displays the trunk cross-‐sectional area in the results window. Note: Before completing the spline measurement, l To erase the line (little by little) back from its current point, press “Clear” key once. l To clear the trace caliper and the current data measured, press “Clear” for at least 2 seconds. Fetal Trunk Area (FTA) To calculate Fetal Trunk Area, there are five measurement methods: LTD&TTD, Ellipse, Polygon, Spine and Trace. Ellipse and LTD&TTD method are the most default settings. To measure Fetal Trunk Area with the LTD&TTD method, make two distance measurements. The steps are as follows: 1. Press “Measure”. 2. Select “FTA”. 3. Select the measurement method “LTD&TTD” as the default setting from the configuration menu and an active tracing caliper displays on the image screen 4. Perform a standard distance measurement. The system displays the distance value in the results window. 5. Repeat Step 3 to make the second distance measurement. 6. After the second distance measurement is completed, the system displays the fetal trunk area in the results window. To measure Fetal Trunk Area with the Ellipse method, make an ellipse measurement. The steps are as follows: 1. Press “Measure”. 2. Select “FTA”. 3. Select the measurement method “Ellipse” as the default setting from the configuration menu, and an active ellipse displays. 4. To position the active caliper of the ellipse, move the trackball. 5. To fix the start point, press “Enter”. The system fixes the first caliper and displays a second active caliper. 6. To position the second caliper, move the trackball. 169 / 265 8000098 7. Adjust the “Ellipse” control and an ellipse with an initial circle shape displays. Note: To position the ellipse and to size the measured axes (move the calipers), move the trackball. 8. To complete the measurement, press “Enter”. The system displays the fetal trunk area in the results window. To measure Fetal Trunk Area with the “Polygon” method, make a polygon trace measurement. The steps are as follows: 1. .Press “Measure” 2. Select “FTA”. 3. Select the measurement method “Polygon” as the default setting from the configuration menu, and an active tracing caliper displays on the image screen 4. To position the active caliper of the polygon, move the trackball. 5. To fix the start point, press “Enter”. The system fixes the first caliper and displays a second active caliper. 6. To position the second caliper, move the trackball. 7. To fix the second point, press “Enter”. The system fixes the second caliper and displays a third active caliper. 8. To position the third caliper, move the trackball. 9. To fix the third point, press “Enter”. The system fixes the third caliper and displays a next active caliper. Note: At least three calipers are needed to form a polygon. 10. Repeat Steps 8-‐9 to add more caliper of the polygon. 11. To complete the measurement, press “Enter”. The system displays the fetal trunk area in the results window. Note: Before completing the polygon measurement, l To erase the line (little by little) back from its current point, press “Clear” once; l To clear the trace caliper and the current data measured, press “Clear” for at least 2 seconds. To measure Fetal Trunk Area with the “Spline” method, make a spline trace measurement. The steps are as follows: 1. Press “Measure”. 2. Select “FTA”. 3. Select the measurement method “Spline” as the default setting from the configuration menu, and an active tracing caliper displays on the image screen 4. To position the active caliper of the spline, move the trackball. 5. To fix the start point, press “Enter”. The system fixes the first caliper and displays a second active caliper. 6. To position the second caliper, move the trackball. 7. To fix the second point, press “Enter”. The system fixes the second caliper and 170 / 265 8000098 displays a third active caliper. 8. To position the third caliper, move the trackball. 9. To fix the third point, press the Enter key. The system fixes the third caliper and displays a next active caliper. Note: At least three calipers are needed to form a spline. 10. Repeat Steps 8-‐9 to add more caliper of the spline. 11. To complete the measurement, press “Enter”. The system displays the fetal trunk area in the results window. Note: Before completing the spline measurement, l To erase the line (little by little) back from its current point, press “Clear” key once; l To clear the trace caliper and the current data measured, press “Clear” for at least 2 seconds. To measure Fetal Trunk Area with the “Trace” method, the steps are as follows: 1. Press “Measure”. 2. Select “FTA”. 3. Select the measurement method “Trace” as the default setting from the configuration menu, and an active tracing caliper displays on the image screen 4. To position the trace caliper, move the trackball. 5. To fix the trace start point, press “Enter”. The system fixes the first caliper and the trace caliper changes to an active tracing caliper. 6. To trace the measurement area, move the trackball around the anatomy. 7. To complete the measurement, press “Enter”. The system displays the fetal trunk area in the results window. Note: Before completing the spline measurement, l To erase the line (little by little) back from its current point, press “Clear” key once; l To clear the trace caliper and the current data measured, press “Clear” for at least 2 seconds Transverse Thorax Diameter (THD) To measure Transverse Thorax Diameter, the steps are as follows: 1. Press “Measure”. 2. Select “THD”, and an active tracing caliper displays on the image screen 3. Perform a standard distance measurement. The system displays the transverse thorax diameter in the results window. Thorax Circumference (ThC) To calculate Thorax Circumference, there are five measurement methods: L&W, Ellipse, Polygon, Spine and Trace. Ellipse and L&W method are the most default settings. 171 / 265 8000098 To measure Thorax Circumference with the L&W method, make two distance measurements. The steps are as follows: 1. Press “Measure”. 2. Select “THC”. 3. Select the measurement method “L&W” as the default setting from the configuration menu, and an active tracing caliper displays on the image screen 4. Perform a standard distance measurement. The system displays the distance value in the results window. 5. Repeat Step 3 to make the second distance measurement. 6. After the second distance measurement is completed, the system displays the thorax circumference in the results window. To measure Thorax Circumference with the Ellipse method, make an ellipse measurement. The steps are as follows: 1. Press “Measure”. 2. Select “THC”. 3. Select the measurement method “Ellipse” as the default setting from the configuration menu, and an active ellipse displays on the image screen 4. To position the active caliper of the ellipse, move the trackball. 5. To fix the start point, press “Enter”. The system fixes the first caliper and displays a second active caliper. 6. To position the second caliper, move the trackball. 7. Adjust the “Ellipse” control and an ellipse with an initial circle shape displays. Note: To position the ellipse and to size the measured axes(move the calipers), move the trackball. 8. To complete the measurement, press “Enter”. The system displays the thorax circumference in the results window. To measure Thorax Circumference with the Polygon method, make a polygon trace measurement. The steps are as follows: 1. Press “Measure”. 2. Select “THC”. 3. Select the measurement method Polygon as the default setting from the configuration menu, and an active tracing caliper displays. 4. To position the active caliper of the polygon, move the trackball. 5. To fix the start point, press “Enter”. The system fixes the first caliper and displays a second active caliper. 6. To position the second caliper, move the trackball. 7. To fix the second point, press “Enter”. The system fixes the second caliper and displays a third active caliper. 8. To position the third caliper, move the trackball. 9. To fix the third point, press “Enter”. The system fixes the third caliper and 172 / 265 8000098 displays a next active caliper. Note: At least three calipers are needed to form a polygon. 10. Repeat Steps 8-‐9 to add more calipers to the polygon. 11. To complete the measurement, press “Enter”. The system displays the thorax circumference in the Results Window. Note: Before completing the polygon measurement, l To erase the line (little by little) back from its current point, press “Clear” key once; l To clear the trace caliper and the current data measured, press “Clear” for at least 2 seconds. To measure Thorax Circumference with the Spline method, make a spline trace measurement. The steps are as follows: 1. Press “Measure”. 2. Select “THC”. 3. Select the measurement method Spline as the default setting from the configuration menu, and an active tracing caliper displays. 4. To position the active caliper of the spline, move the trackball. 5. To fix the start point, press “Enter”. The system fixes the first caliper and displays a second active caliper. 6. To position the second caliper, move the trackball. 7. To fix the second point, press “Enter”. The system fixes the second caliper and displays a third active caliper. 8. To position the third caliper, move the trackball. 9. To fix the third point, press “Enter”. The system fixes the third caliper and displays a next active caliper. Note: At least three calipers are needed to form a spline. 10. Repeat Steps 8-‐9 to add more caliper of the spline. 11. To complete the measurement, press “Enter”. The system displays the thorax circumference in the results window. Note: Before completing the spline measurement, l To erase the line (little by little) back from its current point, press “Clear” key once; l To clear the trace caliper and the current data measured, press “Clear” for at least 2 seconds. To measure Thorax Circumference with the Trace method, the steps are as follows: 1. Press “Measure”. 2. Select “THC”. 3. Select the measurement method Trace as the default setting from the configuration menu, and an active tracing caliper displays. 173 / 265 8000098 4. To position the trace caliper, move the trackball. 5. To fix the trace start point, press “Enter”. The system fixes the first caliper and the trace caliper changes to an active tracing caliper. 6. To trace the measurement area, move the Trackball around the anatomy. 7. To complete the measurement, press “Enter”. The system displays the thorax circumference in the results window. Note: Before completing the spline measurement, l To erase the line (little by little) back from its current point, press “Clear” key once; l To clear the trace caliper and the current data measured, press “Clear” for at least 2 seconds. Fetal Cardiac Thorax Diameter Ratio (CTDR) To measure Fetal Cardiac Thorax Diameter Ratio, make two distance measurements. The steps are as follows: 1. Press “Measure”. 2. Select “CTDR”, and an active tracing caliper display. 3. Perform a standard distance measurement. The system displays the distance value in the results window. 4. Repeat Step 3 to make the second distance measurement. 5. After the second distance measurement is completed, the system displays the cardiac thorax diameter ratio in the results window. Fetal Cardiac Thorax Area Ratio (CTAR) To measure Fetal Cardiac Thorax Area Ratio, make two area measurements. The steps are as follows: 1. Press “Measure”. 2. Select “CTAR”, and an active tracing caliper displays. 3. Perform a standard area measurement with the default measurement method. The system displays the area value in the results window. 4. Repeat Step 3 to make the second area measurement. 5. After the second area measurement is completed, the system displays the cardiac thorax area ratio in the results window. Spinal Length (SL) To measure Spinal Length, the steps are as follows: 1. Press “Measure”. 2. Select “SL”, and an active tracing caliper displays. 3. Perform a standard distance measurement. The system displays the spinal length in the results window. Femur Length (FL) To measure Femur Length, the steps are as follows: 174 / 265 8000098 1. Press “Measure”. 2. Select “FL”, and an active tracing caliper displays. 3. Perform a standard distance measurement. The system displays the femur length in the results window. Ulnar Length (ULNA) To measure Ulnar Length, the steps are as follows: 1. Press “Measure”. 2. Select “ULNA”, and an active tracing caliper displays. 3. Perform a standard distance measurement. The system displays the ulnar length in the results window. Radius Length (RAD) To measure Radius Length, the steps are as follows: 1. Press “Measure”. 2. Select “RAD”, and an active tracing caliper displays. 3. Perform a standard distance measurement. The system displays the radius length in the results window. Tibial Length (TIB) To measure Tibial Length, the steps are as follows: 1. Press “Measure”. 2. Select “TIB”, and an active tracing caliper displays. 3. Perform a standard distance measurement. The system displays the tibial length in the results window. Fibular Length (FIB) To measure Fibular Length, the steps are as follows: 1. Press “Measure”. 2. Select “FIB”, and an active tracing caliper displays. 3. Perform a standard distance measurement. The system displays the fibular length in the results window. Foot Length To measure Foot Length, the steps are as follows: 1. Press “Measure”. 2. Select “Ft”, and an active tracing caliper displays. 3. Perform a standard distance measurement. The system displays the foot length in the results window. Placenta Thickness (PT) To measure Placenta Thickness, the steps are as follows: 1. Press “Measure”. 2. Select “PT”, and an active tracing caliper displays. 175 / 265 8000098 3. Perform a standard distance measurement. The system displays the placenta thickness in the results window. Amniotic Fluid Index (AFI) To calculate the Amniotic Fluid Index, make measurements of the four quadrants of the uterine cavity. The system adds these four measurements together to calculate the Amniotic Fluid Index. The steps are as follows: 1. Press “Measure”. 2. Select “AFI”. The first distance measurement, AFI-‐Q1, is already selected. 3. Make a standard distance measurement for the first quadrant: a. To position the active caliper at the start point, move the trackball. b. To fix the start point, press “Enter”. The system fixes the first caliper and displays a second active caliper. c. To position the second active caliper at the end point, move the trackball. A dotted line connects the measurement points. d. To complete the measurement, press “Enter”. The system displays the distance value in the results window. 4. When the measurement of the first quadrant is completed, unfreeze the image and move to the second quadrant. 5. After the image is obtained, then “Freeze” and “Measure” are pressed. The system prompts to continue with the AFI measurements. Make sure that the next quadrant has been selected. 6. Perform a standard distance measurement for the second, third and fourth Quadrants, repeat step 2. 7. When all four quadrants have been measured, the system calculates the AFI total and displays it in the results window. OB Ratio: l HC/AC l FL/AC l FL/BPD l CI (BPD/OFD) l FL/HC l TCD/AC To get the ratio result need to finish the two sub-‐items. GA(LMP) GA(LMP): Gestational age that is calculated based on the date of Last Menstrual Period. GA(GA) GA(GA):Gestational age(GA) is to show from the zona-‐binding count that day to birth. The normal maturity is 38 weeks (266 days) for the fetus. Because of zona-‐binding the time cannot be precisely calculated. It can only be estimated, 176 / 265 8000098 and the average time could be reduced by 2 weeks according to the menstrual age calculation. When in the patient information, input the date of the last menstruation, and the system will automatically calculate the gestational age GA. Another method is to measure the results calculated according to some gestational age. EDDbyLMP EDDbyLMP: Estimated delivery date that is calculated from the time of Last Menstrual Period. When in the patient information, input the end time period of time, the system will automatically calculate the estimated delivery date by LMP (EDDbyLMP). EDDbyGA EDDbyGA: When the system obtains the gestational age(GA), the system will automatically calculate the delivery date gestational age estimates (EDDbyGA). Multiple Fetus Measurement The system allows to measure and report multiple fetus development. If more than one fetus is imaged during the examination, enter the number of fetuses in the patient information window, and there will be “ABCD” in measurement menu (take 4 fetuses for example): l A, B, C, D is the specific fetus, and 4 is the fetal quantity. l Switch among A/4, B/4, C/4 and D/4 to take the measurement on the specific fetus. Estimated Fetal Weight (EFW) Measurement Estimated Fetal Weight measurement is applied for OB Mid and OB Late application only. If “Auto Select EFW Method” is enabled in system setting, after do one or more OB related measurements, like BPD, FL, HC, AC, the system will select one method to calculate EFW automatically. If it is disabled, select one method, the do the related measurements, the system will calculate EFW. EFW methods are depended on the selected EFW table in the system setting. OB Curve Graph OB Graphs allow to assess fetal growth compared to a normal growth curve. When a patient has completed two or more ultrasound examinations, the graphs can be used to look at fetal trending. For multi-‐gestational patients can plot all fetuses and compare the growth on the graphs. The system provides the following two basic types of graphs: 177 / 265 8000098 • Fetal Growth Curve Graph – show one measurement per graph. These graphs show the normal growth curve, positive and negative standard deviations or applicable percentiles, and ultrasound age of the fetus using the current measurement. For multi-‐gestational pregnancies can view all fetuses. If previous examination data is available, the graph can show fetal trending. • Fetal Growth Bar Graph – shows the ultrasound age and the gestational age based on patient data. Plot all measurements on one graph. To view OB graphs. The steps are as follows: 1. Press “Measure”. 2. Select “OB Graph” (only for OB application), select “Graph Type”. 3. The system provides 5 types of display format on Fetal Growth Curve Graph: Single, Dual, Quad, Multi-‐fetal Compare and Multi-‐fetal Parallel (these 2 types only work when there are 2 or more fetuses). 3.1 Single display format displays a fetal growth curve graph of any a maternity measuring parameter.Dual display format displays two fetal growth curve graphs of any two maternity measuring parameters parallel. Quad display format displays four fetal growth curve graphs of any four maternity measuring parameters together. 3.2 Multi-‐fetal Compare and Multi-‐fetal Parallel are for the fetal growth curve graph of multiple fetuses. Multi-‐fetal Compare displays the fetal growth curve graph of the comparison among all fetuses. Multi-‐fetal Parallel displays the fetal growth curve graphs of all fetuses parallel in the separate graph. 4. The system provides two types of display format on Fetal Growth Bar Graph: Single and Multi-‐fetal Parallel (only work when there are 2 or more fetuses). 4.1 Single display format displays a fetal growth bar graph. 4.2 Multi-‐fetal Parallel displays the fetal growth curve graphs of all fetuses parallel in the separate graph. Fetal Growth Curve Graph • The horizontal axis shows the fetal age in weeks. The system determines this age from the data on the patient information window. • The vertical axis shows one of the following: - For measurements, mm or cm - For ratios, percent - For fetal weight, grams • The Fetal Growth Curve Graph shows the information for the selected 178 / 265 8000098 measurement as follows: - The normal growth curve - The standard deviations or relevant percentiles - The gestational age of the fetus, using patient data (vertical dotted line) - Using the current ultrasound measurement data, where the fetus is on the growth curve • The legend at the bottom of the graph shows the symbols and colors that indicate data for fetal trending (Past and Present), and multiple gestation (Fetus) in the Multi-‐fetal Compare Display format. • To select which measurement want to display on the Fetal Growth Curve Graph: a. On the graph display, the system displays a list of measurements. b. Select the desired measurement. The system displays the Fetal Growth Curve Graph for the selected measurement. Fetal Growth Bar Graph • The fetal growth bar graph shows current examination measurements and the normal growth range based on the gestational age. It shows all measurements on one graph. - The horizontal axis shows the gestational weeks. - The red vertical shows GA by LMP/EDD, or GA inputted by operator. - The white “X” shows the ultrasound average age using the current measurement. - The green rectangle shows the normal age range for the measurement. • To add a new measurement to be displayed on the Fetal Growth Bar Graph, do one of the following: a. On the graph display, the system displays a list of measurements. b. Select the desired measurement. The system displays the new selected measurement on the Fetal Growth Bar Graph. To Edit Patient Data on the Fetal Growth Graph When working with graphs can change or enter the patient data as follows. Note: Select the field to be changed or entered. The system allows to input the patient data. • LMP: the time of last menstrual period of the patient. • BBT: the time of basal body temperature of the patient. • GA: this field is computed using the LMP/BBT/Avg.US date on the Patient Information Window. Or show the data inputted. • EDD: this field is computed using GA. To change GA: 179 / 265 8000098 a. Select the field. b. Type the correct weeks or days. The system makes the following changes: -‐GA (LMP/BBT) is now GA(GA) and shows the age entered. -‐In the Patient Data section, the GA changes. -‐In the Patient Data section, the EDD shows an updated date, using the GA entered. • Fetus Position: type information about the fetus position. • Placenta: type information about the placenta. If there is one connected printer, select “Print” to print the OB graph 10.8.2 M Mode measurements In “M” mode of Obstetrics application, it includes measurement items as follows: • Depth • Distance • LVEF • HR • A/B Ratio 10.8.3 PW mode measurements In “PW” mode of Obstetrics application, it includes measurement folders as follows: • General • Aorta • Desc.Aorta • Umbilical • Placenta • Uterus • Follicle • MCA General Measurement Folder: • Velocity • PS • ED • MD • TAMAX • PI 180 / 265 8000098 • • RI HR Other Measurement Folders: • Velocity • PS • ED • PI • RI • HR Note: Configure the measurement menu of all Measurement Folders by adding or removing the measurement items in the Measurement Folders. Refer to the “Measurement Menu Configuration” in the chapter “General Measurements” for how to make the configuration of the measurement menu. 181 / 265 8000098 10.9 Cardiac Measurements Introduction Based on the application of different subjects, age and weight, Cardiac measurement provides the different measurement options of each chamber and the corresponding valve in diastolic and systolic period: • General • LV • MV • Ao • AV • LA • RV • TV • PV • RA • System Overview Cardiac measurements provides the main measurement folders: General, LV, MV, Ao, AV, LA, RV, TV, PV, RA, and System, on the B/M、CF、PW/CW/TD mode of this device. Measurement Configuration of Measuring Option Folders To configure the measurement folder options: 1. Press “Measure”. 2. Select the configuration menu of the measurement folder options. Note: Measurement folder option may not be same in the different mode. 3. Choose the measurement folder option which to have, or uncheck the measurement folder option which does not need but has been chosen. 4. After finishing the configuration, press “Back” to return to the previous menu, and the system shows the measurement folder list which has chosen. To add the new measurement folder option: 1. Press “Measure”. 2. Select the configuration menu of the measurement folder options. Note: Measurement folder option may not be same in the different mode. 3. Select “Add”, and the system shows as the following window to add the new measurement folder. 4. Input the name of the new added measurement folder, move the trackball and press “OK”, or press “Cancel” to return to the previous menu. 5. The system returns to the measurement menu, and shows “Add” button in 182 / 265 8000098 the new added measurement folder. Choose this button to add the measurement item for this measurement folder. Note: • For how to add measurement items in the measurement folder, refer to “Measurement Customization” in the General Measurements. • The following Cardiac Measurements are organized in accordance with the measurement folder firstly, secondly according to the mode, and finally based on the type of the measurement. • Configure the measurement item, and refer to the corresponding section in the General Measurements. • Measurement of the last letter d general said diastolic, the letter s general said systolic. In “B” mode of Cardiac examination, the General Measurement Folder includes measurements as follows: • Depth • Distance • Circumference or Perimeter • Area • Volume • Volume d • Volume s • %Stenosis n Diam n Area • A/B Ratio n Diam n Area In “M” mode of Cardiac examination, the General Measurement Folder includes measurements as follows: • Distance • Time • Slope or Velocity • A/B Ratio • HR In the PW mode of Cardiac examination, the General Measurement Folder includes measurements as follows: • Velocity • Time • Acceleration • TAMAX • TAMEAN 183 / 265 8000098 • • • • • A/B Ratio n Velocity n Time n Acceleration FLOW VOL Max PG Mean PG SV n SV Diam n SV TAMEAN n CO HR HR • Note: Refer to the chapter “General Measurements” for how to execute and configure the above measurements. Cardiac Left Ventricular(LV) Measurement Folder In “B” mode of Cardiac examination, the LV Measurement Folder includes measurements as follows: Single distance measurement: • LVIDd • LVPWd • LVIDs • LVPWs • LVd Major • LVd Minor • LVs Major • LVs Minor • LVOT Diam To execute the single distance measurement, the steps are as follows: 1. Press “Measure”. 2. Select the distance measurement to be executed, and an active tracing caliper displays. 3. To position the active caliper at the start point, move the trackball. 4. To fix the start point, press “Enter”. The system fixes the first caliper and displays a second active caliper. 5. To position the second active caliper at the end point, move the trackball. A dotted line connects the measurement points, if preset accordingly. 6. To complete the measurement, press “Enter”. The system displays the distance value in the results window. Multiple distance measurement: • LV Study 184 / 265 8000098 - IVSd - LVIDd - LVPWd - IVSs - LVIDs - LVPWs • LV Study (Simple) - LVIDd - LVIDs To complete the LV Study or LV Study (Simple) measurement, perform six or two standard distance measurements continuously. To configure the measurement setting of LV Study, the steps are as follows: 1. Press “Measure”. 2. Select “Config” then selects “LV Study” button, and a menu displays. a. Select Cube or Teichholz as the calculation formula. b. Choose the parameters that need to be calculated and displayed in the results window: LVEDV, LVESV, SV, EF, CO, SI, CI, LVIDd Index, LVd Mass, LVd Mass Index, LVd Mass(ASE), LVd Mass Index(ASE), LVIDs Index, LVs Mass, LVs Mass Index, LVs Mass(ASE), LVs Mass Index(ASE), %FS, %IVS, and %LVPW. Note: The calculation of some parameters need to use HR and BSA, where HR can be gotten from ECG device, and BSA can be calculated through the patient’s height and weight. Area Measurement, and the measurement method option can be Polygon, Spline and Trace, where Trace method is the default setting. • 2C LVAd • 2C LVAs • 4C LVAd • 4C LVAs • S LVAd • S LVAs • Endo LVAd • Endo LVAs • EpiLVAd • Epi LVAs • LVOT Area To execute the area measurement by Trace method, the steps are as follows: 1. Press “Measure”. 2. Select the area measurement to be executed. 3. Select the measurement method Trace as the default setting from the configuration menu, and an active tracing caliper displays. 185 / 265 8000098 4. To position the trace caliper, move the trackball. 5. To fix the trace start point, press “Enter”. The system fixes the first caliper and the trace caliper changes to an active tracing caliper. 6. To trace the measurement area, move the Trackball around the anatomy. 7. To complete the measurement, press “Enter”. The system displays the measured area value in the results window. Note: Before completing the spline measurement, • To erase the line (little by little) back from its current point, press “Clear” key once; • To clear the trace caliper and the current data measured, press “Clear” for at least 2 seconds. Single Trace combined with Single Distance Measurement: • Diastolic Period: A2C LVEDV, A4C LVEDV • Systolic Period: A2C LVESV, A4C LVESV When the single plane area-‐length method is applied, area of cross-‐section of the left ventricle (A), and length of the long axis of the left ventricle (L) are measured, and length of the short axis of the left ventricle (D) is calculated from these data using the following formula on the assumption that the left ventricle is a spheroid: • A2C A-‐L - LVAd - LVLd - LVAs - LVLs • A4C A-‐L - LVAd - LVLd - LVAs - LVLs • Bi-‐plane A2C&A4C A-‐L - A2C LVAd - LVLd - A2C LVAs - LVLs - A4C LVAd - A4C LVAs To execute the multiple area and multiple distance measurements, the steps are as below: 1. Enter “Measure”, select the measurement item. 2. Press Enter key to start the measurement. 3. Fix the area with the relevant method. 186 / 265 8000098 4. Fix the distance. 5. Repeat step 3-‐4 for twice or three times to complete the measurement. When the Single-‐plane/Enter Simpson Disc method is used, the long axes (L) of apical two-‐chamber or four-‐chamber views is divided equally into 20, and the inside diameters of the short axes (ai and bi) of 20 disks in directions perpendicular to the long axes are obtained. Left ventricular volume is calculated from the total sum of the cross-‐sectional areas of the 20 discs. The areas of the left ventricular cavity are obtained on the assumption that each disc is oval: • A2C-‐Enter Simpson Disc Method - LVEDV - LVESV • A4C-‐Enter Simpson Disc Method - LVEDV - LVESV • Modified Simpson Disc Method - A2C LVEdV - A2C LVESV - A4C LVEdV - A4C LVESV To execute the multiple area and multiple distance measurements, the steps are as below: 1. Enter “Measure”, select the measurement item. 2. Press Enter key to start the measurement. 3. Fix the trace. 4. Fix the vertex. 5. Repeat step 3-‐4 for twice or more times to complete the measurement. In “M” mode of Cardiac examination, the “LV” measurement folder includes measurements as follows: Single Distance Measurement: • LVIDd • LVPWd • LVIDs • LVPWs To execute the single distance measurement, the steps are as follows: 1. Press “Measure”. 2. Select the distance measurement to be executed, a vertical and horizontal dotted line and an active tracing caliper will display on the image screen. 3. To position the active caliper at the most anterior point to be measured, move the trackball. 4. To fix the start point, press “Enter”. The system fixes the first caliper and displays a second active caliper. 187 / 265 8000098 5. To position the second caliper at the most posterior point to be measured, move the trackball. 6. To complete the measurement, press “Enter”. The system displays the vertical distance between the two points in the results window. Multiple Distance Measurements: • LV Study - IVSd - LVIDd - LVPWd - IVSs - LVIDs - LVPWs • LV Study (Simple) - LVIDd - LVIDs To complete the LV Study or LV Study (Simple) measurement, perform six or two standard distance measurements continuously. To configure the measurement setting of LV Study, the steps are as follows: 1. Press “Measure”. 2. Select “Config” then selects “LV Study” button, and a menu displays. a. Select “Cube” or “Teichholz” as the calculation formula. b. Choose the parameters that need to be calculated and displayed in the results window: LVEDV, LVESV, SV, EF, CO, SI, CI, LVIDd Index, LVd Mass, LVd Mass Index, LVd Mass(ASE), LVd Mass Index(ASE), LVIDs Index, LVs Mass, LVs Mass Index, LVs Mass(ASE), LVs Mass Index(ASE), %FS, %IVS, and %LVPW. Note: The calculation of some parameters need to use HR and BSA, where HR can be gotten from ECG device, and BSA can be calculated through the patient’s height and weight. Single Time Interval Measurement: • LVPEP • LVET • MVcf • HR(R-‐R) To execute the time interval measurement, the steps are as follows: 1. Press “Measure”. 2. Select the time measurement to be executed, a vertical and horizontal dotted line and an active tracing caliper will display on the image screen. 3. To position the caliper at the start point, move the trackball. 188 / 265 8000098 4. To fix the first caliper, press “Enter”. The system fixes the first caliper and displays a second active caliper. 5. To position the second caliper at the end point, move the trackball. 6. To complete the measurement, press “Enter”. The system displays the horizontal time interval between the two calipers in the results window. In “PW” mode of Cardiac examination, the LV Measurement Folder includes the following measurements: • Single Velocity Measurement: • LVOT Vmax To execute the velocity measurement, the steps are as follows: 1. Press “Measure”. 2. Select the velocity measurement to be executed, a vertical and horizontal dotted line and an active tracing caliper will display on the image screen.. 3. To position the caliper at the desired measurement point, move the Trackball. 4. To complete the measurement, press “Enter”. The system displays the velocity measurement in the results window. Double Velocity Measurement: • LVOT Max PG n Vmax1 n Vmax2 To execute the two velocity measurements, the steps are as follows: 1. Press “Measure”. 2. Select the double velocity measurement which to be execute, a vertical and horizontal dotted line and an active tracing caliper will display on the image screen. 3. To position the caliper at the desired measurement point, move the Trackball. 4. To complete the first velocity measurement, press “Enter”. The system displays the first velocity measurement in the Results Window, and a second active caliper with a vertical and horizontal dotted line displays. 5. To position the caliper at the desired measurement point, move the Trackball. 6. To complete the second velocity measurement, press “Enter”. The system displays the second velocity measurement and Max PG in the results window. Single Time Interval Measurement: • LVET • LVHR To execute the time interval measurement, the steps are as follows: 1. Press “Measure”. 2. Select the time measurement to be executed, a vertical and horizontal dotted 189 / 265 8000098 line and an active tracing caliper will display on the image screen.. 3. To position the caliper at the start point, move the trackball. 4. To fix the first caliper, press “Enter”. The system fixes the first caliper and displays a second active caliper. 5. To position the second caliper at the end point, move the trackball. 6. To complete the measurement, press “Enter”. The system displays the horizontal time interval between the two calipers in the results window. Single Trace Measurement: • LVOT Trace To execute the trace measurement, the steps are as follows: 1. Press “Measure”. 2. Select the trace measurement to be executed, an active trace caliper displays. 3. To fix the start point, press “Enter”. 4. To trace the velocities of the desired portion of the spectrum, move the trackball. Note: To re-‐edit the existing trace line, press “Clear” once and move the trackball again. 5. To complete the measurement, press “Enter”. The system displays the measurement values in the results window. To configure the trace measurement: Configure the single trace measurement to define the parameter that needs to be calculated and displayed in the Results Window. 1. Press “Measure”. 2. Select “Config”, then select "LVOT Trace”, and a menu displays. 3. Choose the measurement to be executed. Single Trace combined with Single Distance Measurement: • SV (Stroke Volume) n SV Diam n SV TAMEAN CO HR SI CI To measure SV, the steps are as follows: 1. Press “Measure”. 2. Select “SV”. 3. Select “SV Diam”, and perform the single distance measurement. 4. Select “SV TAMEAN”, and perform the single trace measurement. 5. The system displays “SV” and “SI” measurement values in the results window. 190 / 265 8000098 CO HR To measure CO, the steps are as follows: 1. Press “Measure”. 2. Select “SV”. 3. Execute “SV” measurement first. 4. Select “CO HR”, and perform the measurement on HR. 5. The system displays “CO” and “CI” measurement values in the results window. To execute “Semiauto Trace”, the steps are as follows: 1. Press “Measure”. 2. Select item “Semiauto Trace”. 3. Fix the start and end point on PW image. 4. The system will provide the results automatically. In config page, the operator can select target items to display in the result window. Cardiac Mitral Valve(MV) Measurement Folder In “B” mode of Cardiac examination, the MV Measurement Folder includes measurements as follows: Single Distance Measurement: • MV Ann Diam • EPSS • MR Radius(only available in the CFI mode) To execute the single distance measurement, the steps are as follows: 1. Press “Measure”. 2. Select the distance measurement to be executed, and an active tracing caliper displays. 3. To position the active caliper at the start point, move the trackball. 4. To fix the start point, press “Enter”. The system fixes the first caliper and displays a second active caliper. 5. To position the second active caliper at the end point, move the trackball. A dotted line connects the measurement points, if preset accordingly. 6. To complete the measurement, press “Enter”. The system displays the distance value in the results window. Area Measurement, and the measurement method option can be Polygon, Spline and Trace, where Trace method is the default setting. • MVA by PHT To execute the area measurement by “Trace” method, the steps are as follows: 1. Press “Measure”. 2. Select the area measurement to be executed. 3. Select the measurement method “Trace” as the default setting from the configuration menu, and an active tracing caliper displays. 191 / 265 8000098 4. To position the trace caliper, move the trackball. 5. To fix the trace start point, press “Enter”. The system fixes the first caliper and the trace caliper changes to an active tracing caliper. 6. To trace the measurement area, move the Trackball around the anatomy. 7. To complete the measurement, press “Enter”. The system displays the measured area value in the results window. Note: Before completing the spline measurement: • To erase the line (little by little) back from its current point, press “Clear” once; • To clear the trace caliper and the current data measured, press “Clear” for at least 2 seconds. In “M” mode of Cardiac examination, the MV Measurement Folder includes measurements as follows: Single Distance Measurement: • EPSS To execute the single distance measurement, the steps are as follows: 1. Press “Measure”. 2. Select the distance measurement to be executed, a vertical and horizontal dotted line and an active tracing caliper will display on the image screen. 3. To position the active caliper at the most anterior point to be measured, move the trackball. 4. To fix the start point, press “Enter”. The system fixes the first caliper and displays a second active caliper. 5. To position the second caliper at the most posterior point to be measured, move the trackball. 6. To complete the measurement, press “Enter”. The system displays the vertical distance between the two points in the results window. Single Slope Measurement: • D-‐E Excursion • D-‐E Slope • E-‐F Slope To execute the slope measurement, the steps are as follows: 1. Press “Measure”. 2. Select the slope measurement to be executed, a vertical and horizontal dotted line and an active tracing caliper will display on the image screen. 3. To position the active caliper at the start point to be measured, move the trackball. 4. To fix the start point, press “Enter”. The system fixes the first caliper and displays a second active caliper. 192 / 265 8000098 5. To position the second caliper at the end point to be measured, move the trackball. 6. To complete the measurement, press “Enter”. The system displays the slope, vertical distance and horizontal time interval between the two points in the results window. • A/B Ratio(Slope) • MVE/A Ratio n MV Vel A n MV Vel E To measure A/B Ratio(Slope), the steps are as follows: 1. Press “Measure”. 2. Select MV E/A Ratio, a vertical and horizontal dotted line and an active tracing caliper will display on the image screen. 3. To position the velocity A, move the trackball. 4. To fix the velocity A, press “Enter”. The system fixes the first caliper and displays a second active caliper. 5. To position the velocity A, move the trackball. 6. To complete the measurement, press “Enter” to fix the velocity B. The system displays the velocity A, velocity B and velocity A/velocity B ratio in the results window. In the PW mode of Cardiac examination, the MV Measurement Folder includes the following measurements: Single Velocity Measurement: • MR Vmax • MV Vmax To execute the velocity measurement, the steps are as follows: 1. Press “Measure”. 2. Select the velocity measurement to be executed, a vertical and horizontal dotted line and an active tracing caliper will display on the image screen. 3. To position the caliper at the desired measurement point, move the trackball. 4. To complete the measurement, press “Enter”. The system displays the velocity measurement in the results window. Double Velocity Measurement: • MR Max PG n Vmax1 n Vmax2 • MV Max PG n Vmax1 n Vmax2 193 / 265 8000098 • MV E/A Ratio n MV Vel A • MV Vel E To execute the two velocity measurements, the steps are as follows: 1. Press “Measure”. 2. Select the double velocity measurement to be executed, a vertical and horizontal dotted line and an active tracing caliper will display on the image screen. 3. To position the caliper at the desired measurement point, move the trackball. 4. To complete the first velocity measurement, press “Enter”. The system displays the first velocity measurement in the results window, and a second active caliper with a vertical and horizontal dotted line displays. 5. To position the caliper at the desired measurement point, move the trackball. 6. To complete the second velocity measurement, press “Enter” . The system displays the second velocity measurement and Max PG or velocity ratio in the results window. Single Time Interval Measurement: • MV Acc Time • MV Dec Time • MVET • MV A Dur • MV TTP To execute the time interval measurement, the steps are as follows: 1. Press “Measure”. 2. Select the time measurement to be executed, a vertical and horizontal dotted line and an active tracing caliper will display on the image screen. 3. To position the caliper at the start point, move the trackball. 4. To fix the first caliper, press “Enter”. The system fixes the first caliper and displays a second active caliper. 5. To position the second caliper at the end point, move the trackball. 6. To complete the measurement, press “Enter”. The system displays the horizontal time interval between the two calipers in the results window. Single Slope Measurement: • MR Acc • MV Acc • MV Dec • MV PHT • MPA by PHT To execute the slope measurement, the steps are as follows: 194 / 265 8000098 1. Press “Measure”. 2. Select the slope measurement to be executed, a vertical and horizontal dotted line and an active tracing caliper will display on the image screen. 3. To position the active caliper at the start point to be measured, move the trackball. 4. To fix the start point, press “Enter”. The system fixes the first caliper and displays a second active caliper. 5. To position the second caliper at the end point to be measured, move the trackball. 6. To complete the measurement, press “Enter”. The system displays the slope, two velocities and horizontal time interval between the two points in the results window. Single Trace Measurement: • MR Trace • MV Trace To execute the trace measurement, the steps are as follows: 1. Press “Measure”. 2. Select the trace measurement to be executed, an active trace caliper displays. 3. To fix the start point, press “Enter”. 4. To trace the velocities of the desired portion of the spectrum, move the Trackball. Note: To re-‐edit the existing trace line, press “Clear” once and move the trackball again. 5. To complete the measurement, press “Enter”. The system displays the measurement values in the results window. To configure the trace measurement: Configure the single trace measurement to define the parameter that needs to be calculated and displayed in the Results Window. 1. Press “Measure”. 2. Select “Config” then select “MR Trace or MV Trace” button, and a menu displays. 3. Choose the measurement to be executed. Multiple Time Interval Measurement: LV TEI Index l MV C-‐O dur l LVET To execute the time interval measurement, the steps are as follows: 1. Press “Measure”. 2. Select “LV TEI Index” to be executed, a vertical and horizontal dotted line and an active tracing caliper will display on the image screen. 195 / 265 8000098 3. To position the caliper at the start point, move the trackball. 4. To fix the first caliper, press “Enter”. The system fixes the first caliper and displays a second active caliper. 5. To position the second caliper at the end point, move the trackball. 6. To complete the measurement, press “Enter”. The system displays the horizontal time interval between the two calipers in the results window. Cardiac Aortic Measurement Folder In “B” mode of Cardiac examination, the “Ao” Measurement Folder includes measurements as follows: Single Distance Measurement: • AoDiam • Ao Arch Diam • AoAscDiam • AoDescDiam • Ao Isthmus • Ao ST Junct To execute the single distance measurement, the steps are as follows: 1. Press “Measure”. 2. Select the distance measurement to be executed, and an active tracing caliper displays on the image screen 3. To position the active caliper at the start point, move the trackball. 4. To fix the start point, press “Enter”. The system fixes the first caliper and displays a second active caliper. 5. To position the second active caliper at the end point, move the Trackball. A dotted line connects the measurement points, if preset accordingly. 6. To complete the measurement, press “Enter”. The system displays the distance value in the results window. In “M” mode of Cardiac examination, the “Ao” Measurement Folder includes the following measurements: Single Distance Measurement: • AoDiam To execute the single distance measurement, the steps are as follows: 1. Press “Measure”. 2. Select the distance measurement to be executed, a vertical and horizontal dotted line and an active tracing caliper will display on the image screen. 3. To position the active caliper at the most anterior point to be measured, move the trackball. 4. To fix the start point, press “Enter”. The system fixes the first caliper and displays a second active caliper. 5. To position the second caliper at the most posterior point to be measured, 196 / 265 8000098 move the Trackball. 6. To complete the measurement, press “Enter”. The system displays the vertical distance between the two points in the results window. In “PW” mode of Cardiac examination, the “Ao” Measurement Folder includes measurements as follows: Single Velocity Measurement: • AR Vmax • AREndVmax • Coarc Pre-‐Dust • Coarc Post-‐Dust To execute the velocity measurement, the steps are as follows: 1. Press “Measure”. 2. Select the velocity measurement to be executed, a vertical and horizontal dotted line and an active tracing caliper will display on the image screen. 3. To position the caliper at the desired measurement point, move the trackball. 4. To complete the measurement, press “Enter”. The system displays the velocity measurement in the results window. Double Velocity Measurement: • AR Max PG n Vmax1 n Vmax2 To execute the two velocity measurements, the steps are as follows: 1. Press “Measure”. 2. Select the double velocity measurement to be executed, a vertical and horizontal dotted line and an active tracing caliper will display on the image screen. 3. To position the caliper at the desired measurement point, move the Trackball. 4. To complete the first velocity measurement, press “Enter”. The system displays the first velocity measurement in the results window, and a second active caliper with a vertical and horizontal dotted line displays. 5. To position the caliper at the desired measurement point, move the trackball. 6. To complete the second velocity measurement, press “Enter”. The system displays the second velocity measurement and Max PG in the results window. Single Slope Measurement: • AR PHT To execute the slope measurement, the steps are as follows: 1. Press “Measure”. 2. Select the slope measurement to be executed, a vertical and horizontal dotted 197 / 265 8000098 line and an active tracing caliper will display on the image screen. 3. To position the active caliper at the start point to be measured, move the trackball. 4. To fix the start point, press “Enter”. The system fixes the first caliper and displays a second active caliper. 5. To position the second caliper at the end point to be measured, move the trackball. 6. To complete the measurement, press “Enter”. The system displays the slope, two velocities and horizontal time interval between the two points in the results window. Single Trace Measurement: • AR Trace To execute the trace measurement, the steps are as follows: 1. Press “Measure”. 2. Select the trace measurement to be executed, a vertical and horizontal dotted line and an active tracing caliper will display on the image screen. 3. To fix the start point, press “Enter”. 4. To trace the velocities of the desired portion of the spectrum, move the trackball. Note: To re-‐edit the existing trace line, press Clear once and move the trackball again. 5. To complete the measurement, press “Enter”. The system displays the measurement values in the results window. To configure the trace measurement: Configure the single trace measurement to define the parameter that needs to be calculated and displayed in the Results Window. 1. Press “Measure”. 2. Select “Config” then select “AR Trace” button, and a menu displays. 3. Choose the measurement to be executed. Cardiac Aortic Valve(AV) Measurement Folder In the B mode of Cardiac examination, the AV Measurement Folder includes the following measurements: Single Distance Measurement: • AV Diam • AV Cusp • AR Radius(only available in the CFI mode) To execute the single distance measurement, the steps are as follows: 1. Press “Measure”. 2. Select the distance measurement to be executed, a vertical and horizontal 198 / 265 8000098 dotted line and an active tracing caliper will display on the image screen. 3. To position the active caliper at the start point, move the trackball. 4. To fix the start point, press “Enter”. The system fixes the first caliper and displays a second active caliper. 5. To position the second active caliper at the end point, move the Trackball. A dotted line connects the measurement points, if preset accordingly. 6. To complete the measurement, press “Enter”. The system displays the distance value in the results window. Area Measurement, and the measurement method option can be Polygon, Spline and Trace, where Trace method is the default setting. • AVA • AV–A • Trans AVAd • Trans AVAs To execute the area measurement by Trace method, the steps are as follows: 1. Press “Measure”. 2. Select the area measurement to be executed. 3. Select the measurement method Trace as the default setting from the configuration menu, and an active tracing caliper displays. 4. To position the trace caliper, move the trackball. 5. To fix the trace start point, press “Enter”. The system fixes the first caliper and the trace caliper changes to an active tracing caliper. 6. To trace the measurement area, move the trackball around the anatomy. 7. To complete the measurement, press “Enter”. The system displays the measured area value in the results window. Note: Before completing the spline measurement: • To erase the line (little by little) back from its current point, press “Clear” once; • To clear the trace caliper and the current data measured, press “Clear” for at least 2 seconds. In the M mode of Cardiac examination, the AV Measurement Folder includes the following measurements: Single Distance Measurement: • AV Cusp To execute the single distance measurement, the steps are as follows: 1. Press “Measure”. 2. Select the distance measurement to be executed, a vertical and horizontal dotted line and an active tracing caliper will display on the image screen. 3. To position the active caliper at the most anterior point to be measured, move 199 / 265 8000098 the trackball. 4. To fix the start point, press “Enter”. The system fixes the first caliper and displays a second active caliper. 5. To position the second caliper at the most posterior point to be measured, move the trackball. 6. To complete the measurement, press “Enter”. The system displays the vertical distance between the two points in the results window. In “PW” mode of Cardiac examination, the AV Measurement Folder includes measurements as follows: Single Velocity Measurement: • AV Vmax To execute the velocity measurement, the steps are as follows: 1. Press “Measure”. 2. Select the velocity measurement to be executed, a vertical and horizontal dotted line and an active tracing caliper will display on the image screen. 3. To position the caliper at the desired measurement point, move the trackball. 4. To complete the measurement, press “Enter”. The system displays the velocity measurement in the results window. Double Velocity Measurement: • AV Max PG n Vmax1 n Vmax2 To execute the two velocity measurements, the steps are as follows: 1. Press “Measure”. 2. Select the double velocity measurement to be executed, a vertical and horizontal dotted line and an active tracing caliper will display on the image screen. 3. To position the caliper at the desired measurement point, move the trackball. 4. To complete the first velocity measurement, press “Enter”. The system displays the first velocity measurement in the Results Window, and a second active caliper with a vertical and horizontal dotted line displays. 5. To position the caliper at the desired measurement point, move the trackball. 6. To complete the second velocity measurement, press “Enter”. The system displays the second velocity measurement and Max PG in the results window. Single Time Interval Measurement: • AV Acc Time • AV Dec Time • AVET • AVHR 200 / 265 8000098 To execute the time interval measurement, the steps are as follows: 1. Press “Measure”. 2. Select the time measurement to be executed, a vertical and horizontal dotted line and an active tracing caliper will display on the image screen. 3. To position the caliper at the start point, move the Trackball. 4. To fix the first caliper, press “Enter”. The system fixes the first caliper and displays a second active caliper. 5. To position the second caliper at the end point, move the trackball. 6. To complete the measurement, press “Enter”. The system displays the horizontal time interval between the two calipers in the Results Window. A/B Ratio(Time)Measurement: • AV Ratio • AV Acc Time • AVET To measure AV Ratio, the steps are as follows: 1. Press “Measure”. 2. Select “AV Ratio”, a vertical and horizontal dotted line and an active tracing caliper will display on the image screen. 3. Perform two standard time interval measurements on AV Acc Time and AVET. 4. The system displays AV Acc Time, AVET and AV Acc Time/AVET Ratio in the results window. Single Slope Measurement: • AV Acc • AV Dec • AVA by PHT To execute the slope measurement, the steps are as follows: 1. Press “Measure”. 2. Select the slope measurement to be executed, a vertical and horizontal dotted line and an active tracing caliper will display on the image screen. 3. To position the active caliper at the start point to be measured, move the trackball. 4. To fix the start point, press “Enter”. The system fixes the first caliper and displays a second active caliper. 5. To position the second caliper at the end point to be measured, move the trackball. 6. To complete the measurement, press “Enter”. The system displays the slope, two velocities and horizontal time interval between the two points in the results window. 201 / 265 8000098 Single Trace Measurement: • AV Trace To execute the trace measurement, the steps are as follows: 1. Press “Measure”. 2. Select the trace measurement to be executed, an active trace caliper displays. 3. To fix the start point, press “Enter”. 4. To trace the velocities of the desired portion of the spectrum, move the trackball. Note: To re-‐edit the existing trace line, press Clear once and move the trackball again. 5. To complete the measurement, press “Enter”. The system displays the measurement values in the results window. To configure the trace measurement: Configure the single trace measurement to define the parameter that needs to be calculated and displayed in the results window. 1. Press “Measure”. 2. Select “Config” then select “AV Trace” button, and a menu displays. 3. Choose the measurement to be executed. Cardiac Left Atrium(LA) Measurement Folder In the B mode of Cardiac examination, the LA Measurement Folder includes the following measurements: Single Distance Measurement: • LA Diam • LAd Major • LAd Minor • LAs Major • LAs Minor To execute the single distance measurement, the steps are as follows: 1. Press “Measure”. 2. Select the distance measurement to be executed, and an active tracing caliper displays. 3. To position the active caliper at the start point, move the trackball. 4. To fix the start point, press “Enter”. The system fixes the first caliper and displays a second active caliper. 5. To position the second active caliper at the end point, move the Trackball. A dotted line connects the measurement points, if preset accordingly. 6. To complete the measurement, press “Enter”. The system displays the distance value in the results window. Area Measurement, and the measurement method option can be Polygon, 202 / 265 8000098 Spline and Trace, where Trace method is the default setting. • LAAd • LAAs To execute the area measurement by Trace method, the steps are as follows: 1. Press “Measure”. 2. Select the area measurement to be executed. 3. Select the measurement method Trace as the default setting from the configuration menu, and an active tracing caliper displays. 4. To position the trace caliper, move the trackball. 5. To fix the trace start point, press “Enter”. The system fixes the first caliper and the trace caliper changes to an active tracing caliper. 6. To trace the measurement area, move the trackball around the anatomy. 7. To complete the measurement, press “Enter”. The system displays the measured area value in the results window. Note: Before completing the spline measurement: • To erase the line (little by little) back from its current point, press “Clear” once; • To clear the trace caliper and the current data measured, press “Clear” for at least 2 seconds. Single Trace combined with Single Distance Measurement: • Diastolic Period: A2C LAEDV, A4C LAEDV • Systolic Period: A2C LAESV, A4C LAESV In the M mode of Cardiac examination, the LA Measurement Folder includes the following measurements: Single Distance Measurement: • LA Diam To execute the single distance measurement, the steps are as follows: 1. Press “Measure”. 2. Select the distance measurement to be executed, a vertical and horizontal dotted line and an active tracing caliper will display on the image screen. 3. To position the active caliper at the most anterior point to be measured, move the trackball. 4. To fix the start point, press “Enter”. The system fixes the first caliper and displays a second active caliper. 5. To position the second caliper at the most posterior point to be measured, move the trackball. 6. To complete the measurement, press “Enter”. The system displays the vertical distance between the two points in the results window. 203 / 265 8000098 A/B Ratio(Diam) Measurement: • LA/Ao • LA Diam • AoDiam To measure LA/Ao, the steps are as follows: 1. Press “Measure”. 2. Select “LA/Ao”, a vertical and horizontal dotted line and an active tracing caliper will display on the image screen. 3. Perform two standard distance measurements on LA Diam and Ao Diam. 4. The system displays LA Diam, AoDiam and LA Diam/AoDiam Ration in the results window. Cardiac Right Ventricular(RV) Measurement Folder In the B mode of Cardiac examination, the RV Measurement Folder includes the following measurements: Single Distance Measurement: • RVAWd • RVIDd • RVAWs • RVIDs • RVd Major • RVd Minor • RVs Major • RVs Minor • RVOT Diam • LPA Diam • RPA Diam • MPA Diam To execute the single distance measurement, the steps are as follows: 1. Press “Measure”. 2. Select the distance measurement to be executed, and an active tracing caliper displays. 3. To position the active caliper at the start point, move the trackball. 4. To fix the start point, press “Enter”. The system fixes the first caliper and displays a second active caliper. 5. To position the second active caliper at the end point, move the trackball. A dotted line connects the measurement points, if preset accordingly. 6. To complete the measurement, press “Enter”. The system displays the distance value in the results window. Area Measurement, and the measurement method option can be Polygon, Spline and Trace, where Trace method is the default setting. • RVAd 204 / 265 8000098 • RVAs • LPAA • RPAA To execute the area measurement by Trace method, the steps are as follows: 1. Press “Measure”. 2. Select the area measurement to be executed. 3. Select the measurement method “Trace” as the default setting from the configuration menu, and an active tracing caliper displays. 4. To position the trace caliper, move the trackball. 5. To fix the trace start point, press “Enter”. The system fixes the first caliper and the trace caliper changes to an active tracing caliper. 6. To trace the measurement area, move the Trackball around the anatomy. 7. To complete the measurement, press “Enter”. The system displays the measured area value in the results window. Note: Before completing the spline measurement: • To erase the line (little by little) back from its current point, press “Clear” once; • To clear the trace caliper and the current data measured, press “Clear” for at least 2 seconds. In the M mode of Cardiac examination, the RV Measurement Folder includes the following measurements: Single Distance Measurement: • RVAWd • RVIDd • RVAWs • RVIDs To execute the single distance measurement, the steps are as follows: 1. Press “Measure”. 2. Select the distance measurement to be executed, a vertical and horizontal dotted line and an active tracing caliper will display on the image screen. 3. To position the active caliper at the most anterior point to be measured, move the trackball. 4. To fix the start point, press “Enter”. The system fixes the first caliper and displays a second active caliper. 5. To position the second caliper at the most posterior point to be measured, move the trackball. 6. To complete the measurement, press “Enter”. The system displays the vertical distance between the two points in the results window. Double Distance Measurement: 205 / 265 8000098 • RV Study • RVIDd • RVIDs To complete the RV Study measurement, perform the two standard distance measurements continuously. Single Time Interval Measurement: • RVPEP • RVET To execute the time interval measurement, the steps are as follows: 1. Press “Measure”. 2. Select the time measurement to be executed, a vertical and horizontal dotted line and an active tracing caliper will display on the image screen. 3. To position the caliper at the start point, move the trackball. 4. To fix the first caliper, press “Enter”. The system fixes the first caliper and displays a second active caliper. 5. To position the second caliper at the end point, move the trackball. 6. To complete the measurement, press “Enter”. The system displays the horizontal time interval between the two calipers in the results window. In the PW mode of Cardiac examination, the RV Measurement Folder includes the following measurements: Single Velocity Measurement: • RVOT Vmax To execute the velocity measurement, the steps are as follows: 1. Press “Measure”. 2. Select the velocity measurement to be executed, a vertical and horizontal dotted line and an active tracing caliper will display on the image screen. 3. To position the caliper at the desired measurement point, move the trackball. 4. To complete the measurement, press “Enter”. The system displays the velocity measurement in the results window. Double Velocity Measurement: • RVOT Max PG n Vmax1 n Vmax2 To execute the two velocity measurements, the steps are as follows: 1. Press “Measure”. 2. Select the double velocity measurement to be executed, a vertical and horizontal dotted line and an active tracing caliper will display on the image screen. 206 / 265 8000098 3. To position the caliper at the desired measurement point, move the trackball. 4. To complete the first velocity measurement, press “Enter”. The system displays the first velocity measurement in the results window, and a second active caliper with a vertical and horizontal dotted line displays. 5. To position the caliper at the desired measurement point, move the trackball. 6. To complete the second velocity measurement, press “Enter”. The system displays the second velocity measurement and Max PG in the results window. Single Time Interval Measurement: • RVET To execute the time interval measurement, the steps are as follows: 1. Press “Measure”. 2. Select the time measurement to be executed, a vertical and horizontal dotted line and an active tracing caliper will display on the image screen. 3. To position the caliper at the start point, move the Trackball. 4. To fix the first caliper, press “Enter”. The system fixes the first caliper and displays a second active caliper. 5. To position the second caliper at the end point, move the trackball. 6. To complete the measurement, press “Enter”. The system displays the horizontal time interval between the two calipers in the results window. Single Trace Measurement: • RVOT Trace To execute the trace measurement, the steps are as follows: 1. Press “Measure”. 2. Select the trace measurement to be executed, an active trace caliper displays. 3. To fix the start point, press “Enter”. 4. To trace the velocities of the desired portion of the spectrum, move the trackball. Note: To re-‐edit the existing trace line, press “Clear” once and move the trackball again. 5. To complete the measurement, press “Enter”. The system displays the measurement values in the results window. To configure the trace measurement: Configure the single trace measurement to define the parameter that needs to be calculated and displayed in the Results Window. 1. Press “Measure”. 2. Select “Config” then select “RVOT Trace” button, and a menu displays. 3. Choose the measurement to be executed. Single Trace combined with Single Distance Measurement: 207 / 265 8000098 • - SV (Stroke Volume) n SV Diam n SV TAMEAN CO HR SI CI To measure SV, the steps are as follows: 1. Press “Measure”. 2. Select “SV”. 3. Select “SV Diam”, and perform the single distance measurement. 4. Select “SV TAMEAN”, and perform the single trace measurement. 5. The system displays “SV” and “SI” measurement values in the results window. CO HR To measure CO, the steps are as follows: 1. Press “Measure”. 2. Select “SV”. 3. Execute “SV” measurement first. 4. Select “CO HR”, and perform the measurement on “HR”. 5. The system displays CO and CI measurement values in the results window. Cardiac Tricuspid Valve(TV) Measurement Folder In the B mode of Cardiac examination, the TV Measurement Folder includes the following measurements: Single Distance Measurement: TV Ann Diam • TR Radius(only available in CFI mode) To execute the single distance measurement, the steps are as follows: 1. Press “Measure”. 2. Select the distance measurement to be executed, and an active tracing caliper displays. 3. To position the active caliper at the start point, move the trackball. 4. To fix the start point, press “Enter”. The system fixes the first caliper and displays a second active caliper. 5. To position the second active caliper at the end point, move the Trackball. A dotted line connects the measurement points, if preset accordingly. 6. To complete the measurement, press “Enter”. The system displays the distance value in the results window. Area Measurement The measurement method options are Polygon, Spline and Trace. Trace method is the default setting. 208 / 265 8000098 • TVA To execute the area measurement by Trace method, the steps are as follows: 1. Press “Measure”. 2. Select the area measurement to be executed. 3. Select the measurement method Trace as the default setting from the configuration menu, and an active tracing caliper displays. 4. To position the trace caliper, move the trackball. 5. To fix the trace start point, press “Enter”. The system fixes the first caliper and the trace caliper changes to an active tracing caliper. 6. To trace the measurement area, move the trackball around the anatomy. 7. To complete the measurement, press “Enter”. The system displays the measured area value in the results window. Note: Before completing the spline measurement, • To erase the line (little by little) back from its current point, press “Clear” once; • To clear the trace caliper and the current data measured, press “Clear” for at least 2 seconds. In the M mode of Cardiac examination, the TV Measurement Folder includes the following measurements: Single Time Interval Measurement: • Q-‐to-‐TV close To execute the time interval measurement, the steps are as follows: 1. Press “Measure”. 2. Select the time measurement to be executed, a vertical and horizontal dotted line and an active tracing caliper will display on the image screen. 3. To position the caliper at the start point, move the trackball. 4. To fix the first caliper, press “Enter”. The system fixes the first caliper and displays a second active caliper. 5. To position the second caliper at the end point, move the trackball. 6. To complete the measurement, press “Enter”. The system displays the horizontal time interval between the two calipers in the results window. In the PW mode of Cardiac examination, the TV Measurement Folder includes the following measurements: Single Velocity Measurement: • TR Vmax • TV Vmax To execute the velocity measurement, the steps are as follows: 1. Press “Measure”. 209 / 265 8000098 2. Select the velocity measurement to be executed, a vertical and horizontal dotted line and an active tracing caliper will display on the image screen. 3. To position the caliper at the desired measurement point, move the trackball. 4. To complete the measurement, press “Enter”. The system displays the velocity measurement in the results window. Double Velocity Measurement: • TR Max PG n Vmax1 n Vmax2 • TV Max PG n Vmax1 n Vmax2 • TV E/A Ratio n MV Vel A n MV Vel E To execute the two velocity measurements, the steps are as follows: 1. Press “Measure”. 2. Select the double velocity measurement to be executed, a vertical and horizontal dotted line and an active tracing caliper will display on the image screen. 3. To position the caliper at the desired measurement point, move the trackball. 4. To complete the first velocity measurement, press “Enter”. The system displays the first velocity measurement in the results window, and a second active caliper with a vertical and horizontal dotted line displays. 5. To position the caliper at the desired measurement point, move the trackball. 6. To complete the second velocity measurement, press “Enter”. The system displays the second velocity measurement and Max PG or TV E/A Ratio in the results window. Single Time Interval Measurement: • TCO • TV TTP • TV A Dur • Q-‐to-‐TV close To execute the time interval measurement, the steps are as follows: 1. Press “Measure”. 2. Select the time measurement to be executed, a vertical and horizontal dotted line and an active tracing caliper will display on the image screen. 3. To position the caliper at the start point, move the trackball. 4. To fix the first caliper, press “Enter”. The system fixes the first caliper and displays a second active caliper. 210 / 265 8000098 5. To position the second caliper at the end point, move the trackball. 6. To complete the measurement, press “Enter”. The system displays the horizontal time interval between the two calipers in the results window. Multiple Time Interval Measurement: RV TEI Index l TV C-‐O dur l RVET To execute the time interval measurement, the steps are as follows: 1. Press “Measure”. 2. Select “RV TEI Index” to be executed, a vertical and horizontal dotted line and an active tracing caliper will display on the image screen. 3. To position the caliper at the start point, move the trackball. 4. To fix the first caliper, press “Enter”. The system fixes the first caliper and displays a second active caliper. 5. To position the second caliper at the end point, move the trackball. 6. To complete the measurement, press “Enter”. The system displays the horizontal time interval between the two calipers in the results window. Single Slope Measurement: • TR Acc • TV PHT To execute the slope measurement, the steps are as follows: 1. Press “Measure”. 2. Select the slope measurement to be executed, a vertical and horizontal dotted line and an active tracing caliper will display on the image screen. 3. To position the active caliper at the start point to be measured, move the trackball. 4. To fix the start point, press “Enter”. The system fixes the first caliper and displays a second active caliper. 5. To position the second caliper at the end point to be measured, move the trackball. 6. To complete the measurement, press “Enter”. The system displays the slope, two velocities and horizontal time interval between the two points in the results window. Single Trace Measurement: • TR Trace • TV Trace To execute the trace measurement, the steps are as follows: 1. Press “Measure”. 2. Select the trace measurement to be executed, an active trace caliper displays. 211 / 265 8000098 3. To fix the start point, press “Enter”. 4. To trace the velocities of the desired portion of the spectrum, move the trackball. Note: To re-‐edit the existing trace line, press Clear once and move the trackball again. 5. To complete the measurement, press “Enter”. The system displays the measurement values in the results window. To configure the trace measurement: Configure the single trace measurement to define the parameter that needs to be calculated and displayed in the results window. 1. Press “Measure”. 2. Select “Config” then select “TR Trace” or “TV Trace” button, and a menu displays. 3. Choose the measurement to be executed. Single Trace combined with Single Distance Measurement: • SV (Stroke Volume) n SV Diam n SV TAMEAN CO HR SI CI To measure SV, the steps are as follows: 1. Press “Measure”. 2. Select “SV”. 3. Select “SV Diam”, and perform the single distance measurement. 4. Select “SV TAMEAN”, and perform the single trace measurement. 5. The system displays “SV” and “SI” measurement values in the results window. CO HR To measure CO, the steps are as follows: 1. Press “Measure”. 2. Select “SV”. 3. Execute SV measurement first. 4. Select “CO HR”, and perform the measurement on HR. 5. The system displays CO and CI measurement values in the results window. Cardiac Pulmonary Valve(PV) Measurement Folder In the B mode of Cardiac examination, the PV Measurement Folder includes the following measurements: Single Distance Measurement: • Pulmonic Diam • PV Ann Diam 212 / 265 8000098 • PR Radius(only available in the CFI mode) To execute the single distance measurement, the steps are as follows: 1. Press “Measure”. 2. Select the distance measurement to be executed, and an active tracing caliper displays. 3. To position the active caliper at the start point, move the trackball. 4. To fix the start point, press “Enter”. The system fixes the first caliper and displays a second active caliper. 5. To position the second active caliper at the end point, move the trackball. A dotted line connects the measurement points, if preset accordingly. 6. To complete the measurement, press “Enter”. The system displays the distance value in the results window. Area Measurement The measurement method options are Polygon, Spline and Trace, where Trace method is the default setting. • PVA • PV-‐A To execute the area measurement by Trace method, the steps are as follows: 1. Press “Measure”. 2. Select the area measurement to be executed. 3. Select the measurement method Trace as the default setting from the configuration menu, and an active tracing caliper displays. 4. To position the trace caliper, move the trackball. 5. To fix the trace start point, press “Enter”. The system fixes the first caliper and the trace caliper changes to an active tracing caliper. 6. To trace the measurement area, move the trackball around the anatomy. 7. To complete the measurement, press “Enter”. The system displays the measured area value in the results window. Note: Before completing the spline measurement: • To erase the line (little by little) back from its current point, press “Clear” once; • To clear the trace caliper and the current data measured, press “Clear” for at least 2 seconds. In the M mode of Cardiac examination, the PV Measurement Folder includes the following measurements: Single Time Interval Measurement: • Q-‐to-‐PV close To execute the time interval measurement, the steps are as follows: 213 / 265 8000098 1. Press “Measure”. 2. Select the time measurement to be executed, a vertical and horizontal dotted line and an active tracing caliper will display on the image screen. 3. To position the caliper at the start point, move the trackball. 4. To fix the first caliper, press “Enter”. The system fixes the first caliper and displays a second active caliper. 5. To position the second caliper at the end point, move the trackball. 6. To complete the measurement, press “Enter”. The system displays the horizontal time interval between the two calipers in the results window. In the PW mode of Cardiac examination, the PV Measurement Folder includes the following measurements: Single Velocity Measurement: • PR Vmax • PREnd Vmax • PV Vmax To execute the velocity measurement, the steps are as follows: 1. Press “Measure”. 2. Select the velocity measurement to be executed, a vertical and horizontal dotted line and an active tracing caliper will display on the image screen. 3. To position the caliper at the desired measurement point, move the trackball. 4. To complete the measurement, press “Enter”. The system displays the velocity measurement in the results window. Double Velocity Measurement: • PR Max PG n Vmax1 n Vmax2 • PREnd Max PG n Vmax1 n Vmax2 • PV Max PG n Vmax1 n Vmax2 To execute the two velocity measurements, the steps are as follows: 1. Press “Measure”. 2. Select the double velocity measurement to be executed, a vertical and horizontal dotted line and an active tracing caliper will display on the image screen. 3. To position the caliper at the desired measurement point, move the trackball. 4. To complete the first velocity measurement, press “Enter”. The system displays the first velocity measurement in the results window, and a second 214 / 265 8000098 active caliper with a vertical and horizontal dotted line displays. 5. To position the caliper at the desired measurement point, move the trackball. 6. To complete the second velocity measurement, press “Enter”. The system displays the second velocity measurement and Max PG in the results window. Single Time Interval Measurement: • PV Acc Time • PV Dec Time • PVET • Q-‐to-‐PV close To execute the time interval measurement, the steps are as follows: 1. Press “Measure”. 2. Select the time measurement to be executed, a vertical and horizontal dotted line and an active tracing caliper will display on the image screen. 3. To position the caliper at the start point, move the trackball. 4. To fix the first caliper, press “Enter”. The system fixes the first caliper and displays a second active caliper. 5. To position the second caliper at the end point, move the trackball. 6. To complete the measurement, press “Enter”. The system displays the horizontal time interval between the two calipers in the results window. A/B Ratio(Time)Measurement: • PV Ratio • PV Acc Time • PVET To measure PV Ratio, the steps are as follows: 1. Press “Measure”. 2. Select “PV Ratio”, a vertical and horizontal dotted line and an active tracing caliper will display on the image screen. 3. Perform two standard time interval measurements on PV Acc Time and PVET. 4. The system displays PV Acc Time, PVET and PV Acc Time/PVET Ratio in the results window. Single Slope Measurement: • PR Acc • PR PHT • PV Acc To execute the slope measurement, the steps are as follows: 1. Press “Measure”. 2. Select the slope measurement to be executed, a vertical and horizontal dotted line and an active tracing caliper will display on the image screen. 215 / 265 8000098 3. To position the active caliper at the start point to be measured, move the trackball. 4. To fix the start point, press “Enter”. The system fixes the first caliper and displays a second active caliper. 5. To position the second caliper at the end point to be measured, move the trackball. 6. To complete the measurement, press “Enter”. The system displays the slope, two velocities and horizontal time interval between the two points in the results window. Single Trace Measurement: • PAEDP • PR Trace • PV Trace To execute the trace measurement, the steps are as follows: 1. Press “Measure”. 2. Select the trace measurement to be executed, an active trace caliper displays. 3. To fix the start point, press “Enter”. 4. To trace the velocities of the desired portion of the spectrum, move the trackball. Note: To re-‐edit the existing trace line, press Clear once and move the trackball again. 5. To complete the measurement, press “Enter”. The system displays the measurement values in the results window. To configure the trace measurement: Configure the single trace measurement to define the parameter that needs to be calculated and displayed in the results window. 1. Press “Measure”. 2. Select “Config” then select “PR Trace” or “PV Trace” button, and a menu displays. 3. Choose the measurement to be executed. Cardiac Right Atrium(RA) Measurement Folder In the B mode of Cardiac examination, the RA Measurement Folder includes the following measurements: Single Distance Measurement: • RAd Major • RAd Minor • RAs Major • RAs Minor To execute the single distance measurement, the steps are as follows: 216 / 265 8000098 1. Press “Measure”. 2. Select the distance measurement to be executed, and an active tracing caliper displays. 3. To position the active caliper at the start point, move the trackball. 4. To fix the start point, press “Enter”. The system fixes the first caliper and displays a second active caliper. 5. To position the second active caliper at the end point, move the trackball. A dotted line connects the measurement points, if preset accordingly. 6. To complete the measurement, press “Enter”. The system displays the distance value in the results window. Area Measurement, and the measurement method option can be Polygon, Spline and Trace, where Trace method is the default setting. • RAAd • RAAs To execute the area measurement by Trace method, the steps are as follows: 1. Press “Measure”. 2. Select the area measurement to be executed. 3. Select the measurement method Trace as the default setting from the configuration menu, and an active tracing caliper displays. 4. To position the trace caliper, move the trackball. 5. To fix the trace start point, press “Enter”. The system fixes the first caliper and the trace caliper changes to an active tracing caliper. 6. To trace the measurement area, move the trackball around the anatomy. 7. To complete the measurement, press “Enter”. The system displays the measured area value in the results window. Note: Before completing the spline measurement: • To erase the line (little by little) back from its current point, press “Clear” once; • To clear the trace caliper and the current data measured, press “Clear” for at least 2 seconds. Cardiac System Measurement Folder In the B mode of Cardiac examination, the System Measurement Folder includes the following measurements: Single Distance Measurement: • IVC Diam • Systemic Vein Diam • PDA Diam • PFO Diam • VSD Diam • ASD Diam 217 / 265 8000098 • PEd To execute the single distance measurement, the steps are as follows: 1. Press “Measure”. 2. Select the distance measurement to be executed, and an active tracing caliper displays. 3. To position the active caliper at the start point, move the trackball. 4. To fix the start point, press “Enter”. The system fixes the first caliper and displays a second active caliper. 5. To position the second active caliper at the end point, move the trackball. A dotted line connects the measurement points, if preset accordingly. 6. To complete the measurement, press “Enter”. The system displays the distance value in the results window. Multiple Distance Measurement: • %IVS n IVSd n IVSs • RV/LV n RVIDd n LVIDd n RVIDs n LVIDs To complete the %IVS and RV/LV measurement, perform the multiple standard distance measurements continuously. In the M mode of Cardiac examination, the System Measurement Folder includes the following measurements: Single Distance Measurement: • PEd To execute the single distance measurement, the steps are as follows: 1. Press “Measure”. 2. Select the distance measurement to be executed, a vertical and horizontal dotted line and an active tracing caliper will display on the image screen. 3. To position the active caliper at the most anterior point to be measured, move the trackball. 4. To fix the start point, press “Enter”. The system fixes the first caliper and displays a second active caliper. 5. To position the second caliper at the most posterior point to be measured, move the trackball. 6. To complete the measurement, press “Enter”. The system displays the vertical distance between the two points in the results window. 218 / 265 8000098 Multiple Distance Measurement: • %IVS n IVSd • IVSs • RV/LV n RVIDd n LVIDd n RVIDs n LVIDs To complete the %IVS and RV/LV measurement, perform the multiple standard distance measurements continuously. In the PW mode of Cardiac examination, the System Measurement Folder includes the following measurements: Single Velocity Measurement: • PVeinVel A • PVeinVel S • PVeinVel D • PVeinVd • PVeinVs • Systemic Vein Vd • Systemic Vein Vs • VSD Vmax • ASD Vmax To execute the velocity measurement, the steps are as follows: 1. Press “Measure”. 2. Select the velocity measurement to be executed, a vertical and horizontal dotted line and an active tracing caliper will display on the image screen. 3. To position the caliper at the desired measurement point, move the trackball. 4. To complete the measurement, press “Enter”. The system displays the velocity measurement in the results window. Double Velocity Measurement: • VSD Max PG n Vmax1 n Vmax2 • PVein S/D Ratio n PVeinVel S n PVeinVel D To execute the two velocity measurements, the steps are as follows: 219 / 265 8000098 1. Press “Measure”. 2. Select the double velocity measurement to be executed, a vertical and horizontal dotted line and an active tracing caliper will display on the image screen. 3. To position the caliper at the desired measurement point, move the trackball. 4. To complete the first velocity measurement, press the Enter key. The system displays the first velocity measurement in the results window, and a second active caliper with a vertical and horizontal dotted line displays. 5. To position the caliper at the desired measurement point, move the trackball. 6. To complete the second velocity measurement, press “Enter”. The system displays the second velocity measurement and VSD Max PG or PVein S/D Ratio in the results window. Single Time Interval Measurement: • PVein A Dur • IVCT • IVRT To execute the time interval measurement, the steps are as follows: 1. Press “Measure”. 2. Select the time measurement to be executed, a vertical and horizontal dotted line and an active tracing caliper will display on the image screen. 3. To position the caliper at the start point, move the trackball. 4. To fix the first caliper, press “Enter”. The system fixes the first caliper and displays a second active caliper. 5. To position the second caliper at the end point, move the trackball. 6. To complete the measurement, press “Enter”. The system displays the horizontal time interval between the two calipers in the results window. Single Trace Measurement: • PA VTI • Systemic Vein VTI To execute the trace measurement, the steps are as follows: 1. Press “Measure”. 2. Select the trace measurement to be executed, an active trace caliper displays. 3. To fix the start point, press “Enter”. 4. To trace the velocities of the desired portion of the spectrum, move the trackball. Note: To re-‐edit the existing trace line, press “Clear” once and move the trackball again. 5. To complete the measurement, press “Enter”. The system displays the measurement values in the results window. 220 / 265 8000098 Double Trace Measurement: • Qp/Qs To complete the Qp/Qs measurement, perform the two standard single trace measurements. 221 / 265 8000098 11 Probes and Biopsy 11.1 Probe overview This device supports following types of probes • Curved array (Convex) • Linear array • Phase array • 4D probe • Endocavity • Intra-‐operative 11.2 Probes S2-‐9C (convex) Center frequency: 5MHz Frequency range in B mode: 2-‐6.5MHz Grade of waterproof: Transducer IPX7, housing to cable IPX4 (The grade of waterproof for all convex probes, linear probes and phased array probes can refer this picture.) G2-‐5C (convex) Center frequency: 4MHz Frequency range in B mode: 2 -‐ 5.5MHz Grade of waterproof: Transducer IPX7, housing to cable IPX4 F2-‐5CE (convex) Center frequency: 4MHz 222 / 265 8000098 Frequency range in B mode: 2 -‐ 5.5 MHz Grade of waterproof: Transducer IPX7, housing to cable IPX4 G4-‐9E (Endocavity) Center frequency: 6.5MHz Frequency range in B mode: 5 – 10 MHz Grade of waterproof: Transducer IPX7, housing to cable IPX4 (The grade of waterproof for all endocavity probes can refer this picture.) D4-‐9E (4D Endocavity) Center frequency: 6.5MHz Frequency range in B mode: 5 -‐10MHz Grade of waterproof: Transducer IPX7, housing to cable IPX4 F4-‐9E (Endocavity) Center frequency: 6.5MHz Frequency range in B mode: 5 -‐ 10 MHz Grade of waterproof: Transducer IPX7, housing to cable IPX4 G4-‐9M (Micro convex) Center frequency: 6.5MHz Frequency range in B mode: 5 -‐ 10MHz Grade of waterproof: Transducer IPX7, housing to cable IPX4 X4-‐12L (linear) Center frequency: 7.3MHz Frequency range in B mode: 6 -‐ 12MHz Grade of waterproof: Transducer IPX7, housing to cable IPX4 X6-‐16L (high frequency Linear) Center frequency: 10MHz Frequency range in B mode: 7.3 -‐ 14MHz 223 / 265 8000098 IPX7 IPX7 Grade of waterproof: Transducer IPX7, housing to cable IPX4 U5-‐15LE (linear) Center frequency: 8.5MHz Frequency range in B mode: 6 -‐ 12MHz Grade of waterproof: Transducer IPX7, housing to cable IPX4 F4-‐12L (linear) Center frequency: 7.3MHz Frequency range in B mode: 6 -‐ 12MHz Grade of waterproof: Transducer IPX7, housing to cable IPX4 I4-‐11T (Intra-‐operative) Center frequency: 7.3MHz Frequency range in B mode: 6 – 11MHz Grade of waterproof: IPX7 I7-‐18L X9-‐22L (linear) Center frequency: 15MHz Frequency range in B mode: 9 -‐ 18MHz Grade of waterproof: Transducer IPX7, housing to cable IPX4 D3-‐6C (4D convex) Center frequency: 4.5MHz Frequency range in B mode: 3 -‐ 6MHz Grade of waterproof: Transducer IPX7, housing to cable IPX4 224 / 265 8000098 D3-‐6CE (4D convex) Center frequency: 4.5MHz Frequency range in B mode: 3 -‐ 6MHz Grade of waterproof: Transducer IPX7, housing to cable IPX4 S1-‐6P (Phased Array) Center frequency: 3.5MHz Frequency range in B mode: 2 -‐ 5MHz Grade of waterproof: Transducer IPX7, housing to cable IPX4 G1-‐4P (Phased Array) Center frequency: 2.75MHz Frequency range in B mode: 2 – 3.5MHz Grade of waterproof: Transducer IPX7, housing to cable IPX4 Probe orientation: Each probe has one mark in one side of the probe head. This mark indicates the start point of scanning. Probe Labeling: Each probe is labeled with the following information: • Name of manufacture • Model name • Probe serial number • Year of manufacture • Regulatory marks 225 / 265 8000098 11.3 Probe connection and disconnection Only approved probes can be connected with this device. The probe can be connected or disconnected from the probe port at any time. When the probe is connected to this device, it is automatically detected. After inserting the probe connector into this device, the operator needs to lock the probe by pressing the locker into the probe connector. To disconnect the probe, the operator can push the locker and let the locker pop up for un-‐locking. Then pull the probe connector straight out of the probe port. 11.4 Maintenance Improper handling can lead to early probe failure and electric shock hazards. Only follow the specific cleaning and disinfection procedures provided in this chapter and the germicide manufacturer's instructions. Improper cleaning and disinfection procedures will result in probe failure which will void probe warranty. 11.4.1 Inspecting the probe: After each use, needs to inspect the probe, clean the probe and disinfect the probe if required. Inspect the probe before each use and an approved. If any damages are found, DO NOT uses the probe until it has been inspected and released for further use by VINNO qualified person. After each use, inspect the lens, the probe housing and the cable as shown below figure. Check whether there is damage area that might allow the liquid into the probe. 226 / 265 8000098 Lens Probe orientation mark Housing Cable Strain relief Before each use, inspect the lens, the probe housing and the cable. Check whether there is damaged area that might allow liquid into the probe. When connected to this device, needs to test the functionality of the probe. Note: Only qualified ultrasound gel is approved for use. 11.4.2 Special handling instructions: Using protective sheaths: Protective barrier may be required to minimize disease transmission. Use of legally marketed, sterile probe sheath is strongly recommended for intro cavity and intra operative procedures. Instructions Each probe sheath kit consists of a flexible and elastic sheath which can cover the probe and cable. DO NOT use an expired sheath. Before using probe sheaths, verify whether the term of validity has expired. Also read sheath document careful to avoid allergic reaction in sensitive individuals. Probe handling and infection control: Ultrasound system utilizes ultrasound energy that must be coupled to the patient by direct physical contact. Depending on the type of examination, this contact can be different ranging from intact skin in a normal examination to 227 / 265 8000098 re-‐circulation blood in surgical procedure. The level of risk of infection varies greatly with the type of contact. Single use or disposable device may be one of the most effective ways to prevent transmission between patients, but ultrasound probes are complex and expensive devices that have to be reused. Therefore, using protective sheaths and following the proper hygienic process between patients is extremely important in order to minimize the risk of a disease . Adequate cleaning and disinfection are necessary to prevent disease transmission. It is the responsibility of this device operator to verify and maintain the effectiveness of the infection control procedures in use. Always use sterile, legally marketed probe sheaths for intra-‐cavity and intro-‐operative procedures. Cleaning and disinfecting probes Probes must be disconnected from this device during cleaning/disinfecting operations. Failure to do so can damage this device. Cleaning procedure • Disconnect the probe from this device • Remove the coupling gel by wiping the probe lens with soft cloth • Wipe the probe and cable with a soft cloth moisten in a warm soap and water solution (<27°C) • Wipe the probe and cable with a soft cloth moisten in clean water (<27°C) until all soap is removed • Wipe dry with a soft towel To minimize the risk of infection from blood, the probe and all disposable which have contacted blood or other potential infection material must be handled in accordance with infection control procedures. Operator must wear protective gloves when handling potentially infectious materials. Disinfecting probes Although representing a necessary step in protecting patients and employees from disease transmission, liquid chemical germicides must also be selected to minimize potential damage to the transducer. It is important to use germicides 228 / 265 8000098 of probe recommended by VINNO company. Below is the list of germicides for each probe: • Alkazyme • Klenzyne • Steranios 2% • Cidex OPA Low-‐level disinfection After cleaning, the probe and cable may be wiped with a tissue sprayed with a recommended disinfectant. When decontaminating an infected probe, use additional precautions such as gloves and gown. High-‐level disinfection High-‐level disinfection destroys vegetative bacteria. This is required for endocavity probe after contact with mucosal membrane. High-‐level disinfection procedure • Prepare the germicide solution according to the manufacturer’s instructions. • Place the cleaned dried probe in contact with germicide for the time duration specified by the manufacturer. • Rinse the part of the probe which was in contact with the germicide according to the germicide manufacturer’s instructions. • Wipe dry with a soft towel or air dry the probe. Note: We do not recommend that the operator use colored ultrasound gel. Long-‐term use may cause discoloration of the probe housing, although the discoloration does not affect the performance and functionality of the probe. Returning/shipping probes and repair parts When return a probe or part for service, needs to clean and disinfect the probe or part prior to packing and shipping this device. Ensure that the follow probe cleaning and disinfection instruction. This ensures that the employees in the transportation industry as well as the people who receive the package are protected from any risk. 11.5 Probe Safety Ultrasound probes are highly sensitive medical devices that can easily be damaged by improper handling. DO NOT use a damaged or defective probe. Failure to follow these precautions can result in serious injury and 229 / 265 8000098 equipment damage. 11.6 Biopsy The data in the following list is the depth which is the distance between the surfaces with the cross point. The cross point is between the biopsy angle line and the center line for probes in this device. Cross point depth H can be referred the diagram as an example as shown below. H Unit: cm Probes for Biopsies G2-‐5C G4-‐9E(Steel, reusable) X4-‐12L X6-‐16L G1-‐4P S1-‐6P Fixed Angle Infinite Multiple Angles 4.0 2.0 1.5 4.0 4.0 6.0 4.0 2.5 5.5 5.5 8.0 6.0 3.5 8.0 8.0 230 / 265 8000098 12 System Setting 12.1 General After “Sys Setting” in “B” mode main menu is selected, the system will enter the system settings menu. The default first entrance is “General”. In the display menu, the following items can be changed. • Hospital name, department and address can be input and edit. • Select time format by 12 hours or 24 hours, date format by Month-‐Day-‐Year, Year-‐Month-‐Day or Day-‐Month-‐Year. • Select Date, Time Zone and Time. But the selected Time Zone is only effective after rebooting. • Select which language will be used in the general. But the selected language is only effective after rebooting. • Time Span for VRD/AVI/DICOM image can be set in this menu. Clicking up/down arrow can increase or decrease time span by 5 seconds, dragging the sliding block can increase or decrease time span too. And the Max cine loop time can be set up to 1500 seconds for VRD, 30 seconds for DICOM and AVI. Take 10 seconds time span for example to explain how it works: Ø If the operator press “Store to HDD” while scanning to store the cine loop, a 10-‐second VRD cine will be saved. However If the real time scan time is less than 10 second, the length of the cine is the scanning time. Ø If the operator press “Freeze” while scanning to scroll, the time interval from start frame to end frame will be 10 seconds as set. If the operator wants to save it, touch “Cine/Single” to enable cine play, and then press “Store to HDD” to save. • Select thermal index display which is one of TIS, TIB and TIC. TIS is the Soft Tissue Thermal Index. TIB is Bone Thermal index. TIC is Cranial Bone Thermal Index. • Auto Level: The level is low, medium, high. • Auto Frequency: Change the frequency of modes automatically. • Auto Invert when steering on flow or Doppler. • Auto Freeze after a period of idle time (minutes): Never, 5, 10, 15, 30, 45, 60. 15 is the factory setting, if the system run 15 minutes with no operation, it will be frozen. • Turn off the display while freezing automatically: Turn off the main screen and touch panel while the system freezing automatically. Press any key or touch the touch panel to activate the main screen and touch panel again. • Counterclockwise rotate to increase depth: Enable it, the depth will be 231 / 265 8000098 increased when rotate “Depth” key counterclockwise. • Default state of SyncDisplay: If selecting “Enable”, when enter CF mode, it has two images on main screen, the left one is 2D image, the right one is 2D+CF image. If selecting “Disable”, when enter CF mode, it only has 2D+CF image. • Automatically refresh tissue image when Doppler MDLine is moved: In PW/CW/TD mode, move MDLine, tissue image will be activate automatically for a while. • Replay Doppler Audio: Play doppler audio for replayed doppler images if it is enabled. • C3D/C4D use ContrastGain: Adjust contrast gain of C3D/C4D image when rotate Gain key after enable this function. • 3D/4D use Depth Mapping: There is “Depth Mapping” in 3D/4D menu after enable this function. And the operator can enable/disable “Depth Mapping”. • The Contrast Bubble type: default, typeA, typeB, typeC. • Biopsy Ø Biopsy line type: Guide line, Parallel Region, Guideline And Tolerance Line. Ø If select “Parallel Region”, user can select Biopsy Parallel Line Distance: 0.2, 0.3, 0.5, 0.8, 1, 1.5. • UI Theme: there are two options, Ocean blue, Simple Dark. After reboot the system, the selected theme will be effective. • Comments fontsize: Set different fontsize for comments. • Show Login Window: Enable it, the login window will appear when boot the system. Disable it, the system starts to scan at once when boot it. • Body Pattern size: Adjust the size of body pattern displayed on the image. • Full Screen: Enable it, set “Full Screen” as default. • Caps Lock as default: Set “Caps” as default for Alphanumeric keyboard. • Patient ID prefix: Add prefix for patient ID. • Show help tips to universal commands panel: There are help tips when touch the little arrow at the left bottom corner of the touch panel or slide the touch panel from the left edge after enable this function. • There is one button for the online operator manual. After “Show Manual” is selected, the operator manual will appear. After changing settings, select “Save” or “Save & Exit” on the touch panel to save the information. If selecting the “Save”, it will save current page information only without changing menu page. If selecting “Save & Exit”, it will save current page information and exit out from system setting menu. Select “Exit” to exit from the system setting menu without saving any information. 232 / 265 8000098 12.2 LCD Tests Select “LCD Tests” on the top left side of the system setting menu to enter LCD testing menu. In this LCD tests menu, select the test pattern on the screen in order to test LCD quality, such as “Gradient-‐H”, “Color Bands”, “Response Time Ref”, “Sub Pixel Font”, “White”, “Inversion All”, “Response”, “Sharpness D”, “Black”. Select “Exit Test” to exit LCD test, or 10 seconds later, it exits automatically. Select “Exit” to exit system setting menu or switch to other menu within the system setting group by selecting the other setting key. 12.3 Measurement On the touch panel, enter “Sys Setting” menu, and select “Measure”, then display setting items as follows: Cursor Type: “+” is the default factory setting for cursor type. Other cursor types can also be selected to replace the factory setting. Cursor Size: “8x8” is the factory setting. Other size can also be selected for cursor size. Cursor Size When Measure: “5x5” is factory setting. Other size can be also selected for shape cursor size. Use Arrow Cursor for indication on image: Enable it and enable “Cursor”, there is an arrow on the image. Show Result Window: During measurement, results are displayed in the results window with measurement number, and are updated simultaneously until complete. All results are displayed in the measurement results window. If necessary, this window can be deleted. To delete the window, select “Show Result Window" again. Window Position: The position of the measurement result window can be changed. To move the window, select the option from the list below: l LT (Left, Top) l LB (Left, Bottom) 233 / 265 8000098 l l RT (Right, Top) RB (Right, Bottom) Font Size: To change the font size in the results window, select the size from the “Font Size” pull-‐down menu: l 10 l 12 l 14 l 16 l 18 l 20 Retain measure results after unfreeze: Unfreeze the system in measure, enter measure again, if select “Retain”, all measurements results of unfinished items are retained, if select “Clear”, all measurement results are cleared. Show Cursor line: During measurement, the system will display one dotted line to indicate measurement. After the position is selected when using touch panel measurement, the system will display measurement line “Enable” is selected for “Show cursor line”. If “Disable” is selected, the system will erase the dotted line and only display the caliper with a number. Hold Measure on Image: During measurement, the system will display one dotted line to indicate measurement. If “Hold Measure on Image” is selected and enabled (by pressing “Enable”), all measurement items on the image will be saved. If “Disable” is pressed, the system will erase the dotted line of all measurement when replay one image which contains measurements. Show depth guideline: Display a dotted line when do the measurement of “Depth”. If the probe is linear and “TView” is disabled, the dotted is not needed. Show brief annotation: Enable it, display brief annotations when do the measurements. Auto adjust cursor size for tiny distance (px): If the distance is shorter than 10, 20, 30 or 50 pixels, the cursor size will becomes very small. This function is disabled if select “off”. Auto snap range setting (px): If the measurement method is “Trace”, “Polygon” or “Spline”, when the distance between the end point and the start point is shorter than 10, 20, 30 or 50 pixels, the measurement will 234 / 265 8000098 finish automatically, and the last cursor back to the start point. This function is disabled if select “off”. Annotation font size: To change the font size of the annotation, select the size from the “Annotation font size” pull-‐down menu: l 10 l 12 l 14 l 16 l 18 l 20 l 22 Show result of protocol items in worksheet: If the current measurement is multi-‐step (like “Volume-‐L&W&H”), before finish the measurement, enter “Worksheet”, this measurement item will be displayed. This function is disabled if select “off”. Show comment of measure item: Explain the measurement item in local language. Unit for normal distance related measurement: cm, mm. Select different unit for normal distance measurement. Show GA(LMP/BBT) on status bar: If there is GA(LMP/BBT) for the current patient, display it on the status bar. Show GA after Measure: During measurement, select whether or not to display the estimated fetal age automatically. If the fetal age is selected to be displayed in system set-‐up, the measurement results window will display estimated age after a measurement. If not, the estimated age will not be displayed in the results window. Add 1 week to EDD Calac: If this item is selected, delivery time will be increased by 1 additional week. Show EDD after Measure: During measurement, select whether or not the estimated delivery time is displayed automatically after measurement. If estimated delivery time display is selected in the system setting, the estimated delivery time will appear in the results window after measurement. If not, estimated delivery time will not appear in the results window. Show Percentile after Measure: Enable it, after finish the OB related 235 / 265 8000098 measurement, show the percentile according to the OB table. Auto Select EFW Method: Enable it, the system will select EFW method automatically when do EFW related measurements. GA Display Format: To change the display format for “GA” after enable “Show GA after measure”. EFW GP Table: According to different areas, different “OB Table Type” -‐> “EFW GP Table” (estimated fetal weight table) can be selected. After the pull down menu is selected, the system displays items for selection as follows: l Hadlock l JSUM l Osaka l Shinozuka OB Table Type: According to different area, different “OB Table Type” (Fetal age and fetal growth table) can be selected. Selecting the “OB Table Type” pull down menu, the system can display items as follows for global setting: l ASUM l ASUM2000 l Chitty l FCFU_CFEF l Hadlock l Hansmann l Jeanty l JSUM l Merz l Shinozuka.1 l Shinozuka.2 l Berkowitz l Eik-‐Nes l Kurtz l Osaka l Paris l Rempen l Tokyo l Yarkoni l ASUM2001 l Nelson l Robinson l Mercer l Hellman 236 / 265 8000098 l l l l l Mayden Bertagnoli Eriksen Goldstein Hill OB Measure Item GA Table Config: To config GA table for every measurement item. Heart Cycle: To set the default value for heart cycle. 12.4 Extended key Printing and Save Keys in Control panel: There are three keys on the right side of the control panel to start printing and saving functions. They are “Print”, “Store to HDD” and “Store to USB” which are marked on the control panel. Here the HDD means the system’s HDD which stores OS, application software, system setting and patient data. This section can configure those keys for following usage. And “Foot Switch” can be configured too. The operator must make sure that USB memory stick is virus-‐free before connecting it with this device. Run a virus scan for USB memory stick in your computer before using. The following functions can be configured into those three keys, 2 external foot switches. l Print Select “Details” to choose different printers. Ø Printer connected by USB (thermal printer or normal printer) Ø Printer connected by network: connect the network first, then add one network printer. Ø DICOM printer: connect the network first, then connect one DICOM printer. Also “Display format” can be changed in “Details”. Select the different display formats in pull-‐down menu. If “Draw background” is enabled, draw black background when print images. And “Paper size” and “Orientation” can be changed. l Store Select “Details” to select different destinations and file formats. Ø Destination: HDD USB File Server (need to connect one file server first) 237 / 265 8000098 DICOM Storage Server (need to connect one DICOM storage server first) FTP Server (need to connect one FTP server first) Ø File Format: VRD DICOM AVI or Image l Freeze/Unfreeze l Do nothing Note: 1. If store file format is VRD or DICOM, there is an option “Store single frame image”, after it is enabled one single frame image is stored even when the system is in live scan mode. 2. If “Including patient information on snapshot” is enabled, preview the stored image in Report, there are patient ID and name on the image. 3. If store destination is USB, DICOM Storage Server, File Server or FTP Server, there is an option “Backup stored file in Local Machine”, after it is enabled, the image will be stored to the server and HDD. 4. If store destination is DICOM Storage Server or FTP Server, there is an option “Auto image data transfer after end exam”. If it is enabled, the image will be stored to the server after the exam is ended. If it is disabled, the image will be stored to the server immediately. Factory default configuration as below: l “Print” key: SONY UP-‐X898MD l “Store to HDD” key: Save VRD to HDD. l “Store to USB” key: Save image to USB. l “Built-‐in Foot Switch”: Do nothing. l “External Foot Switch 1”: Do nothing. l “External Foot Switch 2”: Do nothing. Config Network Printer Select “Search” to find network printers, display all available printers. If the printer is installed, it can be used directly. Otherwise, “Install” should be selected to install the printer’s driver. Also, installed printers can be uninstalled. 12.5 Network 12.5.1 General This configuration category enables the operator to set the network for the syste m and connected remote archive. 238 / 265 8000098 If one network cable is plugged in, the operator can do the following settings to connect the network: l If enable “Auto config IP address”, the system will connect to the network automatically. l If disable “Auto config IP address”, the operator needs to input IPv4, Subnet mask and Default gateway. If one wireless network adaptor is plugged in, the operator can do the following settings to connect the network: l Reboot the system after plug in the adaptor, l Select one network, input the password, then touch “Enter”; l Or select “Other”, input the network name and password, then touch “Enter”. 12.5.2 File Server If the operator wants to connect one server: l Input the server address in “Server Path”, and touch “Confirm”. l If the server needs authentication, enable “User Authentication” then input username and password. After all settings are ready, select the “Save” or “Save & Exit” key to save all setting in the system. 12.5.3 Email Setting l Email Account: Input the email account here for sending emails. l Email Password: Email account’s password. l SMTP Server: Input SMTP server here. l SMTP Port: Input SMTP port here. l Secure Mode: There are 2 secure modes, “Normal” and “SSL”. l Email Subject and Email Body: There is default template of email subject and email body, the operator can edit them. l Addressee: Input one addressee here and select “Test” to test the email account setting. 12.5.4 FTP l FTP server address: Input FTP server address. l FTP server port: Input FTP server port. l FPT sub folder: Input the store path on the server. l FTP account: Input FTP account. l FTP password: Input FTP password. 239 / 265 8000098 l Enable FTP storage: Enable it to connect FTP server. During uploading, there is an icon showing the number of the uploading images. If the file upload to server failed, there will be an error icon on the right bottom corner of the main screen. Click the icon, popup the file list of fail uploaded. Select “Retry” to upload again, or select “Delete” to delete the file. Images of all formats can be uploaded to FTP server, but only DICOM images can be downloaded and viewed. 12.6 DICOM 12.6.1 General DICOM file format: Lossless bitmap Lossless compressed jpeg Lossy compressed jpeg. Local setting: l Local AET: input service class user’s application entity title l Local Address: input service class user’s address l Local port: input service class user’s port 12.6.2 Storage l Storage SCP AET: input service class provider’s application entity title l Storage SCP address: input service class provider’s IP address l Storage SCP port: input service class provider’s port l Enable storage: enable it, save DICOM image to PACS server. Please select “ Save DICOM to HDD and DICOM server” first in Print. Only DICOM image can be uploaded to DICOM Storage Server. During uploading, there is an icon showing the number of the uploading images. If the file upload to server failed, there will be an error icon on the right bottom corner of the main screen. Click the icon, popup the file list of fail uploaded. Select “Retry” to upload again, or select “Delete” to delete the file. 12.6.3 Worklist l Worklist SCP AET: input service class provider’s application entity title l Worklist SCP address: input service class provider’s IP address l Worklist SCP port: input service class provider’s port l Enable Worklist: enable it to get patient list from server. Worklist Special Config: 240 / 265 8000098 l Specify Local AET: Only list the patient(s) whose AET is the same with the local AET set in General if it is enabled. l Force Date Format: Only start date can be selected when filter the patients if it is enabled, the end data is the current data. l Auto Load Worklist: Get the patient list from worklist server automatically if it is enabled. l Convert patient name to Double-‐byte for querying. l End query when end of sequence. l Patient Name Format: Family name at the first, or first name at the first. 12.6.4 Print l Print SCP AET: input service class provider’s application entity title l Print SCP Address: input service class provider’s IP address l Print SCP port: input service class provider’s port l Enable print: Enable it to connect the DICOM printer. 12.7 Service Tool This menu includes auto diagnostic functions for each electrical part and catches software log files in order for engineers to identify the root cause. 12.7.1 Demo mode Enable this function, loop playback the images in the clipboard. 12.7.2 Electrical parts auto diagnostic tools There are several following automatic diagnostic tools for different electrical parts l Keyboard Ø Select “Diagnostic” to detect if there are some keys stuck. Ø Press the keys on the keyboard, the related button on the touch panel will be highlighted. l Touch panel Ø Test: Touch every point on the touch panel to check if all points work well. Ø Calibration: Do calibration for the touch panel. Ø Reset: Reset calibration data to default. l LCD Monitor l Probe Board 241 / 265 8000098 l l l l Transport Save the information of PCIE status to one log file, and it can be downloaded. Please refer “Software log file download”. Acceptor Mainboard DCDC board 12.7.3 Display Backlight Config The display backlight of Main Screen and touch screen can be adjusted and reset. 12.7.4 S-‐Video Output Select different resolution for video output: SVGA(800X600), PAL(720X576), NTSC(720X480). 12.7.5 Power l l Display power information: temperature, voltage, current, capacity percent, charging state and other. Shut down after closing lid(Minutes): Immediately, 1, 5, 10, 15, 20. 12.7.6 Software log file download There is one “Report” button to send this issue to service engineer. l Report Current Issue: input some words to descript the issue. l Report: Copy the description words to the log l Download log file: Download all log files to one connected USB device. 12.7.7 Export/Import UserDefine Configuration Export to USB: Export all user defined data to one USB device, include data of “Application&Parameters”, “Measurements”, “Comments” and “System Setting”. Select “Export” to start. l Import from USB: Select “Import”, come out one dialog for the operator to select which item is needed to import. If there is no user defined data, “Empty UserDefine config” will be displayed. l Delete UserDefine Configuration: After select “Delete”, the system need to restart. Then all userdefine configurations are cleared, all settings are reset as factory default. l 242 / 265 8000098 12.7.8 System Upgrade There is one “Check” button to check the system upgrade. l Plug in USB memory stick l Select “Check” button l The system will check the available new version software from the USB memory stick. If the USB memory stick has valid upgrade, select “OK”, the system start upgrade. 12.8 Features l l Installed Features: List all features can be used at the current moment, including standard features and optional features that already got license. Available Features: List all features those are optional but no license. 12.9 User Management This section defines the operator’s ID, the operator’ authority and login procedure setting. When enter the system as a certain user, the operator can select “User Management” in “System Settings”. Once enter the system as a certain user, the status will be shown in the left bottom of the LCD monitor. Please refer 1.7 Auto Login There is one “Auto Login” button. 1. If enabled, a check mark will indicate auto login feature is active. The system will then automatically login as what you set it to be next time you start the system. 2. If disabled, System will not log in automatically. Then user can either log in as a certain authorized user or select the cancel button to enter without authority. Authority levels: 1. Administrator: can new, modify and delete a user, and use “Auto Login” feature. 2. User: can only use “Auto Login” feature. 3. No authority(select “Cancel” to login): cannot enter user management system. The following steps show how to manage users. Add New User: 243 / 265 8000098 Input “User Name”, “Password”. Select “Admin” (administration) or “User” authority. l Select “Enter” button to confirm adding action The factory default Administrator account is as below: Name: admin Password: admin l l Modify User: l Select the user in user list l Select the user icon to modify the password. Remove operator: l Select the user to be removed in user list l Press “X” button to delete this user 12.10 About The list displays “Software Version”, “Hardware Version”, “DongleId”, “License”, “CopyRight”. 244 / 265 8000098 13 Accessories and Peripherals 13.1 Introduction This chapter provides information on peripherals that can operate with this device as follows: l Color thermal printer l Black & White thermal printer Only use VINNO approved equipment as internal peripherals. External peripheral equipment must be CE marked and in compliance with relevant standards (EN 60601-‐1 or EN 60950). Anyone who uses this device with external peripheral equipment that are powered from a separated wall receptacle is considered to be configuring a medical system, is therefore responsible to verify that the system complies with EN 60601-‐1. All devices meeting IEC60950 must be kept outside the patient environment as defined in IEC60601-‐1:2005, unless equipped with additional earth or extra isolating transformer. Commercial devices such as laser printers, VCRs and external monitors, usually exceed allowable leakage current limits and, when plugged into separate AC outlets, are in violation of patient safety standards. Suitable electrical isolation of such external AC outlets, or providing the device with extra protective earth, will be required in order to meet UL2601-‐1 and IEC60601-‐1 standards for electrical leakage. When using the peripheral devices, observe all warnings and cautions given in the peripheral operator manuals please. 13.2 Printing Do not connect printer power cable to other devices except the 245 / 265 8000098 approved printer. This device can support a color and a black & white thermal printer. The printer devices are controlled from “Print” key on the control panel. “Store to HDD” or “Store to USB” keys can be also configured as printing key. Alternatively, the “Print” key can be also configured as storage function. Refer to system set-‐up chapter. When pressing “Print” key on the control panel, the image displayed on the screen is printed on B&W or Color Printer, which depends on the key assignment configuration. 13.3 Approved printers The following printers are approved as printing peripherals. l B&W thermal video printer: Sony UP-‐D897MD l B&W thermal video printer: Sony UP-‐D898MD l Color thermal video printer: Sony UP-‐D25MD Refer to the document accompanying those peripherals to be familiar with specification. If the operator wants to install the driver of the third party printer, please contact VINNO. 246 / 265 8000098 14 Operator maintenance and technical data 14.1 System maintenance As there are no components with short working lives, periodic maintenance inspection is not mandatory. However, some customer quality assurance programs may require the additional inspections at periods of frequency different from those listed in this manual. The operator must ensure that safety inspections are performed at least every 12 months according to the requirements of the patient safety standard IEC 60601-‐1. Only trained person are allowed to perform the safety inspections mentioned above. To ensure maintaining good operating conditions of this device, we recommend the customer internal maintenance plan includes the following procedures. 14.1.1 Inspecting this device If any defect is observed, DO NOT operate this device and inform a qualified service person. Inspect the following parts on a monthly basis: l Connectors on cables, for any mechanical defects l Entire length of electrical and power cables, for cuts or abrasions l Equipment, for loose or missing hardware l Control panel and touch panel defects l Caster brakes To avoid electric shock hazard, DO NOT remove panels or covers from this device. 247 / 265 8000098 14.1.2 Virus protection To minimize virus vulnerability this device is configured with a minimal set of open ports and all network services not active used. This significantly reduces the risk of a virus attack. VINNO Company is continuously assessing the need for additional actions to reduce vulnerability of equipment; this includes vulnerability scanning of our products and evaluation of new security patches for the third party technology used. This device should only be used with an internal Local Area Network (LAN). 14.1.3 Cleaning this device Frequent and diligent cleaning of this device will reduce the risk of spreading infection from person to person, and also help maintain a clean working environment. When performing cleaning procedures, to prevent the risk of system damage, always observe following precautions: l Use only recommended cleaning materials and solutions l Do not spray any liquid directly onto this device’s covers, LCD display, touch panel and control panel l Do not allow any liquid to drip or seep into this device. l Prior to cleaning, turn OFF power of this device System cabinet cleaning: On a weekly basis, moisten a soft, non-‐abrasive folded cloth or sponge with a mild, general purpose, non-‐abrasive soap and water solution. DO NOT use any solution containing abrasive powder or strong chemicals such as acid or alkaline. Squeeze excess liquid from the cloth/sponge, and then wipe down the top, front, back and both sides of this device. l Rinse the cloth/sponge with clean running water and wipe this device surfaces again. l Use a dry, soft, line-‐free cloth to dry this device surfaces. l Wait for this device surfaces to dry completely before turn on the system. l Note: If disinfection is required, wipe with a soft, dust-‐free cloth and a small quantity of isopropyl alcohol. 248 / 265 8000098 LCD Display cleaning: On a weekly basis, gently wipe the LCD display with a dry, soft, lint-‐free non-‐abrasive folded cloth. Wipe or dust the stain gently with a soft, dry cloth. If the stain remains, moisten a soft, lint-‐free cloth with water or a 50/50 mixture of isopropyl alcohol and water. Wring the cloth to remove as much liquid as possible then wipe the LCD display again. Control panel cleaning: DO NOT spray any liquid directly onto the control panel! l On a weekly basis, moisten a soft, non-‐abrasive folded cloth or sponge with a mild, general purpose, non-‐abrasive soap and water solution or general purpose disinfectant. DO NOT use any solution containing abrasive powder or strong chemicals such as acid or alkaline. l Squeeze excess liquid from the cloth/sponge, and then wipe down the control panel. l Rinse the cloth/sponge with clean running water and wipe this device surfaces again. l Use a dry, soft, line-‐free cloth to dry this device’s surfaces. l Wait for this device surfaces to dry completely before turning on the system. DVDRW drive cleaning: Clean the drive head and media with the vendor-‐supplied cleaning kit. DVD or CD must be stored away from dust and cigarette smoke. Do not use alcohol or benzene to clean the DVDRW drive. Peripherals: Clean the peripherals in accordance with the respective manufacturer’s directions. 14.1.4 Battery Battery The lithium ion battery provides power when an AC power source is not available. Lithium ion batteries last longer than conventional batteries and do not require replacement as often. You can expect one hour of battery life with a single fully charged battery. Used batteries should not be placed with common household waste products. Contact local authorities for the location of a chemical waste collection program nearest you. NOTE: The battery is designed to work with this device only. Only use the batteries authorized by VINNO. 249 / 265 8000098 • The battery has a safety device. Do not disassemble or alter the battery. • Charge the batteries only when the ambient temperature is between 0° and 50°and discharge the batteries between 0° and 60°. • Do not short-‐circuit the battery by directly connecting the negative terminals with metal objects. • Do not heat the battery or discard it in a fire. • Do not expose the battery to temperature over 60°. Keep it away from fire and other heat sources. • Do not charge the battery near a heat source, such as a fire or heater. • Do not leave the battery in direct sunlight. • Do not pierce the battery with a sharp object, hit it, or step on it. • Do not use a damaged battery. • Do not solder a battery. • Do not connect the battery to an electrical power outlet. If this device is not being used on a monthly basis, the battery needs to be removed during the lengthy non-‐use period. To avoid the battery bursting, igniting, or fumes from the battery causing equipment damage, observe the following precautions: • Do not immerse the battery in water or allow it to get wet. • Do not put the battery into a microwave oven or pressurized container. • If the battery leaks or emits an odor, remove it from all possible flammable sources. • If the battery emits an odor or heat, is deformed or discolored, or in a way appears abnormal during use, recharging or storage, immediately remove it and stop using it. If you have any questions about the battery, consult VINNO or your local representative. • Short term (less than one month) storage of battery pack: • Store the battery in a temperature range between 0° and 50°. • Long term (3 months or more) storage of battery pack: • Store the battery in a temperature range between -‐20° and 45°. • Upon receipt of this device and before first time usage, it is highly recommended that the opertor performs one full discharge/charge cycle. If the battery has not been used for >2 months, the operator is recommended to perform one full discharge/charge cycle. It is also recommended to store the battery in a shady and cool area with FCC (full current capacity). • One Full Discharge/Charge Cycle Process: 250 / 265 8000098 1. Full discharge of battery to let this device automatically shut down. 2. Charge this device to 100% FCC (full current capacity). 3. Discharge of this device for complete shut down (takes one hour for discharge). • When storing packs for more than 6 months, charge the pack at least once during the 6 month timeframe to prevent leakage and deterioration in performance. • Use only VINNO recognized batteries. Battery Replacement and Disposition: Battery replacement every three years is recommended. Contact a local Service Representative for the replacement of the battery. Used batteries will be discarded appropriately by VINNO. NOTE: Disposing of the battery should meet local law and regulatory requirements. NOTE: Dispose of the system according to local law and regulatory requirements. AC Adapter Do not use an AC adapter without approval by VINNO. Be sure that nothing rests on the AC adapter’s power cable and that the cable is not located where it can be tripped over or stepped on. Place the AC adapter in a ventilated area, such as a desk, when you use it to run this device. Do not cover the AC adapter with paper or other items that will reduce cooling; do not use the AC adapter inside a carrying case. Battery label 251 / 265 8000098 AC Label 252 / 265 8000098 14.2 Technical Data 14.2.1 General Model: VINNO 6 Serial number: marked in identification plate on the rear side of this device Identification plate: Example Electro-‐magnetic influence: In the working frequency range of the ultrasound system from 1 to 18MHz can be visible in the range from 200 to 500mV/m influence depending on the probe connected. 253 / 265 8000098 Safety classification: a) Type: Class I b) Type BF applied part: Ultrasound probe, Type CF applied part: ECG electrode c) No defibrillation-‐proof applied part d) Waterproof level: IPX0, except transducer lens is IPX7, probe housing to cable is IPX4 but intra operative probe housing to cable is IPX7. e) NOT category AP equipment or category APG equipment Ambient temperature: 10°C to 40°C or 50°F to 104°F of operational temperature. Relative Humidity: 30% to 75% in operation. Stock and transportation temperature: -‐10°C to 50°C or 14°F to 122°F. Stock and transportation humidity: less than 90% RH, no condensation. Barometric Pressure: 700 to 1060 hPa Humidity: 30% to 85% no condensation when operating. And in stock and transport conditions it should be less than 90%RH no condensation. Dimension: Width: 340mm. Length: 387mm Height: 72mm Weight: Basic unit without accessories approx: 3.8kg 14.2.2 Power supply Power requirement: 100V – 240VAC. 50Hz or 60Hz Power consumption: Nominal <= 170VA. 14.2.3 Operator panel Control panel: Ergonomic designed control panel with interactive back-‐lighting. Touch panel: 8”projected capacitive touch panel in high resolution and color. And it is the operator-‐defined and configurable layout UI. LCD monitor: 15.6” high resolution monitor with wide view angle: +178° to -‐178°. Horizontal swivel angle: 30°-‐150°. 254 / 265 8000098 14.2.4 Console Design l 1 active probe ports 14.2.5 Transmitter Frequency range: Broadband system 1 to 18MHz, automated adaptation to the probe used. Control of acoustic output: 10% -‐100% Focusing: selectable transmit focal width and focal depth 14.2.6 Receiver Frequency range: Broadband system 1 to 20MHz, automated adaptation to the probe used. Focusing: Digital dynamic focusing system, accuracy of focus: +/-‐ 5ns. Sample-‐rate: 50MHz. 14.2.7 Scan Converter Image resolution: 1920 x 1080 Image Lines: max 1024 Scan angle: max 360° 14.2.8 Cine Loop Memory Call back sequence: manually frame by frame. Call back automatically from 20% to 400% of real time rate with selectable start and end point. 14.2.9 Basic Measurement Accuracy The table below lists the basic measurement accuracy of this device, in order to guide the operator to use this instrument for clinical diagnosis when the number 255 / 265 8000098 of changes or measurement error may arise. The error may be due to the limitations of the instrument itself or inappropriate operation of the operator. If a operator regulates the operation according to the operational guidelines, can make the potential measurement error reduced to a minimum. Measurement Unit Accuracy Conditions Distance Lateral mm ±5% Axial mm ±5% Depth mm ±5% Perimeter L&W Ellipse Polygon Spline B Trace mm ±10% B Harmonic Area L&W Ellipse Polygon Spline mm^2 ±10% Trace Volume L&W&H mm^3 ±30% Angle deg ±5% Time s ±5% M,PWD,TD Slope Velocity mm/s ±10% M Acceleration mm/s^2 ±10% PW SV Depth mm ±2mm PWD,TD Velocity cm/s 0-‐100cm/s:±10% 100-‐130cm/s:±5% PWD,CWD 50%(only for reference) CFI Angle cm/s 0-‐60deg:±5% Correction 60-‐80deg:±12% PWD 14.2.10 Basic Performance Specification The table below lists this device basic performance specification of B mode, including the penetration, lateral resolution, axial resolution, dead area, slice thickness, lateral geometry distance precision and axial geometric distance accuracy. Basic Performance Specification in B mode Specification Frequeccy(M Hz) S2-‐9C 2 3 4 5 6 256 / 265 8000098 Penetration(mm ) Lateral Resoultion(mm) Axial Resolution(mm) Dead Area(mm) ≥160 ≥160 ≥100 ≥100 ≥50 ≤3(Depth≤80) ≤4(80<Depth≤1 30) ≤2(Depth≤80) ≤3(80<Depth≤1 30) ≤5 ≤3(Depth≤80) ≤4(80<Depth≤1 30) ≤2(Depth≤80) ≤3(80<Depth≤1 30) ≤5 ≤2(Depth≤6 0) ≤2(Depth≤6 0) ≤2(Depth≤4 0) ≤1(Depth≤8 0) ≤1(Depth≤8 0) ≤1(Depth≤5 0) ≤4 ≤4 ≤3 ≤7 ≤5 ≤5 ≤7 ≤15 ≤15 ≤15 ≤10 ≤10 ≤10 ≤10 ≤5 Slice ≤7 Thickness(mm) Lateral Distance ≤15 Precision(%) Axial Distance ≤10 Precision (%) Specification Frequeccy(MH z) Penetration(m m) Lateral Resoultion(m m) Axial Resolution(m m) Dead Area(mm) Slice Thickness(mm) Lateral Distance Precision(%) Axial Distance Precision (%) Specification Frequeccy(MH z) Penetration(m m) Lateral Resoultion(m m) Axial Resolution(m m) Dead Area(mm) Slice G2-‐5C (R=50 convex) 2 3 4 5 5.5 ≥140 ≥140 ≥80 ≥80 ≥80 ≤3(Depth≤80) ≤4(80<Depth≤1 30) ≤3(Depth≤80) ≤4(80<Depth≤1 30) ≤2(Depth≤4 0) ≤2(Depth≤4 0) ≤2(Depth≤4 0) ≤2(Depth≤80) ≤2(Depth≤80) ≤1(Depth≤4 0) ≤1(Depth≤4 0) ≤1(Depth≤4 0) ≤7 ≤7 ≤5 ≤5 ≤5 ≤7 ≤7 ≤10 ≤8 ≤8 ≤20 ≤20 ≤20 ≤20 ≤20 ≤10 ≤10 ≤10 ≤10 ≤10 F2-‐5CE (R=59.9 convex) 2 3 4 5 5.5 ≥140 ≥140 ≥80 ≥80 ≥80 ≤3(Depth≤80) ≤4(80<Depth≤1 30) ≤3(Depth≤80) ≤4(80<Depth≤1 30) ≤2(Depth≤4 0) ≤2(Depth≤4 0) ≤2(Depth≤4 0) ≤2(Depth≤80) ≤2(Depth≤80) ≤1(Depth≤4 0) ≤1(Depth≤4 0) ≤1(Depth≤4 0) ≤7 ≤7 ≤5 ≤5 ≤5 ≤7 ≤5 ≤5 ≤5 ≤5 257 / 265 8000098 Thickness(mm) Lateral ≤20 Distance Precision(%) Axial Distance ≤10 Precision (%) Specification Frequeccy(MHz) Penetration(mm) Lateral Resoultion(mm) Axial Resolution(mm) Dead Area(mm) Lateral Distance Precision(%) Axial Distance Precision (%) Specification Frequeccy(MHz) Penetration(mm) Lateral Resoultion(mm) Axial Resolution(mm) Dead Area(mm) Lateral Distance Precision(%) Axial Distance Precision (%) Specification Frequeccy(MHz) Penetration(mm) Lateral Resoultion(mm) Axial Resolution(mm) Dead Area(mm) Slice Thickness(mm) Lateral Distance Precision(%) Axial Distance Precision (%) Specification ≤20 ≤20 ≤20 ≤20 ≤10 ≤10 ≤10 ≤10 G4-‐9E (R=11.5 convex) 8 ≥40 5 ≥80 6.5 ≥40 ≤2(Depth≤40) ≤2(Depth≤30) ≤2(Depth≤30) ≤1(Depth≤30) ≤1(Depth≤40) ≤1(Depth≤40) ≤1(Depth≤40) ≤0.5(Depth≤30) ≤5 ≤4 ≤4 ≤4 ≤4 ≤5 ≤3 ≤5 ≤20 ≤10 ≤10 ≤5 ≤10 ≤5 ≤5 ≤5 D4-‐9E (R=11.5 convex) 8 ≥40 10 ≥30 5 ≥80 6.5 ≥40 ≤2(Depth≤40) ≤2(Depth≤30) ≤2(Depth≤30) ≤1(Depth≤30) ≤1(Depth≤40) ≤1(Depth≤40) ≤1(Depth≤40) ≤0.5(Depth≤30) ≤5 ≤4 ≤4 ≤4 ≤4 ≤5 ≤3 ≤5 ≤20 ≤10 ≤10 ≤5 ≤10 ≤5 ≤5 ≤5 F4-‐9E (R=11.5 convex) 8 ≥40 10 ≥30 5 ≥80 6.5 ≥40 10 ≥30 ≤2(Depth≤40) ≤2(Depth≤30) ≤2(Depth≤30) ≤1(Depth≤30) ≤1(Depth≤40) ≤1(Depth≤40) ≤1(Depth≤40) ≤0.5(Depth≤30) ≤5 ≤5 ≤4 ≤5 ≤4 ≤5 ≤3 ≤4 ≤20 ≤10 ≤10 ≤5 ≤10 ≤5 ≤5 ≤5 G4-‐9M(R=11.5 convex) 258 / 265 8000098 Frequeccy(MHz) Penetration(mm) Lateral Resoultion(mm) Axial Resolution(mm) Dead Area(mm) Slice Thickness(mm) Lateral Distance Precision(%) Axial Distance Precision (%) Specification Frequeccy(MHz ) Penetration(m m) Lateral Resoultion(mm) Axial Resolution(mm) Dead Area(mm) Slice Thickness(mm) Lateral Distance Precision(%) Axial Distance Precision (%) Specification Frequeccy(MHz ) Penetration(m m) Lateral Resoultion(mm ) Axial Resolution(mm ) Dead Area(mm) Slice Thickness(mm) Lateral Distance Precision(%) Axial Distance Precision (%) 5 ≥80 ≤2(Depth≤40) 6.5 ≥40 ≤2(Depth≤30) 8 ≥40 ≤2(Depth≤30) 10 ≥30 ≤1(Depth≤30) ≤1(Depth≤40) ≤1(Depth≤40) ≤1(Depth≤40) ≤0.5(Depth≤30) ≤5 ≤5 ≤4 ≤3 ≤4 ≤3 ≤3 ≤4 ≤20 ≤10 ≤10 ≤5 ≤10 ≤5 ≤5 ≤5 X4-‐12L/ F4-‐12L (linear) 6 7.3 8.5 10 12 ≥50 ≥50 ≥50 ≥30 ≥30 ≤2(Depth≤4 0) ≤1(Depth≤5 0) ≤3 ≤2(Depth≤4 0) ≤1(Depth≤5 0) ≤3 ≤2(Depth≤4 0) ≤1(Depth≤5 0) ≤3 ≤1(Depth≤30) ≤1(Depth≤30) ≤0.5(Depth≤3 0) ≤2 ≤0.5(Depth≤3 0) ≤2 ≤4 ≤4 ≤4 ≤4 ≤4 ≤10 ≤10 ≤10 ≤5 ≤5 ≤5 ≤5 ≤5 ≤5 ≤5 X6-‐16L (linear) 7.3 8.5 10 12 14 ≥50 ≥50 ≥30 ≥30 ≥30 ≤2(Depth≤4 0) ≤2(Depth≤4 0) ≤1(Depth≤30) ≤1(Depth≤30) ≤1(Depth≤30) ≤1(Depth≤5 0) ≤1(Depth≤5 0) ≤0.5(Depth≤3 0) ≤0.5(Depth≤3 0) ≤0.5(Depth≤3 0) ≤3 ≤3 ≤2 ≤2 ≤2 ≤4 ≤4 ≤3 ≤3 ≤3 ≤10 ≤10 ≤5 ≤5 ≤5 ≤5 ≤5 ≤5 ≤5 ≤5 259 / 265 8000098 Specification Frequeccy(MHz ) Penetration(m m) Lateral Resoultion(mm) Axial Resolution(mm) Dead Area(mm) Slice Thickness(mm) Lateral Distance Precision(%) Axial Distance Precision (%) Specification Frequeccy(MHz ) Penetration(m m) Lateral Resoultion(mm) Axial Resolution(mm) Dead Area(mm) Slice Thickness(mm) Lateral Distance Precision(%) Axial Distance Precision (%) 6 7.3 ≥50 ≥50 U5-‐15LE (linear) 8.5 ≥50 10 12 ≥30 ≥30 ≤2(Depth≤4 0) ≤1(Depth≤5 0) ≤3 ≤4 ≤2(Depth≤4 0) ≤1(Depth≤5 0) ≤3 ≤4 ≤2(Depth≤4 0) ≤1(Depth≤5 0) ≤3 ≤4 ≤1(Depth≤30) ≤1(Depth≤30) ≤0.5(Depth≤3 0) ≤2 ≤4 ≤0.5(Depth≤3 0) ≤2 ≤4 ≤10 ≤10 ≤10 ≤5 ≤5 ≤5 ≤5 ≤5 ≤5 ≤5 6 7.3 I4-‐11T (linear) 8.5 ≥50 ≥50 ≥50 10 11 ≥30 ≥30 ≤2(Depth≤4 0) ≤1(Depth≤5 0) ≤3 ≤4 ≤2(Depth≤4 0) ≤1(Depth≤5 0) ≤3 ≤4 ≤2(Depth≤4 0) ≤1(Depth≤5 0) ≤3 ≤3 ≤1(Depth≤30) ≤1(Depth≤30) ≤0.5(Depth≤3 0) ≤2 ≤3 ≤0.5(Depth≤3 0) ≤2 ≤3 ≤10 ≤10 ≤10 ≤5 ≤5 ≤5 ≤5 ≤5 ≤5 ≤5 Specification Frequeccy(MHz) Penetration(mm) Lateral Resoultion(mm) Axial Resolution(mm) Dead Area(mm) Slice Thickness(mm) Lateral Distance Precision(%) Axial Distance Precision (%) Specification Frequeccy(MHz) Penetration(mm) 9 ≥30 ≤1(Depth≤30 ≤0.5(Depth≤30) ≤2 ≤5 ≤5 X9-‐22L (linear) 12 15 ≥30 ≥30 ≤1(Depth≤30) ≤1(Depth≤30 ≤0.5(Depth≤30) ≤0.5(Depth≤30) ≤2 ≤2 ≤4 ≤4 ≤5 ≤5 18 ≥30 ≤1(Depth≤30) ≤0.5(Depth≤30) ≤2 ≤4 ≤5 ≤5 ≤5 ≤5 10 ≥30 13 ≥30 ≤5 X10-‐23L (linear) 17 ≥30 20 ≥30 260 / 265 8000098 Lateral Resoultion(mm) Axial Resolution(mm) Dead Area(mm) Lateral Distance Precision(%) Axial Distance Precision (%) Specification Frequeccy(MHz) Penetration(mm) Lateral Resoultion(mm) Axial Resolution(mm) Dead Area(mm) Slice Thickness(mm) Lateral Distance Precision(%) Axial Distance Precision (%) ≤1(Depth≤30 ≤0.5(Depth≤30) ≤2 ≤5 ≤1(Depth≤30) ≤0.5(Depth≤30) ≤2 ≤5 ≤1(Depth≤30 ≤0.5(Depth≤30) ≤2 ≤5 ≤1(Depth≤30) ≤0.5(Depth≤30) ≤2 ≤5 ≤5 ≤5 ≤5 ≤5 D3-‐6C (R=40 convex) 3 4 5 ≥140 ≥80 ≥40 ≤3(Depth≤80) ≤2(Depth≤40) ≤2(Depth≤30) ≤4(80<Depth≤130) 5.5 ≥40 ≤2(Depth≤30) ≤2(Depth≤80) ≤1(Depth≤40) ≤1(Depth≤40) ≤1(Depth≤40) ≤7 ≤5 ≤4 ≤4 ≤7 ≤5 ≤8 ≤7 ≤20 ≤20 ≤10 ≤10 ≤10 ≤10 ≤5 ≤5 Specification Frequeccy(MHz) Penetration(mm) Lateral Resoultion(mm) Axial Resolution(mm) Dead Area(mm) Slice Thickness(mm) Lateral Distance Precision(%) Axial Distance Precision (%) 3 ≥140 ≤3(Depth≤80) ≤4(80<Depth≤130) ≤2(Depth≤80) ≤7 ≤6 D3-‐6CE (R=40 convex) 4.5 ≥80 ≤2(Depth≤40) ≤1(Depth≤40) ≤5 ≤6 6 ≥40 ≤2(Depth≤30) ≤1(Depth≤40) ≤4 ≤7 ≤20 ≤20 ≤10 ≤10 ≤10 ≤5 Specification Frequeccy(MHz) Penetration(mm) Lateral Resoultion(mm) Axial Resolution(mm) Dead Area(mm) Slice Thickness(mm) Lateral Distance Precision(%) Axial Distance Precision (%) 2 ≥140 ≤3(Depth≤80) ≤4(80<Depth≤130) ≤2(Depth≤80) ≤7 ≤8 ≤20 ≤10 G1-‐4P (Phased Array) 2.75 ≥140 ≤3(Depth≤80) ≤4(80<Depth≤130) ≤2(Depth≤80) ≤7 ≤7 ≤20 ≤10 3.5 ≥140 ≤3(Depth≤80) ≤4(80<Depth≤130) ≤2(Depth≤80) ≤7 ≤7 ≤20 ≤10 261 / 265 8000098 Specification Frequeccy(M Hz) Penetration( mm) Lateral Resoultion(m m) Axial Resolution(m m) Dead Area(mm) Slice Thickness(mm ) Lateral Distance Precision(%) Axial Distance Precision (%) S1-‐6P (Phased Array) 2 2.75 3.5 4.25 5 ≥140 ≥140 ≥140 ≥80 ≥80 ≤3(Depth≤80) ≤4(80<Depth≤1 30) ≤3(Depth≤80) ≤4(80<Depth≤1 30) ≤3(Depth≤80) ≤4(80<Depth≤1 30) ≤2(Depth≤ 40) ≤2(Depth≤ 40) ≤2(Depth≤80) ≤2(Depth≤80) ≤2(Depth≤80) ≤1(Depth≤ 40) ≤1(Depth≤ 40) ≤7 ≤7 ≤7 ≤5 ≤5 ≤7 ≤7 ≤7 ≤7 ≤7 ≤20 ≤20 ≤20 ≤20 ≤20 ≤10 ≤10 ≤10 ≤10 ≤10 Note: The degree of uncertainty of slice thickness measurement is +/-‐20%. The table below lists this device’s basic performance in terms of penetration in CF mode, PDI mode, PW mode and CW mode. Probe G2-‐5C F2-‐5CE S2-‐9C D3-‐6C D3-‐6CE Penetration 1.8MHz 2.5MHz 3.3MHz 4.0MHz 2.5MHz 3.3MHz 4.0MHz 1.7MHz 2.5MHz 3.3MHz 4.0MHz 5.0MHz 3.1MHz 4.0MHz 5.0MHz 2.5MHz 3.3MHz CF >125mm >120mm >110mm >100mm >120mm >110mm >100mm >130mm >120mm >110mm >100mm >80mm >110mm >95mm >75mm >110mm >95mm PDI >125mm >120mm >110mm >100mm >120mm >110mm >100mm >130mm >120mm >110mm >100mm >80mm >110mm >95mm >75mm >110mm >95mm PW >125mm >120mm >110mm >100mm >120mm >110mm >100mm >130mm >120mm >110mm >100mm >80mm >100mm >90mm >80mm >100mm >90mm 262 / 265 8000098 4.0MHz 4.0MHz D4-‐9E 5.0MHz 4.0MHz G4-‐9E 5.0MHz 4.0MHz F4-‐9E 5.0MHz 4.0MHz G4-‐9M 5.0MHz 4.0MHz X4-‐12L 5.0MHz 6.3MHz 5.0MHz 6.3MHz X6-‐16L 8.0MHz 10.0MHz 5.0MHz U5-‐15LE 6.3MHz 8.0MHz 4.0MHz I4-‐11T 5.0MHz 4.0MHz F4-‐12L 5.0MHz 6.3MHz 8.3MHz 10MHz X9-‐22L 12.5MHz 14.3MHz 16.7MHz 11.1MHz X10-‐23L 12.5MHz 14.3MHz 1.7MHz 2.0MHz G1-‐4P 2.5MHz 3.3MHz 1.7MHz 2.0MHz S1-‐6P 2.5MHz 3.3MHz >75mm >70mm >60mm >70mm >60mm >70mm >60mm >70mm >60mm >75mm >70mm >55mm >45mm >40mm >35mm >25mm >45mm >40mm >35mm >75mm >70mm >75mm >70mm >55mm >25mm >25mm >25mm >20mm >20mm >25mm >20mm >20mm >120mm >120mm >120mm >110mm >120mm >120mm >120mm >110mm >75mm >70mm >60mm >70mm >60mm >70mm >60mm >70mm >60mm >75mm >70mm >55mm >50mm >40mm >35mm >25mm >50mm >40mm >35mm >75mm >70mm >75mm >70mm >55mm >25mm >25mm >25mm >20mm >20mm >25mm >20mm >20mm >120mm >120mm >120mm >110mm >120mm >120mm >120mm >110mm >80mm >65mm >55mm >65mm >55mm >65mm >55mm >65mm >55mm >70mm >65mm >55mm >45mm >40mm >40mm >25mm >45mm >40mm >40mm >70mm >65mm >70mm >65mm >55mm >25mm >25mm >25mm >20mm >20mm >25mm >20mm >20mm >120mm >120mm >120mm >110mm >120mm >120mm >120mm >110mm 263 / 265 8000098 Probe G1-‐4P S1-‐6P Penetration 1.7MHz 2.0MHz 2.5MHz 1.7MHz 2.0MHz 2.5MHz CW >120mm >120mm >110mm >120mm >110mm >95mm 264 / 265 8000098