1
Android Tracker Capture App
Downloading tracker data from the online
DHIS 2 instance
3.5. Downloading tracker data from the online DHIS 2 instance
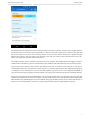
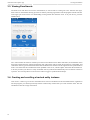
From the main screen press the middle button for querying the server. Since this task requires an Internet connection,
please make sure that you have one. This task will query the server with the organisation unit and programme that you
have selected from the main screen. After you have pressed this button a dialog appears. In this dialog you can either
specify your search by pressing the detailed search button. The detailed search queries the server for tracked entity
instances that contains the values that you have specified in your query. When you are finished with your query, press
the globe for displaying the results from the server. If you want to display all tracked entity instances from the selected
organisation unit and programme, you can simply press the globe button without entering any details. Depending on
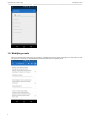
your Internet connection, this task can take some time so please be patient. A new dialog will present a list of results
from your query containing tracked entity instances. Select the tracked entity instances that you want to download by
tapping on them (A green tick on the right side will indicate that you have selected the tracked entity instance). After
you have selected all your tracked entity instances that you want to download, press the download button, that has an
icon with a downwards arrow, at the top of the dialog screen. The tracked entity instances will be downloaded in the
background and the synchronization wheel will be displayed. When a tracked entity instance is finished downloading
it will appear in the list at the bottom of the main screen.
3.6. Modifying enrollment and tracked entity instance attribute values
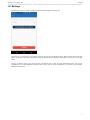
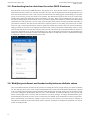
After an enrollment has been created you can go back to or modify the event by simply clicking on it in the enrollment
list. This will open an overview screen of the enrolled tracked entity instance with information that has been captured
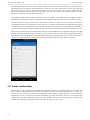
so far. To change the tracked entity instance attribute values that has been captured, simply press the profile box and a
new screen will apppear. By default the data entry rows will be disabled. To enable the data entry rows press the edit
button in the top-right corner. This form will save whenever you do any changes. To change enrollment details, press
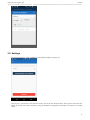
the Enrollment box from the overview screen. To make the rows editable, press the edit button in the top-right corner.
Data is automatically saved whenever changes is done. In the Overview screen you can also choose to complete or
terminate the enrollment for the tracked entity instance. When an enrollment is completed or terminated, you will not
be able to modify the data
12