1
User’s Manual English
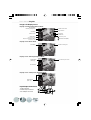
Camera Menus
Record Menu
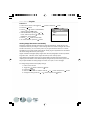
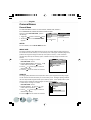
The RECORD MENU contains six items: SETUP, IMAGE SIZE, QUALITY,
EV COMPENSATION, WHITE BALANCE and QUICK VIEW.
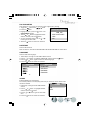
Steps to access RECORD MENU, perform
01:20
01:20
RECORD MENU
RECORD MENU
the following:
WHITE BALANCE
SETUP
QUICK VIEW
1. Toggle the
button to select the
mode. IMAGE SIZE
QUALITY
2. Press the
button. The RECORD MENU
EV COMPENSATION
appears.
SETUP
For more details, refer to SETUP MENU section.
IMAGE SIZE
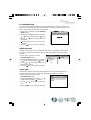
The image resolution (size) determines the size of your image and how many images can
be stored in the internal memory or on the memory card. The higher resolution (larger size)
produces the large size image but takes up more space in memory. Lower resolution
(smaller size) takes up less memory space, suitable for sharing images via email or the
Internet.
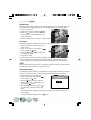
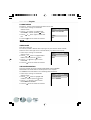
1. Follow steps 1 through 2 in access
IMAGE SIZE01:20
RECORD MENU section.
2. Highlight IMAGE SIZE by using the
or
L 1600 X 1200
button, and then press the
button.
S 800 X 600
3. Use the
or
button again to select the
desired image size.
4. Press the
button to confirm the selection.
QUALITY
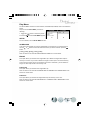
The image quality determines the compression ratio of your image and how many images
can be stored in the internal memory or on the memory card. The higher quality produces
the less compressed image but takes up less memory space. Lower quality takes up less
memory space, suitable for sharing images via email or the Internet.
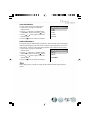
1. Follow steps 1 through 2 in access
QUALITY 01:20
RECORD MENU section.
or
2. Highlight QUALITY by using the
NORMAL
button, and then press the
button.
FINE
3. Use the
or
button again to select the
SUPER FINE
desired image quality.
4. Press the
button to confirm the selection.
20