1
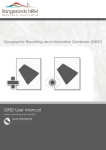
RPG MANAGER v2.x Campaign Editor and Game Manager User Manual Written by Flavio Roli Designer and developer of RPG Manager http://www.rpgmanager.net INDEX RPG MANAGER v2.x – AN INTRODUCTION. . . . . . . . . . . . . . . . . . . 01 CHAPTER 1: An overview of the Campaign Editor CHAPTER 2: Basic world map editing . . . . CHAPTER 3: Advanced world map editing . . . CHAPTER 4: Map linking . . . . . . . . CHAPTER 5: Basic location map editing . . . CHAPTER 6: Objects . . . . . . . . . CHAPTER 7: Characters . . . . . . . . CHAPTER 8: Creatures . . . . . . . . CHAPTER 9: Spells . . . . . . . . . . CHAPTER 10: Equipment . . . . . . . . CHAPTER 11: Skills . . . . . . . . . . CHAPTER 12: Rules and Tables . . . . . . CHAPTER 13: Utilities . . . . . . . . . CHAPTER 14: Custom world and location tiles . . . . . . . . . . . . . . . . . . . . . . . . . . . . . . . . . . . . . . . . . . . . . . . . . . . . . . . . . . . . . . . . . . . . . . . . . . . . . . . . . . . . . . . . . . . . . . . . . . . . . . . . . . . . . . . . . . . . . . . . . . . . . . . . . . . . . . . . . . . . . . . . . . . . . . . . . . . . . . . . . . . . . . . . . . . . . . . . . . . . . . . . . . . . . . . . . . . . . . . . . . . . . . . . . . . . . . . . . . . . . . . . . 03 05 15 24 28 36 38 48 54 56 59 60 62 70 THE CAMPAIGN EDITOR RPG MANAGER 2.x – An Introduction RPG Manager is a suite of tools aimed to Role Playing Game Masters, which allow the creation and management of fictional worlds and campaigns. RPG Manager consists of two separate programs: Campaign Editor: the creative heart of RPG Manager let’s you graphically create world and location maps and embed these with a great deal of data which goes along with them (calendars, events, descriptions, encounters, etc.). Moreover it offers tools to create characters, creatures, equipment, spells, skills and tons of more data. Game Manager: the management part of the program let’s you use the created data to play actual game sessions. With the Game Manager you can load your maps, create groups of players and track their position and movements in the fictional created worlds and locations. Moreover it let’s you track the flow of time, deal with combat situations, manage experience and much more. All the features of the Campaign Editor and the Game Manager will be discussed in this manual. For those people who have been using RPG Manager v1.x I will here summarize some of the most important differences and additions between the older versions and RPG Manager 2.x: CAMPAING EDITOR Unlike versions 1.x, now maps consist of a unique scrollable file. This means you will have the entire map on screen and will be able to scroll and reach any part of it very easily. Moreover maps consists now of 4 separate layers. This means for example that you can have roads overlapping with rivers. Finally maps now feature new improved graphics and new tools to manage them (resizing tools, tools to find particular locations, etc.). Also you can now export and save your entire map as an image. Location maps have been added. These maps are square based and feature a set of graphical elements which allow you to create buildings, cities and such maps which require a greater level of detail. These maps have all the characteristics explained above with the addition of objects, which are external graphics which you can load into RPG Manager and use inside location maps. Calendars can now be created. The calendar creation tool let’s you create complex calendars with any number of months/weeks/days. You can give names to months and days and decide on the day/night cycle. Character sheets and creature sheets are much more detailed now and allow for an impressive amount of information. Moreover these sheets feature tabs to group and organize similar data together. The new name generator tool let’s you add first and last names for races or nationalities. The tool then let’s you generate random complete names that you can use for any purpose. http://www.rpgmanager.net Pg. 1 of 72 Finally you can easily import and convert to version 2.x format all the data created with previous versions of the program. GAME MANAGER Unlike version 1.x, with the Game Manager you can now manage completely any number of characters and creatures groups. You can have more than one group marker on the world map and keep track of the flowing of time and the movement for each group. Groups can be made of a mixed type of characters and creatures and can interact with one another. Finally on location maps you can position single group members and keep track of their movement on the smaller scale map. You can now save entire game sessions. The new save game feature not only let’s you save the position of groups and group members on the maps but also saves their complete status. INSTALLING RPG MANAGER 2.X To install RPG Manager, just extract the files in the ZIP archive using WinZIP or a similar program, in a custom folder. Be sure to have the “Use folder names” option enabled when doing so. LITTLE DISCLAIMER Due to the vast nature of the project and considering that indeed RPG Manager 2.x has been totally designed and developed by whom is writing this manual at this moment, there may be situations where you might encounter some program bugs, hangs, malfunctioning or strange behaviors. I have tested the program thoroughly but being human I might have missed some of these annoyances. If ever encountered please feel free to report them to me writing at [email protected] possibly adding some description of the problem (where and how it occurred) and maybe even a print screen. I will look to fix things, if possible. http://www.rpgmanager.net Pg. 2 of 72 CMP CHAPTER 1: An overview of the Campaign Editor To load the Campaign Editor program just double click on the “cmpEditor.exe” program icon in your RPG Manager folder. The main program window shows. You can see a top menu, a toolbar with some buttons and a drop down list box and an empty work area which will display all the data you will be working with. Here is what the menu and toolbar controls do. MAIN MENU Worlds: with this menu you can create, modify, import, save, save as bitmap image and delete any world map. A world map is a large scale hexagonal map which represents geographical features such as mountains, plains, rivers, lakes, seas, forests cities and other points of interest. Locations: similar to the Worlds menu, it does the same thing with location maps. Location maps are square based small scale maps which represent a location such as a town, a castle, a small part of a forest, caverns, etc. Map Objects: map objects are external bitmaps which you can load into RPG Manager and use in location maps. With this menu you can create, load, save and delete map objects. Characters: with this menu you can create, modify, import and delete any character. Creatures: same as the Character menu but deals with creatures instead. Spells: with this menu you can create, modify, import and delete spells for different races or classes. These spells may then be used by themselves or inside character and creature sheets. Equipment: similarly to the Spells menu, once equipment has been created it can be used inside the character sheet. You may also modify, import and delete equipment. Skills: skills are special abilities or knowledge possessed by characters and creatures. Skills may be created, modified, imported or deleted and can be used inside character and creature sheets. Rules & Tables: this menu allows you to create text notes for game rules, personal rules (house rules) and simple tables. You my then call up the information during game sessions for rapid reference. Rules and tables may be also modified, imported and deleted. In this section you can also find dynamic program tables which are program tables that can interact with other data of RPG Manager. Utilities: this menu enables you to access some of the new Campaign Editor utilities. These utilities are also available with their graphical representation in the toolbar beneath. The utilities are: http://www.rpgmanager.net Pg. 3 of 72 Your personal dice bag containing a wide variety of digital dice plus a customizable one. Of course tossing real dice is always better than simulating but sometimes you just don’t have the physical space to do it. The world terrain option utility which serves as a map legend for each graphical symbol of the world map. Here, among other things, you can modify world symbol descriptions, the impact on movement and vision distance and the percentage chance of random encounters. You can also add new personalized graphic symbols if the ones in the program do not fully satisfy you. The world weather option let’s you customize each weather type with regards to description and the impact on movement and vision distance. The location terrain option utility is similar to the world one, but with some less features. The powerful calendar generator let’s you create and manage your personalized calendars. Each calendar may have different characteristics. You may for instance create an Aztec calendar, or one like it was used in ancient Rome and later add these inside your world maps. The name generator enables you to create list of names and last names for any type of race or nationality. This tool then comes in handy at any time, when you need to come up with a random name. The equipment monitor displays a list of statistics based on equipment type. This tool is pretty useful to have all your equipment on hand at a glance. View: this menu contains a list of active windows in the work area and let’s you call up any of those windows. ?: the mystery menu; what this does nobody knows. TOOLBAR The toolbar features some buttons which allow you to access to some of the utilities explained in the Utilities menu and a drop down list box which contains the list of the dynamic program tables. This is what the buttons do: Dice bag World terrain options World weather Location terrain options Calendar generator http://www.rpgmanager.net Pg. 4 of 72 Name generator Equipment monitor http://www.rpgmanager.net Pg. 5 of 72 CMP CHAPTER 2: Basic world map editing Once we have had an initial feel with the Campaign Editor, let us really start now with one of the most exciting tasks in role playing games: world map creation. Select the World menu and then the New… command: The following window is shown in the work area: In the Properties tab you need to specify some information such as: World name. This will be the name the map will be saved with. Hexagon size. The hexagon size is the size in miles or kilometers of each hexagon. This has to do with handling movements of groups of characters/creatures. Changing hexagon size does not alter in any way how the map will be graphically displayed. Once inserted, this information may be later modified. Calendar. Select a calendar to use with the world map. Default Modern is the standard calendar (similar to the one actually used worldwide, but with no leap year). You may create more calendars http://www.rpgmanager.net Pg. 6 of 72 using the calendar generator tool which will be explained later on. Once inserted, this information may be later modified. Map size. You can select among some standard map sizes or you can specify your own. Width and height are the numbers of horizontal and vertical hexagons of the map. Depending on your computer hardware you may be able to create very HUGE maps. A world’s map size may be later on modified once created. Manual world creation. Well first of all if there’s a manual world creation you might think there also should be an automatic world creation. So where is it? Well I’m still working on routines to automatically create land features by just specifying the percentage of land/water and of each type of land. So for now you can just choose to have your world all filled up with land, all filled up by water or a universe filled up with space. In the Description tab you can have fun by writing some text about the world, whether it may be a description or the history of its creation. This information may be inserted or changed in a second time. When done click OK to proceed. The world will be saved into RPG Manager and the world map window will be displayed. Depending on your choices, your world map might display all land or all water. In the following example I have created a world called “Tutorial World” with hexagon size of 10 (kilometers or miles) and a tiny map size. The world has been filled with water. Looking at the world map window, we can see it is made of several elements: An horizontal toolbar at the top containing some graphical buttons and a few controls. A vertical editing toolbar on the left containing information about layers, land types and a small map preview. http://www.rpgmanager.net Pg. 7 of 72 A central work area containing the map. An horizontal status bar at the very bottom displaying some information (usually just map coordinates). A few words on how a world map is composed. Each hexagon of the world map may have up to 4 layers of graphical data. If you move the mouse on a map hexagon, the graphics of the layers in the vertical toolbar change showing the information for each layer. In our case since all of the map is filled with water only the layer 1 shows something. Also note that while the mouse is on the map hexagon, the hexagon terrain type is displayed as a hint. Other information may be displayed as well depending on the hexagon characteristics. Let’s look with more attention to the vertical editing toolbar on the left. First of all we are able to choose between several types of graphic sets (in RPG Manager there’s only one at the moment, called “RPG Manager 2.x”). Each graphic set may be composed of 4 different layers each of which may contain different graphic tiles. Later on I will show how to create user designed (custom) graphic sets. Underneath the graphic sets you have 4 layers. The selected layer in yellow is the current layer you are editing in the map and the one who’s graphics are displayed in the toolbar at the moment. To switch from one layer to the another just click on it. The corresponding set of graphics will be loaded and displayed: Layer 1 graphics deal with terrains so in layer 1 you will find any sorts of land, sea, mountains, hills, forests, etc. Layer 2 graphics include streets, roads and trails. http://www.rpgmanager.net Pg. 8 of 72 Layer 3 graphics are characterized by rivers and canals of different dimensions. Layer 4 graphics include symbols used to represent cities, towns, farms, bridges and so on. Let’s stay on layer 1 for the moment. Still underneath the layers you have a control to randomize, mirror or flip graphics: Randomizing tiles: layer 1 contains all terrain types. Graphics from layer 1 are composed of 5 different images. This means that when you are adding mountains to your map, for example, you may choose to use always the same representation or you may choose to randomize a mountain representation. This option is just for your eyes delight but may dramatically improve the way world maps look. Tile randomization is not possible on layers 2, 3 and 4 and thus is disabled when those layers are selected. Mirror/Flip: one great new feature of the Campaign Editor is the possibility to mirror and flip graphics from layers 2, 3 and 4. This permits the creation of complex graphics with very few hexagon tiles. To mirror or flip a graphic, just select it in the editing toolbar and click on the mirror or flip button. Continuing down on the editing toolbar we can see the graphics set of the selected layer. You can scroll forth to see more graphics or back. Just hover the mouse on one of the buttons to see a description of what it is. To select a graphics just click on the button. That will be the current editing graphics. It’s time to add some land to our sea. I will leave checked the randomize tiles checkbox and click on the “Plains” button. Then, on the map, I will draw some land left-clicking on all the hexagons I would like to change or by leaving the left mouse button pressed and moving the mouse around. This is my result: http://www.rpgmanager.net Pg. 9 of 72 Notice that the map preview in the editing toolbar has change to reflect what was drawn. You may scroll the map preview and click on it to rapidly reach any part of the main map. You may also scroll the main map if you wish using the vertical and horizontal scrollbars. Also, another important thing to notice is the fact that when I selected the plains graphics, on my horizontal toolbar, the terrain name box was filled with the “Plains” text. And in the map, if the mouse is left on a plains hexagon, the same description appears as a hint. But what if I wanted to assign specific terrain names to what I’m drawing? Well that’s easy enough, let’s create a lake in the map and call it “Sojourn lake”. To do so, first select the “Deep ocean or lake” graphics in the editing toolbar; notice that when you click on the button, the terrain name box is filled with the text “Deep ocean or lake”. Now before drawing the lake in the map, change the text of the terrain name box to “Sojourn lake”. Finally draw the lake in the map as shown in the following image. Let us now play with graphics randomization on layer 1. Now I will select the “Mountains” button on the editing toolbar and uncheck the randomize tile checkbox. In this way, the editor will use the same graphic representation for each mountain hexagon drawn. I will call these mountains “Monotonous mountains”. Now I will do the same thing, but this time I will leave the randomize tile checkbox checked. In this way the editor will randomize a mountain graphic for each map hexagon and the result will appear much more varied. I will call these mountains “Varied mountains”. Below you can see how both mountains drawn look…the “Monotonous mountains”…well, they’re all the same. The “Varied mountains” appear much more realistic. http://www.rpgmanager.net Pg. 10 of 72 http://www.rpgmanager.net Pg. 11 of 72 Terrain names, once assigned, may be changed at any time. For instance when drawing the land, this was called “Plains”. After hours of thinking I have finally decided that I prefer the land to be called “Drakmar peninsula”. So now I will change it giving it this last name. Right-clicking with the mouse is always a good thing to do. If you right click on the main map, a popup menu appears. Depending on many things, the menu may display one or more commands. For instance while on a plains map hexagon of the newly created map, the popup menu right click appears as the following: With the Change terrain name… command it is possible to accomplish the task of changing the name of one or more map hexagon terrains. The Add link to map… command is used to link different maps together, add location maps or images. This command will be described further on. I will click on the Change terrain name… command. A small window appears showing me the terrain name of the hexagon I right-clicked on. I can change this name; also I can change the name of all other terrain hexagons that are called the same way. This is what I will do: Once clicked on the OK button I can check on the map the result. Now each land that was “Plains” has been changed to “Drakmar peninsula”. One final word on terrain names. It is possible to look for a particular terrain name on a map. Let’s say you’ve been editing quite a bit and at a certain point you don’t remember where the “Dwarven city of Kgnaarrr” is located. That’s where the horizontal toolbar comes in handy with its search feature. Just type in any text and go for it. If a similar terrain name exists it will be found. http://www.rpgmanager.net Pg. 12 of 72 At this point, I will add some layer 2, 3 and 4 graphics. While doing so I will show the function of the Mirror and Flip buttons on the editing toolbar which are available for these layers. But first I need to add to the map a small town on the upper lakeside (“Town of Earin”), and a big city near the sea (“City and seaport of Vesprin”). The graphics for these markers are found in layer 4. After this, I will connect these two populated areas with a road. The road graphics are found in layer 2. When clicking on a graphics button in the editing toolbar, the chosen graphic is selected. While map editing in layers 2, 3 or 4 it is possible to mirror or flip the chosen graphic to obtain a greater variety. Mirroring and flipping is especially useful when dealing with rivers, roads and similar graphics which may have many different directions, curves or angles. In this next step I will use graphics from layer 3 to add a small river which originates from the near mountains and flows into the lake. The river will intersect with the road just drawn but since the river and road belong to a different layer, they will be drawn just fine. Finally I will add a bridge graphics taken from layer 4 to facilitate the crossing of the river by people on travelling on the road. The result of my editing using graphics from layers 2, 3 and 4 is shown in the image below. http://www.rpgmanager.net Pg. 13 of 72 Notice that while editing, whenever the mouse is on a particular map hexagon, the graphics in the layers of the editing toolbar change to reflect the map hexagon’s content. For instance, while on the hexagon with the bridge, the layers will show the following graphics which are contained in the hexagon: This is particularly useful because at any time we can know how a particular map hexagon is made. So now I have changed my mind…I don’t want a bridge anymore in the map, besides, it wasn’t even a toll bridge. So I will take it away. Again right-clicking turns out to be very useful. This time, if I right click on the hexagon map showing the bridge, the popup menu which appears contains the following commands: So that’s how you delete layers! Of course you cannot delete graphics from layer 1 because you cannot have a map hexagon without any type of terrain. But you can always replace a terrain type with another just drawing on top of it. The bridge comes from layer 4 so I will choose the Delete layer 4 command the take it away from the map. A window prompting a name change for the hexagon appears. The meaning of the window is the following. The hexagon containing the bridge was called “Bridge” because this was the http://www.rpgmanager.net Pg. 14 of 72 last graphics drawn on it. But now, having deleted it the editor asks me if I still want to call the hexagon bridge- It makes no sense to keep the old name so I will call it “Road and River Intersection”. And this is the final result on the map: This concludes Chapter 2. I will save the map using the World menu in the main Campaign Editor window and choosing the Save command. http://www.rpgmanager.net Pg. 15 of 72 CMP CHAPTER 3: Advanced world map editing In this chapter I will conclude the information on world map editing by illustrating some advanced features. To do so I will use the Test World map created in CMP Chapter 2. You can load maps from the World menu in the Campaign Editor and selecting the Load… command. A new window containing a list of existing maps will be shown. After previewing the maps you can finally select the one you wish to load: I will start by completing the description of the top horizontal toolbar. We’ve already seen in CMP Chapter 2 how to use the terrain name text box and the search text box contained in this toolbar. Now let’s see the meaning of each button: Enlarge map. If you discover that a map needs to be larger you can increase its dimensions. Reduce map. Likewise you can also reduce a map from its original size. Terrain descriptions. Let’s you add a long text description to each terrain of the map. World weather. Let’s you specify and manage world atmospheric conditions and weather. Random encounters. Let’s you add random encounters to each different terrain type. World trade commodities. Let’s you manage world trading goods and values. World calendar. Let’s you specify world events that occur at particular points in time. World monitor. It gives a global situation of your map. It is like a summary of your world. ENLARGE MAP This editing button let’s you increase the dimensions of a world map. After processing a while (time depends on the power of you computer), a window is displayed showing you a preview of your map and the actual map dimensions. You can adjust these dimensions, choose the type of terrain fill and also select how the map enlargement will occur. For instance: http://www.rpgmanager.net Pg. 16 of 72 The lighter blue color is your original map, the darker color is represents the fill enlargement. You may preview the results and change things if you don’t like what you see. When done just click on the Enlarge button to actually enlarge the map. REDUCE MAP Likewise the enlarge button, the reduce button enables you to decrease the dimensions of a world map. This means that you may crop the map and make it smaller, but be aware: cropped data is lost so be sure to check things twice before same your map after a map reduction. Again, after processing a while (time depends on the power of you computer), a window is displayed showing you a preview of your map and the actual map dimensions. You can adjust these dimensions, choose the type of terrain fill and also select how the map cropping will occur. For instance: In this case, the darker blue color is your entire map and the lighter blue color is the final map after cropping. http://www.rpgmanager.net Pg. 17 of 72 Again, you may preview your changes before applying them. When done just click on the Reduce button to actually shrink the map. TERRAIN DESCRIPTIONS Terrain descriptions are texts which may be assigned to each different terrain types to add a high level of detail to a world map. For example with terrain descriptions you can add descriptions to forests, rivers, cities and so on. These descriptions then may come in handy during actual playing sessions in the Game Manager. When you click on the terrain description button the first thing you are asked is to save the map. This is a prerequisite for dealing with terrain descriptions. Then a new window appears listing on the left side all terrain types available in your map. Each terrain type may have up to 99 different descriptions. These will be listed on the right side of the window. The reason for so many descriptions available is variety. In fact, the Game Manager let’s you see all descriptions for a particular terrain, and while a group is moving around, the program can automatically randomize terrain descriptions each time a new hexagon has been travelled across. This adds great variety to the gameplay since players may get similar but different descriptions of places they visit. Of course someone has to put the descriptions in, that’s why you’re the game master. To add a description, just select a terrain type from the list. After done so, descriptions already inserted are listed on the right side. You can add a description by clicking on the “+” plus button. http://www.rpgmanager.net Pg. 18 of 72 To delete a description just right-click on a description and on the popup menu which appears, select the Delete description command. WORLD WEATHER Weather conditions are very important when dealing with world maps. These affect travel and sight distance. You may add weather conditions based on the actual world map calendar in use to your world. Each different terrain type may have up to 10 different weather conditions for each month. Once assigned, random weather will be automatically generated in the Game Manager. Click on the world weather button, after saving the world map, a new window appears with a list of available terrains on its left side and a list of months generated from the calendar the world map uses. Notice that if you select a terrain type you are then given the option to insert up to 10 weather conditions for a particular month. You may also choose to insert weather conditions for some periods and none for others. How is weather used in the Game Manager? OK let’s say a group of characters are travelling in the plains and it is February. The program will check for random weather conditions twice a day (once during the daytime and once during the night). So according to the image below, for the “Drakma peninsula” terrain and the month of February, the group will have a 20% chance of snow, 20% of rain, 20% of cloudy conditions, 20% of fog and finally a 20% of partly cloudy weather. http://www.rpgmanager.net Pg. 19 of 72 RANDOM ENCOUNTERS The random encounters button enables you to create tables of encounters which may occur while wandering in the world map. These tables will be then used by the Game Manager to automatically generate random encounters. Random encounters feed from creatures already existing in RPG Manager so a prerequisite is that you must have at least one creature in the database (creatures will be discussed later on). In any case, when you click on the button, after confirming the saving of the world map, the random encounters window appears. Here again, on the left side of the window you have a list of terrains types. On the right side you have a list of creatures and in between you have your random encounters table. Through the sort button it is possible to sort the list of creatures by creature name or by habitat. Finally the random encounters table is made up of common, uncommon, rare and very rare encounters. Two buttons at the top of the random encounters table let you switch between day and night encounters (when a new table is created, the default is always day). To populate random encounters, first select a particular terrain type, then click on a creature in the list and drag it inside the table. To switch between day and night click on the corresponding buttons. During a play time using the Game Manager, the program will automatically check for random encounters and if one occurs, it will generate for you the encounter data. If you wish, may also write text in the random encounters table. For instance you may want to add some particular random encounter event not linked to any creature (for instance a mountain avalanche, a wandering army, an earthquake, etc.). In these cases, in the Game Manager you will receive just a notice and no random encounter data will be generated. http://www.rpgmanager.net Pg. 20 of 72 WORLD TRADE COMMODITIES Trade commodities are goods bought and sold by merchants on trade markets. In RPG Manager, each different world terrain type may have its own trade market. So this button enables you access to the trade commodities data where, for each terrain type you may specify up to 30 trading goods. The trade commodities table has the following characteristics: Trade commodity name is the name of the good traded on the market. Base price is the universal base price of a good. These two types of data are maintained in the Trading commodities base prices table, which means that you can add/modify the default RPG Manager trading goods and base prices if you wish. This possibility will be better explained later on. Percentage of base price is the price adjustment for the selected terrain. For instance seafood probably costs less near rivers, lakes and seas and it will probably cost more in places far away from the water. The final price is the price adjusted by the percentage of the base price. It is the final value of a particular good in a particular terrain. When populating the trade commodities table you can modify the percentage of a base price to obtain the final price. You may also modify directly the final price if you wish; the program will automatically calculate the percentage of the base price for you. http://www.rpgmanager.net Pg. 21 of 72 WORLD CALENDAR Using the world calendar it is possible to specify events which will occur at certain points in time. The calendar will be generated according to the one you chose for your world. When you click on the button, the world calendar and events window appears. On the left side of the window you may see a list of events that have been already inserted, on the right there is a calendar, whose year is initially set to 0. Click on the Year button to change the current year, the calendar will adjust itself accordingly. You can browse through each month using the back and forth buttons. To add an event at a particular date, just click on one of the days. Days which are already associated to an event will be shown with a green color. When you click on any day, a new window open showing you the event or allowing you to insert a name for the event and a description. http://www.rpgmanager.net Pg. 22 of 72 To delete an event, either select an event from the list and then right-click on it, or right-click on a green colored day on the calendar. A popup menu will appear allowing you to delete the event. WORLD MONITOR The world monitor is a very powerful tool which gives you a summary of your world at a glance and helps you inspect many of your world’s aspects to see whether some data may be missing or wrong. After clicking on the button and confirming the saving of the world map, a new window appears, showing you a complete list of all terrain types available in your world and the status for each one of them. In particular you will find: Information about terrain descriptions. Which terrain types have or do not have a terrain description and if terrain descriptions do exist, how many are present. Information about weather. Which terrain types have been assigned a weather table. Information about random encounters. Which terrain types have been assigned a random encounter table. A yellow light means that the terrain has a random encounter table for day but not for night or viceversa. http://www.rpgmanager.net Pg. 23 of 72 Information about map linkage. As I will describe in the next chapter, it is possible to link locations together. Links can be between locations in the same map, different maps or an image plus some text description. Linkage information will show you if a link exists, and the type of link. Trade market information. Which terrain types have been assigned a trade market table. FINAL EDITING NOTIONS When I initially created my map, I had the option to specify the size of the hexagons in kilometers/miles, the calendar used and I had the possibility to insert a terrain description. All of this information may be varied at any time. To do so, just load up a map, and then in the Campaign Editor World menu, select the Change world description… command: Please note that if a world map has a particular calendar assigned for which you have already created events, if this calendar changes, the events may not be compatible with the new calendar. Events not compatible will not be shown in the Game Manager. To conclude this chapter, you may save your map as a bitmap image form the Campaign Editor World menu, selecting the Save as bitmap… command. http://www.rpgmanager.net Pg. 24 of 72 CMP CHAPTER 4: Map linking Map linking, if planned with care, may be very useful as it helps you in connecting various map parts. For instance, you may have a world map linked with a city. Perhaps the city could be a location map (we will deal with location maps later on). In the Game Manager, when a group of individuals would reach such city, you could have them brought directly to the city map. So as anticipated in the previous chapter, once a world or location map has been created, it is possible to link any terrain of that map with any other world map or location map (included itself) or with an image and a text description. This chapter will deal with map linking. LINKING TO AN RPG MANAGER 2.0 MAP Linking an RPG Manager map location to an RPG Manager map is very simple. In the previously created map I have added two location features, to simulate a portal: a magical entrance gate, and a magical exit gate. Those travelling through the entrance gate can reach the exit gate within a matter of minutes. Let’s link the entrance gate of the portal to the exit gate. While the mouse is on the portal entrance tile, right click with the mouse and select the Add link to map… command from the popup menu which appears: http://www.rpgmanager.net Pg. 25 of 72 After saving the map, a new window enables you to choose between two different link types. In this case we want to link to another RPG Manager map (and precisely to our map). After selecting RPG Manager 2.x map you are brought to a new and final window. Here you can select from all your world/location maps. Once you have selected a map, a list of terrain types is listed. Single terrains are tiles which occur only once in the whole map (for instance a city or tower). Multi terrains are tiles which are repeated such as a forest, mountains, etc. To link the gate entrance to the gate exit, I will choose the “Portal exit” terrain type. That’s it, the link has been established. Notice that if you stay with the mouse on the portal entrance in the map, the hint which appears will notify you that this is a linked terrain. Also, in the map monitor the portal entrance will show to be linked to the portal exit. http://www.rpgmanager.net Pg. 26 of 72 LINKING TO AN IMAGE AND TEXT DESCRIPTION The second option which you have when linking, is to link a particular terrain to an image and a text description. I will use this option to link the “City and seaport of Vesprin” to a city image previously created. Again, while the mouse is on the tile of the city, right click with the mouse and select the Add link to map… command from the popup menu which appears: After saving the map, this time I will select the Image option. Now you may insert location images. Each location image may be assigned a name and a text description. To add a new location image, just click on the Add location image button (+). With the and the button you may sort location images moving them up or down. Double-clicking on a location image lets you see the image at 100% zoom. Finally, you may delete a location image by right-clicking on it and selecting the Delete location image command from the pop-up menu which appears. When done, just click on the Exit button. The link has been established. Notice that if you stay with the mouse on the city tile in the map, the hint which appears will notify you that this is a linked terrain. Again, this information will be also shown in the map monitor. http://www.rpgmanager.net Pg. 27 of 72 Once a link has been established, it is always possible to modify or remove it. To do so, just right-click on the terrain which has the link and select the Modify link to map… or the Delete link to map…commands from the popup menu which appears. One important note and warning. When you delete a link which is an image and a text description, those files (which are contained in the “RPG Manager\Worlds\Your World Name\Locations” folder, will be actually deleted from your computer. You will loose all the images and text descriptions inserted, so be sure to have a backup or that you really do not need them anymore before confirming the deletion. http://www.rpgmanager.net Pg. 28 of 72 CMP CHAPTER 5: Basic location map editing Location maps are really very similar to world maps, the only difference being they are square based instead of hexagon based and most of the times depict small scale places such as dungeons, castles, parts of a forest, etc. Many concepts from world editing also apply to location editing. To create a new location select the Location menu and then the New… command: The following window is shown in the work area: In the Properties tab you need to specify some information such as: Location name. This will be the name the map will be saved with. Square size. The square size is the size in feet or meters of each square. This has to do with handling movements of characters/creatures. Changing square size does not alter in any way how the map will be graphically displayed. Once inserted, this information may be later modified. Map size. You can select among some standard map sizes or you can specify your own. Width and height are the numbers of horizontal and vertical squares of the map. Depending on your computer hardware you may be able to create very HUGE maps. A location’s map size may be later on modified once created. http://www.rpgmanager.net Pg. 29 of 72 Standard location creation. For now you can just choose to have your location all filled up with land or water. Again, in the Description tab you can have fun by writing some text about the location. This information may be inserted or changed in a second time. When done click OK to proceed. The location will be saved into RPG Manager and the location map window will be displayed. Depending on your choices, your location map might display all land or all water. In the following example I have created a location called “Tutorial Location” with square size of 10 (feet or meters) and a tiny map size. The location has been filled with land. Looking at the location map window, we can see it is made of several elements: An horizontal toolbar at the top containing some graphical buttons and a few controls. A vertical editing toolbar on the left containing information about layers, land types and a small map preview. A central work area containing the map. An horizontal status bar at the very bottom displaying some information (usually just map coordinates). http://www.rpgmanager.net Pg. 30 of 72 Location maps logic is the same as the one for world maps. Location maps have 4 layers and may have different graphic sets (though at the moment there’s only one called “RPG Manager 2.x”). I’ll take for granted that the basic concepts from world editing are familiar and understood at this moment. So I won’t talk about placing graphic tiles on the map, naming them and editing in general. Just note that like the world editor, you still have the possibility to randomize tiles and rotate/mirror them. Underneath the graphic sets you have 4 layers each one of them represents the following: Layer 1 graphics deal with terrains so in layer 1 you will find any sorts of grass, water, road, pavement, etc. Layer 2 graphics include the same tiles in layer 1 but reworked to blend and fade with other tiles. Layer 3 graphics are characterized by wall types and other linear patterns like hedges, pipes, etc. Layer 4 graphics include symbols and other small graphics. After a few minutes, by playing with the different graphic tiles it is possible to accomplish a result like the one shown here below: http://www.rpgmanager.net Pg. 31 of 72 ADDING CHARACTERS/CREATURES One possibility of location maps is that you can add characters/creatures to your map. To do so, just rightclick on the square where the character/creature must be placed and select the Insert character/creature command from the popup menu which appears. Then specify a group name for the character/creature. This feature allows you to create different groups in the location map and allows for management in the Game Manager. Finally select the group type and the character or creature from the list. You can also select the color of the marker that will be used to represent the character/creature on the map. http://www.rpgmanager.net Pg. 32 of 72 The selected character/creature will be placed on the map and saved along with it. If the Show character or creature size checkmark is enabled, a circle around the marker will also show the size. This information is based on the dimensions specified in the character or creature sheet. To remove a character/creature from a location map, right-click on it and tselect the Remove character/creature command the popup menu which appears. http://www.rpgmanager.net Pg. 33 of 72 ADDING OBJECTS Another feature in location maps is the possibility to add objects. An object is a pre-drawn graphic which may be included and moved around the map. Objects will be explained in a separate chapter later on. What concerns us here is how to deal with objects in location maps. The location map editor horizontal toolbar contains two controls which allow for objects to be inserted in maps: the default object class and the default object: In the default object class list, you can see all objects classes available. Objects are groups into classes, so for instance in the furniture class you will have all your pre-drawn graphics like tables, chairs, beds, etc. while in the ground vehicles you might have all your cars, trucks and such. Once you have selected an object class, the default object list will show a list of available objects. Picking one will enable the object preview, that is the object will be shown in a separate window and it will be selected as default object. To place the selected object inside the map, just right-click on the map and select the Insert default object command which appears in the popup menu. The object will then be placed after layer 4 (so overlapping any other graphic) in the place you selected. Hovering over an object with the mouse will display a hint with the details about the object. It is possible to have up to 2 different objects at the same place. When this happens, the objects will overlap each other (the first being under the second). http://www.rpgmanager.net Pg. 34 of 72 This layering can be modified acting on the object. In fact there are several operations which you can do on an object positioned in a location map: you can move the object (up, down, left or right), you can rotate the object (rotation occurs only if the object has been assigned rotation views), you can refresh objects forcing them to be redrawn and finally you can delete an object from a location map. All these commands are found by right-clicking on an object and by selecting the appropriate action from the popup menu which appears. Finally, to insert an object you can also use the Insert object command from the same popup menu. This is a less immediate way to place an object into a location map but allows for greater object information, since it loads up the Insert object window which, once a particular object has been selected, shows the object image with zoom possibility, the rotations available, the object dimensions in terms of horizontal and vertical tiles and finally allows to specify after which layer should the object be placed. http://www.rpgmanager.net Pg. 35 of 72 http://www.rpgmanager.net Pg. 36 of 72 CMP CHAPTER 6: Objects As already mentioned, an object is a pre-drawn graphics which may be placed inside location maps for various purposes: - add complexity to an architectural structure with non default RPG Manager graphics (towers, bridges, predesigned buildings, etc.) - add images of creatures - add complex land features, vegetation, etc. Basically objects allow for anything to be added inside location maps. But in order for an object to be used in RPG Manager it must be imported and created from an external source. At the moment, only bitmap (.BMP) images can be imported as objects. Objects may have a transparent background. Everything in an imported image that is color magenta RGB(255,0,255) will not be drawn as part of the object. For example, in the image beneath, the magenta background will not be considered and only the Ferrari will be placed and drawn in the map. To create an object, just select the Map Objects menu and then the New… command: Then browse your computer for the desired image. Unfortunately at this moment there’s no image preview but in the browser, but I’m planning to have this in a future release. Once you have selected your graphics, the Object window will appear. Here you can specify the object class and type an object name and preview the object with different rotation views. You can also specify which views must the program create for the object. In the views preview gauge you can right-click on the rotation buttons to select or deselect a view. Selected views (green) will be created when the object is http://www.rpgmanager.net Pg. 37 of 72 saved; deselected views (red) will not be created. An object must have at least one view (the default one). Finally it is also possible to specify a text description for the object. Once saved, the object will created in RPG Manager and placed inside your object library and from that moment on you will be able to add it to your location maps. also, an object created may be reloaded and modified (for instance you can add or remove views after creation). http://www.rpgmanager.net Pg. 38 of 72 CMP CHAPTER 7: Characters One important aspect of role-playing is character creation and management. RPG Manager allows for a character database and tries to automate those annoying tasks involved with character management such as equipment, carried weight, movement rate, etc. in order to give the DM more focus on gameplay. To create a new character, just select the Characters menu and then the New… command. One improvement from RPG Manager 1.9 is the fact that now you have all the character sheet under control in one window, thanks to the addition of tabs. Also, the amount of information available has definitely increased. Finally, data coming from the RPG Manager database (skills, equipment, spells, etc.) can be directly opened with a double-click and even drag and dropped around. Following, I will try to describe in a few words all the character fields. CHARACTER TAB 1. GENERAL Character image: double-click to add a custom image for your character. Name: character name. http://www.rpgmanager.net Pg. 39 of 72 Race: human, android, elf, proto, etc. Class: warrior, mage, cleric, colonial marine, etc. Level: character level. Gender: male, female or unknown. Age: character age. Alignment: good, neutral, evil ,etc. Size: tiny, small, large, etc. This field is used in location maps to eventually draw the character marker. Dimensions: height, width, etc. Weight: character weight (without considering equipment). Total life: total life points of the character. Current life: current life points of the character. Stun damage: damage caused by heat, stunning, dizziness, etc. When stun damage is greater or equal to the character’s current life points, the character is considered unconscious. Fame: fame points. This field can be used to determine character consideration in society. A great positive value might imply that the character is considered a hero, a negative value might mean that the character is feared or avoided. Total experience points: character’s total experience points. These can assigned manually. In the Game Manager, during combat, the character may obtain (if confirmed by the game master) a percentage of the foe’s experience points, depending on successful hits. Next level experience points: the experience points needed for the character to advance to the next level. The Game Manager keeps track of points increases/decreases and informs of level advancements. But you can also manage this piece of information manually should you wish to do so. Movement rate: (unencumbered) for a variety of movement types. Maneuverability class: for water and air movement, determines the character’s movement ability (speed of turning, diving, ability to do evasive actions, etc.). This field is linked to an RPG Manager embedded table. Double-click on the field to load the table (which is divided into maneuverability classes from A to Z) and populate or view the data it contains. http://www.rpgmanager.net Pg. 40 of 72 Senses: here you can add numerical values for vision, hearing and such. A word about 6th sense and precognition. The 6th sense is the ability to perceive by intuition things like dangers, the fact of being followed or starred at, etc. Precognition is the ability to perceive emotions or images that come from objects or places and that involve occurred events. Abilities: character’s classic abilities along with bonus/penalties. The “aim” ability may be used when dealing with firearms and modern warfare (military guns, laser rifles, etc.). Physical description: character’s physical description. http://www.rpgmanager.net Pg. 41 of 72 CHARACTER TAB 2. COMBAT Base armor: the base character armor class (without any equipment that is). Armor modifier: you may specify here a temporary modifier for armor class. Final armor: the character’s final armor class. This value is calculated starting from the base armor class, adding up all the armor from equipment and finally adding the armor modifier. Initiative: base character initiative. In the Game Manager, you can use character and creature initiative to determine who acts first during an encounter or combat. Also, some equipment might have influence on character initiative. Initiative modifier: you may specify here a temporary modifier for initiative. Number of attacks: number of melee attacks that the character can do during his action. Attack modifiers: modifiers for melee attacks or attacks with ranged weapons. Total shield points: the character might have shielding. If so, when hit or damage, the shield points go first, then when these are expired character life is decreased. Current shield points: character’s current shield points. Shield regeneration: the character might be wearing a portable force field, or other device, which regenerates in time. Shield regeneration determines how many shield points are regained each time. Weapon proficiencies: the character might be particularly skilled with some weapons and not with others. This is the place where you can specify this information. This list is populated from the weapon equipment database. Saves: a list of values for saving throws for different types of dangers and threats. Special attacks and defenses: specify here if the character can use poison, can become invisible or such. Combat notes: describe here how the character deals with combat and his fighting techniques. http://www.rpgmanager.net Pg. 42 of 72 CHARACTER TAB 3. SKILLS Skills: a list of skills that pertain to the character, along with the number of points possessed and notes field. This list is populated from the skills database. Languages spoken: languages spoken by the character. Culture: you can add here details about the character’s knowledges and culture. http://www.rpgmanager.net Pg. 43 of 72 CHARACTER TAB 4.1 EQUIPMENT Maximum carriable weight: the total amount of weight that can be carried by the character. Carried weight: the weight carried by the character. This weight is calculated by summing the weight of all equipment carried, including coins/money. The weight carried field is then used in conjunction with the movement rate to compute movement. For instance, a character has a ground movement rate of 60. This means that with a single action it may travel unencumbered for 60 feet. The character can carry a maximum of 100 pounds and at the moment is carrying 50 pounds of equipment. This means that his movement will only be half (30). Movement modifier: you can add further movement modifier (for instance if the character is slowed down). Total energy: if dealing with sci-fi characters you might want to use this field for bionic or robot characters. Current energy: character’s current energy. Energy regeneration: the character might be regenerating it’s energy from solar cells or by other means. This field specifies the regeneration rate at each character action. Equipment: divided into armors (protections, shields, etc.) and weapons. You may specify if the equipment is in use or just carried, the quantity and some notes. http://www.rpgmanager.net Pg. 44 of 72 CHARACTER TAB 4.2 EQUIPMENT Wealth and money: click on the buttons to specify wealth type (for instance dollar bills or euros instead of platinum and gold coins). You can change values for each wealth type by clicking on the desired component’s arrows. You can also fast-modify a value by right-clicking on a component and selecting the Change value… command. Weight of single money unit: a coin weighs obviously more than a paper bill, so here you can specify the weight of a single unit of wealth. Other wealth: here you can specify other wealth like gems, jewels, etc. Other equipment: other equipment carried by the character which does not fit in the categories above. This equipment still affects the carried weight. http://www.rpgmanager.net Pg. 45 of 72 CHARACTER TAB 4.3 EQUIPMENT Other possessions: other wealth, equipment and possessions (houses, castles, mounts, etc.) owned by the character but not carried and used at the moment. Possessions description: you can further describe equipment and possessions in this box. http://www.rpgmanager.net Pg. 46 of 72 CHARACTER TAB 5.1 MAGIC AND OTHER POWERS Class type: mage, cleric, druid, etc. The spell class affects which list of spells is loaded from the spell database. School: necromancy, conjuration, alteration, nature, etc. QI points: this field can be used for monks or martial artists to indicate their stamina and resistance. Psyonic points: this field may be used for those characters which have mental powers. Magic resistance: percentage to resist to magic. Psyonic resistance: percentage to resist to psyonics. Spells: spell list and quantity available for 1st through 4th level. CHARACTER TAB 5.2 MAGIC AND OTHER POWERS and 5.3 MAGIC AND OTHER POWERS Spells: spell list from 5th level to 10th level and Immortal spells. With this I believe there’s enough for everyone!!! http://www.rpgmanager.net Pg. 47 of 72 CHARACTER TAB 6. HISTORY History: write down the story of the character, his background, his recent adventures, etc. http://www.rpgmanager.net Pg. 48 of 72 CMP CHAPTER 8: Creatures Another important aspect of role-playing is determined by creatures. RPG Manager allows for a creature database where you can keep track of different animals, monsters, etc. Creatures are used to populate world maps (through the use of random encounters), or location maps (just by placing them at the desired point). You can also use creatures for encounters, combat, etc. Again, data coming from the RPG Manager database (skills, equipment, spells, etc.) can be directly opened with a double-click and even drag and dropped around. Following, I will try to describe in a few words all the character fields. To create a new creature, just select the Creatures menu and then the New… command. The creature sheet is managed by tabs and allows you to insert a great amount of data. CREATURE TAB 1. GENERAL Creature image: double-click to add a custom image for your creature. Name: creature name. http://www.rpgmanager.net Pg. 49 of 72 Climate and terrain: the creature’s main habitat. Alignment: good, neutral, evil ,etc. for aesthetic reasons, changing the creature’s alignment will change the color of the creature’s sheet window. Frequency: determines how common it is to encounter the creature. This field is mainly used when populating random encounters. Activity cycle: day, night, dusk, dawn, etc. Organization: pack, tribe, school, flock, etc. Diet: carnivore, vegetarian, omnivore, plankton, etc. Maximum number of appearing: this field is used in random encounters to determine the maximum number of encountered creatures. This value is randomized by the Game Manager during gameplay. Size: tiny, small, large, etc. This field is used in location maps to eventually draw the creature marker. Dimensions: height, width, etc. Experience value: the total amount of experience gained by a character if the creature is defeated. If more than one character fights the creature, this value is divided proportionally among all characters accordingly to the amount of damage each one of them deals. Treasure type: type of treasure carried by the creature. Soon to become an RPG Manager embedded table. Weight: character weight (without considering equipment). Movement rate: for a variety of movement types. Maneuverability class: for water and air movement, determines the creature’s movement ability (speed of turning, diving, ability to do evasive actions, etc.). This field is linked to an RPG Manager embedded table. Double-click on the field to load the table (which is divided into maneuverability classes from A to Z) and populate or view the data it contains. Senses: here you can add numerical values for vision, hearing and such. A word about 6th sense and precognition. The 6th sense is the ability to perceive by intuition things like dangers, the fact of being followed or starred at, etc. Precognition is the ability to perceive emotions or images that come from objects or places and that involve occurred events. Abilities: creature’s classic abilities along with bonus/penalties. The “aim” ability may be used when dealing with firearms and modern warfare (military guns, laser rifles, etc.). Physical description: creature’s physical description. http://www.rpgmanager.net Pg. 50 of 72 CREATURE TAB 2. COMBAT Armor class: the creature’s total armor class. Hit dice: the creature’s hit dice (1d8) number. This value is used by the Game Manager to automatically compute the creature’s life. Hit dice modifier: modifier to the creature’s life. Initiative: creature’s initiative. In the Game Manager, you can use character and creature initiative to determine who acts first during an encounter or combat. Morale: indicates a percentage of chance for the creature to retreat or flee during an encounter or combat. Morale is checked automatically by the Game Manager. Number of attacks: number of melee attacks that the creature can do during his action. Attack modifiers: modifiers for melee attacks or attacks with ranged weapons. Total shield points: the creature might have shielding. If so, when hit or damage, the shield points go first, then when these are expired creature life is decreased. Current shield points: character’s current shield points. Shield regeneration: the creature might be wearing a portable force field, or other device, which regenerates in time. Shield regeneration determines how many shield points are regained each time. Attack types: you can specify up to 10 different attack types use by the creature and the probability that it will be using them. Total percentage must be always equal to 100%. This option can then be used in the Game Manager during combat, the program will suggest the game master which attack type the creature will be using. Of course the game masters may decide for a different type of attack. Saves: a list of values for saving throws for different types of dangers and threats. Special attacks and defenses: specify here if the creature can use poison, can become invisible or such. Combat notes: describe here how the creature deals with combat and its fighting techniques. http://www.rpgmanager.net Pg. 51 of 72 CREATURE TAB 3. SKILLS Skills: a list of skills that pertain to the creature, along with the number of points possessed and notes field. This list is populated from the skills database. Languages spoken: languages spoken by the creature. Culture: you can add here details about the creature’s knowledges and culture. http://www.rpgmanager.net Pg. 52 of 72 CREATURE TAB 4.1 MAGIC AND OTHER POWERS Class type: mage, cleric, druid, etc. The spell class affects which list of spells is loaded from the spell database. School: necromancy, conjuration, alteration, nature, etc. QI points: this field can be used for monks or martial artists to indicate their stamina and resistance. Psyonic points: this field may be used for those creatures which have mental powers. Magic resistance: percentage to resist to magic. Psyonic resistance: percentage to resist to psyonics. Spells: spell list and quantity available for 1st through 4th level. CREATURE TAB 4.2 MAGIC AND OTHER POWERS and 4.3 MAGIC AND OTHER POWERS Spells: spell list from 5th level to 10th level and Immortal spells. http://www.rpgmanager.net Pg. 53 of 72 CREATURE TAB 5. OTHER TEXTS Habitat and society: add a text here about the creature’s habitat or it’s social organization. Ecology: add a text here about the ecological impact of the creature. http://www.rpgmanager.net Pg. 54 of 72 CMP CHAPTER 9: Spells The spells database is another important part of RPG Manager. Here you can create spell classes and spells ranging from levels 1-10 and Immortal level (just in case you need to create a supernatural creature or character). To create a new spell, just select the Spells menu and then the New… command. The data provided in the spell sheet is pretty straight-forward. Class: spell class name, choose one from the list or just type in a new class name to create a new one. School: the spell school. A spell class might have several schools within it. Level: the level of the spell or at which the spell becomes available. Name: the spell name. Magic words: I added this field so that you may specify magic words for each spell. I found out that this adds for a greater depth during gameplay. For example, a character mage, instead of saying I’m casting Shield to myself (thus in this way letting know everybody else the nature of his magic), might just say I’m casting Jun-Knor. The DM and him obviously will know what he is talking about but for the other characters (not comprehending the magic language) it will be mistery. So use this field if you wish. The Check button serves the purpose of searching duplicate magic words for a particular class (since it makes sense togive a particular magic word to only a single spell). Casting time: the time it takes until the spell has effect. Range: the maximum distance the spell can reach. Area of effect: the area of effect the spell has. http://www.rpgmanager.net Pg. 55 of 72 Duration: the lasting time of the spell. Description: the spell description. http://www.rpgmanager.net Pg. 56 of 72 CMP CHAPTER 10: Equipment RPG Manager offers the possibility to create and manage an equipment database for a variety of equipment types: standard equipment, weapons, armors, transports and constructions. In addition, and this is a new feature, you can create equipments which are sort of a bill of materials. In other words, equipments now may have components which make them up. For example, you may now create an equipment called Summer Castle, which is a construction, and then inside this equipment specify all the single parts the castle is made of: walls, corner towers, moat, etc. If the castle is expanded or damaged, you can then add or remove components from it. To create a new equipment, just select the Equipment menu and then the New… command. The equipment data window is composed of two tabs. EQUIPMENT TAB STANDARD http://www.rpgmanager.net Pg. 57 of 72 Image: double-click to add an image to the equipment. Name: the name of the equipment. Value: the value or cost of the equipment. Weight: the equipment weight. Size: tiny, small, medium, etc. Dimensions: width, height, etc. Armor class: the armor class of the equipment (not the armor rating it gives). Hit points: if you wish you can assign hit points to the equipment. Saving throw: you can assign a value to determine the equipment’s behavior in case of damage. Construction time: the time it takes to manufacture or construct the equipment. Equipment type: the equipment type determines how the equipment is managed inside character and creature sheets. Weapon type: piercing, slashing, firearm, etc. Weapon damage: the damage provoked by the weapon on a successful hit. Critical hit: the percentage or value indicating a critical hit (a hit which for some reason deals more damage than normal). Critical damage: the critical damage provoked by the weapon on a successful critical hit. Speed factor: the weapon speed. This value affects initiative. Rate of fire: for instance 1/3 (once every 3 action turns). Range: the weapon range. Size: the weapon size. I’m not sure if this information is redundant with the equipment size. Anyway it’s there. Armor rating: the protection rating given by the equipment when in use. Armor points: the points of armor possessed by the equipment. Regeneration: the points of armor regenerated by the equipment at each action turn. Movement rates: if the equipment is a transport you may specify the movement rates for a number of movement types and maneuverability classes for water and air movement. Maximum weight: the maximum weight that the transport can carry. Character weight affects movement: you may have transports like horses or camels, where the character weight does indeed affect the movement rates; or you can have for instance a naval vessel where the character’s weight is insignificant for the movement rate. http://www.rpgmanager.net Pg. 58 of 72 EQUIPMENT TAB COMPONENTS Here you can specify the list and quantity of the components which make up the equipment. Again, for example, in the case of a spaceship, you could add the hull, cannons, defense systems, etc. http://www.rpgmanager.net Pg. 59 of 72 CMP CHAPTER 11: Skills Skills are special abilities and knowledge which a character or creature may possess, such as flying, horseriding, two-hand fighting, etc. RPG Manager gives you the opportunity to specify and manage your personal database of skills. To create a new skill, just select the Skill menu and then the New… command. Following is the data contained in the skill sheet. Name: the name of the skill. Number of points: certain skills may require certain amount of points in order for the character or creature to deal with advanced techniques. This is the place where you can specify this information. Class: the class which may use the skill. Ability: the primary ability which the skill is based on. Description: use your imagination here. http://www.rpgmanager.net Pg. 60 of 72 CMP CHAPTER 12: Rules and Tables RPG Manager gives you the possibility to organize simple text data into rules and tables. For instance you might want to have the game rules in hand at any moment, or maybe just some basic rule summary or game table. This is the place where you can gather this type of information. Also, RPG Manager offers some embedded program tables, which you may fill at will. More embedded program tables might be available in the future, depending on feedback and user needs. To create a new rule or table, just select the Rules & Tables menu and then the New… command. The window which appears is pretty simple. Basically, you may specify a rule/table name, a type and description where you may put all your text. Embedded tables are similar but with 2 main differences: Embedded tables may be included inside other RPG Manager data and used by RPG Manager (for instance the AIR MANEUVERABILITY CLASSES table can be found inside the character, creature and equipment sheets). Each embedded table may have it’s own structure. http://www.rpgmanager.net Pg. 61 of 72 To access an embedded table, just select the desired one from the Rules & Tables menu list or just select it directly from the Campaign Editor horizontal toolbar: http://www.rpgmanager.net Pg. 62 of 72 CMP CHAPTER 13: Utilities Besides all the features and functions seen so far, the Campaign Editor offers a set of other utilities which may come in handy. These utilities may be accessed from the Utilities menu as well as from the Campaign Editor horizontal toolbar. I will briefly describe. DICE BAG Even though I consider it more fun to roll dices, I have provided a dice bag for the lazy ones. Here you can find a whole set of dices (d4, d6, d8, d10, d12, d20, d100). Can’t find the dice good for you? Just personalize it at will. WORLD TERRAIN OPTIONS The world terrain options utility gives you access to the RPG Manager world graphic tiles or to a custom tileset which you or others may have eventually created. The world terrain options window has 4 tabs, one for each layer: in each tab are shown: the graphics tile. the default terrain name. the preview color (used in the map preview). the terrain modifier in terms of movement. the terrain modifier in terms of vision. the random encounter chance for day/night. a flag that shows if the terrain is enabled in the Campaign Editor. Note that if the selected tileset is the RPG Manager 2.x you cannot modify the terrain names and cannot disable any terrain. In a later chapter I will describe how to create custom tilesets. http://www.rpgmanager.net Pg. 63 of 72 WORLD WEATHER OPTIONS With the world weather options utility, you can add descriptions to the 15 standard weather conditions provided by RPG Manager. You may also specify how each weather condition affects movement and visibility. http://www.rpgmanager.net Pg. 64 of 72 LOCATION TERRAIN OPTIONS Similar to the world terrain options, this utility gives you access to the RPG Manager location graphic tiles or to a custom tileset which you or others may have eventually created. The location terrain options window has 4 tabs, one for each layer: in each tab are shown: the graphics tile. the default terrain name. the preview color (used in the map preview). a flag that shows if the terrain is enabled in the Campaign Editor. Note that if the selected tileset is the RPG Manager 2.x you cannot modify the terrain names and cannot disable any terrain. Again, in a later chapter I will describe how to create custom tilesets. CALENDAR GENERATOR RPG Manager gives you the possibility to create custom calendars. Included with RPG Manager there’s already the “Default modern” calendar which is similar to the calendar used worldwide at the moment but without calculation for the leap year. As this is the default RPG Manager calendar, it is not possible to modify it. Anyway, the creation/modification of a calendar is a 5 steps process. I will review here the creation of the “Arcaic Egyptian” calendar. http://www.rpgmanager.net Pg. 65 of 72 The Arcaic Egyptian calendar was a 365 days calendar consisting of 12 months of 30 days each. Five extra days were then added at the end of the 12 months period. The months were divided into 3 weeks of 10 days each. With this information we are ready to create out calendar: As the first step I insert the calendar name, click on the Add button and specify a short calendar description: The purpose of Step 2 is to define the number of months, the name and number of days for each one of them. Specifically: 1. Thout (30 days) 2. Paopi (30 days) 3. Hathor (30 days) 4. Koiak (30 days) 5. Tobi (30 days) 6. Meshir (30 days) 7. Paremhat (30 days) 8. Paremoude (30 days) 9. Pashons (30 days) 10. Paoni (30 days) 11. Epip (30 days) 12. Mesori (35 days) http://www.rpgmanager.net Pg. 66 of 72 Step 3 defines the weeks and days. Apparently, ancient Egyptians did not give names to their days, but referred to them as Day 1, Day 2, Day 3, etc. So I will call them that way. Step 4 is used to define the hours, minutes and action rounds (gameplay rounds) as well the start and end time of day/night. http://www.rpgmanager.net Pg. 67 of 72 Finally the last step gives a calendar summary and offers a gauge to test out the calendar before saving it. You can change values for days, months, etc. by clicking on the desired component’s arrows. You can also fast-modify a value by right-clicking on a component and selecting the Change value… command. At any moment it is possible to navigate back to the any previous step and to make modifications. Should you wish to change the description of the calendar, to rename it , or delete it, you can accomplish all these tasks in Step 1. Just select a calendar from the list, then if you right-click on the list, a popup menu will appear where you have the three options. http://www.rpgmanager.net Pg. 68 of 72 NAME GENERATOR The name generator is a helpful utility with which you can rapidly generate a name for your gaming purposes. The name generator window is divided into 3 tabs, each of which is considered to be a main category (Fantasy, Modern or Sci-fi). In each one of this category you can find and create subcategories, each one of which is then divided into male and female. For example, in the Fantasy category you can load up the Dwarf subcategory which contains first names and last names for male and female dwarves. Once this selection has been made, to generate the name, just click on the Generate button. The name generator allows you to create new subcategories, as well as new first and last names. Just use the Add buttons to create a new subcategory within the tab and to create new male/female first and last names. http://www.rpgmanager.net Pg. 69 of 72 THE EQUIPMENT MONITOR The equipment monitor is a utility which summarizes equipment data and statistics on a single screen. In this way you can have all your equipment on hand at a glance and moreover it is easier to compare equipment of the same type: THE VIEW MENU While working with the Campaign Editor data, you might have a situation where at any time you have several data windows loaded up which might be overlapping. The View menu comes handy at these times, since it will give you a list of all open windows in the Campaign Editor and a way to quickly access each one of them. http://www.rpgmanager.net Pg. 70 of 72 IMPORTING DATA FROM RPG MANAGER v1.x Another useful tool, for those users coming from RPG Manager v1.x, is the possibility to convert and import the data they had from that format to the new RPG Manager 2.x format. In specific, RPG Manager v 2.x allows to import the following from RPG Manager v1.x: Worlds Characters Creatures Spells Equipment Skills Rules & Tables Inside each of the above menus you will find the option to import that data. To proceed, just browse to your RPG Manager v1.x folder and select at will. http://www.rpgmanager.net Pg. 71 of 72 CMP CHAPTER 14: Custom world and location tiles I will describe in this chapter, how it is possible to create and include custom world and location tilesets for RPG Manager. Looking at the RPG Manager program folder, you will notice that there are the following 2 subfolders: Each one contains the tilesets for worlds and locations. On a new RPG Manager installation, each one will contain an “RPG Manager 2.x” tileset which is the default tileset used by the program. To create a new tileset, just create a new folder inside the Tilesets – Worlds or the Tilesets – Locations, as shown in the image below: Inside your newly created folder for the tileset you need to create the following subfolders: Layer1, Layer2, Layer3, Layer4. So basically at the end you should have a structure like this: RPG Manager v2.x Tilesets – Worlds Custom Tiles Layer1 Layer2 Layer3 Layer4 ---> ---> ---> ---> ---> ---> ---> main program folder world or location tilesets folder your new custom tileset folder subfolder where you will place the layer1 graphic tiles subfolder where you will place the layer2 graphic tiles subfolder where you will place the layer3 graphic tiles subfolder where you will place the layer4 graphic tiles Once the above structure has been created you can start creating or copying image tiles into the layer folders. The image specification is the following: 32 bits bitmap image (.BMP) with 40x40 dimensions. Transparent color is RGB(255,0,255). To allow for randomization, layer1 requires 5 tiles for each type so tiles belonging to the same type should end with _1, _2, _3, _4, _5. For instance, if you want to create a tile for Water then in layer1 you need 5 and they should be called as the following: Once you have created your tileset, just load up the World Terrain Options utility or the Location Terrain Options utility in the Campaign Editor to assign terrain names, preview colors, etc. and thus save and enable the tileset. Your newly created tileset will be available in the world or location map editor. http://www.rpgmanager.net Pg. 72 of 72