1
DIAL|IT User Manual Date: 2/10/2015 Copyright ©CRMADDON GmbH. All Rights Reserved. DIAL|IT User Manual copyright © CRMADDON GmbH All rights reserved. http://www.crmaddon.com The information contained in this document is subject to change without notice. This document contains proprietary information which is protected by copyright. All rights are reserved. No part of this document may be photocopied, reproduced, or translated to another language without the prior written consent of [company]. Table of Contents 1 Chapter 1: Welcome Chapter 2: Support Free Support Paid Support Request support How to submit a ticket directly from your addon Chapter 3: Introduction Dial|IT Version Comparison System Requirements Chapter 4: Installation Installation without Internet Chapter 5: Configuration Info Licensing Email License Evaluation License Update license Remove computer from license Send Request Order license Order an Upgrade Order an Update Send Reset Request Send Request License Info RDP License Addon Settings Display Addon Settings Field selection Common Settings Folder Settings Spell check Window handling Configuration Management Dial Settings Phone numbers Search Criteria Internal Phone Numbers Local Area Code Settings Example for speed dial 3 3 5 5 6 11 12 14 16 21 23 23 25 26 29 33 37 39 45 46 47 49 51 53 54 57 58 60 62 63 63 64 65 65 68 68 71 72 74 Detail Settings ToDo List Create Activity History Skype configuration Call Center Call Center settings EmailReport Settings Email Settings Report Settings New contact Multi Company Dialing 75 76 78 79 81 84 84 85 87 88 89 89 Dial|IT toolbar Dialing Call from Clipboard Go to last contact Contact list ToDos Dial|IT report Contact Report Send Email List of phone calls Inbound Call PopUp Add to Contact Several contacts found for one number History Pop Up Activity Group Membership Sending report/email templates by email About the report designer Report Wizard Standard Report Report Wizard Labeled Report Report Designer Report Editing Add or Modify Static Information in Your Report Report Designer User Interface Context Menu Control Toolbox Design Panel Designer Tab Formatting Toolbar 92 92 93 96 97 97 98 102 103 104 106 108 109 111 112 115 118 120 121 121 126 128 135 137 139 139 140 141 142 143 Chapter 7: Index 144 Chapter 6: Dial|IT Features Welcome . 1 CRMADDON's Online Help DIAL|IT Control ‐ Executes all calls that were scheduled by you or your colleagues directly from a to‐do list. Simplified Calling ‐ Selects a particular phone number with a click or calls directly from the clipboard. Speed‐ or direct dialing is also available. Quick Information ‐ Shows all relevant information related to an incoming call immediately. Multi Tasking ‐ Creates a new contact for an unknown incoming number or adds it to an existing contact. Takes notes and outlines new activities during the call. Reporting ‐ Writes detailed reports from your history. Organization ‐ Adjusts group affiliations during the phone conversation ﴾only possible with the Professional/Callcenter version﴿. Workflow ‐ Creates and sends emails automatically generated by user defined report templates for the direct initiation of further steps during the conversation ﴾only possible with the Professional/Callcenter version﴿. Multi Client Capability ‐ In case you are working for several companies, the DIAL|IT Callcenter version enables you to identify which company the incoming call is related to. DIAL|IT 2 . Welcome See also Support Introduction Installation Configuration Dial|IT Features DIAL|IT Support . 3 Home > Support Support Free Support Paid Support How to submit a ticket directly from your addon See also Welcome Introduction Installation Configuration Dial|IT Features Home > Support > Free Support Free Support Free support is provided for the first installation and all technical questions. The support is provided via our Ticketing System. Before submitting a ticket to our support team, please read our User Manual and check if the issue is already described in our Knowledge Base. In case you cannot find a solution to your issue in our documentation, please submit a ticket to our support team. To submit a ticket, please follow the below steps or submit a ticket right from your addon : 1. Open our Ticketing system 2. Select an appropriate department: DIAL|IT 4 . Support 3. Describe the issue in the following form 4. In some cases it might be necessary to attach some screenshots with the errors or send schemas and databases. DIAL|IT Support . 5 5. Click "Submit" button to create your ticket See also Paid Support How to submit a ticket directly from your addon Home > Support > Paid Support Paid Support If you require support for more than one installation or extended help, we encourage you to purchase our reasonably priced time based or flat rate support. You can purchase support based on actual time used which is fine if you consider the problem to be minor, or our flat rate support which is the better choice if you don’t know what may be causing the problem or if you consider the problem to be rather time consuming. Please fill in the payment form fr the support type you chose. As soon as we receive your payment we will send you an email with a phone number to call. The actual support takes place via a remote session. Please note: Our time based support is being charged in advance and will be billed in 15 minute units. Our flat rate support will also be charged in advance. It is valid for one installation only. We will download, install and configure everything for you using a remote session . See also Free Support How to submit a ticket directly from your addon Home > Support > Paid Support > Request support Request Support We offer support via remote session (chat). In preparing yourself for this online meeting, follow these steps: 1. Please make sure you are inquiring during our support business hours from 1:00am till 1:00pm CST (on business days). 2. Download and run TeamViewer (TeamViewer leaves no traces on your computer since it is a zerofootprint software). The program will automatically provide you with a session ID and a password. 3. Open a Chat session by clicking on the Live Support Online button located in the top right corner on every page of our website, and return the TeamViewer session ID and password to our support engineers. 4. Leave TeamViewer and the Chat tool running until our support person contacts you. Occasionally this may take some time, depending on how busy they are. Note: TeamViewer must be running uninterruptedly during the remote session. If for any reason TeamViewer is being closed from your end you need to go back to step 3. Note 2: If it takes unreasonably long for a support person to process your request (longer DIAL|IT 6 . Support than 60 minutes) please make sure you sent your support request during our business hours and your computer is being monitored while you’re waiting. To be able to help you quickly and competently we require certain details: 1. 2. 3. 4. 5. The product‘s license number Where and when did you purchase the product? Which version of Act! has been used when you did the first install of the addon? Which version of Act! is currently installed on your computer? Please make sure you direct your support inquiry to the right department. Replying to a "General" query takes typically longer as it has to be redirected to the concerned support unit. 6. Finally, please describe the problem in one sentence (what is the addon supposed to do, what’s it actually doing or not doing, what’s the difference to the state before, what has changed?) See also Home > Support > How to submit a ticket directly from your addon How to submit a ticket directly from your addon Each addon is supplied with a separate module that allows creating support tickets directly from the addon interface. To take advantage of this functionality, please follow Support tab of your addon and select there 'Create a Supportticket' DIAL|IT Support . 7 When creating a ticket through this interface your log files are attached automatically. It is also possible to restart your Act! to reproduce the issue without closing this tool. Right after clicking 'Create a Supportticket' link you will be offered to provide your email. Please make sure you insert the correct email as it will be used to create an account in our system and we will get in touch with your regarding the issue through this email: On the following dialog you can create a ticket for our support team: DIAL|IT 8 . Support 'Department' ‐ Please select the corresponding to your addon department 'Subject' ‐ Add a subject to your ticket. We suggest making a short issue description in your subject 'Status' ‐ Select a status for your ticket 'Type' ‐ Select a type for your issue 'Priority' ‐ Select your ticket priority. Please be advised that free support tickets are normally processed within 24 hours during business days. However, if you'd like to have your ticket to be handled with highest priority, please consider purchasing our paid support . 'Details / Description' ‐ Please add a detailed description of the issue 'Attach File' ‐ Besides log files, please attach all files ﴾screenshots, schemas or copies of your databases﴿ that will help us to better understand the issue. 'Create a ticket' ‐ Click this button to create a ticket. Please visit Helpful Links section, probably you will find there the answer to your question or the solution to your issue DIAL|IT Support . 9 User Settings menu item leads to the section where you can add your user data: DIAL|IT 10 . Support See also Free Support Paid Support DIAL|IT Introduction . 11 Home > Introduction Introduction Dial|IT is a powerful addon for ACT! that works like CRM Workflow. It allows managing your work by one mouse click. All necessary tabs and icons are visible: As a reminder check all activities that have been planned by you and for you. Check the list of unanswered calls. Choose a number for dialing (even to secondary contacts) or call from the clipboard. Speed dial/Direct dialing is available. Check who is calling you in a small pop up window and/or in a window with contact details. Save an unknown number to any contact or create a new one. Record notes and plan further activities at the same time while talking to your interlocutor. Your activity becomes history automatically. Create reports about your histories. Manage group membership during the conversation in special pop up tab (for Call Center). Create and send professional templates while communicating with your partner (for Call Center). If you have several numbers, call to a particular contact from the specified number (for Call Center). Dial|IT is available in Basic, Standard, Advanced and Professional editions. Integrate Skype to ACT! Free SkypetoSkype calls and text messages. With Skype Credit you can call landlines and mobiles worldwide. You are able to follow your ToDos, record histories, plan activities and take other advantages of Dial|IT Basic. Join a landline to ACT!, call and receive calls to your personal telephone number and Dial|IT Standard enjoy all advantages of listed above. Voip and landlines application is possible if you have special TAPI driver. All advantages of Standard and Basic versions in one program. Choose the best and cheapest way of communicating with your business partners with Dial|IT Professional. Dial|IT Professional (Call Center) With additionaly you can specify number for calling a particular contact, manage group membership, set up special contact names for unknown numbers and create and send emails to your collaborator about the topic you have discussed. To see more details please click these icons: Dial|IT Version System Requirements DIAL|IT 12 . Introduction Comparison Home > Introduction > Dial|IT Version Comparison Dial|IT Version Comparison Functions Customized easyto use Dial|IT toolbar in Contact detail view and Contact list view Dial / adopt call by mouse click with headset use Choose one number for speed dial Direct dialing if only one number is available Call to secondary contacts Call from clipboard Call via Skype Call a Skype contact Send SMS DIAL|IT ACT! Dialer Basic Standard Advanced Professional only only Skype & Call Center Skype TAPI TAPI Introduction . 13 Customized Caller Identification Pop Up window with contact details appears by receiving the call Jump to contact detail by receiving the call Go back to last contact after finishing the call Internal / external forwarding of numbers Pop up window with history that allows editing / removing histories during the call after stopping the dialer Pop up window with activity that allows adding activities during the call via history window only Show ToDo list as reminder to dial Automatically plans an activity / history for unanswered calls Spell checking in text After confirmation of fields the entry During During During the During the the the entering entering entering entering Creates Activity reports for inbound / outbound calls DIAL|IT 14 . Introduction Pop up window with templates allows creating, editing and sending email and report templates during the call Pop up window with groups allows adding / removing contact from the group during the call Call to particular contact from specified number (if you have several numbers) Set up special contact names for unknown numbers Save unknown number to any contact or add as new contact by one mouse click Home > Introduction > System Requirements System Requirements Act! 9 and higher Phone with TAPI driver or Skype Please note!: For Windows 8 a desktop Skype application should be installed. Dial|IT is not compatible with built in Skype version for Windows 8. Most of the Internet phones are compatible like most of the large providers (Cisco, VIA, etc.), the driver comes from the provider not from the application. Therefore users have to request software from their provider to use TAPI, just as you require a printer driver when installing a printer. For example: There is hardware available that can be connected to switch spots in companies for the phone switches. Each phone of this switch becomes TAPI compatible with this solution. Very often these solutions are free with the first installation of the phone system in companies (or for individuals). If, however, you want to add them later your provider will often charge you. Please click on the following link to test whether your phone system is TAPI compatible and if everything works fine, choose your TAPI provider from the drop down list. Phone.exe If Phone.exe connects and works fine, this means that your system is TAPI compatible and you can start using DialIT program. DIAL|IT Introduction . 15 DialIT program. If you prefer to use Dial|IT with Skype, please click on the following link: Skype DIAL|IT 16 . Installation Home > Installation Installation Installation Instructions Use the following link to download Dial|IT → Download Dial|IT here ATTENTION: Please make sure that ACT! and all processes depending on ACT! have to be ended To install Dial|IT administrator rights are required Now you have a possibility to Open or Save the file. If you select Save a ZIP file will be saved. Using a removable media you can install Dial|IT with this file also on computers having no Internet access. Select Open and the following window will show up. Please click on the file. The Dial|IT version will be downloaded from the Internet. You can store it from your end so that it was not downloaded each time you reinstall the application. DIAL|IT Installation . 17 On the following windows select "Next". Accept our license agreement and select "Next". DIAL|IT 18 . Installation Then you will need to select the type of registration for Dial|IT program: Then read the following information and confirm reading by clicking "Next" button: DIAL|IT Installation . 19 Select here whether you have Skype or a TAPI driver or both installed on your PC and click "Next" button. After selecting installed programs the ready for installation window will appear, click "Next" to proceed: DIAL|IT 20 . Installation During the installation the following 'Setup Status' window will appear: If the installation was successful, the following window will show up. Click "Finish". DIAL|IT Installation . 21 See also Welcome Support Introduction Configuration Dial|IT Features Home > Installation > Installation without Internet Installation without Internet ATTENTION PLEASE MAKE SURE THAT ON BOTH COMPUTERS THE SAME ACT! VERSIONS HAVE BEEN INSTALLED and that you have not installed any other addon of CRMADDON! If you want to install the addon on a computer without Internet connection, at first you need to follow these steps: 1. download and save the addon on a computer which has Internet access DIAL|IT 22 . Installation 2. extract the .exe and run it once on this computer If you do not have any other CRMADDON addon installed there will be new files created in the directory of the .exe 3. you need to copy the new created files on a USB or removable disk (depending on the addon there can be 4 .exe!) 1. General.exe 2. DevExpress.exe 3. CRMADDON's.exe 4. move the USB / removable disk to the PC where you want to install it 5. install each packet in the stated order: 1. General.exe 2. DevExpress.exe 3. CRMADDON's.exe 6. After you installed all packages the addon will run on your computer Please note to license the addon you need the Internet connection without Internet the registration is not possible See also DIAL|IT Configuration . 23 Home > Configuration Configuration Here you will find all informations required for the proper configuration of Dial|IT. Please note that Dial|IT can only be used if you have the VoIPSoftware (Voice over Internet Protocol Software) Skype or a TAPI compliant telephone with an installed TAPI driver. Test with the program Phone.exe if TAPi is properly installed and configured. If this test is successful you can proceed with Dial|IT installation and configuration Instruction: After the download click on Start Session. Enter a number in the provided box and click on "Make Call". If you are able to execute inbound and outbound calls, your TAPI is configured properly If not, please contact your telephone provider who will install a TAPI compliant driver and configure it for future usage. See also Welcome Support Introduction Installation Dial|IT Features Home > Configuration > Info Info Under Info you get information about your current addon licence, our contact information, important links like e.g. to our website, our manual, our news as well as our email address. Furthermore you will see the latest installed Dial|IT version. Having licensed Dial|IT, you will see here further license information like type of the license, version of the addon or the directory where the license was saved. DIAL|IT 24 . Configuration Click to go to our website. www.crmaddon.com This is your link to the Online manual. This leads to our Knowledgebase. On this page you will find entries that will help you with common problems. This Icon leads you directly to the News (regarding the product) on our website. This link allows you to update your AddOn version. This Icon leads directly to your AddOn manual. Click here to save the modified settings and / or close the configuration window. See also DIAL|IT Configuration . 25 Licensing RDP License Addon Settings ‐ Display Addon Settings ‐ Field selection Dial Settings Phone numbers Detail Settings Skype configuration Call Center Home > Configuration > Licensing Licensing When you install a new addon, it is required to be licensed. For testing purposes a trial period is offered, so you are welcome to start with evaluation and then purchase a license if you decide to continue using the product. Almost all addons offered by CRMAddon Factory have 14 days fully functional trial period. The following addons have some limitations: 1. DialIT 'Repair Phone Numbers' feature is not available 2. ImportIT Scrambles importing lists, i.e. does not allow to import information exactly as it appears in the source file, allows only 10 records importing. SQL connect is not possible as well 3. ScanIT allows scanning only 5 business cards per run 4. ExportIT allows exporting only 10 records per run. For licensing a convenient license wizard will open. You will need to follow its steps to evaluate or register the product with your license. It has the following look: DIAL|IT 26 . Configuration With this wizard you can start evaluation, register your license, remove computer from license, send request to our support team or get information about your license. Email License Evaluation License Remove computer from license Send Request License Info See also Info RDP License Addon Settings ‐ Display Addon Settings ‐ Field selection Dial Settings Phone numbers Detail Settings Skype configuration Call Center Home > Configuration > Licensing > Email License Email Activation In case you need to perform an activation via email, this can be done by using Email Activation option. In this case you should have your license file and license key, which were sent you by email. To start Email Activation DIAL|IT Configuration . 27 Wizard click button: Then you would need to insert your registration license key, specify a link to the folder where your license .lic file is stored and provide your email: DIAL|IT 28 . Configuration On the following dialog you should request an unlock code sending. It will be sent to your email specified on the previous step, you will get the following notification if the email has been sent successfully: Then you'd need to insert this key and press "Apply Key" button: DIAL|IT Configuration . 29 If the code was correct, you'll get the following notification: This means the addon has been successfully activated. Press 'Next' to complete and exit the Email Registration Wizard. See also Evaluation License Remove computer from license Send Request License Info Home > Configuration > Licensing > Evaluation Evaluation To start free trial period you need to select 'Evaluation' option on the Start Wizard page: DIAL|IT 30 . Configuration On the next form you will need to register your details and validate your email by sending a code to it. To send a code, please do the following: 1. 2. 3. 4. click 'Request code' button. Once you receive a code to your email, please copy it Then paste to the 'Requested code' field Click 'Next' button to proceed further DIAL|IT Configuration . 31 On the next step you will need to specify you connection settings. If you use proxy for connecting to the Internet, then, please add server and port to the corresponding fields. 'No proxy' should be selected if you use direct connection to the Internet. DIAL|IT 32 . Configuration Then you will need to click 'Finish' button to exit the Wizard and complete evaluation registration. Each time you start the addon the program will offer you to purchase a license or to continue using the evaluation: DIAL|IT Configuration . 33 To proceed with trial just click 'Ok' button. On this window you will see the name of the addon you are using and how many days of trial are left. If you would like to purchase a license you will need to click 'Buy now' button. If you experience any issues and need our assistance, please click the following button at the bottom of the Wizard to create a support ticket To open our User Manual, please click button at the bottom of the Wizard. See also: Email License License Remove computer from license Send Request License Info Home > Configuration > Licensing > License License By selecting this option you can license the product you are using. To do this you need to specify the registration key you received from our team. The license is provided per user computer, i.e. single licence is for 1 machine where the software is installed. If you purchase 3 licenses you will receive one license key which should be used for all machines. The system automatically connects to the server and checks your license, e.g. if there are available licenses for your computers or not. DIAL|IT 34 . Configuration On the next window you will need to fill out the following form and validate your email by requesting a code. For this purpose, please fill out all fields, except 'Requested Code' and click 'Request Code' button, the validation code will be sent to the email you have specified. Then you will be able to proceed with license registration by entering the code and clicking 'Next' button DIAL|IT Configuration . 35 On the next step the system will check if your license key is valid or not, this might take some time, click analyse button to start analyse: DIAL|IT 36 . Configuration The application will connect to the server and check the entered license key. If the analysis result returns Ok, you will be able to proceed further and run registration by clicking button. After registration completing you need to click 'Next' to proceed further: DIAL|IT Configuration . 37 Click 'Close' button to finish licensing and exit the Wizard. See also: Email License Evaluation Remove computer from license Send Request License Info Home > Configuration > Licensing > License > Update license Update license To update your license you need to open 'License and support' window in your addon and follow License tab there. On this tab you need to click 'Wizard for Registration' button . This will start licensing Wizard, where you can DIAL|IT 38 . Configuration select 'License' option to proceed with updating: On the next window you will need to select whether you would like to analyse your current license or update the license with online backup. DIAL|IT Configuration . 39 If you select 'Analyse of local license' you will need to click 'Analyse button' on the opened window to get details about your current license. To proceed with updating you will need to select 'Update license with online backup'. The further steps will be the same as when you register for the first time. Please find detailed instructions on the 'License' page. If you experience any issues and need our assistance, please click the following button at the bottom of the Wizard to create a support ticket To open our User Manual, please click button at the bottom of the Wizard. See also: Home > Configuration > Licensing > Remove computer from license Remove computer from license This option allows moving the license to another machine. It is possible to change computers only twice then it will not be possible to reset a license. For example if you have a single machine license you can change the computer twice. In case you need to do this more times you will need to create a ticket for our support team. In case you have already uninstalled the program on your old machine and would like to install it to a new one. Please install it and then via licensing wizard remove it from your old DIAL|IT 40 . Configuration PC. The license keeps computer name so it will be displayed under registered computers. To remove the computer you need to click 'License and support' button then select Wizard for Registration on the License tab: and On the opened window you will need to select 'Remove computer from license' option. Then you will need to provide your license and user information. To request the code, please click 'Request Code' button and then copy the code sent to your registered email to the 'Requested Code' field and proceed by clicking 'Next'. DIAL|IT Configuration . 41 On this window you need to select connection options you have. If you have a direct connection to the Internet, then select 'No proxy' option: DIAL|IT 42 . Configuration On the next window, please select an option you would like to proceed with: whether you would like to deactivate a local computer or select another machine from the list: DIAL|IT Configuration . 43 If you need to deactivate some other machine, please select 'Other computer' option, the following window will open: DIAL|IT 44 . Configuration Here you can select the computer you would like to deactivate, click 'Run deregistration' button to proceed further. If you select 'Local Computer' option, the system will ask you to confirm deactivation: Click 'Yes' to proceed with deactivation: DIAL|IT Configuration . 45 Once the system finishes license key checking, the following text will appear notifying that the deactivation has been completed: Click 'Next' button to proceed and then 'Finish' to close the Wizard. If you experience any issues and need our assistance, please click the following button at the bottom of the Wizard to create a support ticket To open our User Manual, please click button at the bottom of the Wizard. See also: Email License Evaluation License Send Request License Info DIAL|IT 46 . Configuration Home > Configuration > Licensing > Send Request Send Request Use this option if you would like to send us a request concerning upgrading your ACT! version, ordering license, adding more computers to the license or resetting a computer from license: See also: Email License Evaluation License Remove computer from license License Info Home > Configuration > Licensing > Send Request > Order license Order License Select this option if you would like to send us a request for license ordering. The following window will open: DIAL|IT Configuration . 47 On this window you will need to specify the amount of licenses you would like to order, type your request and provide your contact email. See also: Order an Upgrade Order an Update Send Reset Request Send Request Home > Configuration > Licensing > Send Request > Order an Upgrade Order an Upgrade Here you can order an upgrade of your ACT! version. If you do not change your ACT! version and would like to get a software upgrade within the same version release, for example upgrade 2.3 version to 2.6. version, this will be done for free. However, if you would like to upgrade from 2.x.x version to 3.x.x version then you will need to purchase an upgrade. You will get the upgrade already starting at as low as 10% of the addon license cost. The support for the latest version is provided for free. In case you have an old version, you will need to purchase support units or upgrade to the latest version. The following window will open after you select 'Order Upgrade' option: DIAL|IT 48 . Configuration Here you will need to provide your license key and email you are registered with in our system. To proceed further just click 'Next' button. DIAL|IT Configuration . 49 Here you will need to specify the amount of licenses, type your request and provide contact email, where you would like our support team to send you a reply. Then click 'Send request' button to submit your request. To exit the Wizard just click 'Finish' button on the next window. See also Order license Order an Update Send Reset Request Send Request Home > Configuration > Licensing > Send Request > Order an Update Order an Update Select this option if you would like to purchase more licenses of the addon. On the following window specify your licence key and registered in our system email: DIAL|IT 50 . Configuration Specify here the number of licenses you would like to upgrade to, type your request and provide an email you would like to get a reply to. DIAL|IT Configuration . 51 To proceed click 'Send Request' button and on the next window click 'Finish' to exit the Wizard. See also Order license Order an Upgrade Send Reset Request Send Request Home > Configuration > Licensing > Send Request > Send Reset Request Send Reset Request If you have already removed computers from licensing 2 times, then you will need to send us a reset request to reset your machine from licensing. You can do this by selecting 'Send reset request ' option. On the following window you will need to specify your license key and registered in our system email: DIAL|IT 52 . Configuration On the next window you will need to select a computer you would like to release from the license from the drop down list. type in your request and add contact email. DIAL|IT Configuration . 53 Press 'Send Request' button to submit your request. See also Order license Order an Upgrade Order an Update Send Request Home > Configuration > Licensing > Send Request > Send Request Send Request You can use this simple form to send us a request. Just type in your question and provide the email you would like us to reply to: DIAL|IT 54 . Configuration See also Order license Order an Upgrade Order an Update Send Reset Request Home > Configuration > Licensing > License Info License Info Here you can check the license code for your computer and for other machines where the license is installed. If the machine is in evaluation mode then 'Evaluation' option will be active, if there is a license specified for this machine, then 'Evaluation' will be inactive as shown on the screenshot below. You need to select the following option on the License Wizard to check your license information: DIAL|IT Configuration . 55 On the next step you can select whether you would like to analyse the local license or update it. You need to select the first option 'Analyse the local license' to get details about the license: DIAL|IT 56 . Configuration The following window will open: DIAL|IT Configuration . 57 On this window you will find information about the license owner, number of used and available licenses, what addon is the license for. To proceed further you will need to click 'Next' button and then 'Finish' to close the License Wizard. If you experience any issues and need our assistance, please click the following button at the bottom of the Wizard to create a support ticket To open our User Manual, please click button at the bottom of the Wizard. See also Email License Evaluation License Remove computer from license Send Request Home > Configuration > RDP License RDP License DIAL|IT 58 . Configuration The license for all our addons is tied to a PC. This error appears if you try to use addon from another PC. So in case you'd like to use the addons via RDP, you need a client access license for each machine that accesses the tool via RDP. We did see that lately different companies have installed our import/export on the server, and then everybody of the company logged in, and did imports via Remote (so it happened that we sold a single license, and did see support requests from 10 different persons for a single license). This is not the idea of a single user license, so we decided to allow only local access. If you/your customer wants to login via RDP from different PC´s he needs to purchase a RDP license for each PC that will access the server. See also Info Licensing Addon Settings ‐ Display Addon Settings ‐ Field selection Dial Settings Phone numbers Detail Settings Skype configuration Call Center Home > Configuration > Addon Settings Display Addon settings DIAL|IT Configuration . 59 Display Define here the Dial|IT Icons that shall be shown with Contact Detail View, Company Detail View and those with Contact List View and Company List View. Function Description DIAL|IT 60 . Configuration Clicking on this symbol allows you to start a call with a mouse click on the button to which a number was allocated or to select another number and Dial|IT. Clicking on the button 'Refresh' will update the numbers. This is helpful if a colleague modified a number or added a new number. Call a Contact Call from clipboard ToDo's Copy a phone number from emails, websites, ... and call it by clicking on this icon. You will find further functions on the subpage 'Call from clipboard' . Look here for further activities. For further information please visit the subpage 'ToDo's'. Create a report for all histories. Find more information under 'Dial|IT Report'. Dial|IT Report Go to last contact The contact that was active before the call/dialog would be called. Contact list The contact list of the latest search will be called up. Opens the configuration of Dial|IT. There you can define and/or edit all userdefined Dial|IT Configuration information. List of Phone Calls Check here a list of made phone calls Send Email Check this box if you would like to send email to the called contact Skin You may change here the layout of the Dial|IT by selecting a skin from the drop down list Choose Font Define here your font style and size as well as special effects and scripts. These settings will then be used in all text boxes, e.g. Histories, Activity. See also Info Licensing RDP License Addon Settings ‐ Field selection Dial Settings Phone numbers Detail Settings Skype configuration Call Center Home > Configuration > Addon Settings Field selection Addon settings Field Selection DIAL|IT Configuration . 61 You can define here the information to be displayed in the PopUp with an inbound call. Example: If you have a field called customer advisor you can have this field displayed so that everybody taking this call will see whose contact he is talking to. Functions Description Show PopUp Standardfield Contact Name Alternate Field 13 You can define here the information about the caller which you wish to be displayed in a Popup with incoming calls. When deactivating the tick mark, the Popup will be suppressed. This field cannot be changed. The Popup will always show the contact name as long as the numbers or the contacts in your databank. You can select here 3 free userdefined fields which are to be displayed in the Popup. Otherwise the standard fields Company, Address 1 and Town will be shown. This function must be supported by the phone system. Test with Phone.exe whether your system does it. This is the case if Phone.exe execution shows the number. Only then this function can work Show with Dial|IT! called phone When having activated this function you will see which number the caller has dialed. number You have several numbers with which you can be contacted. E.g. an English, an American and several German numbers. If the caller dials the English number it will be displayed that he is calling via the English number. DIAL|IT 62 . Configuration See also Common Settings Folder Settings Spell check Window handling Configuration Management Home > Configuration > Addon Settings Field selection > Common Settings Common settings You reach this tab when going in Addon Setting → Field Selection Functions Description Choose between the following options: Do you wish the contact details of the inbound call to be displayed during the call? Do you wish the contact details of the inbound call to be displayed on answering the call? Or do you prefer the contact not to be displayed at all? Alert settings Define the location of the PopUp ﴾TopLeft, TopRight, BottomLeft, BottomRight﴿ DIAL|IT Configuration . 63 Set the display speed of the popup window. Should it be fast, slow or moderate? Define here after how many milliseconds the PopUp should be closed automatically. See also Folder Settings Spell check Window handling Configuration Management Home > Configuration > Addon Settings Field selection > Folder Settings Folder settings You reach this tab when going in Addon Setting → Field Selection. Select here one of the folders where the complete Dial|IT configuration should be saved. This feature is useful if you share your PC with other people. This way each employee using this PC can have personal settings of the Dial|IT program. Here you can select how many MB of the recent calls should be stored in the caller list. In this folder the information about the program is stored, its settings and log files, which will show errors the application encountered. See also Common Settings Spell check Window handling Configuration Management Home > Configuration > Addon Settings Field selection > Spell check Spell check You reach this tab when going in Addon Settings → Field Selection. Spell check compares the words in your text element with words of OpenOffice dictionaries. Spell check can suggest alternative spelling and words. Define here the settings for the Spell check: 1. Please check the check box to activate automatic spell check 2. Select the required language to be used Spell check will work when you create an activity or record a history. DIAL|IT 64 . Configuration ATTENTION: Use of spell check takes some additional time during ACT! startup See also Common Settings Folder Settings Window handling Configuration Management Home > Configuration > Addon Settings Field selection > Window handling Window handling You reach this tab when going in Addon Settings → Field Selection Define in the tab 'window handling' whether AddOn dialogues should be brought automatically to front. You can also define here the time ﴾miliseconds﴿ for the window to be brought back to front. You need to specify additionally this setting if you wish to set th proper behaviour for your Dial|IT application. For example you do not wish to be interrupted when working with other programs, so you should not check 'Bring automatically windows to front'. However, if you would like to be interrupted, i.e. any program notifications are of highest priority for you, you will need to check this check box so that the program popped up all windows. ACT! covers all other windows and if you use this option a hangup can occur when several windows are forced to front. In such situations we recommend setting DialIT windows in other position of your screen where they are not covered and not having ACT! windows covering the whole screen. E.g. you can have ACT! windows displayed to the left and Dial|IT ‐ to the right. See also Common Settings DIAL|IT Configuration . 65 Folder Settings Spell check Configuration Management Home > Configuration > Addon Settings Field selection > Configuration Management Configuration Management Configuration management allows saving Dial|IT settings into SQL Database. All these settings are loaded when ACT! starts. This feature is available for CallCenter Dial|IT edition only. E.g. manager can make some changes in SQL and then they will be uploaded when ACT! starts. Function Description Click this button to save central settings of the program. After that they will by uploaded to SQL database Check this box if you would like to load central settings each time the ACT! starts By clicking on this button central settings will be downloaded, you will need to restart your ACT! for new settings to be reflected. See also Common Settings Folder Settings Spell check Window handling Home > Configuration > Dial Settings Dial settings DIAL|IT 66 . Configuration Function Tapi device Use dial out number / Prefix Use this code to make internatinal calls Remove this code for incoming calls DIAL|IT Description Define here the device you wish to use. With a wrong definition Dial|IT cannot work. If you cannot make any phone calls with your phone, please use Phone.exe to test whether your device is Tapi compliant at all. This Icon refreshes the list of available TAPI devices Select here a Tapi provider. Each producer offers his own Tapi driver. If the standard driver does not work, you can select here the driver of one of listed providers. All these listed providers offer drivers with certain adaptations to the corresponding TAPI. Use this prefix as it is required by your phone system to make a call. In most cases it will be 0 (USA: 9). Use this prefix as it is required by your phone system to make international calls. In most cases it will be 00 (USA: 011) Some telephone systems place a zero before incoming calls which then will be displayed by ACT! as an unknown contact. To prevent this, activate this function. Configuration . 67 Add this number to incoming calls Area code Use Headset Tapi Trace Use a modem (not recommended) Caller ID Settings Default setting Redirecting Redirection Caller ID Some telephone systems do not show the first digit of a number of incoming international calls. This number will then be displayed by ACT! as an unknown contact. To prevent this, activate this function. Enter here your area code. Local calls can be dialed without using any prefix just like with a normal fixed line. This function does not work for the USA. Check this box if you wish to use Dial|IT with a headset. Click on in the Popup to take the call. This function can also be used without headset and your phone will be set to the hands free mode. An additional file will be created where the information about the execution of the program is stored. This requires a lot of working memory! Activate this function only if requested by our technicians or if you dispose yourself of sufficient expert knowledge about DialIT. If you wish to use an analogue modem instead of a TAPI phone, please activate this function. However, we do not recommend using Dial|IT with a modem. Any questions in relation to your modem are not supported by us. Select one of these functions to redirect a call and to display the number of the caller. Test all four options until the number is displayed. Depending on the phone system you use, the number may be displayed with any of these settings. if you do not see the right contact when a phone call is transferred to you, please do the following: Connected ID 1. Run Phone.exe check if the caller id of the "original" caller is shown in any of the fields 2. Test blind transfer and run Phone.exe check if the caller id of the "original" caller is shown in any of the fields 3. if the caller ID of the transferring person is shown first, and switches later to the real caller id, there are 2 options limit the length (i.e. if your internal number is 4 digits) you would have to set a minimum length to 5 or longer If there is no Tapi connection, i.e. the device could not connect. You will get the following "Offline Mode" warning: To resolve this you will need to check your Tapi device configuration. DIAL|IT 68 . Configuration See also Info Licensing RDP License Addon Settings ‐ Display Addon Settings ‐ Field selection Phone numbers Detail Settings Skype configuration Call Center Home > Configuration > Phone numbers Phone numbers Search Criteria Internal Phone Numbers Local Area Code Settings See also Info Licensing RDP License Addon Settings Display Addon Settings Field selection Dial Settings Detail Settings Skype configuration Call Center Home > Configuration > Phone numbers > Search Criteria Search Criteria DIAL|IT Example for speed dial Configuration . 69 Functions Phone Numbers Description Select the ACT! fields to be used for outbound calls. You can select particular or all listed fields. We recommend, however, not to use a fax or a pager number. The selected fields are displayed in the Call a Contact Popup window. Having created a new field for a phone number in your ACT! databank you can select it and use it for this function. Inbound calls use all phone fields (e.g. Faxnumbers), independent of the here selected fields so that you can identify the contact also if the phone field had not been selected. Note: If a field is not displayed although phone numbers had been allocated there, please check whether this field really is a phone field. DIAL|IT 70 . Configuration Define here a Standard Phone Field. This phone field will be "allocated in advance", i.e. if there are several numbers for a contact, this phone field is tagged and you can dial this number with a click. But you still have a possibility to dial any other listed number . This function is for USA / Canada. E.g. your contact works in a company and has his own extension so you can reach this person right away if you use the extension. Click the "Use extension" box if you have entered a direct dial number under phone number in your ACT! databank. This serves as an alternate phone field and replaces the last digits of the phone number entered in the field phone number. Example: Mary: 31... 31... Joanna: 31... 31... Mike: 31... 31... Enter in ACT! as on the following example to use this function properly: Phone: 314 ... 314 ... App.:2227 (Example for Joanna) The last 4 digits will be replaced here with the 4 digits of the direct dial number. This function will only work if the direct dial number of the switch has the same number of digits as the direct dial numbers. If this function is activated no PopUp window will be opened for contacts with only one phone number. The existing number will be dialed straight away. This function overwrites the speed dial function if it is activated. Note: This option is available if you use Dial|IT only with Skype (Basic) or only with a TAPIphone(system) (Standard). If you use Dial|IT Advanced (TAPI and Skype) this function is not available because you need to select whether you want to call the contact via your phone or via Skype. Minimum Length Caller ID DIAL|IT Selecting Minimum Length Caller ID instructs the Dial|IT interface to ignore all numbers having less than here defined number of digits. Configuration . 71 Minimum number of matching digits 0 means the entire number Show only exact found records Enter the minimum amount of matching numbers so that the Contact detail is displayed. Example: The main number to contact the switch is 089 3820. Your contact has the direct dial number 089 ... 089 ... that was allocated in your ACT! databank. If you call via switch or his secretary or if you are called, Dial|IT will not display his contact detail. In order to identify a contact in spite of that you can define here the amount of matching numbers to find a contact. 6 digits would here be helpful as all contact numbers starting with 089382 would be searched. Activation of this function only shows contact details matching the number exactly. For all Contacts having several phone numbers, select here a phone number field that then will always be dialed directly without opening the Call a Contact PopUp window. E.g. you can set main phone number or mobile phone number to be dialed this way. This option is helpful when you import phone numbers to your ACT! database or use converted ACT! database. It "repairs" your phone numbers and makes them compatible for using with Dial|IT. Before you use this function please make a backup of your database This function is only available if you are logged in as administrator! Repair phone field values 1. 2. 3. 4. Open the Config of Dial|IT Go to the tab 'phone numbers' Click on the button 'Repair Phone field values' Your phone numbers will be checked and repaired for using in Dial|IT The formatting of your phone numbers will still be the same in your ACT! mask this function only works within the system. See also Internal Phone Numbers Local Area Code Settings Example for speed dial Home > Configuration > Phone numbers > Internal Phone Numbers Internal Phone numbers An ACT! database only contains external and no internal phone numbers. So there is no possibility to identify and record an internal call. Example: If the Marketing Director of a company calls his office to schedule a meeting the number would be displayed as unknown when not using Dial|IT. This tab which is being used with a telephone system or an extension enables the recording of internal calls by adding names and numbers to the list of this tab. DIAL|IT 72 . Configuration Functions Description A Popup opens if there is an internal call. On taking an internal call History opens to record it. Display of all internal numbers with the allocated contacts. Click on an empty field to add new numbers. Delete a checked entry. Directory path of internal call record list See also Search Criteria Local Area Code Settings Example for speed dial Home > Configuration > Phone numbers > Local Area Code Settings Local Area Code Settings DIAL|IT Select here the location of your internal numbers. Configuration . 73 This function is only shown for the user having a '1' as country code ﴾e.g. USA, Canada,...﴿ The US numbers are always 10 digits ‐ numbers. The first 3 digits are the local area code ﴾e.g. 203 ‐ 4047508﴿ Within the US you need to dial the country code as well. With this function you can set that the area code will not be called You want to call us, your number is 203 780 4709 Our number is 203 404 7508 You can set here that you do not need to call the 203 in front of the number. Function Prefix for national Calls Description Enter here a number which your phone system needs to dial national calls DIAL|IT 74 . Configuration Area Code: Enter the area code you want to add a prefix Use Prefix: Choose if you want to use the prefix with / without / optional with the area code e.g. 203 Prefix: Enter the prefix number which should be used Dial Area Code. Select when you want to use the prefix Default: Delete the selected row with prefix settings. See also Search Criteria Internal Phone Numbers Example for speed dial Home > Configuration > Phone numbers > Example for speed dial Example for Speeddial On the following window you can set a field for speed dialing: DIAL|IT Configuration . 75 This field will be active when you start calling a contact: See also Search Criteria Internal Phone Numbers Local Area Code Settings DIAL|IT 76 . Configuration Home > Configuration > Detail Settings Detail settings History See also Info Licensing RDP License Addon Settings Display Addon Settings Field selection Dial Settings Phone numbers Skype configuration Call Center Home > Configuration > Detail Settings > ToDo List ToDo's To use this function, please create Activities in one or several of your contacts in ACT! After that open the Activity Window Dial|IT using the corresponding Icon: . Subsequently a window opens where you can view all created activities. See the chapter ToDo's for further information. Having done this, open the Dial|IT configuration and select under the tab Detail settings → ToDo List the activities which shall be displayed later. Having finished the setting click on OK. According to your settings your Dial|IT Activity list will only display the activities selected in your configuration. Example: You have a list with 10 scheduled calls that have to be done today. You can set the list so that the first and each following call will or will not be removed from the Activity list after being started. Further definitions can be made when clicking on the DIAL|IT Icon . Configuration . 77 Function Description Show Activity types Define the types that shall be displayed. You can select from all the Activity types available in ACT!, e.g. Call, Meeting, Completion, .... Activity type Never clear activity Clear activity after completion of call Clear activity when call is connected Define what should happen to the activity after completion. Activation of this option shows the ToDo list with each start. So you can always see the activities you still have to do. Automatic update of the ToDo list after the Update ToDo list defined interval e.g. the list is updated every 10 minutes. This makes sense if other users are scheduling activities for you. Display ContactInfo in ToDoList. It might take long time to display Select from the dropdown list what a big number of records and details. If you would like not to slow information about the contact you would like the Dial|IT program performance you will need to enable 'Load ToDo to be displayed. Leave these fields empty if List manually with Refresh button' on the ToDos tab . you do not wish to display any details. Having activated this function, you will be alerted if the scheduled activity is on a day Warn if activity scheduled for a weekend? off with the option to postpone it to the next workday. Show ToDo list at start DIAL|IT 78 . Configuration See also Create Activity History Home > Configuration > Detail Settings > Create Activity Create Activity Define in this part of the configuration whether an activity for missed calls shall be created and make the required settings. You or another user of ACT! will then be reminded of the scheduled activity depending on your settings. Function Description Do you wish to create a history for missed calls? Define here the setting to create an activity or not. For example you would like to get back to the contacts whose calls you missed, in this case you will need to enable 'For All' option. This way an activity will be created for each missed call and you will be able reminded about it. Define here a type of your activity: a call, a meeting or another type. DIAL|IT Configuration . 79 Enter here a default time after which the activity should be started. Define here the duration of the activity. Alarm Timeless Private Activity Enter here a subject for your activity or select it from the DropDown list. Having activated this option a reminder Popup will remind you of the activity depending on the setting, e.g. 10 minutes before the activity is due. The activity is created as a timeless activity. In order to mark the activity as being private so that it will not be displayed to other ACT! users (unless they are involved in the activity), mark the checkbox Private Activity. If other users view your calendar, the space for your private activities will be displayed as "booked up". Define here for whom the activity should be created. Select from the 3 options. You can select the users from the DropDown list if you wish to schedule 'For selected users'. If necessary you can select here a default activity from the following dropdown list: Default Activity (preselected) You can also leave this field empty, in this case no default activity will be specified See also ToDo List History Home > Configuration > Detail Settings > History History If History is configured to appear, History PopUp dialog will open when you answer an incoming call or when your call is being answered. However, by default if the contact was not found in Act! the history for this call will not be saved and will disappear after the time set in 'Close History Dialog automatically if no data entered' field. The below window lets you configure your hisotry settings: DIAL|IT 80 . Configuration Function Description Missed calls Never Create History Create History and Activity Show History PopUp Show history for unknown contacts Add call duration to history regarding DIAL|IT Should a history be created for missed calls? Define here the appropriate settings. History Pop Up opens when you make a call or receive a call. Check this function if you wish to create a history for calls. On deactivating it, no dialog will show up in future allowing you to create a history. Having checked this function, the history dialog will show up also for unknown phone numbers. It will allow you to create a history for a new contact. As Act! rounds the duration time up or off to full minutes, you can add the exact duration to the regarding line after checking this function. Configuration . 81 Add busy state to Regarding Close history window automatically if no data entered Save history as note Save text as RTF Take History Details over to Activity Show this contact field in history Create history for own record after completion Set Phone Call Status to Done after Create contact record for unknown callers seconds Minutes There is no extra field just as for duration. Having checked this function, the engaged number will be added to Regarding. Availability of this setting will depend on the phone system version you use. You will need to clarify availability of this function with your phone system provider. The history window will be closed after the defined time if you have not entered any data. Having checked this function, History will not be saved as History but as a note. The text in the textfield will be saved with all formatting (e.g. color, italic, ...). If this option is checked History details will appear in Activity Select an Act! field that also should be displayed in the history dialog. The history is added to the personal record if this function was checked. After the defined period the phone call status will be set to done. The program will set the call to done after defined time period. E.g. if you managed to reach the person and started the conversation in defined time the Dial|IT program will set the call status to Done automatically. You can create a new contact with all information from your phone call. This will work if you have 'Show History for Unknown Contacts' enabled. The Dial|IT will allow you to add a record to your Act! database about this new contact and all available details. See also ToDo List Create Activity Home > Configuration > Skype configuration Skype Dial|IT allows you to call via Skype, call to Skype accounts and to send SMS. For Windows 8 a desktop Skype application should be installed. Dial|IT is not compatible with built in Skype version for Windows 8. Skype window is only visible if you have a Basic, Advanced or Professional license of Dial|IT. With a Basic license you can use only Skype. With the Advanced or Professional license you can use your TAPI compliant phone and Skype. To setup Skype function you should go to Dial|IT Configuration=> Skype and check 'Use Skype' field. In the "Name of Skype field" you should put ACT! field where skype names of your contacts will be saved. It can be Messenger ID, or you can create a new field in ACT! and name it as Skype contact. DIAL|IT 82 . Configuration Function Use Skype Name of Skype Field For creating History to send text messages please select a history type For creating History for failed text messages please select a history type Description Check this field if you want to use Dial|IT with Skype Here you need to select a field where your Skype contact name is saved. If you do not have a Skype name for particular contact, you can dial to any telephone number available for this contact. Select an activity type to send messages. If there is no suitable history type just create the one in ACT! Select an activity type for messages, which were failed to send. If there is no suitable history type just create the one in ACT! To connect your Skype to ACT! please go to your Skype account, choose Tools => Options => Advanced => Advanced settings and select Manage other program's access to Skype. In the window you should choose ActSage.exe and allow this program to use Skype. DIAL|IT Configuration . 83 Please Note!:ACT! should be restarted so that new settings were applied successfully. After ACT! is restarted calling via Skype will be available. You can start making calls by clicking on the 'Phone' icon in the Dial|IT toolbar in ACT!: To make a call you will need to select a phone number from the drop down list and click 'Call via Skype' button To send SMS via Skype, please select a phone number from the drop down list and click 'Send SMS' button See also Info Licensing RDP License DIAL|IT 84 . Configuration Addon Settings ‐ Display Addon Settings ‐ Field selection Dial Settings Phone numbers Detail Settings Call Center Home > Configuration > Call Center Call Center Call Center window is only visible if you have a Professional license of Dial|IT. It displays groups and subgroups and you can easily add or remove contact from group during the call. You can create and send email and report templates at the same time you talk to the contact. If you have several companies then you can define what company should be displayed in your client’s computer or telephone. Also you can set up special contact name for unknown calls. Call Center settings Email‐Report Settings New contact Multi Company Dialing See also Info Licensing RDP License Addon Settings ‐ Display Addon Settings ‐ Field selection Dial Settings Phone numbers Detail Settings Skype configuration Home > Configuration > Call Center > Call Center settings Call Center settings If you have several companies ﴾e.g. Crmaddon, Voipaddon and Glcomputing﴿ then you can define what company should be displayed in your client’s computer or telephone. You will dial from special telephone number that belongs to your particular company. For example, you call to one of your contact as Crmaddon, and to other contact as Voipaddon. DIAL|IT Configuration . 85 You can take an advantage of the following function if your phone system provides the option to use several phone numbers. This function needs to be configured in your phone system ‐ therefore you need to talk to the person who is supporting your phone system. You need to set up numbers for companies you have. In your ACT! go to Tools => Define fields and create a new field named “Belongs to company”. Put there numbers for every company, e.g.: Your telephone system will automatically match each company to a particular telephone number. Then you only need to fulfill “Belongs to company” field for each contact and call to your particular client from your special telephone number. See also Email‐Report Settings New contact Multi Company Dialing Home > Configuration > Call Center > EmailReport Settings DIAL|IT 86 . Configuration Email‐Report Settings Call Center edition allows you to send email about the topic you discuss at the same time while talking to your interlocutor. In Dial|IT Call Center configuration you will see this window: You can send email and/or report as attachment. In each template you can display static and dynamic information. Dynamic information, such as values from a database ﴾which comprise the main report data﴿ or service information ﴾such as current user name or page numbers﴿ changes through a report. Static information is text or images that aren't obtained from a data source, and therefore don't change throughout the report, and don't depend on the current computer. DIAL|IT Configuration . 87 See also Call Center settings New contact Multi Company Dialing Home > Configuration > Call Center > EmailReport Settings > Email Settings Email Settings Email Settings Configuration window is very important and should be filled in properly in case you would like to send emails to your contacts through the Dial|IT. The information filled in here will be used in outgoing emails you send. Function Description DIAL|IT 88 . Configuration Don’t send as email Select this option if you don’t want to send Emails at all Use report template as Email Report template will be sent as email ﴾not as attachment﴿ Use email template You need to open or create your template below. Create / open / edit / delete / copy Email template. You can read about creating templates in Email template Report Generator section. Also click here to read manual about report designer >> Path of templates Here you can put a path to save all email templates you have created Format of Email body Select a format for your email: html, rtf or txt Use history regardibg as email You can define here any subject you would like to have or use a subject from the history of the subject call. Email to CC Select if you would like your email to be sent in copy or in blind carbon copy? Email to BCC Outlook email profile Email account Specify your email data here Password See also Report Settings Home > Configuration > Call Center > EmailReport Settings > Report Settings Report Settings On this tab you can specify settings for email reports, which can be sent after email conversation or during it. For example it can be a simple follow up email or a newsletter. For creating newsletters you can use Report Designer feature which allows creating email templates. DIAL|IT Configuration . 89 Function Description Create / open / edit / delete / copy template. You can also read about Report Designer here >> Here you can put a path to save all email templates you created before. You can share this Path of templates folder so your colleagues can use these templates as well. You can save the document in pdf, txt, rtf, xls﴾x﴿ and html formats. Attach as document in ACT!, please You can download a template as a document to ACT! or send a template without saving it in select document format ACT! Save attachment in Here you can define the path for data of the related contact Report template Attach document as link in ACT! You can attach as a link to the document in ACT! See also Email Settings Home > Configuration > Call Center > New contact New Contact In Configuration => Call center => New Contact you can set up special contact names for unknown numbers. They will not be saved as New Contact. Dial|IT will take contact name from Caller ID, Connected ID, Redirecting, Redirection or will use default settings. For contact name you can select Default settings, Redirecting, Redirection, Caller ID and Connected ID. Proper variant depends on your phone system. You should try all variants to setup contact name to be displayed properly. See also Call Center settings Email‐Report Settings Multi Company Dialing Home > Configuration > Call Center > Multi Company Dialing Multi Company Dialing Specify in this tab settings for multi Company dialing. For example you receive calls and make calls to different Companies and would like to identify such calls and separate them by Companies. Adding Prefix will separate them and make easier to identify such calls. DIAL|IT 90 . Configuration Function Description Prefix Groupfield (incoming calls) Prefix Groupfield (outgoing calls) Prefix Contactfield (outgoing calls) Show groupname in AlertPopup Save history/note for group, too Define Email Template Add here a prefix for your incoming calls so that you could identify which Company the caller is calling from. Such information can be provided by your phone Company Here the prefix for outgoing calls can be specified, so that the called Contact could see that the call is from your Company. Here the prefix for outgoing calls can be specified, so that the called Contact could see that the call is from your Company. In this case the prefix is saved directly in Contacts if Groups for example are not used. See also Call Center settings Email‐Report Settings DIAL|IT Check this box in case you would like the Group Name to appear in the Alert Pop up Check this box if you would like to have History or Note saved for the group as well Specify here a path to the email template you would like to use Configuration . 91 New contact DIAL|IT 92 . Dial|IT Features Home > Dial|IT Features Dial IT Features Here you will find description of the most useful features offered by Dial|IT program. See also Welcome Support Introduction Installation Configuration Home > Dial|IT Features > Dial|IT toolbar Dial|IT toolbar Customized Dial|IT toolbar can be settled in Contact detail view and Contact list view: Dialing DIAL|IT Call from clipboard ToDo's Dial|IT Report Go to last contact Contact list List of phone calls Dial|IT Configuration Dial|IT Features . 93 Dialing Go to last contact Send Email Contact list Dial|IT report List of phone calls Home > Dial|IT Features > Dial|IT toolbar > Dialing Dialing To make a call click on this list view. icon in Contact details view, Contact list view, Company details view and Company When you call a contact, a popup window 'Call a contact' appears where you can select the number of the contact you want to call (including secondary contacts). Depending on Dial|IT version you will be able to call via Skype (Dail IT Basic), via TAPI (Dial|IT Standard) or both (Professional and Advanced). You can call a contact from Company details view and Company list view. You have a possibility to dial any employee's number from the list , including secondary contacts. This example shows calling a Company. DIAL|IT 94 . Dial|IT Features You can click either on call via Skype. button to call via TAPI or to to To call SkypetoSkype accounts you need to define a field where skype accounts of your contacts will be saved: Configuration → Skype → Click on Click on Use The option to send the message to your contacts via Skype. button refresh the displayed contact and his phone number. to renew the connection to the telephone system. will close the "Call a contact' window without saving settings. This example shows calling a Company. Here all contacts of this Company are displayed, so you can select the needed phone number: DIAL|IT Dial|IT Features . 95 You can also call a secondary contact when you click 'Call' button for a contact, this contact can be selected from the list of available phone numbers: DIAL|IT 96 . Dial|IT Features Home > Dial|IT Features > Dial|IT toolbar > Call from Clipboard Call from Clipboard Selecting this function allows you to simply insert here the number that you might have copied from websites or e mail signatures allowing you a faster and time saving calling. In addition you can choose from the following possibilities: 1. Call this number with your Tapiintegrated phone by clicking on the DIAL|IT button. Dial|IT Features . 97 2. Call this number by Skype by clicking (as long as you have credit there) 3. You can add the number to the currently displayed contact in your database. . You only have to select the telephone field where you want to save the number. 4. Create a new contact in your ACT! database with this number . 5. By clicking on database and add the number for this selected contact. you can select any contact from your Additional functions: Having also copied some letters by mistake those will be automatically removed when being inserted to the clipboard. Your national and international calls will automatically dial and display the prefix number as well. Home > Dial|IT Features > Dial|IT toolbar > Go to last contact Go to last Contact By clicking on in the tool bar of ACT!, the last shown contact details will be shown again in your ACT! database. See also Dialing Call from Clipboard Contact list ToDos Dial|IT report Contact Report Send Email List of phone calls Home > Dial|IT Features > Dial|IT toolbar > Contact list Contact List By clicking on button the contact list will be shown again. It will appear as a List View in your ACT! database, so if you would like to work with contacts in this view mode, please make sure that all needed functions for Dial|IT are enabled on the Dial|IT Configuration tab . It opens by clicking on the configuration button . See also DIAL|IT 98 . Dial|IT Features Dialing Call from Clipboard Go to last contact ToDos Dial|IT report Contact Report Send Email List of phone calls Home > Dial|IT Features > Dial|IT toolbar > ToDos ToDos This feature gives you an ability to get an overview of all activities that have been planned by you. Do you only want to see certain activities? You can define the activities you want to see according to your wishes/needs/activities and make a grouping. 'Todays ToDos' window shows activities planned for the today. 'Activities' window shows the whole list of activities. DIAL|IT Dial|IT Features . 99 You have a possibility to customize the columns in ToDos window, that means to add / delete fields from the list: 1. icon, 2. activity type, DIAL|IT 100 . Dial|IT Features 3. priority, clear, 4. private, 5. scheduled by, 6. scheduled for, 7. associate with, 8. e‐mail, 9. phone number, 10. extension, 11. contact info 1...4, 12. regarding, 13. details, 14. start date, 15. occur time, 16. duration, 17. end date, 18. recurring appointment. Right mouse click on the column header opens the menu. Click the Column chooser and move fields from/to the Customization window. You can also select 2 or more activities with intent to bulk changes ﴾deleting, deactivation, rescheduling for another date, changing the priority﴿. Select activities holding down a modifier key Ctrl + Activities or Shift + Activity range. Right mouse click on Activity field allows you to modify them. E.g. to change date or to clear them. Important Function: DIAL|IT Dial|IT Features . 101 When completing your activities in ToDo list (calls, transactions, ...), they will be automatically set as "completed" in ACT! as well. Example: There is a call to be made from the above list. In Configuration => Detail Settings => History you put 60 seconds in the field "Set phone call status to done after". Having completed your call (duration over 60 seconds) it will be cleared from your ToDo list automatically. Function Description Only activities from this range will be displayed. Example: You wish to have only future activities to be displayed. Define here the period for the activities to be displayed. Example: All activities scheduled for the period from 2009.10.20 to 2009.10.25 are to be displayed. Define here the activity types to be displayed. Example: You wish only calls and meetings to be displayed? Make your choice here. Only the activities of those users that you selected here will be displayed. If you wish recurring events to be displayed, please check this function. Select a group here for which you would like to display Contacts. If you would like to display ToDos for all contacts, then leave this field empty This function is useful if you have a lot of ToDos set for your contact and would not like the program to refresh your list since this will slow the program performance. The update time is set in Configuration in Details Settings > ToDo list under 'Update ToDo List' Click this button to refresh the list New settings/ changes will be accepted. All settings are reset. Clicking on this button will call the contact (who is marked) that you clicked in your list. If this contact has several numbers, a Popup will open allowing you to choose the needed number. The contact linked to the activity will be displayed. Clicking this button will call a Company. If this Company has several numbers, a Popup will open allowing you to select from the list. Your ACT! will open on the Company Detail View. This button can be used if you would like to call a number from Company details. This option can be used if you do not know a Contact person. The Company linked to this activity will be displayed in Details View in your ACT! Click this button to display Contacts without ToDos in your ACT! in List View If you resize your window manually by dragging borders and then click this button, the program will set the window to the default size. Important Function: DIAL|IT 102 . Dial|IT Features Let us assume you had a call in the above list. Having completed this call, the entry will be cleared from your activity list. Example: That is, you can select e.g. all activities to be displayed that were scheduled for the period from 2009.09.10 to 2009.09.25. If this selection does not display any activities, it will imply that no activities were scheduled for this period. You can also select the Activity Type, e.g. if you wish only calls to be displayed, select the respective Activity Type. Only those activities are to be displayed that were scheduled for you? Choose function Select User. Home > Dial|IT Features > Dial|IT toolbar > Dial|IT report Dial|IT report By clicking on icon you will see History Report Window. select here the date range you would like to generate reports for select History types from the drop down list here select a report template check this box if you would like to include notes Using the >> If you click on allows you to create a report step by step. To read more about Report Wizard click here you will see an overview of all histories and activities button will start Report Designer DIAL|IT Dial|IT Features . 103 Home > Dial|IT Features > Dial|IT toolbar > Contact Report Contact Report The following window will open if your click 'Contact Report' icon in your ACT! Dial|IT toolbar. This feature is available only for Call Center edition of Dial|IT. It is used for notifying call center's customers or Record Manager. DIAL|IT 104 . Dial|IT Features Here you can select Email Report Template and Contact Report Template. Email settings can be filled manually or will load automatically if specified on Configuration / Call Center / Email‐Report Settings / Email Settings tab 'Preview Email' ‐ by clicking on this button email preview window will open 'Preview Report' ‐ by clicking on this button report preview window will open 'Send as Draft' ‐ allows sending the report as a draft 'Run' ‐ Will run the report 'Close' ‐ click this button to close Contact Report window See also Dialing Call from Clipboard Go to last contact Contact list ToDos Dial|IT report Send Email List of phone calls Home > Dial|IT Features > Dial|IT toolbar > Send Email Send Email By clicking on the icon You will see this window: DIAL|IT you will be able to send professional templates with attachments right form ACT! Dial|IT Features . 105 First of all you need to setup the Dial|IT configuration settings to connect your e‐mail agent to ACT!. This way all fields on the below and above images will be prefilled automatically by details specified on Call Center / Standard Email Reporting Settings/ Email Settings tab. You can open your configuration by clicking on the configuration button in your ACT! Dial|IT toolbar DIAL|IT 106 . Dial|IT Features If you setup everything in Configuration, you should press Standardsettings button. Fields EmailProfile, EmailAccount, Password, CC, BCC, Email Template and Report Template will be loaded automatically. You can create and send professional email and report templates. For more information please visit the page "Sending report/email templates by e‐mail" in History Pop‐Up directory. See also Dialing Call from Clipboard Go to last contact Contact list ToDos Dial|IT report Contact Report List of phone calls Home > Dial|IT Features > Dial|IT toolbar > List of phone calls List of phone calls With this icon the call list pops up which allows you to see the history of your latest phone calls made from the particular PC. The list may be inaccurate depending on the TAPI if you are in a call or if another person took the call. You can select to show one of the following: Incoming calls Incoming calls, completed Outgoing calls Outgoing calls, completed You can also assort outgoing completed calls: Start date When the call started (date and time) End date When the call was ended (date and time) Phone number Phone number called DIAL|IT Dial|IT Features . 107 Caller ID Shows the caller ID of the contact Matched contact Name of called contact (Contact name in ACT!) Conversation partner Who did you talk to? With a right mouse click on a column you can create histories for the contact calls or create a new contact. Assorting: The sign allows you to show suborders and to follow up the calls. The following will be displayed: Start date Start of the call ﴾date & time﴿ End Termination of the call ﴾date & time﴿ Phone number Who/whom you called / number of the contact in ACT! Caller ID The ID of the contact Fitting contacts Name of the contact Who/Whom you called ﴾Contact name in ACT!﴿ Dialog partner Which company and which contact you called / called you With a click on the menu Data you have the following possibilities: You can then delete DIAL|IT 108 . Dial|IT Features refresh load all data ﴾not all calls are shown ‐ only the most recent calls will be shown. If you click on this function all calls you made and you received will be shown here﴿ In the configuration you can also select which size the list is allowed to have ‐ after this MB‐size a new list will be created. Configuration → Addon Settings → Field selection → Folder settings export the list of phone calls ﴾select one of several formats﴿ You can select the following formats for export: HTML HTML, which stands for HyperText Markup Language, is the predominant markup language for web pages. It provides a means to create structured documents by denoting structural semantics for text such as headings, paragraphs, lists etc as well as for links, quotes, and other items. MHT MHTML, short for MIME HTML, is a web page archive format used to bind resources that are typically represented by external links ﴾such as images, Flash animations, Java applets, audio files﴿ together with HTML code into a single file. PDF Portable Document Format PDF is a file format created by Adobe for document exchange. PDF is used for representing two‐dimensional documents in a manner independent of the application software, hardware, and operating system.PDF files include the text, fonts and images. The viewer of the file is not able to change anything on this document. RTF The Rich Text Format ﴾often abbreviated RTF﴿ is a document file format developed by Microsoft for cross‐platform document interchange. Most word processors are able to read and write RTF documents. TXT XLS A text file is a kind of computer file that is structured as a sequence of lines. A text file exists within a computer file system. The end of a text file is often denoted by placing one or more special characters, known as an end‐of‐file marker, after the last line in a text file. Microsoft Excel ﴾full name Microsoft Office Excel﴿ is a spreadsheet application written and distributed by Microsoft. It features calculation, graphing tools, pivot tables and a macro programming language called VBA. Home > Dial|IT Features > Inbound Call PopUp Inbound call PopUp When using Dial|IT and receiving a call, a small Popup will appear on your screen. This window is slightly transparent and will only be completely visible when you go on it with your mouse. The purpose is not to disturb you in your current activities. DIAL|IT Dial|IT Features . 109 When configurating Dial|IT you can define the location of the desktop where the PopUp window shall be displayed . Configuration → AddOn settings → Field Selection → Common settings → Alert settings Function Description Display of the phone number of the caller. Here only the contact and the respective company are displayed. But you can also select 3 further ACT! fields in the configuration that are to be displayed here. Configuration AddOn Settings Field Selection Highlight window Add to contact Create new contact Go to contact If there are more contacts available with the same number the specific contact can be selected through the drop down list. After the selection the contact entry in ACT! will be shown (if configured!) This thumb tack brings the PopUp window to front. Click on this symbol if you wish the window to stay always in front also when other pages are open Clicking on this symbol allows you to add this number to a contact. For further details see 'Add to contact' A new contact is created to whom you can allocate this number. The contact details of the found contact are displayed. If you had not defined during configuration that the contact details of the inbound call are to be automatically displayed, this symbol will be useful. See also Dial|IT toolbar History Pop Up Home > Dial|IT Features > Inbound Call PopUp > Add to Contact Add to contact If you wish to add the number of a caller to any contact you have the following options: 1. Option Click on the thumb tack so that the PopUp window will remain open and in front Go to the contact in ACT! to add this number DIAL|IT 110 . Dial|IT Features Click on the Icon The following window will show up. Select Yes. In the following window you are asked in which phone field you wish to save this number. Select a telephone field and click on Insert to save the number. Phone fields marked red are already lettered with a number. If you select one of these fields you will overwrite it. 2. Select a contact from Database Click on the icon The following window will appear: Click on No This will open the ACT! list where you can select an ACT! contact or a company to which the number should be allocated. DIAL|IT Dial|IT Features . 111 Select here the desired phone field. Phone fields marked red are already lettered with a number. If you select one of these fields you will overwrite it. See also Several contacts found for one number Home > Dial|IT Features > Inbound Call PopUp > Several contacts found for one number Several contacts found for one number If there are several contacts with the same ﴾or similar﴿ number you can select the correct contact. Incoming calls If there are several contacts for one number saved in ACT! you can select one of the contacts by clicking on to see a drop DIAL|IT 112 . Dial|IT Features down with all available contacts. After you select a specific contact the contact detail will show up in ACT! (only if you set this option in the configuration!). Outgoing calls If you dial by hand a number which is saved for several contacts you see a popup where all matching contacts are pre‐selected. If you want to create a history only for one contact you can remove the other contact﴾s﴿. If you let all pre‐defined contacts in there the history will be saved for all shown contacts. Home > Dial|IT Features > History Pop Up History PopUp Set in Configuration whether a History should be displayed or not. Configuration → Details Setting → History History pop up is opened if you answer the call or your call is being answered: DIAL|IT Dial|IT Features . 113 Function Description Select a history type from th down list, e.g. call, meeting completion... History type Select here a result from the down list Result DIAL|IT 114 . Dial|IT Features A contact whom this numbe belongs to If no contact was found wit number in Act! " show up, this line remains e Click on the arrow behind th field of the contact. Then you can select from th following 3 options: Contact Date Time Duration Attachment Associate with Displays the date of the call Displays the time of the call Displays the duration of the You can add here an attach presentation for example Associate this history with o several) Group(s) or Compan 'Add Contact to' select the or group from the drop down where you would like to add contact 'Add Contact to selected Gr clicking on this button all co from the group where your belongs to will be selected 'Add Contact to selected Co by clicking on this button a contacts from the Company your contact belongs to will selected Record Manager Move from Group DIAL|IT Default value is the register Lets you move contact from group to another Dial|IT Features . 115 Private Regarding Details Close If you do not want to save click this button to close wi saving Check the checkbox Private your activity as private so t other Act! users can view it they are involved in the act Select a subject for the hist enter a subject. Enter the details of the histo into the textfield. Closing of the History windo the entries. Activities Here you can select existing screen for activitites and th edit them. Having created new activitie you can load them into the history window with the but ToDo's'. Schedule Activity History History and Activity You can schedule an activit during the call For further information see History is created and the P closed. Activity and History are crea the Popup is closed. See also Activity Group Membership Sending report/email templates by email Home > Dial|IT Features > History Pop Up > Activity Activity DIAL|IT 116 . Dial|IT Features Function Description Activity type Click in the toolbar on an activity type: meeting, call, completion or select one from other existing types. Start date, Start time, Duration Timeless Use Banner Alarm with Hint Contact Associate with Record Manager Regarding Priority Private DIAL|IT You can schedule an activity for a certain time and a cer date, as timeless activity as well as an activity for a full and also define a reminder hint, e.g. to be reminded 15 minutes before the start of the activity. Activity should take place/be displayed in ....days. This b is additive, as e.g. clicking twice on a number will add it s that the event will take place in as many days again. Clicking several times on a day number will multiply it. Example: Clicking twice on "7 days = 14 days". The activity is scheduled for this contact, e.g. it appears this contact detail in the Activities tab. You can associate activities with groups and companies. The associated activities will be displayed on the Activitie tab of the group or company. As default value the registered user is displayed. Select in the Regarding field a subject for the history o enter a Regarding. Define the priority with fitting colors Mark the activity as private to prevent other ACT! users from viewing it (unless they are involved in the activity). Dial|IT Features . 117 Clicking here will check whether there is already another activity at the same time. In case of any conflict you ha the following possibilities: 1. Click on Accept to schedule the activitiy for the stated time. 2. Click on New Schedule to return to the Schedule Activity dialog field and change date and time of t activity. In configuration you can also define a message appearing the activity would be on a weekend. Configuration → Details Setting → ToDo List settings Details Enter details of the scheduled activity in the text field. In case of a meeting, e.g. the individual topics of conversations / items of the meeting, pauses, participant ... See also DIAL|IT 118 . Dial|IT Features Group Membership Sending report/email templates by email About the report designer Home > Dial|IT Features > History Pop Up > Group Membership Group Membership With Dial|IT CallCenter you have a possibility to edit the group membership of the called contact. In the history PopUp you will find a tab named 'Group'. On this tab all ACT! groups are shown. This icon in front of a group shows that the current contact is a member of this group. By doubleclicking on a group you can either remove or add the contact to this group. DIAL|IT Dial|IT Features . 119 With a click on all sub groups will be expanded. DIAL|IT 120 . Dial|IT Features With a click on only the main groups will be displayed. See also Activity Sending report/email templates by email About the report designer Home > Dial|IT Features > History Pop Up > Sending report/email templates by email Sending report/email templates by email With Dial|IT CallCenter you are able to send email and report templates at the same time you are talking by phone. In History Pop Up you can see a new window "Email and Report". If you setup everything in Configuration, you should press Standardsettings button. Fields EmailProfile, EmailAccount, Password, CC, BCC, Email Template and Report Template will be loaded automatically. Function Description Subject Here you can write any subject for email / report template or choose one from Regarding field above. Use report as Emailtext Your Report template will not be sent as attachment, but as Email body / text See also DIAL|IT Dial|IT Features . 121 Home > Dial|IT Features > History Pop Up > About the report designer CRMADDON's Online Help Report Designer is a similar to ACT! report designer tool. It allows you to generate reports and create your own report templates. It is built in Table IT, Dial IT, Service IT and Scan IT addons. With Report Wizard you can create templates and send them by email to your contacts. Report Wizard gives you an opportunity to create a report template, select which variables will be added to it. Report Designer will help you to add content to this template about your service making the report more user friendly. Later those reports can be sent by email to your contacts and leads improving your sales and saving your time for creating follow ups for each particular case. [popular pages] Home > Dial|IT Features > History Pop Up > About the report designer > Report Wizard Standard Report Report Wizard With Report Wizard you can create a report template, please click button to open your report wizard. This wizard will help you to select the information you would like to display in your report and set needed layout. DIAL|IT 122 . Dial|IT Features Select whether you want to create a Standard Report or a Label Report. Then click . Using this wizard, you can easily create a banded report displaying data in a tabular format. While setting up your report, you'll be able to group data, add totals to your report, apply one of the predefined report styles, etc. This wizard is also useful if you need to print out labels. In this case, you're likely to purchase label paper that meets your particular requirements. Depending on paper supplier and label type, your report will need to generate labels with a specific size and location within paper sheets. DIAL|IT With the Label Report Wizard, you won't have to adjust these settings manually, since a wide choice of paper suppliers and their products supported. Simply choose your paper type, and the report is adjusted automatically. After completing the wizard, you get an empty report that clearly indicates label boundaries, and of course, properly positions labels within paper sheets. Dial|IT Features . 123 Define the columns which shall be shown in your report. By clicking the defined columns will be selected for your report, if you click all columns will be selected for the report. Afterwards click get to the next step. to If you want to group by specific columns you can define these columns here. Afterwards please click . This page allows you to group data in your report. For instance, if you are displaying car sales information, you may want to keep records corresponding to the same model together. Each set of records with the same model will become a "group" with its own header. DIAL|IT 124 . Dial|IT Features Define the layout of your report and click . This page sets the layout of elements in your report. If you haven't applied data grouping, you can specify how data field values are arranged into a table, one under another, etc. If report data is grouped, you can choose one of the available indentation styles for nested elements. Additionally, this page allows you to specify the page orientation for your report. Define a style for the font and click DIAL|IT . Dial|IT Features . 125 Give your report a name and click wizard. to end the After completing the Standard Report wizard, you will get a tabular banded report. Depending on how many wizard steps you complete (you don't necessarily have to go through all the pages), you can apply data grouping, display totals, select one of the predefined style sheets, etc. The following image shows a sample report created using the Standard Report Wizard: If you would like to edit an existing report created with Report Wizard, you may use Report Designer : DIAL|IT 126 . Dial|IT Features See also: Report Wizard Labeled Report Report Designer Home > Dial|IT Features > History Pop Up > About the report designer > Report Wizard Labeled Report Report Wizard ‐ Labeled Report When you need to print out stickers or, say, waterproof labels, you need to purchase the appropriate paper. Every supplier will provide it's own specific label size or label position within a paper sheet. To make it easier for you to produce labels, this wizard step lists several label paper suppliers and their products. Once you've selected a supplier and a product (paper and label type), the report will change its settings so that your labels will be printed exactly where they're supposed to, without you having to adjust the label position and size manually. Page Interface On this page, choose the supplier from the Label Products combo box and a particular product from the Product Number list. The box on the lefthand side will be updated to show you label dimensions for the currently selected product. DIAL|IT Dial|IT Features . 127 If you don't need further customization, click Finish to complete the report adjustment. If manual correction of label or paper size is required, click Next. On this page, you can manually adjust settings that were automatically specified in the previous step, based on your supplier and product choice. Page Interface Editors on this page allow free customization of all parameters specified on the previous page. The pane on the lefthand side provides a label dimensions preview based on current values. Click Finish to complete report setup. DIAL|IT 128 . Dial|IT Features See also Report Wizard ‐ Standard Report Report Designer Home > Dial|IT Features > History Pop Up > About the report designer > Report Designer Report Designer Report designer allows you to make needed design for your report template, add images, text, links, etc. After making a report template with Report Wizard you will need to use Report Designer to edit it and make it more user friendly. Simple template made with Report Wizard will contain only fields' details that were selected for the report. The Report Designer will help you to add there other content describing your services or the purpose of this report. The following example shows how to create a report template with Report Designer tool. 1. Using Report Wizard choose Standard Report. 2.Columns to display in our report will be: Contact, Department, Title and Company. 3. Let's make Contact column to be as a group level. 4.In the next window we will choose Outline 1 as a layout and Landscape as orientation. 5.Style for our report will be Bold. 6.The title for our report will be "Dial IT professional". If you change your mind about names of fields, slyles e.t.c., you can change them in Report Designer easily.As a result you will see this window of report designer. Callouts point to important areas. DIAL|IT Dial|IT Features . 129 You can preview you report by clicking HTML View or Preview icons. DIAL|IT 130 . Dial|IT Features Let's come back to our report designer by clicking on the Designer button.We will add our template body to the field right after the area with Company, Department and Title data. In our template the name of this field is "DetailBand1". DIAL|IT Dial|IT Features . 131 Every template consists of different blocks with text, images, diagrams. All blocks in Report Designer may be easily moved within template from one place to another. With the help of your mouse you can change the size of the blocks. You can write text to the block and change font name, font size, font style, font color and alignment with the help of these icons in the top menu: As a sample let's click on two Contact fields in DroupHeaderBand1 at the top of our template and move it down to DetailBand1. In the first field let's change the text from "Contact" to "Dear". Let's also make second field wider and change font style. ==> If you click on any block in Report Designer to activate it, you will see this small icon at the top right corner. By clicking on this icon you will open menu of the block. The DIAL|IT 132 . Dial|IT Features content of the menu depends on icon type. The main functions are: 1.Establish linkage between block and ACT! data. For example when you send one template to different ACT! contacts, Report Designer will put correct name of current contact, his contact details or history data. 2.You can download data to the block (e.g. picture or text in .rtf or .txt format). As a sample let's change contact name "Chris Huffman" to Salutation, so the text will be "Dear Chris". For this you should press icon and choose Salutation in Data Binding field. You can create blocks by selecting icons on Standard Controls panel (on the left) and moving them to the template body. As a sample let's create a text for Dial IT Professional presentation. You can do it with the help of Lable icon or Rich Text icon. You can write the text or paste it. You can take text from ACT! database or download a file. Lable icon allows you to apply text formatting for the text. However you cannot edit the part of the text block because font style will be the same withing one block. Rich Text icon allows you to put it's own font name, font size, font style, font color and alignment for every sentence or for every word. Here you can also download text in rtf or txt formats. In our sample we need Rich Text icon. So we move it to the template with mouse and paste the text. For the first sentence we will choose different text style. DIAL|IT Dial|IT Features . 133 Then we may move our text block to the right side of the template and upload picture to the left side. IMPORTANT: To be sure that the images are visible on the customer's side please upload all images to FTP server and use Image URL Links, e.g.: www.addonsfor act.de/Images/boxes/dialit.png Usually you need to write the names of the pictures in small letters and without spaces: DIAL|IT 134 . Dial|IT Features Below the picture let's put URL link to Dial IT manual. Finally our report is ready. DIAL|IT Dial|IT Features . 135 See also: Report Wizard Standard Report Report Wizard Labeled Report Home > Dial|IT Features > History Pop Up > About the report designer > Report Designer > Report Editing Report editing To guarantee that you will be able to revert your report to its original state, you need to create a backup copy. Then, you can apply changes without worrying that it will be hard to restore your report, in case something breaks. To save a copy of your report, in the Main Menu, select File / Save As. Then, in the invoked standard Save File dialog, specify the folder and file name. To save the current layout of your report, in the Main Menu select File / Save, or press CTRL+S. In thiscase, the report will be saved in the application's current folder. After your report is saved, its path is displayed in the Report Designer's title bar. To load a previously saved report, in the Main Menu, click File | Open, or press CTRL+O. The standard Open File dialog will allow you to locate and open report files. Change Element Layout in your Report: To select a control, simply click it. To select the next control in tab order, press TAB. To select the previous control in tab order, click SHIFT + TAB. Individual controls can be moved, DIAL|IT 136 . Dial|IT Features using either mouse or keyboard. To resize a control using the mouse, select it, and then drag a rectangle drawn on its edge or corner. To resize an element using the keyboard, press SHIFT+ARROW or CTRL+SHIFT+ARROW. To select multiple elements, do one of the following: Click elements while holding CTRL or SHIFT. Click on a blank space and drag the mouse to create a selection frame. When the mouse button is released, all controls within the selection frame's boundaries will be selected. In this case, the previous selection is cleared. Change Fonts and Colors of Report Elements To change fonts and colors (as well as paddings, text alignment and other appearance properties) of a report control or band, select this element and do one of the following: Use the Formatting Toolbar. Use the Property Grid, where all appearancerelated properties are located under the Appearance category. DIAL|IT Dial|IT Features . 137 Note that the appearance settings of a band are applied to all controls contained within it. See also Report Designer User Interface Home > Dial|IT Features > History Pop Up > About the report designer > Report Designer > Report Editing > Add or Modify Static Information in Your Report Add or Modify Static Information in Your Report In a report, static and dynamic information is displayed using appropriate controls. Dynamic information changes through a report, it can include values from a database (which comprise the main report data) or service information (such as current user name or page numbers). Static information is text or images that aren't obtained from a data source, and therefore don't change through the report, and don't depend on the current computer. Static information can be printed only once (e.g. in a Report Header), can repeat on each page (e.g. in a Page Header) or can repeat with every entry in your report's data source. DIAL|IT 138 . Dial|IT Features Change Static Information Text elements (e.g. Labels and Rich Text Boxes) allow inplace editing of their content. Simply doubleclick an element and activate the editor. Another way to change a control's static information, is by clicking its Smart Tag. Then, the invoked actions list will contain a link (or, a button) allowing you to edit this control's content. Load Static Information to Your Report To load static information to your report from an external file, drop an appropriate control from the Control Toolbox (e.g. Label, Rich Text Box or Picture Box). After it is properly positioned, edit its content using the Smart Tag. For instance, the following instructions describe how to display a rich text (a formatted text with embedded images) into your report. DIAL|IT Dial|IT Features . 139 Drop the Rich Text control from the Toolbox onto the Detail band. To load content from an external RTF or TXT file, select the created control and click its Smart Tag. In the invoked actions list, click the Load File... link. Then, in the invoked dialog, locate the required file, and click Open. See also Home > Dial|IT Features > History Pop Up > About the report designer > Report Designer > Report Designer User Interface Report Designer User Interface This section contains detailed description of some Report Designer user interface elements: Context menu Control Toolbox Design Panel Designer Tab Formatting Toolbar See also Report Editing Home > Dial|IT Features > History Pop Up > About the report designer > Report Designer > Report Designer User Interface > Context Menu Context Menu The Context Menu can be invoked by the rightclicking a report... DIAL|IT 140 . Dial|IT Features or its elements (bands and controls). This menu provides quick access to frequently used commands (e.g. zooming, clipboard operations, inserting bands, etc.) The available action set varies, depending on the element See also Control Toolbox Design Panel Designer Tab Formatting Toolbar Home > Dial|IT Features > History Pop Up > About the report designer > Report Designer > Report Designer User Interface > Control Toolbox Control Toolbox The Control Toolbox lists all available controls and allows you to add them to your report. DIAL|IT Dial|IT Features . 141 To add a control from the Toolbox, do one of the following. Doubleclick an item in the Toolbox for the appropriate control, which will be created at the Detail band's top left corner. Drag and drop an item from the Toolbox onto the required location within a report. Select an item in the Toolbox, and then click the required location within a report. Select an item in the Toolbox, and then indicate the bounding rectangle by holding the left mouse button. Select the Pointer item when you need to perform selection, repositioning or resizing operations. It is automatically selected after you drop a control onto a report. If the Toolbox is hidden, you can enable it in the Main Menu, by selecting View / Toolbars / Toolbox. See also Context Menu Design Panel Designer Tab Formatting Toolbar Home > Dial|IT Features > History Pop Up > About the report designer > Report Designer > Report Designer User Interface > Design Panel Design Panel The Design Panel is the Report Designer's main area, where a report is being constructed and previewed. DIAL|IT 142 . Dial|IT Features On the Designer Tab, multiple reports can be opened at once (each in its own Design Panel). The Design Panel provides the following tabs (switched at the bottom): Designer Tab Allows you to modify your report. Preview Tab Shows a print preview, and enables you to print out your report or export it to a file on disk. HTML View Tab Shows the report output in HTML format. Scripts Tab Allows you to manage your report's scripts. See also Context Menu Control Toolbox Designer Tab Formatting Toolbar Home > Dial|IT Features > History Pop Up > About the report designer > Report Designer > Report Designer User Interface > Designer Tab Designer Tab The Designer Tab allows you to customize a report, manage its bands and controls and define their properties. DIAL|IT Dial|IT Features . 143 See also Context Menu Control Toolbox Design Panel Formatting Toolbar Home > Dial|IT Features > History Pop Up > About the report designer > Report Designer > Report Designer User Interface > Formatting Toolbar Formatting Toolbar The Formatting Toolbar allows you to easily customize an element's font, color and alignment settings. If the Formatting Toolbar is hidden, you can enable it in the Main Menu, by selecting View / Toolbars / Formatting Toolbar. See also Context Menu Control Toolbox Design Panel Designer Tab DIAL|IT Index A Activity 115 Activity for missed calls 78 add content to template 128 Add license 49 Add to Contact 109 Alert Settings 62 Analyse your license 54 Ask to reset your computer from license 51 License 33 License details 54 License info 33 License information 23 Licensing , 16 25 List of phone calls 106 local Area code 65 Local Area Code Settings 72 M make a report template 121 Manage ToDo's 75 Modem 65 B O Bring window on front 64 Offline Installer 16 Open last contact 97 Order license 46 C Call a contact 93 Call from clipboard 96 Central Settings 65 Codes/Prefix settings 65 Common Settings 62 Configuration 23 Contact 23 Contact list 97 P PopUp 108 PopUp Settings , 58 68 PopUp View 62 PopUpIcons 108 Print report 102 R D Deactivate computer from license 39 Deactivate local computer from license 39 Deactivate other computers from license 39 Device selection 65 Display Speed 62 Redirecting 65 Registration key 33 Repair Phone Field Values 68 report designer 128 report wizard 121 Requirements 14 E S Evaluate 29 Example for speed dial 74 Search Criteria 68 Search criterias 68 select layout 121 Send request 45 Send request to support 53 Send reset request 51 Show log file 63 Speeddial 68 Spell check 63 Spellcheck 63 Spellchecker 63 System requirements 16 F Field selection 60 Folder path 63 Folder Settings 63 H History PopUp 112 History settings 79 I Icon Description 58 Icon View 58 Inbound Call 108 Installation 16 Installation without Internet 21 Internal Phone Numbers 71 Internanl numbers 68 L Length of caller ID 68 T TAPI drivers 14 TAPI providers 14 TapiTrace 65 ToDo List 76 ToDo's Grouping 98 ToDo's View 98 Trial 29 U Update license 49 Update license online 37 Upgrade ACT 47 Upgrade product version 47 Use extention 68 Use headset 65 Use spellchecker 63 V Version number 23 W Welcome 1 Window handling 64 Window on front 64 Wizard options 25


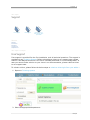
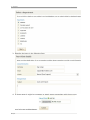

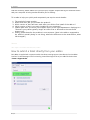
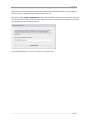
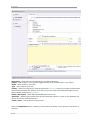


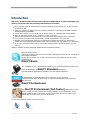
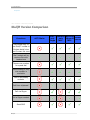
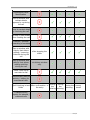
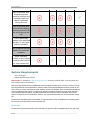

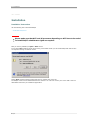


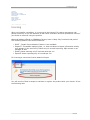

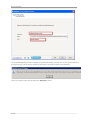
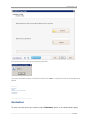
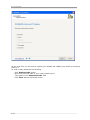

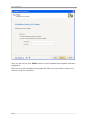
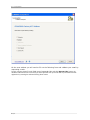
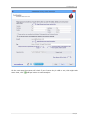
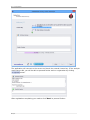


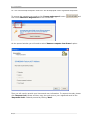

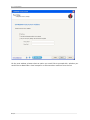
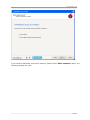
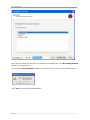
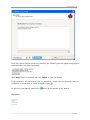
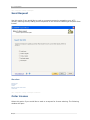
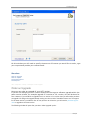

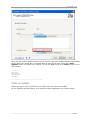
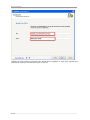
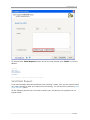

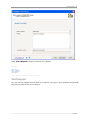
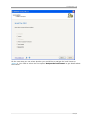
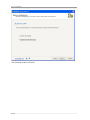
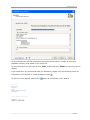
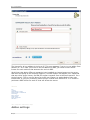
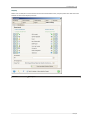
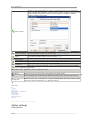
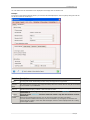
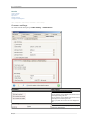
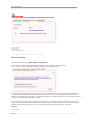
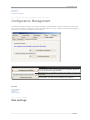
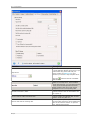
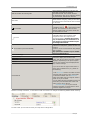
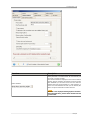
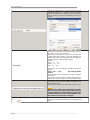
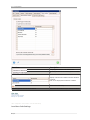
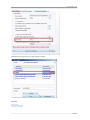
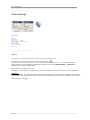
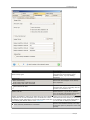
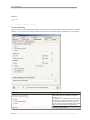

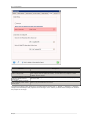
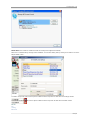

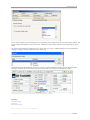

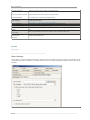
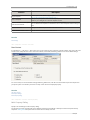
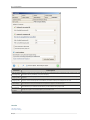

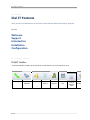
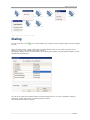
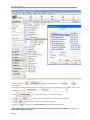
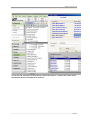
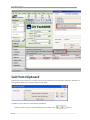
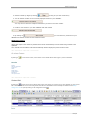


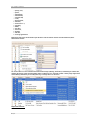
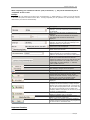
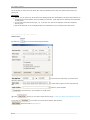

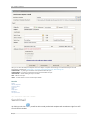
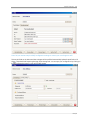
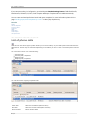
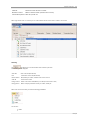
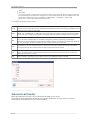
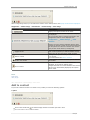
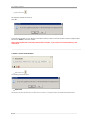
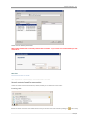
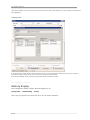
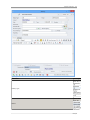

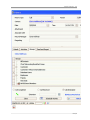
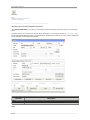
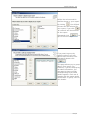
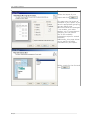
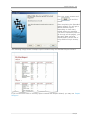
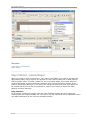
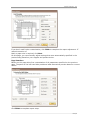
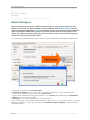
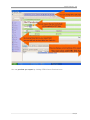

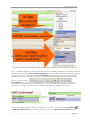
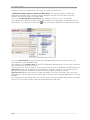
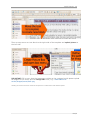
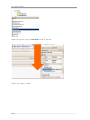

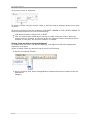

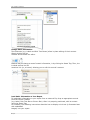
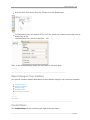
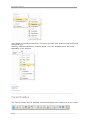
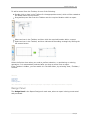

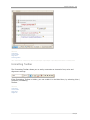


![[OUTREACH] - CRMADDON Factory](http://vs1.manualzilla.com/store/data/006790462_1-5b3f90ba3ef7d9f83133c56a18309581-150x150.png)