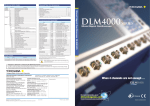
1
User’s
User’s
Manual
Manual
Model MLD1
Loop
Powered
Model
MLD1Process Indicator
Loop Powered Process Indicator
IM 61A01A01-01E-A
IM61A01A01-01E-A_005
IM 61A01A01-01E-A
IM 61A01A01-01E-A
3rd Edition
IM61A01A01-01E-A_005
IM 61A01A01-01E-A
54thth Edition
Edition
Page 2 of 25
Contents
Page 3 of 25
Contents.................................................................................................................... 2
1. Introduction .......................................................................................................... 3
Regarding This Manual ................................................................................. 3
1.1 Safe Use of This Product ............................................................................... 4
1.2 Warranty .......................................................................................................... 5
1.3 ATEX Documentation..................................................................................... 5
2. Handling Cautions................................................................................................ 7
2.1 Model and Specifications Check .................................................................. 7
2.2 Unpacking ....................................................................................................... 8
2.3 Storage ............................................................................................................ 8
2.4 Selecting the Installation Location ............................................................... 8
2.5 Insulation Resistance and Dielectric Strength Test ................................. ..9
2.6 Installation of an Explosion-Protected Instrument ................................... ..9
2.6.1 CENELEC ATEX Certification ............................................................... 10
3. Installation ......................................................................................................... 12
3.1 Mounting Examples...................................................................................... 13
4. Wiring .................................................................................................................. 14
4.1 Wiring Precautions....................................................................................... 14
4.2 Selecting the Wiring Materials .................................................................... 14
4.3 Wiring............................................................................................................. 14
4.3.1 Loop Configuration................................................................................ 14
5. Operation ............................................................................................................ 17
6. Maintenance ....................................................................................................... 18
6.1 Overview........................................................................................................ 18
6.2 Calibration Instruments Selection .............................................................. 18
6.3 Calibration ..................................................................................................... 18
6.4 Rotating Display Direction........................................................................... 20
6.5 Cleaning ........................................................................................................ 20
7. General Specifications ...................................................................................... 21
7.1 Standard Specifications............................................................................... 21
7.2 Model and Suffix Codes............................................................................... 22
7.3 Ordering Instructions................................................................................... 22
7.4 Options .......................................................................................................... 22
7.5 Dimensions ................................................................................................... 23
Revision Record..................................................................................................... 24
IM 61A01A01-01E-A
1. Introduction
Page 3 of 25
Page 4 of 26
Thank you for purchasing the Model MLD1 Loop Powered Process Indicator. Your Model MLD1
Process Indicator was precisely calibrated at the factory before shipment. To ensure both safety and
efficiency, please read this manual carefully before you operate the instrument.
The Model MLD1 field mounted indicator receives DC current signals from electronic transmitters
and indicates process measurement values. This instruction manual gives instructions on handling,
mounting, and wiring of the indicator.
� Regarding This Manual
• This manual should be provided to the end user.
• The contents of this manual are subject to change without prior notice.
• All rights reserved. No part of this manual may be reproduced in any form without
Yokogawa’s written permission.
• Yokogawa makes no warranty of any kind with regard to this manual, including, but not
limited to, implied warranty of merchantability and fitness for a particular purpose.
• If any question arises or errors are found, or if any information is missing from this manual,
please inform the nearest Yokogawa sales office.
• The specifications covered by this manual are limited to those for the standard type under the
specified model number break-down and do not cover custom-made instruments.
• Please note that changes in the specifications, construction, or component parts of the
instrument may not immediately be reflected in this manual at the time of change, provided
that postponement of revisions will not cause difficulty to the user from a functional or
performance standpoint.
• Yokogawa assumes no responsibilities for this product except as stated in the warranty.
• If the customer or any third party is harmed by the use of this product, Yokogawa assumes no
responsibility for any such harm owing to any defects in the product which were not
predictable, or for any indirect damages.
• The following safety symbols are used in this manual:
WARNING
Indicates a potentially hazardous situation which, if not avoided, could result in death or serious injury.
IM 61A01A01-01E-A
Page 4 of 25
Page 5 of 26
CAUTION
Indicates a potentially hazardous situation which, if not avoided, may result in minor or moderate
injury. It may also be used to alert against unsafe practices.
IMPORTANT
Indicates that operating the hardware or software in this manner may damage it or lead to system
failure.
NOTE
Draws attention to information essential for understanding the operation and features.
1.1 Safe Use of This Product
For the safety of the operator and to protect the instrument and the system, please be sure to follow
this manual’s safety instructions when handling this instrument. If these instructions are not heeded,
the protection provided by this instrument may be impaired. In this case, Yokogawa cannot
guarantee that the instrument can be safely operated. Please pay special attention to the following
points:
(a) Installation
• This instrument may only be installed by an engineer or technician who has an expert
knowledge of this device. Operators are not allowed to carry out installation unless they meet
this condition.
• All installation shall comply with local installation requirements and the local electrical code.
(b) Wiring
• The instrument must be installed by an engineer or technician who has an expert knowledge
of this instrument. Operators are not permitted to carry out wiring unless they meet this
condition.
• Before connecting the power cables, please confirm that there is no current flowing through
the cables and that the power supply to the instrument is switched off.
(c) Operation
• Do not open the covers when an explosive atmosphere is present.
IM 61A01A01-01E-A
Page 5 of 25
Page 6 of 26
(d) Maintenance
• Please carry out only the maintenance procedures described in this manual. If you require
further assistance, please contact the nearest Yokogawa office.
• Care should be taken to prevent the build up of dust or other materials on the display glass
and the name plate.
(e) Modification
• Yokogawa will not be liable for malfunctions or damage resulting from any modification
made to this instrument by the customer.
1.2 Warranty
•
•
•
•
•
The warranty shall cover the period noted on the quotation presented to the purchaser at the
time of purchase. Problems occurring during the warranty period shall basically be repaired
free of charge.
If any problems are experienced with this instrument, the customer should contact the
Yokogawa representative from which this instrument was purchased or the nearest
Yokogawa office.
If a problem arises with this instrument, please inform us of the nature of the problem and the
circumstances under which it developed, including the model specification and serial
number. Any diagrams, data and other information you can include in your communication
will also be helpful.
The party responsible for the cost of fixing the problem shall be determined by Yokogawa
following an investigation conducted by Yokogawa.
The purchaser shall bear the responsibility for repair costs, even during the warranty period,
if the malfunction is due to:
- Improper and/or inadequate maintenance by the purchaser.
- Malfunction or damage due to a failure to handle, use, or store the instrument in
accordance with the design specifications.
- Use of the product in question in a location not conforming to the standards specified by
Yokogawa, or due to improper maintenance of the installation location.
- Failure or damage due to modification or repair by any party except Yokogawa or an
approved representative of Yokogawa.
- Malfunction or damage from improper relocation of the product in question after
delivery.
- Reason of force majeure such as fires, earthquakes, storms/floods, thunder/lightening, or
other natural disasters, or disturbances, riots, warfare, or radioactive contamination.
1.3 ATEX Documentation
This is only applicable to the countries in the European Union.
GB
All instruction manuals for ATEX Ex related products are available in English, German and French.
Should you require Ex related instructions in your local language, you are to contact your nearest
Yokogawa office or representative.
IM 61A01A01-01E-A
Page 6 of 25
Page 7 of 26
DK
Alle brugervejledninger for produkter relateret til ATEX Ex er tilgængelige på engelsk, tysk og
fransk. Skulle De ønske yderligere oplysninger om håndtering af Ex produkter på eget sprog, kan De
rette henvendelse herom til den nærmeste Yokogawa afdeling eller forhandler.
I
Tutti i manuali operativi di prodotti ATEX contrassegnati con Ex sono disponibili in inglese, tedesco
e francese. Se si desidera ricevere i manuali operativi di prodotti Ex in lingua locale, mettersi in
contatto con l’ufficio Yokogawa più vicino o con un rappresentante.
E
Todos los manuales de instrucciones para los productos antiexplosivos de ATEX están disponibles
en inglés, alemán y francés. Si desea solicitar las instrucciones de estos artículos antiexplosivos en su
idioma local, deberá ponerse en contacto con la oficina o el
representante de Yokogawa más cercano.
NL
Alle handleidingen voor producten die te maken hebben met ATEX explosiebeveiliging (Ex) zijn
verkrijgbaar in het Engels, Duits en Frans. Neem, indien u aanwijzingen op het gebied van
explosiebeveiliging nodig hebt in uw eigen taal, contact op met de dichtstbijzijnde vestiging van
Yokogawa of met een vertegenwoordiger.
SF
Kaikkien ATEX Ex -tyyppisten tuotteiden käyttöhjeet ovat saatavilla englannin-, saksan- ja
ranskankielisinä. Mikäli tarvitsette Ex -tyyppisten tuotteiden ohjeita omalla paikallisella
kielellännne, ottakaa yhteyttä lähimpään Yokogawa-toimistoon tai -edustajaan.
P
Todos os manuais de instruções referentes aos produtos Ex da ATEX estão disponíveis em Inglês,
Alemão e Francês. Se necessitar de instruções na sua lingual relacionadas com produtos Ex, deverá
entrar em contacto com a delegação mais próxima ou com um representante da Yokogawa.
F
Tous les manuels d’instruction des produits ATEX Ex sont disponibles en langue anglaise,
allemande et française. Si vous nécessitez des instructions relatives aux produits Ex dans votre
langue, veuillez bien contacter votre représentant Yokogawa le plus proche.
D
Alle Betriebsanleitungen für ATEX Ex bezogene Produkte stehen in den Sprachen Englisch,
Deutsch und Französisch zur Verfügung. Sollten Sie die Betriebsanleitungen für Ex-Produkte in
Ihrer Landessprache benötigen, setzen Sie sich bitte mit Ihrem örtlichen Yokogawa-Vertreter in
Verbindung.
S
Alla instruktionsböcker för ATEX Ex (explosionssäkra) produkter är tillgängliga på engelska, tyska
och franska. Om Ni behöver instruktioner för dessa explosionssäkra produkter på annat språk, skall
Ni kontakta närmaste Yokogawakontor eller representant.
IM 61A01A01-01E-A
Page 7 of 25
Page 8 of 26
2. Handling Cautions
This chapter provides important information on how to handle the MLD1 Loop Powered Process
Indicator. Read this carefully before using the indicator.
The MLD1 indicator is thoroughly tested at the factory before shipment. When taking delivery of an
instrument, visually check it to make sure that no damage occurred during shipment.
Also check that the indicator mounting hardware shown in figure 2.1 is included. After checking the
indicator, carefully repack it in its box and keep it there until you are ready to install it.
Horizontal Pipe Mounting
Figure 2.1 MLD1 Mounting Hardware
2.1 Model and Specifications Check
The model name and specifications are written on the name plate attached to the case.
IM 61A01A01-01E-A
Page 8 of 25
Page 9 of 26
MLD
A2/KS
1
1
200
9
035
9
ASSEMBLED IN USA
WITH
FOREIGN
AND
DOMESTIC
PART
S
28V
II200mA
1 Ga Ex ia IIC T5
0.85W
0
0
Tamb.
-10 to
70°C
Enclosure:
IP67
No:
ITS09ATEX26770X
Ui =
Ii =
Pi =
Ci =
Li =
WARNIN
DO G
NOT OPEN WHEN AN
EXPLOSIVE
ATMOSPHERE MAY BE PRESENT. INSTALL
IN
ACCORDANCE WITH THE INSTRUCTION
MANUAL.
MODEL: Specified model code.
SUFFIX: Specified suffix code.
MFG: Year of manufacture.
NO.: Serial number.
INPUT: Input signal (4-20mA).
CALIB RANGE: Specified calibration range.
Figure 2.2 MLD1 Name Plate
2.2 Unpacking
Keep the indicator in its original packaging to prevent it from being damaged during shipment. Do
not unpack the indicator until it reaches the installation site.
2.3 Storage
The following precautions must be observed when storing the instrument, especially for a long
period.
(a) Select a storage area which meets the following conditions:
• It is not exposed to rain or subject to water seepage/leaks.
• Vibration and shock are kept to a minimum.
• It has an ambient temperature and relative humidity within the following ranges.
Ambient temperature: –10 to 70°C
Relative humidity: 0% to 100% R.H.
Preferred temperature and humidity: approx. 25°C and 65% R.H.
(b) When storing the indicator, repack it carefully in the packaging that it was originally shipped
with.
2.4 Selecting the Installation Location
(1) The MLD1 is designed to withstand severe environmental conditions. However, to ensure
that it will provide years of stable and accurate performance, take the following precautions
when selecting the installation location.
(2) Ambient Temperature
(3) Avoid locations subject to wide temperature variations or a significant temperature gradient.
If the location is exposed to radiant heat from plant equipment, provide adequate thermal
insulation and/or ventilation.
(4) Ambient Atmosphere
IM 61A01A01-01E-A
Page 9 of 25
Page 10 of 26
(5) Do not install the indicator in a corrosive atmosphere. If this cannot be avoided, there must be
adequate ventilation as well as measures to prevent the leaking of rain water and the presence
of standing water in the conduits.
(6) Shock and Vibration
(7) Although the MLD1 is designed to be relatively resistant to shock and vibration, an
installation site should be selected where this is kept to a minimum.
2.5 Insulation Resistance and Dielectric Strength Test
Since the MLD1 has undergone insulation resistance and dielectric strength tests at the factory
before shipment, normally these tests are not required. If the need arises to conduct these tests, heed
the following:
(1) Do not perform such tests more frequently than is absolutely necessary. Even test voltages
that do not cause visible damage to the insulation may degrade the insulation and reduce
safety margins.
(2) Never apply a voltage exceeding 500 V DC (100 V DC with an internal lightning protector)
for the insulation resistance test, nor a voltage exceeding 500 V AC (100 V AC with an
internal lightning protector) for the dielectric strength test.
(3) Before conducting these tests, disconnect all signal lines from the transmitter terminals. The
procedure for conducting these tests is as follows:
• Insulation Resistance Test
(1) Short-circuit the + and – SUPPLY terminals in the terminal box.
(2) Turn OFF the insulation tester. Then connect the insulation tester plus (+) lead wire to
the shorted SUPPLY terminals and the minus (–) lead wire to the grounding terminal.
(3) Turn ON the insulation tester power and measure the insulation resistance. The
voltage should be applied as briefly as possible to verify that the insulation resistance
Ω
(4) After completing the test and being very careful not to touch exposed conductors
Ω
disconnect the
between the grounding
terminal and the short-circuiting SUPPLY terminals. Leave this resistor connected at
least one second to discharge any static potential. Do not touch the terminals while it
is discharging.
•
Dielectric Strength Test
(1) Short-circuit the + and – SUPPLY terminals in the terminal box.
(2) Turn OFF the dielectric strength tester. Then connect the tester between the shorted
SUPPLY terminals and the grounding terminal. Be sure to connect the grounding lead
of the dielectric strength tester to the ground terminal.
(3) Set the current limit on the dielectric strength tester to 10mA, then turn ON the power
and gradually increase the test voltage from ‘0’ to the specified voltage.
(4) When the specified voltage is reached, hold it for one minute.
(5) After completing this test, slowly decrease the voltage to avoid any voltage surges.
2.6 Installation of an Explosion-Protected Instrument
WARNING
IM 61A01A01-01E-A
Page 10 of 25
Page 11 of 26
If a customer makes a repair or modification to an intrinsically safe instrument and the
instrument is not restored to its original condition, its intrinsically safe construction may be
compromised and the instrument may be hazardous to operate. Please contact Yokogawa
before making any repair or modification to an instrument.
CAUTION
This instrument has been tested and certified as being intrinsically safe. Please note that
severe restrictions apply to this instrument’s construction, installation, external wiring,
maintenance and repair. A failure to abide by these restrictions could make the instrument a
hazard to operate.
WARNING
Maintaining the safety of intrinsically safe equipment requires great care during mounting,
wiring, and piping. Safety requirements also place restrictions on maintenance and repair.
Please read the following sections very carefully.
2.6.1 CENELEC ATEX Certification
1) Technical Data
a. CENELEC ATEX Intrinsically Safe Type
Caution for CENELEC ATEX Intrinsically safe type.
Note 1. Model MLD1 Loop Process Indicator with optional code /KS1 for
potentially explosive atmospheres:
•
•
•
•
•
•
•
•
Certificate No. ITS09ATEX26770X
Applicable Standard: EN 60079-0:2004, EN 60079-11:2007, EN 60079-26:2004
Type of Protection and Marking code: Ex ia IIC T5
Group: II
Category: 1
Equipment Protection Level: Ga
Ambient Temperature: –10 to 70°C
Enclosure rating: IP67
Note 2. Electrical Data
• In the case where the type of explosion protection is intrinsically safe, Ex ia IIC, only
connect to a certified intrinsically safe circuit with the following maximum values:
Ui = 28 V
Ii = 200mA
IM 61A01A01-01E-A
Page 11 of 25
Page 12 of 26
Pi = 0.85 W
Effective internal capacitance; Ci = 0
Effective internal inductance; Li = 0
Note 3. Installation
• All wiring shall comply with local installation requirements. (Refer to the installation
diagram)
Note 4. Maintenance and Repair
• The instrument modification or parts replacement by other than authorized
representative of Yokogawa Electric Corporation is prohibited and will void Intrinsically
Safe Certification.
Note 5. Special Conditions for Safe Use
• In the case where the enclosure of the MLD1 is made of aluminum, if it is mounted in
an area where the use of category 1 Ga apparatus is required, it must be installed such,
that, even in the event of rare incidents, ignition sources due to impact and friction sparks
are excluded.
IM 61A01A01-01E-A
3. Installation
Page Page 12
13 of
of 25
26
WARNING
The MLD1 MUST be protected by a zener barrier or galvanic isolator whose output
parameters do not exceed the following:
Io = 200mA
Po = 0.85W
Uo = 28V
The capacitance and either the inductance, or the inductance to resistance (L/R) ratio of the cables in
the hazardous area MUST NOT exceed the parameters specified in the schedule of the chosen safety
barrier certificate, and/or system certificate.
The MLD1 has a maximum equivalent capacitance and inductance between the 4-20mA terminals
of:
Ci = 0
Li = 0
These values MUST be subtracted from the maximum cable capacitance and inductance permitted
by the system certificate of the loop to determine the maximum permissible cable parameters.
The complete electrical circuit in the hazardous area MUST be capable of withstanding an AC test
voltage of 500V RMS to earth or frame of the apparatus.
The MLD1 can be mounted on a wall or a 2” pipe. The housing is IP67 rated so it can be mounted
outside in the field.
"0 Ring" seals MUST be carefully examined after opening to ensure that the IP67 protection is
maintained. Damaged seals MUST be replaced.
Where there is a possibility of attack by aggressive substances, the MLD1 must be protected by a
suitable enclosure, capable of protecting it from the environment and the effects of impact, thermal
or mechanical stress.
Do not install the MLD1 in the following conditions:
•
•
•
Extreme Temperatures beyond the temperature rating of the instrument.
High vibration areas above the vibration rating of the instrument.
Extremely corrosive environments.
Installation MUST comply with the requirements specified in EN 60079-14:2008 and must be
performed by suitably qualified staff only.
IM 61A01A01-01E-A
Page 13 of 25
Page 14 of 26
3.1 Mounting Examples
Figure 3.1 Mounting configurations
IM 61A01A01-01E-A
4. Wiring
Page 14 of 25
Page 15 of 26
4.1 Wiring Precautions
IMPORTANT
• Lay wiring as far as possible from electrical noise sources such as large capacity
transformers, motors, and power supplies.
• Remove the electrical connection dust cap before wiring.
• To prevent noise pickup, do not pass signal and power cables through the same ducts.
• Explosion-protected instruments must be wired in accordance with specific requirements
(and, in certain countries, legal regulations) in order to preserve the effectiveness of their
explosion-protected features.
The MLD1 is powered by the current output loop and does not require external power. All devices
must be wired in series with the current loop. Twisted pair shielded cable is recommended.
4.2 Selecting the Wiring Materials
(a) Use stranded leadwires or cables which are the same as or better than 600 V grade PVC
insulated wire or its equivalent.
(b) Use shielded wires in areas that are susceptible to electrical noise.
(c) In areas with higher or lower ambient temperatures, use appropriate wires or cables.
(d) In environment where oils, solvents, corrosive gases or liquids may be present, use wires or
cables that are resistant to such substances.
(e) It is recommended that crimp-on solderless terminal lugs (for 4 mm screws) with insulating
sleeves be used for leadwire ends.
4.3 Wiring
4.3.1 Loop Configuration
The following is a typical wiring example of the MLD1 connected to an EJA Pressure Transmitter.
The voltage drop of the MLD1 is low enough that you can connect it across the Check Terminals
(J12 Wiring Option).
(1) General-use Type
IM 61A01A01-01E-A
Page 15 of 25
Page 16 of 26
The following is another wiring example of the MLD1 Loop Indicator connected to an EJA Pressure Transmitter (Note:
The EJA Transmitter below can be replaced with any 4-20mA 2 wire device.
Figure 4.1 General-use Type wiring examples
IM 61A01A01-01E-A
Page 16 of 25
Page 17 of 26
(2) Intrinsically Safe Type
With the intrinsically safe type, a safety barrier must be included in the loop.
MLD1
Loop
Indicator
+
-
2- Wire
+
Transmitter
+
-
-
Safety
Barrier
4-20mA
Hazardous Area
Safe Area
Figure 4.2 Intrinsically Safe Type example
IM 61A01A01-01E-A
5. Operation
Page 17 of 25
Page 18 of 26
The MLD1 is loop powered. Connect it in series with a 4-20mA loop as per Section 4 “Wiring”.
Observe correct polarity as the indicator is protected against reversed connections but will not
display a reading. After properly connecting the indicator to a transmitter or other 4-20mA source,
the display will indicate the value of the current flowing in the loop (0-100% for the standard model
or other specified engineering units for custom models).
IMPORTANT
Connecting directly across a 24 V supply without a transmitter or similar device to regulate
the loop current will result in a blown fuse, or damage to either the power supply or the
safety barrier.
The MLD1 can easily be ranged to display virtually any engineering units by a combination of the
“Zero Offset” DIP switches mounted on the rear PCB, and a pair of
coarse and fine “Span Adjustment” potentiometers accessible from the front, above the display.
The decimal point can be activated by means of another DIP switch on the rear PCB.
Refer to the Maintenance section for instructions on calibrating the MLD1 and setting the decimal
point.
IM 61A01A01-01E-A
Page 18 of 25
Page 19 of 26
6. Maintenance
6.1 Overview
The electronics of the MLD1 are fully encapsulated. Therefore, it is maintenance free. This chapter
describes the procedures for calibration and rotating the display within the enclosure. Please
carefully and thoroughly read the following sections for information on how to perform these
maintenance procedures.
6.2 Calibration Instruments Selection
Table 8.1 lists the instruments that can be used to calibrate the MLD1. When selecting an instrument,
consider the required accuracy level. Exercise care when handling these instruments to ensure they
maintain the specified accuracy.
6.3 Calibration
The MLD1 is factory calibrated to 0-100% unless ordered with the /ENG Engineering Units option.
Use the procedure below to check instrument operation and accuracy during periodic maintenance or
troubleshooting.
(1) Connect the instruments as shown in Figure 6.1 (red wire to + OUT on current source, black
wire to - OUT on current source) and warm up the instruments for at least five minutes.
Table 6.1 Instruments Required for Calibration
Name
Yokogawa-recommended Instrument
Current Standard
Model CA11 Voltage/Current Calibrator
or
Model CA71 Multifunction Calibrator
Remarks
4-20mA source
IM 61A01A01-01E-A
Page 19 of 25
Page 20 of 26
Current Source
MLD1 Loop Indicator
+ (Out)
+ (Red)
- (Out)
- (Black)
Figure 6.1 Calibrating the MLD1
(2) If a Zero Offset other than the factory default of -500 to +250 is desired, the display unit will
need to be removed from the enclosure to access DIP switches located on the rear of the
display unit. Additionally, the DIP switches are needed to set the decimal point.
(3) Using the values in Table 6.2, set the Current Standard to the 100% value.
Table 6.2 Percent vs. Current Values
Value
0%
25%
50%
75%
100%
Current
4.0mA
8.0mA
12mA
16mA
20mA
(4) Set the span by adjusting the “C” potentiometer until the reading is close to the required full
scale reading. Then adjust the “F” potentiometer to fine tune the reading to the required
value.
(5) Set the Current Standard to the 0% value.
(6) Use the “Z” potentiometer to adjust the zero reading to zero (or some other desired zero value
if a zero offset is being used). Once zero has been set, it will not change regardless of the full
scale selected.
(7) If a zero offset is required, use the following method:
(a) Set the span required (as in Step (3) above) - e.g. for a range of +100 to +500,
set the span to 0 to +400.
(b) Set the zero offset required (as in Step (6) above) – e.g. set the zero to +100 to
complete the +100 to +500 example from Step (7a).
(c) For larger positive or negative offsets, use Table 6.3 to determine the
appropriate DIP switch setting.
IM 61A01A01-01E-A
Page 20 of 25
Page 21 of 26
Table 6.3 DIP Switch Settings for Zero Offset Values
Zero Offset
+1000 to +2000
+250 to +1000
-500 to +250
-500 to -1300
1
On
DIP Switch Position
3
4
5
6
7
8
On
On
On
On
On
On
On
2
(8) Check all points in Table 6.2 and verify MLD1 is within specification.
(9) The decimal point can be set (or cleared) by switching DP DIP switch 1 to the ON (or OFF)
position.
6.4 Rotating Display Direction
The MLD1 display is designed so that it can be rotated in increments of 90 degrees. When there is a
need to change the angle of the display, use the following procedure:
(1) Remove power from the MLD1.
(2) Remove the glass cover from the display side.
(3) Carefully grasp the display with fingers along the side of the display and the face of the
display facing your palm.
(4) Slowly pivot display and it will unseat (snap) away from mounting spacers.
(5) Rotate the display to the desired orientation.
(6) Position display over mounting spacers and snap into position.
NOTE
The display can also be removed by removing the 3 screws holding the mounting plate to the
enclosure. The mounting plate allows one 90 degree rotation (two positions total). If the
desired position is not one of the two allowed, separate the mounting plate from the display
by gently pulling them apart (the four mounting spacers that attach the display to the
mounting plate will snap out of the display). Then, rotate the display (or the mounting
spacers but not both) 90 degrees and snap the spacers back into the display. The display is
now in one of the two remaining 90 degree positions and can be rotated to the other (if
desired).
(7) Replace and tighten firmly the 3 screws holding the mounting plate to the enclosure.
(8) Replace the glass cover.
6.5 Cleaning
Cleaning should be restricted to wiping with a damp cloth or approved anti-static cleaner to avoid the
danger of ignition due to electrostatic charges.
IM 61A01A01-01E-A
Page 21 of 25
7. General Specifications
Page 22 of 26
7.1 Standard Specifications
Input: 4-20mA 2-wire
Voltage Drop: Less than 1 Volt at 20mA
Accuracy: ± 1 digit
Display: 3 digit LCD. Height 12.5mm
Decimal Point: Selectable by DIP switch
Ambient Temperature: -10 to 70°C
Over range: ± 200mA without damage
Rangeability: Zero can be set between -1300 and +1999
Span is fully adjustable ±1999
Method: DIP switches and multi-turn potentiometers
Vibration: 3G @ 9-80Hz, 1G @ 90-150Hz
Shock: 50G
Mounting: Nominal 2” (50mm) pipe mount or
surface. (horizontal or vertical)
Explosion Protection: ATEX Intrinsically Safe (II 1 Ga EX ia IIC T5, Tamb -10° C to 70° C;
Supply circuit: Ui = 28V, Ii = 200mA, Pi = 0.85W, Ci = 0, Li = 0,
Certificate No. ITS09ATEX26770X)
Enclosure Degrees of Protection: IP67
Case and Cover: Aluminum alloy casting
Paint: Polyurethane resin baked finish
Deep sea moss green (equivalent of Munsell 0.6GY3.1/2.0)
Optional /X1 or /X2
Electrical Connection: NPT female or M20
Weight: 2.7 lbs
IM 61A01A01-01E-A
Page 22 of 25
Page 23 of 26
7.2 Model and Suffix Codes
Model MLD1
Model
MLD1
Input signal
Mounting
Housing
Electrical Connection
Suffix Codes
………………………………..
Field Mount Loop Indicator
-A……………………………..
1…………………………...
2…………………………...
4 to 20mA DC
2 inch Horizontal Pipe
2 inch Vertical Pipe (or wall mount)
/1……............................
/00……………………
/10……………………
/20……………………
/30……………………
/40……………………
Explosion Protection
Paint Option
Options
/KS1…………….
/X1………...
/X2………...
/ENG……...
/SST………
/SSW……...
Description
Cast Aluminum Alloy
NPT Female Without Blind Plugs
NPT Female with 304 SST Blind Plugs
NPT Female with 316 SST Blind Plugs
M20 Female Without Blind Plugs
M20 Female with 316 SST Blind Plugs
ATEX Intrinsically
Certification Safe Approval
Epoxy Resin Paint
Polyurethane-Epoxy(Anti-Corrosion Paint)
Engineering Unit Calibration
SST Tag – Attached to Housing
SST Tag – Wired to Housing
7.3 Ordering Instructions
1.
2.
3.
4.
Model and Suffix Codes
Option Codes.
Scale range and unit markings desired.
Tag number.
7.4 Options
Scaling: Special calibration in Engineering Units (/ENG). Max. value = 1999
Other: Stainless Steel Tag, Electrical Connections, and /X1 or /X2 Paint.
/SST (limited to 12 Characters) or /SSW tag
Example Ordering Instructions:
MLD1-A1/1/00/KS1/ENG/SST (Field Mounted Loop Indicator, 4 to 20mA DC, 2”
Horizontal Pipe, ATEX Intrinsically Safe, 0-200 InH2O scale in Engineering Units).
FT-201 Specify Tag Number when ordering /SST; Up to 12 Characters.
IM 61A01A01-01E-A
Page 23 of 25
Page 24 of 26
7.5 Dimensions
IM 61A01A01-01E-A
Revision Record
Page 24 of 25
Page 25 of 26
Title: MLD1 Loop Powered Process Indicator
Manual No.: IM 61A01A01-01E-A
Edition
1st
2nd
3rd
4th
5th
Date
Page
October
-2009
January
17
2010
October
1,
2010
21,22
January 2012 25
July 2012
22
Revised Item
New publication
5.0
Change Model DLI1 to MLD1
Picture Change
Model Structure Revised
Added EC Declaration of Conformity
Removed /2 section in Housing row.
IM 61A01A01-01E-A
Page 26 of 26
YOKOGAWA ELECTRIC CORPORATION
Headquarters
2-9-32, Nakacho, Musashino-shi, Tokyo, 180-8750 JAPAN
Branch Sales Offices
Nagoya, Osaka, Hiroshima, Fukuoka, Sapporo, Sendai, Ichihara, Toyota,
Kanazawa, Okayama, and Kitakyusyu.
YOKOGAWA CORPORATION OF AMERICA
2 Dart Road, Newnan, Georgia 30265-1094, U.S.A.
Phone : 1-800-888-6400 Fax : 1-770-254-0928
YOKOGAWA EUROPE B. V.
Databankweg 20 Amersfoort 3821 AL, THE NETHERLANDS
Phone : 31-33-464-1611 Fax : 31-33-464-1610
Branch Sales Offices / Wien (Austria), Zaventem (Belgium), Ratingen
(Germany), Madrid (Spain), Runcorn (United Kingdom), Milano (Italy),
Velizy Villacoublay (France), Roodeport (Republic of South Africa),
Budapest (Hungary), Stockholm (Sweden)
YOKOGAWA AMERICA DO SUL LTDA.
Praca Acapulco, 31 - Santo Amaro. Sao Paulo/SP - BRAZIL
Phone : 55-11-5681-2400 Fax : 55-11-5681-4434
YOKOGAWA ENGINEERING ASIA PTE. LTD.
5 Bedok South Road, 469270 SINGAPORE
Phone : 65-6241-9933 Fax : 65-6241-2606
YOKOGAWA ELECTRIC KOREA CO., LTD.
14-1, Yangpyongdong-4Ga, Youngdeungpo-Gu, Seoul, 150-866 KOREA
Phone : 82-2-2628-6000 Fax : 82-2-2628-6400
YOKOGAWA AUSTRALIA PTY. LTD.
Tower A, 112-118 Talavera Road, Macquarie Park,
N.S.W.2113, AUSTRALIA Phone : 61-2-8870-1100
Fax : 61-2-8870-1111
YOKOGAWA INDIA LTD.
Plot No.96 Electronic City Complex, Hosur Road, Bangalore 560100, INDIA
Phone : 91-80-4158-6000 Fax : 91-80-2852-0625
YOKOGAWA CHINA CO., LTD.
K. Wah Centre 29F, 1010 Huai Hai Zhong Rd., Shanghai 200031, CHINA Phone : 86-215405-1919 Fax : 86-21-5405-1011
Jul
Oct.‘12
'09
<Recycled Paper Used>
Printed in USA
IM 61A01A01-01E-A