Download 1310784 ENGLISH MANUAL.cdr
Transcript
Welcome
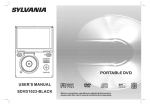
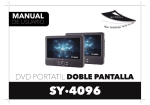
Thank you for purchasing the Dual Screen DVD Player SY-4096. In
order to fully benefit from this product, please follow the
instructions in this user manual very carefully. Store this user
manual in a safe place for future reference. We are sure your new
Dual Screen DVD Player will satisfy your needs.
10.Unplug the power from the outlet when the unit is not in use.
11.Attention should be drawn to the environmental aspects of
battery disposal.
12.CAUTION: Danger of explosion if battery is incorrectly
replaced. Replace only with the same or equivalent type.
Important Safety Instructions
13.WARNNING: The battery (battery or batteries or battery pack)
shall not be exposed to excessive heat such as sunshine, fire or
the like.
1.Warning: To reduce the risk of electric shock, do not remove
the cover or back. There are no user-serviceable parts inside.
Refer servicing to qualified personnel.
14.WARNNING: Excessive sound pressure from earphones or
headphones can cause hearing loss.
2.Warning: To prevent fire or electric shock hazard, do not
expose the unit to rain or moisture.
3.Do not expose the Adaptor and portable DVD to water
(dripping or splashing) and no objects filled with liquids, such as
vases, should be placed on the unit.
15.WARNNING: Only use attachments/accessories specified
provided by the manufacturer, the portable DVD is supplied by
AC adapter, the AC adapter is used as disconnect device, the
disconnect device shall remain readily operable.
4.Keep the portable DVD away from direct sunlight and heat
source such as radiators or stoves.
16.Caution: Danger of explosion if battery is incorrectly replaced,
replaced only with the same or equivalent type (Lithium battery)
5.Do not block the ventilation openings. Slots and openings on
the unit are provided for ventilation. The openings should never
be blocked by placing your portable DVD on a cushion, sofa or
other similar surface.
This marking indicates that this product should not
be disposed with other household wastes
throughout the EU. To prevent possible harm to the
environment or human health from uncontrolled
waste disposal, recycle it responsibly to promote
the sustainable reuse of material resources. To
return your used device, please use the return and
collection systems or contact the retailer where
the product was purchased. They can take this
product for environmental safe recycling.
6.Do not place the portable DVD on unstable cart, stand, tripod,
bracket or table. The unit may fall, resulting in possible damage
or injury.
7.Never place heavy or sharp objects on the LCD panel or frame.
8.Only use the AC adapter included with portable DVD. Using
any other adapter will void your warranty.
9.The plug of AC adaptor is used as the disconnect device, the
disconnect device shall remain readily operable.
1
Safety Precautions
WARNING
N Notes on Copyrights:
RISK OF ELECTRIC SHOCK
DO NOT OPEN
10. It is forbidden by law to copy, broadcast, show,broadcast via
cable, play in public, or rent copyrighted material without
permission.
1.Warning: This digital video disc player employs a laser system.
Use of controls,adjustments, or the performance of procedures
other than those specified herein may result in hazardous
radiation Exposure.
11. This product features the copy protection function developed by
Macrovision.Copy protection signals are recorded on some discs.
When recording and playing the pictures of these discs picture
noise will appear.This product incorporates copyright protection
technology that is protected by method claims of certain U.S.
Patents and other intellectual property rights owned by Macrovision
Corporation and other rights owners.Use of this copyright protection
technology must be authorized by Macrovision Corporation, and is
intended for home and other limited viewing uses only unless
otherwise authorized by macrovision Corporation. Reverse
engineering or disassembly is prohibited.
2.Warning: To prevent direct exposure to laser beam,do not open
the enclosure.Visible laser radiation when open.
3.Warning: Never stare directly into the laser beam.
4.Caution: Do not install this product in a confined space such
as a book case or similar unit.
5.Warning: when the unit using by child, parents must make sure
to let the child understand all contents in Instruction book how
battery using to guarantee using battery correctly all the time.
6.Warning: when find battery overheat, swell or dour, please
stop using battery and contact service centre for getting
replacement.
charge
strong
impact
over
heat
40 C
7.Warning: do not charging battery on the place of insufficient
ventilation such as: mattress, sofa, cushion , soft mat......
8.Warning: we will not take any responsibility if user incorrectly
use battery, not following our warning instruction label on the
battery case.
9.Warning: more than 250mm USB extension cord is prohibited
to use for USB port
2
Package
Troubleshooting
Remote control with battery
1
No sound or
distorted sound
Make sure the machine is connected properly.
Make sure all cables are securely inserted into
the appropriate jacks.
AC adaptor
1
Car charger
1
Can't advance
through a movie
You can't advance through the opening credits
and warning information that appears at the
beginning of movies because the disc is
programmed to prohibit that action.
AV connector
1
Earphone
1
Car bracket
2
Car bag
1
The icon
appears on
screen
The feature or action cannot be completed at
this time because:
1.The disc's software restricts it.
2.The disc's software doesn't support the
feature (e.g.,angles)
3.The feature is not available at the moment.
4.You've requested a title or chapter number
that is out of range.
Picture is distorted
The disc might be damaged.Try another disc;
it is normal for some distortion to appear during
forward or reverse scan.
No forward or
reverse scan
Some discs have sections that prohibit rapid
scanning or chapter skip;If you try to skip
through the warning information and credits
at the beginning of a movie,you won't be able
to.This part of the movie is often programmed
to prohibit skipping through it.
PROBLEM
SOLUTION
If at any time in the future you should need to dispose of this product
pleasenote that waste electrical products should not be disposed of with
householdwaste.Please recycle where facilities exist.Check with your
Local Authority or retailer for recycling advice.(Waste Electricaland
Electronic equipment Directive)
Owing to continuous improvement,no prior notice will be given regarding
changes on above feature and spec.
3
Identification of Controls
Main Unit
MASTER TFT SCREEN
1.SD/MS/MMC
12. UP/DOWN
2. POWER ON/OFF
13. MODE
3. HEADPHONE OUT JACKS
1
14. LEFT/RIGHT
5. DIGITAL AUDIO OUT (COAXIAL)
15.BACK LIGHT
6.USB
7. DC OUT
2
3
4
5
10
6
7
8
Slaver TFT menu setting.
4. VIDEO/AUDIO OUT
Slaver TFT backlight switch.
16. POWER ON/OFF
8. DC IN 9-12V
17. AV IN
9. ENTER
18. HEADPHONE OUT JACKS
10. UP/DOWN/LEFT/RIGHT
19. DC IN
11. SOURCE
20. Volume Rotary
MOUNTING THE CAR BRACKET
9
1. Use the one big screw to assemble the unit to the bracket as the below
illustration.
11
SLAVER TFT SCREEN
16
17
2. Attach the bracket to the headrest as below illustration with the rest four screws
as the below illustration.
18
19
14
20
15
12
13
4
Powering and installation
Connecting to monitor
Plug one end of the AC/DC power adaptor into the DC IN 9-12V jack
on the right of theunit, then plug the other end into the AC power
socket. Please refer to the following illustration.
The unit can also be connected to an external LCD monitor.
Connect the unit to the power outlet through the AC/DC adaptor or the
12V car adaptor.Then connect the unit DC OUT jack to DC IN 9-12V
Jack of the LCD Monitor by a DC/AV cable. Also use this DC/AV cable
to connect the AV OUT jack of the unit to AV IN jack of the Monitor.
Please refer to the following illustration
ON
OFF
AV OUT
COAXIAL
DC OUT
DC IN 9-12V
ON
AV OUT
COAXIAL
DC OUT
DC IN 9-12V
VOL+
When using the 12V car adaptor to connect the power:
Plug one end of the 12V car adaptor into the DC IN 9-12V jack on the
unit, plug the other end into the 12V car socket.See the following
illustration.
OFF
DC IN
AV IN
OFF
AV OUT
COAXIAL
DC OUT
OFF
ON
DC IN 9-12V
ON
Note:
You're advised to supply the power to both the units by the 12V car adaptor.
The AC/DC adapter is used to supply power to one unit only and as the
charger to charge the main unit if it contains the in buitt battery.
Note
1.It is not recommended to recharge the battery using the 12V car
adaptor.
2.The 12V car adaptor can only be used when the car power supply is
9-12V.
3.The mains plug is used as the disconnecting device, the device
should always
be easily accessible.
5
Connecting to TV
Connecting with external Speaker
You can also connect the unit to the TV to enjoy high quality picture and
stereo sound.Please refer to the following illustration:
The unit can be connected with an external speaker.Please see the
following illustration.
ON
ON
OFF
AV OUT
COAXIAL
DC OUT
OFF
AV OUT
COAXIAL
DC OUT
DC IN 9-12V
DC IN 9-12V
AV CABLE
AV CABLE
Not supplied
VIDEO IN
AUDIO IN
AMPLIFIER
TV
Not supplied
Center speaker
AUDIO IN
VIDEO IN
Left front speaker
Right front speaker
SUBWOOFER
TV
Left rear speaker
Please use the AV cable to connect the unit and the TV.Make sure it is
connected correctly.
Right rear speaker
Note:
There is no 5.1 channel in the unit,however, after connecting it to the
APM, the output of audio in 5.1 channel will be possible.
6
The Use of Remote Control
Please put the battery into the remote control as shown below in the
illustration.
1
2
VOL-
ENTER
CR2025
VOL+
SOURCE
CR2025
0
30
30 0
When using the remote control, make sure the infrared window is
pointed to the infrared recieving window of the unit. The distance
between the unit and the remote control should be within 3 metres.
Please refer to the illustration below.
STEP
MUTE
SOURCE
1
2
3
5
6
7
8
9
0
10+
DISPLAY
AUDIO
MENU
/PBC
SUBTITLE
4
TITLE
ENTER
MODE
VOL-
REPEAT
VOL+
SLOW
ZOOM
Note:
1. The remote control should not be placed on table edges to avoid
falling and should
not be placed near damp environments.
2. Avoid placing the unit under direct sunlight as this may block the
infrared receiving
window of the unit.
3. Replace the old battery with a new one when the remote control
stops working.
7
Identification of Controls
Remote control unit
17
STEP
1
18
19
20
SOURCE
3
4
5
6
7
8
9
0
10+
DISPLAY
SUBTITLE
AUDIO
MENU
/PBC
ENTER
MODE
VOL-
REPEAT
1
5
7.AUDIO
DVD:Press AUDIO repeatedly during playback to hear a different
audio language or audio track, if avilable.
MP3/CD/VCD:Press AUDIO repeatedly during playback to
hear a different audio channel ( Left,Right,Mix,Stereo).
4
6
9
8
8.PLAY/PAUSE
Press PLAY/PAUSE once to pause playback, pressing PLAY/
PAUSE second time will resume the playback.
10
11
VOL+
SLOW
6. MENU/PBC
Return to DVD root menu(DVD).
PBC on/off switch (VCD) .
3
7
TITLE
21
22
23
24
25
26
27
15
2
MUTE
5.10+ BUTTON
In order to select a track 10 or greater, first press 10+, For example;
select track 12, first press 10+, and then press number 2 button.
2
16
9.STOP
When this buttom is pressed once, the unit records the stopped
point,from where playback will resume if PLAY( )is pressed after
wards. But if STOP button is pressd again instead of PLAY( )
button, there will be no resume function.
12
13
ZOOM
14
10.MODE
Set LCD parameter(adjust bightness, contrast,and saturation).
11.VOL+
1. SOURCE
DVD/CARD/USB.
12.Forward Skip
Go to next chapter/ track.
2. MUTE
Disable Audio output.
13.Reverse Skip
Go to previous chapter/ track to the beginning.
3.0-9 NUMBER BUTTON
Selects numbered items in a menu.
14.
BUTTON
Press
BUTTON allow skipping ahead at 5-level speed(X2->X4->
X8->X16->X32->PLAY), press PLAY button return to normal playback.
4.DISPLAY
To display the playtime and status information.
8
Identification of Controls
Remote control unit
15.
BUTTON
Press
BUTTON allow skipping back at 5-level speed(X2->X4->
X8->X16->X32 -> PLAY), press PLAY button return to normal playback.
25.SLOW
Press Slow button repeatedly to enter slow playback, and cycle
between different speeds. The speeds are 1/2,1/4,1/8,1/16,and
normal.
16.STEP
Step the motion in DVD mode.
26.PROGRAM
DVD/VCD:The program function enables you to store your
favourite tracks from the disc. Press PROGRAM button ,then
PROGRAM MENU will appear on screen, now you can use the
number key to direct input the titles,chapters or tracks number and
select PLAY option. TO resume normal playback, press PROGRAM
and select clear program option on the program menu,press
PROGRAM again to exit program menu.
17.SEARCH
Goto time point , title or chapter you want in DVD Mode.
18.SUBTITLE
Press SUBTITLE repeatedly during playback to hear a different
subtitle languages.
19.ANGLE
DVD:Press ANGLE will change the view angle, on DVDs that
support this feature.
27.ZOOM
DVD/VCD: Use ZOOM to enlarge or shrink the video image.
1.Press ZOOM during playback or still playback to activate the
Zoom function. The square frame appears briefly in the right bottom
of the picture.
2. Each press of the ZOOM button changes the TV screen in the
following sequence:
20.TITLE
Return to DVD title menu
21.ENTER
Confirms menu selection..
JPEG: Use ZOOM to enlarge or shrink the picture.
1.Press 'ZOOM' .
2,Used "
" to enlarge,or "
" to shorten the picture.
Use the
button to move through the zoomed picture.
22.SETUP
Accesses or removes setup menu.
23.VOLAdjust volume
24.REPEAT
Press REPEAT during playback to select a desired repeat mode.
DVD: you can play select repeat chapter/title/off.
VCD: you can select repeat single/all/off.
CD/MP3: you can select repeat single/folder/off.
9
SETUP Menu Setting
General Setup Page
Angle Mark
Displays current angle setting information on the right hand corner
of the TFT screen if available on the disc.
OSD Language
You can select your own preferred language seetings.
Closed Captions
Closed captions are data that are hidden in the video signal of some
discs.Before you select this function,please ensure that the disc
contains closed captions information and your TV set also has this
function.
Screen Saver
This function is used to turn the screen saver On or Off.
Auto Standby
This function is used to select auto standby settings after 3 or 4 hours.
3 HOURS: the unit will turn to standby mode after 3 hours if there is
no interaction from user within this period of time.
4 HOURS: the unit will turn to standby mode after 4 hours if there is no
interaction from user within this period of time.
OFF: the auto standby function is disabled, and unit will stay in “on”
mode even if no interaction from user.
Press SETUP button to get the setup menu. Use direction buttons
to select the preferred item. After finishing settings, press
SETUP again to normal display.
The following menu items can be changed:
GENERAL: selects the GENERAL PAGE menu.
AUDIO: selects the AUDIO PAGE menu.
VIDEO: selects the VIDEO PAGE menu.
PREFERENCE : selects the PREFERENCE PAGE menu.
PASSWORD: selects the PASSWORD PAGE menu.
General Setup Page
- - GENERALSETUP PAGE - TV DISPLAY
ANGLE MARK
OSD LANGUAGE
CLOSED CAPTIONS
SCREEN SAVER
WIDE
ON
ENG
ON
ON
AUTO STANDBY
3H
ON
OFF
ON
ON
OFF
OFF
OFF
3 HOUR
4 HOUR
ENGLISH
FRENCH
GERMAN
ITALIAN
SPANISH
PORTUGUESE
4:3 PANSCAN
4:3 LETTERBOX
16:9
WIDE SQUEEZE
Audio Setup Page
Audio Setup Page
---- AUDIO SETUP PAGE ---
GOTO GENERAL SETUP PAGE
DOWNMIX
DIGITAL OUTPUT
DOLBY DIGITAL
TV DISPLAY: selects the aspect ratio of the playback picture.
STR
RAW
LT/RT
STEREO
DUAL MONO STR
DYNAMIC
4:3 PANSCAN: if you have a normal TV and want both sides of the
picture to be trimmed or formatted to fit your TV screen.
-- --- --- ------ -
4:3 LETTERBOX: if you have a normal TV. In this case, a wide picture
with black bands on the upper and lower portions of the TV screen will
be displayed.
16:9:wide screen display.
Wide Squeeze: Set screen mode to 4:3.
GO TO AUDIO SETUP PAGE
10
FULL
OFF
STR
L-MONO
R-MONO
MIX-MONO
SPDIF/OFF
SPDIF/RAW
SPDIF/PCM
Video Setup Page
SETUP Menu Setting
Audio Setup Page
Video Setup Page
Downmix
This options allows you to set the stereo analog output of your
DVD Player.
- - VIDEO SETUP PAGE - BRIGHTNESS
CONTRAST
HUE
SATURATION
LT/RT :Select this option if your DVD Player is connected to a
Dolby Pro Logic decoder.
Stereo :Select this option when output delivers sound from only
the two front speakers.
00
00
00
00
GOTO VIDEO SETUP PAGE
Digital Output
The function is used to select the SPDIF Output:SPDIF Off,SPDIF
/RAW,SPDIF/PCM.
Brightness,Contrast,Hue,Saturation:setting the video quality.
SPDIF Off: Turns off the SPDIF output.
SPDIF/RAW: If you have connected your DIGITAL AUDIO OUT
to a multi-channel decoder/receiver.
SPDIF/PCM: Only if your receiver is not capable of decoding
multi-channel audio.
Preference Page
Preference Page
Dolby digital
- - PREFERENCE SETUP PAGE - -
The options included in Dolby Digital Setup are: 'Dual Mono ' and
'Dynamic '.
TV TYPE
AUDIO
SUBTITLE
DISC MENU
PARENTAL
DEFAULT
Dual Mono
Stereo:Left mono sound will send output signals to Left speaker
and Right mono sound will send output signals to Right speaker.
L-Mono:Left mono sound will send output signals to Left speaker
and Right speaker.
R-Mono:Right mono sound will send output signals to Left speaker
and Right speaker.
Mix-Mono:Left and Right mixed mono sound will send output
signals to Left and Right speakers.
PAL
ENG
ENG
ENG
RESET
ENGLISH
FRENCH
1 KID SAF
2G
3 PG
4 PG13
5 PGR
6R
7 NC17
8 ADULT
GERMAN
ENGLISH
ITALIAN
FRENCH
SPANISH
GERMAN
PORTUGUESE
ITALIAN
OFF
SPANISH
PORTUGUESE OTHERS
OTHERS
PAL
ENGLISH
AUTO
FRENCH
NTSC
GERMAN
ITALIAN
SPANISH
PORTUGUESE
OTHERS
GOTO PREFERENCE PAGE
TV Type
Selecting the colour system that corresponds to your TV when AV
outputs.This DVD Player is compatible with both NTSC and PAL.
Dynamic
Dynamic range compression.
11
SETUP Menu Setting
Preference Page
Password Setup Page
Password: select the menu password change page.
PAL - Select this if the connected TV is PAL system.It will change the
video signal of a NTSC disc and output in PAL format.
NTSC-Select this if the connected TV is NTSC system.It will change
the video signal of a PAL disc and output in NTSC format.
Auto:Chang the video signal output automatic according to the
playing disk format.
OLD PASSWORD
NEW PASSWORD
CONFIRM PWD
OK
Audio:Selects a language for audio (if available).
Subtitle:Selects a language for subtitle (if available).
Disc Menu:Selects a language for disc menu (if available).
Parental
Some DVDs may have a parental level assigned to the complete disc
or to certain scenes on the disc.This feature lets you set a playback
limitation level.The rating levels are from 1 to 8 and are country
dependent. You can prohibit the playing of certain discs that are not
suitable for your children or have certain discs played with alternative
scenes.
Default:Back to the factory setting.
OLD PASSWORD: Enter the OLD password, (Factory setting is
1369), and the cursor will jump automatically to
NEW PASSWORD
.
NEW PASSWORD: Enter the NEW password. Enter 4 digits from
the remote control unit numeric buttons, and the
cursor will automatically jump to CONFIRM PASSWORD.
CONFIRM PASSWORD: Confirm the NEW password by entering
it again. If the confirmation is incorrect, the cursor
will stay in this column. After entering, the correct new password
again, the cursor will jump automatically to OK.
Password Setup Page
Password Setup Page
OK: When cursor is on this button, press ENTER key to confirm
setting.
- - PASSWORD SETUP PAGE - PASSWORD MODE
PASSWORD
ON
Note: If the password has been changed, the parentaland disc
lock code will also be changed.
The default password(1369)is always active even the password
has been changed.
ON
OFF
GOTO PASSWORD SETUP PAGE
Password mode: Set password mode on/off. If set to off, change
parental level will not check password.
12
SLAVER TFT MENU SETTING
What can be seen when plugging a
USB or a SD.
PICTURE Page
PICTURE
BRIGHT
CONTRAST
COLOR
LANG
Z00M
RESET
50
50
50
ENGLISH
16:9
DVD
USB
MEDIA
SD
Press the "SOURCE" button on the units main panel or reomote
control,select MEDIA and the units would auto detect the USB
/CARD socket,then press ENTER to enter USB/CRAD mode.
Brightness
Adjust screen Bright Setting.
Contrast
Adjust screen Contrast Setting.
Color
Adjust screen Color Setting.
LANG
Adjust Menu OSD Language
ZOOM
Adjust screen ZOOM 16:9 or 4:3
RESET
Reset to default setting.
Maximum memory card or usb size supported.
13
32G
Electronical parameters
Parameters and specifications
Battery Parameters
Battery Specifications:
Output:7.4V
-20 C ~ +45 C
65+20%
1 week
-20 C ~ +65 C
65+20%
Temperature
Power consumption
: <15W
Operating humidity
: 5 % to 90 %
Humidity
6 months
2.Work circumstances
: AC 100-240 V , 50/60 Hz
VIDEO OUT
Output
Storage and work circumstances:
1. Storage circumstances Temperature
Standard requirement
Item
Power requirements
AUDIO OUT
:1.0 Vrms (1 KHz, 0 dB)
Audio
:Speaker:1WX2,Headphones output, Coaxial output
Humidity
Standard charge
0 C ~ +45 C
65+20%
Standard discharge
-20 C ~ +65 C
65+20%
System
Laser
:Semiconductor laser, wavelength 650 nm
Signal system
: NTSC / PAL
Frequency
response
: 20Hz to 20 kHz(1dB)
Signal-to-noise ratio
:More than 80 dB (ANALOG OUT connectors only)
Dynamic range
:More than 80 dB (DVD/CD)
Note: Design and specifications are subject to change prior notice.
14
Specifications
Digital 9” TFT LCD display (800x480)
Compatible formats: DVD, DVD+R/RW, DVD-R/RW, SVCD,
VCD, CD, CD-R/RW,MP3, WMA, JPEG, Kodak Picture.
Compatible with MPEG-4 videos
2.0 USB port
SD/MMC/MS card reader
Compatible with TV system: PAL / NTSC
Rechargeable battery integrated in main DVD unit of 1200 mAh
2 brackets included for an easy installation on the car seats
Connections: Audio & Video input, Earphone output, DC input
Weight Master Screen: 0,795 Kg
Weight Slaver Screen: 0,445 Kg
Frequency response. : 20-20KHz (1dB)
Power source: 12V
15
16


