1
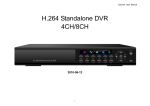
H.264 Network DVR
H.264 Network DVR User Manual
September 2010
-1-
H.264 Network DVR
Table of Contents
CHAPTER.1 Product Introduction....................................................................................................... - 6 1.1 Overview........................................................................................................................................................................................................ - 6 1.2 Features........................................................................................................................................................................................................- 7 -
CHAPTER.2 Familiarization ................................................................................................................. - 8 2.1 Unpacking and Inspection.............................................................................................................................................................................- 8 2.2 Front Panel Keys & Function..........................................................................................................................................................................- 9 2.3 Front Panel.....................................................................................................................................................................................................- 9 2.4 Rear Panel - 4 Channel................................................................................................................................................................................- 10 2.4 Rear Panel - 8 Channel................................................................................................................................................................................- 11 2.5 Remote Control Operation ..........................................................................................................................................................................- 12 -
CHAPTER.3 Basic Operation............................................................................................................. - 14 3.1.1 Mouse operation ......................................................................................................................................................................................- 14 3.1.2 Power on..................................................................................................................................................................................................- 16 3.1.3 Shut down.................................................................................................................................................................................................- 17 3.2 Login.............................................................................................................................................................................................................- 18 3.3 Preview.........................................................................................................................................................................................................- 19 3.4 Record ........................................................................................................................................................................................................- 19 3.4.1 Recording ................................................................................................................................................................................................- 19 3.4.2 Playback ..................................................................................................................................................................................................- 20 3.4.3 File Backup ..............................................................................................................................................................................................- 22 -
CHAPTER.4 Menu Operation............................................................................................................. - 24 4.1 Menu Preview .............................................................................................................................................................................................- 24 4.2 Menu Operation ..........................................................................................................................................................................................- 27 4.2.1 System Information ..................................................................................................................................................................................- 28 “Menu”→“SYSTEM INFO”. (Figure 4-2)............................................................................................................................................................- 28 4.2.2 Disk Management ....................................................................................................................................................................................- 33 -
CHAPTER.5 System Control...........................................................................................................- 34 -2-
H.264 Network DVR
5.1 PTZ Control ................................................................................................................................................................................................- 34 5.1.1 Connection...............................................................................................................................................................................................- 34 5.1.2 Preparation ..............................................................................................................................................................................................- 34 5.1.3 Operation .................................................................................................................................................................................................- 34 5.2 Video Control...............................................................................................................................................................................................- 35 5.3 Sound Monitoring........................................................................................................................................................................................- 36 5.4 Alarm Control ..............................................................................................................................................................................................- 36 5.4.1 Alarm Control ...........................................................................................................................................................................................- 36 5.4.2 Clear Alarm ..............................................................................................................................................................................................- 37 -
CHAPTER.6 System Setup ................................................................................................................ - 39 6.1 System Setup .............................................................................................................................................................................................- 40 6.2 Encoding Setup...........................................................................................................................................................................................- 40 6.3 Recording Setup .........................................................................................................................................................................................- 42 6.4 PTZ Setup...................................................................................................................................................................................................- 43 "Main Menu"-"System"-"PTZ Setup" (Figure 6-5) .............................................................................................................................................- 43 6.5 Network Setup ............................................................................................................................................................................................- 44 6.5.1 E-mail Setup..............................................................................................................................................................................................- 44 6.6 Alarm Setup ................................................................................................................................................................................................- 46 "Main Menu"-"System"-"Alarm Setup" (Figure 6-8)...........................................................................................................................................- 46 6.7 Video Detection Setup ................................................................................................................................................................................- 47 6.7.2 Video Loss................................................................................................................................................................................................- 48 6.7.3 Video Blind................................................................................................................................................................................................- 49 6.8 Local Display................................................................................................................................................................................................- 50 7.1 User Accoun.................................................................................................................................................................................................- 52 7.2 Exception ....................................................................................................................................................................................................- 56 7.3 System Maintenance ..................................................................................................................................................................................- 57 7.4 Output Adjustment........................................................................................................................................................................................- 57 7.5 Restore .......................................................................................................................................................................................................- 59 -
CHAPTER.8 Remote Network Control and Management ............................................................. - 60 8.1 Remote Settings .........................................................................................................................................................................................- 60 8.1.1 Network Security Settings........................................................................................................................................................................- 60 -3-
H.264 Network DVR
8.1.2 Connection Settings.................................................................................................................................................................................- 62 8.1.3 ActiveX Download Installation ..................................................................................................................................................................- 65 8.2 Remote Connection ....................................................................................................................................................................................- 65 8.2.1 Connection...............................................................................................................................................................................................- 65 8.2.2 Multiple Servers Login .............................................................................................................................................................................- 68 8.2.3 Channel Associated Menus .....................................................................................................................................................................- 68 8.3 Control ........................................................................................................................................................................................................- 69 8.3.1 Common Control......................................................................................................................................................................................- 70 8.3.2 Video........................................................................................................................................................................................................- 71 8.3.3 Log...........................................................................................................................................................................................................- 72 8.3.4 Download.................................................................................................................................................................................................- 73 8.4 Setting.........................................................................................................................................................................................................- 74 8.4.1 Local Setting ............................................................................................................................................................................................- 75 8.4.2 Common Setting, Encoding Setting, Record Setting, Alarm Setting, PTZ Setting, Video Detect, Video Loss, Video Blind......................- 75 8.5 Toolbar Introduction ....................................................................................................................................................................................- 76 8.5.1 Real-Time Preview Control........................................................................................................................................................................- 75 8.5.2 Playback ..................................................................................................................................................................................................- 76 User can playback the local recording files, and also can remote playback the files on DVR. Click “stop” to stop playing...............................- 76 8.6 Other Operations ........................................................................................................................................................................................- 77 8.6.1 PTZ and Preset Control ...........................................................................................................................................................................- 77 8.6.2 Lens Control ............................................................................................................................................................................................- 77 8.6.3 Window View Modes ..............................................................................................................................................................................- 78 -
CHAPTER.10 Mobile phone client software operation ................................................................... - 79 CHAPTER.10 FAQ ............................................................................................................................... - 81 Appendix A: Technical Specifications.................................................................................................................................................................- 84 Appendix B: Alarm Input Interface Instruction....................................................................................................................................................- 85 Appendix C: Alarm Output Interface Instruction.................................................................................................................................................- 86 -
-4-
H.264 Network DVR
Caution and Preventive Tips
Power Supply
These DVRs operate on 12V DC; the 4-CH @ 4.16A and the 8-CH at 6A.
If you don't plan to use the DVR for an extended period please turn off and un-plug the power supply.
Safety
These DVRs are intended for use indoors only. To prevent risk of electrical shock don't use these DVRs outdoors or in areas of high moisture.
A DVR is a delicate device and you should leave service of the unit to a qualified technician.
Installation
The DVR must be installed horizontally and on a stable surface.
The DVR chassis should be grounded.
Install the hard disk drive prior to initial operation.
Avoid opening the DVR or replacing the hard disk while the unit is turned on.
A high-speed hard drive is recommended.
Place the DVR to allow for adequate air flow to prevent possible overheating.
Do not place the DVR near a heat source, in an area with excessive dust or mechanical vibration.
-5-
H.264 Network DVR
CHAPTER.1 Product Introduction
1.1 Overview
This series of DVRs represents a high level of engineering and design providing high quality digital monitoring for CCTV applications. Linux operating
system and embedded processors, high-performance coding and decoding chipsets, advanced IT technology; such as audio codec, high capacity
storage hard disk, TCP / IP network and more, make these systems more stable, the image clearer and more powerful functionality.
Stand-alone DVRs can be used independently, but can also be networked to form a powerful network monitoring center. Similar networks are used in
different areas and sectors of security and surveillance; domestic and international banking, telecommunications, power, justice, traffic, residential
area, factory, storage resources, water resources, etc. In addition, DVRs can also play a very important role in home monitoring systems.
This user manual uses the 8-CH unit for illustration purposes.
-6-
H.264 Network DVR
1.2 Features
Real-time
Monitoring
Compression
Format
Composite video out/VGA output
1/4/8 multi-screen display; displays real-time
video and resources occupied per hour.
Channel marks display status; recording,
motion detection, video loss, video block,
alarm triggered. Supports system search via
local access.
Video compression format: H.264.
HDD
USB interface for external USB stick or drive.
Back-up to another PC or drive via network.
Backup
Multi-task operations: Real-time recording
independently for each channel, search and
playback for 1ch/4ch, remote monitoring,
and remote access.
Playback
Multi-record modes: Manual, time,
schedule, alarm, motion.
Search recorded files fast and search
recorded files by type.
2 SATA interfaces, each interface support capacity is 1T.
Record once or continuous to the HDD.
Data format prevents tampering and ensures data security.
Network
Functions
Multi-playback modes: slow motion, fast
motion and frame-by-frame playback.
Displays the exact time of an incident in
playback. Playback recorded files via
network.
-7-
Remote monitoring through network, PTZ control,
Recorded file search and playback; changes settings and
parameters of the system or software upgrade, remote
alarm processing and system log search.
Embedded TCP/IP protocol and Linux operating system;
browse the system through IE browser.
Management modes: Password control so only qualified
users can log in. Set different users with different
authorization according to their needs.
H.264 Network DVR
4/8ch alarm input (alarm can be triggered by
normally open or normally closed switch),
Video loss alarm, Motion detection alarm.
Trigger device can be a smoke detector,
temperature detector, infrared detector, etc.
Relay switch alarm output to link an alarm
system or live lighting control.
Alarm
Communication
Interfaces
Interface for alarm input and PTZ control.
Standard Ethernet interface for remote access via network.
Alarm input and output interfaces include a
protection circuit to keep the main equipment
from being damaged.
PTZ Control
Support PTZ through via RS485 protocol.
Scalable multiple decoder protocols for PTZ
and speed dome control functions.
Smart Operations
Intuitive GUI interface; USB mouse operation.
CHAPTER.2. Familiarization
2.1 Unpacking and Inspection
Upon receipt of your DVR check for any physical damage to the unit or package. Verify the contents of the package include the DVR, Manual, USB
mouse, IR remote control, power supply and cable, screws to attach the hard drive and client software disc.
1. Front
and Rear Panels
Verify that switches on the front panel are all in tact and functional. Verify that all connectors on the rear panel are in tact and not loose.
2.
Open the cabinet and look-over
In addition to checking whether there are obvious signs of external damage, check that the panel data cable, power cable, power supply and
motherboard fan connection has not become loose.
-8-
H.264 Network DVR
2.2. FRONT PANEL Keys and Functions
Key
POWER LED
RECORD LED
NETWORK LED
POWER Button
Name
POWER
REC
NETWORK
POWER
Descriptions
Power indicator light that DVR has power (including the shutdown state)
Shows status of recording
Shows status of network
Turn the DVR ON or OFF as necessary
MENU Button
PTZ Button
FN Button
ESC Button
REC Button
SLOW Button
FAST Button
MENU
PTZ
Function
ESC
REC
SLOW/FAST/+
Press to open the main menu
Press to PTZ
Opens the Function Menu
Press to close the main menu
Press to RECORD
Press to slow playback speed by 1/2, 1/4, 1/8
Press to increase forward playback speed 2X, 4X, 8X
STOP Button
STOP
Press to stop playback
PLAY/PAUSE Button
PLAY/PAUS
Press to freeze playback to one frame, press again to advance frame-by-frame
SEARCH Button
DIRECTION Buttons
ENTER Button
SEARCH
▲.▼.W. X
Press to SEARCH. Press the SEARCH button for 5 seconds for simultaneous VGA and monitor output.
Press to move cursor up, down, left, right
Within menus, press to confirm selection
2.3.Front of DVR
-9-
H.264 Network DVR
2.4. REAR PANEL
4CH
GND
ground
NET
INTERNET INTERFACE
AOUT
Audio output
NCX,NOX
Alarm Out
USB
with USB Mouse, USB Disk
VIN-IN
Video input
ALARM
1,2,3,4
Alarm in
MOUSE
with USB Mouse
AIN-IN
Audio input
RS-485
RS485
VGA
VGA output
VOUT
Video output
- 10 -
H.264 Network DVR
8CH
GND
GROUND
NET
INTERNET INTERFACE
AOUT
Audio output
NCX,NO
X
Alarm Out
USB
with USB Mouse, USB Disk
VIN-IN
Video input
ALARM
1,2,3,4
Alarm in
MOUSE
with USB Mouse
AIN-IN
Audio input
RS-485
RS-485
VGA
Video output
V-OUT
Video output with BNC interface
- 11 -
H.264 Network DVR
2.5 Remote Control Operation
Use the remote to control the DVR.
- 12 -
H.264 Network DVR
No.
Name
1
POWER
2
REC
3
SEARCH
Description
No.
Power on/Power off
Name
8
1/4/8 screen modes switch
9
Pop-up the soft keyboard
Pop-up the relative menu in preview
Pop-up the relative menu in playback
Recording control
Press to SEARCH. Hold SEARCH button for 5
seconds for simultaneous VGA and monitor output
Slowly playback,1/2×,1/4×,1/8×, single frame
playback
Speed playback, 2×,4×,8× playback
4
5
6
7
10
Stop
MENU
ESC/PTZ
ENTER
Description
LENS/VOL-
Lens control, Volume down, Number decrease
LENS/VOL+
Lens control, Volume up, Number increase
Play/Pause
11
MUTE
Switch between Full-screen and Multi-screens
playback modes.
12
0~9, 10+
13
←
14
DEV
Open menu.
Close the software keyboard;
Close the current window
Exit the current control
Back to the last menu
Exit the status of box list selection
Enter into or exit the PTZ control at preview status
Confirm the operation
Switch the editing area (Time, date, IP address)
Switch between full-screen and multi-screens in
preview mode
Enter into the list box selection status and confirm
your selection
Select/Cancel the status of the check box
- 13 -
Mute
Number input
Enlarge the corresponding frame to full-screen
Backspace
Device select
H.264 Network DVR
CHAPTER.3 Basic Operation
3.1.1 Mouse operation
Click the left mouse button to enter the function menu
Click an icon to execute that menu function
Change the status of check box or the motion detection block
Click combination button to get the drop-down list, click on the
list of items to choose an action
In PTZ mode, click the corresponding buttons on the screen to
control the rotational direction of the camera
In the input box, click to select numbers, symbols,
text-transform on the soft keyboard, "←" Backspace, "_"
spaces
1
Single left click
When the input type is data/number, the numeric keypad
below will show
"0 ~ 9" enter the number, "C" clear the current content, "←"
backspace
- 14 -
H.264 Network DVR
In a real-time monitoring screen, click the right mouse button
for the pop-up menu below
2
Single right click
This menu allows you to switch the display mode of the view
screen, start record, playback, PTZ control, start audio, set
recording mode and more
In the Quad mode, click the left mouse button for the pop-up
menu below
This menu allows you to navigate the menu, search, play, stop
increase/decrease playback speed, show or hide the control
strip and more
- 15 -
H.264 Network DVR
Click the right mouse button at the soft keyboard to close the
soft keyboard
Click the right mouse button at any place except the label, edit
box and buttons, to close the current window
Double-click any item in the recording list to play the file
3
Left double-click
Double-click the left mouse button to enlarge the video window
to full-screen or restore it to multi-screen
In PTZ control mode, double-click the left mouse button at the
center of the screen to enlarge the screen or restore it to
multi-screen
Adjust the numbers
4
wheel
Flip list box up and down
Control the lens zoom in the PTZ operation mode
5
Mouse drag
Hold down the left mouse button in any screen position and
drag to the lower right corner to select the motion detection
area; hold down the right mouse button and drag to the lower
right corner to cancel the selected area
Drag the play progress bar forward or backward to adjust the
location of the current record display; drag the slider forward or
backward to adjust the parameter
3.1.2 Power on
If the power indicator LED is not illuminated, follow these steps:
1) Confirm that the power supply is connected to a functioning electrical outlet and connected to the DVR.
2) Switch the MAIN power switch on the rear of the DVR to the ON position.
If the power indicator LED is illuminated (red), press the POWER key to start the DVR.
Upon starting, the DVR video output defaults to multi-screen output mode
- 16 -
H.264 Network DVR
If a hard drive has not been installed you will receive a prompt as below: (Figure 3-1)
Figure 3-1
3.1.3 Shut down
Correct Shut Down:
A. Press and hold the POWER button approximately 3 seconds then confirm shut down of the system; this will stop all the functions of the DVR.
(Figure 3-2)
Figure 3-2
B. Enter into the menu and select “Shutdown System” in exit system menu. (Figure 3-3)
- 17 -
H.264 Network DVR
Figure 3-3
Incorrect Shut Down:
A. Avoid turning off the master POWER switch on the rear panel.
While the DVR is running, you can shut it down immediately by the power switch on the rear panel; avoid this (especially while recording).
B. Avoid unplugging the power cable.
While the DVR is running, you can shut it down immediately by unplugging the power cable; avoid this (especially while recording).
Note: If the power supply is not functioning properly, please contact your dealer for a replacement. Only replace with a compatible
regulated power supply to avoid any incidental damage.
3.2 Login
There are three default users in the system, they are "admin", "user", "default", the users of the system can not be removed. The initial password for
user "admin" is 666666; this is the highest authority user and enables out all system operations. The initial password of user "user" is 123456; this
user level can record, playback, backup and set parameters, etc., but cannot add new users or make changes in the system. The user “default” is set
at the factory, it has the lowest authority level; only monitoring capability. (Figure 3-4)
Figure 3-4
Password security measures: A user can only attempt five times in every 30 minute period to access the system, otherwise the account will be locked.
Note: For security reasons, please change the default password during initial setup. To add and modify users, please refer "User Management"
section.
NOTE: While the DVR is recording, timed recording or alarm recording, and power is lost or the DVR has a forced to shutdown, the DVR
will preserver the videos and automatically return to the prior operating condition.
- 18 -
H.264 Network DVR
3.3 Preview
Upon normal startup the DVR will enter into the preview screen.
The preview screen will display the current time and date, the name and status of each channel. The screen icons and their description are below.
1
This icon is displayed on any channel that is
recording
3
This icon is displayed on any channel if motion
is detected
2
This icon is displayed on any channel with video
loss
3.4 Record
Each channel can record in different modes depending on specific needs. If an attempt is made to change the recording mode while recording, this
icon will be displayed on the screen.
3.4.1 Recording
Note: A user must have recording authority to record. Prior to recording, please confirm that a hard disk has been installed in the DVR and
the hard disk has been formatted correctly.
1) Enter into the recording control interface
Click the right mouse button in the preview screen and select “Recording Control” from the pop-up menu. Or through the "Menu" → "Recording
Control". Press the ”REC” button while in preview mode to enter the "Recording Control" interface directly. (Figure 3-5)
Figure 3-5
- 19 -
H.264 Network DVR
2) Recording operation interface instructions
AUTOMATIC - The channel will automatically begin to record based on the preset settings.
MANUAL – The highest priority level; without regard to the recording state of any channel, clicking the manual button will cause all channels to begin
recording.
STOP - Stop all recording
ALL- Select all channels
3.4.2 Playback
There are two playback modes: fast playback and advanced playback. The user can search files to playback, or search date & time for playback.
1) Fast Playback
Click "Search" or the right mouse button from the preview screen, then select ”playback" from the pop-up menu to enter the fast playback, fast
playback only supports single-channel playback mode.
2) Advanced Playback
Select "Menu" → “File Playback” to enter advanced playback mode. This mode only supports 8 channel playback independently, but also supports 4
channel playback at the same time (8-CH DVR only).
3) Recording Search (Figure 3-6)
- 20 -
H.264 Network DVR
Figure 3-6
SEARCH DATE - The record date of the files that you want to search.
START TIME/END TIME - The record time period of the file that you want to search, start time should be less than end time.
PLAY TYPE - Playback according to the file or according to time.
SEARCH TYPE - Select the file type that you want to search, options are: ALL, TIME, ALARM, MOTION.
SEARCH CHANNEL – Select 4 or 8 channels.
PLAY - Select the file that you want to play in the search list, click "PLAY" button, or double click the file that you want to playback directly.
PLAY TOGETHER - Select the search date, start time/end time and the channels that you want to playback, click "PLAY" button to play.
4) Play Control Strip (Figure 3-7,Figure3-8)
Figure 3-7 playback control
- 21 -
H.264 Network DVR
Button
Description
Button
Description
Button
Description
Play/Pause
Stop
Slow play
From fast play, slowly
play to normal
Fast play
Mute
Volume
File
Single-screen mode
Four-screen mode
Hide the progress bar
Exit
Descriptions:
1) The speed, channel, time, and process are displayed in the playback control panel.
2) The playback control is effective for all channels when the videos are played according to precise time. However, the play control is effective only
for current channel if the video is played in select mode.
3) According to time synchronization playback mode, the system will automatically skip the periods which all channels have no video.
4) The progress can be located through the mouse.
Note: The volume can be controlled through VOL+ and VOL- in playback mode.
3.4.3 File Backup
“Menu” → “FILE BACKUP”. (Figure 3-8)
File backup from the DVR can be carried out through (USB) DVD burners, USB storage equipment, network downloaded, etc. This section introduces
the operation of DVR file backup; regarding network backup refer to chapter 8 "remote network control and management".
- 22 -
H.264 Network DVR
Figure 3-8
DETECT – Connect a backup device to the system, click the detect button to display the type, partition, capacity and other information of the device.
After attaching another backup device, click detect again.
REMOVE - Click remove button to safely detach a backup device from the system.
STOP - Suspend the backup task. (A DVD burner model cannot stop midway.)
ADD - Search for the files needed for backup.
CLR SEL - Remove single or multiple backup files selected in the list box. This operation only removes the backup file from the list, and does not
delete the file from the system.
CLR ALL - Remove all the backup files of the list box. This operation only removes the backup file from the list, and does not delete the file from the
system.
BACKUP - Backup all the files in the list box to the specified backup device. Please confirm the backup device has enough space for the files to be
backed up.
According to the passage, time, or information retrieval type, the user can search for some useful files, and the information of these files will be
displayed in the list box. The user can also select multiple files for backup. After the add operation, the backup files will be displayed in “files backup”
files list.
- 23 -
H.264 Network DVR
Figure 3-9 Backup retrieval
During the backup procedure, the figure at the right bottom will show the current completed progress. Users can view the backup video files, and the
files always have a kind of format: Channel number+ year/month/day.
NOTE: During the backup process the figures at the bottom of the dialog box will display real-time progress.
CHAPTER.4 Menu Operation
4.1 Menu Preview
Main Menu
Submenu
Remark
Main menu
Video search and playback. Search operations: type, channel and time, results will
display in the list
N=normal video recording, A=alarm video recording, M=motion video recording
PLAY BACK
- 24 -
H.264 Network DVR
HARD DISK
LOG
SYSTEM INFO
Displays a system event according to the classification log
VERSION
Displays system hardware and software version and characteristics
NET USER
Displays the network information including IP address and login account
SYSTEM
ENCODING
RECORDING
PTZ
NETWORK
SYSTEM SETUP
Displays hard disk information; type, position of socket, total capacity and usable
capacity
Set basic parameters such as system time, date format, video format and
language
Set the video or audio encoding mode; frame rate, quality, etc.
Settings for advance recording; timed (scheduled) recording, dynamic detection,
external alarm, etc. The record plan can be carried out during a week with each
day divided into four periods
Settings for PTZ agreements and communication parameters
Settings for network address, PPPoE port, and DDNS
ALARM
Settings for type of sensor, alarm video channels, alarm output and corresponding
parameters
DETECTION
Settings for sensitivity and detection zone for the dynamic (video motion)
detection; feedback methods for video loss or freeze (alarm output and video
channels)
DISPLAY
Settings of transparency and color of the menu; the way of picture cruise and
interval
Controls of automatic recording, manual recording or stop recording
REC CONTROL
Information about the hard disk and format operation of the hard disk
HARD DISK
- 25 -
H.264 Network DVR
Select alarm protection or removal, alarm output; allow or prohibit
ALARM
CONTROL
USER
ACCOUNT
EXCEPTION
SOFT
UPGRADE
VGA ADJUST
ADVANCE
RESTORE
Add, delete, or modify user access or user password
Select buzzer and alarm output when system operation is abnormal
Selection of the functions that require maintenance, upgrade system software
Regulations of the VGA and audio output parameters
According to the selection, the users can set the whole or part of the parameters
back to default, but not including the user account
Backup designated video files to the backup device
FILE BACKUP
Cancellation of the current user, and the next operation needs input a password
Close, Stop or Restart the DVR
EXIT
- 26 -
H.264 Network DVR
4.2 Menu Operation
"Menu”(Figure 4-1)
Figure 4-1
The main menu has nine functions including playback, system info, system setup, recording control, hard disk, alarm control, advance, file, files
backup and exit.
Explication: Click on the check-box to select an operation.
- 27 -
H.264 Network DVR
4.2.1 System Information
“Menu” → “SYSTEM INFO”. (Figure 4-2)
System information includes: hard disk, log, version and net user.
Figure 4-2
- 28 -
H.264 Network DVR
(1) Disk information
“Menu” → “SYSTEM INFO” → “DISK INFORMATION” (Figure 4-3)
Display the types, socket positions, total capacity and usable capacity of the hard disk connected to device.
Figure 4-3
- 29 -
H.264 Network DVR
(2) Log information
“Menu” → “SYSTEM INFO” → “LOG INFORMATION”. (Figure 4-4)
Displays log information of the system. The users can search the file log information easily.
"LOG TYPE" Select; all, system, set, data management, warning, video operation, user management.
"START TIME" Set the start point of a log inquiry.
"END TIME" Set the end point of a log inquiry.
After setting the log period and type press the "search" button, the user can see the log information in the list that meets the conditions, using the
button "<<" and "> >”, the user can advance pages.
Figure 4-4
- 30 -
H.264 Network DVR
(3)Version information
“Menu” → “SYSTEM INFO” → “VERSION INFORMATION”. (Figure 4-5)
Displays the version of system software, hardware and MCU, including release date.
Figure 4-5
- 31 -
H.264 Network DVR
(4) Online user
“Menu” → “SYSTEM INFO” → “NET USER”. (Figure 4-6)
View information about online users, including account name and IP address.
Figure 4-6
- 32 -
H.264 Network DVR
4.2.2 Disk Management
“Menu” → “HARD DISK” (Figure 4-7)
Displays the current hard disk attributes: type, total capacity, usable capacity.
Click an activity button to complete operations such as format hard drive.
Figure 4-7
Note: Stop recording before formatting the hard disk.
- 33 -
H.264 Network DVR
CHAPTER.5 System Control
5.1 PTZ Control
5.1.1 Connection
1) Connect the speed dome camera’s control cable to DVD’s RS-485 port. Pay close attention to + , - polarity.
2) Connect the camera's video cable to the DVR video input.
3) Connect power to camera.
5.1.2 Preparation
1) Set the control address of the speed dome camera, choose the corresponding protocol.
2) Switch the current picture to display channel.
5.1.3 Operation
Right click the mouse to display the pop-up menu then choose "PTZ control" or press "PTZ" key to enter the control menu.(Figure 5-1,Figure 5-2)
Figure 5-1
"PTZ" Position the mouse in the top, bottom, left and right quadrant within the current camera image, a corresponding direction arrow will display;
Left-click the mouse to pan/tilt the camera in that direction. Pan/tilt direction can also be controlled through the panel controller ←↑→↓ keys.
"Speed" Control the direction speed of PTZ camera through the step size adjustment; the bigger size, the faster speed.
"-Iris+" Iris open/close adjustment.
"-Focus+" Focus adjustment.
"-Zoom+" Zoom control; the mouse wheel can also control the zoom.
- 34 -
H.264 Network DVR
Note: Change the iris, focus and zoom mode through "MODE" key, it can also control the LENS+ and LENS-.
5-2
Operation
"Scan Limit" Pan the camera left and set the left limit, pan the camera right and set the right limit.
"Auto Scan" Select to start the camera scan automatically between the right and left limit side.
"Pattern Set" Select to record all paths of the PTZ camera and save it when stop.
"Auto Iris" Select to allow the system to automatically adjust the camera iris.
"Backlight Compensation" Select to allow the system to provide backlight compensation when the subject contrast is too high.
Note: This operation function needs to connect with the front end device, and match the protocol.
"Aux" Input the auxiliary output number to be controlled, Click ""ON or "OFF" key.
"Preset" Adjust the direction and angle of camera as desired. Input a preset number and click "Setup”. Input the preset number and click "Call” and
the camera will move to the preset position.
5.2 Video Control
Right click the mouse to display the pop-up shortcut menu. Choose "Video adjust" as the following picture (Figure 5-3):
- 35 -
H.264 Network DVR
Figure 5-3
Adjust the Brightness, Chroma, Contrast, and Saturation of picture, use the mouse wheel or ←→ key to make adjustment with precision.
5.3 Sound Monitoring
The user can monitor the sound corresponding to the displayed image. Right click the mouse on the channel to be monitored, click "open
monitor" from the pop-up shortcut menu. If the option has already been selected the option will be "Close monitor".
5.4 Alarm Control
5.4.1 Alarm Control
"Main menu" -> "Alarm Control" (Figure 5-4)
"Automatic" Arm and disarm according to the alarm schedule setup.
"Manual" High priority level, after choosing manual arm, all channels will be in arm status.
"Clear" Disarm; no response to the alarm input.
"Output" Whether the alarm input is agreed when alarm happen.
"ALL" Choose all channels
Setup the alarm output port, white color means the channel is selected, press "Confirm" to save and "Exit" to cancel setup and return.
- 36 -
H.264 Network DVR
Figure 5-4
5.4.2 Clear Alarm
Right click the mouse to display the pop-up shortcut menu then choose "Clear Alarm" as the following picture :(Figure 5-5)
Figure 5-5
- 37 -
H.264 Network DVR
Press the "Clear" key to stop the current alarm record and output. But not disarm, may trigger the alarm again.
Icons explication:
All alarm input channels are at arm status.
One or several alarm input channels are at arm status.
One or several alarm input triggers the alarm, click this icon and pop-up "Clear alarm" window to display the alarm information.
- 38 -
H.264 Network DVR
CHAPTER.6 System Setup
"Main Menu" - "System Setup" (Figure6-1)
System Setup includes ”System”, “Encoding”, “Recording”, “PTZ”, “Network”, “Alarm”, “Detection ”, “Display”.
Note: A user can only enter into the system setup with appropriate authority.
Figure 6-1
- 39 -
H.264 Network DVR
6.1 System Setup
"Main Menu" - "System Setup" System Setup(Figure 6-2)
Figure 6-2
"System Time" Set the current DVR system date and time, Click “Set Time” to save the setup.
"Date Format" Set the date and format options, including year/month/day, month/date/year, day/month/year etc.
"Separator" Three options: “-” “/” “.” For example; choose “.” To display the date as 2009.02.25.
"Time Format" 24 or 12 hour.
"Language" Language options.
"DVR ID" When one remote controls several DVRs, set the remote controller ID the same as DVR to control.
"Video System" Video system PAL or NTSC; restart the DVR after change.
Note: Stop recording prior to setting system time.
- 40 -
H.264 Network DVR
6.2 Encoding Setup
"Main Menu" - "System Setup" - "Encoding Setup". (Figure 6-3)
Figure 6-3
"Channel" Choose the channel to setup, ALL applies the same setup to all channels.
"Encode Type" Two options; “Audio&Video” stream or “Video” stream only.
"Encode Size" CIF, HD1, D1.
"Stream Control" Two options; "variable rate" and "fixed rate".
"Encode Quality" Six options for picture quality; best, very good, good, general, poor, low.
"Stream Rate" Encode rate options; the higher the rate, the higher the picture quality and the more HDD space is used.
"Frame Rate" 1 ~25/seconds (PAL) or 1~30/seconds (NTSC) continuously adjustable.
"Time Display", "Title Display" Superimpose time and channel label over each camera. Click “Setup” and drag the time or channel title into position.
"Copy setting to the following channel" Copy the setup to all channels using the same encoding setup.
Note: When the code flow control is set to dynamic bit-rate, Stream Rate displays the upper limit value.
- 41 -
H.264 Network DVR
6.3 Recording Setup
"Main Menu" - "System" - "Recording Setup" (Figure 6-4)
The DVR default recording mode is 24 hours continuously. The DVR recording mode can be set to meet the users' application.
Figure 6-4
"Disk Full" There are two options when the DVR hard drive is full; “Over write” the oldest files and continue to record and “Stop Video recording”.
"Duration" Set the maximum time an event will record to a file between 5 and 120 minutes.
"Channel/Schedule" Drop-down menus. Select the corresponding channel number and day to schedule recording. Click “ALL” to choose all channels.
"Alarm Pre-Record" Saves the five seconds of video prior to the alarm event to the file.
"Time Section" Select the scheduled record time for each channel, there are four time options. The time scope is 00:00-24:00. After each channel
parameter is set press the "Save" key.
"Normal, Motion, Alarm" Setup the record mode for each channel; selection can be single or multi-selection.
"Copy Setting To The Following Channel" Copy the setup to all channels.
Note: Select save after setting each channel.
- 42 -
H.264 Network DVR
6.4 PTZ Setup
"Main Menu" - "System" - "PTZ Setup" (Figure 6-5)
Figure 6-5
"Channel" Choose the channel to connect a speed dome camera, "ALL" means all channels.
"DEV Address" Set the address(es) of speed dome camera(s). The numerical ranges 0-255.
Note: The address must be consistent with the speed dome cameras, or the DVR can't control the cameras.
"Protocol" Choose the corresponding control protocol: Pelco_P, Pelco_D, the default is Pelco_D.
"Baud Rate" Choose baud rate of the corresponding speed dome camera, the range is 1200-115200, the default is 9600.
"Data Bit" The range is 5 to 8, the default is 8. "Stop Bit" Select 1 or 2, the default is 1.
"Check" The range is none, odd parity, even parity; default is none.
"Flow Control" The range is None, Xon/Xoff, the hardware, the default is None.
"Copy Setting To The Following Channel" Copy the setup to all channels.
Note: Select save after setting each channel PTZ parameter.
- 43 -
H.264 Network DVR
6.5 Network Setup
"Main Menu" - "System" - "Network Setup" (Figure 6-6)
Figure 6-6
Figure 6-7
"Ethernet IP" Set the IP address. Figure 6-6
"Netmask" Set the IP network mask address.
"MAC Address" Set the physical address of the network card. The digital input is hexadecimal. (Figure 6-7)
"Gateway" Setup the gateway IP address. Figure 6-6
"DNS" Setup DNS server IP address.
"Server Port" The default is 7777, set according to the user need. Requires a system restart.
"HTTP port" Default is 80, set according to the user need. Requires a system restart. If the port has been changed, it must display the selected HTTP
port, such as:http://192.168.0.117:1234
"DDNS Enable" Pass the dynamic domain name analysis server. Supports free dynamic domain name service (Register account at www.dyndds.org)
"PPPoE Auto Link" Input ISP provided PPPoE user name and password. Click "Dial UP" to connect. Upon successful connection “PPPoE IP” will
display an automatically obtained WAN dynamic IP address. If choose PPPoE Auto Link option, DVR will try to connect PPPoE when power on.
- 44 -
H.264 Network DVR
Note: After PPPoE dial up successful, user may visit the DVR remotely according to PPPoE IP displayed IP address, In local area network,
can visit the DVR through the network card.
Figure 6-7A
6.5.1Email Function Setup (Figure 6-7A)
"Mail Server" Enter the e-mail service provider server address. Example: smtp.gmail.com
"Sender Address" Enter the sender address. Example [email protected]
"Sender User Name" Enter the sender user name; should correspond to the mail address. Example: yourname
"Sender Password" Enter the password used to send e-mail.
"Confirm Password" Confirm the password used to send e-mail
"Receiver Address" Enter the address to which an e-mail notification will be sent. Example [email protected]
An e-mail will be sent when an alarm recording is triggered (external trigger or video motion must be enabled).
"E-mail Test" Press to send a test e-mail notification.
NOTE: Your sender mailbox must support SMTP function
- 45 -
H.264 Network DVR
6.6 Alarm Setup
"Main Menu" - "System" - "Alarm Setup" (Figure 6-8).
Figure 6-8
"Alarm Input" Choose the corresponding alarm channel number, “ALL” means all channels.
"Device Type" Alarm input “Normal Open” or “Normal Close” options.
"Alarm Reset After" Setup the corresponding delay time (5~255 seconds) for the event to be recorded prior to reset.
"SEQ Display" Set to trigger the DVR to sequence through the connected cameras on the display when an alarm triggers the system.
"Recording Channel" Set to trigger the DVR to display the camera that corresponds to the alarm input.
"Schedule" Set the time and days for scheduled recording.
"DEV Output" Set to link an alarm output during scheduled record.
"OSD Output" The screen will display information when an alarm event occurs.
Note: User should save setup after each channel is completed.
- 46 -
H.264 Network DVR
6.7 Video Detection Setup
"Main Menu" → "System Setup" → "Detection." (Figure 6-9)
Explanation:
1) Voltage changes within the video channel are detected as motion. The screen will show that motion has been detected by displaying the motion
alarm symbol.
2) The system features drag and drop simplicity to setting the dynamic range of the motion detection region. Press and hold the left mouse button to
set up the detection regions. Press and hold the right button of mouse to clear detection region. Press the save button after setting the detection
regions.
6.7.1 Video Detection
By analyzing the video voltage levels the system will activate the alarm when it detects that motion above the set sensitivity level. (Figure 6-9)
Figure 6-9
- 47 -
H.264 Network DVR
"CHANNEL" Select the video channel(s) to set motion detection, choose "all" to apply motion detection to all channels.
"ALARM TYPE" Select Motion Detection setting.
"ALARM DELAY" Set the corresponding delay time (5 ~ 255 seconds), when the motion ends the system will record to the set point of the delay.
"RECORDING" Select the desired video channel for motion alarm recording. This mode allows the system to record by video motion detection
during a scheduled time period.
"ALARM DEV OUT" The corresponding alarm output terminal is activated in conjunction with the video motion alarm recording.
"SCHEDULE" Set the scheduled monitoring times. The DVR will only record when video motion is detected during scheduled time periods.
"SENSITIVITY" Set the sensitivity level to trigger video motion alarm recording.
"Copy The Current Settings To The Following" Allows you to copy the recording schedule to other DVR channels.
"Dynamic Inspection Area" Select "SETTING" and then enter to display the motion detection zone grid; 192 cells (16X12).
To select the detection zones, hold the left mouse button and swipe across the screen or click on grid cells individually. Green highlighted zones are
now set for motion detection; white zones are not set for motion detection. To clear detection zones, click and hold the right mouse button and swipe
across the screen or click on grid cells individually. (Figure 6-10)
Figure 6-10
Note: When copying parameters from one channel to another only the parameters will copy; the detection zones will not copy.
- 48 -
H.264 Network DVR
6.7.2 Video Loss
Set the system to respond to video loss or unconnected video channels. (Figure 6-11)
Figure 6-11
"CHANNEL" Select the channels to set video loss feedback.
"ALARM TYPE" Select the detection settings: Video loss.
"ALARM DELAY" Set corresponding delay time (5 ~ 255 seconds) the system will alert after an alarm activity.
"ALARM DEV OUT" Set the alarm output that corresponds to a video channel.
"SCHEDULE" Set the schedule time for the system to respond to video loss notifications.
"Copy The Current Settings To The Following" Allows you to copy the setting from one channel to another.
- 49 -
H.264 Network DVR
6.7.3 Video Blind
Alerts that a camera has been blocked or flooded with light in an attempt to "blind" the camera. The shelter alarm alerts the user that this condition
may be in effect. (Figure 6-12)
Figure 6-12
"CHANNEL" Select the channels to set shelter alarm feedback.
"ALARM TYPE" Select the detection settings: shelter detection.
"ALARM DELAY" Set corresponding delay time (5 ~ 255 seconds) the system will alert after an alarm activity.
"ALARM DEV OUT" Set the alarm output that corresponds to a video channel.
"SCHEDULE" Set the schedule time for the system to respond to video loss notifications.
"Copy The Current Settings To The Following" Allows you to copy the setting from one channel to another.
- 50 -
H.264 Network DVR
6.8 Local Display
“Main menu” → “System setup” → “Display” (Figure 6-13)
Figure 6-13
"CHANNEL NAME" Select the channel name button, enter the channel name (e.g. LOADING DOCK).
"WINDOW COLOR" Select the display color for the menu window.
"TRANSPARENCY" Set for transparency level for the menu window.
"SEQ Display" Set eh system to switch sequentially through the system inputs.
"TIME" Set the dwell time for the camera to display, from 5s to 120s.
"Page Turns" Select Full Page, Quad Page or 9-Win Page. Full page will sequence through each page one channel after another. Quad Page will
switch between cameras 1-4 and 5-8 (8-Channel DVR only). 9-Win Page will display all eight cameras (with one black cell), the sequence is single
channel, four channels, and nine channels in turn.
- 51 -
H.264 Network DVR
CHAPTER.7 System Management
"Main Menu" → "Advance" to show sub-menu, including: user accounts, exception handling, system maintenance, output regulation, restoring the
default. (Figure 7-1)
Figure 7-1
- 52 -
H.264 Network DVR
7.1 User Account
"Main Menu" → "Advance" → "User Account." (Figure 7-2)
Figure 7-2
User names can be up to eight characters; any combination of letters, numbers and symbols. The system will accommodate up to unique 12 user
names. Admin users can modify user names, passwords and permissions. Lower level users can modify their password and can view allowed video
channels.
To change a password, select the user name to be changed, enter the current password. Enter the new password and confirm the new password.
Press the save button to confirm the password change. (Figure 7-3, Figure 7-4)
Note: the current user password to enter the menu refers to the user login password; admin users can use their own password to modify
other user's password.
- 53 -
H.264 Network DVR
Figure 7-3
Figure 7-4
- 54 -
H.264 Network DVR
Add new users and set user permissions control or increase a user's access to the user's menu interface. Enter your user name, user password and
confirm password. Configure the list of users and their access level. "Allow duplicate log" eneable multiple users to log in under the same user name.
(Figure 7-5)
Figure 7-5
There are three default users: admin, user, default, the three users can not be deleted. Admin user has the highest authority level and may carry out
all operations. The default user is the lowest with the least permissions in the system. If no users have been defined the system will default to this
account. Users that log on under the default have minimal access to the system.
- 55 -
H.264 Network DVR
7.2 Exception
"Main Menu" → "Advance" → "Exception" (Figure 7-6)
Figure 7-6
"Exception" Select abnormal operation; hard disk is full, hard disk error or network disconnection.
"Buzzer Alarm" Select if there will be a buzzer alert to an abnormal operation.
"Alarm Output" Set an alarm output in conjunction with abnormal operation.
Note: The user can view detailed log record of abnormal operation.
- 56 -
H.264 Network DVR
7.3 System Maintenance
"Main Menu" → "Advance" → "Software Upgrade" (Figure 7-7)
Figure 7-7
"System Upgrade" Select the source device holding the upgrade software from the dropdown menu and click upgrade.
"Auto Reboot" Select auto reboot and set the occurrence and time as necessary.
Click confirm to complete the action.
- 57 -
H.264 Network DVR
7.4 Output Adjustment
"Main Menu" → "Advance" → VGA Adjust." (Figure 7-8).
Manage the VGA output adjustment region, color brightness and resolution.
7-8
Note:"restore"→"Local display", select this to reset the output to factory default.
- 58 -
H.264 Network DVR
7.5 Restore
"Main Menu" → "Advance" → "Restore" (Figure 7-9)
You can set multiple options back to factory default. Select the sub-system to reset and click confirm to complete the operation.
Note: Menu Color, Language, Date & Time format, system, IP address, User account won't revert to factory default.
Figure 7-9
- 59 -
H.264 Network DVR
CHAPTER.8 Remote Network Control and Management
8.1 Remote Settings
8.1.1 Network Security Settings
Set internet security level before install ActiveX.
(1)Open Browser (i.e. Internet Explorer), select ”Tools” - “Internet options”
(2) In the dialog box that appears, select the "Security" tab. (Figure 8-1)
Figure 8-1
- 60 -
H.264 Network DVR
(3) Click on "Custom Level", enter the security settings. (Figure 8-2)
Figure 8-2
ActiveX controls and plug-ins installed
The DVR requires you to install ActiveX controls to see the video stream and Internet Explorer asks if you want to install the ActiveX control.
9 Automatic prompting for ActiveX controls
9 Binary and script behaviors
9 Download unsigned ActiveX controls
9 Download signed ActiveX controls
9 Only allow approved domains to use ActiveX without prompt
9 Run ActiveX controls and plug-ins
The above categories will be "Enable", which is very important.
Note: When installing ActiveX; disable firewall and antivirus.
- 61 -
H.264 Network DVR
8.1.2 Connection Settings
The DVR can be accessed by another PC on the network or on the internet. Following is the information needed to set up the DVR for network
access.
1. Right-Click "My Network Places" on your PC desktop. From the pop-up menu, click on "Properties", open "Network Connections."
2. Double-click to open "Local Area Connection." (Figure 8-3)
Figure 8-3
- 62 -
H.264 Network DVR
3. Click "Properties" to open local area connection properties. (Figure 8-4)
Figure 8-4
- 63 -
H.264 Network DVR
4. Double-click "Internet Protocol (TCP / IP)" to open the setting screen. (Figure 8-5)
Figure 8-5
5. The setting screen displays the PC's IP address, subnet mask, default gateway. (Figure 8-5. Your network parameter setting may be different than
shown.
6. Copy the corresponding subnet mask, and default gateway to the DVR (see section 6.5 Network Settings). The IP address must not be the same
as the PC, this will result in a network conflict. In this example the DVR IP address should be 192.168.0.X, in which X is not 40 or 1 (including the other
is using the IP address), and can not be more than 255, the subnet mask is 255.255.255.0, gateway to 192.168.0.1.
- 64 -
H.264 Network DVR
8.1.3 ActiveX Download Installation
After completing the DVR network settings, open the internet browser and enter the IP address of the DVR and select "install the ActiveX control", the
PC will automatically download and install ActiveX control (Figure 8-6).
Figure 8-6
If the DVR ActiveX have a new version is available, IE browser will automatically update if prompted. Please update ActiveX to ensure that the client
ActiveX are not in use, or else fail to update
8.2 Remote Connection
8.2.1 Connection
Download ActiveX is complete, run ActiveX and the login panel will automatically pop-up. (Figure 8-7)
- 65 -
H.264 Network DVR
Figure 8-7
"Login Mode" There are two options to log into the DVR system.
1) IP Address: enter the DVR's IP address into the web browser.
2) Domain Name: If you use a DDNS service you can use the domain name to access your DVR directly or through your router.
"Port" DVR port number and network port number must be set the same.
"Username / Password" default username is admin;
"Auto-Start all channels upon successful log into the server" (through the wan network connection, so as not to enable);
"From Window X to start preview" From which window to start preview
"After succeed in login or logout server, exit dialog" Click to automatically close the dialog box.
"Delete" Select to delete the corresponding server.
"Alias" Set a server Alias, Click save after setting.
Enter the appropriate parameters, select Login.
- 66 -
H.264 Network DVR
If login fails, an error message will pop-up. Check the IP address, port number, user name, password. (Figure 8-8)
Figure 8-8
After a successful login the PC will display the DVR screen below. (Figure 8-9)
Figure 8-9
- 67 -
H.264 Network DVR
8.2.2 Multiple Servers Login
Click Login on the right side of the DVR screen to login to other servers simultaneously.
8.2.3 Channel Associated Menus
Right-click in the preview window, the pop-up menu below will appear. (Figure 8-10)
Figure 8-10
"Full Screen" Enlarge the interface to fill the screen.
"Full Display" Enlarge the displayed video to fill the screen.
"Start audio" Enable audio monitoring.
"Stop Preview" Stop the current channel preview.
"Start Record" Save real-time video to the PC.
"Speed +" Speed up the video motion in playback mode.
"Speed -" Slow the video motion in playback mode.
"Capture" Capture the current window picture and save to the PC.
"Search" Search video files, including local search and remote search.
"Channel Name" set the name of the DVR video channel (e.g. LOADING DOCK), preview and record overlay of the channel name will change.
- 68 -
H.264 Network DVR
8.3 Control
Click "Control" on right side of the DVR screen to open the "Select Server" dialog box. (Figure 8-11)
Figure 8-11
Select the required Server to display on the PC screen.
- 69 -
H.264 Network DVR
8.3.1 Common Control
"Reboot server" Select to reboot a DVR server.
"Shut down server" Select to close a DVR server.
"Remote Upgrade" Select to begin a system software upgrade. Upgrade will start if files are available.
Figure 8-12
- 70 -
H.264 Network DVR
8.3.2 Video
Remote adjustment of DVR parameters; brightness, color, contrast, saturation.
Figure 8-13
- 71 -
H.264 Network DVR
8.3.3 Log
Remotely access the DVR system log. (Figure 8-15)
Figure 8-15
"Start time / End time" Select the time period to review.
"Log type" Select the type of log to review; system log, configuration log, data log, alarm log, recording log and user management.
- 72 -
H.264 Network DVR
8.3.4 Download
Remotely access the DVR to download video files to archive on the PC, network drive of burn to CD/DVD. (Figure 8-16)
Figure 8-16
"Channel" Select the channel to search.
"Record type" Select the recording type; all, recording, alarm recording, motion recording
"Start time / End time" Select the time period to review.
- 73 -
H.264 Network DVR
8.4 Setting
Click "Setup" on the right side of the DVR screen to open the Setting menu. (Figure 8-17)
- 74 -
H.264 Network DVR
Figure 8-17
8.4.1 Local Setting
"Common Setting"
"GUI Language" Select the GUI language; Chinese or English
"Video Window Color" Set Video Window Color: RGB Color parameters setup
"Record Setting"
"Directory" Select the location to record on the local PC.
"Reserve Disk Space" The system will not use this space on the local PC.
"Auto-divided duration" The amount of time the PC will record video from the DVR; range of 5-120 minutes
"Auto Overlay" Record automatically oaver older video files.
"Capture Setting"
"Directory" Select the location to store screen images on the local PC.
"Reserve Disk Space" The system will not use this space on the local PC.
"Download Setting"
"Directory" Select the location to store downloaded files on the local PC.
"Reserve Disk Space" The system will not use this space on the local PC.
"Stream Transport"
"Protocol" Select UDP for general LAN and TCP for WAN.
"Performance" The data rate the PC receives data is reliant on the network capability and capacity.
8.4.2 Common Setting, Encoding Setting, Record Setting, Alarm Setting, PTZ Setting, Video Detect, Video Loss, Video Blind
Please refer to Chapter 4 System Setup
- 75 -
H.264 Network DVR
8.5 Toolbar Introduction
8.5.1 Real-time Preview Control
Upon logging into the server the user can remotely preview the DVR video in real time.
After successful login the server, users can remote preview DVR images in real-time.
Select an unused window and click the "Start" button, the video channel will pop-up and shows that it in preview mode.
To save real-time video to a specified directory on the PC or a network storage drive click the RECORD button.
To stop recording click the STOP button.
8.5.2 Playback
The user can playback the locally recorded files as well as remotely play back files from the DVR.
- 76 -
H.264 Network DVR
Figure 8-19
8.6 Other Operations
8.6.1 PTZ and Preset Control
Figure 8-20
The direction buttons control a PTZ camera. The respective arrows control direction; up, down, right, left. Click the center button to set camera preset
points and adjust the camera.
8.6.2 Lens Control
Figure 8-21
"+ Focus -" Controls the focus ring of the camera.
"+ Auxiliary -" May be assigned to a needed function on the camera.
"+ Zoom -" Adjust the focal length of the lens. Zoom in – more detail less field of view. Zoom out – more field of view less detail.
"+ Iris -" Open the aperature in lower light conditions or close the aperature in bright light conditions.
- 77 -
H.264 Network DVR
8.6.3 Window View Modes
Figure 8-22
8-settings: Single camera sequencing, four camera view, six camera view with one primary image, eight camera view with one primary image, or
eight small camera view.
- 78 -
H.264 Network DVR
CHAPTER.10 Mobile phone client software operation
Mobile phone model supported currently:
S60
Nokia
N73, N71, N75, N76, N77, N78, N79, N80, N81, N82, N85, N86, N91, N92, N93, N93i, N95, N96
Mobile phone client software installation:
1. First, download software from the CD to your mobile phone and then install the software. Click DVR icon shown below picture 9-1 to enter
software.
9-1
- 79 -
H.264 Network DVR
2. Open software, enter server address and port number. Click Login icon to open surveillance software interface.
3. Upon opening the software interface, follow the mobile phone function button presentation below.
Note: Before use this software, please firstly select corresponding GPRS server from mobile phone server list.
- 80 -
H.264 Network DVR
CHAPTER.10 FAQ
Connected to the power, the machine didn’t start running
1. Check whether the power switch is turned on.
2. Check whether the adapter is plugged in and connected to the DVR.
Hanging at the boot screen
1. The hard disk may have physical damage.
2. The system guide is un-normal.
Starting very slow
1. A hard disc error can cause the mother board to check the hard disk repeatedly.
Host restart repeatedly
1. Please check the host power supply; if multiple hard disks are connected there may be inadequate power.
2. Unplug the network cable and check if the system operates run normally; a serious network failure may cause the host to restart repeatedly.
Hanging video
1. Check the hard disk connection or replace a defective hard disk.
2. Check the operating temperature of the DVR.
3. Check the current capacity of the electrical circuit for high-current devices.
- 81 -
H.264 Network DVR
Operating system update failure
1. USB device incompatibility, try a new USB drive.
2. Bad USB connection.
The image on the monitor is black and white
1. Check the video input, DVR, monitor or TV is exactly the same video format, if it isn’t, please change the setting to automatic.
No image on the monitor
1. Check the status of the monitor; power on, brightness.
2. Check the monitor video cable.
Video ripple or tearing
1. Check for shorts in the video cables.
2. Check for interference from other AC devices on the video cable.
3. Check the video with a newer monitor.
Video color distortion
1. Check whether the video input/output setting is right.
2. Check whether the connection is right.
When using a PC monitor there is color and video distortion
1. Check the connection of VGA cable to the DVR.
2. Check the operating temperature of the DVR.
- 82 -
H.264 Network DVR
Mosaic appears in the server’s videos playback
1. The low parameters would cause the whole quality of videos, and then Mosaic may appear in the playback.
2. Bad disk sectors may lead to the appearance of Mosaic during the playback.
ActiveX of client can’t be updated automatically
1. Whether the IP address accessing server is correct.
2. Whether the settings of browser are correct (refer to 8.1.2).
3. Please turn off the window if it’s open.
4. Support the ActiveX control has some problems of compatibility, please use Microsoft Internet Explorer to access server.
- 83 -
H.264 Network DVR
Appendix A: Technical Specifications
4CH
8CH
Video Compression
Video Input
4ch (Simple Edition)
H.264
4ch (1.0Vp-p/75Ω,BNC)
8ch (1.0Vp-p/75Ω,BNC)
Video Output
4ch (1.0Vp-p/75Ω,BNC)
3ch (1.0Vp-p/75Ω,BNC×1;Super Video×1;VGA×1)
Display: 720×576(PAL),720×480(NTSC)
Resolution
Frame
Audio Input
Recording: D1 :704×576 PAL
704×480 NTSC
704×240 NTSC
320×240 NTSC (only 4ch CIF for Simple Edition)
HD1:704×288 PAL
CIF: 352×288 PAL
D1: 25FPS(PAL),30 FPS (NTSC)
D1 :50 FPS(PAL),60 FPS (NTSC)
CIF:100FPS(PAL),120 FPS(NTSC)
CIF:200 FPS(PAL),240 FPS(NTSC)
BNC×4
CIF:400 FPS(PAL),480 FPS(NTSC)
BNC×8
Audio Output
RCA×1
Audio Codec
ADPCM
RCA×1
Alarm Input
4CH
8CH
NO
Alarm Output
1CH
2CH
NO
Recording Modes
Manual, Schedule, Motion, Alarm
Triplex
Record, Playback, Network
Network Interface
RJ45(10M/100M)
PTZ Control
Enable, set up the preset and use the mouse to move or scale the picture
Communication
Interface
RS485×1, USB2.0×1 USB1.1×1
Hard Disk
2 interface; Support larger than 1TB
SATA HDD
Mouse
2 interface; Support larger than 1TB SATA
HDD
USB2.0
Remote Control
Power Supply
2 interface; Support larger than 1TB SATA HDD
With remote Control
12V/3A DC Adapter
12V/3A DC Adapter
- 84 -
12V/3A DC Adapter
H.264 Network DVR
Appendix B: Alarm Input Interface Instruction
4/8CH alarm input, no input limitation any N/O or N/C contact.
NC terminal of alarm detector connect to DVR alarm input (ALARM)
If the user wants to attach a detector (such as smoke detector) external power must be used.
The external power should share the same ground with the DVR if the device is supply by external power.
- 85 -
H.264 Network DVR
Appendix C: Alarm Output Interface Instruction
4CH switch alarm output, the user can use N/O or N/C contacts. The external alarm device must use external power.
- 86 -