1
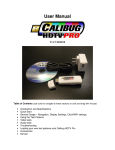
Wilian Souza (wilians)
Veronica Mogni (veroka)
ClassicPro Template
User Manual
Release version: August 10, 2008
1
Index
Introduction ............................................................................................................... 4
ClassicPro 1.03 ..................................................................................................... 4
Overview .................................................................................................................. 5
Getting started .......................................................................................................... 7
Unpacking the skin................................................................................................. 7
Rollover states ....................................................................................................... 8
Transparency ........................................................................................................ 8
Graphics program .................................................................................................. 8
Essential ClassicPro graphic files............................................................................... 9
Mainframe.png ................................................................................................... 9
Shade.png ....................................................................................................... 10
Buttons/sliders ..................................................................................................... 11
Buttons.png ...................................................................................................... 11
Seekvol.png ..................................................................................................... 12
Comp_but.png.................................................................................................. 13
Comp_but_tabs.png ......................................................................................... 13
Browser.png ..................................................................................................... 13
Scrollbars.png .................................................................................................. 14
Interface .............................................................................................................. 14
Beat_left.png .................................................................................................... 14
Eq.png ............................................................................................................. 16
Suiframe.png.................................................................................................... 16
Other components ............................................................................................... 17
Notifier.png ...................................................................................................... 17
Tooltip.png ....................................................................................................... 17
Combobox.png ................................................................................................. 17
Optional ClassicPro graphic files .............................................................................. 18
mainframe_tb.png/mainframe_lr.png..................................................................... 18
About.png ............................................................................................................ 18
Art_aolradio.png, art_notfound.png, art_shoutcast.png .......................................... 19
Beat_right.png ..................................................................................................... 19
Volume_ani.png ................................................................................................... 19
Pb_status.png...................................................................................................... 19
Songinfo.png ....................................................................................................... 20
Songtickerfont.png ............................................................................................... 20
Numfont.png ........................................................................................................ 20
Mainframe_title.png ............................................................................................. 21
Pledit.bmp ........................................................................................................... 21
Promo.png........................................................................................................... 22
Screenshot.png ................................................................................................... 22
XML files setup ....................................................................................................... 23
Skin.xml .............................................................................................................. 24
Colors.xml ........................................................................................................... 24
Greetings ................................................................................................................ 25
2
Appendix: cPro 1.03 skins – Features ...................................................................... 26
New buttons.png .................................................................................................. 26
Color themes support files .................................................................................... 26
mainframe_overlay.png .................................................................................... 27
shade_overlay.png ........................................................................................... 27
colorthemes.png ............................................................................................... 27
The Winamp5 Color Editor ................................................................................... 28
Creating a new color theme .............................................................................. 28
Doing the hard work - editing the colors ............................................................. 29
Saving your theme ........................................................................................... 29
Files table for cPro 1.00/1.03+ .............................................................................. 30
3
Introduction
When the ClassicPro engine was first released, in the beginnings of 2008, as many
other people did it, I figured out the potential of this skin model to be made by many people
who used to create classic skins and wished they could create something that wouldn’t be
constrained to the limitations of that skin engine, but had not courage to do coding in order to
create a modern skin. To reach that goal, it just needed a template that could show it
thoroughly so that people could make their skins without any worries or doubts. Then, in the
mid of April, I called Veroka to help me with the skin template and this manual. After almost 4
months of work, especially due to few spare time, it’s being released now.
This work is intended to introduce Winamp classic skinners and anyone who wants to
make skins for Winamp into the new ClassicPro age, showing them that is now possible to
make modern skins as easy as it is to make the old classic ones, with advantages like the
flexibility of the PNG graphic file format.
We hope you enjoy it!
ClassicPro 1.03
During our work to create this template (it started on beginnings of April 2008), new
versions of the ClassicPro plugin had been being released, and the latest version, the 1.03,
was released with features like the color themes support, that is really interesting, but it had
brought a few changes to the ClassicPro skin format. But don’t panic, this manual is not out
of date! By reading this, you are able to make ClassicPro skins compatible with the version
5.5x of Winamp (the cPros with color themes support require at least the version 5.54 of the
program), and besides that we had gone through the new features in an appendix.
4
Overview
Picture 1 - Cpro template skin in its normal (above) and windowshade (below) mode
A ClassicPro skin is no more than a Winamp modern skin that is built with the SingleUser Interface (SUI) concept. But, differently from other modern skins, where the graphic part
and the coding are all responsibility of the skinner, in a ClassicPro skin the skinner only need
to worry about the graphics part, because all the coding for it is previously installed in the
Winamp/Skins directory if you have the ClassicPro plug-in installed. See how the different
types of modern skins are processed by Winamp before rendering in the two diagrams
below:
Skin file
(*.wal)
with
*png files
*.xml files
scripts
rendering
Diagram 1 – Rendering of a normal modern skin
5
Skin file
(*.wal)
with
*png files
+
colors.xml
skin.xml
merge with
cpro skin engine
with
*xml files
+
scripts
rendering
Diagram 2 – Rendering of a modern ClassicPro skin
For this reason there is no more reason to avoid making modern skins for not knowing
the xml files or MAKI language for scripts; as shown before, the bulk of the coding is
previously solved by the ClassicPro engine! You can make modern skins as easily as it was
to make classic skins, with the advantage of the PNG file format – Besides that PNG files are
much more lighter than BMPs, they all allow transparency – which means that you can make,
for example, buttons files that can suit dozens of skins you would like to do!
6
Getting started
Unpacking the skin
In this pack you received two skin template files: one is a classicPro 1.00 compatible,
and the other is the 1.03+ compatible; In order to see the files, we recommend to unpack the
first one;
First of all, please check if you can see the file extensions in windows Explorer so that
you can change it by renaming the file. Via Control Panel > Folder Options > View,
check if the option “Hide extensions for known file types” - or the equivalent in
another language - is disabled.
Rename the extension file from .wal to .zip so that you can extract all files in it to a
folder.
Create a shortcut for the Winamp skins folder in a place easy to you to find (The path
for it is usually C:\Program Files\Winamp\Skins);
Drag the extracted files to the shortcut and the skin will be installed there as a folder.
Note that these steps are not necessary to install a skin in Winamp (normally you
would double-click the .wal file and say “Yes” to the WA skin installer), but the way it was
shown will be useful when making you own skin - when you edit any file in there, you will edit
directly in the skin file so that you will only “restart” the skin - by choosing another skin while
Winamp is playing and then re-choosing it - to see the result.
7
Rollover states
We are going to talk about it very frequently through this manual. Rollover states are
the different ways a picture is displayed according to the behavior of the mouse cursor over
it. The states are:
normal: when mouse cursor is away from it; the default view;
mouseover (or hover state): when mouse cursor is over it;
mousedown (or simply down state): when you click the image while the mouse cursor
is over it.
Transparency
The best of making classicPro skins is certainly the transparency allowed by the PNG
file format. With it, you are free to make some components freeform, and even create
semitransparent components that would suit many skins you make, saving time without
loosing quality!
In this manual, as is was written using MS Word, the images with transparency
appears in a different way if you opened the original file in a graphics program; the
transparent areas are represented in pure black here.
Though it’s fantastic, be careful with them; if you abuse of full transparency in a small
component, for example a button, the users of your skin may not handle with it, because full
transparency reduces the usable area for the component! There is no problem if you are
using semi-transparent gradients.
Graphics program
It’s the main tool you will use to create your skins. Although it can read and write PNG
graphics, Paint is NOT recommended, because it can’t work with transparency (that in case
of a 1.03+ classicPro is essential to create the overlays)! If you can’t afford programs like
Photoshop or PaintShopPro, and you have a Windows XP SP2 with .NET Framework
installed, Paint.NET is the least you can get; with it you can work with layers and
transparency, although it will took lots of work to make something more elaborated.
8
Essential ClassicPro graphic files
Mainframe
A classic skin has loads of windows to skin, how many, actually? That happens
because the classic skin engine, besides that many modern skins currently available, was
designed over a Multiple User Interface; it means each Winamp interface (Playlist Editor,
Media Library, Equalizer etc) has its own window. The release of the (original) Bento skin in
version 5.5 introduced the Single User Interface concept, where every Winamp interface can
be embedded in only one window. For this reason, you need only two windows to skin in the
ClassicPro interface: the mainframe in its normal and windowshade mode!
Mainframe.png
See detail:
Lightining
bolt
Areas for:
Titlebar buttons
Spec. analyzer/osc.
Timer and songticker
Playback buttons
Mute button
Volume bar
Load button
Seek bar
Shuffle/Repeat button
The highligths in this area
will be useful if you include
songinfo.png and
pb_status.png in your skin
Detail:
GFX suiframe
background(stretched)
Spec/osc color set
(dot &yellow columns)
It's the interface for the normal window. There are many decals in it just to show you
where each component is laid in: menu bar, vis, etc; Notice the window is sliced in this png,
and the smaller areas will be tiled if you resize the window when it is working; If you want
those areas to be stretched instead of tiled, you must include in your skin file the following
files:
mainframe_tb.png (for top and bottom slices)
mainframe_lr.png (for left and right slices)
You can make the transparency for this file easily, just make transparent the areas you
want to be (the corners, for example), without any need for coding!
9
Shade.png
Detail
Winshade mode layout:
Vis area
Volume bar area
Songticker (Stretcheable)
Seek bar (Stretcheable)
The spec/osc color set
follow the same way as for
the normal mainframe
Below all
winshade
mode buttons:
rollover states
for
themselves,
from T to D:
normal,
mouseover,
mousedown
Below the volume area:
Volume level indicator;
Semi-transparent sliders,
from L to R: normal,
mouseover, mousedon
Below the seek area:
Time elapsed indicator;
Semi-transparent sliders,
from T to D: normal,
mouseover, mousedon
It's the interface for the windowshade mode. At the top we have the skin layout; the
buttons are in the same order as in the normal mode, but we also can see where the volume
and seek bar are laid on.
Below the window layout we have all the buttons used to make the window layout; The
buttons that have the same color as in the layout are in the normal state; the clearer ones are
in the mouseover state, and the darker ones are the mousedown state.
It was included a small arrow at the right of the layout only to notice the skin can be
stretched by clicking/dragging it.
There is also a clearer section between the left side of the layout and the vis area: it’s a
smal section that may vary in size, according to the current width of the skin; it will always
appear between the mentioned areas, and sometimes in other areas to fill the layout when
some component doesn’t have enough space to be displayed.
The pictures above show how the winshade mode change its appearance
according to the length it is assumed.
10
Buttons/sliders
Buttons.png
Row set 1,
cols from L to
R: shuffle off,
repeat off,
repeat track
on,
mute off
Row set 2,
cols from L to
R: shuffle on,
repeat pl on,
load file,
mute on
Playback
buttons
Menu bar
patterns and
rating stars
Titlebar
button
columns
Menu
Always on
top (off)
Always on
top (on)
Restore
Maximize
Minimize
Exit Winamp
Switch to winshade
Lightning
bolt in
mouseover
state; by its
left, the
Wasabi
buttons
The graphics file for the buttons in the mainframe and default Wasabi objects in their
three rollover states. The image above is quite self-explanatory, therefore we are going to
show you some observations here about the behavior of the components skinned with this
file.
At first, the rating stars: The states for them are, from left to right: unrated, rated and
highlighted. If you’re not planning to use transparency on them, make sure their background
color
matches
what
is
found
in
the
gfx
of
the
suiframe.
That is, pay attention to the
background color
of the album art
and the
background around the
stars (see suiframe.png for more
details)
The Wasabi buttons will skin all the buttons of the media Library and some buttons of
the browser (in the Search and Go bars), and will also skin the Media Library and the Skin
chooser window scrollbars if you don’t include scrollbars.png in your skin; Theoretically,
because there’s a bug in the ClassicPro skin when scrollbars.png is not included – the Skin
Chooser scrollbar simply doesn’t work (it doesn’t even appear).
11
Seekvol.png
Backgrounds for
the seek bar, up to
down; default
background, time
elapsed and
mouseover state
of time elapsed
Volume (the small)
and seek slider
sets, up to down:
normal,
mouseover and
mousedown state
(They are semitransparent to
show what
happens below
them)
Backgrounds for the volume
bar. The upper image is the
default, the lower image
represents whether volume
level is being used.
The description of each section in this file is enough straightforward, so there are any
secret in this file, but we’ll give you a brief description of how the backgrounds of those bars
work.
The second image of the volume bar (the clearer one) is shown partially over the first
one, according to the volume level that is being used.
The seek bar is a bit more complex: They are divided into three sections; form left to
right, the first one is the start of the bar; the second one is the middle of the bar (it is
stretched to fit the whole bar), and the last one is the end of the bar; the backgrounds for the
time elapsed (both normal and mouseover states) work this way: when the song begins, the
first section is shown; within 3-6% of the time elapsed the second section is shown, and a
little later the last section appears; as the song is being played, the last section moves to
right, while the second section is stretched to follow it, covering the default background. You
must to pay attention to this behavior if you are not planning to use sliders for the seek bar in
your
skin,
avoiding
bugs
like
the
shown
below:
That’s what may
happen if you don’t
pay attention on what
was explained above!
Seekvol of a WIP by wilians (The black
color in seeker sliders and part of the
seeker backgrounds are transparent areas
The result in the WIP
12
Comp_but.png
This file consists of dozens of button sets that will skin the buttons in Playlist editor,
visualizer, widgets and equalizer; the first row is the normal state, the second one is the
mouseover state, the third is the mousedown state and the fourth, for some buttons, is the
normal active state (for example, when your equalizer is turned on, the “on” button in the last
row is used instead of in the first one).
If you don’t know anything about widgets, we’ll describe them when we go through
suiframe.png.
Comp_but_tabs.png
The placement of the button sets follow the same logic used to create comp_but.png.
This file will skin all the buttons inside the tabs.
Browser.png
The placement of the button sets follow the same logic used to create comp_but.png
and comp_but_tabs.png, although there’s no active state for any button in it. This file will
skin all objects inside the browser, which returned with the release of the original Bento skin!
Right below the Media Monitor button set, we find the slices used to create the borders
around the Address and Search bar (From L to R: start, the middle, always stretched, and
the and), and at its right, the dropdown symbol for the dropdown button in the address bar
(the button itself, as well as the other buttons inside those bars, is skinned with the Wasabi
button set found in buttons.png, so you have to take the same care as the rating stares if
you’re not planning to use transparency on it).
13
Scrollbars.png
Vertical scrollbars,
from left to right:
Normal, mouseover,
mousedown, scrollbar
background
Horizontal scrollbars,
from top to bottom:
Normal, mouseover,
mousedown, scrollbar
background
This is the file that will skin the scrollbars for the Media Library and the widgets. When
you don’t include this file, all scrollbars of the Media Library will be skinned with
buttons.png, but as commented before, in this case the scrollbars don’t work in the widgets,
therefore this file is essential to your skin work properly.
Interface
Beat_left.png
It’s the file you need to skin the beats. Actually, the three images above are the
different ways you can create your either beat_left.png or beat_right.png (If it exists – it will
be described in optional ClassicPro files), regarding the type of animation desired.
At left, you see the one-frame animation type; It’s the most simple one, the image is
displayed partially from right to left, according to the beat level;
The center image is the same file in its two-frame animation type; it works similarly
to the first type, but the lower part is used for the background of the animation;
At right, you see the same file in its multi-frame animation type; we did this file with
5 frames, but in your skin file you can add the number of frames you want,
remembering that the beat level increases from top to bottom. See the example
below : the beat_left and beat_right of cPro_munchen by wilians – it was made with
13 frames.
Bear in mind you can create this file with the width you want, but the height for each
frame, in any type, must be 45 pixels! Besides that, the wider you beat vis, the wider the skin
will have to stretch for it to show.
14
.
When the beat vis isn’t showed (disabled or area to small) promo.png is displayed (if it
is included in your skin file).
15
Eq.png
Equalizer interface
Equalizer/Preamplifier sliders in
their three rollover states
EQ band info (WA frequencies)
Toggle crossfade and crossfade
EQ band info (ISO frequencies)
setup buttons in their rollover states
This is the file that will skin the equalizer, which is shown in the widgets area in a
ClassicPro skin; The EQ band info is also part of the equalizer interface (it appears below the
eq bars) and the reason there are two slices to the same thing is that now you can choose
the band frequency set between the Winamp and ISO defaults. But you may worry about it
only if you want to show the frequency values in the interface.
Suiframe.png
Dividers:
The smaller
ones are
stretched
and the
bigger ones
are
displayed in
the middle
Main
frame
(which is
tabbed)
Playlist
section
Widgets
section
Tabs:
Top: active
Mid: inactive
Bottom:
mouseover
inactive
(Alternative) Bottom
left corner for the
widgets section
Toggle drawer buttons:
Green dots: normal state
Yellow dots: mouseover state
Red dots: mousedown state
Actually, the black regions in this file are transparent areas
This file skins the gfx for the interface of the skin. The three frames at left are divided
into 9 slices, and only the “corner” slices have their original size preserved. All the others are
stretched to suit the frame dimensions.
The tabs are divided into three slices, and the mid ones are stretched, and they overlap
the main frame, so you have to pay attention when you make them in order to suit the main
frame.
The alternative bottom for the widgets section usually appears in the tag viewer and the
skin chooser, so don’t forget to skin it, too!
16
Other components
Notifier.png
Notifier layout 1
Notifier layout 2
Album art background
It skins the notifier. The layouts are divided into 3 slices, where the mid ones are
stretched, and one of the layouts are displayed at a time, but the second one allows you to
add, for example, alpha blend around their borders. To switch between layout 1 and 2 you
have to toggle the checkbox “Enable Desktop Alpha Blending (when requested by skin)” in
Alpha Blending (Options>Preferences>Modern skins)
Tooltip.png
It’s a tiny 17x17 pixel png file which skins the tooltip background. If you do not include it
in your skin file, a default, dark one, is used; the text color for the tooltip is set via
colors.xml.
Combobox.png
Another 17X17 pixel .png file that skin the browser’s Address dropdown menu
background.
17
Optional ClassicPro graphic files
The files that are going to be shown below do not need to be included in your skin file
in order to make it work properly, but they can be useful either to give more identity to your
ClassicPro skin, or to make it behave in a different way.
mainframe_tb.png/mainframe_lr.png
The left image is mainframe_tb.png, and the right is mainframe_lr.png. These files
make the skin behave in a different way when you stretch or shrink the mainframe; with
these files, instead of tiling the smaller slices present in mainframe.png, the cPro engine will
stretch these files to render the window, what can be more convenient regarding to the way
you make the mainframe.
Remember that mainframe_tb can be any width, as well as mainframe_lr can be any
height. Also, you do not need to include both files in your skin.
About.png
You have probably seen it before; this png gives “identity” to your skin (It’s displayed in
the Current skin tab – Options>Preferences>Modern skins), so it’s interesting – we
recommend – to edit it in your skin file.
18
Art_aolradio.png, art_notfound.png, art_shoutcast.png
Art_aolradio.png
Art_notfound.png
(black=transparent)
Art_shoutcast.png
These pictures are shown in the Album Art; Only art_notfound is displayed more often,
so you can only skin it if you want.
Beat_right.png
It works the same way as beat_left.png, and if you include this file, it must be the same
width and have the same number of frames than that file. See beat_left.png for further
details.
Volume_ani.png
This file is an alternative, multi-frame animation for the volume bar; It can have the
number of frames you want, but each frame must be 97X15 pixels, as well as each frame
must be 1 px apart from their neighbours. The picture above is the animation used for
cPro_Munchen by wilians (11 frames).
Pb_status.png
It’s quite similar to playpaus.bmp of the classic skins; if you do not include it, your skin
will work, but it won’t show the playback status.
19
Songinfo.png
Font for the numbers
kB/MB/GB indicator
Mono/Stereo/Surround indicator
It’s a simple file that will skin the part of the mainframe that display all the information
about the file that is currently playing. If you do not include it, a true type font is rendered
instead (The file size will not be displayed in this case – but it doesn’t make any difference!).
The images below show how a skin would look with and without songinfo.png: The left
image is a skin with that file (cPro_Winamp Classic by iron2000) and the right image is a skin
without it (cpro_Munchen by wilians).
Songtickerfont.png
The font can be any width and any height, but the characters order must follow the way
it is shown in this file; You also have to add some lines to colors.xml in order to use this file,
we are going to discuss it later.
In this file, the black background is actually a transparent background.
Numfont.png
If you choose for using a ttf, please check colors.xml
20
Mainframe_title.png
In buttons.png we added a information that said if you filled the indicated pixel with the
color #ff0080 you could disable the menu bar in your skin so that you could use this file
instead. It appears centered at the top of the mainframe in its normal layout. Although it can
be any height (it’s 25 pixels height in this case), it must be 90 pixels width.
Pledit.bmp
We could make this file very self-explanatory and straightforward, so there’s no
information to add here. This is the only bmp file you could create for your skin; it’s only to
fine-tune the Playlist editor appearance, as the pictures below will show; they was taken with
the help of the Windows magnifier and show the difference of the PL window appearance
with and without this file:
Picture 2 - Playlist window appearance without pledit.bmp; figure out the
”broken” side borders
Picture 3 -Playlist window appearance with pledit.bmp: the difference is quite visible, and
the user can figure out these differences even with the window in its original size (The pictures
you've just seen were zoomed in by 4X)
21
Promo.png
This picture is used to display anything in your skin, in the area that is normally used
for the beats, when playback is stopped. Notice there are three different sizes for the same
promo, and one of them will be displayed, according to the current width of the skin.
Screenshot.png
As the name says, it’s a screenshot of your skin that you take in its minimal size and
save it as a PNG. It’s only shown when you are installing
22
XML files setup
All we are going to show below is an explanation of some basics about XML standards
so that you can understand the XMLs present in the classicPro skin, as well as any Winamp
Modern skin. If you want to know more about modern skinning and how to create a normal
modern skin, please see the “Skinning Tutorial”, written by Ken Chen.
XML stands for “eXtensible Markup Language”; A XML code consists of storing
information inside tags.
A tag will always follow this construction:
<component>
<property1>value.1</property1>
<property2>value.2</property2>
…
<propertyN>value.N</propertyN>
</component>
or:
<component property1=”value.1” property2=”value.2” … propertyN=
“value.N”/>
Both examples above will mean the same. These are the way data is described in a
XML file; in a Winamp Modern skin (any classicPro for example), the component can be a
button, a slider, and each component has their own properties.
The components in a Winamp Modern skin is often organized in several hierarchy
levels, like this example:
<component id=”component.id”>
<subcomponent1 id=”sub1.id” property=”sub1.prop”>
<auxiliarycomp id=”auxcp” property=”aux.prop”/>
</subcomponent1>
<subcomponent2 id=”sub2.id” property=”sub2.prop”/>
…
<subcomponentN id=”subN.id” property=”subN.prop”/>
</component>
Notice that the two types of tag construction are mixed in this example, and this format
is often used to make the Winamp XML (take a quick look at colors.xml); You can also
realize in the example above that auxiliarycomp is part of subcomponent1, and all
subcomponents belong to a single component. You shouldn’t close a tag (by typing a
backslash before the tag identifier) before adding all the subcomponents desired.
A comment inserted in a XML file will always follow this way:
<!--example of a comment in a XML file-->
Comments are not taken into account by the skin engine when compiling it
You can use even the Notepad to see the codes, but try using code editors like
EditPlus, Dreamweaver or Visual Studio; these programs color the code so that makes it
easier to check if they are consistent or not.
23
Skin.xml
It will always follow this way:
<?xml version="1.0" encoding="UTF-8" standalone="yes"?>
<WasabiXML version="1.31">
<skininfo>
<version>1.00</version>
<name>cPro_Template</name>
<comment>Template for ClassicPro skins</comment>
<author gaybag="wilians/Veroka">Wilian Souza/Veronica
Mogni</author>
<email>[email protected]</email>
<homepage>http://wilian.deviantart.com/http://www.veroka.devian
tart.com</homepage>
<screenshot>screenshot.png</screenshot>
</skininfo>
<scripts> <script file="warning.maki"
param="@COLORTHEMESPATH@"/> </scripts>
<include file="colors.xml"/>
<include
file="@COLORTHEMESPATH@/../../Plugins/classicPro/engine/load.xml"/>
</WasabiXML>
You only need to edit the bold fields: Put the required information inside the respective
tag and you will be all done! The example above is the skin.xml of the skin template, and you
can see the result in the Skin info of the Skin Browser:
cPro_Template v1.00
by Wilian Souza/Veronica Mogni ([email protected])
http://wilian.deviantart.com/http://www.veroka.deviantart.com
Template for ClassicPro skins
Colors.xml
As it is a bit complex to go over it here, you should open the file itself; we explained
every single line of that file (Through the W&V’s N, Wilian & Vero’s Notes, as well as the
original SkinConsortium notes also in there) so that you will not get lost when you edit the
colors of the Wasabi components required by all skins.
Remember the RGB values for the colors are input in decimal values (that vary from 0
up to 255)!
24
Greetings & credits
I’d like to thank Veronica Mogni (Veroka) for all her help to create the graphics, color
themes and other stuff for the skin, as well as for keeping me on track about the news
regarding the ClassicPro engine. I also don’t have to forget that people who supported me to
create this manual through those four months of work.
I have to remember that in several pictures I used skins made by another people, then I
have to mention them; These skins are:
Fluke, by Leechbite;
Winamp Classic, by iron2000;
Winamp Modern, by bartibartman
Insomnis v2 by zrco.
25
Appendix: cPro 1.03 skins – Features
New buttons.png
New required files and scripts were added to this type of skin, in order to receive the
color themes support. Another important aspect of those skins is their new buttons.png file,
where the lightning bolt has now three rollover states, like most buttons in the cPro skin:
New LB rollover states:
normal
mousedown
We couldn’t forget that colors.xml is also a bit different from the one used for the older
ones; A new property was added for all color ids, which is the “gammagroup”, that allows you
to create color themes for your skin. And finally, the script warning.maki is also different from
the one for ClassicPro 1.00 skins (The new file is 3,16 kB big, against 2,47 kB of the older
version).
Color themes support files
The cPro 1.03+ skins also have the overlays: An overlay is no more than a png file
where the non-transparent areas demark those areas that will be affected by the color
themes. Those areas cannot be necessarily filled by plain colors.
26
mainframe_overlay.png
This file is the overlay for the mainframe. It must be the same size as mainframe.png.
shade_overlay.png
This file is the overlay for the mainframe in its windowshade mode. It must be the same
size as the winshade layout (same width as shade.png and 25 pixels height).
colorthemes.png
The placement of the button sets follow the same logic used to create files like
comp_but.png. This file will skin the buttons in the new Color Themes chooser.
27
The Winamp5 Color Editor
This is a very handy plugin where you can create color themes for your skin. It doesn’t
come with Winamp 5.54, you have to install it by yourself, but it’s available on the Winamp
homepage; It doesn’t work only for ClassicPro skins, you can use it to edit or create color
themes for any modern skin, since it has gammagroups defined.
Figure out that its interface borrow some Wasabi components skinned by you, in this
case it will take the buttons from buttons.png and it will color the number fields and the inner
lists with colors defined by colors.xml.
Before using it, you have to check if you created gammagroups for the components
declared in colors.xml which you desire to be affected by your color themes.
All we are going to show now is a quick reference so that you can handle with it in its
basic stuff.
Creating a new color theme
Click the “New theme” button. Then, you will give a name for it and say OK.
28
Doing the hard work - editing the colors
In the “Color Groups” list, select the one desired to be changed;
In “Group Settings”, there are three sliders used to change the color. Move them so
that you can reach the color desired. Once it’s reached, click “Apply”. If you want to,
you can enable the “Auto Apply” so that you can see the changes realtime.
If you didn’t like the final result in any time, click “Revert”, then the original color will
be restored.
Depending on the color you want to reach, you may enable “Max Grayscale”, “Avg
Grayscale” and “Saturate Channels” at the same time, as well as changing the source
color - but it’s best to handle with the last one when you are more experienced on it.
You can copy the color reached in one color group to another color group via “Copy
Group”/”Paste Group”.
Do the steps above until all color groups are edited. You can see the final result in
the skin.
Saving your theme
When you are all done, you’ll think you just need to click “Save Themes” and you are
all done. But THAT’S NOT THE TRUTH, because doing this way your color theme won’t be
saved in colorthemes.xml of your skin, so the color theme you created won’t be available for
other users when you publish it. You neeed to export the color theme by clicking “Export” in
the Color Editor interface and then save the file as “colorthemes.xml”, this way:
After doing that, just insert the file created into the skin file and you are all done. Once
in the skin file, the color themes you created can’t be edited by other users.
29
Files table for cPro 1.00/1.03+
This is a simple table that shows the required
ClassicPro 1.00 compatible
mainframe.png
shade.png
buttons.png
seekvol.png
comp_but.png
comp_but_tabs.png
browser.png
scrollbars.png
beat_left.png
eq.png
suiframe.png
Required notifier.png
files
colors.xml
warning.maki
and optional files for both skin versions:
ClassicPro 1.03+
mainframe.png
mainframe_overlay.png
shade.png
shade_overlay.png
buttons.png**
seekvol.png
comp_but.png
comp_but_tabs.png
colorthemes.png
browser.png
scrollbars.png
beat_left.png
eq.png
suiframe.png
notifier.png
colors.xml
colorthemes.xml
tempfix103.xml
warning.maki**
tempfix103.maki
sendparams.maki
mainframe_tb.png
mainframe_lr.png
mainframe_title.png*
about.png
art_aolradio.png
art_notfound.png
art_shoutcast.png
beat_right.png
Optional
volume_ani.png
files
pb_status.png
songinfo.png
songtickerfont.png
numfont.png
promo.png
pledit.bmp****
skin.xml**
Other files***
* If you disable menu bar in buttons.png, this file will be required
**skin.xml and buttons.png, as well as warning.maki, are different between the skin
versions, If you include the older ones in a 1.03+ skin file, it will crash!
*** You can even add scripts and other graphic elements to your skin file, if you are in
an advanced level.
**** pledit.bmp is not used by the ClassicPro 1.03
30