1
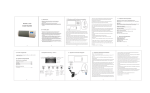
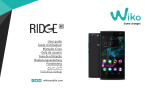
IQX OKU
Welcome
Thank you for purchasing this cellular phone.
To guarantee your cellular phone works properly, please
follow the instructions in this manual to prevent any
possible incidents or malfunctions.
Follow all safety warnings to avoid injury or property
damage.
Screen displays and illustrations in this user’s manual
are designed to help you operate your phone to its
optimum performance.
We continuously strive to improve our products.
Therefore, we reserve the rights to revise this user
manual or withdraw it at any time without prior notice.
Contents
Get Started....................................................................2
Insert SIM card........................................................2
Charge the Battery or Connect to a Computer......2
Keys and Parts..............................................................3
Lock and Unlock the Screen..........................................5
Make it yours................................................................6
Add Widgets and more icons to Home Screen...............7
Add widgets and icons to home screen.................7
Rearrange or remove widgets and icons on your
Home screen............................................................7
Enter Launcher..............................................................8
Open and Switch Applications................................8
Switch to Recently Used Application......................9
Make a Call................................................................ 10
Call Log...................................................................... 11
Reject a Call by Sending a Busy Message.................. 12
Add a Contact............................................................ 12
Send and Receive Message(s)................................... 13
Browse the Web......................................................... 15
Enjoy Music................................................................ 16
Download Applications From Android Market.............. 17
Manage Applications/ Move to SD card..................... 18
System Settings......................................................... 19
Wireless & Network..............................................19
Device....................................................................20
Personal................................................................21
System..................................................................22
Upgrade Software by FOTA......................................... 23
Maintenance & Safety................................................ 30
Battery Information..................................................... 34
Condition of Warranty................................................. 35
Get Started
Insert SIM card
The phone is a Dual SIM mobile phone allowing you to
use the facility of two networks.
1. Switch off the mobile phone.
2. Withdraw the SIM card slots with a thimble, and
insert the Micro SIM card correctly in the card slot(s)
(See figure below)
Charge the Battery or Connect to a Computer
You can charge your battery using the charger or
connect the USB cable (supplied with this phone) to
the computer.
Keys and Parts
The smart phone supports 3G Card and gives you
marvelous feelings to experience on Camera, Video
recorder, FM radio, Music and Sound recorder. Let you
install various APPs, games, and more (supports APK
format) by downloading from Android Market.
1. Volume Up/Down
Key
To adjust the ringer volume, adjust
the voice volume during a call and
adjust media volume.
2. Headset port
To connect an earphone so you
can listen to music or radio, etc.
3. Receiver
To hear the voice of the other side
when calling.
Allow you to take pictures while
4. Front Camera
facing the screen.
5. Power Key
Switch the phone on or off.
Press and hold to open phone
options menu.
6. Menu Key
Open a list of options available in
the current screen or application.
7. Home Key
Go to home screen;
Press and hold to open a window
showing you most recently used
applications.
8. Back Key
Go back to the previous screen;
Close the on-screen keypad, a
dialog box, an options menu, or
the notification panel.
9. USB jack
To connect charger or USB data
cable for data exchange.
10. Back Camera lens For taking photos.
11. Flashlight
To take photos in low-light
conditions.
To listen to music, and other
12. Speaker
sounds offered by your phone.
Lock and Unlock the Screen
Press power button to enter Sleep mode and meanwhile
the screen will be locked; press power button again
to wake up and then drag the lock to the right side to
unlock.
Make it yours
1)Home screen: It is your starting point to access all
the features on your phone. It displays application
icons, widgets, shortcuts, and other features.
2)Notification Bar: At the top of the screen, the Status
bar displays the time, status, and notifications. If
there is a new message, missed call or something
in the notification bar, you can drag it down to open
notification panel and click the desired one to have
a view. When you finished, you can close it by
dragging the panel up or pressing “Back”.
3)Launcher: Touch the Launcher icon at the bottom of
the screen to view all installed applications.
Add Widgets and more icons to Home Screen
Add widgets and icons to home screen
Enter Launcher and long press and hold an application
till the app displays on the home screen, and then
release your finger hold.
Rearrange or remove widgets and icons on your Home
screen
a) Long press and hold the widget or icon you want
to move. Once “Remove” appears, don’t release
your hold on the icon and drag the widget or icon to
a new location on the screen.
b) Press and hold on icon for several seconds, and drag the widgets or icon to remove!
Enter Launcher
Open and Switch Applications
The Launcher holds icons for all of the applications
on your phone, including any application that you
downloaded from Android Market or other sources. On
the Home screen, touch the Launcher Icon to open the
main menu.
Slide the Launcher left
or right to bring more
icons into view.
Touch an application to
open it.
Press Home icon or Back icon to close the Launcher.
Press and hold the
icon for a few seconds.
Touch to open the
application
Make a Call
On the start screen, choose and enter a complete
phone number to make a call.
Make a call
Slide the screen to right
Slide the screen to right
10
Call Log
In call log options, you can Make a call, add new
contact and send message etc.
Short press this
place to add the
new Contact.
Touch the icon
to view details
of this call log.
Touch the icon to Dial
out.
11
Reject a Call by Sending a Busy Message
While there is an incoming call, you are inconvenient to
accept the call, and then you can send a busy message
for rejecting the call.
Drag the circle up to , some busy messages will
show on the screen, short tap any of them to send out.
Add a Contact
Tap and enter Contacts and then add a contact
(see figure below.)
Tap “ ” to add a new contact to Phone or SIM card.
12
Send and Receive Message(s)
Enter Messaging, and then compose new message.
You touch a text field where you want to enter text, to
open the keyboard.
Tap this to select desired
contact from phonebook.
Touch once to capitalize the
next letter you type.
Touch and hold for caps.
Press space or a punctuation
mark to enter the highlighted
suggestion.
a. When you are composing a new text message, you
can select text for cutting or copying. The selected
text is highlighted in blue.
Touch the text field or portion that contains text.
(see the below figure) You can select all contexts, copy, cut and paste.
b. When a new message comes, you can read by
dragging notification panel and click the message, or
entering Message to read it directly.
13
Tap this to select all.
Tap this to paste.
Tap this to copy.
Tap this to cut.
1.Long press one of the all message thread, you can delete the message thread.
2.Short press a message in a message conversation window.
3.Touch Forward in the menu that opens.
4.Add a contact.
5.Touch Send icon to send the message.
14
Browse the Web
Switch on Data connection or Wi-Fi
Touch it to switch on or off
Data connection
Tips: To browse the web, you need switch on Data
connection.
If there is Wi-Fi around, you can switch on Wi-Fi to
use it browse the web. Some may need password.
15
Enjoy Music
When you copy music to your Micro SD card, the Music
player searches the device for music files and builds
a catalog of your music, based on information about
each file that is stored in the file itself.
Touch to open
the album,
songs or
playlist.
16
Download Applications From Android Market
a Add a Google account
b Enter Android Market (Play Store) and download
apps.
17
Manage Applications/ Move to SD card
Enter Setting > Apps, then manage the applications.
As you install downloaded Apps, you need switch on
“Unknown sources” in Security settings.
18
System Settings
Wireless & Network
You can customize wireless & network settings here,
including:
1.Wi-Fi
Turn on or turn off Wi-Fi here. Set up and manage
wireless access point s here.
2.Bluetooth
Turn on or turn off Bluetooth here. Scan for devices and
then it will show the scanned devices. Choose a device
to pair and then you can send or receive information via
Bluetooth.
3. Data usage
4. More…
Airplane mode
VPN
Tap Add VPN and then choose one of the following:
1) Add PPTP VPN (Point-to-point Tunneling Protocol)
2) Add L2TP VPN (Layer 2 Tunneling Protocol)
3) Add L2TP/IPSec PSK VPN (Pre-shared key based
L2TP/IPSec VPN)
4) Add L2TP/IPSec CRT VPN (Certificate based L2TP/
IPSec VPN)
And then set VPN name, VPN server, Enable encryption,
DNS search domains to finish it. Press Menu, then tap
Save to confirm or tap cancel.
19
Tethering & portable hotspot
Share your phone’s mobile data connection via USB or
as a portable Wi-Fi hotspot.
Mobile networks
Set options for roaming, networks, APNs here.
1) Data roaming checkbox: Connect or disconnect to
data services when roaming.
2) Network Mode: Choose preferred network mode
from GSM/WCDMA auto, WCDMA only, or GSM only.
3) GSM/UMTS Options: Set Access Point Names, Use
only 2G networks checkbox, and Network operators
here.
Device
1. Audio profiles
General
Personalize your call ringtone, notification sounds, Dial
pad touch tones, Touch sounds, etc.
Silent
Silent only
Meeting
Vibrate only
Outdoor
Loudest ring and vibrate
20
Drive
Auto answer and hand-free
2. Display
You can define your wallpaper and set auto rotate
screen, brightness, font size, sleep, etc.
3. Storage
You can check out the space of your phone or SD
card here.
4. Battery
You can see the use of the battery.
5. Apps
You can manage installed application here.
Personal
1. Location access
Access to my location: ON/OFF.
GPS Satellites
Let apps use GPS to pinpoint your location.
Wi-Fi & mobile network location
Let apps use Google location service to estimate your
location faster. Anonymous location data will be
collected and sent to Google.
2. Security
Screen lock
Owner information
SIM card lock
21
Passwords
Device administration
3. Language & input
Select language and input method.
4. Backup and reset
Backup my data: Backup app data, Wifi passwords, and
Factory data reset: Erases all data on phone.
System
1. Smart Gesture
2. Date & time
3. Schedule power on/off
4. Accessibility
5. About phone
22
Notice:
Upgrade Software by FOTA
Before testing, please make sure:
1. WIFI is available.
2. Battery power is more than 40%.
Check the firmware:
Check the firmware version before the System Software
Update.
Settings About phone Build number
Android Mode:
1. Click the icon “System Software Update” in
Application Manager (Pic.2)
System Software Update initializing interface will
pop up (Pic.3)
23
2. Pic.3 Press Yes, will try to connect to server,
3 cases will happen:
Case 1: Connect to server successfully, a new
firmware is found on server.
Pic.4 Pic.5, will show you the information and
description of the new firmware package.
24
Case 2: There is no new firmware available on server.
It will pop up” The current system is up-to-date”, if
you press ”OK”, the application will exit. (Pic.6)
25
Case 3: Fail to connect to server. It will pop up “Error
occurred”, then if you press ”OK”, the application will
exit. (Pic.7)
3. Pic.5 Press Yes, will show up the downloading
interface, or if you press ”Cancel”, the application
will exit.
Pic.8
26
4.Updating interface:
4.1 Update Now Update confirmation interface.
If you press ”Yes”, the phone will reboot,
enter the Recovery Mode. (Pic.9 Pic.10
Pic.11)
27
4.2 Update later: Will exit the application. When
you enter the application next time, will show
you Step 4 directly.
Recovery Mode:
Some codes and a progress bar will show in phone
screen. Phone will reboot after the recovery is finished.
Then the phone will enter the Android mode again.
Android Mode:
Report server update statues: System software has
been successfully updated.
28
Check the firmware again:
Check the firmware version again after the System
Software Update.
Settings About phone Build number
29
Maintenance & Safety
Please read and observe the following information for
safe andproper use of your phone and to prevent
damage. Also, keep the user guide in an accessible
place at all the times after reading it.
1.After sales service
Kindly refer to the Warranty Card provided in the sales
package box.
2.Charger and Adapter Safety
Charger and adapter are designed for indoor use only.
3. Battery Information and Care
• Please do not disassemble the rear cover of the
mobile phone, since the battery is inbuilt.
• Recharge the battery after long periods of non-use
to maximize battery life.
• Battery life will vary due to usage patterns and
environmental conditions.
• The self-protection function of the battery cuts the
power of the phone when its operation is in an
abnormal status. In this case, remove the battery from the phone, reinsert it, and turn the phone on.
4.General Notice
• Do not place items containing magnetic components
such as a credit card, phone card, bank book, or
subway ticket near your phone. The magnetism of
the phone may damage the data stored in the
magnetic strip.
30
• Talking on your phone for long period of time may reduce call quality due to heat generated during use.
• When the phone is not used for a long period time,
store it in a safe place with the power cord unplugged.
• Using the phone in proximity to receiving equipment
(i.e. TV or Radio) may cause interference to the
phone.
• Do not immerse your phone in water. If this happens,
remove the battery and take it to an Authorized
Service Center.
• Do not paint your phone.
• The data saved in your phone might be deleted due
to careless use, repair of the phone, or upgrade of
the software. Please backup your important phone
numbers. (Ring tones, text messages, voice
messages, picture, and videos could also be
deleted.) The manufacturer is not liable for damage
due to the loss of data.
• Do not turn your phone on or off when the phone is
close to your ear.
• When charging, please place the phone in an
environment that has a normal room temperature
and good ventilation. It is recommended to charge the phone in an environment with a temperature
under 40 .
Please ensure to use only the charger offered by the
manufacturer. Using unauthorized charger may cause
danger and violate the authorization of the phone and the guarantee article.
31
• Dispose of used batteries according to the instructions.
• Excessive sound pressure from earphones and
headphones can cause hearing loss.
• Due to the used enclosure material, the GSM mobile
phone shall only be connected to a USB Interface of
version 2.0 or higher. The connection to so called
power USB is prohibited. The adapter shall be
installed near the equipment and shall be easily
accessible.
• Do not use the mobile phone in the environment at
too high or too low temperature,
• Never expose the mobile phone under strong sunshine
or too wet environment.
• The suitable temperature for the phone is 0 -50 .
• The maximum operating ambient temperature of the
charger declared by the manufacturer is 45 .
• CAUTION RISK OF EXPLOSION IF BATTERY IS
REPLACED BY AN INCORRECT TYPE. DISPOSE OF
USED BATTERIES ACCORDING TO THE INSTRUCTIONS
• The SAR limit of Europe is 2.0 W/kg. Device types
HIGHWAY has also been tested against this SAR
limit. The highest SAR value reported under this
standard during product certification for use at the ear
is 0.198W/kg and when properly worn on the body
is 0.409W/kg. This device was tested for typical
body-worn operations with the back of the handset
kept 1.5cm from the body. To maintain compliance
with RF exposure requirements, use accessories that
32
maintain a 1.5cm separation distance between the
user’s body and the back of the handset. The use of
belt clips,holsters and similar accessories should not
contain metallic components in its assembly. The
use of accessories that do not satisfy these
requirements may not comply with RF exposure
requirements, and should be avoided.
• Excessive sound pressure from earphones and
headphones can cause hearing loss.
• This charger is for indoor use only.
• The charger type is UD36A50100, output voltage/
current is 5Vdc/1A.
Warnings: Company will not bear any responsibility for
any incompliance with the above guidelines or improper
use of the mobile phone. Our company keeps the right
to make modifications to any of the content here in this
user guide without public announcement in advance.
The content of this manual may vary from the actual
content displayed in the device. In such case, the latter
shall govern.
33
Battery Information
Li-polymer
2350mAh
•The battery life depends on many factors, including
the SIM card, network conditions, settings, usage
and environment.
•Making calls, turning on the backlight and music
player will consume more battery power.
•The standby time is shorter when the network is not
available than in the standard status.
•For power saving, the backlight turns off automatically
if your phone stands idle for an assigned time.
•The performance of battery varies with the charging
status, temperature, local radio wave and backlight
status.
34
Condition of warranty
1.The Warranty Period is twelve (12) months for the
mobile device, travel charger, desktop stand and
wireless headset starting from the time of the
product’s original purchase by the first end-user.
2.The Warranty Period is six (6) months for the battery,
headset, memory card, and data cable starting from
the time of the product’s original purchase by the
first enduser.
3.The Warranty covers the i-mobile’s mobile device
and accessories purchased from an i-mobile by
Samart shop; authorized i-mobile dealer, or i-mobile
authorized service center (Thailand only).
4.The warranty condition of the i-mobile’s mobile
device and accessories purchased outside of Thailand
shall follow the warranty condition specified for that
country.
For products purchased in Thailand, the end-user
acknowledges and recognizes the expiry of the
warranty period from the warranty sticker and the
purchased date recorded by the i-mobile pointof-sale
system.
5.During the Warranty Period, i-mobile or authorized
i-mobile service centers will remedy the defects in
materials and workmanship free of charge by repairing
or replacing the defective part(s).
35
6. i-mobile warrants the mobile device and accessories
where the warranty and conditions shall follow the
applicable national law(s). To the extent permitted by
the applicable law(s), i-mobile does not warrant
any commercial aspect and loss of or damage to or
corruption of data, due to use or loss of use of the
product.
7. As the mobile cellular system/ video and audio
signal which operate with the i-mobile mobile device
and accessories are provided by a third party
(independent operator) therefore, i-mobile will not
accept responsibility under this warranty for the
operation, availability, coverage, or services of other
networks or systems.
8. For any i-mobile mobile device and accessories that
have been repaired or have part(s) replaced, the
repaired part(s) will be warranted for the remainder
of the original warranty period from i-mobile or
ninety (90) days from the date of repair, whichever
is longer.
9. For repair service outside warranty condition(s), the
repairing charge and repair part(s) cost shall be
customer’ responsibility.
10.The warranty sticker on the mobile device and
accessories must not be torn, removed, erased,
defaced, or madeillegible.
36
This Warranty Is Void Under The Following Conditions
1. Damage to the mobile device and accessories
resulting from unusual operation, misuse including
the use that is contrary to the instructions provided
by i-mobile (e.g. as indicated in the user guide),
inappropriate storage, exposure to moisture, to
dampness or extreme thermal or environmental
conditions or rapid changes in such conditions,
corrosion, oxidation, spillage of food or liquid or to
influence from chemical products, or from any
action that causes the damage of the mobile device
and accessories.
2. The damage of the mobile device and accessories
resulting from natural disa ter.
3. The mobile device and accessory has been opened,
repaired, part(s) replaced, modified, adjusted,
connected, or altered by anyone other than an
authorized service center from i-mobile.
4. The mobile device and accessory has been used
with or connected to a product, accessories, s
oftware and/or service not supplied or authorized
by to use with the mobile device and accessory.
5. A variation of the brightness and display color
between each mobile device and accessory may be
found.
37
6. The modification, removal, alteration, or made illegible
of the serial number, the date code, or the IMEI
number of the mobile device and accessory result
invoid of warranty.
7. The damage and ruin of warranty sticker on the
mobile device and accessories result in void of
warranty.
38