1
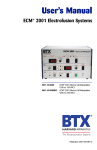
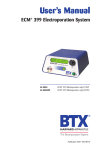
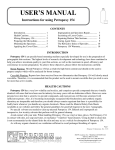
User’s Manual
ECM® 2001 Electrofusion Systems
45-0080
45-0080INT
ECM® 2001 Electro Cell Manipulator
(100 to 120 VAC)
ECM® 2001 Electro Cell Manipulator
(200 to 230 VAC)
Publication 5501-002-REV-E
WEEE/RoHS Compliance Statement
EU Directives WEEE and RoHS
To Our Valued Customers:
We are committed to being a good corporate citizen. As part of that commitment,
we strive to maintain an environmentally conscious manufacturing operation.
The European Union (EU) has enacted two Directives, the first on product recycling
(Waste Electrical and Electronic Equipment, WEEE) and the second limiting the use
of certain substances (Restriction on the use of Hazardous Substances, RoHS).
Over time, these Directives will be implemented in the national laws of each EU
Member State.
Once the final national regulations have been put into place, recycling will be offered
for our products which are within the scope of the WEEE Directive. Products falling
under the scope of the WEEE Directive available for sale after August 13, 2005 will
be identified with a “wheelie bin” symbol.
Two Categories of products covered by the WEEE Directive are currently exempt
from the RoHS Directive – Category 8, medical devices (with the exception of
implanted or infected products) and Category 9, monitoring and control instruments. Most of our products fall into either Category 8 or 9 and are currently
exempt from the RoHS Directive. We will continue to monitor the application of the
RoHS Directive to its products and will comply with any changes as they apply.
• Do Not Dispose Product with Municipal Waste
• Special Collection/Disposal Required
ECM ® 2001 Electrofusion/Electroporation Systems
Table of Contents
General Information:
Serial Number ................................................................2
Calibration ......................................................................2
Warranty ....................................................................2-3
Service ........................................................................3-4
Repair Facilities and Parts ..............................................4
General Safety Summary..............................................5-6
Electrical & Technical Specifications ............................7-8
General Specifications......................................................9
Introduction:
Features........................................................................10
Operation: Getting Started ......................................11-12
Quick Start:
Front Panel Controls ..............................................13-15
External Connections ..................................................16
Replacing Power Entry Module Fuse............................17
Operating Basics ......................................................18-20
Advanced Operation: Programming
Monitoring Connection ..........................................21-22
Experimental Methods..............................................23-28
Appendix A: Troubleshooting ..................................29-34
Appendix B: Glossary of Technical Terms ..............35-38
Appendix C: Accessories and Replacement Parts..39-40
Appendix D: General Cleaning and Maintenance ........40
Appendix E: ECM® 2001 Footswitch Compatibility ......40
Appendix F: Connecting Electrodes ........................41-46
ECM® 2001 Generator Troubleshooting
Guidelines ..............................................................47-48
Page 1
www.btxonline.com
ECM ® 2001 Electrofusion/Electroporation Systems
General Information
Serial Number
The serial number for the ECM® 2001 is located on the rear of the
instrument case. All inquiries concerning these products should refer
to the serial numbers on the units.
Calibration
There is no calibration required for the ECM® 2001.
Warranty
BTX - Harvard Apparatus warranties the ECM® 2001 for a period of
two years from the date of purchase. At its option, BTX – Harvard
Apparatus will repair or replace the unit if it is found to be defective as
to workmanship or materials. This warranty does not extend to any
instrumentation which has been (a) subjected to misuse, neglect, accident or abuse, (b) repaired or altered by anyone other than
BTX - HARVARD APPARATUS without BTX - HARVARD APPARATUS’
express and prior approval, (c) used in violation of instructions furnished by BTX - HARVARD APPARATUS. This warranty extends only
to the original customer purchaser.
Failure to use the Enhancer 3000 High Voltage probe to connect a
BTX Generator to an external digital oscilloscope for monitoring will
result in voiding your warranty; connecting directly to the external
monitoring equipment or modified monitoring setup will damage the
Generator.
IN NO EVENT SHALL BTX - HARVARD APPARATUS BE LIABLE FOR
INCIDENTAL OR CONSEQUENTIAL DAMAGES. Some states do not
allow exclusion or limitation of incidental or consequential damages so
the above limitation or exclusion may not apply to you. THERE ARE
NO IMPLIED WARRANTIES OF MERCHANTABILITY, OR FITNESS
FOR A PARTICULAR USE, OR OF ANY OTHER NATURE. Some states
do not allow this limitation on an implied warranty, so the above limitation may not apply to you.
Without limiting the generality of the foregoing, BTX - HARVARD
APPARATUS shall not be liable for any claims of any kind whatsoever,
as to the equipment delivered or for non-delivery of equipment, and
whether or not based on negligence.
Warranty is void if the ECM® 2001 is changed in any way from its
original factory design or if repairs are attempted without written
authorization by BTX - HARVARD APPARATUS.
Warranty is void if parts, connections or cell fusion chambers not
manufactured by BTX - HARVARD APPARATUS are used with the
ECM® 2001.
Page 2
www.btxonline.com
ECM ® 2001 Electrofusion/Electroporation Systems
General Information
(continued)
If a defect arises within the warranty period, promptly contact BTX –
Harvard Apparatus, 84 October Hill Road, Building 7, Holliston,
Massachusetts, USA 01746-1388 using our toll free number
1-800-272-2775 (US Only) or 508-893-8999
(E-mail: [email protected]). Goods will not be
accepted for return unless an RMA (Returned Materials Authorization)
number has been issued by our customer service department. The
customer is responsible for shipping charges. Please allow a reasonable period of time for completion of repairs, replacement and return.
If the unit is replaced, the replacement unit is covered only for the
remainder of the original warranty period dating from the purchase of
the original device.
This warranty gives you specific rights, and you may also have other
rights, which vary from state to state.
Service
All service under the warranty will be made at the BTX - HARVARD
APPARATUS, Holliston, Massachusetts facilities or an authorized
service site. Owner will ship instrument prepaid to Holliston,
Massachusetts, USA or the service site. BTX - HARVARD APPARATUS
will return the instrument after servicing, freight prepaid to owner’s
address.
Obtaining Service:
Service During Warranty
1. Write or call the BTX - HARVARD APPARATUS Customer
Support Group and describe the nature of the problem.
2. Carry out minor adjustments or tests as suggested by
BTX - HARVARD APPARATUS.
3. If proper performance is not obtained, BTX - HARVARD
APPARATUS will notify you to ship the instrument, prepaid,
to its Service Department.The instrument will be repaired
and returned at no charge for all customers in the
continental United States.
Customers outside of the continental United States who have
purchased our equipment from distributors should contact the
distributor. If you have purchased your equipment from us, you
should contact us directly. We will repair at no charge, but will not
pay for shipment, documentation, etc. These charges will be billed
at cost.
Note: Under no condition should the instrument or accessories be
returned without prior approval from BTX - HARVARD APPARATUS. An
RMA (Returned Materials Authorization) number must be obtained.
Page 3
www.btxonline.com
ECM ® 2001 Electrofusion/Electroporation Systems
General Information (continued)
Out-Of-Warranty Service
Proceed exactly as for Warranty Service, above. If our Service
Department can assist you by phone or correspondence, we will be
glad to, at no charge.
Repair service will be billed on the basis of labor and materials. A
complete statement of time spent and materials used will be supplied.
Shipment to BTX - HARVARD APPARATUS should be prepaid. Your
bill will include return shipment freight charges.
Disassembly by the user is prohibited. Service should only be carried out
by experienced BTX - HARVARD APPARATUS technicians.
Repair Facilities and Parts
BTX - Harvard Apparatus stocks replacement and repair parts. When
ordering, please describe parts as completely as possible, preferably
using our part numbers. If practical, enclose a sample or drawing. We
offer complete reconditioning service.
Page 4
www.btxonline.com
ECM ® 2001 Electrofusion/Electroporation Systems
General Safety Summary
Please read the following safety precautions to ensure proper use of
your ECM® 2001. To avoid potential hazards and product damage, use
these products only as instructed in this manual. If the equipment is
used in a manner not specified by the manufacturer, the protection
provided by the equipment may be impaired.
To Prevent Hazard or Injury
OBSERVE ALL TERMINAL RATINGS
Review the operating manual to learn the ratings on all
connections.
GROUND THE ECM ® 2001
This product is grounded through the grounding conductor of the
power cord. To avoid electric shock, the grounding conductor must
be connected to earth ground. Before making any connections to the
input or output terminals of the product, ensure that the product is
properly grounded.
MAKE PROPER CONNECTIONS
Make sure all connections are made properly and securely.
DO NOT OPERATE WITHOUT COVERS
To avoid electric shock or fire hazard, do not operate these products
with the covers removed.
AVOID EXPOSED CIRCUITRY
Do not touch exposed connections when power is present.
DO NOT OPERATE IN LOW IMPEDANCE
Sample: Load or Sample
If the electroporation samples have an impedance of less than 20 Ω
in LV and 40 Ω in HV, the samples may arc and result in sample loss
and potential damage to unit.
USE PROPER LINE CORD
Use only the specified line cord for this product and make sure line
cord is certified for country of use.
USE PROPER FUSE
Use only specified fuses with product.
DO NOT OPERATE WITH SUSPECTED FAILURES
If damage is suspected on or to the products, do not operate. Contact
qualified BTX service personnel to perform inspection.
DO NOT OPERATE IN EXPLOSIVE ATMOSPHERE
To avoid injury or fire hazard, do not operate these products in an
explosive environment.
DO NOT OPERATE IN WET/DAMP CONDITIONS
To avoid electric shock, do not operate these products in wet or damp
conditions.
Page 5
www.btxonline.com
ECM ® 2001 Electrofusion/Electroporation Systems
General Safety Summary
(Continued)
OBSERVE ALL WARNING LABELS ON PRODUCT
Read all labels on the products to ensure proper usage.
DO NOT CONTINUALLY PULSE UNIT
If you continue to pulse the unit without a 10-20 second delay between
pulse series, the unit may overheat and result in damage to components.
Safety Terms and Symbols:
Terms that appear in this manual:
WARNING. Warning statements identify
conditions or practices that could result in injury or
loss of life.
CAUTION. Caution statements identify
conditions or practices that could result in
damage to these products or other property.
Symbols that may appear on the products:
Page 6
Danger
Attention
Protective
Functional
High
Voltage
Refer to
Manual
(Earth)
Terminal
Ground
www.btxonline.com
ECM ® 2001 Electrofusion/Electroporation Systems
Electrical & Technical Specifications
Standard Capabilities:
Operating Temperature
10˚ to 40˚C
Storage Temperature
10˚ to 50˚C
Humidity
90% relative humidity
Altitude
2,000 m (operating)
Pollution Degree
2 (Not to be operated in
conductive pollutants
atmosphere)
Power Requirements
100 to 120 VAC, 50/60 Hz
200 to 230 VAC, 50/60 Hz
Input Power
85 W maximum (idle)
1.6 kW maximum (peak)
Fusing
T, 8 A, 250 V 5 x 20 mm
Mechanical Characteristics:
Weight
22 kg (47 lbs)
Dimensions, L x W x H
43.2 x 39.4 x 28 cm
(17 x 15.5 x 11 in)
Electrical Characteristics:
Alignment:
Frequency
1 MHz, fixed
Voltage
0 to 75 VRMS
Duration
0 to 99 sec
Post-Fusion AC:
Frequency
1 MHz, fixed
Voltage (VRMS)
1/10 of the alignment AC
amplitude, attenuates with
time
Duration
0 to 9 sec
Electroporation:
High Voltage Mode (HV Mode):
Voltage
10 to 3000 V peak
Pulse Length
1 to 99 µsec
Low Voltage Mode (LV Mode):
Voltage
10 to 500 V peak
Pulse Length
1 to 99 msec
0.01 to 0.99 msec
Number of Repeats
Page 7
0 to 9
www.btxonline.com
ECM ® 2001 Electrofusion/Electroporation Systems
Electrical & Technical Specifications
(continued)
Note:
LV Mode
Less than a 20% V drop at the end of the pulse with the following
constraints:
PL ≤ 25 ms, load 3 20 Ω
PL ≤ 1 sec, load 3 1k Ω
PL ≤ 10 sec, load 3 10k Ω
HV Mode
Less than a 10% V drop at the end of the pulse with the following
constraints:
PL ≤ 600 µs, load 3 40 Ω
BTX instruments are designed for in vitro and in vivo animal and
plant applications only and are not for human Clinic.
Page 8
www.btxonline.com
ECM ® 2001 Electrofusion/Electroporation Systems
General Specifications
Certifications and Compliances
Overvoltage Category:
CAT III Products in this Category: Distribution-level mains,
fixed installation
CAT II: Local-level mains, applications and portable
equipment
CAT I: Signal levels in special equipment or parts of
equipment, telecommunications and electronics
Meets requirements of Directive 89/336/EEC for Electromagnetic
Compatibility (EC) and Low-Voltage Directive
73/23/EEC for Product Safety.
Compliance was demonstrated to the following specifications as
listed in the Official Journal of the European Communities:
EN 50081-1 Emissions
EN 55011 Class B Radiated and Conducted Emissions
EN 55082-1 Immunity
IEC 10004-2 Electrostatic Discharge Immunity
IEC 10004-3 RF Electromagnetic Field Immunity
IEC 10004-4 Electrical Fast Transient/Burst Immunity
Low Voltage Directive 73/23/EEC
EN 61010-1 Safety requirements for electrical
equipment for measurement, control and laboratory use.
Page 9
www.btxonline.com
ECM ® 2001 Electrofusion/Electroporation Systems
Introduction
The ECM® 2001 is a multifunctional electrofusion and electroporation square wave generator. Embryo and cell fusion are facilitated by the combination of the AC and DC wave pulses. Fusion is
achieved by the generation of an AC current wave form that generates a benign dielectrophoretic alignment of cells. With only
microsecond switchover time from AC to DC, efficient fusion
takes place. After fusion, the AC is reapplied maintaing the cell
compression for the rounding off process resulting in a higher
number of hybrids.
ECM® 2001 features include:
•
•
•
•
•
Page 10
AC waveform of 1 MHz (optimal for fusion)
Electroporation capabilities
A wide range of voltages from 10 V to 3000 V
Finer voltage discrimination
Capable of operating at low impedance loads of 20 Ω
www.btxonline.com
ECM ® 2001 Electrofusion/Electroporation Systems
Operation: Getting Started
Unpacking
The ECM® 2001 Electro Cell Manipulator System is shipped in a
carton specifically designed to provide maximum protection for the
instrument during transportation under normal handling conditions.
Upon receipt, open the carton and carefully remove the ECM® 2001.
The contents should be examined for any apparent damage resulting
from shipment, and if necessary, BTX - HARVARD APPARATUS
should be informed in writing. Be sure to save the carton and packing
materials for any future transportation and shipping requirements.
Packing Data
Check the packing slips to ensure that all items ordered and listed are
included in the shipment. If any parts are missing, call BTX - HARVARD APPARATUS at 1-800-272-2775 (US Only) or 508-893-8999,
(E-mail: [email protected]) or your distributor.
CAUTION
Power Source
As received the ECM® 2001 is ready for use with either a 100 to
120 VAC, or 200 to 230 VAC, single phase, 50/60 Hz power source
according to the electrical requirements of the country to which it is
shipped.
The power cord has a standard three-prong plug. For safety reasons,
it is mandatory that the instrument be grounded.
DO NOT MODIFY THE PLUG.
Installation
Once you have determined that none of the ECM® 2001 components
are damaged or missing, proceed with the installation. The location of
the ECM® 2001 should be a dry, level surface, free from extremes in
ambient temperature, dust, or chemical exposures. Provide a minimum
of a 6" space between the back and any obstruction to airflow while a
2” space on both sides of the unit is required for adequate airflow.
Unpack cables, chambers and accessories ordered and refer to
“OPERATION” for further instructions.
Page 11
www.btxonline.com
ECM ® 2001 Electrofusion/Electroporation Systems
Operation: Getting Started
(continued)
Location Requirements:
•
A sturdy, level, clean, non-flammable, dry surface
•
Adequate power source
•
Ambient room temperature of 15˚ to 40˚C
•
Relative humidity of 20 to 80%, non-condensing
•
A non-explosive atmosphere
•
Adequate clearance for ventilation
Lifting & Carrying
Handles are provided at each side of the front panel for lifting and
carrying the unit.
Page 12
www.btxonline.com
ECM ® 2001 Electrofusion/Electroporation Systems
Quick Start
1.
2.
13.
3.
6.
5.
7.
4.
8.
9.
10.
11.
12.
Front Panel Controls (See Instrument above)
# / Name
Function
1. SET AC VOLTAGE
This knob adjusts the AC alignment
voltage from 0 to 75 volts RMS. The
voltage is shown on the display to the
left of the knob.
2. AC DURATION
The thumbpot controls the length of
time that the SECONDS alignment is
activated during the Automatic Mode.
The time is set using the + and - push
buttons to select any time up to
99 seconds.
3. POST FUSION AC
The thumbpot adjusts the AC duration
after the SECONDS fusion pulse in the
Automatic Mode. Simply set the pulse
length up to 9 seconds for the
compression of cells after the fusion.
4. SELECT MODE
This knob selects the electroporation
mode between the HV mode
(10 to 3000 V/ 1 to 99 µsec), LV mode
(10 to 500/ 0.01 to 0.99 msec) OR LV
mode (50 to 500 / 1 to 99 msec).
Once the selection is made, the
appropriate light will come on.
Page 13
www.btxonline.com
ECM ® 2001 Electrofusion/Electroporation Systems
Quick Start
(Continued)
# / Name
Function
5. PULSE LENGTH
The electroporation/electrofusion
pulse length thumbpot controls the
pulse length of the squarewave pulse.
The pulse is set using the lower (+)
and upper (-) push buttons to the
“ready” mode.
6. SET VOLTAGE
This knob adjusts the pulse voltage.
If the generator is in the HV mode,
the voltage display (left monitor) is
in Volts and it can be set from
10 to 3000 V in the HV Mode and
10 to 500 in the LV Modes. Turn
clockwise to increase, counter
clockwise to decrease the voltage.
7. NUMBER OF PULSES
Set number of pulses from 1 to 9.
The + and - push-buttons are used
to select the desired number of
pulses. The yellow light illuminates
when each pulse is delivered to the
chamber and a beep is emitted.
8. WAIT
This light illuminates when the
instrument has reached the end of
an operating cycle and discharges
all the capacitors for safety. The
generator cannot be operated
when this light is on.
CAUTION: Do not change settings or
initiate another cycle until wait light
has extinguished.
9. AUTOMATIC START
Press and release to initiate an
alignment and electroporation cycle
according to the preset voltage,
pulse length, and number of pulses.
10. REMOTE CONTROL
Optional Accessory – Connect the
remote control box cable so the
generator can be operated from the
remote control box.
11. NUMBER OF REPEATS The thumbpot can be used to set the
number of repeat cycles. It can be set
up to 9 cycles.
Page 14
www.btxonline.com
ECM ® 2001 Electrofusion/Electroporation Systems
Quick Start
(Continued)
12. MANUAL START
This two-position button allows manual
control of the ECM® 2001. Push IN to
Start the alignment. The button
illuminates and the alignment voltage is
applied continuously until the button is
pushed a second time to release or a
timeout of 99 sec is reached. When
released, the green light goes out and
the electrofusion pulses are delivered
to the chamber. If the timeout is
reached, the AC waveform process
LED changes from continuously on
to flashing.
13. PROCESS LEDS
These LEDs illuminate to indicate each
stage of the process.
Page 15
www.btxonline.com
ECM ® 2001 Electrofusion/Electroporation Systems
Quick Start
(Continued)
External Connections:
Output Terminals:
Type
SHV Coaxial
Voltage Rating
5000V DC Max
Remote Control:
Type
Mini-Din, 6-pos, Female
Pinout
Pin
Signal
1
2
3
4
5
6
N/C
RTN
+12V
Auto Start
Manual Start
N/C
Output Terminals
AC Input
and Power Switch
Page 16
www.btxonline.com
ECM ® 2001 Electrofusion/Electroporation Systems
Quick Start (Continued)
Replacing Power Entry Module Fuse
1.
Turn power switch to the “OFF” position
2.
Remove the Power Cable from the wall outlet
3.
Remove the Power Cable from the ECM® 2001
4.
Remove Fuse Holder Drawer (Refer to illustration)
5.
Remove both fuses and perform a visual inspection or a
continuity test on each fuse
6.
Replace defective fuses with 8 A, 250 V, Time Lag
(Slo-Blo) 5 x 20 mm Fuses (Refer to Spare Parts, pg. 38
for ordering information)
7.
Install Fuse Holder Drawer (refer to illustration)
8.
Install the Power Cable into the ECM® 2001
9.
Plug Power Cable into wall outlet
10. Turn power switch to the “ON” position
Additional Fusing (Not Operator Replaceable)
Fuse Rating
Location
T 0.1 A 250 V
XFMR T1 Secondary 2
T 0.1 A 250 V
XFMR T1 Secondary 4
T 1.6 A 250 V
XFMR T1 Secondary 1
T 2.0 A 250 V
XFMR T1 Secondary 3
T 3.15 A 250 V
XFMR T2 Primary 1
T 3.15 A 250 V
XFMR T2 Primary 2
T 4 A 250 V
XFMR T4 Secondary
Page 17
www.btxonline.com
ECM ® 2001 Electrofusion/Electroporation Systems
Operating Basics
Automatic Start Mode Operation
1. Connect Chamber to the input located in the back
panel of the ECM® 2001.
2. Plug the ECM® 2001 power cable into correct line
voltage outlet.
3. Switch POWER ON in the Back Panel.
4. Set AC Voltage (1) to desired voltage.
5. Set AC Duration Seconds (2) to desired time period.
6. Select between the HV or LV mode (4).
7. Set DC Pulse Length (5).
8. Set DC Voltage (6).
9. Set Number of Pulses (7).
10. Set Post-Fusion AC Seconds (3) to the desired time
period.
11. Load BTX Chamber with cell suspension/reagents.
12. Check all settings.
13. Press Automatic Start (9), a beep is emitted and the
ECM® 2001 delivers all preset parameters to the Chamber.
14. For electroporation only - set AC Voltage (1), AC Duration
(2) and Post Fusion AC (3) to ZERO. Follow all other steps.
Manual Start Mode Operation
1. Follow Steps 1to 13 in Automatic Operation
2. Press Manual Start Button (12) (manual start button
illuminates and the AC waveform is output). In this mode,
the AC Duration is over-ridden and the AC field is on
continuously until a 99 sec time out occurs or the button is
released. While viewing cells in a microslide under an
inverted microscope, the AC Amplitude may be varied to
optimize alignment.
3. When cells are aligned appropriately, press Manual Start
Button again to release the AC and initiate the set DC
parameters.
Page 18
www.btxonline.com
ECM ® 2001 Electrofusion/Electroporation Systems
Operating Basics
(Continued)
Selection of Operating Mode
Automatic Start of the fusion process is initiated by pressing the
Automatic Start button (9); in this case, the pre-set AC Voltage and
AC Duration is applied. Alignment is followed automatically by electroporation settings of DC PULSE Voltage and Pulse Length.
Manual Start (Best with Microslides viewed under a microscope). Push
MANUAL START button (12) to turn on the alignment AC voltage. It
will illuminate in this position. By pushing it in a second time, the AC
alignment voltage is turned off and electroporation pulses are delivered
to the test chamber.
Alignment Parameters
AC Voltage: Dial the voltage setting required using the AC
Voltage(1).
AC Pulse Length: Dial the AC Pulse Length on thumbpot
AC Duration switch (2).
Electroporation Parameters
Choose between HV or LV Mode (4).
Pulse Length: Dial the pulse Length on DC Pulse Length
switch (5).
DC Voltage: Select the electroporation pulse Voltage by Set
Voltage (6).
Number of DC Pulses: Set Number of pulses (7).
Post Fusion AC Parameters
Set the Post Fusion AC (3) time for compression of cells after
electrofusion.
The post fusion AC amplitude is 1/10 of the alignment AC amplitude.
The post fusion AC amplitude attenuates with time.
Operation With Microslides & Microscope
To connect Microslides to the ECM® 2001 pulse generator, attach
Banana-to-Micrograbber Adapters to each HV cable and then connect
the micrograbbers to the microslide contacts. It is advisable to tape
the cables to the microscope stand to avoid the weight of the cables
moving the Microslide. The Microslide wire electrode gap can be filled
and emptied with a micropipette tip or a syringe with a hypodermic
needle.
Page 19
www.btxonline.com
ECM ® 2001 Electrofusion/Electroporation Systems
Operating Basics
(Continued)
Operation With Microslides & Microscope (continued)
Adjust the AC voltage setting so that cells move slowly toward the
Microslide Electrodes. Increase fusion voltage and pulse length in
small increments (10%) to get increased fusion yield. Cells will drift
apart after alignment if the fusion pulse is absent or too weak. Look
for fusion events close to the wires. The electric field is strongest
close to the wires and fusion will occur here first. If the field is too
strong, the cells will burst (lyse) immediately.
If the cells do not move and an increase in voltage leads to boiling of
the media, indications are that the cell solution acts too much like an
electrolyte. Use fresh mannitol to prepare 0.3 M mannitol (0.2 micron
filtered) with a pH of 7.0 to 7.3. Adjust pH with sterile 0.1 N NaOH.
Measure pH of mannitol just prior to fusion. Other low molecular weight
sugars such as sucrose and glucose have also been used successfully.
When operating Microslides under a microscope, it is advantageous
to use the generator in the Manual Mode. This way, DC fusion pulses
can be initiated as soon as alignment is achieved, thus subjecting the
cells to minimal electrical stress. Use a stopwatch to measure the
required alignment time. Set the same time or longer in the automatic
mode when working with larger chambers. If a demonstration for
several people is intended, a microscope with a TV camera attachment
and monitor display serves well.
Note: The ECM® 2001 Electrofusion Electropation system is NOT
compatible with the HT (highthroughput) plate handlers.
Page 20
www.btxonline.com
ECM ® 2001 Electrofusion/Electroporation Systems
Advanced Operation: Programming
Important Notices
Please refer to the following important notices prior to setting up and
using the ECM® 2001.
CAUTION
Manual Switch
Prior to turning on the ECM® 2001, verify that the GREEN manual push
button switch is in the "out" or "Off" position, and that it is not pushed
in. If the instrument power is turned on and the GREEN manual switch
light comes on, turn it off immediately. Only use the manual mode
with appropriate buffers under the appropriate conditions for AC
alignment optimization.
WARNING
Procedure
WARNING HIGH VOLTAGE: For practical and safety reasons do not
touch any of the cables or electrode connections while the ECM®
2001 is in the Manual Start or Automatic Start Modes and the AC field
or DC pulses is in use. Check that the unit is not operating and is in
standby mode when connecting and disconnecting cables.
Page 21
www.btxonline.com
ECM ® 2001 Electrofusion/Electroporation Systems
Advanced Operation: Programming
(continued)
Equipment Setup
Setup of the ECM® 2001 Independent of Monitoring
Please refer to the following diagram for a graphical representation of
the set up procedure for using the ECM® 2001:
1. Connect the ECM® 2001 into the appropriate line voltage
outlet with the power cable.
2. Connect electrode accessories to the HV output jacks on the
rear of the unit using recommended HV
cables and adapters (See Appendix A).
3. Proceed to Operation.
Page 22
www.btxonline.com
ECM ® 2001 Electrofusion/Electroporation Systems
Experimental Methods
Experimental Methods for Various Fusion Applications
The following suggested procedure is a recommendation only and
each investigator is encouraged to experiment with alternate cell densities, fusion media and pre and post-fusion procedures, and consult
relevant publications. Ohnishi et al (BTX ECM ID# 218) and Ruzin
(BTX ECM ID#,183) describe successful protocols for mammalian
hybridoma production
List of Materials
Cells:
1. Myeloma in log phase growth.
2. Spleen, peripheral blood cells, etc.
Fusion Solutions
Sterile 0.3 M mannitol, glucose or related sugars; 0.1 mM Ca2+ and
0.1 mM Mg2+, pH 7.0 to 7.3 (adjust pH with 0.1 N NaOH.)
Fusion Facilitators (elective)
Trypsin at a concentration of 5 mg/ml sterile without salt or Pronase
at a concentration of 1 mg/ml sterile without salt, or Calmodulin 100
g/ml and Glyceril mono-oleate 50 µg/ml.
Equipment & Other Materials
1. RPMI 1640 or DMEM with 10% fetal bovine serum and
2 mM L-glutamine.
2. Trypan blue to determine viability of cells before and
after fusion.
3. Sterile 96 microwell plate.
4. Sterile pipette.
5. Microscope with 10x and 40x objective.
6. Optional ice baths for reagents.
7. Laminar flow hood.
8. Table top centrifuge.
9. Sterile conical tubes.
10. Availability of Autoclave.
Suggested Pretreatment of Mouse Cells for ECF
Spleen cells should be removed from the mouse and teased apart in
cold Hank’s Balance Salt Solution (HBSS) or RPMI 1640. Transfer
spleen cells to a sterile test tube and allow the large particles to settle.
Pipette suspended spleen cells into a new sterile test tube. Remove
erythrocytes. Preparations and cell concentrations for human cells
and other fusion partners are the same.
Page 23
www.btxonline.com
ECM ® 2001 Electrofusion/Electroporation Systems
Experimental Methods
(continued)
Fusion Protocol
Establishment of optimal fusion parameters may take some time and
must be done for each new myeloma/lymphocyte pair. Usually fusion
is done at room temperature, but, as an alternative method one might
elect to keep cell suspension on ice during processing. Additionally,
one might decide to place fusion chambers in an ice bath during the
actual fusion process. Immediately prior to fusion, the cells must be
concentrated and washed in a nonelectrolyte solution.
Fusion In Standard 0.3 M Mannitol
The two cell lines are combined at a 1 to 4 myeloma/lymphocyte ratio
and the mixture is centrifuged at 1,000 rpm for 6 minutes, to obtain a
cell pellet. The supernatant is withdrawn and sterile 0.3 M mannitol
with a pH between 7 to 7.3 is added.
The cells are washed two times in 0.3 M mannitol and resuspended to
a final concentration of 2 x 10⁶ cells per ml for fusion. Cells in 0.3 M
mannitol should not be allowed to remain in solution for more than 2
hours.
Therefore, during the course of the experiment it may be necessary to
prepare several cell pellets.
Fusion In Glucose
As an alternative to standard 0.3 M mannitol, one may elect to use
other non-electrolytic buffers such as 0.3 M glucose at a pH of 7 to
7.3 for fusion. In this case one simply substitutes the sugar (or other
substance) for the mannitol with the exception that the cells may be
kept in the glucose for up to 4 hours.
Fusion Facilitators (elective)
One might add pronase or trypsin to remove some of the membrane
surface proteins and to neutralize possible surface electric charges.
This is advisable if cells are difficult to fuse.
Post-Fusion Protocol for Standard 0.3 M Mannitol,
Glucose & Related Sugars
1. Following the fusion process, remove cell suspension
under sterile conditions from the fusion chamber and
carefully pipette into a sterile test tube. Add 10 ml of
RPMI 1640 or DMEM with 10% fetal bovine serum and
2 mM L-glutamine. Allow to rest for 15 minutes.
2. Centrifuge cells at 500 rpm for 5 minutes and remove
supernatant. Carefully resuspend cells in culture medium
and pipette cells into a 96 microwell plate at a concentration
of 2 x 10⁵ cells per well (0.2 ml per well). Check wells for
sufficient amount of medium.
3. Incubate cells at 37ºC with 5% CO2 overnight.
Page 24
www.btxonline.com
ECM ® 2001 Electrofusion/Electroporation Systems
Experimental Methods
(continued)
4. The following day, remove one-half of the medium and
re-feed cells with HAT medium. On days 4, 7, and 10,
again remove one-half of the medium and re-feed with
HAT. Cells may be supplemented with feeder layers or
other growth factors.
5. Check cultures daily for HAT medium selection. Once
colony formation is observed, begin feeding with HAT
medium at first phase of expansion.
Plant Protoplast Fusion
The following protocol is intended only as a guide to researchers
involved in the genetic engineering of plant protoplasts.
Basic Procedure
1. Obtain freshly isolated protoplasts as per usual methods.
(Note: Fusion will not be successful after cell wall
regeneration has occurred.)
2. Gently pellet in non-electrolytic solution.
3. Remove supernatant and resuspend in non-electrolytic
solution, adjusting the density to 1.5 to 6 x 10⁵
protoplasts/ml according to size.
4. Proceed with electrofusion.
Solutions
In general, optimal viability will occur when non-electrolytic solutions
are most consistent with pre-fusion solutions in terms of osmotic
potential, pH, and composition.
1. Non-electrolytic sugars such as mannitol, glucose,
sorbitol, etc. are recommended.
2. Low-salt concentrations of CaCl2 (140 M) and Hepes
(600 M) are optional, and, over a limited time, do not
appear to be detrimental.
3. pH settings can be explored for each protoplast type.
Fusions have been most successful at pH values of
7.0 to 7.5.
4. Osmotic potential should be equal to the protoplast
isolation solution.
5. Recalcitrant protoplasts have been successfully fused by
the addition of two drops (per ml) of trypsin (Sigma Typ XIII
PCK treated, 5 mg/ml). Other facilitators such as pronase,
dispase, DMSO, PEG, etc. should also be investigated.
Page 25
www.btxonline.com
ECM ® 2001 Electrofusion/Electroporation Systems
Experimental Methods
(continued)
Instrument Settings
Typical fusion yields should average approximately 20% with the addition of protease, and 7% without. PEG treated cells fuse typically at a
1% yield.
1. Addition of more than 1 or 2 pulses appears to damage
protoplasts without increasing yield.
2. Typical settings for the Microslide might be as follows:
Amplitude/Voltage
035 V
Time/Pulse Width
25 sec
DC FUSION
260 V
40 µsec
Yeild: Total Fusions
8.6%
Heterokaryons
2.6%
AC ALIGNMENT
Nuclear Transfer/Cloning
The following protocol is intended only as a guide to researchers
involved in nuclear transfer/cloning applications. This protocol was
adapted from Meng et al, 1977 (BTX ID#3588)
ElectroSquarePorator™ T820 ELECTROFUSION PROTOCOL
CELLS: rhesus monkey oocyte
Ce l l P re pa r a t i o n
1. Prepare enucleated recipient oocyte and donor blastomere
as indicated in the paper.
2. Prepare monolayer culture with buffalo liver cells (BRL
1442), CMRL-1066, and 10% neonatal calf serum.
Maintain monolayer culture at 60% confluency during
coculture, and change medium every 24 hours.
Electroporation Settings
Choose Mode
HV (99msec/3 kV)
Set Voltage
130 to 140 V
Set Pulse Length
50 msec
Set Number of Pulses
2 pulses
Chamber
BTX microslide P/N 450
(0.5 mm gap)
Desired Field Strength
2.6 to 2.8 kV/cm
Page 26
www.btxonline.com
ECM ® 2001 Electrofusion/Electroporation Systems
Experimental Methods
(continued)
Electroporation Procedure
1. Aspirate an individual blastomere into a microinjection
pipette and place under the zona pelucida of an enucleated
oocyte or zygote.
2. Culture in KSOM with 10% NCS.
3. Expose oocyte pairs to KSOM containing cycloheximide
(7.5 mg/ml), cytochalasin B (7.5 mg/ml), and 10% NCS for
1 hour to induce ooplast activation. Then place them
individually in an electric field.
4. Induce membrane fusion by 2 continuous square wave DC
electrical pulses in 0.3 mannitol, 100 mM CaCl2,
100 mM MgSO4, and 0.5 mg/ml polyvinylpyrrolidone (with
the aid of a pipette controlled by a micromanipulator or just
manually by hand).
5. Oocyte pairs receive 2nd and 3rd pulses at hourly intervals.
Between pulses, hold the pairs in KSOM, cytochalasin B,
and cycloheximide.
6. Reconstituted embryos are subsequently cocultured on a
BRL cell monolayer.
Results
3 biochemical pregnancies resulted with one lost at 30 days of gestation. The other two culminated in the births of one male and one female
monkey. Genetic typing indicated that the putative sire (sperm donor)
and the putative mother (female from which the nucleus was harvested)
were the true biological parents of both nuclear transfer infants.
Reference: Meng et al, Rhesus Monkeys Produced by Nuclear Transfer, Biology of
Reproduction,
57, 454-459, 1997 ( DB # 3588)
Step-By-Step Procedures To Optimize Yield of Fusion
Products
After preparing the cell lines for fusion as described above, the following
procedures will aid in the determination of optimum instrument settings. This is important if new cell lines are to be fused for which no
previous experimental data is available.
•
Determine instrument setting with Microslide
•
Set both AC Voltage (1) and DC Voltage (6) to zero.
•
Set AC (2) and DC (5) time periods to zero.
•
Fill wire gap with cell suspension.
•
Increase the AC voltage to 10 V.
Page 27
www.btxonline.com
ECM ® 2001 Electrofusion/Electroporation Systems
Experimental Methods
(continued)
•
Push Manual Start button (12) and observe cells for 30
seconds. If no movement occurs, increase AC Voltage
by increments of 10 V until movement is observed.
•
Change cell suspension between experiments, if heating or
drying is observed.
•
Turn off the alignment signal if cell suspension is changed,
by pushing Manual Start (12) button (99 second limit) a
second time. Signal is on as long as the AC waveform
process LED is on continuously (not flashing).
•
Experiment with AC Voltage and time period until a good
percentage of the cells gently form dimers (doublets) within
10 to 20 seconds. Note settings.
•
Set AC time period to the value found good for alignment.
•
Set the Post Fusion AC (3) time period up to 9 seconds to
compress the cells after electrofusion.
•
Optimize system parameters with respect to cell viability.
Use the basic settings that were derived earlier and make
several runs with modified settings. Cultivate cells for 4 days
from each run in RPMI 1640 or DMEM, 10% fetal bovine
serum, hypoxanthine and thymidine 2 mM L-glutamine and
test part of the cell culture each day for viability by trypan
blue exclusion. Choose settings which lead to highest
viability after 4 days.
•
System parameters which should be investigated for cell
viability are as follows:
Vary Alignment Voltage and duration in steps of 20% Higher
voltage requires shorter duration.
•
Vary DC Voltage and Pulse Length in steps of 20%.
•
Experiment with Post Fusion AC duration to hold cells
together after fusion.
Troubleshooting
For trouble shooting refer to Appendix A:
•
Cells Don’t Align
•
Cells Don’t Fuse
•
Cells Don’t Divide
•
Cells Don’t Secrete Antibody
Page 28
www.btxonline.com
ECM ® 2001 Electrofusion/Electroporation Systems
Appendix A: Troubleshooting
Cells Do Not Align
Make sure the Microslide is clean (free of cell debris)
START
Try varying the voltage while observing
the cells on the Microslide under microscope.
YES
Alignment
YES
Alignment
YES
Alignment
YES
Alignment
YES
Alignment
YES
Alignment
NO
Make sure the equipment is set up right.
All cables should be connected.
NO
Check the pH of the cell suspension. It should be
between 7 to 7.3. Adjust with 0.1 N NaOH. If too
much of NaOH is added this produces a basic condition and produces undesired electrical field.
NO
Are cells alive and in logarithmic growth phase?
If not change cells.
NO
Make sure that the microscope is focused on
cells between wires. Adjust accordingly.
NO
Increase the cell concentration if the cells move
but do not align.
NO
Call BTX - HARVARD APPARATUS
at 1-800-272-2775 or 508-893-8999
(E-mail: [email protected])
or your distributor.
Page 29
www.btxonline.com
ECM ® 2001 Electrofusion/Electroporation Systems
Appendix A: Troubleshooting
(Continued)
Cells Do Not Fuse
Observe the microslide under microscope. Fusion is successful if cell pairs do not drift apart after the fusion
pulse and when they round off slowly.
START
Did you set up the instrument right?
YES
Fusion
YES
Fusion
YES
Fusion
YES
Fusion
YES
Fusion
YES
Fusion
NO
Check cable connection to microslide and verify
continuity e.g. with an ohmmeter.
NO
Increase fusion pulse amplitude and pulse length.
Cells will lyse at a critical upper setting. Stay
below this setting.
NO
Do cells rotate? If yes change the alignment
amplitude/alignment time.
NO
Check pH of cell solution: adjust to 7 to 7.3 using
0.1 N NaOH. Were cells in fusion solution for
extended period of time? If yes, use fresh cells in
solution.
NO
Add one drop of 1 mg/ml pronase or one drop
of 5 mg/ml trypsin to the cell suspension about
to be fused (30 sec. before fusion).
NO
GO TO THE NEXT PAGE
Page 30
www.btxonline.com
ECM ® 2001 Electrofusion/Electroporation Systems
Appendix A: Troubleshooting
(Continued)
Cells Do Not Fuse (continued)
Apply post fusion confinement force.
Observe if cells start to round off.
Did you set up the instrument right?
YES
Fusion
YES
Fusion
NO
Change pre fusion treatment: were cells exposed
to hypertonic solution.
NO
Call BTX - HARVARD APPARATUS
at 1-800-272-2775 or 508-893-8999
(E-mail: [email protected])
or your distributor.
Page 31
www.btxonline.com
ECM ® 2001 Electrofusion/Electroporation Systems
Appendix A: Troubleshooting
(Continued)
Cells Do Not Divide
START
Reduce the instrument settings for alignment
amplitude and duration, also the electroporation
DC pulse amplitude and pulse length.
Verify cell viability using trypan blue.
YES
Division
YES
Division
YES
Division
NO
Reduce pronase/trypsin concentration and/or
treatment time of cells.
NO
Post fusion care is critical for cell division.
Verify procedure.
NO
Call BTX - HARVARD APPARATUS
at 1-800-272-2775 or 508-893-8999
(E-mail: [email protected])
or your distributor.
Page 32
www.btxonline.com
ECM ® 2001 Electrofusion/Electroporation Systems
Appendix A: Troubleshooting
(Continued)
Cells Do Not Secrete Antibody (Ab)
START
Reduce instrument settings for alignment amplitude and also the fusion amplitude.
Verify cell viability using trypan blue.
YES
Ab Secretion
YES
Ab Secretion
YES
Ab Secretion
YES
Ab Secretion
YES
Ab Secretion
YES
Ab Secretion
NO
Reduce pronase/trypsin concentration and/or
treatment time of cells.
NO
Immunization protocol might have been
ineffective i.e. was animal hyperimmunized?
Change immunization.
NO
Were myeloma cells in log growth phase?
If no, repeat experiment with myeloma cells in
log growth phase.
NO
Is post fusion care proper?
Verify post fusion protocol.
NO
Genetic makeup of hybrid could be incomplete.
NO
Call BTX - HARVARD APPARATUS
at 1-800-272-2775 or 508-893-8999
(E-mail: [email protected])
or your distributor.
Page 33
www.btxonline.com
ECM ® 2001 Electrofusion/Electroporation Systems
Appendix A: Troubleshooting
(Continued)
Generator Test
#
Generator Test
1.
Make sure the power cord is connected to the ECM® 2001, and it is plugged in.
2.
Turn on the power. Do the displays illuminate?
3.
Set the AC Voltage Setting (1) and DC Voltage Setting (6) to Zero.
Do the monitors display Zero?
4.
Set Select Mode Knob (4) to the HV mode 1 to 99 µsec.
Does the HV Mode green light illuminate?
5.
Set Select Mode Knob (4) to the LV Mode 0.01 to 0.99 msec.
Does the LV Mode green light illuminate?
6.
Set Select Mode Knob (4) to the LV Mode 1 to 99 msec.
Does the LV Mode green light illuminate?
7.
Push in the Manual Start button.
Does the manual start button light illuminate?
8.
Push in the Manual Start button again.
Does the manual start button light extinguish?
9.
Set the following parameters on the instrument
• Set the AC Voltage (1) setting to 30 V.
• Set the AC Durations (2) to 3 seconds.
• Set the Post Fusion (3) to 3 seconds.
• Set the Select Mode Knob (4) to HV Mode 1 to 99 usec.
• Set the Pulse Length (5) to 40.
• Set the DC Set Voltage (6) to 50 volts.
• Set the Number of Pulses (7) to 2.
• Press the Automatic Start (9) button and release.
Yes
No
Do the process LEDs (14) illuminate?
Please contact BTX - HARVARD APPARATUS Technical Services at
(800) 272-2775 or (508) 893-8999
E-mail: [email protected]
if you answered “no” to any of the questions above.
Page 34
www.btxonline.com
ECM ® 2001 Electrofusion/Electroporation Systems
Appendix B: Glossary of Technical Terms
Alignment
A consequence of cells being exposed to an inhomogeneous or divergent electric field, resulting in their movement toward the electrodes,
and subsequent alignment or pearl chain formation.
Alternating Current (AC)
During electro cell fusion, an alternating electrical current is utilized to
induce an inhomogeneous, or divergent electric field, allowing for
dielectrophoresis and pearl chain formation. The resulting physical
contact between cells facilitates the fusion process that may result following the application of a DC electroporation pulse.
Capacitor
Alternating Current (AC)
A device that stores energy in the form of an electric field. A capacitor
consists of two metal plates insulated from each other by a dielectric
(insulating, usually a plastic material such as Mylar) material. In an
ideal capacitor, no conduction current flows between the plates after
the capacitor is completely charged. Capacitors can be fixed, variable,
or adjustable.
Chambers
Electroporation and Electrofusion Chambers are the devices used to
contain the cells/molecules to be fused/transfected. The chambers
include the electrodes through which the ECM® 2001 pulse generator
delivers the electric field to the cells. Fusion Chambers include the
Microslides (Model 450, 450-1, 453, 453-10), Meander Fusion
Chamber Model 454, and the Flat Electrode Model 484.
Cloning
In terms of applications for electro cell fusion, cloning refers to the
ability to generate identical, viable animals, through processes such as
nuclear transplantation.
Disposable Electroporation
Cuvettes Plus™
Compression
See Alignment, Dielectrophoresis, and Pearl Chains. The result of an
AC alignment.
Dielectric Breakdown
The reversible breakdown of bi-lipid layer membranes as a result of
the application of a DC electroporation pulse. A sufficiently high field
strength may increase the membrane potential past a critical point
leading to the breakdown of the membrane.
Dielectric Constant
For a given dielectric (nonmetallic) material, the ratio of electrical
capacitance of a dielectric- filled capacitor to a vacuum capacitor of
identical dimensions.
Page 35
www.btxonline.com
ECM ® 2001 Electrofusion/Electroporation Systems
Appendix B: Glossary of Technical Terms
(continued)
Dimer Formation
The bringing together of two cells, through the process of dielectrophoresis, so that they may be fused, resulting in a hybrid. Refer
also to Pearl Chain.
Dimer Formation
Direct Current (DC)
During electro cell fusion, a direct current is utilized to produce a high
intensity, short duration electric field, causing a reversible physical
breakdown of bi-lipid membranes and resulting in the formation of
temporary pores. When juxtaposed pores in the membranes of two or
more cells reseal following the DC pulse, cells may become fused.See
Electric Field.
Direct Current (DC)
Frequency
The number of times an oscillation goes through a complete cycle in
one second. The unit is either cycle/sec or Hertz (Hz).
Homogenous Electric Field
An electric field where the direction and strength of the field lines are
constant.
Divergence
The deviation of field lines (e.g. electric field lines) from parallel,
homogeneous conditions. A highly divergent field is a very inhomogeneous field where the value and direction of the field change drastically
in the area under consideration.
Electric Field/Electric Field Strength
The potential difference between two points (electrodes) (in Volts)
divided by the distance between the electrodes (called gap, and
expressed in cm). Expressed as V/cm or kV/cm. This is true only if
the electric field is homogenous as it is in parallel plate electrodes.
Electric Field Force
The force acting on any charge in an electric field. The force is equal
to the product of the charge and the electric field.
Electrofusion (EF) or Electro Cell Fusion (ECF) Electric field induced
cell fusion. A novel physical means to bond two cells together by the
application of an electric field pulse of high intensity.
Electrolytic
A fluid containing charged molecules is called an electrolyte.
Electrolytic properties are associated with such a fluid, such as the
ability to conduct current.
Page 36
www.btxonline.com
ECM ® 2001 Electrofusion/Electroporation Systems
Appendix B: Glossary of Technical Terms
(continued)
Electroporation
The application of high electric field pulses of short duration to create
temporary pores (holes) in the membranes of cells.
Embryo Manipulation
The cloning of animals can be accomplished through embryo manipulation techniques, such as nuclear transfer and electrofusion.
Frequency
The number of times an oscillation goes through a complete cycle in
one second. Unit is Hertz (1/sec).
Homogenous Electric Field
The direction and field strength are constant.
Hybrid
A viable daughter cell resulting from the fusion of two parent cells.
Hybridoma
The fusion of an antibody producing cell with an immortalized cell,
resulting in an immortalized hybrid cell capable of generating monoclonal antibodies.
Hydrostatic Pressure
The pressure in liquids at rest.
Inhomogeneous Electric Field
Direction and strength of the electric field vary.
Microslide
An electrofusion chamber allowing for the observation of the alignment and fusion processes under a microscope.
Osmotic Pressure
The applied pressure required to prevent the flow of solvents of different concentration across a semipermeable membrane.
Pearl Chains
See Alignment and Dielectrophoresis. Chains of cells or vesicles
brought into alignment during electro cell fusion, prior to
electroporation.
Pore
A small, mostly transient opening in a cell membrane/wall caused by
the application of a brief high electric field pulse.
Page 37
www.btxonline.com
ECM ® 2001 Electrofusion/Electroporation Systems
Appendix B: Glossary of Technical Terms
(continued)
Potential Difference
The difference (in Volts) between points in an area between
electrodes.
Pressure Gradient
The difference in pressure between two points in a medium.
Pulse Length
The length of time an electric signal is applied.
Relaxation Time
The time of a system to reach equilibrium.
Rounding Off
The phenomena of cells forming a sphere after being fused together.
Turgor Pressure
The pressure in capillaries.
Voltage
The difference of electric potential between two electrodes (expressed
in volts (V) or kilovolts (kV)).
Wave Forms
The shape of time varying electric signals.
Page 38
www.btxonline.com
ECM ® 2001 Electrofusion/Electroporation Systems
Appendix C: Accessories and
Replacement Parts
Accessories
Catalog Number
45-0082
45-0083
45-0085
45-0086
45-0087
Model
ECM2001R
45-0088
45-0089
45-0090
45-0207
45-0059
45-0100
45-0101
45-0102
630B
Enhancer
3000®
366
384
384L
45-0103
45-0104
45-0105
45-0106
45-0107
45-0108
45-0109
45-0110
45-0113
45-0114
45-0115
45-0116
45-0117
45-0118
450
450-1
453
453-10
454
484
485
486
508
510
512
514
516
520
45-0119
522
45-0122
45-0123
45-0124
45-0125
542
543
610
620
Page 39
Description
Cable Set, HV, 1 meter
Cable Set, HV, 3 meter
Cable, Remote Control, 2 meter
Remote Control Box
Adapter Set, Banana-toMinigrabber
Adapter Set, Banana Splice, F/F
Adapter Set, Banana-to-Square
Post Cables
Adapter Set, Banana-to-Pin Tip,
F/F
Safety Stand
Enhancer 3000® Electroporation
Monitoring System
Petri Dish Electrode, 2 mm Gap
Caliper Electrode, 1 x 1 cm, Brass
Caliper Electrode, 1.5 x 1.5 cm &
2 x 2 cm, Stainless Steel
Microslide, 0.5 mm Gap
Microslide, 1.0 mm Gap
Microslide, 3.2 mm Gap
Microslide, 10 mm Gap
Meander Fusion Chamber
Flat Electrode, 1mm Gap
Flatpack Chamber, 1.83 mm Gap
Flatpack Chamber, 0.56 mm Gap
Genetrode, Straight, 5 mm
Genetrode, Straight, 10 mm
Genetrode, Bent, L-Shaped, 5 mm
Genetrode, Bent, L-Shaped, 3 mm
Genetrode, Bent, L-Shaped, 1 mm
Tweezertrode Electrode,
7 mm diameter
Tweezertrode Electrode,
10 mm diameter
Genepaddles, 3 x 5 mm
Genepaddles, 5 x 7 mm
Cuvette, 1 mm Gap, pkg. 50
Cuvette, 2 mm Gap, pkg. 50
www.btxonline.com
ECM ® 2001 Electrofusion/Electroporation Systems
Appendix C: Accessories and Replacement
Parts (continued)
Catalog Number
45-0126
45-0130
45-0203
Model
640
PP35-2P
515
Description
Cuvette, 4 mm Gap, pkg. 50
Petri Pulser, 2 mm Gap
Genetrode/Genepaddle Holder
Model
Description
Fuse, T, 8 A, 250 V, 5 x 20 mm
Spare Parts
Catalog Number
06-004009-01
Appendix D: General Cleaning and
Maintenance
To clean exterior surfaces, use a soft, lint-free cloth to remove loose
dust. For more efficient cleaning, use a soft cloth dampened with water
or an aqueous solution of 75% isopropyl alcohol. Do not immerse the
ECM® 2001. Avoid using abrasive cleaners. Avoid using chemicals
containing benzene or similar solvents. To clean fan and vent filters,
remove outer cover and then remove filter mesh. Rinse filter mesh
with water to remove dust and allow to dry. Reinstall filter mesh and
outer cover.
The ECM® 2001 requires no maintenance.
If the ECM® 2001 does not work properly, contact
BTX – Harvard Apparatus for appropriate instructions.
Appendix E: ECM® 2001 Footswitch
Compatibility
There are two models of footswitches for the ECM® 2001. In 2005,
the ECM® 2001 was redesigned for CE compliance and approval.
These changes resulted in a modification to the footswitch output.
To determine which footswitch is compatible with your generator,
please locate the serial number on the rear panel of the generator.
If the serial number of your ECM® 2001 Generator is ≥ 4000, then
you will use the CE Marked Footswitch product number 45-0085.
If the serial number of your ECM® 2001 Generator is ≤ 3999, then
you will use the Non-CE Marked Footswitch product
number 45-0214.
Page 40
www.btxonline.com
ECM ® 2001 Electrofusion/Electroporation Systems
Appendix F: Connecting Electrodes
Cuvettes/Safety Stand
1. Remove the cuvette and the transfer pipette from their
sterile packaging.
2. Remove the cuvette cover and fill the cuvette with sample
using the transfer pipette and replace cover.
3. Place cuvette on ice for cooling purposes.
4. Push the banana plugs of the Safety Stand into the voltage
output of the BTX generator. Warning: Make sure the
Generator is turned off prior to connecting any cables to it.
If using the Enhancer 3000 to monitor output, connect the
banana plugs into the output ports of the High Voltage
Probe. Use the black and red high voltage cables to
connect the BTX generator to the input ports of the
Enhancer 3000.
5. Open the Safety Stand cover.
6. Use the thumb wheel to slide the electrodes open.
7. Place a BTX cuvette in between the electrodes with the
aluminum of the cuvette coming in contact with
the electrodes
8. Secure the cuvette in place by closing the gap with the
thumb wheel. The cuvette should fit snugly between the
electrodes; however it should be loose enough that it can be
pulled out without adjusting the thumb wheel again.
9. Following instructions for the BTX generator. Set the
appropriate parameters.
10. Deliver the electroporation pulse (s) to the sample.
Warning: Use proper eye protection during electroporation.
11. Remove cuvette cover and extract the cell solution.
12. Dispose of cuvette and prepare for the next experiment.
Flat Pack Chambers
1. Fill the flat pack chamber with sample using a pipette.
2. Push the banana plugs of the Safety Stand into the voltage
output of the BTX generator. Warning: Make sure the
Generator is turned off prior to connecting any cables to it.
If using the Enhancer 3000 to monitor output, connect the
banana plugs into the output ports of the High Voltage
Probe. Use the black and red high voltage cables to
connect the BTX generator to the input ports of the
Enhancer 3000.
3. Open the Safety Stand cover.
Page 41
www.btxonline.com
ECM ® 2001 Electrofusion/Electroporation Systems
Appendix F: Connecting Electrodes
(continued)
4. Use the thumb wheel to slide the electrodes open.
5. Place the Flat Pack Chamber in between the electrodes with
the aluminum coming in contact with the electrodes.
6. Secure the Flat Pack Chamber in place by closing the gap
with the thumb wheel. The Flat Pack Chamber should be
snugly placed between the electrodes; however it should be
loose enough that it can be pulled out without adjusting the
thumb wheel again.
7. Following instructions for the BTX generator, set the
appropriate parameters.
8. Deliver the electroporation pulse (s) to the sample.
Warning: Use proper eye protection during electroporation.
9. Remove Flat Pack Chamber and extract the cell solution.
10. Dispose of Flat Pack Chamber and prepare for the
next experiment.
Flat Electrodes
1. Fill the sterile Flat Electrode Chamber using a syringe.
2. Replace the clear plastic tip so the holes in the top align with
the holes in the electrode bars.
3. Push the banana plugs at the opposite end of the Flat
Electrode (Catalog number45-0217) into the voltage output
of the BTX generator. Warning: Make sure the Generator is
turned off prior to connecting any cables to it. If using the
Enhancer 3000 to monitor output, connect the banana
plugs into the output ports of the High Voltage Probe. Use
the black and red high voltage cables to connect the BTX
generator to the input ports of the Enhancer 3000.
4. Following instructions for the BTX generator, set the
appropriate parameters.
5. Deliver the electroporation pulse (s) to the sample.
Warning: Use proper eye protection during electroporation.
6. Extract the cell solution. (The chamber can be rested on ice
for cooling purposes)
7. Clean as appropriate and prepare for the next experiment..
Page 42
www.btxonline.com
ECM ® 2001 Electrofusion/Electroporation Systems
Appendix F: Connecting Electrodes
(continued)
Genetrodes/Genepaddles
1. Using the Model 515 Genetrodes holder, loosen the two
plastic screws and separate the top half of the positioning
plate from the holder. Place the pair of electrodes in the
predetermined slots based on the necessary gap size. The
electrodes must extend from the holder in the opposite
direction of the holder handle. Secure the electrodes by
reassembling the holder and tightening the two screws.
2. Attached the micrograbber cable (catalog number 45-0216)
to the electrode leads of the Genetrodes/Genepaddles.
3. Push the banana plugs at the opposite end of the
micrograbber cable into the voltage output of the BTX
generator. Warning: Make sure the Generator is turned off
prior to connecting any cables to it. If using the Enhancer
3000 to monitor output, connect the banana plugs into the
output ports of the High Voltage Probe. Use the black and
red high voltage cables to connect the BTX generator to the
input ports of the Enhancer 3000.
4. Prepare tissue and sample for electroporation.
5. Following instructions for the BTX generator, set the
appropriate parameters.
6. Place the Genetrodes/Genepaddles on the sample using a
micromanipulator or manually position them.
7. Deliver the electroporation pulse (s) to the sample.
Warning: Use proper eye protection during electroporation.
8. Remove the electrodes carefully, clean as appropriate and
prepare for the next experiment.
Tweezertrodes
1. Attach the Model 524 Tweezertrode Cables to the electrode
base of the Tweezertrode.
2. Push the banana plugs at the opposite end of the
tweezertrode cable into the voltage output of the BTX
generator. Warning: Make sure the Generator is turned off
prior to connecting any cables to it. If using the Enhancer
3000 to monitor output, connect the banana plugs into the
output ports of the High Voltage Probe. Use the black and
red high voltage cables to connect the BTX generator to the
input ports of the Enhancer 3000. Then plug the banana
cable into the voltage output of the BTX Generator.
3. Following instructions for the BTX generator, set the
appropriate parameters.
Page 43
www.btxonline.com
ECM ® 2001 Electrofusion/Electroporation Systems
Appendix F: Connecting Electrodes
(continued)
4. Prepare tissue and sample for electroporation. Grasp the
tissue between the Tweezertrode electrodes and measure
the interelectrode distance. Adjust generator settings if
necessary. Inject the sample into the tissue.
5. Deliver the electroporation pulse (s) to the sample.
Warning: Use proper eye protection during electroporation.
6. Remove the tissue carefully, clean as appropriate and
prepare for the next experiment.
2-Needle Array
1. Grasping Model 530 or Model 532 2-Needle Array Handle,
position the handle over a Model 531 or Model 533
2-Needle Array Assembly and push to secure the 2-Needle
array to the handle.
2. Push the banana plugs at the opposite end of the 2-Needle
array handle into the voltage output of the BTX generator.
Warning: Make sure the Generator is turned off prior to
connecting any cables to it. If using the Enhancer 3000 to
monitor output, connect the banana plugs into the output
ports of the High Voltage Probe. Use the black and red high
voltage cables to connect the BTX generator to the input
ports of the Enhancer 3000. Then plug the banana cable
into the voltage output of the BTX Generator.
3. Following instructions for the BTX generator, set the
appropriate parameters.
4. Prepare tissue and sample for electroporation. Apply sample
to tissue just before electroporation.
5. Remove the safety shield protecting the needles, place into
the tissue, and deliver the electroporation pulse (s).
Warning: Use proper eye protection during electroporation.
6. Discard the 2-needle array and prepare for the
next experiment.
Microslides
1. Push the banana plugs at the opposite end of the
micrograbber cable (catalog number 45-0216) into the
voltage output of the BTX generator. Warning: Make sure
the Generator is turned off prior to connecting any cables to
it. If using the Enhancer 3000 to monitor output, connect
the banana plugs into the output ports of the High Voltage
Probe. Use the black and red high voltage cables to
connect the BTX generator to the input ports of the
Enhancer 3000.
Page 44
www.btxonline.com
ECM ® 2001 Electrofusion/Electroporation Systems
Appendix F: Connecting Electrodes
(continued)
2. Attach the Micrograbbers onto the terminal pins of the
Meander Chamber slide. Polarity is not important. Tape the
cable to the microscope stage to act as a strain relief and to
avoid movement of the slide and its wires.
3. Pipette one drop of cell suspension and reagents to the
Microslides/Meander Chamber field.
4. Following instructions for the BTX generator and set the
appropriate parameters.
5. Deliver the electroporation pulse (s) to the sample.
Warning: Use proper eye protection during electroporation.
6. Remove the microslides/meander fusion chamber carefully
and prepare for the next experiment.
Petri Dish Electrode
1. Plug the HV cables from the Petri Dish Electrode into the
voltage output of the BTX Generator. Warning: Make sure
the Generator is turned off prior to connecting any cables to
it. If using the Enhancer 3000 to monitor output, connect
the banana plugs into the output ports of the High Voltage
Probe. Use the black and red high voltage cables to
connect the BTX generator to the input ports of the
Enhancer 3000.
2. Prepare sample for electroporation a 35mm Petri Dish.
3. Place the electrode in the 35mm Petri Dish. Allow it to
gently rest on the surface of the dish.
4. Following instructions for the BTX generator, set the
appropriate parameters. Deliver the electroporation pulse (s)
to the sample. Warning: Use proper eye protection
during electroporation.
5. Remove the Petri Dish Electrode carefully; clean as
appropriate and prepare for next experiment.
Petri Pulser
1. Plug the HV cables from the Petri Pulser into the voltage
output of the BTX Generator. Warning: Make sure the
Generator is turned off prior to connecting any cables to it.
If using the Enhancer 3000 to monitor output, connect the
banana plugs into the output ports of the High Voltage
Probe. Use the black and red high voltage cables to
connect the BTX generator to the input ports of the
Enhancer 3000.
2. Prepare sample for electroporation in 6-well plate or in
35mm Petri Dish.
Page 45
www.btxonline.com
ECM ® 2001 Electrofusion/Electroporation Systems
Appendix F: Connecting Electrodes
(continued)
3. Place the electrode in one well of the 6-well plate or 35mm
Petri Dish. Allow it to gently rest on the surface of the dish.
4. Following instructions for the BTX generator and set the
appropriate parameters.
5. Deliver the electroporation pulse (s) to the sample.
Warning: Use proper eye protection during electroporation.
6. Remove the Petri Pulser carefully; clean as appropriate and
complete delivery of pulses to all wells if using a
6-well plate.
Caliper Electrodes
1. Attach the Caliper Electrodes directly to the voltage output
ports of the BTX Generator. Warning: Make sure the
Generator is turned off prior to connecting any cables to it.
If using the Enhancer 3000 to monitor output, connect the
banana plugs into the output ports of the High Voltage
Probe. Use the black and red high voltage cables to
connect the BTX generator to the input ports of the
Enhancer 3000.
2. Prepare tissue for electroporation.
3. Following instructions for the BTX generator, set the
appropriate parameters.
4. Use the Caliper Electrodes to span the target tissue.
5. Deliver the electroporation pulse (s) to the sample.
Warning: Use proper eye protection during electroporation.
Do not exceed 500V.
6. Remove the Caliper Electrodes carefully; clean as
appropriate and prepare for next experiment.
Page 46
www.btxonline.com
ECM ® 2001 Electrofusion/Electroporation Systems
ECM® 2001 Generator Troubleshooting
Guidelines
Basic Information
Date:
Customer Name:
Institution:
Serial Number:
Software Version (will be displayed as v. x.xx when you first power on
the instrument):
Diagnostic Test
Please complete the following chart. Simply set the voltage, pulse
length, pulse interval and pulse numbers on the ECM® 2001 as indicated, and record the actual feedback after pulsing. Use 400 µl of 1X
PBS in a 4 mm cuvette as a 20 Ω load. Use 200 µl of 1X PBS in a
4 mm cuvette as a 40 Ω load. Make sure all cables are well connected
and cuvettes make good contact with the safety stand to ensure proper current flow.
ECM® 2001 Manual Troubleshooting Section
Please refer to Appendix A (page 29-34) in the ECM® 2001 manual
for troubleshooting guidelines. Please contact BTX Technical Service if
the ECM® 2001 routinely Arcs, or if you smell anything coming from
the machine.
Set
Mode V (V)
LV
LV
LV
HV
HV
Page 47
500
500
500
1000
3000
Set PL
1 ms
100 µs
10 µs
100 µs
100 µs
Set
Pulse Expected
No.
V (V)
1
1
1
1
1
450-550
450-550
450-550
850-1150
2700-3300
Actual
V (V)
Expected
PL
Actual
PL
0.9-1.5 ms
90-110 µs
7-13 µs
90-110 µs
90-110 µs
www.btxonline.com
Load
(µL 1x
PBS)
400
600
400
400
600
ECM ® 2001 Electrofusion/Electroporation Systems
ECM® 2001 Generator Troubleshooting
Guidelines (continued)
Additional Information
Please help us diagnose the problem by providing as much information as possible.
1. What is your main concern? Please describe in detail.
(Either instrument related or sample related. Please indicate
past history for repairs and service if applicable.)
2. Please briefly outline your protocol below:
Cell line(s):
Set voltage:
Set pulse length:
Set pulse number:
Set pulse interval:
Mode: LV or HV (circle one)
Buffer (composition and volume):
Cell Density (cell/ml):
Transfectant Name (ie. DNA, RNA, protein, etc.):
Transfectant Amount:
Other information:
3. Are you following an existing protocol or publication? If so,
please specify:
Note: If using BTX protocols, please indicate the protocol ID
number on the bottom left corner.
Final Instructions
We appreciate your patience. Please DO NOT send the instrument
back to BTX without prior authorization from the company.
Instruments will not be received without a proper RMA (Return
Material Authorization) number assigned.
When all the information is completed, please contact BTX Technical
Service via one of the following methods:
•
Email: [email protected]
•
Fax: 508-429-5732
•
Phone: 1-800-272-2775
Thank you and we will do our best to assist you!
BTX Technical Service Group
Page 48
www.btxonline.com
84 October Hill Road • Holliston MA, 01746
Phone:
508.893.8999
Toll Free:
800.272.2775 (U.S. Only)
Fax:
508.429.5732
E-mail:
[email protected]
Web:
www.btxonline.com