1
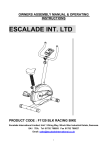
OWNERS ASSEMBLY MANUAL & OPERATING
INSTRUCTIONS
ESCALADE INT. LTD
PRODUCT CODE : LS2005 ERGOMETER BIKE
Escalade International Limited, Unit 1 Viking Way, Winch Wen Industrial
Estate, Swansea. SA1 7DA. Tel 01792 796893 Fax 01792 796627
Email: [email protected]
READ ALL INSTRUCTION BEFORE EXERCISING
THIS
USER MANUAL CONTAINS ASSEMBLY, OPERATION, MAINTENANCE AND
SAFETY INFORMATION. TAKE CARE OF YOUR SELF, PLEASE MAKE CERTAIN
THAT YOU READ AND UNDERSTAND ALL THE INFORMATION BELOW.
IMPORTANT SAFETY PRECAUTIONS
1. This machine is intended for household use only. It is not designed for commercial use.
2. Read this USER MANUAL and all accompanying literature and follow it carefully before using
your machine.
3. Inspect your exercise machine prior to exercising to ensure that all nuts and bolt are fully
tightened before each use.
4. Most exercise equipment is not recommended for sma ll children. Children should not use the
bike unless they are under adult supervision.
5. Exercise equipment has moving parts. In the interest of safety, keep others, especially children,
at a safe distance while exercising.
6. Warm up 5 to 10 minutes before each workout and cool down 5 to 10 minutes afterward. This
allows your hear rate to gradually increase and decrease and will help prevent straining muscles.
7. Never hold your breath while exercising. Breathing should remain at a normal rate in
conjunction with the level of exercise being performed.
8. Rest adequately between workouts. Muscles tone and develop during these rest periods.
Beginners should work out twice a week and increase gradually to 4 to 5 times per week.
9. Remove all jewelry, including rings, chains and pins before commencing exercise.
10. Always wear suitable clothing and footwear during exercise. Do not wear loose fitting clothing
that could become entangled with the moving parts of your exercise machine.
IMPORTANT!!!
THE MAXIMUM RECOMMENDED WEIGHT CAPACITY FOR YOUR CYCLE IS 115KG,
PER USER.
WARNING: Before commencing with any exercise program, please consult your family
physician. If at any time during exercise you feel faint, dizzy or experience pain, stop and
consult your family physician. In the event that any of the above mentioned warnings are
ignored by the consumer, the manufacturer may use same as a defense to any claim for
injuries, damage or loss. The above warnings are in no way intended to limit or modify
the consumer’s rights and will not affect their statutory rights. They are being supplied
strictly to ensure the safety of the individuals using this product.
2
PARTS LIST
No.
Description
Spec
Q’ty
1
Computer
SM8000
1PCS
2
Handlebar
TF2004(36B)
1PCS
3
Screw for computer
M5 x 10L
4PCS
4
Handlebar post
F 60 x1.5t x857.5L
1PCS
5
Semicircular washer
F 8 xF 19 x2t
8PCS
6
Cone hex. screw
M8 xP1.25 x16L(6m/m)
4PCS
7
Metal cover
8
Handlebar cover
TF2004
1PCS
9
T-knob
M7 xP1.0 x 65L
1PCS
10
Bushing
F 7 xF 12 x40MML
1PCS
11
Cone hex. screw
M7 xP1.0 x 30L
1PCS
12
Flat washer
F 7 xF 12 x1t
2PCS
13
Spring washer
F 7 x 2t
2PCS
14
Front stabilizer
F 60 x1.5t x400L(190W)
1PCS
15
Main frame
16
Nut
M8
4PCS
17
Pedal
E16(9/16”)
1SET
18
Carriage bolt
M8 xP1.25 x90L
2PCS
19
Rear stabilizer
F 76 x 1.5t x430L(190W)
1PCS
20
Knob for saddle post
707A M16 x P1.5t x 22L
1PCS
21
Saddle post
F 50.8 x1.5t x 510L
1PCS
22
Saddle
LS-A12+GEL
1PCS
23
Slider
38x38x1.5tx215L
1PCS
24
Flat washer
f 12.5xf20x2t
1PCS
25
Horizontal knob
3/8"ABS
1PCS
26
Hand pulse
WP1007-36B
1SET
27
Cable(upper)
900L12P +12P
1SET
28
Cable(lower)
760L12P +,2P,3P
1SET
29
End cap
Black
2PCS
30
Transportation wheel
Nylon-6(Black)
2PCS
31
Cone cross screw
3/16"x3/4"
6PCS
32
Cover
Black ABS
1PCS
33
Cone cross screw
M4x12L
34
Crank cover
Silver(ABS)
1PCS
35
Bearing
6203
1PCS
36
Magnetic adjustment
f 12x50L
1PCS
37
Adjustable end cap
f 76
2PCS
38
Front cover
I007-4 (ABS)
1PCS
39
Patten nut
3/8"-26(Black)
2PCS
40
Flywheel
9KG
1PCS
41
Idler spring
ODf 12xf 1.8x45T
1PCS
42
Idler clamping
5T
1PCS
43
Hex. Screw
M8x20
1PCS
1PCS
1SET
3
22PCS
44
Bearing
6300
2PCS
45
Flat washer
f 8xf 12x1t
2PCS
46
Hex. Screw
M8
2PCS
47
Pulley
f 232*6
1PCS
48
Belt
1059J6
1PCS
49
Hand pulse wire
650+650 5P
1SET
50
Cone cross screw
M4x50L
7PCS
51
Slider fixed set
3/8"
1PCS
52
End cap
38x38(Black)
2PCS
53
Plastic sleeve
f 60(Black)1.5t
1PCS
54
Sensor box
400L(- 2P)PVC
1SET
55
Round cross screw
M3x14L
2PCS
56
Cone cross screw
M5x12L(Black)
2PCS
57
Handlebar cover
TF2004 Black (ABS)
1PCS
60
Cover for handlebar post
Black(ABS)
1PCS
61
M8xP1.25x75L
2PCS
62
Carriage bolt
Pedal(R、L)
(9/16")6.5"
1SET
63
Nylok screw
M8xP1.0x20L
2PCS
64
Crank cover
65
Chain cover
66
C type
f 17(Black)
1PCS
67
Flat washer
f 17.5xf25x0.3t (Black)
1PCS
68
Wave washer
f 17.5xf25x0.3t(Black)
1PCS
69
Star washer
f 10xf17x1t
2PCS
70
Adapter
71
Cone cross screw
M3x8L
2PCS
76
Bushing
f 10xf14x9mmL
2PCS
77
Bearing
6300
1PCS
78
Axle for flywheel
3/8"-26x145L
1PCS
79
Pulley
f 34*8(f 26Bearing hole)
1PCS
80
Hex. Screw
3/8"-26x4.5t
4PCS
81
Bearing
6000
1PCS
82
Bearing
6003
2PCS
83
One way bearing
84
Spring washer
f6
2PCS
85
Hex. Screw
M6xP1.0*16L
2PCS
86
Flat washer
f 6xf 13x1t
2PCS
87
Axle
168
1SET
88
Hex. Screw
M8xP1.25x12Lx5t (Black)
3PCS
2PCS
PC
2PCS
1PCS
*(KR-6003)
4
1PCS
EXPLODED DIAGRAM
5
ASSEMBLY INSTRUCTIONS
Step 1
1.
2.
3.
Loose the pre-assembly screws on the front /
rear stabilizer.
Fasten front and rear stabilizers each with 4
screws and washers to the base construction.
After assembly the bike can be adjusted to
slightly uneven ground by adjusting the height
of the foot caps in the back. The pre-assembled
transportation wheels in the front allow easy
maneuverings of the bike:
Step 2
1.
2.
Screw the pedals onto the crank. The pedals are
marked with R and L at the screw.
Tighten the left pedal anti-clockwise, the right
pedal clockwise.
Step 3
1.
2.
6
Assemble the saddle with horizontal slider for
saddle post.
Insert the saddle pole in the main frame,
choose the desired position and tighten the
knob. Ensure that the knob is always tightened.
ASSEMBLY INSTRUCTIONS
Step 4
1.
2.
Connect the computer cable.
First, loosen the pre-assembled screws. Then,
put the handlebar post into the cover and main
frame and fix it with 4 hexagon screws and
washers.
Step 5
1.
2.
3.
4.
Place handlebar on the handlebar fixture, and put
the metal cover on the top of handlebar.
Then assemble the upper screw, spring washer,
and flat washer.
Place the plastic cover on the handlebar and
insert T-shape knob into the metal cover and
assemble with the lower spring washer, flat
washer. Please ensure it is tightened very well.
Make sure the handlebar is located right position
by adjusting both upper and lower screws
together
Step 6
1.
2.
7
Connect the computer cable insert the
computer socket.
Mount the computer to the hold of the
handlebar pole with the enclosed screws and
connect the computer cables.
3.
Plug the delivered of hand-on pulse
wire in the socket at the computer.
4.
Wear chest belt for pulse measurement.
Monitor manual instruction
SM8000-11
Operating process
1. Have power connection (with power supply)
2. Initial display : U0 is blinking. The monitor has 5 users for selection. Press UP button to select U0 to U4.
3. Press UP/DOWN button to input personal data of sex, age, height and weight. Press MODE to enter
each setting.
4. After personal data has been set-up, press UP/DOWN button to select training program mode :
MANUAL/PROGRAM/WATT/PERSONAL/H.R.C.,press MODE button to enter.
5. Press UP/DOWN button to set-up each function target : Time, Distance, Calories, and Pulse. Press
MODE to enter.
6. Press START/STOP button to start training.
7. Or, you press QUICK START button to start training directly in MANUAL mode after the monitor is just
power on.
Function buttons
QUICK START : To start training directly without any presetting necessary.
UP ▲ : To make upward adjustment of each setting.
DOWN ▼ : To make backward adjustment of each setting.
MODE : Press the button to confirm setting, or skip to next function.
START/STOP : To start or stop training.
RECOVERY : To act heart rate recovery function.
RESET : During set up mode, you may use it to clear to zero for each function.
Functions
Time :
Counting range :0:00 ~ 99:59, setting range : 0:00~99:00 (minute).
Count up - Time starts to count up from 0:00 when the training starts.
Count down - You can set-up Time target by pressing UP/DOWN/MODE buttons
with each 1 minute increment. Once the training starts, Time starts to count down
from the target. The monitor starts to beep to remind you when Time has been achieved 0:00.
Speed :
Displays trining speed from 0.0 to 99.9 Km/h.
RPM :
Displays training rotation per minute from 0 ~ 999 (rpm).
8
Distance :
Counting range :0.00 ~ 99.99, setting range : 0.0~99.0 (Km/Ml).
Count up - Distance starts to count up from 0.0 when the training starts.
Count down - You can set-up Distance target by pressing UP/DOWN/MODE buttons
with each 1.0 km increment. Once the training starts, Distance starts to count down
from the target. The monitor starts to beep to remind you when Distance has been achieved 0.0.
Calories :
Counting range 0~9999, setting range : 0 ~ 9990 cal.
Count up - Calories starts to count up from 0 when the training starts.
Count down - You can set-up Calories target by pressing UP/DOWN/MODE buttons
with each 10 cal increment. Once the training starts, Calories starts to count down
from the target. The monitor starts to beep to remind you when Calories has been achieved to 0.
Pulse :
Working range : 30 ~ 240, setting range : 30 ~ 240 (bpm). The monitor can display either
handpulse figure or chest pulse figure (the chest belt is attached), or earpulse, and the
pulse pirority sequence is earpule, chest pulse, and handpulse. If you would like to
check handpulse, please do not wear on the chest transmitter belt and remove the
earclip cable while holding two hands to the handgrip sensors.
User :
0 ~ 4 ; when the user selection is User 0, all training data will be not kept. If the user is
from U1 to U4, the monitor will keep the preset function data, and each program
profile created in U1 to U4.
Recovery :
Press the button to act heart rate recovery function. After the button is pressed, please
keep heart rate sensor attached, Time starts counting down for 1 minute. Once 0:00 is
achieved. the monitor will display recovery grade with Fx. F1 is the best, F6 is the worst.
You may press RECOVERY button again to switch back to previous training display.
Personal data content
Age : 0 ~ 99 years.
Sex : Male or Female
Height : Setting range : 100 ~ 200 (cm), 40~80 (inches).
Weight : Setting range : 20 ~ 150 (kgs), 40 ~ 350 (lbs).
Training programs
MANUAL :
1. There are 16 training resistance that you can adjust during or before training.
2. Each profile unit will move forward in the time duration of the preset time devided by 16.
9
3. If there is no preset time target, each profile unit will move forward in every 0.5 km
of the training distance.
PROGRAM :
1. There are 12 program profiles for training, and 16 resistance level as well.
2. You can adjust training resistance during or before training.
3. Each profile unit will move forward in the time duration of the preset time devided
by 16.
4. If there is no preset time target, each profile unit will move forward in every 0.5 km
of the training distance.
WATT :
1. Preset Watt target range is from 10 to 350 watts by each 10 watt adjustment.
2. Once the Watt has been set-up, the training resistance level will be adjusted automatically according to your current training speed and rpm.
3. When your current speed is too fast, the resistance level will be dropped down;
when your current speed is too slow, the resistance level will be increased.
PERSONAL :
1. Press UP/DOWN/MODE buttons to creat your personal training profile.
2. Each profile unit will move forward in the time duration of the preset time devided by 16.
3. If there is no preset time target, each profile unit will move forward in every 0.5 km
of the training distance.
4. When you select your personal number Ux next time, the profile created in this training
will be called out for next training.
H.R.C. :
1. The monitor will calculate your target heart rate automatically according to your age input.
2. There are 55%, 75%, 90%, and manually set-up target figure for selection.
3. Once a target range is selected, the training resistance level is not able to be manually
adjusted by UP/DOWN buttons pressing.
4. When your current heart rate figure is exceed to the target, the resistance level will be
dropped down one level immediately, and keep decreased one level in every 15 seconds
if your heart rate is still higher, till level 1 is achieved. If the resistance level is dropped to
level 1 but your heart rate is still higher, the monitor will keep beeping to remind you to
stop. If this condition keeps for over 30 seconds, the system will stop automatically as a
protection action.
5. When your current heart rate figure is less than the target, the resistance level will be
increased one level in every 30 seconds, till level 16. If the resistance level is achieved 16,
but your heart rate is still less than the target, the monitor will start to beep to remind you.
6. Each profile unit will move forward in the time duration of the preset time devided by 16.
10
7. If there is no preset time target, each profile unit will move forward in every 0.5 km of the
training distance.
Extra Training program :
This is a special feature on the monitor. The monitor has three additional
training plugs in red, yellow and green colors attached to the monitor console. You may use
one of them to choose specified heart rate training program to improve your training. Here
below is the specification content of these three additional programs :
Green : Beginning
Yellow : Intermediate
Red
: Advanced
Once you connect any color of the plug, the monitor will reset automatically and start the
training to the program specified directly from zero. Those training will be not kept to the
monitor memory that any user can use it any time.
Note
1. The monitor will not save your training and preset data after you pressing RESET button for 2 seconds.
2. When you have preset function target or have been training for a while, if you change to another
Training mode, all previous data will be kept and keep counting up or counting down when you start
training in different mode.
3. The monitor display will switch off automatically if you stop training and pressing any button for 4
minute. You may wake up the monitor display by pressing any button or start training directly.
4. After the monitor display is switch off, all previous function datas and training datas will be kept. You
may keep training after awake the monitor display up, all function datas will keep counting up or
down from previous data.
5. The monitor user initially set is U0 after production. For the first time use, you may either choose using a
user U1 ~ U4 for training or use U0 for training.
6. When you have preset a target function data, once the target is achieved, the monitor will stop. You
may either press START/STOP button to have a new training. In this case, the function that is count
down to zero will start counting down again from the last preset target. Other functions will keep
counting up or down from previous data.
7. There is one information indicates monitor failures :
E-2 When the monitor appears this information, it means the monitor and control board connection is
failed. After the failure is fixed, this information will disapear.
8. Power requirement: AC adaptor(Output : DC9V, 500mA)
11