1
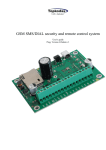
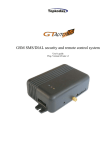
UAB „Topkodas“ GTC812 GSM SMS/DIAL security and remote control system User‟s guide Prog. Version GTC812 APPLICATION Individual protection of houses, garages, cottages and other premises. For remote monitoring of premises and for control via GSM network. Remote control of the devices via GSM network Access control. Gate/door control. Automation of premises, temperature and voltage control. GSM thermostat for premisses and heating/cooling systems. FEATURES 7 inputs. Fully programmable zones. 1 inputs for arm/disarm the security system. 4 programmable 1.5 OC outputs for remote control or for fulfilment of selected function. 1 output for monitoring of system‟s state. LED indicator. 16 users who receive information about protected object. Reception of information in a form of SMS or via DIAL short call. 400 users. Activation/deactivation (ARM/DISARM) and output control by using Maxim-Dallas iButton keys (iButton DS1990A - 64 Bit ID) 400 users being able to control gate or electromagnetic lock via free short call. ARM/DISARM of the system via free short call. Temperature measurement. For temperature control, tracking, alarm and control. Voltage measurement. Voltage monitoring and alarm. Option to connect BELL for sound siren alarm. System state BUZZER. (Optional output type) FLASH feature may be used for direction indicators on arming or disarming or in the event of alarm. (Optional output type) Sending of periodical test including system parameters. SMS about state of each sensor, alarms, power supply voltage and GSM communication level. Built-in GSM module. Testing and diagnostic of the module via USB by using program SERA Remote set-up via SMS messages. Configuration of the module via USB. Free configuration program SERA. Very compact GSM SMS/DIAL security and remote control systemwww.topkodas.lt 2 Content 1. 2. 3. 4. 5. Safety requirements .................................................................................................................................................. 4 Application of the device .......................................................................................................................................... 4 Used definitions and terms ........................................................................................................................................ 4 Short description of the operation principle .............................................................................................................. 5 Package content ........................................................................................................................................................ 6 5.1. Standard package content: ............................................................................................................................... 6 5.2. Additional accessories under request ............................................................................................................. 6 6. Specifications ............................................................................................................................................................ 7 7. General view of the product and layout of control devices ....................................................................................... 8 7.1. Input/output connector pinouts meaning and layout....................................................................................... 9 8. Users ....................................................................................................................................................................... 10 8.1. Control and programming of the module via SMS messages ....................................................................... 10 8.1.1. Installer ..................................................................................................................................................... 10 8.1.2. User .......................................................................................................................................................... 10 8.2. Users to receive SMS/AUTODIAL messages ............................................................................................... 10 8.3. Remote control. Users who are able to control the module via short call. .................................................... 10 9. Temperature control and thermostat function Heating and cooling system control ................................................ 10 9.1. Premisses automation, temperature controller installation and connection diagram ..................................... 11 9.2. Remote temperature control via SMS messages ........................................................................................... 12 9.3. Connection of temperature sensor ................................................................................................................. 13 10. ARM/DISARM/STAY security modes of the module ........................................................................................... 13 10.1. ARM/DISARM via short call ........................................................................................................................ 13 10.2. ARM/DISARM/STAY by sending SMS message ........................................................................................ 13 10.3. ARM/DISARM by using Touch input ......................................................................................................... 13 10.4. Automatic arming of the security system “Auto reARM” ............................................................................ 14 10.5. Bell confirmation signal by arming/disarming the security system............................................................... 14 11. iButton keys ............................................................................................................................................................ 15 11.1. iButton keys entering/deletion directly into configuration program table ..................................................... 15 11.2. iButton keys entering/deletion via SMS messages ........................................................................................ 15 11.3. iButton keys learning by using MASTER key .............................................................................................. 15 12. Module inputs (zones)............................................................................................................................................. 17 12.1. Equivalent input diagrams ............................................................................................................................. 17 12.2. Sensor connection diagrams .......................................................................................................................... 17 12.3. Input configuration parameters...................................................................................................................... 17 12.4. Voltage measuring IN8 (internal) .................................................................................................................. 18 13. Programmable outputs ............................................................................................................................................ 18 13.1. Equivalent output diagrams ........................................................................................................................... 18 13.2. Output connection diagrams .......................................................................................................................... 18 13.3. Operational output parameters ...................................................................................................................... 19 14. Timers of the security system ................................................................................................................................. 19 14.1. Setting of built-in clock module .................................................................................................................... 19 15. Automatic periodical test sending ........................................................................................................................... 19 16. Messages sending ................................................................................................................................................... 20 17. Remote control of the module via SMS messages or via short call ........................................................................ 20 18. Preparation to operate ............................................................................................................................................. 20 18.1. SIM card ........................................................................................................................................................ 21 18.2. Configuration and control of GSM communication module via SMS messages .......................................... 21 18.3. Configuration of the module via PC .............................................................................................................. 28 18.4. Installation of the product and connection diagram....................................................................................... 28 18.5. Installation and control of the module when using in line with other security systems. ............................... 29 18.6. Mounting instruction and connection diagram of security system for premises ........................................... 29 18.7. Premisses automation, temperature controller installation and connection diagram ..................................... 30 18.8. Testing and diagnostics ................................................................................................................................. 31 19. Software updating ................................................................................................................................................... 32 Annexes ............................................................................................................................................................................ 32 1. Annex. ..................................................................................................................................................................... 32 GSM SMS/DIAL security and remote control systemwww.topkodas.lt 3 1. Safety requirements Before applying the module in operation please read this user's guide. Any operations, related with mounting of the module and connecting of peripheral devices, should be performed only after unplugging the module from the mains. 2. Application of the device GSM communication module GTC812 (hereinafter the Module) is applied for sending of GSM SMS messages to the mobile phone of a user. The module GTC812 may be applied for protection of house, garages, cottages, vehicles as well as for access control, gate control, objects' automation, smart house and temperature control. For premisses protection and many other applications. In the event of burglary, the device, depending on programmed operation algorithm, is able to call or to send SMS to up to 16 users. A user is able to hear what is going on premises after answering a call or he may make a call by himself. A user is able to receive an SMS with detailed information about status of each protected zone and number of alarm events. The user is able to control the device via SMS messages only if he knows user's password. If a call is being performed from the telephone number not included in the system„s data base, the call is rejected immediately. The module has system voltage monitoring and control. If power supply voltage drops below the defined value, a user automatically will be notified via SMS. The SMS message includes voltage of backup battery (System Voltage). The module has external temperature sensor. A user receives information about temperature alarms and restores via SMS messages. The SMS on voltage of the module and ambient temperature is also available. Temperature may be measured in Celsius and Fahrenheit. SMS periodical test ensures communication control of the module. Test sending time is programmable [Test Time]. The test will include all essential information: GSM communication strength, system power supply voltage, temperature and IMEI of the module. Remote Control by Dialling The module compares incoming number with programmed users' numbers and in a case of coincide activates an output or other action and interrupts the call automatically. All parameters of the module should be configured via PC by using software SERA or in remote manner by sending appropriate SMS including password. . 3. Used definitions and terms Installer – a person provided with INST (installer's) password. User - is a person being aware USER password. Authorized user - is a person whose mobile phone‟s number is entered in GSM module. Two authorized users with the same rights may be entered into the module. Configuration - programming of the settings, which will define the operation of the item. For example, user's telephone numbers, set-up of periodicity for sending SMS message, input names etc. Event - event a user receives the information about. ARM - status of the security system. The module is in ARM mode DISARM - status of the security system. The module is in standby mode; only 24h inputs are active. NO - input type (Normal Open) - this means that the alarm will be send when the input will be connected with ground (-V). NC - input type (Normal Close) - this means that the alarm will be send when the circuit between input and ground (-V) will be broken. EOL - (end of line resistor) input type with resistor. Service messages– ARM/DISARM, test, resetting of the system. DIAL- the system makes a call to the number specified. Pull-up resistor - is that it weakly "pulls" the voltage of the wire it is connected to towards +V (or whatever voltage represents a logic "high"). MIC - microphone COM – negative power supply terminal. +V - positive power supply terminal. SSR- Solid State Relay Caller ID - Caller's identification GSM SMS/DIAL security and remote control systemwww.topkodas.lt 4 4. Short description of the operation principle The module transfers messages on events of the security system to the mobile phone of a user via GSM communication channel. Upon alarm occur , the module will generate SMS message about alarmed sensors. Door, PIR, Fire etc. SMS message is being sent to a user in-line with a short call. This is to reduce the probability that a user will not observe SMS message. It is possible to send SMS and to call to 16 users. The algorithm of message sending is SMS1,SMS2...SMSn till all SMS messages will be send. After DIAL1,DIAL2....DIALn. All messages are being sent until all users will be notified about the event. Preferred messages and texts of these messages should be defined when programming the module. The module understands when the call is rejected and will not repeat calling. When the module is calling to the user‟s phone, the user can not reject the call at least 15 seconds. Otherwise the module will understand that the user„s number is busy and will try to repeat the call again. In a case the user„s number is busy in fact, the module will make repetitive calls following the programmed number of calls. Note: Efficiency of this function depends on interpretation of call control by the operator; in some cases the operator may wrongly interpret the call and thus the module will make repetitive calls each 60 seconds, following the programmed number of repetitions (by default 3 repetitions). In such case GSM operator may be changed or simply the amount of DIAL repetitions reduced. Parameters of the module are set by sending SMS or via PC by using standard miniUSB cable and configuration software SERA, which is available to download at www.topkodas.lt.Page In order to activate voice listening it is necessary to call from a user„s telephone number. When calling, the module will immediately activate voice listening, which will last as long as the user will reject the call or when the module will start performing other commands. Calls from other telephone numbers (of non-authorized users) are ignored. GSM SMS/DIAL security and remote control systemwww.topkodas.lt 5 5. Package content Note: For wholesalers the package content is different. For more info contact the seller 5.1. Standard package content: Or GT812 module - 1 pcs GSM antenna - 1 pcs Shipping Package Temperature sensor - 1pcs. 1 kOhm resistors - 6 pcs Note: Some package content may be optional. Please ask seller for more information. 5.2. Additional accessories under request Temperature sensor with 1 m cable Mini USB cable External microphone with 1 m cable and connector Mini CD - 1 pcs: User‟s guide in PDF Program SERA USB drivers GSM SMS/DIAL security and remote control systemwww.topkodas.lt iButton probe with LED indicator iButton DS1990A-F5+ key 6 6. Specifications Parameters of built-in GSM module: Quad-band (850/900/1800/1900 MHz) Sending of SMS messages Receiving of calls and dialling Outputs: OUT1 max current - (-V) 1500 mA. OUT2 max current - (-V) 1500 mA. OUT3 max current - (-V) 1500 mA. OUT4 max current - (-V) 1500 mA. All outputs can be controlled via short call DIAL or via SMS message. This feature may be used for gate opening, ignition locking etc. Output alarm parameters may be programmed. Programmable algorithms for outputs operation: CTRL/SMS/DIAL, SIREN, BUZER, ARM state, Zones OK, Light Flash,inverting ,pulse mode INI-IN7 inputs: SMS text for input alarm and restore Programmable enabling or disabling of inputs; Input type NC/NO/EOL Algorithm for zones operation:: delay, interior, instant, 24 hours, silent, fire, interior stay, instant stay Response time; Time of additional response; Commutation of selected output Stay - the mode of partial perimeter security IN8 voltage control (internal power supply voltage input) Alarm voltage (programmable); Restore voltage (programmable); Programming-based voltage calibration; Power supply voltage range from 8.0 V to 16 V. Measurement scale 0.01V; IN9 (temperature control) parameters: External temperature sensor; Alarm temperature (programmable); Restore temperature (programmable); Programming-based calibration of temperature sensor; Temperature measurement range from -40 oC to +80 oC Measurement system Fahrenheit/Celsius Measurement scale 0.1 oC / 0.18 oF Module control: ARM/DISARM of the security system via "Touch" input. 5 control algorithms: via SMS message via short call DIAL Maxim-Dallas iButton key (iButton DS1990A - 64 Bit ID) Automatic periodical test: Test sending in a form of SMS message. Periodicity for communication control messages (tests) from 1 to 99 nights and days according to selected time. Power supply voltage: Nominal power supply voltage - 12.6 V Power supply voltage range 10 - 15 V Current consumption: Standby mode.....................................................................................................less than 50 mA. In dialling or SMS sending mode ..............................less than 300 mA. Environmental parameters: Storage temperature range from -40 to +85 oC / -40 iki 185 oF Operational temperature range from -30 to +75 oC / from -22 to 167 oF GSM SMS/DIAL security and remote control systemwww.topkodas.lt 7 Max relative humidity under +40 oC / 104 oF ....................................... 95% Package weight:............................................................................................. 280g Module weight: ............................................................................................. 112g Overall dimensions of the module: ............................................................... 90x63x32 mm * Current consumption in idle running depends on inputs connection type, on output state and load. 7. General view of the product and layout of control devices 1. 2. 3. 4. 5. 6. 7. MOD (red) LED WDG (green) LED REG (yellow) LED MiniUSB programming connector RESET button GSM antenna connector SIM card holder "Push-Push" type Fig. - GSM SMS/DIAL security and remote control systemwww.topkodas.lt 8 7-1 Meaning of LEDs Name External indicator "ARM" state (15 contact) WDG (green) built-in LED REG (yellow) built-in LED MOD (red) built-in LED WDG/REG Indication variations Flashes 50ms/300ms Flashes 50ms/10ms Flashes 500ms/500ms Flashes 500ms/500ms Flashes 250ms/250ms Blinking, remains lit for 50ms, turns off after 1000ms. Off Lights continuously Flashes, remains lit for 50ms, turns off for 300ms. Off Flashes Lights continuously Off Turns on alternating 500 ms Meaning GSM module is in ARM (security) mode. GSM module is in DISARM (non-security) mode. GSM module is in STAY perimeter arm mode. iButton key learning mode. iButton key deletion mode. The module is functioning. The module is out of order or no voltage. Modem has been registered to the network. Modem is being registered to the GSM network. Modem failed to register to the network. Power supply OK and the module is registered to the GSM network. Modem power supply is OK, but the module failed to register to the GSM network. Modem power supply failure or it is switched off. The Bootloader mode In this mode it is possible to update the firmware of the module This mode lasts 5 sec after reset of the module. 1 2 3 4 5 6 7 8 9 10 11 12 13 14 15 16 17 18 Name Contact No 7.1. Input/output connector pinouts meaning and layout GND +V Input 1 Input 2 Input 3 Input 4 Input 5 Input 6 Input 7 Touch OUT1 OUT2 OUT3 OUT4 LED Temp+ BUS GND Description Negative supply voltage (GND) Positive supply voltage Power supply voltage 10-15V 1 zones/input, NC/NO/EOL 2 zones/input, NC/NO/EOL 3 zones/input, NC/NO/EOL 4 zones/input, NC/NO/EOL 5 zones/input, NC/NO/EOL 6 zones/input, NC/NO/EOL 7 zones/input, NC/NO/EOL ARM/DISARM input of the security system First output 1500mA. Open Collector. Second output 1500mA. Open Collector. First output 1500mA. Open Collector. Second output 1500mA. Open Collector. System LED ARM/DISARM for state indication. Connection of LED cathode Temperature sensor LM335 input Data bus to connect extension module Negative supply voltage (GND) GSM SMS/DIAL security and remote control systemwww.topkodas.lt 9 8. Users Users of the module are divided into three groups: 1. Users allowed to control the module by using SMS commands are of two types 1.1. Installer's (INST) SMS commands 1.2. User's (USER) SMS commands 2. Users, receiving information from the module about events (alarms, restores, tests etc.) 3. Users who are able to control the module via short call or using iButton key 8.1. Control and programming of the module via SMS messages 8.1.1. Installer Installer is able to execute all (INST) commands available in the table18-1. The installer is able to change parameters of the module only with INST password 8.1.2. User User is able to execute only user‟s (USER) commands available in the table18-2. A user may send SMS request any time and receive parameters of the security system: zones and inputs states, communication strength, temperature etc. SMS messages may be used to control outputs (Out1, Out2, Out3, Out4) and to activate ARM/DISARM mode.. A User is able to control the module only when using USER password. 8.2. Users to receive SMS/AUTODIAL messages The number of users - up to 16 These users are able to receive messages or/and autodial calls after alarm occurs of the security system or communication test or system state test messages, which are being generated after alarm response of the security system or following test messages schedule. The number of users - up to 16 See Error! Reference source not ound. on how to define types of messages to be sent to different users. 8.3. Remote control. Users who are able to control the module via short call. The number of users - up to 400 These users are able to control outputs via short call, to activate voice listening and to activate ARM/DISARM mode of the system. Action of the user is free-to-select. The actions to be done by the module, after the telephone number having been recognized, might be assigned individually to every telephone number. The following actions may be selected regarding telephone number of each user: To activate outputs OUT1,OUT2,OUT3,OUT4 optionally. This function might be used to lock a vehicle's ignition, to start a vehicle and for remote control of other equipment. ARM/DISARM security system 9. Temperature control and thermostat function Heating and cooling system control Temperature control with GSM phones GTC812 thermostat measure temperature through a probe (that is on system cable) and can drive any of outputs OUT1, OUT2, OUT3, OUT4 (you can program which) to activate or deactivate the heating/cooling system so to keep the temperature required. This is the way to keep room temperature required. Temperature range is -40 to 80 degrees Celsius or accordingly Fahrenheit. It is possible to set a low temperature alarm and a high temperature alarm. Reaching these thresholds will trigger alarm SMSs. You can set a temperature hysteresis. If the temperature is too low or too high the Module will send SMS message including warning and actual temperature value. allowing you to take action or a output to be activated to correct the temperature. For example a user can receive a reporting SMS and also switch output on or off to achieve the requested temperate. This is quite powerful temperature control system not only for residential use but for professional use only. If your company sells heating on a calories basis, this solution can help you a lot, avoiding energy waste and useless trips to a location. If you have a house in the mountains and want to make sure temperature is kept correctly. the GTC812 is the professional solution you want. Module can be used to monitor industrial refrigerators, electrical transformers animal farms or any location or machine where temperature control is significant. Temperature controller configuration window. GSM SMS/DIAL security and remote control systemwww.topkodas.lt 10 Temperature sensor LM335 or LM35 should be connected to the 16th contact Temp(+) and COM 18 or 1 contact. Alarm and restore temperature may be changed. Upon temperature alarm, the module will send SMS message to a user. And if setting exist, the module will switch the selected output. It is comfortable to use this function for indoor heating management. In a case of accuracy shortage, temperature sensor may be calibrated additionally. Following the equation Temperature=X*ADC+Y and by selecting X and Y coefficients. Temperature calibration may be performed in software SERA in testing window. It is necessary to have accurate thermometer in order to measure temperature at least in two points. In testing window to read temperature ADC indications in these points. Following the equation “Temperature=X*ADC+Y“ to calculate X and Y coefficients. Calculated X and Y coefficients should be programmed in the module. It is easy to calculate X and Y coefficients in MC Excel by using trendline. y = 0,3284x - 269,26 40 35 30 Teperature 25 20 15 10 5 0 800,00 -5 820,00 840,00 860,00 880,00 900,00 920,00 940,00 ADC Temperature may be measured in Celsius and Fahrenheit. 9.1. Premisses automation, temperature controller installation and connection diagram Preparation of the module for operation by using configuration software (pictures and the more detailed info are available in SERA description): Define parameters of the outputs. Output state SMS text, output operation description (OUT definition) „CTRL/SMS/DIAL“, state type (State mode)- Steady. If necessary output operation might be inverted. In the GSM communication window parameters of the users to send SMS and DIAL should be set. Also check boxes should be checked to send SMS and DIAL to a user about temperature alarms. In GSM remote control window telephone numbers of users, who will be able to control selected outputs via free short call , should be entered. On The "Temperature Controller Settings" window, set the cooler device temperature control settings: o Cooling temperature value "High temperature" o Cooling hysteresis o Select cooler control output (OUT1-OUT4) or disable, if cooler device is not used. o Determine the temperature value at which will be sent an SMS overheat temperature alarm o Determine the temperature at which the value will be sent an SMS temperature alarm o If you want to receive overheat alarm, need to check box "Enable" Similar settings are done with heater control options. GSM SMS/DIAL security and remote control systemwww.topkodas.lt 11 In order to control big power alternating current equipment, it is comfortable to use solid state relays. Standard AC/DC adapter with the voltage 10V-14V and current >=1A might be used to powering the module. Attention! AC equipment can not be connected directly to the module. It is necessary to use a special relays or other methods, which are in compliance with electrical safety requirements. Attention! When controlling devices from the AC grid (110-230V), it is necessary to follow all electrical safety requirements. Module connection scheme to control heating or cooling equipment: 9.2. Remote temperature control via SMS messages Temperature may be changed in remote manner by using SMS commands. Overheating temperature value upon reaching which, the following SMS message will be sent: „High temperature alarm“. INST123456˽70˽35.5# INST - user type (installer) 123456 – user code space character 70 - the command to change overheating temperature alarm value space character 35.5# - overheating alarm temperature value. The end symbol # Freezing temperature value upon reaching which, the following SMS message will be sent: „Low temperature alarm“. INST123456˽71˽5.5# Temperature value for freezing equipment control. INST123456˽72˽28.5# Temperature value for heating equipment control. GSM SMS/DIAL security and remote control systemwww.topkodas.lt 12 INST123456˽73˽21.7# More information about SMS commands see chapter 18.2 COM BUS Temp LED OUT4 OUT3 OUT2 OUT1 Touch IN7 IN6 IN5 IN4 IN3 IN2 IN1 +V COM 9.3. Connection of temperature sensor +13.8V LM335Z 3 V- V+ ADJ 2 1 10. ARM/DISARM/STAY security modes of the module Security system can operate in three security levels ARM/DISARM/STAY. ARM mode - the highest security level In this mode all zones are protected according to set operation algorithm (zone definition) 12.3 STAY mode - perimeter security mode, enabling a user to stay in a room (at home/office), by connecting only external zones of the perimeter zone being protected (i.e. windows and doors). This is partial activation of the security system. In this mode all three zones are being protected, except „instant STAY“ and „interior STAY“ type zones 12.3. STAY mode is activated, if those two conditions are satisfied. The first condition: even one STAY type zone should be set. The second condition: when activating the security system, Delay type zone should not be triggered, i.e. door of the object should not be open while exit time is being calculated (Exit Delay) DISARM mode –security system is turned off. In this mode only „Silent“ and „24h“ zones are operating 12.3 ARM/DISARM/STATE state of the module may be changed thus: via short call, via SMS message, via Dalass/Maxim iButton and by using Lock/Unlock inputs. All system state control methods may supplement each other. For example: The module may be ARM-ed via „Touch“ input and DISARM-ed via short call or SMS message. 10.1. ARM/DISARM via short call It is possible for 400 users to activate/deactivate the module via short call. The module will recognize user„s number and will automatically cancel the call. Not identified numbers are being ignored. Information on how to program the user numbers is available in the description of SERA. 10.2. ARM/DISARM/STAY by sending SMS message It is possible to ARM/DISARM of the module by sending SMS commands using USER or INST password. Example of SMS message: USER123456˽59˽0 To DISARM the system: USER123456˽59˽1 To activate the system (ARM) USER123456˽59˽2 Partial perimeter security (STAY) More info see 18.2 10.3. ARM/DISARM by using Touch input A few working algorithm modes of Touch input are available: 1st mode (>500ms Positive Pulse On Touch input). If in input „Touch“ >500ms the impulse will appear into +V, the security system's state will be changed from ARM to DISARM or wise versa. 2nd mode (>500ms Negative Pulse On Touch input) algorithm similar as 1 mode only inverted. GSM SMS/DIAL security and remote control systemwww.topkodas.lt 13 3rd mode (Positive Level ARM/Negative Level DISARM On Touch input). When in input „Touch“ is a positive level +V, the state of the module will be ARM. When negative level - V, the state of the module will be DISARM. 4th mode (Positive Level DISARM/Negative Level ARM On Touch input) as the 3rd mode is only inverted. 5th mode (iButton Access ID On Touch Input) uses „Touch“ input. System state ARM/DISARM is changed by using Dalass/Maxim iButton key. (iButton DS1990A - 64 Bit ID) see Fig. -. GTC812 15 ARM state LED (K) 2 +V DS1990A Serial Number iButton iButton Probe +V 10 COM Touch input 18 COM Fig. - GTC812 +V 10 Touch/ARM/DISARM input ARM/DISARM switch Fig. 10-1 10.4. Automatic arming of the security system “Auto reARM” If the function „Auto-reARM“ is on, the module will automatically return to ARM state, if during „Entry Delay“ none of zones was alarmed. This feature is active only if the module was deactivated via telephone DIAL or SMS. This protects from casual DISARMing of the system via telephone. 10.5. Bell confirmation signal by arming/disarming the security system The siren will generate confirmation signal when arming/disarming the security system, if function „Siren signal on ARM/DISARM“ was selected in the software SERA. When the security system is to be turned in ARM mode, the bell will beep once, when in DISARM mode - the bell will beep twice. GSM SMS/DIAL security and remote control systemwww.topkodas.lt 14 11. iButton keys The First iButton key may be learned (recorded) by touching it to the reader. Without the need to send any SMS. The system will notify about successfully recording of the key into memory by shortly beeping twice via buzzer. The system will automatically assigns control function (ARM/DISARM) to learned key. The first key is the main key (MASTER) Other keys might be learnt thus: 1. To enter key codes directly into configuration programme table. 2. By pressing Learn iButton button in a configuration table. 3. By sending SMS with command for new keys learning. 4. By using MASTER key 11.1. iButton keys entering/deletion directly into configuration program table In the configuration program to open Remote Control USERS table. And to enter iButton codes for users. Upon entering desirable codes, it is necessary to write the configuration into the module. 11.2. iButton keys entering/deletion via SMS messages Association of keys is carried out by activating special programming mode - by sending SMS or by pressing „Learn iButtons“ configuration program. Format of SMS message is as follows: INST123456˽63˽1 You will receive a message into your mobile phone in relation to activation of iButton key programming mode. Touch the key to the reader and its unique code will recorded into system memory. Buzzer will notify you about successful recording by beeping twice. The system allows to associate up to 400 iButton keys. For example: You may link either one or 400 keys. Each time when touching the key, the system records its code till all desirable keys will be recorded,. If during 2 minutes not a single iButton key will not be learned, the system will automatically exit keys learning mode. or after finishing programming of the keys, you might send SMS message: INST123456˽63˽0 This SMS will disable recording of new keys into memory. In the event of failure to send this message, ARM/DISARM of the system via iButton key will not operate. Control action functions for all newly associated keys will be assigned according to MASTER key. For example: If MASTER key will control OUT1, all newly associated keys will also control OUT1. A new control actions can be assigned using configuration software via USB. In order to delete all iButton keys from the memory, e.g. if it was lost or if it was stolen, please send SMS: INST123456˽63˽3 All key codes available in the system memory will be deleted. Association again will be carried out as described early. In order to delete iButton key from the memory, it is necessary to have that key, which you want to delete from the memory and to send SMS message: INST123456˽63˽2 After sending that SMS message, the module will delete these keys, which will be touched to the reader . 2 minutes later, the module will deactivate the keys deletion mode. 11.3. iButton keys learning by using MASTER key The mode for new keys learning may be activated by using MASTER key. Master key should be kept attached for 15 sec white keys learning mode will be activated (Buzzer beeps) ARM state indicator starts blinking 500/500ms. Further another keeps you need to learn should be touched. After 120 sec the module will automatically exits the keys learning mode. The same applies to keys deletion mode. Keep MASTER key attached for 30 sec. ARM state indicator starts blinking 250/250ms. After the same procedure applies to all other keys, you want to delete. After 120 sec the module will automatically exits keys learning mode. GSM SMS/DIAL security and remote control systemwww.topkodas.lt 15 GSM SMS/DIAL security and remote control systemwww.topkodas.lt 16 12. Module inputs (zones) GTC812 module has: 7 programmable external inputs (zones). 1 temperature sensor input. Measuring of power supply voltage. Internal input is visible in programming table. Control input „Touch“ see section10.3 . Each input may be linked with selected output, i.e. to switch selected output depending on output state. This feature enables to apply the module for premisses automation and temperature control. For example: For example, if temperature drops below the standard limit, the module is able to automatically activate heating system and also to inform a user about critical temperature by sending him an SMS. 12.1. Equivalent input diagrams Equivalent 1-7 input diagram: +V GTC812 2.2K IN1-IN7 12.2. Sensor connection diagrams Sensors may be connected following 4 different connection diagrams: NC – normally closed contact; NO – normally open contact; NC/EOL – normally closed with end of line resistor, line resistor), NO/EOL – normally closed with end of line resistor, resistor), NOTE. All resistors should be 1 kOm ± 10%. The length of wires for connection of sensors can not exceed 300m and resistance of wire connected to sensor contacts can not exceed 300 Ohms. Resistors should be mounted as near the sensor as possible. Improper connection of resistors system will not work properly. IN1-IN7 IN1-IN7 NO COM 1K COM IN1-IN7 NO/EOL COM IN1-IN7 NC 1K NC/EOL COM 12.3. Input configuration parameters The following parameters may be set for all inputs: GSM SMS/DIAL security and remote control systemwww.topkodas.lt 17 Text of SMS messages for alarms and restores. This text will be included when sending SMS message to a user about alarms and restores of zones. Input types: NC,NO,EOL. These parameters should be set depending on type of zone connection. Definitions of input application: o Delay – Entry/Exit zone. Set "Entry delay" and "Exit Delay" are applied for this zone. Such type zones are used for connection of door sensor. o Interior – disturbance of this type of the zone will not be responded if alarm of “Delay” type zone occurred and “Entry Dlay” or “Exit Delay” time still have not run out. Such type zones may be used for connection of motion sensor in front of the door. The input will be activated immediately, if the door has not been opened before. o Instant – Instant zone. Upon disturbance of this zone, the system will immediately activate burglary alarm. o 24 hours - Upon disturbance of this zone, the system will activate burglary alarm not depending whether the security system is in ARM or in DISARM modes. The applications of this type zones are safes, storehouses, tampers of the sensors. o Silent - silent zone is always active not depending on whether the security system is ARM or DISARM. Upon disturbance of this zone, SMS messages are being generated but the siren will not be activated. These zones may be applied for voltage, temperature control, AC mains failure control and for alarm of silent panic. o Fire - this zone is always active not depending on whether the security system is ARM or DISARM. The zone generates a special siren signal with interruptions. The zone is applied for smoke sensors and for fire alarm. o Interior Stay – operation algorithm identical to „Interior“ type zone, when the system is in ARM state, however it automatically turns into inactive, when the module is in STAY state. o Instant Stay – operation algorithm identical to „Instant“ type zone, when the system is in ARM state, however it automatically turns into inactive, when the module is in STAY state. Enabling or disabling of zone alarm or restore. Input speed – time of the input reaction, this is the time period during which changed input state should remain stable in order to let the module to register alarm or restore input state. Repeat time – this is the time period, during which repeated event of the input will be ignored. Zone action – switching of selected output (OUT1, OUT2, OUT3, OUT4) in the event of alarm or restore. May be used for object automation. For example, for indoor temperature control. Upon dropping of temperature will critical limit, heater would be switched on automatically. 12.4. Voltage measuring IN8 (internal) This input is visible only in configuration window of the SERA software of the module. IN8 input is intended for power supply voltage control. A user will always be alerted that a car battery has been charged or discharged. This the car battery will be protected from full discharge or damage. Alarm and restore voltages are programmable. Voltage measurement may be calibrated additionally. 13. Programmable outputs The module GTC812 has 4 programmable outputs. Outputs of the module may be used to switch relay, LEDs, siren or other sound device. Current for OUT1 - OUT4 is 1500mA. All outputs are protected from short-circuit, overvoltage and overheating. 13.1. Equivalent output diagrams OUT1 - OUT4 outputs is open collector in terms of grounding –V. OUT1 - OUT4 equivalent diagram: GTC812 OUT1-OUT4 COM 13.2. Output connection diagrams Examples of output connection diagrams see below: GSM SMS/DIAL security and remote control systemwww.topkodas.lt 18 1500mA OUT1-OUT4 GTC812 1500mA OUT1-OUT4 GTC812 +V COM +V Siren COM 13.3. Operational output parameters The following parameters may be set for each output: SMS text for ON output state SMS text for OFF output state Output operation algorithm „OUT def“: o CTRL/SMS/DIAL – output is used for remote control via short call or SMS. e.g. for ignition blocking, for gate control or for remote vehicle starting etc. o SIREN – output used for connection of siren. “Siren time” can be changed. o BUZER – sound signalling device. In the event of zone alarm - beeps continuously. When security system starts calculating exit delay, the user is able to hear short, repetitive sound signals. When 10 seconds are left till the begging of activation, signals are being repeated each 0.5 seconds. If after expiry of the delay time, all zones remain unalarmed, the system turns into ARM state along with beep sound to confirm the action. o ARM state – state of alarm system: ARM/DISARM. May be used for light indication. o Inputs OK- if any of zones is disturbed, the output will be alarmed. This feature is usually used for indication whether all zones are in order. o Light Flash – used for connection of light signal. Upon alarm of the security system the light starts blinking. Lights will also blink when arming/disarming the security system. o DISARM state - the output is triggered when the module turns into DISARM state. Output inversion; Output type is constantly on/off or impulse; Output impulse duration. 1-65535 seconds. 14. Timers of the security system Entry Delay – time period, during which the user after passing Delay zone should manage to disarm the security system. Exit Delay – time period, during which the user should manage to leave the object and pass Delay zone. Siren time – Siren switch on time in the event of alarm. Test time – time of automatic periodical test. Test Period - test sending period in 24 hours. 14.1. Setting of built-in clock module Built-in clock of the module is to be set by SMS message or by using configuration software. Time setting via SMS message: INST123456˽93˽31/12/2010#23:55# 123456 – Inst password space character 93-command for clock setting space character 31/12/2010#23:55# - time dd/MM/yyyy#HH:mm# Time format of the module: dd/MM/yyyy#HH:mm# dd - day of the month 1-31 MM-month 1-12 yyyy -year HH-hours 0-23 mm- minutes 0-59 After successful setting of module time, the module will send confirmation SMS, the clock will be set. The timer may be set according to PC time via USB by using configuration software SERA, In order to set module's timer time, it is necessary to press „Set Module Clock“ button. 15. Automatic periodical test sending Periodical test may be used for communication control of the module. GSM SMS/DIAL security and remote control systemwww.topkodas.lt 19 It is necessary to carry out these actions: To set built-in clock of the module, see chapter 14.1 ; To set test sending periodicity in 24 hours; To set test sending time, at which hour of the 24 hours, the test will be sent. Test sending may be disabled by setting test sending time 00. Periodical test may be used for SIM card's account control. The following parameters of the module are available in a test message: GSM communication strength, power supply voltage, temperature, IMEI number of the module, software version. 16. Messages sending Messages are being sent in the event of alarm, after ARM/DISARM of the security system (if specified in the configuration), upon test sending time (if specified in the configuration), after changing the module configuration (if specified in the configuration), upon sending request about parameters (command code 80). SMS about alarm of the security system is doubled with a short telephone call (if specified in configuration). 17. Remote control of the module via SMS messages or via short call With the help of SMS messages it is possible to control devices connected to outputs Out1, Out2, Out3, Out4. It is possible to ARM/DISARM the security system. Control command for user (USER) are available in the table No 182. The amount of users when controlling via SMS is unlimited. Example of control command when changes the states of all three outputs and inquiry is made to send information via SMS about output states after changing of output states: USER123456˽51˽1˽80˽5 123456 – user code; space character 51- changing of the first output state space character 1 – to turn on the output (0 - to turn off the output) space character 80- information request command (see table 18-1) space character 5 – to send information via SMS about output states. More examples of controlling via SMS message see the chapter Configuration of GSM communication module via SMS modules All outputs may be controlled via short call (the module will automatically reject the call). Up to 400 users may control the module. All users optionally may control outputs Out1, Out2, Out3, OUT4, ARM/DISARM the security system. It is possible to assign to each user that he is able to control. This is comfortable to use a single module for controlling of few gates when several masters are. 18. Preparation to operate Before or after installation of the module it is necessary to configure its parameters. SIM card settings may be configured by using only GSM phone. How to prepare the module to operate: Connect system connector, GSM antenna. Connect power supply source: 10-15V battery or stabilized 10-15V/1A power supply source. Check and if necessary enter SMS message centre number (using GSM phones). Mostly SIM card already has SMS centre number inserted, please skip this step. Remove PIN code request of the SIM card (it can be done by using GSM phone). Install SERA configuration program. Connect USB cable to the PC and to the module. Launch SERA program. Guidelines on how to use SERA program is available in SERA description. GSM communication strength, IMEI and SMS centre number are available in Test window (see SERA description). Configure telephone numbers to which information should be transferred*; Set the numbers to send SMS and to make a call*; Set active inputs, which will be used; For example, if the input will not be used, it should be disabled*; Set periodicity of communication test (if 00 is entered, the test will not be send); Set input parameters. GSM SMS/DIAL security and remote control systemwww.topkodas.lt 20 Set output OUT1, OUT2, OUT3, OUT4 states (if applied)*; After inserting SIM card or upon changing parameters of the module, it is necessary to press RESET button. There are two types to configure the module. The first – via SMS messages. The second – via PC, by connecting the module to PC via programming cable. Full change of parameters is possible only via PC by connecting programming cable.. If possible we recommend to configure the module via PC. 18.1. SIM card GTC812 module is not locked with a particular GSM network. This means that a user may use SIM card of any GSM service provider with a possibility to send SMS and to call. In order to control the module via a short call, SIM card should be have Caller ID option. Usually SIM cards have such option. If your card can not identify a caller, please contact GSM service provide or use another SIM card. Locate SIM card into a holder. Card's circuitry should look downward and card's key (cut angle) should look upwards. The card holder is of "Push-Push" type. This means that after pushing the card once, it is fixed and after pushing it again - it is released. Locate SIM card into a holder. Note: do not locate SIM card with force, because you may damage SIM card holder. 2 Gently push it 3 Fix SIM card. 18.2. Configuration and control of GSM communication module via SMS messages Only basic parameters of the module, shown in the table 18-1 , may be configured via SMS messages. All parameters of the module may be changed via USB by using configuration software SERA. Configuration of the module via SMS messages may be performed only with installer„s password. 18-1 The table shows configuration and control codes of the module. Configuration of the module may be performed via SMS messages. Configuration SMS command structure: Verifier: INST – Install. This verifier is used for configuration of parameters of the module. USER – User. This verifier is used for module control. Installer‟s or user‟s password. space character Command code. space character Configuration array The module can perform a few commands available in one message: GSM SMS/DIAL security and remote control systemwww.topkodas.lt 21 Verifier: INST – Install. This verifier is used for configuration of parameters of the module. USER – User. This verifier is used for module control. Installer‟s or user‟s password. space character First command code. space character First configuration array space character Second command code. space character Second configuration array etc. ....... One SMS message may include as many commands as one SMS message may cover, i.e. 160 symbols (including spaces). In such case firstly verifier should be sent, password should be written without space after the verifier and further come command code, parameter, command code, parameters etc. separated with space „_“. The module executes the commands as follows: the first command next after the password and further go all other commands from the left to the right. 123456 INST Begi nnin Pass g wor d Comma nd code. 18-1 Table of Installer’s command codes. Command parameters default settings Examples of command parameters examples Clarifications Telephone number of users to whom send SMS and to whom make a call (DIAL) up to 16 symbols, the end symbol “#”; after the symbol “#” user priority number 01-16 should be entered. Delete selected user‟s telephone number according to priority number. User ID from 01 to 16 Delete telephone numbers of all users ARM/DISARM control modes: 0,1,2,3,4,5 see 10.3 chapter Periodicity of communication test in 24 hours. (from 00 am to 99), 00 – no test In the example test to users will be send each hour. Periodical test time format HH:mm# Input IN1,IN2,IN3,IN4,IN5,IN6, IN7, IN8 modes (0-'delay',1-'interior',2-'instant',3-'24h',4-'silent',5-'fire') Input IN1,IN2,IN3,IN4,IN5,IN6, IN7, IN8 types (0-NO type, 1-NC type, 2-EOL) Service messages: Arm, Disarm, Reset, Test (1-ON, 0-OFF) In the example service messages Reset and Test will be sent. Input triggering: IN1,IN2,IN3,IN4,IN5,IN6, IN7,IN8,IN9 (1-on, 0-off) In the event of example IN6 IN8 IN9 alarm will be activated. Input restores: IN1,IN2,IN3,IN4,IN5,IN6, IN7,IN8 (1-ON, 0-OFF) In the example, inputs IN1, IN3, IN5, IN6, IN8, IN9 will be restored. 01 none TelNo#01 02 none 01 03 05 none 1 4 06 01 01 07 14:30# 15:55# 08 11111121 02111133 09 11111221 02111111 10 1111 0011 11 11111111 00000101 12 11100001 10101101 21 22 23 24 25 26 27 28 Alarm 1# Alarm 2# Alarm 3# Alarm 4# Alarm 5# Alarm 6# Alarm 7# Low Battery# Door# PIR1 alarm# PIR1 alarm# Tamper.# Ignition# Siren# Siren# Battery# IN1 input name changing up to 16 symbols, the end symbol “#” IN2 input name changing up to 16 symbols, the end symbol “#” IN3 input name changing up to 16 symbols, the end symbol “#” IN4 input name changing up to 16 symbols, the end symbol “#” IN5 input name changing up to 16 symbols, the end symbol “#” IN6 input name changing up to 16 symbols, the end symbol “#” IN7 input name changing up to 16 symbols, the end symbol “#” IN8 input name changing up to 16 symbols, the end symbol “#” 31 32 33 34 35 36 37 38 Restore 1# Restore 2# Restore 3# Restore 4# Restore 5# Restore 6# Restore 7# Battery Restore# Restore 1# Restore 2# Restore 3# Restore 4# Restore 5# Restore 6# Restore 7# Battery Restore# IN1 input restore name changing up to 16 symbols, the end symbol “#” IN2 input restore name changing up to 16 symbols, the end symbol “#” IN3 input restore name changing up to 16 symbols, the end symbol “#” IN4 input restore name changing up to 16 symbols, the end symbol “#” IN5 input restore name changing up to 16 symbols, the end symbol “#” IN6 input restore name changing up to 16 symbols, the end symbol “#” IN7 input restore name changing up to 16 symbols, the end symbol “#” IN8 input restore name changing up to 16 symbols, the end symbol “#” 40 41 42 43 44 45 Out1 ON# Out2 ON# Out3 ON # Out4 ON # Out1 OFF# Out2 OFF# Out3 ON # AC ON# Light ON# Siren on# Heater OFF## AC OFF# Out1 output activation text changing up to 16 symbols, the end symbol “#” Out2 output activation text changing up to 16 symbols, the end symbol “#” Out3 output activation text changing up to 16 symbols, the end symbol “#” Out4 output activation text changing up to 16 symbols, the end symbol “#” Out1 output deactivation text changing up to 16 symbols, the end symbol “#” Out2 output deactivation text changing up to 16 symbols, the end symbol “#” GSM SMS/DIAL security and remote control systemwww.topkodas.lt Ou 22 46 47 Out3 OFF # Out4 OFF # Light OFF # Siren off# 48 0000 1111 49 0000 1024 50 none 1,2,3,4 51 52 53 54 none none none none 0 or 1 0 or 1 0 or 1 0 or 1 59 none 0 or 1 60 none TelNo#001#00010 61 none 001 62 none 63 none 1 70 30.0# 35.5# 71 2.0# 10.3# 72 73 26.0# 20.0# 27.1# 21.4# 80 none 1 90 123456 654321 91 92 123456 none 948921 none 93 none 31/12/2010#23:55# Out3 output deactivation text changing up to 16 symbols, the end symbol “#” Out4 output deactivation text changing up to 16 symbols, the end symbol “#” OUT1, OUT2, OUT3, OUT4 output states: 1 -Inverted, 0-Normal Example outputs OUT1 OUT2 OUT3 OUT4are inverted. Description of output Out1, Out2, Out3,Out4 operation algorithm 0-CTRL,1-SIREN,2-BUZZER,3-ARM state,4-Zones OK,5-Flash In the above example OUT1 will operate in siren mode; OUT2 – for remote control; OUT3 – to connect buzzer (BUZZER).OUT4- Zones OK 1,2,3,4 - selectable output number 1-OUT1, 2-OUT2, 3- OUT3, 4- OUT4. Inverting state of selected OUT output to opposite. Output state: changes every time after sending command code. Explanation see below the table. Activates or deactivates OUT1 output. 0 – deactivates, 1 - activates Activates or deactivates OUT2 output. 0 – deactivates, 1 - activates Activates or deactivates OUT3 output. 0 – deactivates, 1 - activates Activates or deactivates OUT4 output. 0 – deactivates, 1 - activates ARM/DISARM command. 0 – DISARM the security system, 1 - ARM the security system Command to enter new user for remote control via short call. Command parameters: User telephone number, end symbol #, user ID number from 001 to 400, #, dial action 0 – off or 1 - on, sequence OUT1,OUT2,OUT3,OUT4,ARM/DISARM Delete selected user‟s telephone number according to ID number. User ID from 001 to 400 Delete all telephone numbers of remote control users from 001 to 400 0- to turn off iButton keys association mode 1- to associate new iButton keys 2- to delete touched iButton keys 3- to delete all iButton keys Overheating temperature value upon reaching which, the following SMS message will be sent: „High temperature alarm“. Freezing temperature value upon reaching which, the following SMS message will be sent: „Low temperature alarm“. Temperature value for freezing equipment control. Temperature value for heating equipment control. Send via SMS a part of information regarding configurations of the module: 1. 05…12 command code parameters will be sent; 2. 21…28 command code parameters will be sent; 3. 31…38 command code parameters will be sent; 4. 40…49 command code parameters will be sent; 5. to make a request about output states (Out 1 – Out 4); 6. test request; 7. system state request. input/output states will be sent along with current state of the system (ARM/DISARM). To change installer‟s (INST) code (recommended to change before applying the module in operation) To change user‟s (USER) code (recommended before applying the module in operation) Remote module reset (Reset) by using SMS message Time format of the module: dd/MM/yyyy HH:mm dd - day of the month 1-31 MM-month 1-12 yyyy -year HH-hours 0-23 mm- minutes 0-59 Examples of typical programming messages: 1. Programming of users telephone numbers to send SMS and to make a call: INST123456˽01˽37011111111#01 123456 – installer‟s code; space character 01- command code (programming of users‟ numbers); space character user‟s telephone number without (+) comprised of country code, operator‟s code and user‟s telephone number. the end symbol #; 01- user ID number 01-16 In this example the telephone number of 1st user is entered. After the telephone number has been entered all events of the security system will be sent to a user. Optional events to be send may be selected only when configuring via USB. 2. It is possible to delete telephone numbers one by one according order of priority or all 16 numbers at once: INST123456˽02˽15 GSM SMS/DIAL security and remote control systemwww.topkodas.lt 23 INST123456 02 15 Delete user„s telephone number whose ID number is 15. It is possible to select from 01 to 16. INST123456˽03 INST123456 03 Delete all 16 users' telephone numbers. 3. To enter user‟s telephone number for remote control via short call: INST123456˽60˽3701111111#001#00010 123456 – installer‟s code; space character 60 – command code (programming of users‟ telephone numbers for remote control via short call); space character 3701111111# - user‟s telephone number without (+) comprised of country code, operator‟s code and user‟s telephone number. the end symbol #; 001- user ID number; from 001 to 400; In this example the telephone number of 1st user is entered; the end symbol #; 00010 – What actions should be done after making call to a user. Sequence from the left to the right: OUT1,OUT2,OUT3,OUT4 ,ARM/DISARM 0 - active functions, 1- non-active function. In the example, the function ARM/DISARM is selected. Delete user‟s for remote control via short call telephone number according to ID number or all numbers at once: INST123456 61 001 ;Delete user„s telephone number whose ID number is 001. It is possible to select from 001 to 400. INST123456 62 ; Delete all numbers of remote control users from 001 to 400. 4. 5. Inputs programming INST123456˽11˽00000111˽12 01101111˽80˽1 123456 – installer‟s code; space character 11 – command (see table 18-1) space character 00000111 – used inputs are calculated from the left to the right. IN1, IN2, IN3, IN4, IN5 alarms are disabled and IN6,IN7, IN8 alarms are enabled. space character 12 – command (see table 18-1) space character 01101111 - IN1, IN4 restores are disabled, IN2, IN3, IN5, IN6, IN7,IN8 restores are enabled. space character 80 – command (see table 18-1) space character 1 will send command code 05-12 parameters back to SMS sender. More input parameters may be changed via USB. 6. Programming of input names: INST123456˽21˽Alarmluggage#˽22˽Alarmcapote#˽23˽Alarmdoor#˽80˽2 Output names programming INST123456 40 37011111111#01 43 ignition off.# 80 4 123456 – installer‟s code; space character 40 – command (see table 18-1) space character „ignition on.#“ name of output state when ignition is on. 43 – command (see table 18-1) space character „ignition off#“ – name of output state when ignition is off. space character 80 – command (see table 18-1) space character GSM SMS/DIAL security and remote control systemwww.topkodas.lt 24 7. 4 – will send 40-49 parameters of command codes. Programming of output parameters: INST123456˽48˽1010˽49˽1053˽80˽4 8. 48 – command – outputs inversion (see table 18-1) space character 1010 – OUT1 inverted, OUT2 normal, OUT3 inverted., OUT4 normal. space character 49 – command - description of operation output algorithm (see table 18-1) space character 1053– OUT1 siren, OUT2 – remote control, OUT3 light signalling device (FLASH), OUT4 ARM state. space character 80 – command (see table 18-1) space character 4 – will send 40-49 parameters of command codes. Module control modes (ARM/DISARM/STAY) see chapter see 10.3 ARM/DISARM by using Touch input chapter. INST123456˽05˽1 123456 – installer‟s code; space character 05 – command (see table 18-1) space character 1 - ARM mode see chapter see 10.3 ARM/DISARM by using Touch input chapter. Beginn ing USER Password Command code. 18-2Table of users codes. Command parameters default settings 50 none 1.2 3.4 51 52 53 54 none none none none 58 none 0 or 1 0 or 1 0 or 1 0 or 1 1.2 3.4 # Time in seconds # 59 none 0.1 2 80 none 1,2,3,4,5,6,7 93 none 31/12/2010#23:55# Possible commands 123456 Clarifications 1-OUT1, 2-OUT2, 3- OUT3, 4- OUT4. Change state of selected OUT output. Output state: changes every time after sending command code. Explanation see below the table. Activates or deactivates OUT1 output. 0 – deactivates, 1 - activates Activates or deactivates OUT2 output. 0 – deactivates, 1 - activates Activates or deactivates OUT3 output. 0 – deactivates, 1 - activates Activates or deactivates OUT4 output. 0 – deactivates, 1 - activates 1,2,3,4 - selectable output number #- delimiter Time #- delimiter ARM/DISARM/STAY command. 0 – DISARM the security system, 1 - ARM the security system, 2- STAY mode Send via SMS a part of information regarding configurations of the module: 1. 01…12 command code parameters will be sent; 2. 21…28 command code parameters will be sent; 3. 31…38 command code parameters will be sent; 4. 40…49 command code parameters will be sent; 5. to make a request about output states (Out 1 – Out 4); 6. test request 7. System state request. will send information on input/output states and system state (ARM/DISARM). Time format of the module: dd/MM/yyyy HH:mm dd - day of the month 1-31 MM-month 1-12 yyyy -year HH-hours 0-23 mm- minutes 0-59 Outputs control via SMS messages: Output states of the module may also be controlled via SMS messages. Let„s assume that vehicle ignition should be blocked, thus the first output should be connected to ignition blocking relay. For outputs control the following commands are used: 50,51,52,53, 54,58 Command "50" changes (inverts) state of selected output. When this command is being sent, output state is being changed, i.e. if output has been deactivated, it is activated and vice versa. GSM SMS/DIAL security and remote control systemwww.topkodas.lt 25 51, 52, 53.54 commands sets preferred output state: if 0 is being sent, the output is being deactivated; if 1 – the output is being activated. 50 and 51, 52, 53.54 commands performs the same action, i.e. changes output states. The user may use command, which are the more convenient for him. 58 command changes the state of selected output for set time limit. If you wish to change (invert) OUT1- OUT4 states and to receive information about output states, the following message should be sent: USER123456˽50˽1˽80˽5 123456 – user code space character 50 – to change state of selected output; space character 1 – to change state of first output OUT1; space character 80 5 - command to send SMS about output states. This command is not necessary. If you wish to activate OUT1 and to deactivate OUT2 at once: USER123456˽51˽1˽52˽0˽80˽5 123456 – user code space character 51- set OUT1 state; space character 1 – deactivated output; space character 52- set OUT2 state; space character 0 – deactivated output; space character 80 5 - command to send SMS about output states. This command is not necessary. Output control by selecting trigerring time interval: USER123456˽58˽1#48# (enable OUT1 for 48 seconds) USER123456˽58˽2#5# (enable OUT2 for 5 seconds) 123456 – user code space character 58 – command (see table 18-1) space character 1 enable OUT1 output (1-OUT1, 2-OUT2, 3-OUT3, 4-OUT4); # 48 Output triggering time limit set for 48 seconds. After time limit of 48 seconds OUT1 will be disabled automatically; # ARM/DISARM of the security system via SMS message: USER123456˽59˽0 DISARM the security system USER123456˽59˽1 ARM the security system GSM SMS/DIAL security and remote control systemwww.topkodas.lt 26 It is possible to receive test of the module on the basis if request command: USER123456˽80˽6 123456 – user code space character 80- information request command (see table 18-1) space character 6 – command (test request) --Test-Signal strength: 17 System voltage: 13.16V Temperature: +26.1 C IMEI: 356895030001799 HW:GTC812 SW: GTC812 120628 Upon sending command SMS (USER123456˽80˽6) test message will be sent to the number, from which SMS message has been sent. Below see the example of received test SMS message: Clarifications: Signal strength: Numerical values of communication signal level. Corresponds the following meanings (according GSM telephone): 0- very weak signal (communication loss limit); 1...5 - very weak signal (correspond to one bar on the monitor of a mobile phone); 6...9 - satisfied signal (correspond to two bars on the monitor of a mobile phone); 10...14 - good signal (correspond to three bars on the monitor of a mobile phone); 15 and more - excellent signal (corresponds to four bars on the monitor of a mobile). Voltage:Voltage of car battery or other power supply source the module is connected to. Temperature: temperature sensor‟s showings (C or F). IMEI: IMEI number of GSM modem. HW:hardware version SW: software version. System state request according to the command: USER123456˽80˽7 123456 – user code; space character 80 – command (see table 18-1) space character 7 – command (system state request) The module will sent two part message to the number the SMS was sent from. Below you will see the example of received SMS message following request command (USER123456˽80˽7): The first of two SMS: System voltage: State:ARM Inputs: In1: Door closed. In2: PIR1 OK . IN3: PIR2 OK. In4:MicrowaveRestore In5:Shock restore . (Clarification: system state) (Clarification: state of the first input) (Clarification: state of the second input) (Clarification: state of the third input) (Clarification: state of the forth input) (Clarification: state of the filth input) The second of two SMS: Inputs: In6:Ignition OFF . In7:Siren OFF . In8:Battery restore . (Clarification: state of the sixth input) (Clarification: state of the seventh input) (Clarification: state of the eighth input) Output states Out1 OFF# Out2 OFF . Out3 OFF . Out4 OFF . (Clarification: state of the first controlled output) (Clarification: state of the second controlled output) (Clarification: state of the third controlled output) (Clarification: state of the fourth controlled output) GSM SMS/DIAL security and remote control systemwww.topkodas.lt 27 The module is considered to be installed properly and communication is reliable, if all messages and calls are received properly and all user command are being executed properly. 18.3. Configuration of the module via PC The module may be configured and tested via PA by using standard miniUSB cable. This configuration is being performed by using the software “SERA”, which you may download at www.topkodas.lt . More info about the module configuration by using SERA program see SERA description. 18.4. Installation of the product and connection diagram The module should be installed in such way to ensure GSM communication. It is necessary to properly select place for GSM antenna. GSM antenna can not be hidden deeply in metal constructions to prevent GSM communication shielding. GSM antenna should be mounted as fa as possible from electronic sensors, shock, microwave, microphone, temperature sensors etc., because GSM electromagnetic field may disturb operation of sensors or other electronic devices. We are not liable for disturbances related with your GSM communication service provider. Connection diagram is available in the annex, however other connections versions are also possible. Fuses are necessary. In order to check operation of the module it is necessary to activate used sensors, door, PIR sensor etc. and to observe their operation. The user should receive messages a about alarmed zones (depending on programming). If SMS messages have not been received, please check GSM communication and whether the module is configured properly by sending 80 command with 1,2,3,4,5,6,7 parameters. We recommend to check configurations of the module and test with the software SERA. The module is considered to be equipped properly and communications is reliable, if all sent SMS and calls are properly received as well as all user commands are being performed. GSM SMS/DIAL security and remote control systemwww.topkodas.lt 28 18.5. Installation and control of the module when using in line with other security systems. GTC812 module may be used in remotely ARM/DISARM secondary burglary alarm system. The security system should have input to arm/disarm the security system. For this purpose selected GTC812 output should be connected to the input of the security system. And to carry out these setting: To include user's telephone number into Remote Users table. To select ARM/DISARM To select ARM state under Our Definition in Outputs table To select Pulse or Steady and time. Also it can be done like when connecting the control panel from the keyboard, GTC812 module would be ARMed/DISARMed. The following is necessary: To set PGM function ARM/DISARM To connect PGM of the control panel with GTC812 touch input. To set Touch input control in terms of level and pulse depending on type of the signal being generated by PGM of the control panel. Backup Battery 12V +V CO M O U T1 Touch AC AC Controll ZN PGM AUX + CO M Secondary Burglar Alarm Transformer ~18-24V COM AUX power +13.8V >500mA Signal to GTCOM to ARM/DISARM Signal to Cental Panel from GTCOM to ARM/DISARM AC 110-220V 18.6. Mounting instruction and connection diagram of security system for premises It is recommended to use standard motion, fire, glass breaking sensors. For powering of sensors we recommend to use standard 6-8 wires cable for, designed for installation of security system. For sound signalling we recommend to use siren DC12V up to 1500mA. It is recommended to connect the siren to the system by using 2x0,75 sq. mm double insulation cable. It is possible to supply the security system from stabilized power supply source 10-15V and not less than 1,5A. It is necessary to calculate max current of power supply. The current of the alarm system is the current used by sensors, relays, siren and other devices. It is most convenient to use power supply source applied for power supply of security systems with the option to connect backup lead battery. It is recommended to mount remote control relays into sockets. Sockets may be easily fixed in metal box. It is necessary to select relays according to preferred voltage and current. Auxiliary BUZZER is recommended to be installed inside the premises not far from the entrance. Buzzer operates together with the main siren also when the system starts calculating the time to leave the premises and the time till alarm response of the security system after entering the premises (see clause 7.1). e.g. It is possible to use buzzer of Hitpoint PB12N23P12Q or similar modified piezoelectric 12V DC, 150mA max Buzzer. GSM SMS/DIAL security and remote control systemwww.topkodas.lt 29 Backup Battery 12V IN 7 IN 6 IN 5 IN 4 IN 3 IN 2 IN 1 +V CO M +12V COM COM +12V AC Fail ARM State +12V BA T+ BA T- COM A C 18V A C 18V Temp LED O UT4 O UT3 O UT2 O UT1 Touch CO M Temperature Sensor Trans former ~ 18-24V AC 110-220V External power supply Flash Lamp +12V COM COM COM Tamper1 Tamper2 Tamper3 NC NC NC iButton Probe (Optional) D oor S ensor 1K EO L/N C M otion S ensor P IR 1 EO L/N C EO L/N C EO L/N C COM 1K COM GND Led Gr(+) I/O Led R(+) Led(-) 1K XS3 G las s Break S ensor +12V 1K BELL 1K EO L/N C +12V S moke F ire s ensor + M otion S ensor P IR 2 +12V BUZZER COM COM GSM remote control +12V The module configuration blank sample for this diagram you will find after installing configuration program SERA, located in the directory „ConfigTemplates“. File name: GTC812_v1_House_Office_Alarm.tcfg 18.7. Premisses automation, temperature controller installation and connection diagram Preparation of the module for operation by using configuration software (pictures and the more detailed info are available in SERA description): Parameters of the selected output are set. Output state SMS text, output operation description (OUT definition) „CTRL/SMS/DIAL“, state type (State mode)- Steady. If necessary output operation might be inverted. In the GSM communication window parameters of the users to send SMS and DIAL should be set. Also check boxes should be checked to send SMS and DIAL to a user about temperature alarms. In GSM remote control window telephone numbers of users, who will be able to control selected outputs via free short call , should be entered. GSM SMS/DIAL security and remote control systemwww.topkodas.lt 30 In order to control big power alternating current equipment, it is comfortable to use solid state relays. Standard AC/DC adapter with the voltage 10V-14V and current >=1A might be used to powering the module. Attention! AC equipment can not be connected directly to the module. It is necessary to use a special relays or other methods, which are in compliance with electrical safety requirements. Attention! When controlling devices from the AC network , it is necessary to follow all electrical safety requirements. Module connection scheme to control heating or cooling equipment: Furnance/Heater/Cooling Device Antenna Reset Mini USB SIM Card MOD WDG AC/DC adapter 10-14V, >1A REG COM BUS Temp LED OUT4 OUT3 OUT2 OUT1 Touch IN7 IN6 IN5 IN4 IN3 IN2 IN1 +V COM GTC812 SSR Output ~ AC 85-260V DC 85-260V - ~ Solid State Relay Temperature Sensor COM + GND - GND DC 10-14V, >1A 5-24V Input +V FUSE 5A + +12V 18.8. Testing and diagnostics Diagnostics and testing of the module may be performed via USB port with software SERA. The software will show system input, output, GSM states in real time. Thus it would be easier to evaluate whether the module operates as appropriate. GSM SMS/DIAL security and remote control systemwww.topkodas.lt 31 19. Software updating Updating of firmware version should be performed via PC. The following is necessary: mini-USB configuration cable, Suitable any standard miniUSB cable configuration software SERA, new software version may be downloaded at www.topkodas.lt website. Upon installing the new configuration software, the newest Firmware version will be put into the folder FirmareUpdate. More about software updating process see user manual of the software „SERA“. Annexes 1. Annex. GSM SMS/DIAL security and remote control systemwww.topkodas.lt 32