1
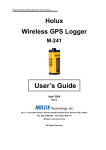
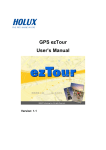
GPS DATA LOGGER
User’s Manual
Safety Warnings
Before using GPS DATA LOGGER, please read and ensure you of fully
understood the following safety precautions. The safety precautions
describe important details regarding your safety. Our company can’t be held
liable for accidents and product damage due to non-observance of these
safety precautions.
Warnings
To avoid loss of log data, promptly turn off the device before replacing the
battery.
The device has waterproof design that can sustain rainfall condition. But do
not throw it into water that may cause permanent damage to the device.
Don’t repair, disassemble or modify this device at discretion. It might be
damaged and not be repaired according to the level of damage.
If the device is severely damaged beyond repair or no longer functions,
please dispose of it in accordance with the relevant local laws.
-1-
Contents
Safety Warnings ................................................................................ - 0 Parts checklist................................................................................... - 3 Basic set up ....................................................................................... - 3 GPS Data Logger Control ................................................................ - 3 Step 1: Install the battery.................................................................. - 4 Step 2: Turn on the GPS DATA LOGGER ........................................ - 4 Step 3: Set Local Time ..................................................................... - 5 Step 4: Install The GPS DATA LOGGER properly ............................ - 5 Step 5: Push To Log ......................................................................... - 5 Generating the KML file .................................................................... - 5 Step 1: Install the CD driver ............................................................. - 5 Step 2: Connect GPS DATA LOGGER to PC ................................... - 6 Step 3: To find the COM port ............................................................ - 6 Step 4: Launch the Utility program ................................................... - 6 Using the GPS_Utility....................................................................... - 6 Using GPS DATA LOGGER............................................................... - 8 Menu Tree ........................................................................................ - 9 Status Bar ...................................................................................... - 10 Speed and Height .......................................................................... - 10 Position ........................................................................................... - 11 Clock ............................................................................................... - 11 Mileage ........................................................................................... - 11 Storage........................................................................................... - 12 Settings .......................................................................................... - 12 Advanced Settings ......................................................................... - 15 GPS Photo Tagger (Option)............................................................ - 18 Troubleshooting .............................................................................. - 19 Specifications.................................................................................. - 19 -
-2-
Parts checklist
Congratulations on your purchase of the GPS Data Logger, the cutting edge
in GPS tracking technology.
Your GPS Data Logger contains the following components and accessories:
- GPS DATA LOGGER
- Bicycle cradle
- Two AAA Batteries
- User’s manual
- Driver installation CD
- USB cable
Basic set up
To use the GPS Data Logger with a PC, you must have:
- PC with PIII-500 or above
- Windows 2000 (SP4) or above
- CD drive
- USB port (USB 2.0 recommended)
GPS Data Logger Control
LCD
USB
SEL
ENTER
-3-
Turn on the GPS DATA
Pressing ENTER until it switch on
LOGGER
Turn off the GPS DATA
Pressing ENTER until it switch off
LOGGER
Change menu page
Pressing SEL
Push to log
Pressing ENTER twice within one second.
Browsing Options
Pressing SEL
Select Option
Pressing ENTER
Step 1: Install the battery
Loosen the screw to open battery door. Installing two AAA size batteries by
the polarity indicated in battery room. Recover the battery door firmly, then
fasten the screw.
Step 2: Turn on the GPS DATA LOGGER
Pressing ENTER until GPS DATA LOGGER is switched on.
Right after its power up, the device seeks for satellites’ signals. As the GPS
signals are acquired, the GPS DATA LOGGER will start to log the waypoints
and the tracking information such as speed, position, clock…etc are
available as well.
Note: If failed to acquire GPS signals, please refer to Troubleshooting for
solutions.
-4-
Step 3: Set Local Time
To display correct local time, you need to set the time zone of where the
GPS DATA LOGGER is operating. Please refer to section “Settings” for how
to set the time zone.
Step 4: Install The GPS DATA LOGGER properly
In order to acquire good GPS signals continuously, Please be aware the
installation of GPS DATA LOGGER shall always have its face up to open
sky.
Step 5: Push To Log
To record the Point Of Interested (POI), pressing ENTER twice within one
second. The current position will be marked in log data. You can, later,
retrieve the POI by generating the KML file on PC.
Generating the KML file
The easiest way to use your log data is to output it by KML file which can
used for Goggle Earth® to display the track and points of Interested. To
generate the KML file at your PC, you need to run the supplied CD software,
the GPS_Utility.exe.
Step 1: Install the CD driver
Run the CD driver at your PC. If the installation doesn't auto run, please find
the GPS DATA LOGGER_DRV.exe file in the CD and run the program.
Follow the prompt to do the driver installation.
-5-
When the installation run into "Installshield Wizard Complete", just check the
"Launch the CP210x VCP driver installer" and then, click "Finish" to
complete the rest of the installation.
Step 2: Connect GPS DATA LOGGER to PC
To connect GPS DATA LOGGER to PC via USB cable and make sure that
Windows has found the device.
Step 3: To find the COM port
You need to know which COM port is used by GPS DATA LOGGER. To find
the COM port, click Windows' <START> menu, choose "My Computer"Æ
"Control Panel"Æ "Performance and Maintenance"Æ "System". Then,
choose the "Hardware" tab to find "Device Manager".
In the device manager, extend the (COM and LPT) to find “CP210xUSB to
UART Bridge Controller (COMnn)”. The nn is the com port number.
Step 4: Launch the Utility program
To find and run the utility program " GPS DATA LOGGER_Uitility.exe" in the
CD driver.
Using the GPS_Utility
To use the utility with GPS DATA LOGGER, there are settings need to be set
before it can make the connection correctly.
(1). To select the COM port that was found at Step.3
(2). Baud rate should be 9600
(3). Select your time zone.
-6-
(4). Click the connect button
to make connection
with GPS DATA LOGGER. As it connects successfully, the icon is
changed to connected
. And it is ready for you to read the log data.
(5).Click "Log Read" to start reading log data. The dialog box is shown for you
to select the destination folder and file name to save the log file. It takes a
while to decompress the log data from GPS DATA LOGGER.
(6).The "Log Clear" allows you to clear the whole storage of GPS DATA
LOGGER to free the memory space for a new log. Please be aware that all
the log data will be lost.
-7-
(7).The "Reset Default" can restore the factory setting back to GPS DATA
LOGGER. That is, all your personal settings will be lost.
The GPS DATA LOGGER, when connected to PC, can be used as a GPS
receiver. The utility provides the GPS Viewer function for user to monitor the
GPS satellites' signals and your location data as well.
(8). If the GPS DATA LOGGER failed to acquired GPS satellites' signal, click
"Cold Start" to force it to reset existing almanac data of satellites and
re-build new data base upon your current location. It usually gets the
satellites data within one minute.
-8-
Using GPS DATA LOGGER
Menu Tree
Speed/Height
SEL
Position
Log mode
SEL
SEL
Clock
Back Light
SEL
SEL
Mileage
Time Zone
SEL
SEL
Storage
Unit
SEL
SEL
ENTER
Settings
Power Saving
SEL
SEL
Clear Log Data
SEL
SEL
Reset to Default
-9-
Status Bar
At the top of menu pages, there is status bar that display current operating
status.
Status Bar
This icon shows the availability of GPS signals. The more bars it shows,
the better GPS signals are available.
Indicate that mileage counting is in progress.
This icon is displayed to confirm to user that a P.O.I record is saved.
This icon is flashing while logging. If log memory is used up. The log will
be stop and
icon is displayed and there is beep sound warning by
every 15 minutes.
Indicate that battery is full.
Indicate that battery has only one third of its capacity left. There are
two consecutive beep sound warnings by every 15 minutes. It can last
long for around 1 hours operation before exhausted.
Indicate that battery is exhausted. The LCD back light is flashing while
beep sound is alerting. The GPS DATA LOGGER will, then, switch off
itself.
Speed and Height
Speed and Height is the first menu page upon power up. In this menu, it
shows your moving speed and height. It can be displayed either by metric
units or English units. You can change the unit in the menu SettingsÆUnit.
SEL: To go to next menu, the Position page.
ENTER: To turn on the back lit.
Fast double ENTER: Pressing ENTER twice within 1 second to save present
- 10 -
log data as P.O.I mark.
Position
The Position page displays the longitude and latitude of your current position.
Please note that due to the bad weather or tall buildings around that may
impair the GPS signals. Your position displayed can drift when you are
stationary or with moving speed below 10km/h.
SEL: To go to next menu, the Clock page.
ENTER: To turn on the back lit.
Fast double ENTER: Pressing ENTER twice within 1 second to save present
log data as P.O.I mark.
Clock
The Clock page can displays present UTC time (GMT), which is provided by
the GPS satellites. You can convert it to your local time by the menu
Settings Æ Time Zone.
SEL: To go to next menu, the Mileage page.
ENTER: To turn on the back lit.
Fast double ENTER: Pressing ENTER twice within 1 second to save present
log data as P.O.I mark.
Mileage
In Mileage page, you can start/stop the mileage and elapse time counting.
Please note that starting the counting will reset the counters. The
icon
is displayed at status bar while proceed the counting. The display can be
either metric units or English units. You can change the unit in the menu
- 11 -
SettingsÆUnit.
SEL: To go to next menu, the Storage page.
ENTER: To turn on the back lit or to start/stop the mileage counting.
Fast double ENTER: Pressing ENTER twice within 1 second to save present
log data as P.O.I mark.
Storage
The Storage page shows the used memory, which helps you to judge if it
needs to retrieve the log data to free the storage for next trip.
SEL: To go to next menu, the Settings page.
ENTER: To turn on the back lit.
Fast double ENTER: Pressing ENTER twice within 1 second to save present
log data as P.O.I mark.
Settings
The Settings page allows you to change the configurations of GPS DATA
LOGGER for your preferences.
SEL: To roll over to the first menu, the Speed/Height page.
ENTER: To turn on the back lit or to enter the settings' sub-menus.
Settings - Log Mode
- 12 -
The first menu of settings is Log Mode. Proper selection of the log mode that
matches your moving speed can optimize the accuracy of log path and also
make the best use of storage.There are four options as followings:
High Speed: By driving on highway.
Middle Speed: The speed between 10Km/h ~ 50Km/h
Low Speed: By walking.
User Defined: To be detailed in advanced setting.
ENTER: To unlock the log mode setting. The background of the characters is
reversed. Using SEL to change log mode. Pressing ENTER again to confirm
the selection and the display will be back to normal.
SEL: To go to next setting of Back Light, if it doesn't unlock the log mode
setting.
Settings – Back Light
This timer setting control the time to maintain LCD
back light. The options include 5 sec, 10 sec, 30 sec, 60 sec and Always On.
The default value is 10 sec.
ENTER: To unlock the LCD back light timer setting. The background of the
characters is reversed. Using SEL to change the timer value. Pressing
ENTER again to confirm the selection and the display will be back to normal.
SEL: To go to next setting of Time Zone, if it doesn't unlock the LCD back
light timer setting.
Settings – Time Zone
Changing the time zone to convert the UTC time (GMT) to your local time.
For example, the local time of California, USA is UTC-08, because it has 8
hours time difference between California and Greenwich.
- 13 -
ENTER: To unlock the time zone setting. The background of the characters is
reversed. Using SEL to change the time zone. Pressing ENTER again to
confirm the selection and the display will be back to normal.
SEL: To go to next setting of Unit, if it doesn't unlock the time zone setting.
Settings – Unit
You can change the unit for mileage and speed display. There are options of
metric unit and English unit.
ENTER: To unlock the unit setting. The background of the characters is
reversed. Using SEL to change the unit. Pressing ENTER again to confirm
the selection and the display will be back to normal.
SEL: To go to next setting of Power Saving, if it doesn't unlock the Unit
setting.
Settings – Power Saving
With the power saving mode turns on, if there is no movement detected for a
period of time the GPS DATA LOGGER will fall into sleep to save power. And
it can be wakened as soon as next movement is detected. However, in a
comfortable car, the movement might be too smooth to be detected that
makes GPS DATA LOGGER failed to be waken. Therefore, it is
recommended to switch off the power saving mode in such circumstance.
ENTER: To unlock the power saving setting. The background of the
characters is reversed. Using SEL to change the power saving mode.
Pressing ENTER again to confirm the selection and the display will be back
to normal.
SEL: To go to next setting of Clear Flash, if it doesn't unlock the power
saving mode setting.
- 14 -
Settings – Clear Flash
Here is an easy way to clear the whole storage to free the memory space for
a new log. Please be aware that all the log data will be lost when you clear
flash.
ENTER: To unlock the clear flash. The background of the characters is
reversed. Using SEL to select "YES" or "NO". Pressing ENTER upon "YES"
will clear the whole storage with all its log data. Then, the display will be back
to normal when it is done.
SEL: To go to next setting of Reset Default, if it doesn't unlock the clear flash
setting.
Settings – Reset Default
Reset Default can restore the factory setting back to GPS DATA LOGGER.
That is, all your personal settings will be lost.
ENTER: To unlock the reset default. The background of the characters is
reversed. Using SEL to select "YES" or "NO". Pressing ENTER upon "YES"
will restore the factory setting back to GPS DATA LOGGER. Then, the
display will be back to normal when it is done.
SEL: To exit setting sub menus if it doesn't unlock the reset default setting.
Advanced Settings
The User Defined log mode is a more advanced setting that allow you to fine
tune the logging parameters to obtain better accuracy of log path and the
use of storage.
Entering the User Define page, there are two options:
Log by seconds: The log is recorded by fixed time interval. This mode is
- 15 -
suitable for high speed movement.
Log by distance: The log is recorded by fixed distance along the movement.
This mode is suitable for low speed movement.
ENTER: To unlock the log mode setting. The background of the characters is
reversed. Using SEL to change log mode. Pressing ENTER again to enter the
sub-menu for parameter setting.
SEL: To exit log mode menu if it doesn't unlock the log mode selection.
The sub-menu of Log by seconds provides five different time intervals for
selection. The 1 sec, 5 sec, 15 sec, 30 sec and 60 sec. The higher the
moving speed the shorter time interval is recommended.
ENTER: To unlock the time interval setting. The background of the
characters is reversed. Using SEL to change time interval. Pressing ENTER
again to confirm the selection and the display will be back to normal.
SEL: To exit sub menu if it doesn't unlock time interval selection.
The sub-menu of Log by distance provides five ranges for selection. The
20m, 50m, 100m, 300m and 1000m. The lower the moving speed the
shorter range is recommended. The 1000m range can be used at very high
speed condition such as a flight.
ENTER: To unlock the range setting. The background of the characters is
reversed. Using SEL to change range. Pressing ENTER again to confirm
the selection and the display will be back to normal.
- 16 -
SEL: To exit sub menu if it doesn't unlock the range selection.
- 17 -
GPS Photo Tagger (Option)
In order to provide user the more powerful tool to managing the travel log data.
The GPS Photo Tagger, a PC based application software, can be used with
the GPS DATA LOGGER. In addition to retrieve the log data from GPS DATA
LOGGER, it also allow user to do the followings:
1. To analyze the recorded tracks by positions, speed, altitude or mileage.
2. To fine-tune the drifts of the log data that make it align with real track.
3. To add photos that were taken with the trips. The software will nail each
photo to the position where it was taken automatically.
4. To upload the travel log and associated photos to web sites such as
frlickr® and locr®.
To Install the GPS Photo Tagger, please find the installation file in supplied
CD driver. The user's manuals is also included.
Troubleshooting
1. For the first time use in a new location
For the first time use in a new location, the device may need a minute to
seek satellites’ signals before it can provide tracking information.
2. After long time of unused.
Long time of unused, the battery can be exhausted that cause the loss of
almanac data of satellites. The device may need a minute to seek
satellites’ signals before it can provide tracking information.
3. Unable to acquire good GPS signals.
You need to move the device to have its face up to open sky.
4. The device doesn't log even the GPS signals is good.
If the log mode setting is "Log by distance", it won't record anything until
you move beyond the range you selected and continue the movement.
Other than that, please check if log mode setting is "Log by seconds" with
60 seconds interval.
5. Log path drift from actual route.
The GPS accuracy is depends on acquired satellites' signals. The better
the signal quality, the more accurate log data is available. Therefore, in the
city downtown with tall buildings that may fading the signals from sky can
cause higher drift than in open area.
6. The clock is incorrect
To check the time zone setting if it is set correctly for your location.
- 18 -
7. The utility program can't connect with GPS DATA LOGGER
To check the COM port and baud rate setting.
8. Unable to turn on the device
Please check the battery.
9. When boot up the PC with GPS DATA LOGGER attached, the cursor
is jumping around.
Follow the procedure below to solve the problem:
(1).Press and hold the "SEL" of GPS DATA LOGGER for more than 3
seconds, the PC should settle down.
(2).Rlease the "SEL" of GPS DATA LOGGER
(3).If your mouse doesn't work properly, please re-boot the PC and
then repeat step.1
(4).Open the "Device Manager" in Windows' Control Panel by selecting
Control Panel -> System -> Hardware -> Device Manager.
(5).Click on the "+" next to "Mice and other pointing devices"
(6).Click on "Microsoft Serial Mouse" or "Microsoft Serial Ball point"
(7).Check "Do not use this device" (Disable).
(8).Click "OK"
(9).Unplug GPS DATA LOGGER from PC and then plug again.
Specifications
GPS Frequency: L1, 1575.42 MHz
Channels: 14 channel all in view tracking
Update rate: 1 Hz
Antenna: Built in patch antenna
Accuracy: Less than 2.5 meters CEP
Re-acquisition Time: < 1 second.
Cold Start: 35 seconds (average,under open sky)
PC Interface: USB 2.0
Protocol: NMEA 0183 v3.01 (GPGGA, GPGSA,GPGSV, GPRMC, GPVTG)
Battery: AAA * 2, non-rechargeable.
Tracking Time: Up to 12 hours
Dimension: 71 x 47 x 25 (mm)
Weight: 65g (without batteries)
Operating Temperatures: -20oC to +60oC
Storage Temperature: -55oC to +75oC
Operating Altitude: <18,000m
- 19 -