1
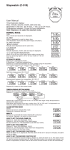
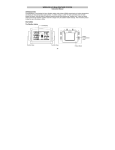
WS9480 - WEATHER STATION USER MANUAL 1. Features 1.1 Time - Radio Controlled Time Perpetual Calendar Up to Year 2099 Day of week in 8 languages user selectable Daily Alarm Snooze Function 1.2 Humidity - Indoor & Outdoor measurable range: 20 ~ 99% Outdoor Humidity Record from Start-Up/Reset, and the corresponded time 24 Hours Min/Max Display for Outdoor Humidity 1.3 Temperature 1.4 Wireless Outdoor Sensor - Indoor measurable range: -10~ 50°C Measures °C / °F user selectable Outdoor measurable range: -20 ~ 50°C Outdoor Temperature Record from Start-Up/Reset, and the corresponded time 24 Hours Min/Max Display for Outdoor Temperature Comfort Indicator - Low-battery indicator for Outdoor Thermo Sensor Wall Mount or Table Stand One Wireless Thermo Sensor Included 433MHz RF transmitting frequency 100 meter transmission range in an open area 1 2. Main Unit Appearance 2.1 Part A- LCD A1: Comfort Indicator A2: Indoor Temperature A3: Indoor Humidity A4: Outdoor Temperature A5: Outdoor Humidity 2.2 Part B- Buttons B1: “MODE “button B2: “AL ON/OFF” button B3: “MEM” button B4: “SNOOZE/LIGHT” button B5: “RESET” button A6: Temperature Memory A7: Humidity Memory A8: Time A9: Radio Controlled Icon A10: Date B6: “SEARCH” button B7: “ALERT” button B8: “▼/C/F/” button B9: “▲” button 2.3 Part C- Structure C1: Battery Compartment 2 3. Outdoor Thermo Sensor D1: Transmission Indication LED D2: Outdoor Temperature display D3: Outdoor Humidity display D4: Wall Mount Hole D5: “C/F” button D6: Battery Compartment D7: Stand 4. Getting Started: 4.1 Main Unit: Open main unit battery compartment cover [C1] Insert 2 x AA batteries observing polarity [ “+” and “ –“ marks] Replace main unit battery compartment cover Use a pin to press the RESET [B5] button on the rear of the main unit, the main unit is now ready for use 4.2 Outdoor Thermo Sensor Batteries compartment (D6) of thermo sensor is locating behind the back cover, Insert 2 x AAA batteries observing polarity [ “+” and “–“ marks] 5. Installation 5.1 Main Unit The main unit can be placed onto any flat surface. 5.2 Outdoor Thermo sensor The remote sensor should be securely mounted onto a horizontal surface. Note: Transmissions between receiver and transmitter can reach up to 100m in open area. Open Area: there are no interfering obstacles such as buildings, trees, 3 vehicles, high voltage lines, etc. 6. Thermometer 6.1 RF Transmission Procedure: The main unit automatically starts receiving transmission from outdoor thermo sensor for outdoor temperature & humidity after batteries inserted. The outdoor sensor will automatically transmit temperature and humidity signal to the main unit after batteries inserted. If main unit failed to receive transmission from outdoor thermo sensor in first 3 minutes after the batteries inserted (“- - . –”display on the LCD), hold “SEARCH” button (B6) for 3 seconds to receive transmission manually. RF icon “ ” flashes on the LCD 6.2 Temperature & Humidity (1) Past 24 Hours Maximum / Minimum Outdoor Temperature and Humidity After start up, the unit automatically shows past 24 hours maximum outdoor temperature and humidity record. “MAX” show on the LCD After start up, the unit automatically shows past 24 hours minimum outdoor temperature and humidity record. “MIN” show on the LCD. (2) Recorded Maximum/Minimum Outdoor Temperature and Humidity from Start-up/Reset. Press “MEM” button (B3) to view the maximum and minimum temperature and humidity record from start-up or reset. “ ” flash on the LCD. When viewing the memory record, hold “MEM” button for 3 seconds to clear the maximum and minimum record. When viewing the memory record, press “MEM” button (B3) again to check the corresponded time and date for memory maximum and minimum temperature & humidity record. The memory record value and corresponded time and date flash. Press “MEM” button select to view: Time & date for minimum temperature memory record, Time & date for minimum humidity memory record, Time and date for maximum temperature memory record, Time and date for maximum humidity memory record. (3) Celsius / Fahrenheit Press “°C /°F” button (B8) to select Indoor/Outdoor Temperature in Celsius mode or Fahrenheit mode. If the temperature is out of the measurable range, LL.L (beyond the minimum 4 temperature) or HH.H (beyond the maximum temperature) will be shown on the LCD. (4) Humidity The humidity measurable range is 20% ~ 99%. If the current humidity measurement is lower than 20%, the LCD would display . For past 24 hours or memory maximum or minimum temperature and humidity record. If the record is lower than 20%, the LCD would display (5) Outdoor Temperature Alert Function Press “ALERT” button (B7) to select to activate or deactivate outdoor temperature alert function. press ALERT button select to: Active outdoor upper temperature alert, the icon “ ” besides outdoor temperature digit would display. Active outdoor upper& lower temperature alert, the icon “ ” besides outdoor temperature digit would display. Active outdoor lower temperature alert, the icon “ ” besides outdoor temperature digit would display. Deactivate outdoor temperature alert, alert icon disappear. Hold “ALERT” button (B7) for 3 seconds to enter outdoor temperature alert setting. Icon “ ” or “ ” beside Temperature’s digits flash. Press “▲” or “▼ “button to adjust the setting value, press “ALERT” (B7) to confirm the setting. Setting Sequence as follow: Upper limit of temperature, Lower limit of Temperature. When it’s alert, the corresponding icon “ ” or “ ” and temperature digit would flash on the LCD. Press any buttons to stop the alert sound, otherwise, it will sound for 2 minutes, and stop automatically. (6) Comfort Indicator (A1) for the display of pleasant/unpleasant climate. 7. Time and Alarm Setting 7.1 Radio Controlled Clock: After batteries inserted and main unit finishes receiving the transmission from outdoor sensor, the clock automatically starts to scan the DCF time signal. Radio Control Icon“ ” flashes on the LCD. 5 flashes, turns on, disappear, Indicating now is receiving Indicating signal received Indicating signal reception DCF signal successfully failed The clock automatically scans the time signal at 3.00 a.m. every day to maintain accurate timing. If reception fail, scanning stops (“ ” on LCD disappear) and repeats again at 4.00 a.m. 5.00a.m. and6.00a.m. The clock can be set to scan the time signal manually by holding “▲” and “▼ buttons (B9 &B8) for 3 seconds. Each reception takes about 5 minutes. If receptions fail, scanning stops. (“ ” on LCD disappear) and repeats again on next full hour. E.g. scanning failed at 8:20a.m. It will scan again at 9:00a.m. Stop scanning by holding “▲” and“▼” buttons (B9 &B8) for 3 seconds. “ ” shown on the LCD if it is in Daylight Saving Time Mode. 7.2 Manual Time Setting: Hold “MODE” button (B1) for 3 seconds to enter Clock/Calendar setting mode. Press “▲” (B9) or “▼” (B8) button to adjust the setting and press “MODE” button (B1) to confirm each setting. (By keeping the “▲” (B9) or “▼” (B8) button pressed, could accelerate the process and reach the desired value more quickly) The setting sequence is shown as follow: 12/24 Hour, Time Zone, Hour, Minutes, Second, Year, Month, Day, Day-of-week language. 8 languages can be selected in Day-of-week, they are: German, French, Spanish, Italian, Dutch, Denmark, Russian, and English. The languages and their selected abbreviations for each day of the week are shown in the following table. Language Sunday Monday Tuesday Wednesday Thursday Friday Saturday German, GE English, EN Russian, RU SO SU BC MO MO ПН DI TU BT MI WE CP DO TH ЧТ FR FR ПТ SA SA СБ Denmark, DA Dutch, NE Italian, IT Spanish, ES SO ZO DO DO MA MA LU LU TI DI MA MA ON WO ME MI TO DO GI JU FR VR VE VI LO ZA SA SA 6 French, FR DI LU MA ME JE VE SA Note: (1) Second adjusted to zero only. (2) The Time Setting Mode will automatically exit in 15 seconds without any adjustment. (3) The Time zone is used for the countries where can receive the DCF time signal but the time zone is different from the German time. (4) When the country time is faster than the German time for 1 hour, the zone should be set to +1. Then the clock will automatically set 1 hour faster from the signal time received. 7.3 Daily Alarm Function: Press “ MODE” button (B1) to select to view: Time Time & Day of Week Alarm Time ( “AL” shown on the LCD) When viewing the Alarm Time, hold “MODE” button (B1) for 3 seconds to enter Alarm Time setting. Press “▲” (B9) or “▼” (B8) button to adjust the alarm time. Press “MODE” button (B1) to confirm the setting. Press “AL ON/OFF” button (B2) to switch alarm on or off. If it is on, “ on the LCD. When Alarming, press “SNOOZE / LIGHT” button (B4) to activate the snooze alarm, (“ ” show ” flash on the LCD). The alarm will snooze for around 5 minutes, then it alarms again. This snooze function can be enabled for maximum 7 times. Except “Snooze” button, press any buttons to stop the snooze alarm. Otherwise, the alarm signal sounds for about 2 minutes, and then stops automatically. 8. Low battery indication: The low battery icon “ ”will appear l indicating that thermo sensor is in low battery status. The batteries should be replaced. 9. Backlight Press “SNOOZE/LIGHT” button (B4), back light states for 5 seconds. 10. Precautions Use a pin to press the reset button (B5) if the Unit does not work properly. 7 Avoid placing the clock near interference sources/metal frames such as computer or TV sets. The clock loses its time information when the battery is removed. Do not expose it to direct sunlight, heavy heat, cold, high humidity or wet areas The outdoor sensor must not be set up and installed under water. Set it up in away direct sunlight and Rain Never clean the device using abrasive or corrosive materials or products. Abrasive cleaning agents may scratch plastic parts and corrode electronic circuits 11. Specifications Indoor Data: Temperature range: -10 to 50°C Temperature Units Measured: °C or °F [switchable] Humidity Range: 20% to 99% Outdoor Data: Transmission distance: (open area) 100m @ 433MHz Temperature range: -20 ~ 50°C Humidity Range: 20% to 99% Main Unit Dimensions: W92x h152 x d45 mm Thermo Sensor Dimensions: W55 x h111 x d16 mm Battery Requirements: Base Station [indoor]: 2 x AA batteries Sensors [outdoor]: 2 x AAA batteries 8