1
EPIC TRACK
USER GUIDE
Version 1.0
EPIC Track User Guide
Version 1.0
Table of Contents
Table of Contents .................................................................................. 2
EPIC Track Server ................................................................................ 4
Overview ............................................................................................ 4
Log-In ................................................................................................. 4
Creating Users/Groups....................................................................... 5
Creating Lists ................................................................................... 12
Creating Events................................................................................ 16
Status Functions .............................................................................. 24
Reporting ......................................................................................... 27
Connecting a Bluetooth Scanner ...................................................... 33
Page 2
5/30/2014
EPIC Track User Guide
Version 1.0
Notice:
Elliott Data Systems Inc. reserves the right to make improvements or
changes in the products described in this manual at any time without
notice.
While reasonable efforts have been made in the preparation of this
document to insure its accuracy, Elliott Data assumes no liability resulting
from any errors or omissions in this document, or from the use of
information contained herein.
Copyright Notice:
This manual is copyrighted. All rights reserved. This manual may be
printed for use by licensed EPIC Track users only. This manual may not
be reproduced for distribution outside a licensed site.
Copyright © 2013 Elliott Data Systems Inc.
Prepared By:
Elliott Data Systems, Inc.
17825 Edison Ave
Chesterfield, MO 63005
(636) 386-8400
Fax (636) 386-3072
Customer Service Support
1-888-345-8511
[email protected]
www.elliottmobilesolutions.com
Page 3
5/30/2014
EPIC Track User Guide
Version 1.0
EPIC Track Server
Overview
EPIC Track Server is a web based application that allows for five
functions within the EPIC Track program.
Add/ Manage Users
Add/Manage Lists
Create/Manage Events
View Status
Create Reports
Log-In
1. To access the EPIC Track Server, open your internet browser and
type the following URL https://www.epictrackserver.com/epictrack
you should now see the screen below.
Note: Epic Track is generally tested in Internet Explorer, Firefox, Safari
and Chrome. Since these change frequently, we may request that you use
a particular browser or version from time to time for compatibility
reasons.
2. Enter the username and password provided by your account
administrator.
3. Once successfully logged in, you will see a screen similar to the one
below.
Note: You may not see all five of the icons based upon the account
privileges.
Page 4
5/30/2014
EPIC Track User Guide
Version 1.0
Creating Users/Groups
To create users/groups and assign or modify privileges use the following
steps.
1. After logging into EPIC Track Server, click on the Users icon.
2. To create a new user, click on the New Users button as shown
below:
Page 5
5/30/2014
EPIC Track User Guide
Version 1.0
3. Fill in all of the data elements as shown on the screen below.
Page 6
5/30/2014
EPIC Track User Guide
Version 1.0
Click here to create a
new group, or use the
drop down menu to
select and existing
group
.
4. Click Save, to save the new user you created. You should now see
the new user display on the Users List screen, as illustrated below.
Page 7
5/30/2014
EPIC Track User Guide
Version 1.0
5. To create a new group, click Edit for a user displayed in the Users
List screen as shown below.
Page 8
5/30/2014
EPIC Track User Guide
Version 1.0
6. From the Modify User screen, click on the pencil icon to the right of
the Group drop down menu, see below:
Page 9
5/30/2014
EPIC Track User Guide
Version 1.0
Click here to create a
new group, or use the
drop down menu to
select and existing
group
7. From the Groups List screen, click on “New Group”.
Page 10
5/30/2014
EPIC Track User Guide
Version 1.0
8. From the Create Group screen, you can name your group and
select any rights that you want to assign to this group. Once
finished, click Save to save your new group.
Page 11
5/30/2014
EPIC Track User Guide
Version 1.0
Creating Lists
Lists can be created for anything that will be tracked using EPIC Track.
Please remember that lists can be people, places or things. Lists can be
created manually through the EPIC Server screens, explained in the
following steps. Lists can also be generated automatically by using the
EPIC Data Connector Tool.
Note: Please see the section on EPIC Data Connector for more information.
1. From the EPIC Track Server screen, click on the Lists button.
2. You should now see the lists screen as shown below.
3. From the screen you can select to “show” Active or Archive lists,
click “Edit” to modify an existing list, or click “New List” to create a
new list.
Page 12
5/30/2014
EPIC Track User Guide
Version 1.0
4. Click on “New List” to manually create a new list of people, places,
or things.
5. You should now see the List Edit screen. From here you can name
your list using the List Name Field. If this is a list of Personnel, you
should also click the check box next to Personnel List. Last, click
on “New List Item” to begin adding things to your list.
Page 13
5/30/2014
EPIC Track User Guide
Version 1.0
6. You should now see the “List Item Edit” screen as shown below.
In the example below we are creating a list of people or “Personnel”.
7. Use the fields for First Name, Last Name, to enter the data
associated with this person. You can add a unique number if you
wish, but this is not required.
8. To add a photo to your list item, click on the Browse button below
the photo field. This will allow you to search for photos on any of
your accessible drives. Once you select the photo you want, click
the Upload button and it should appear in the “List Item Edit”
Screen.
Page 14
5/30/2014
EPIC Track User Guide
Version 1.0
9. The last step is to click “Save List Item”. You should now see your
list item created as shown below.
Page 15
5/30/2014
EPIC Track User Guide
Version 1.0
Creating Events
Before going through the steps to create a new event, it is important to
have a basic understanding of the logic behind creating events. Events
can be configured for almost any tracking scenario. Simple events may
only track items from one list, while complex events might track items
from several lists that need to be associated together. When designing
an event it is important to understand what the main item you want to
track is, and set up the event so that item is the last list in the event. It is
also helpful to understand the output or reporting that you want to get
from a tracking event. By understanding the output, it is easier to design
the event appropriately.
Below are some diagrams that show a simple and complex event
displayed with all the steps included in the event.
Page 16
5/30/2014
EPIC Track User Guide
Version 1.0
Level 1 Event
This is designed to track people or things from only one list. It is
important to understand Levels. Level 1 events track one list, Level
2 Events track two lists and so on.
Level 4 Event
This is designed to track people or things from four lists. In the
example below we are tracking a location, juvenile, service provider,
and visitor.
1. From the EPIC Track Server screen, select the “Events” button.
2. From the Events screen shown below, you can either edit an
existing event, or create a new event. Please also note, the “Show”
drop down menu can be changed to either show only Active or
Archived events.
Page 17
5/30/2014
EPIC Track User Guide
Version 1.0
3. To create a new event click on the New Event button.
4. You should now see the “Event Configuration” screen.
5. Name your event by typing in the Event Name field. Below is a
sample event named “Test 20”. If you wish to select this event by
scanning a barcode, you will need to enter the barcode number you
wish to associate with the event. You can click “Set Background”
to change the background color of the event. From the Steps
Menu, select the number of levels included in your event. In the
sample, Level 3 has been selected. Click the Apply Preview
button to preview the settings you have configured so far. Lastly,
click “Next” to configure the next step in your event.
Page 18
5/30/2014
EPIC Track User Guide
Version 1.0
6. On the next “Event Configuration” screen, you should start by
adding your label for this first step. In the example, Location will be
tracked. So you will fill in “location as the 1st Step Label. Under
“Select Data” you will also select the “locations list” that you
previously created. Next, choose what you want the event to do if a
scanned/selected item is not in a list. The choices are Auto Add,
Passive, or Not Allowed.
Note: See screenshot for definitions of the choices of Not in List.
For this example Passive has been chosen. Lastly, choose an
option to show photos if photos will be associated with this step.
Page 19
5/30/2014
EPIC Track User Guide
Version 1.0
7. Continue on to the 2nd Step screen. Fill in the label for “2nd Step
Label, then select the appropriate list to pull data from in the
“Select Data” drop down menu. In the example, “Select Gate” and
the Gates list were selected for the data. Make your selections on
how to handle the items not in the list and photos, just as you did in
step 1.
Page 20
5/30/2014
EPIC Track User Guide
Version 1.0
8. On the next screen we set our functions for status of the item being
tracked. In our example so far we have set up screens to track a
location and gate. Now we must determine how to label status
(such as In/Out or if we only want to know status In Only. We can
also change the labeling so that it matches with the context of our
event.
Note: Examples would be to change In/Out to Start/Stop.
Page 21
5/30/2014
EPIC Track User Guide
Version 1.0
9. After clicking Next, you should now be on the final step of the event.
This is where you will configure tracking for the key item that you
want to keep track of. In our sample tracking event, that item will be
students. We can select a data list under “Final Step”. Label the
completed button and click on the group you want to return to after
scanning. In our example we want to return In-Out after we finish
scanning students. Select the “Not in List” function and Photo
function for this step. Last in the Label Field, label the screen
appropriately. In our example, we labeled “Scan Student ID”.
Page 22
5/30/2014
EPIC Track User Guide
Version 1.0
10.
After clicking Next you have completed your event. You
should now see your event listed in the Events screen. It is now
ready to use.
Page 23
5/30/2014
EPIC Track User Guide
Version 1.0
Status Functions
The status function serves two purposes. The first purpose is to monitor
status in real time for events you have created. Second, it can be used
as a mustering solution by identifying people or items from a list that have
not been checked in. This is typically used for evacuation scenarios, but
could be applied to other applications also.
1. From the EPIC Track Server screen, click on the Status button.
You should now see the Status Criteria Screen.
Page 24
5/30/2014
EPIC Track User Guide
Version 1.0
2. From the Event drop down menu, select the event you want to see
status on. For status, use the drop down lists under “Filters” to
select the action you want to monitor in the status screen, and the
Time Period you want to see status for.
3. Click “View Status”
Page 25
5/30/2014
EPIC Track User Guide
Version 1.0
1.
2.
3.
4. You should now see the status for your event. This screen will
update in real time as people or things are active in the event. You
can also see many pieces of data, including the last activity and
action for the event. Clicking the icon on the right hand side of the
line for a particular record, will also display the photo associated
with this record.
Page 26
5/30/2014
EPIC Track User Guide
Version 1.0
Click to show photo.
Reporting
The EPIC Track reporting tool provides an easy way to analyze data
collected through EPIC Track.
1. From the main EPIC Track Server screen, click on the Reporting
icon.
2. From the “Reporting Screen, select the type of report you want to
see.
Page 27
5/30/2014
EPIC Track User Guide
Version 1.0
3. Next Select the Event that you would like to see reporting for.
Page 28
5/30/2014
EPIC Track User Guide
Version 1.0
4. Select the report you would like to view.
Page 29
5/30/2014
EPIC Track User Guide
Version 1.0
5. Now type in the “From” and “To” date that you would like to see on
your report or you can select the check box for a single day or all
dates.
Page 30
5/30/2014
EPIC Track User Guide
Version 1.0
6. Finally, click Preview to view your report.
Page 31
5/30/2014
EPIC Track User Guide
Version 1.0
7. From the report preview you can use the toolbar to do several
functions such as print, export, and tab through pages in the report,
zoom in/out, or view the page in full screen.
Page 32
5/30/2014
EPIC Track User Guide
Version 1.0
Connecting a Bluetooth Scanner
1. Scan the Bluetooth Default barcode that matches the connection
method you wish to use, HID (recommended) or SPP.
Tip: If you enable the iOS Keyboard Toggle feature by scanning the ENABLE
barcode, you will also be able to toggle the on-screen keyboard of an iOS device
by tapping the Clear/Function key.
2. Hold Clear/Function Key for 5 seconds.
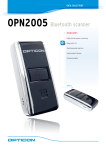
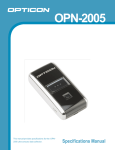
Hold the OPN2005’s Clear/function key for 5 seconds until it beeps
and begins to flash blue. The OPN2005 is now discoverable by your
Page 33
5/30/2014
EPIC Track User Guide
Version 1.0
host device. This can be cancelled at any time by holding the
Clear/function key for another 5 seconds.
3. Perform Bluetooth search on host.
Use the Bluetooth interface on your host device to search for and
select eh OPN2005. The OPN2005 will beep and the LED will flash
blue slower than before indication pairing was successful. If you are
pairing in Bluetooth-SPP mode, the OPN2005 will complete the
pairing process as soon as you launch an appropriate application
and open the serial port created by your Bluetooth software.
See attached barcodes for scanning.
Page 34
5/30/2014