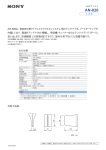
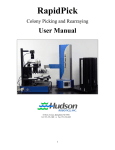
1
BioOdyssey Microarray Systems
BioOdyssey™
Calligrapher MiniArrayer
™
User’s Manual 2.0
Table of Contents
Chapter 1 – Introduction .................................................................................................................1
Key Features of the BioOdyssey™ Calligrapher™ Miniarrayer.........................................................................................1
Features and Benefits ..................................................................................................................................................1
System Description ......................................................................................................................................................2
An Overview of the Printing Procedure Using the BioOdyssey Calligrapher Miniarrayer ...............................................2
Chapter 2 – BioOdyssey Calligrapher miniarrayer Software ......................................................................4
The Main Window ........................................................................................................................................................4
Menu Options ..............................................................................................................................................................4
File Menu...............................................................................................................................................................4
View Menu.............................................................................................................................................................5
Setup Menu ...........................................................................................................................................................5
Manual Control Menu ............................................................................................................................................5
Arraying Menu .......................................................................................................................................................6
Help Menu .............................................................................................................................................................6
Toolbar.........................................................................................................................................................................6
Status Bar....................................................................................................................................................................6
Windows™ File Structure ..............................................................................................................................................7
Chapter 3 – Defining Print Parameters .........................................................................................................8
Starting the BioOdyssey Calligrapher Miniarrayer 2.0...................................................................................................8
Open the Define Parameters for Arraying Window........................................................................................................9
Create a New Run ...............................................................................................................................................10
Substrates Window ......................................................................................................................................10
Grid Layout Window .....................................................................................................................................10
Advanced Grid Window................................................................................................................................12
Blot Window .................................................................................................................................................14
Wash Window ..............................................................................................................................................15
Options Window...........................................................................................................................................15
Open an Existing Run ..........................................................................................................................................16
Predefined Protocols ...........................................................................................................................................17
Chapter 4 – SourceSelect™ Mode ..............................................................................................................18
Creating a SourceSelect File......................................................................................................................................18
Inserting Samples in Your SourceSelect File ..............................................................................................................21
Deleting Samples in Your SourceSelect File ...............................................................................................................21
Open an Existing SourceSelect File ...........................................................................................................................22
Define a SourceSelect Run ........................................................................................................................................22
Chapter 5 – Preparing the BioOdyssey Calligrapher Miniarrayer for Printing .........................................24
Placement of Substrates on Platen ............................................................................................................................24
Placement of Blotting Slides.......................................................................................................................................25
Placement of the Source Plate...................................................................................................................................25
Load Pins into the Printhead ......................................................................................................................................25
Load the MCP Pins ....................................................................................................................................................26
How to Use the MCP Loading Tool.............................................................................................................................26
Preparing the MCP Pins for Printing...........................................................................................................................28
Operating the Humidity Control Module (HCM) ..........................................................................................................29
Using the Cooled Platen ............................................................................................................................................29
Chapter 6 – Printing with the BioOdyssey Calligrapher Miniarrayer ........................................................31
Starting a Print Run....................................................................................................................................................31
Pausing a Printing Run...............................................................................................................................................33
Stopping a Printing Run .............................................................................................................................................33
Defining the Start Position After a Stopped Run .........................................................................................................34
Resuming a Print Run After a Power Outage .............................................................................................................35
Chapter 7 – Generating Mapping Files .......................................................................................................36
Plate Librarian™ Software .........................................................................................................................................36
Creating a Text File (.txt) to Be Imported to the Plate Library................................................................................36
Importing a .txt File to Plate Librarian Software ....................................................................................................37
Creating a Map File with SpotMapper™ Software..................................................................................................38
BackTracker™ Software Files ......................................................................................................................................40
Chapter 8 – Maintaining the BioOdyssey Calligrapher MiniArrayer .........................................................42
MCP Pin Cleaning......................................................................................................................................................42
MCP Loading Tool Cleaning .......................................................................................................................................42
Cleaning the Printhead...............................................................................................................................................42
Humidity Control Module (HCM).................................................................................................................................42
Changing the Desiccant.......................................................................................................................................42
Changing the Filter ..............................................................................................................................................43
Glossary .......................................................................................................................................................44
FAQ ...............................................................................................................................................................46
Appendix A – Source Plates Compatible with the BioOdyssey Calligrapher Miniarrayer.......................52
Appendix B – Available Tech Notes ............................................................................................................53
Appendix C – SpotMapper File Formats ....................................................................................................54
Appendix D – Sensors.................................................................................................................................57
Appendix E – Catalog Numbers..................................................................................................................58
Appendix F – Safety Precautions ...............................................................................................................59
Appendix G – Legal Notices........................................................................................................................64
Safety
!
The BioOdyssey Calligrapher miniarrayer is a precision arraying instrument that should be operated
with care at all times. Improper use and opening parts of the instrument (to which access is not
permitted by the user) can be hazardous to the user or to persons who later come in contact with the
instrument. Refer to Appendix F for additional critical safety precautions.
The Calligrapher miniarrayer system conforms to the requirements of FCC class A equipment (for
the United States). The instrument can cause interfering electromagnetic emissions while still
meeting the requirements of FCC Class A.
The Calligrapher miniarrayer system also conforms to the requirements of the EMC Directive (for the
European Union) as part of compliance to EN61326 (laboratory equipment). The instrument (meets
Class A) can cause interfering electromagnetic emissions and be susceptible to the same while still
meeting the requirements of EN61326.
The Calligrapher miniarrayer system provides a protective ground connection through the grounding
conductor of the power cord. Do not use a cord that appears frayed or otherwise damaged.
Bio-Rad is available to answer any questions that you have about the Calligrapher miniarrayer and
the Custom Calibration software. Your questions will be addressed promptly so you can focus on
what is most important — your research.Your Calligrapher miniarrayer serial number will be requested when you contact technical support using any of the following methods:
Bio-Rad Technical Support Department
Phone: (800)-424-6723, option 2, option 4
FAX: (510)-741-5802
E-mail: [email protected] (US)
[email protected] (International)
Chapter 1 – Introduction
Chapter 1 – Introduction
Key Features of the BioOdyssey Calligrapher Miniarrayer
The BioOdyssey Calligrapher miniarrayer is a benchtop arrayer that prints up to 16 slides with
8 pins from a single source plate. The BioOdyssey Calligrapher miniarrayer has the same robotic
precision demanded of larger and more expensive arrayers; 1 µm motion increment is executed by
the actuators and 5 or 8 micron print repeatability. The Calligrapher miniarrayer printhead is specifically
designed to hold the BioOdyssey MCP Pins, and one pin of each style/type (MCP100, MCP360, and
MCP310S) is included. The software is icon driven and very easy to use. The BioOdyssey
Calligrapher miniarrayer has several optional upgrades to select from: a humidity control module
(HCM) to increase and reduce humidity; a cooling module for chilling the platen (both substrates and
source plate); and upgradable software to give total control of the robot. The MCP Loading Tool is
available as an option to assist with easy pin loading. The instrument is calibrated at the factory and
requires NO field engineering support. A training DVD and quick start guides are included with the
unit, allowing you to easily begin the printing process.
Features and Benefits
The BioOdyssey Calligrapher miniarrayer has been designed for use by all levels of scientists, from
those with no microarray experience to the seasoned veteran. The BioOdyssey Calligrapher miniarrayer
features are numerous, and include unique hardware and software components. Key features include:
• Prints onto slides, membranes, and into the wells of 96 well microplates
• Easy-to-use software that automatically creates grids
• Sized to fit onto the benchtop
• Sensors to notify when supply and waste bottles require attention
• BioOdyssey MCP Pins optimized for multiple sample types
• Humidity control option to maintain constant humidity levels
• SourceSelect, proprietary software that allows “cherry-picking” of samples. Once you have
performed a global survey of your gene set, this feature allows you to select the individual
samples of interest from the source plate to print, saving time and effort.
• Cooled platen and source plate option
• Software upgrade option for printing onto custom substrates
• Optional MCP Loading Tool for easy pin loading
Page 1
Chapter 1 – Introduction
BioOdyssey MCP Pins
MCP Loading Tool
The BioOdyssey Calligrapher miniarrayer shown with optional Humidity Control Module.
System Description
The BioOdyssey Calligrapher miniarrayer is shipped with 3 pins, (1 of each style: MCP100,
MCP360, MCP310S), a user manual, an instructional DVD, and two CDs that contain BioOdyssey
Calligrapher miniarrayer 2.0 application software, a simple, yet comprehensive software. BioOdyssey
Calligrapher miniarrayer has been carefully tested with source plates that meet the ANSI/SBS standards.
For further information see Appendix A. If you plan to use plates from other providers or any type of
custom substrates, an optional software upgrade is available. This option includes a training course to
teach you how to calibrate the robot for your printing needs.
An Overview of the Printing Procedure Using the BioOdyssey Calligrapher miniarrayer
Printing arrays with the BioOdyssey Calligrapher miniarrayer is very easy. Below you will find an
overview of the steps involved in printing an array:
Step 1
Obtain samples in source plates.
These may be purchased from vendors, or you may create them yourself using BackTracker software.
(See Chapter 7: Generating Mapping Files)
Step 2
Define your array.
See Chapter 3: Defining Print Parameters
Step 3
Prepare the Calligrapher miniarrayer for printing.
See Chapter 5: Preparing the BioOdyssey Calligrapher miniarrayer for Printing
Step 4
Prepare the MCP Pins for Printing
See Chapter 5: Preparing the BioOdyssey Calligrapher miniarrayer for Printing
Step 5
Print your array.
See Chapter 6: Printing with the BioOdyssey Calligrapher miniarrayer
Page 2
Chapter 1 – Introduction
Step 6
Generate your mapping files to merge your source plate files and your array files.
See Chapter 7: Generating Mapping Files
After you have completed your first set of arrays and analyzed the data, you may want to redefine
your array. This can be accomplished in two ways. The first is to open an existing run and alter the
parameters. Save this as a new file and follow Steps 3–5.
The second is to use one of the advanced features in The BioOdyssey Calligrapher miniarrayer
software, the SourceSelect mode, in which you define plate files to enable you to “cherry pick” only
the samples you wish from the source plates (See Chapter 4: SourceSelect Mode). Once you have
generated a Source Select file (ssr), follow Steps 3–5.
Page 3
Chapter 2 – BioOdyssey Calligrapher MiniArrayer Software
Chapter 2 – BioOdyssey Calligrapher MiniArrayer Software
This section describes the features of the BioOdyssey Calligrapher miniarrayer user interface. The
software runs on Windows™ based operating systems, and has several pull-down menus and easyto-understand icons. Use this section to familiarize yourself with the screen layout and the functions
of buttons and menus.
The Main Window
When you start the BioOdyssey Calligrapher miniarrayer software, the Main Window in the user
interface opens. It is composed of three parts: the menu, the toolbar, and the information bar. This
chapter details the functions of each of these.
Menu Options
The BioOdyssey Calligrapher miniarrayer software has nine menu headings; six are designed to be
used for printing and mapping. These are: File, View, Setup, Manual Control, Arraying, and Help.
Access to the Calibration menu is only acessible to Bio-Rad Service personnel. You can modify the
calibration settings via the Define Array Parameters window, by clicking on the ‘Modify Calibration’
button, with purchase of the Custom Calibration Upgrade; detailed training is included with purchase.
Although the Edit and Window headings are standard in Windows programs, they are not available
in the BioOdyssey Calligrapher miniarrayer software. In the tables below, you will find details of each
available heading, subheading, and a brief description of each.
File Menu
The following options are available on the File menu:
OPTION
DESCRIPTION
Open
Select this option to open an existing program (prg), parameters (par), define (def )
or log file (log.rlg).
Select this option to set up printing parameters for your computer output
Select this option to open the console window to run the Calligrapher miniarrayer
Select this option to exit Calligrapher miniarrayer software
Print Setup
Console
Exit
View Menu
The following options are available on the View menu:
OPTION
DESCRIPTION
Toolbar
Status Bar
Array Monitor
Select this option to display the toolbar
Select this option to display help information
Select this option to display the Array Monitor, to monitor a printing procedure in
real time
Page 4
Chapter 2 – The BioOdyssey Calligrapher MiniArrayer Software
Setup Menu
The following options are available on the Setup menu:
OPTION
DESCRIPTION
Set Ports
Select this option to change the serial communications port for the instrument
and to reestablish communication with the robot. Note: This procedure occurs
automatically each time you start the BioOdyssey Calligrapher miniarrayer
software program. You only need to select this option if the instrument has
been turned off and on without exiting the software
Select this option to open the humidity control window, to adjust the humidity
to the desired level. Temperature is also displayed
Humidity Control
Manual Control Menu
The following options are available on the Manual Control menu:
OPTION
DESCRIPTION
Joystick
The option is available only to Bio-Rad service personnel
Control Panel Select this option to open the control panel to manually control the vacuum and
wash baths
Wash Pins
Select this option to automatically prepare the pins for printing (prime) and wash the
pins
Load Pins
Select this option to automatically move the printhead forward to load the pins
Arraying Menu
The following options are available on the Arraying menu:
OPTION
DESCRIPTION
Define
Arraying
Sample
Tracking
Define
Washing
SourceSelect
Editor
Select this option to create a new arraying run, open an existing run, or create a
SourceSelect run
Select this option to generate files to map the spots on your arrays to the samples in
your source plates
Select this option to open a window that allows you to define a manual wash
program
Select this option to create or open a SourceSelect file
Page 5
Chapter 2 – The BioOdyssey Calligrapher MiniArrayer Software
Help Menu
The following options are available on the Help menu:
OPTION
DESCRIPTION
Calligrapher
Help
Custom
Calibration Help
About
Calligrapher
Select this option to open the user manual in searchable pdf format
Select this option to open the user manual for the Custom Calibration option
Select this option to learn what version of the software is currently running
Toolbar
The toolbar consists of eleven icons that allow you to control the robot. Many of these functions are
also found in the main menu. The table below shows each icon and briefly describes its function.
Icon
Function
To open a new window to select a file to open
To open the console dialog window
To open the Array Monitor window
Available only to Bio-Rad service personnel and via Custom Calibration option
To open the Control Panel
To open the Humidity Control window
To wash the pins automatically with the default program
To automatically move the print head to the proper position to load the pins
To open the window to define your arraying run
To open the Calibration window*
To open the BioOdyssey Calligrapher miniarrayer User Manual
* Accessible only to Bio-Rad Service personnel.
Status Bar
This bar is found at the bottom of the main window and is used to display help information.
Page 6
Chapter 2 – The BioOdyssey Calligrapher MiniArrayer Software
Windows File Structure
When the program is initiated, it asks for a username. Each user is assigned a file in which their
programs and sub-files are stored. Files used with your arrayer are saved in several formats, listed
below. Each of these can be opened by a text program such as Microsoft Notepad. The ssr, gal, btk,
txt, plt files can be open with Microsoft Excel.
File Extension
par
Purpose
Stores the parameters of the run
def
Stores parameters of the run in user-friendly manner
vrk
Stores parameters of the run to use to generate gal files for mapping your array
prg
Stores the robot program generated upon defining a run
rlg
Stores information describing all the steps that actually occurred in the arraying
run. These are named with the date and time of each run
log
Stores the parameters of the run and the plate number, the first dip time, last dip
time, last dip number, last slide number and Plate ID
ssr
SourceSelect file for a "cherry-picking" run
gal
Used in downstream image analysis to generate a grid and supply location
information
btk
Generates a spreadsheet from your robot program that assists you in creating a
source plate
Tab delimited text file generated in SpotMapper
Created by Plate Librarian for use in Sample Tracking
txt
plt
Page 7
Chapter 3 – Defining Print Parameters
Chapter 3 – Defining Print Parameters
The BioOdyssey Calligrapher miniarrayer default parameters are optimized for printing onto glass
surfaces or either inactive, activated or coated with nitrocellulose (eg. FAST slides, Whatman), membranes,
or into 96-well plates using PBST print buffer and the MCP360 capillary pin. These parameters will also
perform adequately for the MCP100 capillary pin and MCP310S solid pin on different substrates, but
to ensure optimal performance we have included in the software several robot files with parameters
that are optimal for printing under various conditions.
Starting the BioOdyssey Calligrapher MiniArrayer
Prior to launching the BioOdyssey Calligrapher miniarrayer software, turn the instrument on using
the toggle switch located on the right side of the unit. Launch the software either through the Start
menu or by selecting the desktop icon ( ).
A splash screen appears followed by a log-in window. Type in your username to create your own
directory. Once your name has been entered, it will appear automatically each time you relaunch the
program or can be selected in a pull-down menu.
The main window opens and the Console window appears.
Page 8
Chapter 3 – Defining Print Parameters
Note: If the Calligrapher miniarrayer is not powered on, the error message below will appear.
To connect to the Calligrapher miniarrayer, power on the unit and select Set Port from the Setup
main menu.
Click Search for COM ports, and then click Establish Communication and Initialize the Calligrapher
miniarrayer.
The software will automatically connect to the Calligrapher miniarrayer.
Open the Define Parameters for Arraying Window
In order to run the Calligrapher miniarrayer, an arraying program file must be defined. Open the
→Define Arraying from the main menu or
Define Arraying Selection Dialog, by choosing Arraying→
clicking on the Define Arraying button ( ). The Selection Dialog has three options for defining an
arraying run. These are:
1. Create new arraying run
2. Create SourceSelect run, or
3. Open an existing run.
Options 1 and 3 are described in detail below; option 2, SourceSelect, is described in Chapter 4.
Within the program, you will find a basic window that will automatically create a grid for you, based
on the number of samples and the number of pins that you enter. If you would rather create your
own grid layout, an advanced window is available that allows you to alter many parameters (see
page 11).
Page 9
Chapter 3 – Defining Print Parameters
Create a New Run
First select the Create new arraying run option in the selection dialog box. Click on the OK button,
and the tab-selectable Define Parameters for Arraying window opens. There are 5 tab-selectable
windows containing parameters that can be adjusted to fulfill the requirements of your arraying run.
Note: For basic print runs, it is only necessary to enter parameters into the substrate and basic grid
layout windows.
Substrates Window
Enter the type, size, and number of substrates that you will be printing your array onto in this window
(see image above).
• Enter the type of substrate you will be printing. This will be a slide, a membrane, or a
96-well plate.
• Select the size of the substrate. Standard size for slides is 25.4 x 75.5 mm; for
membranes, 65 x 105 mm; for 96-well plates, 62.9 x 98.9 mm.
• Using the up/down arrows on the right side of the screen, adjust the number of substrates
in the x and y position.
• When you have finished entering your parameters, press the Apply button to save the
information.
• Modify Calibration is active only if you have purchased the Custom Calibration software
upgrade. Please refer to the Custom Calibration Use Manual for more information.
Note: To use custom sizes, you must have the Custom Calibration upgrade package, which allows
access to the calibration parameters. Contact your Bio-Rad sales representative for more
information (for US Customers call 1-800-4BIORAD).
Grid Layout Window
The Grid Layout Tab opens the window to enter parameters for your arraying grid. The window is
divided in half. In the upper portion, enter your printing parameters. Select the Source Plate; the
type, number, and orientation of Pins; and the number of Samples and Replicates to be printed.
Page 10
Chapter 3 – Defining Print Parameters
Once you have entered the parameters in the top portion of the window, the program automatically
generates a grid, and displays it in the bottom panel. Images of both the grid and the substrate
pattern as well as the dimensions of each are displayed.
Note: A grid is created by a single pin. Each unique sample is represented by a unique color. The
substrate image shows the pattern of printing based on the number of pins and samples that you
have entered. The grids are color-coded to the pins. Replicate grids will be printed by the same pin
and will be the same color.
• Source-Plate: Enter the type of source-plate that you are using. This can be a 96-,
384-, or 1536-well plate. The default sample picking direction from the source plate is
left-right, top-down.
If using ,1536-well plates, a volume of 10 µl is required to use the default settings. If
you have less, please adjust the Z-Down offset in the Options window, by 0.5 mm
increments.
Note: adjusting the Z-Down in negative increments (e.g. -0.5) moves the pins up and away from the
platen.
Note: The BioOdyssey Calligrapher miniarrayer is designed for use with source plates meeting the
ANSI SBS standards. Specific source plates that are compatible with the BioOdyssey Calligrapher
miniarrayer are found in Appendix A.
• Pins: Select the pin type, MCP100, MCP360 (capillary) or MCP310S (solid) (1 each
supplied with the BioOdyssey Calligrapher miniarrayer). Also select the distance
between the pins.
Note: For 96-well plates, the distance is automatically set at 9 mm to match the distance
between the wells. (For 384- and 1536-well plates the distance between individual wells is
4.5 mm.)
• Printhead: Use the pull-down menus to enter the number of pins that you will place in
the printhead in the X and Y directions. Load the pins in exactly the way you indicate.
• Number of Samples: Enter the number of samples you will be printing.
Page 11
Chapter 3 – Defining Print Parameters
• Replicate Spots:Enter the number of replicates of each spot that you want to print.
Spots will be replicated in only the Y direction.
• Replicate Grids: Enter the number of replicates of each grid that you want to print.
Grids will be replicated in only the X direction.
• Number of Spots to be Printed: This number is calculated automatically based on
the number of samples and the number of replicates entered. The default grid- printing
direction on the substrate is bottom-up, left-right.
In the lower left window, an image of the pattern of the grid that will be printed by each pin is shown.
Each sample is represented by a unique colored square; replicated spots are the same color. To the
right of the grid is an image of the pattern that will be printed on the substrate. This shows the printing
pattern of the entire printhead and the color pattern corresponds to the color of the pins in the
printhead.
Once you have entered all the parameters, click Apply to save these values.
Note: the grid pattern created may have more spots than you have samples. These spots will be
blank on your substrate. If you would prefer a different grid pattern, simply open the Advanced Grid
window to make adjustments.
Advanced Grid Window
If you would like to refine the grid that is generated automatically, you can enter the Advanced
Grid window and change parameters. A graphical view of the grid and substrate appears on the
right and adjusts as the parameters are changed.
Note: One (1) indicates a single spot, grid, supergrid or replicate supergrid will be printed. To produce
duplicates, increase the value to 2, for triplicates, 3 etc.
•
Grid:
• Top/bottom margins: These values will determine the overall X and Y positions of the
grids on the substrate
• Distance between Spots (micron): These values will affect the spacing between
each spot
Page 12
Chapter 3 – Defining Print Parameters
• No. of Spots per Grid: Number of spots in each grid in the x and y directions
• No. of Replicate Spots per Grid: Number of replicate spots in each grid. These are
printed adjacent to each other, and in immediate succession, i.e. no wash step is
involved
• No. of Reprints of the Same Spot: This value sets the pin to respot at the same
location the chosen number of times
• Grid Printing Direction: Use the pull-down menu to enter the direction the grid is
printed. Default is bottom up, left right
• Supergrid Cluster
If you have more samples to spot than the grid that you have defined will accommodate,
supergrid clusters should be selected. This option will maintain your grid dimensions, and
spot all samples in that configuration. Supergrids can be created in the x or y direction,
depending upon the configuration of the grids.
For example, if you have 400 samples to print and 2 pins to print with, you may wish to create
10 x 10 grids. In the basic window, you would select 2 pins. In the Advanced window, you
would enter the number of spots in the grid (10 x10) grid. The first two grids printed would
accommodate 200 samples, which is reflected in the “Full Grids Require _______ Samples
box in the bottom of the window. (See image on the left below.)
In order to print all 400 of your samples, you would select 2 in the number of different
Supergrid Clusters. You now would have 2 pins printing 2 different 10 x 10 grids, or all 400
unique samples. (See image on the right below.)
• No. of Different Supergrids: use the up/down arrows to change the number of
supergrids. They will appear on the substrate image to the right
• Distance Between Supergrids: use the up/down arrows to change the distance
between the supergrids. The distance is measured from the top left column in the first
grid to the top right column in the next
• Supergrid Printing Direction: use this pull down menu to indicate the direction your
grids are printed on the substrate
Page 13
Chapter 3 – Defining Print Parameters
• Replicate Supergrid Cluster
Once you have defined your grids and supergrids, this is a quick way to replicate them at
different locations on the substrate.
• No. of Replicate Supergrid Clusters: Use the up/down arrows to change the
number of supergrids. They will appear on the substrate image to the right.
• Distance between Replicate Supergrids Clusters: Use the up/down arrows to
change the distance between the grids.
• Sample Picking Direction in Source Plate: Use the pull-down menu to select the
direction of printing from your source plate. Default is right-left, top-down.
Once all parameters have been adjusted, press the Accept Grid Layout button. A window will pop-up
showing the number of spots that will be printed based on your new layout. If you accept this value,
the information is passed to the basic window. If you decline this window, you will return to the Basic
window and the parameters that you entered prior to the Advanced Grid Window will appear.
Pressing the default button in the Basic Window, will regenerate the values you originally entered.
Blot Window
Your Calligrapher miniarrayer has been programmed with optimal settings for blotting the pins prior
to printing. Up to four 1” x 3” slides are used for blotting. Blotting eliminates excess liquid from the
outside of the pin to maintain high quality spots.
Note: we do not recommend blotting with solid pins (MCP310S), and the default setting is No.
• Select “Yes” to use this function
• Enter the distance the printhead should move between each blot
• Enter the number of times to blot per sample
• Click on the Apply button
• The program will automatically calculate the number of plates that can be accommodated by
the parameters entered
Page 14
Chapter 3 – Defining Print Parameters
Wash Window
Your BioOdyssey Calligrapher miniarrayer has default washing parameters whose performance has
been optimized in our facility using the MCP pins. You may need to adjust these parameters in order
to obtain the highest quality pin cleaning in your laboratory setting.
The wash window lets you adjust the wash parameters for your print run. You can select to never
wash your pins, only wash between different samples (or dips), or always wash the pins (between
dips and redips). There are three wash cycles available: a Pre Wash, a Cycle Wash, and a Final
Wash. Each of these is used during the entire print run.
Note: The Calligrapher miniarrayer performs an initial prewash of your pins prior to starting the run.
Within each cycle are various steps that can be altered through pull-down menus. Each step can be
programmed for the Vacuum, Wash 1 (passive bath) or Wash 2 (Flow Through bath). The time for
each step is adjusted using the up/down arrows. If you change any parameters, press apply.
If you select Never Wash, the pins will not be washed during a print run cycle. If you select Different
Samples the pins will be washed when you move to a new sample in your source plate. By selecting
Always Wash, the pins will be washed before every dip into the source plate.
Note: The more extensive your wash parameters, the longer the print run will take.
Options Window
Your BioOdyssey Calligrapher miniarrayer has default parameters whose performance has been
optimized in our facility.You may need to adjust these parameters in order to obtain the highest quality
spot morphology in your laboratory setting.
The options menu allows you to vary the speed and time settings for the arrayer. You can also set
the pin oscillations during washing. Varying these parameters will help you to fine-tune your print
runs and obtain the highest quality spots possible.
• Source Plate: Varying the Z-Down Offset, Approach Speed, Dwell Time, and Withdraw
Speed for the Source Plate will optimize sample uptake in the pin and minimize droplet
formation on the outside of the tip. The Z-Down Offset will allow you to make incremental
changes in the z-axis to ensure that the pin is able to reach the source plate bottom to collect
the sample.
Page 15
Chapter 3 – Defining Print Parameters
• Printing Parameters: Varying the Z-Down Offset, Approach speed, and Dwell Time for the
Printing Parameters will optimize sample output onto the substrate. The Z-Down Offset is
especially important since this dictates the downward motion of the pins in order to reach the
substrate surface. This must be adjusted based on the type of substrate that you are printing.
Coated surfaces, such as nitrocellulose slides, will require fine adjustment of this parameter.
Note: A negative (–) value moves the printhead up and away from the platen.
• Varying the Approach Speed and the Dwell Times will result in spot morphology differences.
• Wash Baths: Oscillating the pins will assist in washing by reducing carryover from sample dip
to sample dip.
• No. of Substrates between Redips: This dictates the number of substrates to print from a
single dip into the well of source plate. This allows the pin to redip into the source plate for
additional sample.
Once you have entered all of your chosen parameters on the Define Parameters for Arraying
Window, first click Apply and then click OK. A dialog box appears requesting a file name. Enter a
name and click OK. The file is saved with several file extensions (see page 6) in the program folder.
Open an Existing Run
Select Open an Existing Run in the Selection dialog window to open an existing .par file to view or
edit. A window opens that lets you browse to the file. Select and open the desired file, and the Define
Parameters for Arraying window opens with each of the tabbed windows containing the parameters
from the existing file. If you change any parameters, be sure to press Apply and then press OK.
Rename the file to save it without overwriting the existing file.
Page 16
Chapter 3 – Defining Print Parameters
Predefined Protocols
We have designed predefined array parameter protocols for you to use when spotting onto commonly
used substrates such as Whatman FAST slides with discreet pads, or Schott MPX16 microarray
slides.
Note: Always perform a test experiment to check that these parameters meet your specific substrate
size and sample type. As with all default parameters, they may require fine-adjustment to optimize
for your specific needs. Once you have adjusted the parameters for your print run, rename them to
save to your User file.
The dimensions of these slides are equivalent to the spacing of a 96 well plate, and have been
entered into the arraying program.
Three predesigned protocols are available, and are based on the pin type you select (see the table
below for nomenclature.) Each is designed to allow you to print 32 samples, in duplicate on each of
the 16 pads. A total of 16 slides have been entered for the default print run; this number can be
changed. The protocol requires the uses of two pins with 9 mm spacing. For use with a single pin,
see the note that follows.
Name
Pin
pad_mcp310S
MCP310S
pad_mcp360
MCP360
pad_mcp100
MCP100
Follow these easy steps to use this file.
•
Select Open an Existing Run (see page 16)
• Navigate to the default user’s folder and open the Predefined Protocols file. Select the pad slide
protocol that you wish to use, and the Define Parameters for Arraying window will open with the
parameters preset for use with this format.
• To change the number of spots printed, open the Advanced window and use the up/down arrows
change the Number of Spots per Grid, the Number of Replicates Spots per grid. For more information,
see Chapter 3: Defining Print Parameters, Advanced Grid Window, (see page 12).
Note: Altering the Grid margins, or the distance between Supergrids will result in incorrect printing
parameters.
•
Save any changes by pressing Apply.
•
Rename the file and save it.
Note: The advanced parameters for using this with a single pin are found in the image below.
Page 17
Chapter 4 – SourceSelect™ Mode
Chapter 4 – SourceSelect™ Mode
The BioOdyssey Calligrapher miniarrayer's SourceSelect mode allows you to select and print samples
from specific locations in your source plate (cherry picking). Arraying is performed with a single pin.
The SourceSelect Editor is used to create a plate file (.ssr) that you then import into the arraying
program. The steps to create a SourceSelect run are:
• Use the SourceSelect Editor to select the samples from your original plate files to print
• Create a SourceSelect Arraying run by opening the Define Parameters for Arraying and
importing your ssr file in the grid layout window
Note: the SourceSelect mode allows use of only one type of source plate; i.e. you can select samples
from 384 well plates OR 96 well plates, but not both 384 AND 96 at the same time.
Creating a SourceSelect File
→SourceSelect Editor and the Selection window appears.
1. Select Arraying→
2. Select Create a new SourceSelect file to open the Select Input File window.
Page 18
Chapter 4 – SourceSelect™ Mode
3. Select the Source Plate Type.
Note: All source plates must be of the same type.
4. Click on the Select Input File button to open the Read from file window.
Note: You can select samples from different source plates for your output file, but each .plt file must
be opened individually.
5. Select the file to open and click on the Open button. The samples are loaded into the top Input
File window with the file name appearing as the Input File.
Note: Sample files are available for use by browsing to user/default/plate library. Examples of each
plate type and format are included (see Chapter 7).
Page 19
Chapter 4 – SourceSelect™ Mode
6. Select the samples that you wish to print by highlighting the row or rows.
7. Click add.
Note: multiple adjacent rows can be added by pressing the shift key while selecting the rows.
Non adjacent rows can be selected pressing the CTRL key while selecting the rows.
Page 20
Chapter 4 – SourceSelect™ Mode
8. The samples are added to the output file in the bottom window. As you add the samples to the
output file, the total number of samples that you have selected will appear in a box at the bottom
right.
9. Once you are satisfied with your selections, you can browse to open the next plate file and
repeat the steps above to add samples to your output files. The total number of selected plates
will appear in the bottom right box.
10.When you have completed your SourceSelect file, press Save and enter a file name in the
window that opens.
11. A pop-up window, appears for you to save the .ssr file that was created.
Inserting Samples in Your SourceSelect file
Samples can be inserted within the output file by following these directions:
1. Highlight the row you wish to insert in the Input File window. Multiple adjacent or nonadjacent
rows can be inserted by selecting as described above.
2. Highlight the location in the Output File that you want to insert your samples. The sample to be
inserted will appear above the highlighted row.
3. Press Insert.
4. Save the file by clicking on the Save button.
Deleting Samples in Your SourceSelect File
1. Highlight the row you wish to delete in the Output File window and press Delete. Multiple adjacent
or nonadjacent rows can be deleted by selecting as described above, then pressing the Delete
key.
Page 21
Chapter 4 – SourceSelect™ Mode
2. Save the file by clicking on the Save button. The file is saved as an .ssr extension in the user's
directory.
Open an Existing SourceSelect File
→SourceSelect Editor and the Selection window appears.
1. Select Arraying→
2. Select Open an existing SourceSelect file.
3. In the “Open” window that appears, select the ssr file to edit.
4. The Select Input File window opens with your ssr file in the bottom window.
5. To add or delete from this file, follow the directions described previously.
6. When you have completed your SourceSelect file, press Save and enter a file name in the
window that opens.
7. A pop-up window appears giving you the location of the ssr file that was created.
Define a SourceSelect Run
→Define Arraying.
1. Select Arraying→
2. In the Selection dialog, select Create SourceSelect run, press OK.
3. The Define Parameters for Arraying window opens.
4. Select the Grid Layout window.
5. Enter the pin type, MCP100, MCP360 or MCP310S.
Note: In the SourceSelect mode, printing is done with a single pin.
6. Browse to the ssr file that you wish to run and click on Open.
Page 22
Chapter 4 – SourceSelect™ Mode
7. The number of samples, spots, and replicates to be printed appears and a grid is automatically
generated.
8. For all other parameters in the Define Parameters for Arraying window, follow the directions in
Chapter 3.
Page 23
Chapter 5 – Preparing the BioOdyssey Calligrapher MiniArrayer for Printing
Chapter 5 – Preparing the BioOdyssey Calligrapher MiniArrayer for Printing
The BioOdyssey Calligrapher miniarrayer is designed for minimal user intervention. Sensors present
in many components of the unit will warn you of any problem. To avoid messages or errors during
your arraying run, follow these few basics steps.
1. Turn on the Calligrapher miniarrayer using the toggle switch on the right side of the instrument.
2. Launch the software.
Note: If you have forgotten to power on your Calligrapher miniarrayer prior to launching the software,
you will receive a prompt. To connect to the Calligrapher miniarrayer,
a. Open set ports through the Setup menu.
b. Click the button on the right, "Establish Communication and Initialize the Calligrapher
miniarrayer".
3. Check the Supply bottle and ensure that it is full.
Note: We recommend distilled water.
4. Check the Waste bottle and ensure that it is empty.
5. Check the HCM and ensure that the 1 Liter bottle is full and that at least 50% of the desiccant is
blue. (See Chapter 8 for information on changing desiccant.)
6. Ensure the platen is free of dust and debris; wipe with a Kimwipe wet with 70% ethanol.
7. Fill the passive wash bath with 10 ml of print buffer. We recommend 10% ethanol with 0.1%
Tween whenprinting proteins; 10% ethanol for oligonucleotides. Note: Ethanol is not recommended
for use in the Flow-Through Wash Bath.
Note: Ensure the disposable cup is seated properly in the passive wash bath holder.
8. Place the source plate, substrates, and blotting slides on the platen following the directions
below.
9. Load pins into the printhead.
Placement of Substrates on Platen
Note: Use of powder-free gloves for working with all materials is highly recommended.
Page 24
Chapter 5 – Preparing the BioOdyssey Calligrapher MiniArrayer for Printing
a. Slides, 25.4 mm x 75.1 mm (1” x 3”): The platen will hold 16 glass slides. Simply place the
slides on the platen as you entered in your program. Secure the slides in place using the
magnetic bars.
Note: For bar-coded slides, the bar-coded area of the slide is NOT placed against the top left corner
of the slide area. Rather, the bar-code is positioned to the right.
b. 96-well Destination plates: the platen will hold two 96-well destination plates. Place the
plate adaptor into the two holes on the platen (see below), and place magnets at the bottom
and side of the plates. This will enable you to correctly position the plates.
c. Membranes: the platen is designed to hold two membranes, 8 x 12 cm, within two OmniTrays
(Nunc catalog #242811). Place the plate adapter into the two holes on the platen and position
one OmniTray such that the upper left corner is over the area labeled “SLIDE 1”; the second
should abut the adaptor. Place a magnet at the bottom and right side of each plate to hold
them in place.
d. Custom: the platen will hold any size substrate required. Use a series of magnets to hold the
desired material in place. Use of a custom sized substrate may require the Custom
Calibration Software Upgrade of the BioOdyssey Calligrapher miniarrayer. Call
1-800-4BIORAD for more information.
Placement of Blotting Slides
The platen will hold four 25 x 75 mm slides for blotting prior to printing. Space is available for the
blotting slides in the left front of the platen, separated from the source plate holder by a raised bar
(see image above). Place the slides on the platen and position a magnet at the side to hold them in
place.
Note: the blotting slides do not need to be held in place as securely as the substrate.
Placement of the Source Plate
Position the Source Plate in the area designated on the platen. The source plate is held in place by a
raised bar on the top left and a spring on the bottom right. Make sure the spring is holding the plate
flat on the platen. Position the plate such that well A1 is in the top left corner.
Load Pins into the Printhead
The instrument is designed to hold up to 8 BioOdyssey MCP pins with 4.5 mm spacing. When
printing from a 96-well source plate, the distance between each pin is 9 mm. Therefore, you may only
Page 25
Chapter 5 – Preparing the BioOdyssey Calligrapher MiniArrayer for Printing
use two pins when printing from a 96-well plate, but 8 pins when printing from a 384-well or 1536well source plate.
Note: Pins are critical to the success of your print run. Take care to clean them thoroughly after each
print run as detailed below.
To load the pins into the printhead, close the instrument door, and press the Load pins icon ( ) or
→Load Pins. The robot will move the printhead to a position to let you easily
select ManualControl→
load. Properly loaded pins will drop into the printhead, but remain free floating, i.e. move up and
down easily.
Note: Load the pins into the printhead in the same way specified in the arraying program. The
top-left pin should always be loaded.
Load the MCP Pins
For easy loading of the MCP pins into the printhead, please use the MCP Loading Tool (catalog
#169-2020) to assure proper placement of your pins in the printhead.
If you do not have the MCP Loading Tool, use forceps to grasp each pin by the stainless steel head
and position the pins into the printhead. The stainless steel head of the MCP Pins have a flat edge,
which is used to align the pins. Orient the flat edge of each pin towards the center of the printhead
for precise alignment of the pins in the printhead.
How to Use the MCP Loading Tool
1. On a clean surface, close to the Calligrapher miniarrayer, place the magnet in the designated
groove on the top side of the MCP Loading Tool.
2. Turn over the MCP Loading Tool so that the magnet is on the bottom.
3. Load the pins into the holes on the underside of the tool.
Page 26
Chapter 5 – Preparing the BioOdyssey Calligrapher MiniArrayer for Printing
4. Allowing the magnet to hold the pins in position, turn the tool upright and move to the
Calligrapher printhead.
5. Position your pins above the printhead and insert them into the holes in the printhead.
6. Remove the magnet from the MCP Loading Tool and the pins will drop into position.
7. Your pins are now loaded.
Page 27
Chapter 5 – Preparing the BioOdyssey Calligrapher MiniArrayer for Printing
Preparing the MCP Pins for Printing
Please ensure that you take the time to prime the pins before use, and after any extended storage
(2–3 weeks). To prime your pins, place 10 ml print buffer (e.g., PBST) into the static wash bath.
Select the Wash Pins icon from the toolbar or from the ManualControl menu.
The Calligrapher miniarrayer will now wash the pins using a default wash protocol.
The dialog window below will appear. Press yes to to continue the program.
→Define Washing.
The default wash program can be viewed by selecting Arraying→
Page 28
Chapter 5 – Preparing the BioOdyssey Calligrapher MiniArrayer for Printing
Operating the Humidity Control Module (HCM)
The HCM has been designed to maintain constant humidity within your BioOdyssey Calligrapher
→Humidity Control.
miniarrayer. Turn on the HCM by clicking the HCM icon ( ), or selecting Setup→
Fill in the desired values in the window that appears. The window will also display the current humidity,
the current temperature in the chamber and the estimated temperature on the platen.
Hint: We suggest printing DNA at a humidity value between 55 and 60% unless you are cooling the
platen.
Using the Cooled Platen
To use the cooled platen option, follow these directions carefully.
Note: Overcooling of the Calligrapher miniarrayer will result in excess condensation, which may
require a service call.
1. Ensure that your dessicant is adequate.
Note: We strongly recommend beginning a cooled print run with NEW or regenerated dessicant.
2. Fill the refrigerated circulator with 50% ethylene glycol.
3. Set the refrigerated circulator to 0°C one hour before you plan to print.
4. Turn on the Calligrapher miniarrayer and launch the software.
5. Open the Humidity Control Window and set the desired humidity to 40%.
Note: This setting is required to remove condensation from the instrument.
6. Load your substrate, blot slides, and pins.
Caution: Do not Home the robot until you are ready to begin your print run.
Note: Leaving the door open for long periods of time will result in condensation forming in the
instrument and on your slides. To maintain the proper humidity work quickly any time the door is
open.
7. Prepare your source plate and define your arraying run.
Page 29
Chapter 5 – Preparing the BioOdyssey Calligrapher MiniArrayer for Printing
8. After approximately one hour, the chamber temperature should register between 15 and 17°C, the
cooled platen temperature ~10°C, and the humidity between 40 and 45%.
9. Quickly load your source plate.
10. Home the robot.
11. Begin your print run.
12. When the print run is complete, turn off the refrigerated circulator, open the door and remove
your slides and source plate.
Page 30
Chapter 6 – Printing with the BioOdyssey Calligrapher MiniArrayer
Chapter 6 – Printing with the BioOdyssey Calligrapher MiniArrayer
Once you have finished preparing the BioOdyssey Calligrapher miniarrayer for the print run, you are
ready to begin to print. Prior to printing, you may want to wash your pins, please follow directions in
the previous chapter for preparing your MCP pins.
Note: The Calligrapher miniarrayer is equipped with a door interlock system for safety purposes.
Anytime the door is opened, the robot is disabled. Once the door is closed, the robot will rehome for
positional accuracy.
Starting a Print Run
1. If you have just defined and loaded an arraying run, skip to Step 6.
2. If you do not have a run loaded, open the Console window by clicking on the icon (
→Console.
File→
) or select
3. In the console window, select the Load Robot program icon ( ). When the window opens,
browse to the .prg program that you wish to run and select by highlighting the name.
Page 31
Chapter 6 – Printing with the BioOdyssey Calligrapher MiniArrayer
4. Click Open and the Browse window disappears, and the name of the program that you have
selected appears in the Run Log.
5. If this is the first run of the day, press the Homing button (
) and allow the robot to home.
Note: The BioOdyssey Calligrapher miniarrayer requires homing when communication with the
Calligrapher miniarrayer and computer is initiated. The Calligrapher miniarrayer performs automatic
homing after the door is opened or when a run is stopped.
6. Press the Run button ( ). A Selection Dialog will appear to allow you to start from the beginning
or define a start position for the run. In most instances, you will select start from the beginning.
7. Click OK, and the robot will start a quick wash of the pins using an optimal set of parameters. The
array monitor window will also appear showing the program name on the top left corner.
Page 32
Chapter 6 – Printing with the BioOdyssey Calligrapher MiniArrayer
Note: The Array Monitor™ window shows a representation of the source plate (lower left), the grid
(upper right) and the substrate (lower right). The current slide number is listed as (row, column)
indicating it’s position on the platen. The Calligrapher miniarrayer will perform 2 print cycles before
displaying the estimated length of the print run.
8. Once the BioOdyssey Calligrapher miniarrayer is done washing the pins, you have a final chance
to ensure everything is in place for the run. A message appears in the Reminders window asking
if everything is ready. To continue the run, press the Continue button ( ).
Note: Once a run has been started, do not touch the computer keyboard as it may pause or stop the
run.
Pausing a Printing Run
You may pause the BioOdyssey Calligrapher miniarrayer during the run by pressing the Pause button
( ) located in the Console window.
When you are ready to continue the run, press the Continue button (
).
Stopping a Printing Run
To Stop a printing run, press the Stop button (
) located on the console window.
The run will abort. The Console window run log will display “The run stopped”. The Array Monitor will
provide the current plate, dip, and slide number information.
Note: The Array Monitor displays the information required to enter when running the “Start from the
middle parameters” window. Ensure that the current plate, dip, and slide numbers are available when
the Define Start Position option is selected. These values are also available in the Run Log file.
Page 33
Chapter 6 – Printing with the BioOdyssey Calligrapher MiniArrayer
Defining the Start Position After a Stopped Run
1. To restart a stopped run, click the run button on the console window.
2. A selection dialog box will appear; select Define Start Position. Click OK.
3. In the Start from the middle parameters window that appears, enter the Array Monitor information
provided for the current plate (source plate number), dip (source well position), and slide number
(substrate) into the appropriate boxes. The source plate and substrate diagrams will display the
information entered.
Note: This information is also stored in the .log file in the Log directory.
Note: Replace the blot slides that have been used. The Calligrapher miniarrayer will resume blotting
on the first slide.
4. Click OK.
5. The Console window will appear and washing will automatically begin.
6. After washing, press the continue button and the run will resume with the defined start positions
entered.
Page 34
Chapter 6 – Printing with the BioOdyssey Calligrapher MiniArrayer
Resuming a Print Run After a Power Outage
The Calligrapher miniarrayer software will issue an error message when a power outage was
experienced during a run. The software will display error boxes and guide you to resume the print
run.
1.
2.
3.
4.
5.
Click OK on the error boxes until power is restored.
Once power is restored, click the Run button.
A message, “Serial line communication for controller is broken”, appears.
Click OK.
Click the homing button. If communication is not established with the Calligrapher miniarrayer, go
to the next step.
→Set Port and click on the Establish Communication and Initialize Calligrapher button.
6. Go to Setup→
Click OK (see page 8 for more details).
7. Click the Home button and a dialog box appears containing information about the aborted run.
8. Click Yes to continue the run from this position.
9. The run begins with a wash cycle.
Note: In the Console Reminders window, a message will be displayed “This run starts from the middle! If necessary, exchange blot slides, load appropriate source plate and press Continue button!”
The print run will resume after the pins have been automatically washed.
Note: At the end of the run, we recommend that you wash your MCP pins using the Wash icon (
)
on the tool bar prior to storage. Ethanol (10%)should be used in the Static wash bath. See Chapter 8
for further information regarding pin cleaning and maintenance.
Page 35
Chapter 7 – Generating Mapping Files
Chapter 7 – Generating Mapping Files
Scanning the slides with a microarray scanner generates the quantitative information needed for
microarray data analysis. To complete the analysis, this quantitative information has to be linked to a
file with information about the name, location, source, and identity of the molecules used to create
each spot on the slide. This “linked” file, known as a GAL file, is normally used during image analysis
after scanning.
The BioOdyssey Calligrapher miniarrayer has integrated mapping software to create map files such
as .gal files. The software possesses two programs used in generating map files: Plate Librarian™
and SpotMapper™. The Plate Librarian reformats text files (.txt) containing plate content information
into new files with a .plt. extension which are used by SpotMapper software. In some instances, the
files containing plate content information are obtained from vendors with ready to print plates or can
be downloaded from a content provider’s internet web site. Your reformatted files are stored in a
Plate Library file.
SpotMapper lets you select plate files (.plt) from the Plate Library and merge them with a robot file
(.vrk) containing the arraying protocol. As a result of the merge, SpotMapper creates several map
files, GenePix Array List (GAL), BackTracker (btk), and tab-delimited text (txt). The GAL files generated
can be used in image analysis software, such as Bio-Rad’s VersArray Analyzer 5.0. The BackTracker
format (btk) files can be used as a tracking spreadsheet for creating your own source plates. The
process of generating these map files can take place before or after the print run.
Plate Librarian Software
To use Plate Librarian Software, you need a tab-delimited text file that has the source plate data
arranged in one of the formats shown in Table I. Format 1 has a separate column for Plate, Row, and
Column; Format 2 has a separate column for Plate, and a combined column for both row and column
(Position); Format 3 has all the location information in a single column (see examples below). If you
are using a file obtained from a vendor, all information prior to these headings must be removed. No
empty spaces should be left between the headers of the Excel sheet and the headers that describe
the plate information. In addition, no blank spaces should be left between adjacent rows. The program
will maintain the information from a total of eight columns.
Table 1: Formats available to arrange source plate data.
Format 1
Plate
100
100
100
Row
a
a
a
Column
1
2
3
Format 2
Plate
300
300
300
Position
a1
a2
a3
Format 3
Address
200a1
200a2
200a3
Creating a text file (.txt) to be imported to the Plate Library
1. Open the file provided by the content vendor or provider. Usually, these files contain header
information regarding plate position, row, column, oligo ID, gene symbol, etc. An example of a
vendor Excel file is shown in Appendix C.
2. Save this file as a Tab-Delimited Text file (.txt).
Page 36
Chapter 7 – Generating Mapping Files
Importing a .txt File to the Plate Librarian
→Sample Tracking→
→Plate Librarian. The Select
1. Open the Plate Librarian by selecting Arraying→
Plate File window opens.
2. Browse to the folder that contains the text file that describes your plate; select the desired file and
click Open.
Note: To open multiple files, press the shift or CTRL key while selecting the desired files.
3. Select the file format that is similar to the selected files (See Table I).
Note: If the wrong file format is selected, an error message will appear.
4. Click next and the Select fields window will appear. This window allows you to assign names to
each column. Use the scroll window to select the name to assign to each column.
Page 37
Chapter 7 – Generating Mapping Files
5. Browse to the destination folder to save the file(s) that you have created. If you do not browse to
a specific folder, the file will be saved in the users folder in the Plate Library file (see page 7).
6. Press Finish to close the program.
Creating a map file with SpotMapper Software
The next step in creating your Gal file requires merging the arraying file with your plate file.
→Sample Tracking→
→SpotMapper.
1. From the main menu select Arraying→
2. In the Arraying Parameters File Name window, browse to the folder that contains the printing
protocol required to create the gal file. The arraying file is normally stored in your user file and
has a .vrk extension.
3. The file will load and the arraying parameters are displayed in the “Selected file parameters”
window.
4. Click Next to continue. The Select Source Plates window opens (see image on next page).
5. Browse to the folder containing your Plate Files (normally in your user name/Plate Librarian
folder). All plate text files (.plt) contained within the Plate Library folder that are properly formatted
are displayed on the left side of the window.
Note: It is critical to select the plate files that were used in your robot arraying run in the proper
ORDER that they were printed.
Files can be added to the right window by double-clicking on the file name with your mouse or by
selecting a single or multiple files (hold down Ctrl/Shift key while selecting) and pressing Add. To
remove a file, select the file name and press Remove. To insert a file, select the file in the left window;
select the plate above the insertion in the right hand window and press Insert.
Page 38
Chapter 7 – Generating Mapping Files
6. When all plates that were used in the arraying run have been added, press Next.
7. The Export Files window appears allowing you to select the destination folder for the output files,
to select the format of output files required, and to enter additional information that will be shown
in the file.
8. To specify a location for your file, click Select destination folder, and a window opens to allow you
to browse to a specific location. The default location is your Users file in the Map files folder.
Page 39
Chapter 7 – Generating Mapping Files
9. Press Finish. A box will appear listing the files generated and the location. Press OK.
Examples of each file type are shown in Appendix C.
BackTracker Files
For researchers who are creating their own source plate, we have created a file format to fill a
source plate based on a predefined robot-printing protocol. An example of the file that will be
obtained is found Appendix C. Note that this is a tab delimited text file that can be open with Excel
for use as a spreadsheet. At the top of the file is information required to create the grid, which can be
removed for easier manipulation of your file. The column labeled “Block” indicates the number of pins
that you have defined in your print run. The information in the next two columns indicates the location
of the spots on the array. The space in the next two columns provides space for your information.
The next three columns provide information about the location of the sample in the source plate.
Follow these instructions to create a BackTracker file:
1. Create your arraying run and save the file (see Chapter 3).
2. Open SpotMapper following the directions above.
3. Select the robot printing program you created, click on the Open button, and select Next.
4. In the Select Source Plates window, browse to the default Plate Library file and select
BackTracker 96, 384, or 1536 (plate well formats are indicated as 96, 384, 1536), depending
upon the source plate you will fill. Click on theAdd button.
Page 40
Chapter 7 – Generating Mapping Files
5. Select Next.
6. In the Export Files window, select your destination folder and then BackTracker file format (.btk).
Add any other pertinent information.
7. Select Finish. Click OK.
Note: When complete, this .btk file can be saved with a .gal extension and used for image analysis.
Page 41
Chapter 8 – Maintaining the BioOdyssey Calligrapher MiniArrayer and MCP Spotting Tools
Chapter 8 – Maintaining the BioOdyssey Calligrapher MiniArrayer and MCP
Spotting Tools
The BioOdyssey Calligrapher miniarrayer has been designed to be maintenance free. We recommend
cleaning the platen surface with a Kimwipe prewet with 70% ethanol.
MCP Pin Cleaning
Clean pins are essential to the performance of the instrument.
To maintain these pins in optimal condition we would recommend that you prime/wash the pins as
detailed on page 28 before initial use, after extended storage (2–3 weeks) and also at the end of
each print run. Prior to use, place 10 ml 10% ethanol into the static wash bath. For post-run washing
use water in the static wash bath, to ensure that solution residue does not build up inside the
capillary pins. Store the pins, clean and dust free, in the tubes in which they were shipped.
MCP Loading Tool Cleaning
The MCP Loading Tool should be cleaned with a tissue and 10% ethanol solution.
Note: The magnet is quite strong, this should be stored away from individual pins.
Cleaning the Printhead
To clean the printhead: use the load pins feature in the Calligrapher software to bring the printhead
to the front of the platen. Place a tissue below it and flush with 70% ethanol, then use an interdental
brush to clean the holes in the printhead. Use compressed air to "blow-dry" the printhead or allow to
air dry.
Humidity Control Module (HCM)
Changing the Dessicant
The HCM contains an indicator desiccant (blue to pink) that must be changed at appropriate
intervals. The software will monitor the humidity and notify you when it is out of range. However, it is
recommended that prior to a print run you visually check the dessicant color. Dessicant can be
ordered from VWR (catalog #CADX0017-3).
Follow these easy directions to change the dessicant:
1. Carefully remove the green cover of the HCM.
2. Carefully release the dessicant tube from the clip holders.
3. Release the quick coupler from both ends of the dessicant tube by pushing the blue collar
towards the connector and then pulling the tube out.
4. Hold the tube upright and unscrew the end cap. Pour the dessicant into a glass beaker.
Page 42
Chapter 8 – Maintaining the BioOdyssey Calligrapher MiniArrayer and MCP Spotting Tools
Note: The dessicant can be reused by heating in a 120°C oven until the color is blue.
5.
6.
7.
8.
9.
Fill the tube with fresh dessicant.
Replace the end cap and tighten.
Reconnect both quick couplers.
Replace the dessicant tube in the clip holders.
Replace the green cover of the HCM.
Changing the Filter
The HCM contains a filter used in adding humidity to the system. It is recommended that this filter be
changed every three months. The filter can be ordered from Bio-Rad (catalog #169-2013).
Follow these instructions to change the filter:
1.
2.
3.
4.
5.
6.
Locate the filter cover at the top rear of the HCM.
Using the finger grip, remove the cover by sliding to the rear.
Unfasten the two thumbscrews to release the clear cover.
Carefully remove the filter and replace with a new filter.
Replace the clear lid with the guide facing away from the instrument.
Tighten the thumbscrews.
7. Replace the lid by sliding it in place.
Page 43
Glossary
Glossary
Approach speed-source plate: the speed that can be selected for the pins to enter into the source
plate wells. For more viscous samples you may wish to slow down the approach speed for maximal
sample uptake by the pins.
Approach speed-printing parameters: the speed that can be selected for moving the printhead
towards the slides, membranes, or 96-well plates. Adjusting varies spot morphology. If the approach
speed is increased, the pin will tap the substrate more forcibly and produce a smaller spot. The
converse is also true; decreasing the approach speed, will produce larger spots.
Array Monitor: a graphical representation of the current state of execution of an arraying run. It
allows you to check the phase of the printing run and the estimated remaining time for the
completion of the run. The estimated run time is presented after 2 full print cycles, as the pins
approach for the third dip.
Backtracker files: file format that allows you to create your own plate content file based on your
source plate and the printing protocol used to print these samples.
Blot: removal of excess sample from the outside of capillary pin (MCP100, MCP360) to ensure
homogeneous spots. We do not recommend blotting with solid pins.
Blot distance: the distance in microns between blotted spots in both x and y coordinates. As this
distance increases, it also increases the number of slides needed for blotting a certain number of
samples.
Calibration: procedure used to define the x, y, and z coordinates of different points in the
Calligrapher miniarrayer that are important for the printing process. Access is limited to Bio-Rad
Service personnel.
Console: allows you to established an interactive dialog with the embedded instrument controller. The
console is used to home, load, start, pause, continue, and stop printing programs. In addition,
messages are displayed about the current arraying run in the console window.
Dwell time-Source plate: the time the pins spend in the source plate. This feature is useful when
dealing with viscous samples, as a longer dwell time in the source plate will enable maximal uptake
of viscous samples.
Dwell time-Printing parameters: the time the pins spend on the substrate during printing.
Increasing the dwell time will increase the spot size.
GAL file: GAL is the abbreviation for "GenePix Array List"file. This is a type of Map file that was
developed by Axon Instruments and has become an industry standard used by many microarray
scanner and software providers to locate the spots on your array. This file type can be generated
within the SpotMapper program, located under sample tracking in the arraying menu.
Grid: Two-dimensional array of spots printed on a substrate by a single pin.
Home position: the robot position where the value for the x, y, and z coordinates is zero; reached by
pressing the Home button located in the Console.
Page 44
Glossary
Humidity Control Module: controls the humidity used when performing printing protocols. In general
increasing the humidity levels above 55–60% will increase spot size. Low humidity (<55%) will result
in misfires and donut shaped spots.
Joystick: tool that allows you to move the printhead in the x, y, and z directions, when using the
custom calibration option.
Map file: a Map file contains a layout of the array, the organization of grids and supergrids with a list
of all the genes and their position. This file is created through merging source plate files (.plt) with
the arraying program file (.vrk) using the Plate Librarian and SpotMapper functions.
Plate Library: the folder that stores plate files (.plt).
Plate Librarian: tool used to reformat text files (.txt) containing plate content information into new
files compatible with SpotMapper; files contain a .plt extension. The newly created plate files are
then stored in the Plate Library.
Platen: work surface that holds the different types of substrates used for printing microarrays.
Printhead: the part of the robot in which pins are loaded before starting a printing protocol. The
printhead guides the movement of the pins with high precision during the microarray printing
procedure.
SourceSelect Editor: is a novel feature included in the Calligrapher miniarrayer that allows users to
select and print sample from selected locations in the source plate. The SourceSelect Editor creates
a file (.ssr) that can be imported into the printing program.
SpotMapper: tool used to generate Map files. The SpotMapper combines a .plt file with a .vrk file to
generate a Map file (.gal, .btk, and .txt).
Substrate: different types of solid supports used for immobilization of sample (oligonucleotides,
cDNA), proteins, etc. Glass slides, nitrocellulose and nylon membranes, and 96-well plates are the
most commonly used substrates for printing microarrays. In general you will observe larger spots or
spot-spreading on plain glass slides or membranes, compared to coated glass slides (e.g. Corning
UltraGAP or Whatman FAST Slides).
Supergrid cluster: a group of grids printed on a substrate by all the pins loaded in the printhead
when printing a grid. A supergrid maintains the grid configuration while printing all samples.
Withdraw speed-Source plate: the average speed for the pins to exit the source plate wells. Again
for more viscous samples, slowing down the withdraw speed will allow for optimal sample uptake.
Z-down offset-Printing parameters: used to adjust the z height of the pin during printing. The Z
down offset is used to optimize spot morphology and troubleshoot pin contact on the substrate
surface, i.e. nitrocellulose slides. We recommend that you make minor adjustments at 0.5 mm intervals.
Note: adjusting the Z-down offset by -0.5 will raise the pin upwards, away from the platen.
Page 45
FAQ
Frequently Asked Questions
General Instrument Information
Does my new Calligrapher miniarrayer come pre-calibrated?
Yes, the Calligrapher miniarrayer comes pre-calibrated from manufacturing and is optimized with
default settings that are applicable for many frequently used applications. You only have to set up
array parameters, i.e. choose the type of source plate (96-, 384- or 1536-well plates), preferred
substrate (slides, membranes or 96-well plate); choose the pin style (quill (stealth) or solid); the
number of pins (up to 8 pins) and design the array. The default wash parameters are sufficient for
many applications, however with extended use you may wish to 'tweak' these parameters to optimize
for different sample types.
What are the options available for the Calligrapher miniarrayer?
• Humidity control module (HCM)
• Cooling module: cooled platen (slide and source plate area), external chiller unit and HCM
• Custom Calibration Software
• MCP Loading Tool
Can I use a laptop to run the Calligrapher miniarrayer?
No, we strongly recommend a dedicated PC desktop computer, as detailed in the product literature
and user guide.
How much bench-space is required for safe operation of the Calligrapher miniarrayer?
One of the nice features of the Calligrapher is its small footprint (52.1 x 55 x 39.4 cm), however you
should allow for at least 5 cm clearance behind the instrument. The Calligrapher miniarrayer door
opens upwards and therefore you will require approximately 30 cm clearances on top of the
machine. The power switch is on the right side, so please allow at least 5 cm clearance on the right
side in order to access the power switch.
General Printing
How long will it take to print my microarray using the Calligrapher miniarrayer?
The length of the print run will depend upon the number of samples, replicates, blotting options, type
and quantity of pin, type of source plate, but MAINLY the washing parameters.
With the Calligrapher miniarrayer it will take less than 2 hours to print 384 spots on 16 slides using
8 pins with minimal to no contamination. It will also take approximately 2 hours and 45 minutes to
print 10 x 10 arrays with two replicates into all the wells of a 96 well plate.
What are the maximum numbers of spots that can be printed on a slide?
There is no real limitation on the number of spots that can be printed. The parameters in the software
can be adjusted to print more than 20,000 spots; however, this might take hours to days to print
because the printhead holds just 8 pins.
The Calligrapher miniarrayer was designed for printing <5000 spots, and easily ~1000.
Page 46
FAQ
What conditions should I use to test my new Calligrapher miniarrayer system?
To perform a test run, we recommend that you fill a source plate with red or green food coloring diluted
1/10 in PBS with 0.1% Tween 20 (PBST). Design a test array to print onto a single substrate, such
as a plain glass slide or membrane. Load your pin(s) and print the array. Image the array at 546 nm
(red dye ) or at 506 nm (green dye), to assess your spots.
NOTE: spot morphology on plain glass slides will not be identical to that on microarray substrates.
The spots may be larger and shapes irregular.
If you print on membranes, a plate and membrane adapter, (cat# 169-2004) is shipped with the
Calligrapher miniarrayer system. The plate and membrane adaptor aligns the OmniTrays (Nunc, cat#
242811) in place, while the OmniTrays are an additional protection for your membranes. The
Calligrapher miniarrayer has been calibrated for the extra height requirements of the OmniTrays; no
adjustment of the z axis is necessary.
Are there any special adjustments for printing on FAST slides?
Yes, when printing onto FAST slides (or other nitrocellulose coated slides) adjust the Z-axis height in
the Options window to -0.5. If results are not satisfactory, adjust another -0.5.
Protein Printing
What would you recommend as a standard protocol to print a protein array?
There are several ways to print protein arrays. Please refer to our Tech note 5480 Proteomic
Analysis of Tumor Biomarkers in Human Clinical Specimens Using the BioOdyssey Calligrapher
MiniArrayer.
Can we print crude protein extracts or must we use purified protein?
You can print either; the Calligrapher miniarrayer is a tool to allow spotting of any soluble molecule
onto a surface. However, you will likely want to review our Tech notes. Special applications may
require optimizing the spotting parameters.
What is the sensitivity for an ELISA-type assay using microarray?
This will varying depending upon many factors. In general, with the proper antibody sets, down to
fmol amounts of protein can be detected.
What temperature would you recommend for a protein array print run?
We recommend setting the chiller to 0°C , which will cool the Calligrapher miniarrayer to ~10°C. If you
are printing proteins denatured with SDS, guanidine or other detergent, use of the chiller is
unnecessary UNLESS you are planning on long print runs. If print runs are greater than 3 hours,
then use the chiller to maintain a temperature of 22–24°C (to keep everything solubilized), and
reduce the amount of evaporation from your source plate to maintain the concentrations of your
denatured proteins.
Do you have a list of publications by researchers performing protein arrays in the scientific
field?
Yes, see Tech note 5480.
Page 47
FAQ
Pins
What are the differences between capillary and solid pins?
Solid pins require re-dipping after 1-2 spots, while capillary pins have a sample reservoir that, when
filled with sample, can deposit tens or hundreds of spots/dip.
Why should I blot?
Blotting is used with any type of pin that is used for repetitive spotting to eliminate excess sample on
the outside of the pin and to prime the pin. This results in more consistent spot morphology.
We recommend that you blot 5 to 10 times before printing on plain glass slides cleaned with ethanol;
Can Telechem quill pins be used with the Calligrapher miniarrayer?
If your Calligrapher miniarrayer was designed for use with the Telechem pins, then the SMP3 pins,
which produce a spot of approximately 120 µm on glass were used for the default parameters.
However, different sized Telechem Stealth Micro Spotting (SMP) pins do fit in the printhead.
Note: If you wish to use different pins you will need to adjust the spot distance in the Advanced
menu.
Source Plates and Substrate
Will the MJ plates (round-bottom or v-bottom) work with the Calligrapher miniarrayer?
No, these are not recommended for microarray use.
What kind of slides do you recommend that we use with the Calligrapher miniarrayer?
The Calligrapher can use any standard slide. If using a 25 X 75 mm slide, note that the dimensions
are slightly different from a 1" X 3" size.
What type of slides and buffers do you recommend for printing non-modified 25-30-mer
oligonucleotides?
The slides that are most frequently used are the Corning slides, specific for short oligonucleotides
(including 20-mers). Corning also recommends Epoxide slides in 150 mM sodium phosphate buffer,
pH 8.5 containing 0.005% SDS.
Spot Deposition
Why are some of the spots in my array missing?
The missing spots can be a result of a clogged pin, or dust/debris in the printhead. Make sure the
pins are cleaned following the directions found in Chapter 8.
For cleaning the printhead we recommend the following:
• In the Calligrapher miniarrayer software, use the 'Load Pins' option to bring the printhead to the
front of the platen
• Place a tissue (Kimwipe) below the printhead and flush the holes with 70% ethanol, then use an
interdental brush (or small pipe cleaner) to clean through the holes in the printhead. Do not apply
any pressure or force to the printhead.
•
Use a can of compressed air to dry the printhead.
Page 48
FAQ
Why do my spots look like donuts?
This can be caused by several factors including inadequate humidity (the most common), dwell time
and Z-height. The humidity in the Calligrapher miniarrayer chamber should be ~55%. The HCM will
maintain this humidity; simply set the desired humidity to 55 in the Control Panel window. When
using the cooling option, the chamber requires dehumidification. Set the desired humidity to 40% in
the Control Panel window. You may also consider decreasing the dwell time. Finally adjusting the
z-height may improve morphology. Please note that these parameters are dependent upon the
sample and substrate type.
Why do I see inconsistent spot sizes in my membrane array?
Several things can lead to inconsistent spots in your array. This can include inadequate maintenance
of pins, or inefficient pin cleaning, an uneven substrate surface, or printing parameters that have not
been adequately optimized.
•
To increase the consistency of spot size, ensure that your pins are cleaned.
•
If printing on membranes:
•
Adhere them to the OmniTray with a small piece of double stick tape, which will reduce the
fluctuation in the substrate surface.
•
Adjust the printing parameters: the approach speed should be at 10 mm/s, the dwell time can
then be varied from 50 msec to 5 msec, to minimize the amount of 'wicking' of the sample
from the pins
•
Adjust the z-down height so that the pin barely touches the membrane to avoid too much of
the sample 'wicking' off the pin onto the membrane.
Why am I observing carryover between spots in my array?
In most cases, sample carryover is a result of inadequate washing of the pins between dips. The
inert surface of the MCP capillary pins provides assure consistent cleaning. Our R&D team has
performed extensive tests with the Calligrapher miniarrayer, using a number of samples with varying
viscosity to ensure that the default wash parameters offer excellent pin cleaning and little or no carryover
contamination.
What solutions do you recommend using in the static wash bath?
Type
Solution
Protein
0.1% Tween in 10% ethanol
DNA
10% ethanol
Final Wash
10% ethanol
NOTE: ONLY use water in the flow through bath.
Why am I not getting the spot size that the manufacturer states is specific for my pin type?
When reviewing the expected spot size of a pin, be careful to note the sample and buffer used to
validate these recommendations. The consistency and viscosity of the sample, as well as the substrate
surface can have a significant effect on the spot size printed. For example, with the Telechem SMP3
pins we expect to see a 100 µm spot feature; when printing oligos in 3xSSC buffer onto Corning
UltraGAPS slide we observe a 130 µm spot. On membranes or plain glass slides the spots will tend
to spread and appear larger.
Page 49
FAQ
Software
In the Calligrapher miniarrayer software what is the difference between a grid and a supergrid?
• A grid is generated by the printing of a single pin on the substrate (i.e. slide, membrane or 96-well
plate).
• A supergrid is a group of grids printed on the substrate by all the pins loaded into the printhead
(maximum of 8 pins).
How do I program the Calligrapher miniarrayer to print into 96-well plates?
This is done when defining your array parameters. From the Arraying menu select 'Define Arraying' >
select 'Create new arraying run' and then select 96 well plates as your substrate of choice in the
Substrates tab.
• In the grid layout window, enter the number of samples that you wish to print.
Note: the basic window allows up to 81 samples to be printed into a single well.
• Replicate the grids 12 times in the x directions.
• Open the Advanced window, and under replicate supergrids, enter 12 in the y column.
Note: when printing into a 96 well plate you can only use up to 2 pins, due to the spacing of the wells
in the 96 well plates.
Can I print an array without using the Plate Librarian and/or SpotMapper?
Yes. The Calligrapher will print a run directly, from the vrk/prg files without having to go through the
plate librarian or SpotMapper tools. There is no special error message or warning.
Instrument Use
How do I use the HCM?
• Access the Humidity Control window in the software, and set the desired humidity level. We
recommend 55% when printing oligos or any sample WITHOUT cooling. When printing proteins
or any sample WITH cooling, we recommend 40%.
• When setting the humidity, please allow 15-30 minuties for the humidity to reach the set point,
and leave this on for the duration of the run.
If I have the cooled BioOdyssey Calligrapher miniarrayer system, how do I adjust the platen
temperature?
Temperature adjustments are made on the refrigerated circulator. Set the chiller at 0°C to obtain a
platen temperature of 10–15°C which is suitable for most protein applications. Please allow
approximately 45–60 minutes for cooling to equilibrate, depending on the difference between the
ambient temperature and the desired temperature.
The humidity should be set at 40% to assure adequate dehumidification.
Where can I see the platen temperature in the software?
The Control Panel and Array Monitor windows display a chamber temperature and an estimated
temperature on the cooled platen. The chamber temperature is a real measurement taken by a
sensor located within the chamber, but not on the platen. To calculate the platen temperature, a
series of measurements were taken to yield the following equation y = 1.29x - 8.6322. (See Tech
note) This value is automatically calculated by the softwarae and displayed in both windows.
Page 50
FAQ
What does "communication not established" mean?
This indicates that the Calligrapher miniarrayer is not on or not being recognized by the software.
First check that you have followed the installation guide and installed the hardware, software and
drivers correctly; go to the Setup Menu > select Set Ports > click on "Search for COM Ports" followed
by "Establish Communication".
Custom Calibration Software Upgrade
How can I adjust the Calligrapher miniarrayer calibration settings myself?
Purchase the Custom Calibration software upgrade, part number: 169-2070. The package will
include:
a) Training
c) 2 calibration pins (MCP310S)
d) DVD-ROM training video
e) Certificate of successful completion of training
With the activation of the Custom Calibration option, you can adjust: source plate, slide, vacuum,
wash, blot, membrane, and 96-well destination plate parameters.
How do I use the Custom Calibration Module to adjust the calibration settings?
Once the Custom Calibration option has been activated, you can adjust source plate, slide, vacuum,
wash, blot, membrane, and 96-well destination plate parameters. The parameters are changed in the
array parameter windows: select 'Define Arraying' from the Array menu > choose to Create new
arraying run > in the substrates tab, select 'Modify Calibration', from here you will have access to the
calibration settings.
Note: Each calibration file is specific to the defined arraying protocol. If you wish to use the modified
calibration settings again, you must open this specific array protocol (.par file). If you create a new
print array run, the calibration parameters will default back to the original factory calibration values.
This is a safety feature to protect the Calligrapher miniarrayer from damage.
Page 51
Appendix A – Source Plates Compatible with the BioOdyssey Calligrapher MiniArrayer
Appendix A – Source Plates Compatible with the BioOdyssey Calligrapher
MiniArrayer
The BioOdyssey Calligrapher miniarrayer has been designed for use with source plates that are
produced according to the American National Standards Institute (ANSI). For further information on
these standards, please refer to the Society for Biomolecular Standards, the Microplate Standards
Development Committee (MSDC). We have tested the following plates and found them to be
satisfactory with our default programs.
Plate
Vendor
Catalog #
Characteristics
1
96
Corning/Costar
3371
clear PP
2
96
Nunc
267334
clear PP
3
96
Nunc
249944
clear PP
4
384
AbGene
AB1055
clear PP
5
384
Genetix
X7020
clear PP
6
384
Genetix
X7022
clear PP
7
384
Costar
3656
clear PP
8
384
Whatman
7701-5105
clear PP
9
1536
PerkinElmer
6005228
white/opaque
10
1536
Greiner
782074
white/opaque
Page 52
Appendix B – Available Tech Notes
Appendix B – Available Tech Notes
5308
DNA Microarrays: Optimization of Fabrication Parameters and Control Plate Design
5309
Demonstration of Superior Printing Accuracy by the BioOdyssey Calligrapher MiniArrayer
5310
Reducing Carryover Contamination During Microarray Printing
5346
Using the Molecular Imager PharosFX System to Image Arrays Printed with the
BioOdyssey Calligrapher MiniArrayer
5392
Genotyping by Arrayed Primer Extension (APEX) Using the BioOdyssey Calligrapher
MiniArrayer
5403
Cooling Characteristics for the BioOdyssey Calligrapher Cooling Module
5437
BioOdyssey Calligrapher MiniArrayer: Screening for Gene Silencing
5480
Proteomic Analysis of Tumor Biomarkers in Human Clinical Specimens Using the
BioOdyssey Calligrapher MiniArrayer
Page 53
Appendix C – SpotMapper File Formats
Appendix C – SpotMapper File Formats
Examples of a commercially purchased oligonucleotide set file and each of the three files generated
by SpotMapper software are found below.
Image 1. Example of a plate file obtained from a vendor. To import into the Plate Librarian software,
the first two rows must be removed and the file saved as a tab-delimited text file.
Page 54
Appendix C – SpotMapper File Formats
Image 2. GAL file output generated by SpotMapper software.
Image 3. BackTracker format used to create source plates. Delete the location information at the top
of the file to fill in as a spreadsheet. Once completed, reinsert the location information for use as the
GAL file for image analysis.
Note: SP means source plate.
Page 55
Appendix C – SpotMapper File Formats
Image 4. Text file created by SpotMapper software.
Page 56
Appendix D – Sensors
Appendix D – Sensors
The BioOdyssey Calligrapher miniarrayer is equipped with sensors to assist you in completing a
print run successfully. The table below lists each sensor, the message that will appear if a problem is
encountered, and the resolution for each problem.
Sensor
Message
Resolution
Door Interlock
Door opened
Close door; robot will restore positions and
resume print run
Wash Bath
Water bath overfilled
Call Technical Support (1-800-424-6723, US)
Vacuum
Vacuum level insufficient
1. Ensure the vacuum tubing is connected
to the Calligrapher miniarrayer
2. Ensure the power cable is connected to
the Calligrapher miniarrayer
Supply Bottle
Supply bottle is empty
1. Ensure supply bottle is filled with the
desired solution
2. Ensure the sensor cable and tubing are
connected to the supply bottle
3. Ensure the sensor cable and tubing are
connected to the Calligrapher miniarrayer
Waste Bottle
Waste bottle is full
1. Empty waste bottle
2. Ensure the sensor cable and tubing are
connected to the waste bottle
3. Ensure the sensor cable and tubing are
connected to the Calligrapher miniarrayer
HCM
HCM not attached
1. Ensure the USB cable is connected to
the Calligrapher miniarrayer
Page 57
Appendix E – Catalog Numbers
Appendix E – Catalog Numbers
Catalog #
169-2000
Description
BioOdyssey Calligrapher MiniArrayer System, 115 V, includes the arrayer, 3 pins;
1 of each pin type MCP100, MCP360 and MCP310S, platen adaptor, waste and
supply bottles, vacuum pump, Training DVD, User Manual
169-2001
BioOdyssey Calligrapher MiniArrayer System, 230 V
169-2200
BioOdyssey Calligrapher MiniArrayer System with Cooling Module, 115 V,
includes a refrigerated circulator with digital control, Humidity Control Module
(169-2040), the arrayer, 3 pins; 1 of each pin type MCP100, MCP360 and MCP310S,
platen adapter, waste and supply bottles, vacuum pump, Training DVD, User Manual
169-2300
BioOdyssey Calligrapher MiniArrayer System with Cooling Module, 230 V
169-2040
Humidity Control Module (HCM), includes the module, water bottle, filter and
dessicant
169-2050
Cooled Platen Upgrade, 115 V, includes refrigerated circulator with digital control,
Humidity Control Module (169-2040) not included, but required
169-2060
Cooled Platen Upgrade, 230 V, includes refrigerated circulator with digital control,
Humidity Control Module (169-2040) not included, but required
169-2070
Custom Calibration Software Upgrade, includes on-site training, User Manual, and
password
MiniArrayer Accessories
169-2017
MCP100, capillary pin
169-2018
MCP360, capillary pin
169-2019
MCP310S, solid pin
169-2020
MCP Loading Tool
169-2004
Plate & Membrane adaptor
169-2002
Wash Bottle, 2 L
169-2003
Waste Bottle, 2 L
169-2005
Static Bath Cups, 10 ea
169-2010
Magnets, small
169-2011
Magnets, large
HCM Accessories
169-2011
Dessicant Tube
169-2012
Dessicant, 250 g
169-2013
Filter
Page 58
Appendix F – Safety Precautions
Appendix F – Safety Precautions
!
Observe the following precautions to ensure your personal safety and to prevent damage to either
the instrument or the equipment connected to it. Failure to observe these precautions may result in
improper operation of the instrument and/or personal injury.
Internal Access and Unauthorized Adjustments
There are no user serviceable parts within the instrument. Avoid a shocking hazard or mechanical
trauma by not attempting to gain access (by means of any tool) to any internal parts of the
instrument. Use of controls, adjustments, or performing procedures other than those described in
this document may result in hazardous electrical shock, mechanical trauma, or damage to the
instrument.
Power Source
The instrument operates from an AC power source as specified in the Instrument Specifications
(90–132 VAC and 198–264 VAC, 50/60 Hz). Mains supply fluctuations must not exceed ± 10% or
contain undue amounts of noise. A protective ground connection (through the grounding conductor of
the power cord) is essential for safe operation of the system.
Operate the power switch located on the right side (toward the rear) of the instrument to power off
the Calligrapher miniarrayer if there is ever any question that the instrument is operating safely. Open
the door to abort a run if there ever appears any danger of "crashing" the pins.
Grounding the Instrument
The instrument is grounded through the power cord. To avoid electric shock, plug the power cord into
a properly wired receptacle with an earth-ground connection. Do this before making other connections to the Calligrapher miniarrayer rear panel.
Use the Proper Fuse
To avoid a fire hazard, use only a fuse that meets all type, voltage, and current specifications. For
more information about these specifications, see Instrument Specifications at the end of this section.
The fuse is removed by prying open the small cover at the back of the Power Entry Module
(Calligrapher miniarrayer power cord detached first). Slide-out the fuse tray. Remove the old fuse,
and replace with a new fuse of exactly the same rating (T-type; 6.3A SB). Reinsert the tray (the same
as it was before), and again snap-on the Power Entry Module cover. Reconnect the power cord. If
the Calligrapher miniarrayer still does not work (the Mains Power should have already been
checked), call Bio-Rad Technical Support.
Operating the Instrument
This device is designed to be operated on a level desk or benchtop in an office or laboratory
environment, and should not be moved during operation. If moving the instrument (in such a way
Page 59
Appendix F – Safety Precautions
that the instrument might be shocked or tipped) is required, use the shipping block and the packing
material that came with the instrument. If these materials have been lost, contact Bio-Rad Technical
Service. When moving the Calligrapher miniarrayer the Vacuum Pump, Humidity Control Module
(HCM), Supply and Waste bottles, and Refrigerator unit should be detached. For more information
about detaching these units, contact Bio-Rad Technical Support.
The Calligrapher miniarrayer should not be operated in an environment where heavy airborne
particles are present. Use the instrument only as specified in this document-—use other than as
specified may cause impairment of the safety precautions of the system. This instrument is for indoor
use only.
Do not place the bottles or other parts of the Calligrapher miniarrayer system on a high shelf, due to
the potential of operator injury. The bottom of the bottles should not be placed higher than the shelf
on which the Calligrapher miniarrayer sits.
Do not operate the instrument with loose or disconnected tubing unless specifically indicated as
permissible in this manual.
Do not mix the drain and fill lines as this could result in the application of contaminated fluid within
the Calligrapher miniarrayer printing compartment.
Avoid running out of water from the Supply bottle, and expect cross-contamination if such occurs.
Do not use the vacuum pump on the same table or benchtop as the Calligrapher miniarrayer. The
vibration can modify the quality of printing.
The vacuum pump openings should not be blocked. Do not put the vacuum pump close to the wall
(maintain at least two inches of separation).
Do not operate the Calligrapher miniarrayer system if the vacuum pump/tube is not attached.
The Calligrapher miniarrayer openings at the rear of the instrument should not be blocked. Do not
put it close to the wall (maintain at least two inches of separation).
If the cooling option is present and turned off, the Humidity Control Module should be attached and
set to work normally; otherwise the considerable condensation may be expected.
Alcohol concentrations over 15% should not be used in the wash baths.
Avoid running out of water – the robot will stop, and the samples may evaporate from the plate.
Take care that the Calligrapher miniarrayer is properly balanced and put on a stable (non-vibrating)
table. Use a level to determine that the platen (robot plate) is level within one degree.
Do not connect/disconnect (plug or unplug) Vacuum Pump and HCM when the Calligrapher miniarrayer system is ON. Doing so may cause computer/system "lockup" or error and will require a complete restart after power-off of all components for at least 10 seconds.
Use After Instrument/Component Trauma
1. Do not use the vacuum pump if it ever suffers a significant fall or other traumatic event. Especially
be careful if part of the case or power cord becomes damaged. Contact Bio-Rad Technical
Support before use if any significant trauma to the instrument occurs.
2. Do not use the Calligrapher miniarrayer or the HCM if they suffer a significant fall or other
traumatic event. Especially be careful if part of the case or power cord becomes damaged.
Contact Bio-Rad Technical Support before use if any significant trauma occurs.
Page 60
Appendix F – Safety Precautions
3. Do not use the Calligrapher miniarrayer, the HCM, the vacuum pump, or the attached computer if
fluid enters those components. Quickly unplug the Calligrapher miniarrayer, the vacuum pump,
and/or the computer if such occurs. Contact Bio-Rad Technical Support for cleaning procedures.
4. Do not operate the Calligrapher miniarrayer or any of its attached components if electrical cords or
fluid/vacuum hoses become frayed or damaged.
5. Do not use the Calligrapher miniarrayer or any of its components if case cracks (large enough to
see internal components) occur.
Mechanical Use Cautions
The Calligrapher miniarrayer is heavy. Use caution when lifting or otherwise moving. Bodily injury
can occur if the Calligrapher miniarrayer, the HCM, the vacuum pump, or the computer are allowed to
drop on anyone in proximity to the system.
Cleaning the Instrument
To clean the instrument externally, use a soft rag, dampened only with soap and water or glass
cleaner. Internal cleaning other than routine platen and printhead cleaning, should be done by a
Bio-Rad technician only.
Precautions Regarding Failures
1. Do not operate the Calligrapher miniarrayer if the door interlock fails to stop the Calligrapher
miniarrayer when the door is opened; contact Bio-Rad Technical Support.
2. Use of magnets to defeat the door interlock is done at the customers’ risk.
3. If for any reason, the door does not slowly drop to the closed position when released, do not use
the Calligrapher miniarrayer; contact Bio-Rad Technical Support.
4. If for any reason the door does not hold in the up position (still drops slowly when released), the
Calligrapher miniarrayer can be used. However, Bio-Rad Technical Support should be contacted.
Label Locations
Refer to the interconnect illustration to see the location of the various instrument labels.
Instrument Specifications
AC Specifications
90–132 and 198–264 VAC, 50/60 Hz, 850 VA
Fuses
The system contains the following fuse: Slow acting, 5 x 20 mm style fuse, 6.3 A, 250 VAC, Bussmann GDC-6.3A
Dimensions
Depth: 21.5 inches (55 cm)
Width: 20.5 inches (52.1 cm)
Height: 15.5 inches (39.4 cm)
Page 61
Appendix F – Safety Precautions
Weight
Approximately 60 lb (27.3 kg)
Environmental
This equipment is intended for indoor use only. Use the equipment only under the following environmental
conditions:
_ Installation category II
_ Pollution degree 2
_ Operating temperature range: 18–35°C
_ Maximum relative humidity: 90% RH
_ Maximum altitude: 2000 m
© Site Wiring
The instrument must not share any circuit that contains heavy inductive starting loads such as electric motors,
heavy machinery, or air conditioners. The site wiring must comply with all the local applicable Electrical Code
directives.
External Connections
AC Power
IEC 320 power inlet
This is the operating power input connector. It connects to 90–132 VRMS, or 198–264 VRMS, 50/60 Hz.
Data Cables
USB cable to PC
Other Cables
Two cables connecting the Calligrapher miniarrayer to the Supply and Waste Bottles
DB9 cable between Calligrapher miniarrayer and HCM
Humidity Control Module
Dimensions (W x D x H)
30.5 x 49 x 30.5 cm (12 x 19.3 x 12”)
Weight
8.4 kg (18.5 lb)
Maintains
20–63% RH
Cooling Module
Cooling capacity
10–15°C
Page 62
Appendix F – Safety Precautions
System Requirements*
PC requirements
Minimum
800 MHz processor
128 MB RAM
1 GB hard drive
Recommended
1 GHz Pentium processor
256 MB RAM
20 GB hard drive
Screen requirements
Minimum
Recommended
*
Windows 2000 or Windows XP
operating system
CD-ROM drive
USB port
Adobe Acrobat 6.0 or higher
1,024 x 768 pixel resolution
256 colors
True-color mode (24 bits)
A dedicated IBM-compatible desktop PC is recommended for use with the Calligrapher miniarrayer.
Page 63
Appendix G – Legal Notices
Appendix G – Legal Notices
Acrobat is a trademark of Adobe Systems.
Costar is trademark of Corning Costar Corporation.
Excel, Windows, Windows 2000, and Windows XP are trademarks Microsoft Corporation.
Omni is a trademark of Nalge Nunc International.
Pentium is a trademark of Intel Corporation.
Stealth Microspotting Pin (SMP) is a trademark of Telechem International, Inc.
Tween is a trademark of ICI Americas, Inc.
UltraGAPS is a trademark of Corning Inc.
Page 64
Bio-Rad
Laboratories, Inc.
Web site www.bio-rad.com USA 800 4BIORAD Australia 02 9914 2800 Austria 01 877 89 01 Belgium 09 385 55 11 Brazil 55 21 3237 9400
Canada 905 712 2771 China 86 21 6426 0808 Czech Republic 420 241 430 532 Denmark 44 52 10 00 Finland 09 804 22 00 France 01 47 95 69 65
Germany 089 318 84 0 Greece 30 210 777 4396 Hong Kong 852 2789 3300 Hungary 36 1 455 8800 India 91 124 4029300/5013478 Israel 03 963 6050
Italy 39 02 216091 Japan 03 5811 6270 Korea 82 2 3473 4460 Mexico 55 5200 05 20 The Netherlands 0318 540666 New Zealand 64 9415 2280
Norway 23 38 41 30 Poland 48 22 331 99 99 Portugal 351 21 472 7700 Russia 7 095 721 14 04 Singapore 65 6415 3188 South Africa 27 0861 246 723
Spain 34 91 590 5200 Sweden 08 555 12700 Switzerland 061 717 95 55 Taiwan 886 2 2578 7189/2578 7241 United Kingdom 020 8328 2000
Life Science
Group
Bulletin 0000
US/EG
Rev A
00-0000
0000
Sig 1205
22-0400-0001 Rev C