1
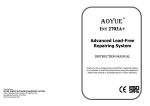
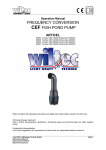
AIR NOZZLES Sold Separately Lead-Free Repairing System INSTRUCTION MANUAL Thank you for purchasing model Int2738 Leadfree Repairing System. Please read manual before using the unit. Keep manual in an accessible place for future reference. Manufacturer: AOYUE TONGYI INTERNATIONAL LIMITED Jishui Industrial Zone, Nantou, Zhongshan City, Guangdong Province, P.R.China http://www.aoyue.com 12 REPLACEMENT TIPS Sold Separately TABLE OF CONTENTS Package Inclusion ………………………………..…..… 3 Spare Parts List .…..……………………..…….………… 3 Specifications ……………………………..……………. 4 Features …..………………………………….………….. 5 Safety Precaution ……….……………………….……... 5 Assembly and Preparation …………………………….. 6 Operation Guidelines Panel Guide ………………………………………. 7 Hot Air Gun …………….………………...……….. 8 Soldering Iron ………………………………..……. 9 Smoke Absorber . ………………………….….….. 9 Maintenance ……………….………………………..…. 10 Replacement Tips ………...………………………….… 11 Air Nozzles ………………...………………………..….… 12 2 11 MAINTENANCE A. PACKAGE INCLUSION Replacing the Hot Air Gun heating element 1. Remove the screws which secure the handle and slide the cord tube. 2. Open the handle. Disconnect the ground wire and remove the pipe. Hot Air Gun and Hot Air Gun Holder 3. Remove the heating element by disconnecting the terminal. 4. Insert a new heating element and reconnect the terminal. Handle the heating element with care. Never rub its wire. Reconnect the ground wire after replacing the element. 5. Assemble the handle in the reverse order of disassembly. B. C. Air Nozzles (1124, 1130, 1197,1010, 1313, 1919) 2738 Main Station Soldering Iron with Smoke Absorber Replacing the Soldering Iron tip 1. Always turn the power OFF when removing or inserting a tip. 2. When the tip is hot, hold it with the heat resistant pad and pull it out. 3. Insert the new tip fully into the handle. If the tip is not fully inserted, the display will show a sensor error when power is turned on. LF2B Tip 2630B Soldering Iron Holder with Solder Wire Stand Care for the Soldering Iron tip Always keep the solderplated section of the tip/nozzle coated with a small amount of solder. If the tip of the nozzle is coated with oxide, the tip/nozzle’s heat conductivity will be lowered. Coating the tip with a small amount of fresh solder ensures maximum heat conductivity. 30150J Heat Resistant Pad 939 Vacuum Suction Pen 30181X Filter Pads (6 pcs.) Power Cord D. Checking the soldering iron connection cord for damages G001 IC Popper SPARE PARTS LIST 1. Remove the soldering tip and the nipple. 2. Push the socket out from inside the handle assembly. 3. Measure the resistance values between the connector and the lead wires at the socket as follows: Pin 1 Red ( + ) Pin 3 Blue (ground) Pin 5 Black ( ) If any value exceeds 0W or is ¥, replace the handle assembly. 10 Part No. 10094 Description Hot air gun heating element 30106S Plastic handle of hot air gun S009 Hot air gun complete handle 20962 Hot air gun metal pipe P002 Diaphragm pump 30127S Soldering Iron plastic handle B011 Soldering Iron complete handle 3 SPECIFICATIONS OPERATING PROCEDURE II. SOLDERING IRON MAIN STATION Power Input : Station Dimensions: Weight: available in 110V / 220V 188(w) x 126(h) x 250(d) mm 5.6Kg Set the airflow level. You can adjust to your desired airflow by using the SOLDERING IRON Power Consumption: 70W Temperature Range: 250°C 480°C Heating Element: Ceramic Heater Output Voltage: 24V Note: Automate soldering time — This is an optional setting. You can set soldering time to 30 minutes then it automatically turns off. To activate this function: 1. Press the temperature adjust button of the solder iron in a simultaneous manner together with the Reset button. 2. The display will show indicating that the 30 minute automate time is turned on. 3. After 30 minutes the buzzer beeps and the temperature decreases to room temperature. When heating element power has been shutoff, the display will show 4. To start soldering again, press the Reset button once. HOT AIR GUN Power Consumption: 500W Temperature Range: 100°C 480°C Heating Element Pump/Motor Type: Air Capacity: 1. Check if the Soldering Iron is attached properly to the 5pin receptacle and the vacuum tube is securely connected. 2. Be sure that all function buttons are not pressed. 3. Turn on the Power Switch. 4. Press the function switch to turn on the soldering iron SOLDER IRON function. 5. When a signal beep is heard, press the Reset button. 6. Solder iron is set to automatically increase temperature to 350°C upon turning on. Unit will display 350°C for 3 seconds then automatically switch to display real temperature of the solder iron. 7. Set the temperature. Adjust to your desired temperature, using the button. 8. Start using when real temperature reaches the set temperature. Metal Heating Core Diaphragm Pump ** Automate function is automatically deactivated when temperature is readjusted or when reset button is pressed. 23 l /min (max) III. SMOKE ABSORBER SMOKE ABSORBER Vacuum Pressure: 1. 2. 3. 4. 600mm Hg Wait until the soldering iron reaches the set temperature and stabilizes. Set Vacuum Control to smoke absorber. SMOKE ABSORBER Press the function switch. Fumes absorbed will pass through a filter and be blown out thru the hot air gun. So the smoke that is blown out from the hot air gun during soldering is already filtered. IMPORTANT: Filters should be cleaned and replaced regularly so that it would not clog up the air path and will effectively clean the toxic fumes produced during soldering process. 4 9 OPERATING PROCEDURE FEATURES ◆ I. HOT AIR GUN 1. 2. 3. 4. 5. 6. 7. 8. Be sure that all function buttons are not pressed. Turn on the Power Switch. Set Vacuum Control to SMD rework. Press the function switch to turn on hot air reworking HOT AIR GUN function. Set the airflow level. You can adjust to your desired airflow by using the buttons. Airflow range is from 15 – 99. Set the temperature. Adjust to your desired working temperature, using the button. When airflow and temperature has been set, wait until the real temperature reaches the set temperature before using the Hot Air Gun. After using the Hot Air Gun, do not immediately turn off the power switch, instead turn off the hot air gun function switch to activate the autocool off function of the unit. This is for safety and proper maintenance of the unit. ◆ ◆ when the handle is held up again. Programmable auto reworking time from ◆ ◆ ◆ IMPORTANT: Airflow level should be set accordingly, working with low airflow and high temperature often causes heating element to get easily burnt. 20 to 9999 seconds. Designed with an autocool off process. Upon turning the unit off, it starts to blow cold air until it reaches a safe temperature of 85 degrees, this is to ensure safety and to prolong usage life of the heating element. Compound tip designed for efficiency. Replacement of tips with easy slip in/ out method. Creative builtin smoke extractor that absorbs the fumes created at the source. Eliminates the space hindering smoke absorbing units yet allowing a healthy environment. ◆ IMPORTANT: Remember to set airflow level first before setting the temperature so that it would not damage the heating element, causing it to be burnt out prematurely. Leadfree, smokefree, 3 in 1 multifunctional repairing system. Combines the function of a Hot Air Gun, a Soldering Iron and a Smoke Absorber. Microprocessor controlled ESD safe unit. All digital display of hot air temperature, soldering iron temperature and air pressure with touch type panel controls. Unique 15minute standby auto sleep mode. Returns to previous setting ◆ Compatible with various type of air nozzles. Please see page #12 for list of available air nozzles. Compatible with different kind of tips. Please see p#11 for list of replacement tips. SAFETY PRECAUTION CAUTION: Misuse may cause extensive damage to the unit. Note: Auto-cool off function — after turning off the hot air gun function switch, unit starts to blow cool air to decease temperature of the hot air gun, hot air gun function will automatically be turned off when the hot air gun temperature reached a safe level of 90°C. (Auto-cool off will not function when main power switch is turned off) Note: Auto-sleep mode — unit is also programmed to have an autosleep mode, this is activated when hot air gun is turned on but is placed on the hot air gun holder and not put to use for fifteen minutes, temperature automatically decreases and eventually turns to sleep mode. When the handle is held again the unit will go back to its previous setting. For your own safety, be sure to comply with the following precautions. ◆ Check every component after opening the package whether everything is in good working condition. If there are any damages suspected , don’t use the item and contact your dealer. ◆ When moving the unit to another location, be sure to turn off the power switch and remove the plug. ◆ Do not strike or subject to physical shock the main unit, hot air gun, soldering iron or any parts of the system. Use carefully and lightly so as not to damage any parts. ◆ Be sure the unit is grounded. Always connect power to a grounded receptacle. 8 5 PANEL GUIDE ASSEMBLY AND PREPARATION A. Soldering Iron 1. Install solder wire to the solder iron holder. (Figure 1) 1 10 2 9 11 3 12 4 13 14 Figure 1. Soldering Iron stand with solder wire holder 2. Attach the soldering iron cord assembly to the 5pin output at the lower center area of the main unit. 3. Place soldering iron to the soldering iron stand as shown in Figure 1. B. Smoke Absorber Attach the smoke absorbing tube to the vacuum cap. Make sure that the cord connections are free from any tangles. C. Hot Air Gun The Hot Air gun holder was installed on the station upside down for packaging purpose. To set up the Hot Air Gun holder, loosen the screw that holds it on the left side of the station. After loosening both screws, turn the holder ride side up, then tighten the screws back. Place the hot air gun in the sensor controlled holder to prepare for usage. 5 15 1 2 3 4 5 6 7 8 9 — — — — — — — — — 6 7 8 Airflow gauge Hot air gun temperature adjustment button Hot air gun airflow adjustment button Soldering iron temperature adjustment button Hot air gun connecting outlet Vacuum Cap Soldering iron receptacle Main power switch Digital display of hot air gun temperature (actual and set) actual temperature temperature being set cooling down sleep (standby) and off mode 10 — 11 — Hot air gun function switch Digital display of airflow actual airflow airflow being set 12 13 14 15 — — — — Reset button for all settings Soldering iron temperature (actual and set) Soldering iron function switch Vacuum control Smoke Absorber when using smoke absorbing function of solder iron SMD rework when using the hot air gun 6 7