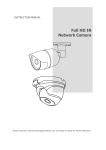
1
2006 owners manual table of contents Letter of introduction....................................................................3 Jet and Feature Operation Jet Identification Chart.......................................................33 Flow Adjustment..................................................................33 Removal and Replacement.................................................34 Diverter valve......................................................................34 Waterfall control (optional)................................................34 Important User Safety Instructions Warnings................................................................................4 Hyperthermia.........................................................................4 Choosing the Right location Indoor locations....................................................................5 Outdoor locations..................................................................5 Hydropool Surround Sound Audio and Audio/Video Systems Section (optional)............................35-55 Special Considerations for Indoor installations...............................................................6 Outdoor installations.............................................................6 Hot Tub Water Balance General Overview................................................................56 Glossary of Common Water Maintenance Terms............57 Water Balance Summary for your Hot Tub (chart)..........57 Signs of Improper Water Balance.....................................58 Ozonator...............................................................................58 Site Preparation for Above Ground installations..................................................6 Full or Partial In-ground installations.................................7 Overall Support......................................................................7 Equipment Accessibility.......................................................7 In-ground Installations.........................................................8 Remote Equipment Placement.............................................8 Suggested Routine Water Maintenance Initial Fill...............................................................................59 Daily, Weekly, Monthly, Quarterly.....................................59 Chemical safety hints.........................................................59 Unloading/Handling your Hot Tub...............................................8 Cleaning the Skimmer Basket...................................................59 Leveling your Hydropool Hot Tub................................................9 Cartridge Filter Removal, Cleaning, Re-installation....................................60 General Installation Instructions................................................9 Cleaning the Acrylic Surface....................................................60 Important Electrical Safety Instructions..................................10 G.F.C.I./R.C.D. Application Guideline & Wire Size............10 North America G.F.C.I. installation diagrams...................11 Europe R.C.D. installation diagram....................................12 Safety Hard Cover.......................................................................60 Changing your Hot Tub water Formula.................................................................................61. Water Softeners..................................................................61 Installing Accessories Pillows..................................................................................13 Filter/ice bucket lids...........................................................14 Mood lighting.......................................................................14 Safety Hardcover locks......................................................14 Cover Remover (optional)...................................................14 Draining your Hot Tub water.....................................................61 Hydropool Exclusive Quick-Drain™ & Fill (diagram)................62 Wood Products Gazebos................................................................................63 Protecting your Cabinet Wood Finish...............................63 Cabinet Wing-Locks............................................................63 Filling, Checking and Starting your Hot Tub............................15 Pump priming/releasing an air lock..................................15 Hydropool Control Systems North American Silver & Gold Series............................................................17 Platinum & Titanium Series................................................20 European Silver & Gold Series............................................................24 Platinum & Titanium Series................................................27 Winterizing your Hydropool Hot Tub.........................................64 General Troubleshooting............................................................65 What to do in the event of Power fluctuations..............................................................66 Cold weather power failure...............................................66 Topside Control Panel Display Messages...............................31 On behalf of everyone at the company, we thank you for your decision to purchase a Hydropool hot tub. Recognized for quality worldwide, we are confident that your new hot tub will provide you, your family and friends, with years of enjoyment and fulfill all your hydrotherapy needs. Hydropool hot tubs are not only healthful and relaxing, they can even add value to your home. Please take the time to carefully read and understand all the safety, installation and operating instructions in this manual before adding water or electrically connecting your hot tub. The following pages contain valuable information and pointers that will save you both time and money, as well as help you to simplify upkeep and maintenance. Since we manufactured our first hot tub in 1985, the Hydropool team has been dedicated to producing a quality product catering to maximum hydrotherapy, comfort, energy efficiency and ease of operation. We are confident that as you become more familiar with the various safety and maintenance features of your new hot tub you will be satisfied that you made the right decision in purchasing a Hydropool hot tub. Happy hot tubbing... Dale Papke C.E.O. David Jackson President 3 S ave these instructions Important user safety instructions Your physiological response to hot water is very subjective and depends on your age, health, and medical history. If you don’t know your tolerance to hot water, or if you get a headache, or become dizzy or nauseous when using your hot tub, get out and cool off immediately. WARNINGS HYPERTHERMIA 1 Children should NOT use a hot tub without alert adult supervision. 2 Children should not enter a hot tub where water temperature exceeds body temperature (37˚C / 98.6˚F). 3 As prolonged immersion in water temperatures in excess of 38˚C (100˚F) may be injurious to your health, we recommend measuring the water temperature with an accurate thermometer before entering the tub. We also recommend establishing lower temperatures and shorter use periods for young children and/or those users potentially affected by hot temperatures. 4 Do not allow children to submerge their head under water. 5 Do not use a hot tub unless all suction guards are installed to prevent body and hair entrapment. Do not sit in front of, or on top of the suction fittings or skimmer, as this will obstruct proper circulation and may result in personal injury. 6 Never operate the hot tub pump at high speed without having all suction and return lines open. 7 Always keep the hardcover installed and locked when the hot tub is not in use. 8 People using medications and/or having any adverse medical history should consult a physician before using a hot tub. 9 People with infectious diseases should not use a hot tub. 10 Exercise caution when entering or exiting a hot tub. Where practical, install a safety grab bar or handrail. Turn off the jets before entering the hot tub to improve visibility of the steps or flat entry area. 11 To avoid unconsciousness and possible drowning, do not use drugs or alcohol before or during the use of a hot tub. 12 Pregnant woman should consult a physician before using a hot tub. 13 Do not use a hot tub immediately following strenuous exercise. 14 Do not permit or use electric appliances (such as light, telephone, radio or television) within 1.5 m (5 ft) of this hot tub, unless such appliances are rated at 12VDC or less. 15 Test the GFCI (Ground Fault Circuit Interrupter) monthly. 16 Post emergency phone numbers for Police, Fire Dept., and Ambulance at the nearest phone. Since your hot tub can be set to reach temperatures of 40˚C (104˚F), users should be aware that extended submersion in water that exceeds normal body temperature can lead to hyperthermia. The causes, symptoms and effects of hyperthermia may be described as follows: Hyperthermia occurs when the internal temperature of the body reaches several degrees above the normal body temperature of 37˚C (98.6˚F). The symptoms of hyperthermia include drowsiness, lethargy, and an increase in the internal temperature of the body. The effects of hyperthermia include: • Unawareness of impending hazard • Failure to perceive heat • Failure to recognize the need to exit the hot tub • Physical inability to exit the hot tub • Fetal damage in pregnant woman • Unconsciousness resulting in the danger of drowning If you sense any of the symptoms of hyperthermia, safely exit the hot tub immediately. WARNING THE USE OF ALCOHOL, DRUGS OR MEDICATION CAN SIGNIFICANTLY INCREASE THE RISK OF FATAL HYPERTHERMIA. CHOOSING THE RIGHT LOCATION Your Hydropool hot tub can be installed indoors or out, on the ground, in the ground or half-and-half. The following information will assist you in choosing the right location for your individual needs. When making your decision, always remember that hot tubs can be enjoyed year-round, indoors or out, regardless of the climate. Many Hydropool owners report that their favourite time to use a hot tub is in the cooler fall and winter months, while others praise the enjoyment of using their hot tub in the warmer spring and summer months. INDOOR LOCATIONS These ‘split’ and lower profile versions are designed to accommodate narrow doors or shallow stairwells. Since the dimension from the seat to the top of the lip is identical to the “regular profile” units, water submersion, for even the tallest user, is the same. If members of your family are not cold winter enthusiasts, or if your backyard or patio area is not suitable for a hot tub installation, then an indoor location for your hot tub may be your best or only choice. You may wish to create an exercise/spa area in your home, or install your hot tub in a glass solarium or four-season room adjoining your home. Your Hydropool dealer can even arrange for your hot tub to be shipped without a cabinet or with the cabinet packaged separately for on-site installation. In many cases the smaller dimensions of a hot tub wit out a cabinet is all that is needed to ensure the hot tub can be delivered without wall or door alterations. Where the hot tub is being submerged, or a custom deck or tile is being installed, the cost savings of being able to order a hot tub without a cabinet is another benefit of choosing Hydropool. Indoor installations not only add a unique look and appeal to your home, they provide the privacy and controlled climate to ensure that use and enjoyment of your hot tub is maximized. If you are considering an indoor location, Hydropool manufactures certain lower profile models in two pieces (referred to as ‘split’ models) that can be easily moved into most tight or difficult access locations and then assembled on-site by your authorized Hydropool dealer. If you should choose an indoor location, you will find further information as outlined in the section “SPECIAL CONSIDERATIONS FOR INDOOR INSTALLATIONS” OUTDOOR LOCATIONS For those who choose an outdoor location, hot tub operating temperatures can be adjusted to match the season. In colder months, many owners will operate their hot tub in the range of 38-40˚C (101 -104˚F). During warmer months, an operating temperature of 36-37˚C (9799˚F) will provide a refreshing retreat. If you should choose an outdoor location, you will find further information as outlined in the section “SPECIAL CONSIDERATIONS FOR OUTDOOR INSTALLATIONS” For a variety of reasons, outdoor locations are a far more popular choice. Some of the reasons include: • Limited indoor space • Delivery complications due to door openings, stairwells, etc. • Limited budget (indoor installations usually also involve interior home renovations) • Desire for an outdoor entertainment center • Hot tub is being installed adjacent to an existing or planned swimming pool • Concerns over splashing water inside the home SPECIAL CONSIDERATIONS FOR… Indoor InstallationS Outdoor InstallationS •When the hot tub is to be installed in a small room (under 150 ft2/14 m2), we recommend that large units be fully or partially submerged in-floor so that it does not dominate the room. This is to allow sufficient headroom for entry and exit to and from the hot tub •It is beneficial if the hot tub room is located near wash room and shower facilities •The hot tub room should have a floor drain to handle spillage, a window, outside exhaust fan or humidistat controlled exhaust fan for ventilation. Where this is not practical, the use of indoor/outdoor carpeting or a tile floor and the opening of a window while the hot tub cover is removed should be sufficient. You should not have concerns regarding humidity. When the hardcover is installed, no humidity will escape. During use, the small amount of humidity released into the room can be removed with the use of a small dehumidifier •Consider plumbing a fresh water tap nearby and a permanent drain location for the hot tub to eliminate having to use a long garden hose each time you fill or drain the hot tub • Always provide adequate ventilation for the support equipment • Consult your local dealer for further information •Contact your local building code department to determine if a building permit is necessary and for information on applicable bylaws (distance from property lines, buildings, fencing requirements, etc.) •If you are doing any excavating, contact your local gas, hydro, and cable-company to ensure that there are no underground lines •Locate the hot tub, where practical, within close distance of a door to the house, to maximize potential winter use. •Ensure that your pump(s), controls, drain-valve and thermal probe are easily accessible and protected •If possible, locate the hot tub where you will enjoy some privacy, out of the site of neighbours. If this is not possible, a partial privacy or wind partition, or proper placement of the optional Hydropool cover lifter should provide adequate privacy Hot tub equipment is generally designed for indoor (out of the direct elements) use. When your HYDROPOOL hot tub is equipped with a factory-installed cabinet, and installed as per the guidelines of this manual, the equipment is adequately protected. If the hot tub is shipped without a cabinet, your custom cabinet or other structure must be designed to supply protection for the hot tub support equipment from rain, snow, splash water, etc., but still designed in a manner to ensure adequate ventilation. Site preparation for… Above-ground Installations Where the hot tub is a “stand-a-lone” above-ground installation to be installed in regions where freeze/thaw conditions occur, a patio stone or pre-formed paver type pad may be sufficient if there is no abutting deck(s) to be damaged during potential seasonal movement of the ground. The drawback to this type of base is that splash water could eventually de-stabilize the ground under the pad, with the resulting support base shift causing damage to the structure. •Dig out and level the ground 20-30 cm (8-12 in.) below your desired base level • Install 10-15 cm (4-6 in.) of crushed stone • Next, install 10-15 cm (4-6 in.) of poured concrete • Level the concrete and apply a broom-type finish •We recommend that the pad be made 15 cm (6 in.) larger than the hot tub on three sides, and 1 m (3 ft.) larger on the side where the access steps and/or planters will be installed For best results, we suggest the installation of a level concrete pad: In regions where freeze/thaw occurs, or where there will be custom decking abutting the hot tub we recommend the installation of sono-tubes beneath the pad to prevent future shifting. WOOD OR CONCRETE DECK FACTORY FOAM INSULATION WOOD OR CONCRETE DECK CONCRETE OR WOOD RETAINING WALL FACTORY INSTALLED PLUMBING CLEAN SAND BACKFILL OPEN CAVITY BELOW FROST LINE ORIGINAL COMPACTED EARTH FACTORY INSTALLED PLUMBING POURED 4" SLAB POURED 4" SLAB 6" GRAVEL NATURAL DRAIN 6" GRAVEL SONO TUBES SITE PREPARATION FOR… FULL OR PARTIAL IN-GROUND INSTALLATIONS EQUIPMENT ACCESSIBILITY The equipment must be located in an area where it will remain dry and will not be exposed to rain, snow or ground water. The standard Hydropool hot tub has the equipment installed inside the protective cedar cabinet. •When your hot tub is to be installed above-ground, the cabinet is designed for both protection and accessibility •When your hot tub is to be installed fully or partially in the ground, if you are relocating the equipment remotely from the hot tub, or if you have ordered a hot tub without a cabinet: it is necessary that the equipment is installed in an area that is dry, protected from the elements, has proper ventilation and is easily accessible for service •Always ensure that the equipment is mounted on a raised base or platform to prevent water damage to the motor, equipment or controls •Ensure that any opening to the equipment and the working area around the equipment is large enough to accommodate a service person For units being installed fully or partially in the ground, the type of support will again vary based on whether or not the tub is being installed in an area with freeze/thaw conditions. • Non-freezing climates – it is sufficient to ensure that the base of the hole or cavity created for the tub simply has a stable, compacted base. The side walls do not need to be supported, however where the climate permits, should you choose to backfill directly against the hot tub, a clear sand backfill is suggested •Climates where freeze/thaw occurs – it is necessary that a proper poured concrete base, complete with sono-tubes, be installed as outlined in the section ABOVE-GROUND INSTALLATIONS - p.6. •Areas with a high ground water table – the concrete base, as well as a concrete or wood retaining wall to hold back the earth, is suggested. This forms a box or ‘bunker’, in which the hot tub is placed •ALWAYS ensure that there is good drainage, via a properly designed French (gravel) drain system and/or a sump pump, to prevent ground water flooding damage to the support equipment or structure •Install protective waterproof pipe to house any light, sensor, or topside control cables that could be buried •Access for future service must be considered at the time of design and installation. Difficult access can result in supplemental service labour charges. Consider easily removable deck materials Whenever possible, install the pump below water level to ensure easy priming. Where above-grade equipment location is necessary, please ensure that your hot tub is equipped with the Remote Above-Grade Option Package. The equipment should be located as close to the hot tub as possible to maximize jet performance. Where you have ordered your hot tub with optional remote equipment, ensure that the equipment is not located more than 5 m. (15 ft.) from the hot tub. Use only 2 in. flex-pipe or larger for the pipe runs from the equipment to the hot tub, with minimal use of elbows or other pipe restrictions. OVERALL SUPPORT Your Hydropool hot tub is equipped with a factory installed wood cradle support, which helps distribute the weight of the water over the entire foot area of the hot tub. The cabinet, either factory installed or customized on-site, should be decorative only, and not relied on for overall support. Never suspend a hot tub from a deck or floor as the acrylic lip will crack and possibly break off. Install protective waterproof conduit to house any applicable cords or line extensions such as the sensor and top-side control cables, light wires or ozone tubing. In climates where freeze / thaw occurs we suggest that remote piping be buried below the frost line and that pipe insulation is applied over all pipes that run from the hot tub to the remote equipment to maintain energy efficiency. IN-GROUND INSTALLATIONS • When submerging the hot tub all or part way below ground level, a concrete base along with a concrete or wood retaining wall to hold back the earth is suggested. This forms a box or ‘bunker’, in which the hot tub is placed • Where the climate permits, should you choose to backfill directly against the hot tub, a clear sand backfill is suggested • Install protective waterproof conduit to house any light, sensor, or topside control cables that could be buried • ALWAYS ensure that there is adequate drainage via a properly designed gravel drain system and/or a sump pump to prevent ground water flooding damage to the support equipment • Access for future service must be considered at the time of design and installation. Difficult access can result in supplemental service labour charges or damage to your decking WOOD OR CONCRETE DECK SERVICE HATCH CLEAN SAND BACKFILL CLEAN SAND BACKFILL ORIGINAL COMPACTED EARTH FACTORY INSTALLED PLUMBING POURED 4" SLAB 6" GRAVEL SONO TUBES STANDARD EQUIPMENT NATURAL DRAIN (Rainproof vented enclosure required) ALLOW APROX. 4 FT. for SERVICE ACCESS REMOTE EQUIPMENT PLACEMENT • Equipment should be installed at or below water level. If it is necessary to install the equipment above grade, the purchase of the optional Remote Above-Grade Option Package will be required •All control cables should be run through a protective pipe to avoid problems associated with ground settling, frost, etc. • All support equipment MUST be weather protected, yet still have adequate ventilation Where the support equipment is being located in a remote location, the following should be considered: • The distance from the hot tub should never exceed 5 m. (15 ft.) of pipe length • Piping diameter must be 5.08 cm (2 in.) with minimal use of elbows • All piping should be insulated to minimize heat loss, and reduce the risk of freezing UNLOADING / HANDLING YOUR HOT TUB All Hydropool hot tubs are shipped with a protective combination layer of bubble wrap, cardboard and plastic film. Each hot tub is factory strapped onto a wood skid. If your hot tub is to be delivered by your local dealer, it will generally arrive on a flat bed truck or low profile trailer. Most dealers are equipped with the necessary equipment to maneuver the hot tub from the truck to the dolly or cart that will be used to move your hot tub to the installation location. Most Hydropool models require a clearance width of at least 100 cm. (39 in.) to allow movement of the unit (on its side) through alley-ways, fence openings, etc. Where this is not possible, the use of a crane to lift the hot tub from the truck or trailer over the house to the patio or yard is often a simple and economical option. CAUTIONS •Do not move or place the hot tub on the side where the equipment is located as damage could occur •Never roll or flip the hot tub end over end as the cabinet could be damaged • Never lift or handle the hot tub by the plumbing • Make sure that there is sufficient assistance to gently slide the hot tub off the dolly or cart to the support base without any damage Should your hot tub arrive in a common closed box trailer, it may be necessary to arrange with a local towing company for a tilt and load tow truck, with a pulley winch system, to pull the skid from the larger trailer to the lower profile tow truck flat bed. The hot tub can be gently slid off the low profile trailer and positioned on its side on a cart or dolly. UNLOADING / HANDLING YOUR HOT TUB CONTINUED LEVELING YOUR HYDROPOOL HOT TUB After the hot tub is properly positioned on the support base, the entire unit should be checked with a level and shimmed as necessary. Should you find that the support base is sloped or otherwise uneven, level your hot tub using TAPERED wood shims where necessary, ensuring that the tapered end extends at least 61 cm (24 in.) under the unit. This will insure contact with the support substructure to appropriately distribute the weight of the unit. Do not just shim under the cabinet base outside edge, as this will cause structural stress on the unit, potentially causing unwarrantable damage to the hot tub structure and /or shell. GENERAL INSTALLATION INSTRUCTIONS aYour HYDROPOOL Hot tub is self-supporting on its base. The cabinet should be decorative only, not for support. Never suspend the hot tub from the deck or cabinet. bWhere the hot tub is not equipped with a factory installed cabinet, it is the installing electrician’s responsibility to ensure all electrical equipment is weather protected. cAlways provide adequate access for servicing the support equipment. dDecking should be constructed to allow repair access around the entire hot tub. eIn remote equipment or no-cabinet installations, you may add extra insulation, but the equipment area must have adequate cross-flow ventilation. 7Installation of a safety grab rail or reachable support for use when entering or exiting the hot tub is recommended. 8The hot tub equipment and all electrical plugs, outlets and lights within 1.5m (5ft) of the unit must be G.F.C.I protected. Consult your electrician or local electrical authority for further details. 9Access to the hot tub must always be secured: Outdoors - in accordance with local property by-laws and/or via an approved fence with a self-closing gate and a safety hardcover; Indoors - by a lockable door and a safety hardcover. 10A nearby garden hose connection is recommended for filling and “topping up” the hot tub. Your HYDROPOOL Hot tub is a self-contained pre-plumbed unit, so that no on-site plumbing connections to the residential water supply or drain are required. Simply place the hot tub in the desired location and install as outlined on the following pages. IMPORTANT NOTES 1 Do not lift the hot tub by the plumbing, you may cause leaks. 2 Your hot tub can be installed above grade, in the floor or ground, or half-and-half. 3Ensure that your HYDROPOOL hot tub is properly supported by either a level concrete pad, or a properly constructed deck capable of supporting 1220 kg/m2 (250 lbs./ft.2). If there is a possibility that the pad could shift by freezing/thawing ground movement (such as in clay regions, and/or areas with high water tables) sono-tubes extending below the frost line should be used. 4 Decking should be chosen and constructed in a manner that minimizes the chance of slipping or falling. 5 Level your hot tub using wood shims where necessary, ensuring that the tapered end extends at least 61 cm (24 in.) under the unit. 6 If you do not have a factory installed foamed cabinet, it is assumed that you are building your own custom cabinet, tiling or decking. Please consider the following: IMPORTANT ELECTRICAL SAFETY INSTRUCTIONS Safety comes first. When installing & using this electrical equipment, basic safety precautions should always be followed * 1 READ AND FOLLOW ALL INSTRUCTIONS 2Electrical installation must be performed by qualified persons only (electrician or equivalent). 3Connect only to a dedicated circuit protected by a class ‘A’ two-pole ground fault circuit interrupter (GFCI) 4 Use copper conductors only! 5The hot tub equipment and all electrical plugs, outlets and lights within 1.5m (5ft) of the unit must be G.F.C.I protected. Consult your electrician or local electrical authority for further details. 6A green colored terminal or a terminal marked “G”, “GR”, “Ground”, or “Grounding” is located inside the supply terminal box or compartment. To reduce the risk of electric shock, this terminal must be connected to the grounding means provided in the electric supply service panel with a continuous copper wire equivalent in size to the circuit conductors supplying the equipment. 7At least two lugs marked “BONDING LUGS” are provided on the external surface or on the inside of the supply terminal box or compartment. To reduce the risk of electric shock, connect the local common bonding grid in the area of the hot tub to these terminals with an insulated or bare copper conductor not smaller than No.6 AWG (Canada/Europe) / No.8 AWG (USA). 8All field installed metal components such as rails, ladders, drains or other similar hardware within 3 m (10 ft) of the hot tub shall be bonded to the equipment grounding bus with copper conductors not smaller than No.6 AWG. G.F.C.I./R.C.D. Application Guide for hydropool Self clean & serenity series 2006 models NORTH AMERICA Hydropool Self clean Series Silver Series/Gold Series With blower system and/or Audio system option 40A 50A Platinum Series 50A With blower system and/or Audio or Audio/Video system option 60A Titanium Series/Titanium Plus Series 60A With blower system and/or Audio or Audio/Video system option 60A Limited Edition 50A With blower system and/or Audio or Audio/Video system option 60A Hydropool Serenity Series Silver Series/Gold Series With blower system and/or Audio system option Platinum Series 50A 60A Special Edition 40A 50A With blower system and/or Audio system option Wire Size With blower system and/or Audio system option North America •The minimum wire size for systems that require a 40A GFCI is #8/3 c/w ground (also refered to as #8 gauge / 4 conductor). •The minimum wire size for systems that require a 50A or 60A GFCI is #6/3 c/w ground (also refered to as #6 gauge / 4 conductor). Europe • The minimum wire size for European system is 2.5 mm2 copper wire. 40A 50A EUROPE Hydropool Self clean & Serenity Series All models 20A With blower system and/or Audio or Audio/Video system option 20A Important Notes: • This guide is for standard installations where the wire run is 15 m (50 ft.) or less. For longer wire runs, consult a qualified electrician. • This is the rated maximum amperage draw. Actual amperage draw will vary based on line voltage and optional features. And read this manual thoroughly before *proceeding! 10 North America – GFCI INSTALLATION SIEMENS - TYPICAL O N NOTE THIS - The white Neutral wire from the back of the GFCI MUST be c o n n e c t e d t o a n i nc o m i n g L in e Neutral. The internal mechanism of t he G F C I r e q u i r e s t h i s n eu t r al connection. The GFCI will not work without it. 60 60 O F F TE S T W hite W ire Line Neutral LOAD POW ER LOAD NEUTRAL LOAD POW ER LINE NEUTRAL Fro m Electric Service Pa ne l or Other Source L I N E 2 - I NP UT LI N E 1 - I N PU T IMPORTANT NOTE: Installation of this GFCI- Ci rcu it B reak er, in clu d in g amp er e sizing and selection of conductor size and type, must be accomplished by a qualified e lectrician in accordance with the National Electrical Code, or the Canadian Electrical Code, a nd a ll f edera l, stat e a n d lo c a l c o d e s a n d regulations in effect at the time of installation. GROUND Note : Ground b a r ( i nc l u d e d ) must be installed in panel. GROUND - INPUT GROUND TO SPA To S pa or Pool E qu i pm en t LO A D 2 120 volts LOAD NEUTRAL - 240 volts 120 volts L OA D 1 - square d - TYPICAL Bottom View of G.F.C.I. (Square D) Front View of G.F.C.I. (Square D) WHITE. TBI (NOT APPLICABLE IN EUROPE) 11 WHITE. WHITE.(NEUTRAL). BLACK.(HOT). RED.(HOT). GREEN.(GROUND). GRN.(GROUND). WHITE. RED.(HOT). WHITE. GRN.(GROUND). BLACK.(HOT). BLACK.(HOT). WHITE. BLK.(HOT). RED.(HOT). GRN. WHITE.(NEUTRAL) RED.(HOT). BLACK.(HOT). GRN.(GROUND). RED.(HOT). 1 2 3 4 5 Europe – R.C.D. Installation - Typical House Breaker Box Spa System Box (Neutral) (not applicable in North America) 12 INSTALLING ACCESSORIES When unpacking your new Hydropool hot tub, you will find an accessories bag inside containing • pillows • filter and ice-bucket covers • coloured light lenses (not required for units ordered with optional L.E.D. lighting) • tool for opening the wall fitting to access the light bulb • #10 expansion plug • hose bib adapter (Europe only) PILLOWS Tubular The tubular pillows are a friction fit. Simply compress the ends slightly, and slide into the semi-circular recess above the seat or lounger, with the Hydropool logo facing out. Corner Wrap The corner wrap pillows are pre-installed at the factory and are attached via pin and socket. To remove, grasp ends of pillow and pull away from hot tub seat. To re-install, lineup pins on back of pillow to mounting sockets and press firmly. Although the pillows are designed to remain in-place in the hot tub, to extend the life of the pillows, remove after each use. Waterfall If you received the optional waterfall package, remove the blade from the waterfall receiver fitting in the hot tub (already installed at the factory). Insert the waterfall blade through the front of the special waterfall pillow. The front flange of the waterfall blade will be recessed into the front of the pillow. If it is not recessed, the blade needs to be removed and re-inserted through the opposite side of the pillow. Push the pillow into the semi-circular recess, ensuring that the portion of the blade protruding out of the back of the pillow inserts firmly into the waterfall receiver fitting. 13 FILTER/ICE-BUCKET LIDS The filter and ice-bucket covers provide that finishing touch to your Hydropool hot tub. As the covers are identical to each other, simply place over either opening for a finished appearance. Mood lIGHTing Standard Mood Lighting Press the ‘light’ pad on the topside control to turn the light on and off. LED Mood Lighting optional - Factory Installed Press the ‘light’ pad on the topside control to start the following LED lighting modes. Pressing the ‘light’ pad on/off within 3 seconds cycles through the various ‘light shows’. When the LED lighting is turned off for more than 5 seconds, then turned back on, the system will resume the last ‘light show’. Description of Light Shows: • Mode 1 – Synchronous colour change • Mode 2 – Freeze mode, freezes on selected colour blend from above mode (gives unlimited colour blend selection) • Mode 3 – solid colour blue • Mode 4 – solid colour green • Mode 5 – solid colour red • Mode 6 – solid white (simulated) For systems with optional Galaxy light package: • Mode 7 – Galaxy lights OFF; interior lights ON • Mode 8 – Galaxy lights ON; interior lights OFF Changing Bulbs & Lenses The coloured light lenses supplied with your hot tub (not required for units with optional LED lighting) simply push over the existing clear light lens. SAFETY HARDCOVER LOCKS The safety hard cover is designed to open away from the control area, however, if the hot tub is symmetrical in dimension, the cover can be oriented to open in either direction. Simply place the cover on the hot tub, pull the straps down so that they are fully extended, then release slightly so that there is approximately 6 mm (1/4 in.) of slack. Mark the position on the cabinet, and fasten the receiver clip with the screws provided. Always ensure the safety hard cover is in place and locked whenever the hot tub is not being used. OPTIONAL COVER REMOVER Hydropool offers several different devices to assist in the removal of the safety hard cover. Please refer to the instructions supplied with your particular cover remover for installation. For further information, contact your local Hydropool dealer. 14 FILLING, CHECKING AND STARTING YOUR HOT TUB Although your hot tub was thoroughly water-tested in the factory, some loosening of fittings can occur during shipping. Before any decking, tiling or carpeting is completed around the installation, fill and operate your hot tub to test for leaks (this ensures easy access and inexpensive correction). Check all union connections and plumbing for minor leaks. In the event of a leak, ensure all union connections, pump plugs are tight and o-rings/gaskets are in place. •Fill the hot tub to the recommended level, approximately 19 mm (3/4“) from the top of the skimmer opening. •Visually check all union connections pump plugs and plumbing for minor leaks. In the event of a leak, ensure all union connections and pump plugs are tight and o-rings/gaskets are in place. • Before applying voltage to power-up your hot tub, it is very important that you understand the sequence of events that occur when the system is activated in order that the pump can be primed efficiently and damage to the system can be avoided. Unions • Turn the main power “on” at your electrical panel. •Follow the control instructions for your particular model hot tub to put the pump into low speed see section Hydropool CONTROL Systems – p. 17 Gate Valves PUMP PRIMING/RELEASING AN AIR LOCK On some systems a message will appear on the display indicating that the system is in pump Priming Mode. This mode will last for 4 to 5 minutes before automatically entering the normal operation mode. See complete details for your spa in section HYDROPOOL CONTROL SYSTEMS - p. 17 Hose Bib Proper Water Level •When adding water for the first time, the hot tub should be filled through the skimmer opening (helps to prevent air locks) using a standard garden hose, turning the tap on slowly to prevent damage to the surface by a jerking hose connection. • If the hot tub pump is located below water level, the water should start circulating immediately. If the motor works but you do not notice water circulation within the first 15 seconds, the pump may require priming due to trapped air (referred to as an ‘air lock’). To prime, open the hose-bib to allow trapped air to escape. Close as soon as the water flow from the jets becomes regular. If the pumps have not primed after 2 minutes, and water is not flowing from the jets, DO NOT allow the pumps to continue to run. Turn power off at the main house panel (or GFCI) and try releasing the air again by loosening the union on the discharge side of the pump(s) while the motor is not running. Turn the power back on. If the pumps do not prime after 15 seconds, sometimes momentarily turning the pump(s) off and on will help the system to prime (note: do not do this more than 5 times). •Pull up the handles on the intake and return gate valves Important: Under NO circumstances should the pump(s) (handles are pulled up when valves are open and pushed be allowed to operate without priming beyond 5 minutes, as this may not only cause unwarrantable down when valves are closed). damage to the pump, it may also cause the control system to go into an overheat condition. • Ensure the drain hose-bib is closed. •Ensure that all jets are open. See section JET & FEATURE OPERATION – p. 26 15 •If your hot tub is equipped with the optional Remote Above-Grade Equipment Package, you should close the gate valves on either side of the pump, loosen off the lids on the priming pots, fill with water, re-seal, turn on the pumps and quickly re-open valves. •Turn the pump onto high speed and re-check for leaks. The control system will automatically return the pump to low speed after 15 minutes. •Adjust the hot tub heat control at the topside panel to the desired water temperature. O-ring/ gasket at union connections •Adjust water balance (pH, TA, calcium hardness) to recommended levels and add sanitizor. •The hot tub will require 8-10 hours to reach the desired temperature. Releasing An Air Lock… •Keep insulated safety hard cover on the hot tub, and the air controls closed during the entire heat up process. …Through the pump union Definition: ‘Priming’ a pump is a term used to describe the process in which air trapped in the plumbing and pump wet-end (referred to as an ‘air lock’) is released, allowing the pump to move water efficiently through the plumbing system and to the jets. …Through the Hose bib winter drain Plugs winter Drain Plugs 16 Hydropool Self Clean Series Control Systems North america Hydropool Self Clean – Silver & Gold Series TEMPERATURE CONTROL FUNCTIONALITY AND ADJUSTMENT After you manually exit or the system automatically exits Priming Mode, your hot tub will automatically heat to the factory preset default temperature of 38˚C (100˚F) The topside panel will briefly show the default temperature, and then the display will appear as follows: INITIAL START-UP Before applying voltage to power-up your hot tub, it is very important that you understand the sequence of events that occur when the system is activated in order that the pump can be primed efficiently and damage to the system can be avoided. Note that the water temperature is not yet displayed, as the system requires approximately 2 minutes of water flow through the heater to determine temperature. This is referred to as ‘polling’ and is indicated on the display by the icon. After 2 minutes the display will show the current measured water temperature At initial power-up, this display will appear, and the system will show 4 sets of numbers in succession (ie. 100 then 103 then 15 then 240). These numbers represent the current software revision, and the system input voltage. Press the pad to increase the temperature to the desired setting. The Heat indicator light on the Topside Panel will shimmer for 90 seconds, indicating that the system is not yet heating, then will illuminate solidly to indicate that the heater circuit has been energized and the spa water is being heated. After the initial software indicators are shown, this display will appear. This display is indicating that the system is in pump Priming Mode. This mode will last for 4 to 5 minutes before automatically exiting and entering the normal operation mode. You can also manually exit pump Priming Mode after the pump is primed. The system automatically activates Pump 1 low speed every 30 minutes for at least 2 minutes. After 2 minutes, the spa water temperature is determined. At this point, if the water temperature is lower than the set temperature, P1 will continue to run and the Heat indicator light on the Topside Panel will illuminate. The heater will operate until the water temperature reaches the set temperature point, after which, both the heater and Pump 1 low will automatically turn off. While in this mode, the heater circuit is disabled to allow the priming process to be completed without the possibility of energizing the heater element during low flow or no flow conditions. The system will not automatically activate any of the functions, however, by pushing the pad on the topside control, the pump can be manually activated. Definition: ‘Priming’ a pump is a term used to describe the process in which air trapped in the plumbing and pump wet-end (referred to as an ‘air lock‘) is released, allowing the pump to move water efficiently through the plumbing system and to the jets. To Check/Change the Set Temperature The last measured temperature is constantly displayed on the topside panel. When this pad is pressed once any time during normal operation, the display will show the set temperature for 3 seconds. Press this pad a second time to increase or decrease the set temperature. To change the direction of the temperature settings (ie. lower vs. raise the temperature), allow the display to revert back to the current water temperature then press the pad again. PUMP PRIMING MODE As soon as ‘PR’ is indicated on the topside panel, push the pad to start Pump 1 in low speed, then again to switch to high speed to facilitate priming. See FILLING, CHECKING AND STARTING YOUR HOT TUB - p. 15 for complete instructions on pump priming. Once pump priming has been successfully completed, press the pad to turn off the pump. Next, manually exit Priming Mode by pressing the pad. If you do not manually exit Priming Mode, it will automatically terminate after 4 to 5 minutes. Be sure that the pump is primed before exiting this mode. The temperature can be adjusted from 27˚C (80˚F) to 40˚C (104˚F) in 1˚ increments. 17 PUMP / JETS FUNCTION The display will show: both day and night cycles day cycle only night cycle only Press this pad to activate the pump 1st press – turns on low speed 2nd press – turns on high speed 3rd press – turns off pump Press to select the number of filter cycles When low speed is already operating, the 1st press of the pad puts the pump directly into high speed. Low speed starts automatically every 30 minutes to measure water temperature (in STANDARD Mode only – see MODE FUNCTION), when a filter cycle is activated, or when a freeze condition is detected. When the blower (optional) is manually activated, the pump low speed is automatically activated and operates until the blower times out. If the blower is turned on even briefly, and then turned back off, low speed will operate for a minimum of 2 minutes. For continuous filtration, select F12 and PUMP AUTOMATIC TIME-OUT High speed – 15 minutes Low speed – 2 hours Press to cycle though to the desired mode Press to select and confirm the selection. CLEAN-UP CYCLES The Clean-up Cycle begins 30 minutes after the pump or blower have been turned off or have automatically timed-out. The pump low speed and the ozonator (optional) will operate for one hour. STANDARD MODE The system automatically starts the pump low speed every 30 minutes to measure water temperature, and maintain the set temperature. The display will show (North American Systems)/ (European Systems) briefly, then the last measured water temperature. The current water temperature is displayed only after the pump has been operating for at least 2 minutes. Press MODE FUNCTION A combination of keypads is used to change hot tub operation to either ‘STANDARD’, ‘ECONOMY’ or ‘SLEEP’ mode. PROGRAMMING Mode Function Press then - the current mode setting will flash on the display FILTER CYCLES The system will automatically activate the pump low speed to filter the water either once or twice each day, and can be programmed by the user. The first filter cycle (“day”) begins 6 minutes after the spa is initially powered up. The second filter cycle (“night”) begins 12 hours after the start of the first filter cycle. The filter cycle duration - length of time the pump low runs - is programmable from 1 to 12 hours (F1 to F12). The factory default is 2 hours, twice daily. ECONOMY MODE The system will heat to the set temperature only during the filter cycles. The display will show (North American Systems)/ (European Systems) when the temperature is non-current. When the temperature is current, the display will alternate between / and the water temperature. PROGRAMMING Filter Cycles To change the factory default filter cycle settings Press then be displayed Press to exit programming mode and save changes. - the current filter cycle duration will to configure the filter cycle frequency 18 BLOWER OPTIONAL – Factory Installed STANDARD-In-ECONOMY MODE For North American systems only Press this pad to turn the blower on and off. While the system is in Economy Mode, pressing the pad or the pad will cause the system to activate Standard Mode for 1 hour, after which the system will revert back to Economy Mode. The display will show while in this mode. Pressing the then pads during this time will put the system back into Economy Mode immediately. The system will automatically turn off the blower after 15 minutes. PURGE CYCLES Blower only The system automatically activates the blower for 30 seconds at the beginning of each filter cycle to introduce fresh, sanitized water into these plumbing circuits. SLEEP MODE The system will heat to within 10˚C (20˚F) of the set temperature only during filter cycles. The display will show (North American Systems)/ (European Systems) until the mode is changed. OZONATOR OPTIONAL The ozonator operates during FILTER CYCLES and CLEAN UP CYCLES only FREEZE PROTECTION STANDBY / DRAIN ASSIST If the temperature sensor detects a drop to 7˚C (44˚F) within the heater chamber, the system automatically activates the pump to provide freeze protection. The pump will operate until the temperature reaches 7.2˚C (45˚F), and then will continue to operate for an additional 4 minutes before returning to normal system mode. The standby/drain assist feature stops the system from operating automatically, allowing for convenient filter cartridge removal and for safe draining of the hot tub. The following pads must be pressed within 3 seconds of each other. Press then the pad - the display will flash . All functions will turn off, but the pump low speed can be activated (by pressing the pad) to facilitate draining the hot tub - the display will show DRN (North American Systems)/DN (European Systems). Press any pad other than the pad to return the system to normal operation. See DRAINING YOUR HOT TUB – p. 61 - for detailed instructions. MOOD LIGHTING STANDARD MOOD LIGHTING Press the pad on the topside control to turn the light on and off. LED MOOD LIGHTING OPTIONAL – Factory Installed Press the pad on the topside control to start the selection of LED lighting modes. Pressing the pad on/off within 3 seconds cycles through the various ‘light shows’. When the LED lighting is turned off for more than 5 seconds, then turned back on, the system will resume the last ‘light show’. For complete description of ‘light shows’, see MOOD LIGHTING – p. 14 The system will automatically turn off the mood lighting after 4 hours. 19 Hydropool Self Clean Series Control Systems North america Hydropool Self Clean – Platinum & Titanium Series PUMP PRIMING MODE As soon as PRIMING MODE is indicated on the topside panel, push the left pad to start Pump 1 in low speed, then again to switch to high speed. Push the center pad and right pad to start Flashing Pump 2 and *Pump 3 respectively Pump Icon(s) (*Titanium Series only). These are both single speed - high only. All of the pumps will now be operating in high speed to facilitate priming. See FILLING, CHECKING AND STARTING YOUR HOT TUB - p. 15 for complete instructions on pump priming. Titanium Once pump priming has been successfully completed, press the pads to turn off the pumps. Next, manually exit Priming Mode by pressing either the pad or the pad. If you do not manually exit Priming Mode, it will automatically terminate after 4 to 5 minutes. Be sure that the pumps have been primed before exiting this mode. Platinum INITIAL START-UP Before applying voltage to power-up your hot tub, it is very important that you understand the sequence of events that occur when the system is activated in order that the pumps can be primed efficiently and damage to the pumps can be avoided. TEMPERATURE CONTROL FUNCTIONALITY and Adjustment After you manually exit or the system automatically exits Priming Mode, your hot tub will automatically heat to the factory preset default temperature of 38˚C (100˚F). The topside panel will briefly show the default temperature, and then the display will appear as follows: Note that the water temperature is not yet displayed, as the system requires approximately 2 minutes of water flow through the heater to determine temperature. This is referred to as ‘polling’ and is indicated on the display by the Flashing Pump 1 Low Speed Icon icon. After 2 minutes the display will show the current measured water temperature. At initial power-up, this display will appear, and the system will show 4 sets of numbers in succession (ie. 100 then 113 then 15 then 240). These numbers represent the current software revision, and the system input voltage. After the initial software indicators are shown, this display will appear. This display is indicating that the system is in pump Priming Mode. This mode will last for 4 to 5 minutes before automatically Flashing exiting and entering the normal operation mode. You can also manually exit the pump Priming Mode after the pumps are primed. While in this mode, the heater circuit is disabled to allow the priming process to be completed without the possibility of energizing the heater element during low flow or no flow conditions. The system will not automatically activate any of the functions, however, by pushing the pads on the topside control, the pumps can be manually activated Press the pad to increase the temperature to the desired setting. The icon will appear on the display indicating that the heater has been activated. Flashing Pump 1 Low speed Icon Definition: ‘Priming’ a pump is a term used to describe the process in which air trapped in the plumbing and pump wet-end (referred to as an ‘air lock‘) is released, allowing the pump to move water efficiently through the plumbing system and to the jets. 20 The system automatically activates Pump 1 low speed every 30 minutes for at least 2 minutes. After 2 minutes, the spa water temperature is determined. At this point, if the water temperature is lower than the set temperature, P1 will continue to run and the icon will appear on the display. The heater will operate until the water temperature reaches the set temperature point, after which, both the heater and Pump 1 low will automatically turn off. To Check/Change the set temperature The last measured temperature is constantly displayed on the topside control. When either of these pads is pressed once, the display will show the set temperature. Press either pad a second time to increase or decrease the set temperature. After 3 seconds the display will once again show the last measured temperature. PUMPS AUTOMATIC TIME-OUT P1 high speed, P2 & P3 – 15 minutes P1 low speed – 4 hours. CLEAN-UP CYCLES The Clean-up Cycle begins 30 minutes after the pump(s) or blower have been turned off or have automatically timed-out. P1 low speed and the ozonator (optional) will operate for one hour. The temperature can be adjusted from 27˚C (80˚F) to 40˚C (104˚F) in 1˚ increments SETTING THE SYSTEM CLOCK TIME Special note for European systems Heater works only on pump 1 low speed and turns off whenever another pump is activated (exception: 3-Phase installations) The flashes on the topside control display upon initial start-up. This reminder will disappear once the clock time is programmed. Press PUMPS / JETS FUNCTION from left to right on topside control – P1, P2, *P3 (*Titanium series only) PUMP 1 (P1) 1st press – turns on low speed – 2nd press – turns on high speed – 3rd press – turns off pump – then to enter programming mode. To set the hour: Press time by 1 hour. Press the P1 icon spins slowly the P1 icon spins faster no icon displayed when P1 is off or - each press changes the to enter, and to continue to set minutes. To set minutes: Press time by 1 minute. or - each press changes the Press the pad again to continue to the filter cycle programming mode (see below) When P1 low is already operating, the 1st press of the P1 pad puts the pump directly into high speed. OR Press the Low speed P1 starts automatically every 30 minutes to measure water temperature (in STANDARD Mode only – see MODE FUNCTION), when a filter cycle is activated, or when a freeze condition is detected. pad to exit programming mode. During normal operation, pressing the the current time for 3 seconds. pad will display FILTER CYCLES When P2, P3 or the blower is manually activated, P1 low speed is automatically activated and operates until the pump(s) or blower time out. If P2, P3 or the blower is turned on even briefly, and then turned back off, P1 low will operate for a minimum of 2 minutes. Once the system clock time has been programmed, the system will automatically activate P1 low speed to filter the water for 2 hours twice each day. During the filter cycle, the display will show FILTER 1 or FILTER 2. Factory preset default PUMP 2 (P2) 1st press – turns on high speed – the P2 icon spins fast 2nd press – turns off pump – no icon displayed when P2 is off. PUMP 3 (P3) – Titanium series only 1st press – turns on high speed – the P3 icon spins fast 2nd press – turns off pump – no icon displayed when P3 is off. ‘FILTER 1’ the system automatically activates P1 low to operate from 8 AM to 10 AM. The filter 1 LED indicator will light during filter cycle 1 operation. ‘FILTER 2’ the system automatically activates P1 low to operate from 8 PM to 10 PM The filter 2 LED indicator will light during filter cycle 2 operation. 21 PURGE CYCLES The system automatically activates P2 & P3 for 5 minutes, and the blower for 30 seconds at the beginning of each filter cycle to introduce fresh, sanitized water into these plumbing circuits. PROGRAMMING Filter Cycles To change the factory default filter cycle settings Press then then then within three seconds. (You will already have advanced to this point if you pressed after completing the SETTING THE SYSTEM CLOCK TIME sequence) MODE FUNCTION This pad is used to change hot tub operation to either STANDARD, ECONOMY or SLEEP mode. Press to enter mode programming and press to select the desired mode. The LCD will flash until is pressed again to confirm the selection. At this point PROGRAM, FILTER 1 and START TIME will appear on the display To set the hour: Press time by 1 hour. Press - each press changes the STANDARD MODE The system automatically starts P1 low speed every 30 minutes to measure water temperature, and maintain the set temperature. The word STANDARD will remain on the display along with the last measured temperature. The current water temperature is displayed only after the pump has been operating for at least 2 minutes. to enter, and to continue to set minutes. To set minutes: Press time by 5 minutes Press or or - each press changes the to enter, and to proceed ECONOMY MODE The system will heat to the set temperature only during the filter cycles. The display will show the word ECONOMY. At this point PROGRAM, FILTER 1 and END TIME will appear on the display To set the hour: Press time by 1 hour. Press STANDARD-In-ECONOMY MODE While the system is in Economy Mode, pressing any pad or the pad will cause the system to activate Standard Mode for 1 hour, after which the system will revert back to Economy Mode. Pressing the pad during this time will put the system back into Economy Mode immediately. - each press changes the to enter, and to continue to set minutes To set minutes: Press time by 5 minutes Press or or - each press changes the SLEEP MODE The system will heat to within 10˚C (20˚F) of the set temperature only during filter cycles. The display will show the word SLEEP. to enter, and to proceed At this point PROGRAM, FILTER 2 and START TIME will appear on the display LIQUID CRYSTAL DISPLAY (LCD) Adjust time as above Press to enter, and to proceed At this point PROGRAM, FILTER 2 and END TIME will appear on the display Continually provides feedback on the operating status of the hot tub. Icons indicate various functions and programming information. LCD INVERT This feature inverts the LCD readout for convenient viewing from inside the hot tub. To invert the readout, Adjust time as above Press the pad again to enter the filter cycle times into the system and exit programming mode. Platinum Series: press Titanium Series: press The ‘F1’ light on the left side of the topside control panel will illuminate to indicate that the system is in Filter 1 cycle. or then To return the LCD readout to normal viewing (from outside of the hot tub), repeat. The ‘F2’ light on the left side of the topside control panel will illuminate to indicate that the system is in Filter 2 cycle. 22 Topside Panel Lock Features All functions will turn off, but P1 low speed can be activated (by pressing the P1 pad) to facilitate draining the hot tub and the display will show (Platinum series) DRAINING (Titanium series) TEMPERATURE LOCK The temperature lock feature prevents unauthorized temperature adjustment of the hot tub water. When the temperature lock is activated, all automatic functions will continue to operate normally. Press any pad other than the P1 pad to return the system to normal operation. See section DRAINING YOUR HOT TUB – p. 61 - for detailed instructions. The following pads must be pressed within 3 seconds of each other to activate the lock: then then P1 MOOD LIGHTING then STANDARD MOOD LIGHTING Press the pad on the topside control to turn the light on and off. TEMPERATURE Unlock The following pads must be pressed within 3 seconds of each other to deactivate the lock: then then P1 then LED MOOD LIGHTING OPTIONAL – Factory Installed Press the pad on the topside control to start the selection of LED lighting modes. Pressing the pad on/off within 3 seconds cycles through the various ‘light shows’. When the LED lighting is turned off for more than 5 seconds, then turned back on, the system will resume the last ‘light show’. For complete description of ‘light shows’, see MOOD LIGHTING – p. 14 When locked, the TL light on the left side of the topside control panel will illuminate. Only the topside control panel temperature pads will be deactivated. TOPSIDE PANEL Full LOCK The topside panel lock feature prevents unauthorized use of the hot tub controls. When the topside control panel lock is activated, all automatic functions will continue to operate normally. The system will automatically turn off the mood lighting after 4 hours. The following pads must be pressed within 3 seconds of each other to activate the lock: then P1 BLOWER OPTIONAL – Factory Installed then 1st press – turns on high speed – the icon is displayed 2nd press – turns on low speed – the icon is displayed 3rd press – turns off blower – no icon displayed when blower is off The system will automatically turn off the blower after 15 minutes TOPSIDE PANEL Unlock The following pads must be pressed within 3 seconds of each other to deactivate the lock: then P1 then When locked, the PL light on the left side of the topside control panel will illuminate. All of the topside control panel pads will be deactivated except for the pad. OZONATOR OPTIONAL The ozonator operates during FILTER CYCLES and CLEAN UP CYCLES only. The display will show the O3 icon while the ozonator is operating. STANDBY / DRAIN ASSIST The standby/drain assist feature stops the system from operating automatically, allowing for convenient filter cartridge removal and for safe draining of the hot tub. The following pads must be pressed within 3 seconds of each other. Press then the P2 pad and the display will flash: SBY (Platinum series) STANDBY (Titanium series) FREEZE PROTECTION If the temperature sensor detects a drop to 7˚C (44˚F) within the heater chamber, the system automatically activates all pumps to provide freeze protection. The pumps will operate until the temperature reaches 7.2˚C (45˚F), and then will continue to operate for an additional 4 minutes before returning to normal system mode. 23 Hydropool Self Clean Series Control Systems Europe Hydropool Self Clean – Silver & Gold Series TEMPERATURE CONTROL FUNCTIONALITY AND ADJUSTMENT After you manually exit or the system automatically exits Priming Mode, your hot tub will automatically heat to the factory preset default temperature of 38˚C (100˚F) The topside panel will briefly show the default temperature, and then the display will appear as follows: INITIAL START-UP Before applying voltage to power-up your hot tub, it is very important that you understand the sequence of events that occur when the system is activated in order that the pump can be primed efficiently and damage to the system can be avoided. Note that the water temperature is not yet displayed, as the system requires approximately 2 minutes of water flow through the heater to determine temperature. This is referred to as ‘polling’ and is indicated on the display by the icon. After 2 minutes the display will show the current measured water temperature At initial power-up, this display will appear, and the system will show 4 sets of numbers in succession (ie. 100 then 103 then 15 then 240). These numbers represent the current software revision, and the system input voltage. Press the pad to increase the temperature to the desired setting. The Heat indicator light on the Topside Panel will shimmer for 90 seconds, indicating that the system is not yet heating, then will illuminate solidly to indicate that the heater circuit has been energized and the spa water is being heated. After the initial software indicators are shown, this display will appear. This display is indicating that the system is in pump Priming Mode. This mode will last for 4 to 5 minutes before automatically exiting and entering the normal operation mode. You can also manually exit pump Priming Mode after the pump is primed. The system automatically activates Pump 1 low speed every 30 minutes for at least 2 minutes. After 2 minutes, the spa water temperature is determined. At this point, if the water temperature is lower than the set temperature, P1 will continue to run and the Heat indicator light on the Topside Panel will illuminate. The heater will operate until the water temperature reaches the set temperature point, after which, both the heater and Pump 1 low will automatically turn off. While in this mode, the heater circuit is disabled to allow the priming process to be completed without the possibility of energizing the heater element during low flow or no flow conditions. The system will not automatically activate any of the functions, however, by pushing the pad on the topside control, the pump can be manually activated. Definition: ‘Priming’ a pump is a term used to describe the process in which air trapped in the plumbing and pump wet-end (referred to as an ‘air lock‘) is released, allowing the pump to move water efficiently through the plumbing system and to the jets. To Check/Change the Set Temperature The last measured temperature is constantly displayed on the topside panel. When this pad is pressed once any time during normal operation, the display will show the set temperature for 3 seconds. Press this pad a second time to increase or decrease the set temperature. To change the direction of the temperature settings (ie. lower vs. raise the temperature), allow the display to revert back to the current water temperature then press the pad again. PUMP PRIMING MODE As soon as ‘PR’ is indicated on the topside panel, push the pad to start Pump 1 in low speed, then again to switch to high speed to facilitate priming. See FILLING, CHECKING AND STARTING YOUR HOT TUB - p. 15 for complete instructions on pump priming. Once pump priming has been successfully completed, press the pad to turn off the pump. Next, manually exit Priming Mode by pressing the pad. If you do not manually exit Priming Mode, it will automatically terminate after 4 to 5 minutes. Be sure that the pump is primed before exiting this mode. The temperature can be adjusted from 27˚C (80˚F) to 40˚C (104˚F) in 1˚ increments. 24 PUMP / JETS FUNCTION PROGRAMMING Filter Cycles To change the factory default filter cycle settings 1st press – turns on low speed 2nd press – turns on high speed 3rd press – turns off pump Press then be displayed Press this pad to activate the pump When low speed is already operating, the 1st press of the pad puts the pump directly into high speed. Low speed starts automatically every 30 minutes to measure water temperature (in STANDARD Mode only – see MODE FUNCTION), when a filter cycle is activated, or when a freeze condition is detected. When the blower (optional) is manually activated, the pump low speed is automatically activated and operates until the blower times out. If the blower is turned on even briefly, and then turned back off, low speed will operate for a minimum of 2 minutes. - the current filter cycle duration will Press again to adjust the filter cycle duration Press to exit programming mode and save changes. MODE FUNCTION A combination of keypads is used to change hot tub operation to either ‘STANDARD’, ‘ECONOMY’ or ‘SLEEP’ mode. PROGRAMMING Mode Function Press then - the current mode setting will flash on the display Press PUMP AUTOMATIC TIME-OUT High speed – 15 minutes Low speed – 2 hours then repeatedly to select mode STANDARD MODE The system automatically starts the pump low speed every 30 minutes to measure water temperature, and maintain the set temperature. The display will show (North American Systems)/ (European Systems) briefly, then the last measured water temperature. The current water temperature is displayed only after the pump has been operating for at least 2 minutes. CLEAN-UP CYCLES The Clean-up Cycle begins 30 minutes after the pump or blower have been turned off or have automatically timed-out. The pump low speed and the ozonator (optional) will operate for one hour. FILTER CYCLES ECONOMY MODE The system will heat to the set temperature only during the filter cycles. The display will show (North American Systems)/ (European Systems) when the temperature is non-current. When the temperature is current, the display will alternate between / and the water temperature. The system will automatically activate the pump low speed to filter the water either once or twice each day, and can be programmed by the user. The first filter cycle (“day”) begins 6 minutes after the spa is initially powered up. The second filter cycle (“night”) begins 12 hours after the start of the first filter cycle. The filter cycle duration - length of time the pump low runs - is programmable from 1 to 12 hours (F1 to F12). The factory default is 2 hours, twice daily. 25 BLOWER OPTIONAL – Factory Installed STANDARD-In-ECONOMY MODE For North American systems only Press this pad to turn the blower on and off. While the system is in Economy Mode, pressing the pad or the pad will cause the system to activate Standard Mode for 1 hour, after which the system will revert back to Economy Mode. The display will show while in this mode. Pressing the then pads during this time will put the system back into Economy Mode immediately. The system will automatically turn off the blower after 15 minutes. PURGE CYCLES Blower only The system automatically activates the blower for 30 seconds at the beginning of each filter cycle to introduce fresh, sanitized water into these plumbing circuits. SLEEP MODE The system will heat to within 10˚C (20˚F) of the set temperature only during filter cycles. The display will show (North American Systems)/ (European Systems) until the mode is changed. OZONATOR OPTIONAL The ozonator operates during FILTER CYCLES and CLEAN UP CYCLES only FREEZE PROTECTION STANDBY / DRAIN ASSIST If the temperature sensor detects a drop to 7˚C (44˚F) within the heater chamber, the system automatically activates the pump to provide freeze protection. The pump will operate until the temperature reaches 7.2˚C (45˚F), and then will continue to operate for an additional 4 minutes before returning to normal system mode. The standby/drain assist feature stops the system from operating automatically, allowing for convenient filter cartridge removal and for safe draining of the hot tub. The following pads must be pressed within 3 seconds of each other. Press then the pad - the display will flash . All functions will turn off, but the pump low speed can be activated (by pressing the pad) to facilitate draining the hot tub - the display will show DRN (North American Systems)/DN (European Systems). Press any pad other than the pad to return the system to normal operation. See DRAINING YOUR HOT TUB – p. 61 - for detailed instructions. MOOD LIGHTING STANDARD MOOD LIGHTING Press the pad on the topside control to turn the light on and off. LED MOOD LIGHTING OPTIONAL – Factory Installed Press the pad on the topside control to start the selection of LED lighting modes. Pressing the pad on/off within 3 seconds cycles through the various ‘light shows’. When the LED lighting is turned off for more than 5 seconds, then turned back on, the system will resume the last ‘light show’. For complete description of ‘light shows’, see MOOD LIGHTING – p. 14 The system will automatically turn off the mood lighting after 4 hours. 26 Hydropool Self Clean Series Control Systems Europe Hydropool Self Clean – Platinum & Titanium Series PUMP PRIMING MODE As soon as PRIMING MODE is indicated on the topside panel, push the left pad to start Pump 1 in low speed, then again to switch to high speed. Push the center pad and right pad to start Flashing Pump 2 and *Pump 3 respectively Pump Icon(s) (*Titanium Series only). These are both single speed - high only. All of the pumps will now be operating in high speed to facilitate priming. See FILLING, CHECKING AND STARTING YOUR HOT TUB - p. 15 for complete instructions on pump priming. Titanium Once pump priming has been successfully completed, press the pads to turn off the pumps. Next, manually exit Priming Mode by pressing either the pad or the pad. If you do not manually exit Priming Mode, it will automatically terminate after 4 to 5 minutes. Be sure that the pumps have been primed before exiting this mode. Platinum INITIAL START-UP Before applying voltage to power-up your hot tub, it is very important that you understand the sequence of events that occur when the system is activated in order that the pumps can be primed efficiently and damage to the pumps can be avoided. TEMPERATURE CONTROL FUNCTIONALITY and Adjustment After you manually exit or the system automatically exits Priming Mode, your hot tub will automatically heat to the factory preset default temperature of 38˚C (100˚F). The topside panel will briefly show the default temperature, and then the display will appear as follows: Note that the water temperature is not yet displayed, as the system requires approximately 2 minutes of water flow through the heater to determine temperature. This is referred to as ‘polling’ and is indicated on the display by the Flashing Pump 1 Low Speed Icon icon. After 2 minutes the display will show the current measured water temperature. At initial power-up, this display will appear, and the system will show 4 sets of numbers in succession (ie. 100 then 113 then 15 then 240). These numbers represent the current software revision, and the system input voltage. After the initial software indicators are shown, this display will appear. This display is indicating that the system is in pump Priming Mode. This mode will last for 4 to 5 minutes before automatically Flashing exiting and entering the normal operation mode. You can also manually exit the pump Priming Mode after the pumps are primed. While in this mode, the heater circuit is disabled to allow the priming process to be completed without the possibility of energizing the heater element during low flow or no flow conditions. The system will not automatically activate any of the functions, however, by pushing the pads on the topside control, the pumps can be manually activated Press the pad to increase the temperature to the desired setting. The icon will appear on the display indicating that the heater has been activated. Flashing Pump 1 Low speed Icon Definition: ‘Priming’ a pump is a term used to describe the process in which air trapped in the plumbing and pump wet-end (referred to as an ‘air lock‘) is released, allowing the pump to move water efficiently through the plumbing system and to the jets. 27 The system automatically activates Pump 1 low speed every 30 minutes for at least 2 minutes. After 2 minutes, the spa water temperature is determined. At this point, if the water temperature is lower than the set temperature, P1 will continue to run and the icon will appear on the display. The heater will operate until the water temperature reaches the set temperature point, after which, both the heater and Pump 1 low will automatically turn off. To Check/Change the set temperature The last measured temperature is constantly displayed on the topside control. When either of these pads is pressed once, the display will show the set temperature. Press either pad a second time to increase or decrease the set temperature. After 3 seconds the display will once again show the last measured temperature. PUMP 3 (P3) – Titanium series 1st press – turns on high speed – 2nd press – turns off pump – only the P3 icon spins fast no icon displayed when P3 is off. PUMPS AUTOMATIC TIME-OUT P1 high speed, P2 & P3 – 15 minutes P1 low speed – 4 hours. The temperature can be adjusted from 27˚C (80˚F) to 40˚C (104˚F) in 1˚ increments Important note Heater works only on pump 1 low speed and turns off whenever another pump is activated (exception: 3-Phase installations) CLEAN-UP CYCLES The Clean-up Cycle begins 30 minutes after the pump(s) or blower have been turned off or have automatically timed-out. P1 low speed and the ozonator (optional) will operate for one hour. PUMPS / JETS FUNCTION SETTING THE SYSTEM CLOCK TIME from left to right on topside control – P1, P2, *P3 (*Titanium series only) PUMP 1 (P1) 1st press – turns on low speed – 2nd press – turns on high speed – 3rd press – turns off pump – The flashes on the topside control display upon initial start-up. This reminder will disappear once the clock time is programmed. the P1 icon spins slowly the P1 icon spins faster no icon displayed when P1 is off Press then to enter programming mode. To set the hour: Press time by 1 hour. Press When P1 low is already operating, the 1st press of the P1 pad puts the pump directly into high speed. or - each press changes the to enter, and to continue to set minutes. To set minutes: Press time by 1 minute. or - each press changes the Low speed P1 starts automatically every 30 minutes to measure water temperature (in STANDARD Mode only – see MODE FUNCTION), when a filter cycle is activated, or when a freeze condition is detected. Press the pad again to continue to the filter cycle programming mode (see below) When P2, P3 or the blower is manually activated, P1 low speed is automatically activated and operates until the pump(s) or blower time out. If P2, P3 or the blower is turned on even briefly, and then turned back off, P1 low will operate for a minimum of 2 minutes. Press the PUMP 2 (P2) 1st press – turns on high speed – 2nd press – turns off pump – Once the system clock time has been programmed, the system will automatically activate P1 low speed to filter the water for 2 hours twice each day. During the filter cycle, the display will show FILTER 1 or FILTER 2. OR pad to exit programming mode. During normal operation, pressing the the current time for 3 seconds. pad will display FILTER CYCLES the P2 icon spins fast no icon displayed when P2 is off. Factory preset default Important note For systems connected to a 16A electrical supply service, pump 2 and blower cannot operate simultaneously. ‘FILTER 1’ the system automatically activates P1 low to operate from 8 AM to 10 AM. The filter 1 LED indicator will light during filter cycle 1 operation. ‘FILTER 2’ the system automatically activates P1 low to operate from 8 PM to 10 PM The filter 2 LED indicator will light during filter cycle 2 operation. 28 PURGE CYCLES The system automatically activates P2 & P3 for 5 minutes, and the blower for 30 seconds at the beginning of each filter cycle to introduce fresh, sanitized water into these plumbing circuits. PROGRAMMING Filter Cycles To change the factory default filter cycle settings Press then then then within three seconds. (You will already have advanced to this point if you pressed after completing the SETTING THE SYSTEM CLOCK TIME sequence) MODE FUNCTION This pad is used to change hot tub operation to either STANDARD, ECONOMY or SLEEP mode. Press to enter mode programming and press to select the desired mode. The LCD will flash until is pressed again to confirm the selection. At this point PROGRAM, FILTER 1 and START TIME will appear on the display To set the hour: Press time by 1 hour. Press - each press changes the STANDARD MODE The system automatically starts P1 low speed every 30 minutes to measure water temperature, and maintain the set temperature. The word STANDARD will remain on the display along with the last measured temperature. The current water temperature is displayed only after the pump has been operating for at least 2 minutes. to enter, and to continue to set minutes. To set minutes: Press time by 5 minutes Press or or - each press changes the to enter, and to proceed ECONOMY MODE The system will heat to the set temperature only during the filter cycles. The display will show the word ECONOMY. At this point PROGRAM, FILTER 1 and END TIME will appear on the display To set the hour: Press time by 1 hour. Press STANDARD-In-ECONOMY MODE While the system is in Economy Mode, pressing any pad or the pad will cause the system to activate Standard Mode for 1 hour, after which the system will revert back to Economy Mode. Pressing the pad during this time will put the system back into Economy Mode immediately. - each press changes the to enter, and to continue to set minutes To set minutes: Press time by 5 minutes Press or or - each press changes the SLEEP MODE The system will heat to within 10˚C (20˚F) of the set temperature only during filter cycles. The display will show the word SLEEP. to enter, and to proceed At this point PROGRAM, FILTER 2 and START TIME will appear on the display LIQUID CRYSTAL DISPLAY (LCD) Adjust time as above Press to enter, and to proceed At this point PROGRAM, FILTER 2 and END TIME will appear on the display Continually provides feedback on the operating status of the hot tub. Icons indicate various functions and programming information. LCD INVERT This feature inverts the LCD readout for convenient viewing from inside the hot tub. To invert the readout, Adjust time as above Press the pad again to enter the filter cycle times into the system and exit programming mode. Platinum Series: press Titanium Series: press The ‘F1’ light on the left side of the topside control panel will illuminate to indicate that the system is in Filter 1 cycle. or then To return the LCD readout to normal viewing (from outside of the hot tub), repeat. The ‘F2’ light on the left side of the topside control panel will illuminate to indicate that the system is in Filter 2 cycle. 29 Topside Panel Lock Features All functions will turn off, but P1 low speed can be activated (by pressing the P1 pad) to facilitate draining the hot tub and the display will show (Platinum series) DRAINING (Titanium series) TEMPERATURE LOCK The temperature lock feature prevents unauthorized temperature adjustment of the hot tub water. When the temperature lock is activated, all automatic functions will continue to operate normally. Press any pad other than the P1 pad to return the system to normal operation. See section DRAINING YOUR HOT TUB – p. 61 - for detailed instructions. The following pads must be pressed within 3 seconds of each other to activate the lock: then then P1 MOOD LIGHTING then STANDARD MOOD LIGHTING Press the pad on the topside control to turn the light on and off. TEMPERATURE Unlock The following pads must be pressed within 3 seconds of each other to deactivate the lock: then then P1 then LED MOOD LIGHTING OPTIONAL – Factory Installed Press the pad on the topside control to start the selection of LED lighting modes. Pressing the pad on/off within 3 seconds cycles through the various ‘light shows’. When the LED lighting is turned off for more than 5 seconds, then turned back on, the system will resume the last ‘light show’. For complete description of ‘light shows’, see MOOD LIGHTING – p. 14 When locked, the TL light on the left side of the topside control panel will illuminate. Only the topside control panel temperature pads will be deactivated. TOPSIDE PANEL Full LOCK The topside panel lock feature prevents unauthorized use of the hot tub controls. When the topside control panel lock is activated, all automatic functions will continue to operate normally. The system will automatically turn off the mood lighting after 4 hours. The following pads must be pressed within 3 seconds of each other to activate the lock: then P1 BLOWER OPTIONAL – Factory Installed then 1st press – turns on high speed – the icon is displayed 2nd press – turns on low speed – the icon is displayed 3rd press – turns off blower – no icon displayed when blower is off The system will automatically turn off the blower after 15 minutes TOPSIDE PANEL Unlock The following pads must be pressed within 3 seconds of each other to deactivate the lock: then P1 then When locked, the PL light on the left side of the topside control panel will illuminate. All of the topside control panel pads will be deactivated except for the pad. Important note For systems connected to a 16A electrical supply service, pump 2 and blower cannot operate simultaneously. STANDBY / DRAIN ASSIST The standby/drain assist feature stops the system from operating automatically, allowing for convenient filter cartridge removal and for safe draining of the hot tub. The following pads must be pressed within 3 seconds of each other. Press then the P2 pad and the display will flash: SBY (Platinum series) STANDBY (Titanium series) OZONATOR OPTIONAL The ozonator operates during FILTER CYCLES and CLEAN UP CYCLES only. The display will show the O3 icon while the ozonator is operating. FREEZE PROTECTION If the temperature sensor detects a drop to 7˚C (44˚F) within the heater chamber, the system automatically activates all pumps to provide freeze protection. The pumps will operate until the temperature reaches 7.2˚C (45˚F), and then will continue to operate for an additional 4 minutes before returning to normal system mode. 30 Topside Panel Display Messages / / / / (solid) Overheat – Spa has shut down. One of the sensors has detected 119˚F (48˚C) at the heater. Spa has shut down – sensor plugged into Sensor ‘B’ port not working. / DO NOT ENTER WATER! Remove cover and allow water to cool. Reset system by pressing any topside control panel pad. If spa does not reset, shut off power and call your dealer. Sensors are out of balance – If topside display alternates between temperature and SNS, then occurrence may be temporary and will correct itself. The spa shuts down completely when the SNS message is flashing on the display. POSSIBLE CAUSES OF OVERHEATING • filter cycle too long or overlapping (pump running for extended periods of time) • isolation/gate valves partially closed • extremely hot weather/high ambient temperatures • defective sensor wire / / / A substantial difference in temperature between the sensors has been detected – this could indicate a flow problem. Check water level in spa and add if necessary. If water level is okay, make sure that pumps are primed and all gate valves are fully opened. / (flashing) Overheat – Spa has shut down. One of the sensors has detected that the spa water is 112˚F (44.5˚C). / (solid) Indicates that system is detecting pressure at the pressure switch when the pump is not operating (switch is staying closed). DO NOT ENTER WATER! Remove cover and allow water to cool. At 107˚F the spa should automatically reset. If spa does not reset, shut off power and call your dealer. Possible causes: • static pressure (weight of water) in plumbing keeping pressure switch closed; usually associated with remote equipment location • diaphragm in pressure switch coated with minerals due to improper spa water maintenance POSSIBLE CAUSES OF OVERHEATING • filter cycle too long or overlapping (pump running for extended periods of time) • isolation/gate valves partially closed • extremely hot weather/high ambient temperatures • defective sensor wire / (Flashing) indicates that the system is not detecting pressure at the pressure switch while the pump is operating (switch is staying open). / Potential freeze condition detected. Pumps and blower will automatically activate when temperature drops to 40˚F (4˚C) regardless of spa mode. / Possible causes: / • water level in hot tub may be too low • isolation/gate valves partially closed • air lock in pump reducing flow Sn1 The high-limit temperature sensor is non-functional (open circuit). Spa control system is deactivated. / Sn3The water temperature sensor is non-functional (open circuit). Spa control system is deactivated . Persistent low flow problem – displays on the fifth occurrence of an HFL message within a 24 hour period. Heater circuit is deactivated but other spa functions continue to operate normally. Check water level in spa and add if necessary. If water level is okay, make sure that pumps are primed and all gate valves are fully opened. Press any topside panel pad to reset. Prr Indicates high-limit or water temperature sensor is non-functional. / Spa has shut down – sensor plugged into Sensor ‘A’ port not working. 31 Topside Panel Display Messages Continued / / Inadequate water detected in heater chamber - Check water level in spa and add if necessary. If water level is okay, make sure that pumps are primed and all gate valves are fully opened. Press any topside panel pad to reset. Allows for convenient draining of the spa using the P1 low speed. Can only be accessed while in Standby mode. Press any topside control pad except for P1 to return to normal operation mode. / / Inadequate water detected in heater chamber – displays on third occurrence of a dr message within a 24 hour period. The spa shuts down completely when the drY message is flashing on the display. Check water level in spa and add if necessary. If water level is okay, make sure that pumps are primed and all gate valves are fully opened. Press any topside panel pad to reset. System is operating in Standard mode. See operating instructions for complete details. / System is operating in Economy mode. See operating instructions for complete details. / System is operating in Standard-in-Economy mode. See operating instructions for complete details. Priming mode – occurs when spa is first powered up, or when power has been restored after a power interruption. Allows for safe priming of the pumps. See M7 operating instructions for complete details. / System is operating in SLEEP mode. See operating instructions for complete details. --- / --F / --C Temperature unknown – after the pump has been operating for 2 minutes, the current water temperature will be displayed. If spa water temperature is more than 20˚F (7˚C) cooler than the set temperature, the system will automatically activate the heater to provide freeze protection. This is a normal function; no corrective action is necessary. --- / ---- Temperature not current while in Economy or Sleep mode – In either of these modes, the pump may be off for hours in between filter cycles. To view the current spa water temperature, either switch to Standard mode or turn on the pump for at least 2 minutes. / / Stops the control system from operating automatically to allow filter cartridge removal. Press any topside control pad except for P1 to return to normal operation mode. 32 JET and FEATURE OPERATION Air Injector* Mini Storm . Twin Roto Adjustable Neck Jet Ozone Jet* (Hydropool Series) Directonal Cluster* Mini Storm Directional Poly Storm . Twin Roto Poly Storm . Directional Power Storm Massage Power Storm . Twin Roto * indicates a non-adjustable jet JET WATER FLOW ADJUSTMENT All Hydropool hot tubs are shipped from the factory with the jets in the open position. Your Hydropool hot tub features adjustable water flow on specific hydrotherapy jets. Interchanging jet inserts A great feature for custom tailoring the jets in your Hydropool hot tub to suit your personal hydrotherapy needs. Jets of like size and dimension may be interchanged with each other, for example, if you wished to swap a standard pulsator jet for a standard adjustable blaster jet, or a medium pulsator jet for a medium adjustable jet. To reduce the flow: grasp the outer flange of the jet, and turn clockwise approximately a 1/4 turn. When it hits the stop, the jet is considered closed, and flow will be restricted. To increase the flow: from the closed position, turn the jet counter-clockwise approximately 1/4 turn. When it hits the stop, the jet is open, and there is maximum jet flow. Do not attempt to turn the jet past the stop, as this will unthread the jet internal from the socket. JET AIR FLOW ADJUSTMENT Your Hydropool hot tub features adjustable air flow on specific hydrotherapy jets. To reduce the flow: turn the handle on the air control clockwise. When it hits the stop, the air is closed, and air flow will be restricted. To increase the flow: turn the handle on the air control counter-clockwise. When it hits the stop, the air control is fully opened. For maximum operating efficiency, the air controls must remain closed when your hot tub is not in use. 33 Jet Insert removal & Replacement Poly/mini storm directional & twin roto Power storm massage & twin roto To Remove: • Turn the jet conter-clockwise to unclip & pull out of socket. To Re-install: • Push the jet into the socket until it snaps into place, ensuring the square pin on the back of the jet lines-up with the groove in the socket flange. DIVERTER VALVE When your HYDROPOOL hot tub is equipped with a diverter valve, it allows you to direct the flow of the water so that it increases the power of the jets on the CAPTAINS CHAIR or on the LOUNGER, or a combination of the two. Simply turn the valve left or right. TURN Always: return the valve handle to the middle position before exiting the hot tub to ensure that there is air and water flow to the ozone jet and ice bucket/filter niche drains for proper performance. WATERFALL CONTROL optional If your hot tub was ordered with the optional waterfall feature, then you will have a waterfall flow control valve. The waterfall feature was designed to provide a gentle cascade of water over the neck and shoulder area. Simply turn the top of the control clockwise for more water flow, and counterclockwise for less water flow. 34 Hydropool Surround Sound audio & Audio/Video Systems Quick-Start Guide Listening to the Radio......................................................................36 Playing a CD......................................................................................36 Watching a DVD...............................................................................36 Component Connections Component Configuration Diagram...............................................37 am/fm CD Player LCD TV Overview of Controls.......................................................................38 Remote Control Key Map................................................................38 General Power ON/OFF..................................................................................39 Opening & Closing Front panel......................................................39 Input Source Selection...................................................................39 Clock – Setting & Viewing..............................................................39 Audio Control Adjusting Volume..............................................................................39 Mute...................................................................................................39 Bass Level.........................................................................................39 Treble Level.......................................................................................39 Balance Adjustment........................................................................39 Fader Adjustment.............................................................................40 Radio Function Selecting Band & Storing Presets................................................40 Setting Station Presets Automatically..........................................40 Seek & Manual Tune.......................................................................40 Scan....................................................................................................40 Preset Station Scan.........................................................................40 Local/Distance Function.................................................................40 CD Player Function Insert, Play & Eject a CD.................................................................41 Changing CD Tracks & Music Seek..............................................41 Intro, Scan, Random & Repeat......................................................41 Overview of Controls & Remote Control Key Map.............................................................................................45 On Screen Menu Language...........................................................45 System Setup Menu.........................................................................46 Programming TV Channels Auto Program Mode........................................................................47 Manual Program Mode...................................................................48 Picture Control Manual Picture Control...................................................................49 Auto Picture Control........................................................................49 PSM (Picture Status Memory).......................................................49 Sound Control Equalizer, Balance, AVL, Surround................................................50 Auto Sound Control..........................................................................50 SSM (Sound Status Memory)........................................................50 Other Functions Input Mode........................................................................................51 Auto Sleep.........................................................................................51 Blue Back..........................................................................................51 ARC (Automatic Ratio Control).......................................................51 Sleep Timer........................................................................................51 Optional Waterproof Remotes DVD Player Overview of Controls.......................................................................42 Remote Control Key Map................................................................42 System Setup Menu.........................................................................43 DVD Player Function Play, Pause........................................................................................44 Fast Fwd/Back, Next/Previous.......................................................44 Display, Title, Subtitle......................................................................44 Angle, Zoom......................................................................................44 Goto, Clear.........................................................................................44 Repeat, A – B....................................................................................44 PBC, Random, Program (VCDs).....................................................44 General Power ON/OFF..................................................................................44 Screen Saver....................................................................................44 Insert & Eject a DVD........................................................................44 Input Source Selection...................................................................44 Mute...................................................................................................44 Video Format (PAL/NTSC)...............................................................44 35 Hydropool Universal Waterproof Remote Overview..................52 AM/FM CD Player.............................................................................53 DVD Player........................................................................................54 LCD TV................................................................................................55 HYDROPOOL SURROUND SOUND™ AUDIO/VIDEO SYSTEM QUICK-START GUIDE For all Hydropool Hot Tubs with optional HYDROPOOL SURROUND SOUND™ systems AM/FM CD Player The following info is a guide to the basic system functions of the HYDROPOOL SURROUND SOUND ™ audio/video system package. 4 TURNING AM/FM CD PLAYER ON/OFF 5 6 7 8 9 10 • Press the POWER button 3 to turn on and off power to the AM/FM CD player MRD 60 MARINE SOURCE LISTENING TO THE RADIO • Press the SOURCE button 4 to cycle through available program sources: TUNER -> CD -> AU-1 If there is no CD inserted, then the CD source will not appear • When TUNER is selected, station frequency will be indicated on the display • Use the TUNE/SEEK-UP button 13 and the • TUNE/SEEK-DOWN button 14 to select station 3 2 1 LOCAL SET DISC IN POWER 11 SCAN INTRO 1 MUTE RANDOM R E P EAT 3 2 – 5 4 AUDIO DISC + 6 TUNE 12 BAND AUTO 21 20 19 18 17 16 15 14 13 LISTENING TO A CD • Open the front panel by pressing down the FRONT PANEL RELEASE button 7 • Insert a CD into the disc slot with the label facing up and close the front panel • The CD plays automatically after loading WATCHING A DVD CD Player 1 10 8 6 15 16 17 2 EJECT POWER On the LCD TV *: • Press the POWER button on the TV remote • Press the TV/AV button on the TV remote until ‘VIDEO’ appears on the screen DISC PLAY/PAUSE STOP AV1 AV2 L VIDEO AUDIO R CONTROLS PREVIOUS On the DVD player: • Press the POWER button 1 on the front of the DVD player or on the DVD remote • Insert a DVD into the disc slot with the label facing up • DVD playback will begin automatically after the disc is inserted. With some DVD discs, you will need to press the PLAY button 10 on the DVD player or the remote to begin playback. NEXT 12 9 7 SOURCE 5 MENU 3 ENTER 13 14 11 LCD TV VIDEO On the AM/FM CD Player: • Press the SOURCE button 4 to cycle through available program sources. Select AU-1 * Note: the TV can only be operated using the factory IR remote or the Hydropool Universal IR Remote LED power indicator 36 4 HYDROPOOL Audio/Video COmponent Configuration Video Audio Antenna Standard Hydropool Series only IR Receiver DVD PLAYER OPTIONAL: Hydropool Series only B3 Subwoofer Y R W R W LCD TV Purple B1 Green Antenna receptacle AM/FM CD PLAYER 12VDC to A/V components Base System: Hydropool and Serenity Series Terminal block SPKR POWER SUPPLY Left Front (+) white (-) white/blk 230VAC INPUT 37 SPKR Right Front (-) gray (+) gray/blk HYDROPOOL SURROUND SOUND AM/FM CD PLAYER OVERVIEW OF CONTROLS 1. Volume control 2. Mute 3. Power ON/OFF 4. Source 5. IR receiver 6. Preset buttons 1 – 6 7. Front panel release 8. Display 9. Clock set 10. Local 11. Scan 12. Band 13. Tune/seek up 14. Tune/seek down 15. Disc + 16. Auto 17. Disc - 18. CD repeat 19. CD random 20. Audio 21. CD intro 4 5 6 7 8 MRD 60 9 10 MARINE SOURCE 3 2 1 LOCAL SET DISC IN POWER SCAN INTRO 1 MUTE RANDOM R E P EAT 3 2 – 5 4 AUDIO 21 20 DISC + 6 TUNE BAND AUTO 19 17 16 4 7 12 MUTE TUNE INTRO 18 15 14 13 IR REMOTE CONTROL KEY MAP Basic functions can be controlled via the AM/FM CD player or the IR remote control 1. Power ON/OFF 2. Volume Zone 1 3. Volume Zone 2 (not applicable) 4. Mute 5. Source 6. Band 7. Tune/seek up 8. Tune/seek down 9. Auto 10. CD repeat 11. Audio 12. Intro 13. Random 14. Disc – (not applicable) 15. Disc + (not applicable) 1 1 9 POWER 5 2 SOURCE AUTO 3 AUDIO ZONE1 ZONE2 6 BAND 13 RANDOM 11 2 8 10 REPEAT 4 3 5 14 VOLUME DISC - 6 DISC + 38 15 11 12 AM/FM CD PLAYER CONTROLS General AUDIO CONTROL OPENING and CLOSING the FRONT PANEL 1 OPEN: Place thumb on the front panel release button, and forefinger below the front panel overhang. Firmly depress the release button while gently pulling the front panel 2 CLOSE: flip up front panel and press firmly until you hear an audible click 3 Except when changing the CD, keep the front panel closed at all times to prevent water intrusion that could cause damage to the system MUTE 1 Press the MUTE button once to mute the sound. ‘MUTE’ will flash on the display 2 Press the MUTE button again or rotate the volume knob to resume audio POWER ON/OFF 1 Press the POWER button on system or IR remote once to turn system ON, and once to turn system OFF. 2 NOTE: The radio power must be turned on in order to turn on power to the DVD player and the LCD TV. ADJUSTING the VOLUME 1 Controls volume for the AM/FM radio/CD player, and also for the TV and DVD player 2 Rotate VOLUME knob to increase or decrease volume (0-31) 3 Current volume setting is momentarily indicated on the display 4 When watching TV or viewing a DVD: set the volume level to ‘15’ and use the TV volume to control sound levels INPUT SOURCE SELECTION 1 Press the SOURCE button to cycle through available input sources. Sequence is TUNER -> CD -> AU-1 2 If a CD is not inserted into the CD player, that input source will not appear on the display. Sequence is TUNER -> AU-1 BASS LEVEL 1 Press the AUDIO button until ‘BAS’ appears on the display 2 Rotate the VOLUME knob to adjust setting. ‘C-0’ indicates neutral bass setting (factory default); -2 to -12 indicates reduced bass; +2 to +12 indicates increased bass 3 Unit will automatically return to volume mode if an input is not detected for 3 seconds CLOCK VIEWING the CLOCK 1 Press the SET button to toggle the display between clock and radio mode. Unit will automatically display clock time whenever radio controls are not being used TREBLE LEVEL 1 Press the AUDIO button until ‘TRE’ appears on the display 2 Rotate the VOLUME knob to adjust setting. ‘C-0’ indicates neutral treble setting (factory default); -2 to -12 indicates reduced treble; +2 to +12 indicates increased treble 3 Unit will automatically return to volume mode if an input is not detected for 3 seconds SETTING the CLOCK 1 Press and hold the SET button for 2 seconds, until the first digit of the time starts flashing 2 Use the TUNE/SEEK-UP or TUNE/SEEK-DOWN buttons to adjust the hour. Note the AM/PM indicator at the left when setting the hour 3 Press SET again to select the minutes. Adjust as above 4 Press the SET button one final time to save the input and complete setting time 5 The system will automatically return to clock mode, and the time will appear after 3 seconds BALANCE ADJUSTMENT 1 Press the AUDIO button until ‘BAL’ appears on the display 2 Rotate the VOLUME knob to adjust setting. ‘C-0’ indicates center (factory default); R1 to R15 indicates right balance; L1 to L15 indicates left balance 3 Unit will automatically return to volume mode if an input is not detected for 3 seconds 39 AM/FM CD PLAYER CONTROLS FADER ADJUSTMENT 1 Press the AUDIO button until ‘FADE’ appears on the display 2 Rotate the VOLUME knob to adjust setting. ‘C-0’ indicates center (factory default); R1 to R15 indicates rear fade; F1 to F15 indicates left balance 3 Unit will automatically return to volume mode if an input is not detected for 3 seconds SEEK and MANUAL TUNE 1 Press the TUNE/SEEK-UP or TUNE/SEEK-DOWN button once to automatically tune to the next strongest higher or lower station signal (auto seek) 2 To manually tune to a station signal, press and hold either TUNE/SEEK button for 2 seconds. Holding the button down will either increase or decrease through the station frequencies manually 3 When the desired frequency is reached, release the TUNE/ SEEK button. The system remains in manual tune for 3 seconds after the last button is released, so that you can still fine tune with additional button presses 4 After 3 seconds the system will return to auto seek mode RADIO FUNCTION Press the SOURCE button to select Radio mode. Station frequency will be displayed SELECTING BAND and STORING STATION PRESETS 1 Press the BAND button to cycle through the 5 sets of radio bands. Sequence is FM1 -> FM2 -> FM3 -> AM1 -> AM2. Each band stores up to 6 independent presets, for a total of 18 FM and 12 AM presets 2 To program a preset: tune into the desired station, press and hold for 2 seconds the numeric button that will be used to store this preset. ‘PX’, where X represents the preset number, will be displayed on the bottom right of the display (i.e. P6) 3 If power to the hot tub is interrupted, or the reset switch is pressed, the station presets will need to be reprogrammed SCAN FUNCTION 1 Select any FM or AM band set and press SCAN to listen to a few seconds of each radio station. The display will flash, and the system will automatically advance to the next available station signal, play that radio station for a few seconds, then advance to the next available station, etc, etc. To stop scanning and continue listening to the current station, press the SCAN button again 2 The radio remains in scan mode until the SCAN button is pressed a second time or one of the TUNE/SEEK buttons is pressed PRESET SCAN FUNCTION 1 Select any FM or AM band set and press AUTO to listen to a few seconds of each radio station preset. The display will flash the preset station number (i.e. P4), and the system will automatically advance to the next preset station signal, play that radio station for a few seconds, then advance to the next preset station signal, etc, etc. To stop scanning and continue listening to the current station, press the AUTO button again 2 The radio remains in preset scan mode until the AUTO button is pressed a second time or one of the preset buttons is pressed SETTING STATION PRESETS AUTOMATICALLY 1 To automatically program the station presets: press a preset button (1-6) – the system will start the programming sequence at this preset button first 2 Hold the AUTO button for 2 seconds, or until the programming sequence begins 3 The current preset and additional presets up to P6 will be programmed with the next available station signal 4 When the auto preset cycle is complete, the unit will remain in preset scan mode (see PRESET SCAN FUNCTION), and will continue scanning the programmed presets until the AUTO button is pressed 5 To select only the strongest station signals, press the LOCAL button 6 All 18 FM and 12 AM presets can be stored sequentially by pressing the BAND button to enter the next band set (i.e. If you started with FM1 preset buttons, pressing the BAND button will step to FM2) and continuing auto programming LOCAL/DISTANCE FUNCTION 1 Press the LOCAL button to select between local station mode and any station (default) mode. When ‘LOCAL’ is displayed, only the strongest station signals will be selected during SEEK or SCAN mode. 2 In the default mode (‘LOCAL’ not shown on display), all usable stations with sufficient signal strength will be selected during SEEK or SCAN mode 40 AM/FM CD PLAYER CONTROLS CD PLAYER FUNCTION CHANGING CD TRACKS and MUSIC SEEK 1 To advance to the next track: press the TUNE/SEEK-UP button once, and the track counter will advance one track. When the final track on the CD is reached, the next press of the button will return to the first track 2 To fast forward or rewind through tracks: press and hold the TUNE/SEEK-UP or TUNE/SEEK-DOWN button. Releasing the button will stop the process and playback will start from that point in the track 3 To return to the beginning of the current track: press the TUNE/SEEK-DOWN button once at any time during track playback. Pressing the TUNE/SEEK-DOWN button a second time within 1 second will skip back to the previous track INSERT, PLAY and EJECT a CD 1 To insert a CD: open the front panel and insert a CD into the slot with the CD label facing up. The CD will be drawn inside the unit. Close the front panel. The system will automatically switch to the CD source mode, and the ‘DISC IN’ symbol on the display indicates that a CD is in the drive. 2 Play: CD playback will begin automatically. The display will show the current track number and the play time of that track. An animated 3-D rotating disc will also show on the display to indicate that a disc is playing 3 To remove a CD: open the front panel and press the CD (eject) button on the inside left of the front panel. Remove CD from the drive, and close the panel. INTRO SCAN, RANDOM and REPEAT 1 Intro Scan: press the INTRO button to select Intro Scan Mode, and ‘SCN’ will appear to the left on the display. The first 10 seconds of each track on the CD will play. To exit Intro Scan Mode, press the INTRO button a second time, or the TUNE/SEEK-UP or TUNE/SEEK-DOWN button 2 Random: press the RANDOM button to play the CD tracks in a random order, and ‘RDM’ will appear to the left on the display. To exit Random Mode, press the RANDOM button a second time 3 Repeat: press the REPEAT button to repeat playback of the current track, and ‘RPT’ will appear to the left on the display. To exit Repeat Mode, press the REPEAT button a second time CAUTION: listen for an audible click to indicate that the front panel has been securely closed to prevent water intrusion that could cause damage to the system 41 HYDROPOOL SURROUND SOUND DVD PLAYER OVERVIEW OF CONTROLS 1. Power 2. Eject 3. Menu 4. IR receiver 5. Source 6. Disc Slot 7. Next 8. Stop 9. Previous 10. Play / Pause 11. Video / Audio input 12. Reset 13. Cursor buttons 14. Enter 15. Indicator light for DISC 16. Indicator light for AV1 17. Indicator light for AV2 1 10 8 6 15 16 17 2 EJECT POWER DISC PLAY/PAUSE STOP VIDEO AV1 AV2 L 4 AUDIO R CONTROLS PREVIOUS 12 9 NEXT 7 SOURCE 5 MENU ENTER 3 13 14 11 IR REMOTE CONTROL KEY MAP Basic functions can be controlled via the DVD player or IR remote control All advanced functions can only be accessed via the IR remote control 1. Power 2. Eject 1 23 3. Mute 4. Subtitle 5. Angle 6. Display POWER 7. Source 8. Setup MUTE ZOOM 9. PAL/NTSC 3 10. GOTO 24 SHUFFLE RESUME 11. Title 25 12. Menu 11 REPEAT A-B 13. Cursor buttons 14. Enter 27 15. Slow Fwd / Back 28 PROGRAM GOTO 16. Play 26 17. Fast Fwd / Back 10 18. Next 19 19. Stop 16 20. Pause 1 2 21. 0 – 9 22. Clear 23. Zoom 4 5 21 24. PBC 25. Random 7 8 26. Program CLEAR 27. Repeat 22 0 28. A – B 42 6 9 2 DISPLAY PBC EJECT P/N SOURCE 7 SUB-T ANGLE 5 TITLE SETUP ENTER 4 8 14 13 MENU 12 20 3 18 6 17 9 -/-- 10+ SLOW 15 DVD Player Controls SYSTEM SETUP MENU: ON SCREEN MENUS and DISPLAYS – overview Press the... 1. …STOP button before proceeding (only if a DVD is playing) 2. …SETUP button to display the main system setup menu 3. …CURSOR buttons to navigate the sub-menus 4. …ENTER button to make selection GENERAL MENU -- MAIN PAGE -- GENERAL PAGE -- -- GENERAL PAGE -- GENERAL SETUP TV DISPLAY NORMAL/PS TV DISPLAY SPEAKER SETUP PIC MODE NORMAL/LB PIC MODE AUTO AUDIO SETUP ANGLE MARK WIDE ANGLE MARK HI-RES PREFERENCES OSD LANG OSD LANG N-FLICKER CAPTIONS CAPTIONS SCR SAVER SCR SAVER EXIT SETUP MAIN PAGE GENERAL SETUP MAIN PAGE GENERAL SETUP GENERAL SETUP -- SPEAKER SETUP PAGE -DOWNMIX -- GENERAL PAGE -- LT/RT TV DISPLAY STEREO PIC MODE MAIN PAGE ANGLE MARK ON OSD LANG OFF CAPTIONS POWER DISPLAY SCR SAVER EJECT MAIN PAGE LOUD SPEAKERS SETUP MUTE ZOOM PBC SHUFFLE RESUME SUB-T P/N ANGLE MARK ON/OFF SOURCE ANGLE -- AUDIO SETUP -AUDIO OUT REPEAT A-B TITLE SETUP -- GENERAL PAGE -- ANALOG TV DISPLAY DYNAMIC PIC MODE ANGLE MARK MAIN PAGE PROGRAM GOTO ENGLISH OSD LANG CAPTIONS ENTER SCR SAVER MAIN PAGE MENU 1 4 7 2 5 8 3 AUDIO OUT – – DYNAMIC – – – – – – – – – – – – – – – – MAIN PAGE 9 / 0 SET OSD LANGUAGE -- AUDIO SETUP -- 6 - -- CLEAR AUDIO RELATED 10+ SLOW DYNAMIC RANGE COMPRESSION -- GENERAL PAGE -- FULL TV DISPLAY 6/8 PIC MODE ANGLE MARK 4/8 2/8 OFF OSD LANG CAPTIONS ON SCR SAVER OFF MAIN PAGE CLOSED CAPTION -- GENERAL PAGE -TV DISPLAY PIC MODE ANGLE MARK OSD LANG CAPTIONS SCR SAVER MAIN PAGE SCREEN SAVER 43 ON OFF DVD Player CONTROLS General 3 Fast Fwd / Back: press the or button during playback. Each time the button is pressed, the fast forward/back speed changes as follows: DVD – normal -> 2x -> 4x -> 6x -> 8x -> 20x VCD – normal -> 2x -> 4x -> 6x -> 8x 4 Next / Previous: press the button to jump to the next chapter (DVD) or the next track (VCD/CD), and press the button to jump to the previous chapter or track POWER ON/OFF 1 Press the POWER button on system or IR remote once to turn system ON, and once to turn system OFF. If there is already a disc in the drive, playback will start automatically. 2 NOTE: Power to the AM/FM CD player must be ON in order to turn ON the DVD player SCREEN SAVER 1 If there is no button input detected for 5 minutes, the screen saver begins automatically 2 The screen saver can be turned ON/OFF in the SETUP menu under ‘Screen Saver’ DISPLAY, TITLE, SUBTITLE 1 Display: press the DISPLAY button on the IR remote to show statistical disc information during playback (chapter, time remaining, counter etc.) 2 Title: press the TITLE button on the IR remote to display the DVD disc title (not available on all DVD discs) 3 Subtitle: press the SUBTITLE button on the IR remote to turn on/off subtitle, and/or to select subtitle language on DVD discs with multilingual subtitle options INSERT and EJECT a DVD 1 To insert a DVD: insert a DVD into the slot with the label facing up. The DVD will be drawn inside the unit. ‘DISC LOADING’ will show on the TV display indicating that a DVD is in the drive. Note: DVD playback will begin automatically 2 To remove a DVD: press the EJECT button on the front panel. Remove DVD from the drive ANGLE, ZOOM 1 Press the ANGLE button on the IR remote to change the view angle (only available on DVDs that have the multi-angle feature) 2 Press the ZOOM button on the IR remote to increase the size of the picture. Note that in ‘ZOOM’ mode, only the enlarged part of the picture will be viewable; the entire picture will not be visible CAUTION: always ensure the component panel door has been securely closed to prevent water intrusion that could cause damage to the system INPUT SOURCE SELECTION 1 Press the SOURCE button to cycle through available input sources. Sequence is DISC -> AV1 -> AV2 GOTO, CLEAR 1 Press the GOTO button to select DVD playback chapter using the 0-9 number buttons 2 Press the CLEAR button to clear a number that was entered in error MUTE 1 Press the MUTE button on the DVD player IR remote, and the word ‘MUTE’ will appear momentarily on the TV screen to indicate that the DVD audio is in mute mode. Press the MUTE button again to exit DVD audio mute mode, and the words ‘MUTE OFF’ will appear momentarily on the TV screen Note: Use of the DVD mute function is generally not required, as the sound volume is muted through either the LCD TV function or the Radio function REPEAT, A – B 1 Press the REPEAT button on the IR remote to select either repeat chapter in current view, or repeat title. On-screen sequence is CHAPTER REPEAT ON -> TITLE REPEAT ON -> REPEAT OFF 2 Press the A – B button on the IR remote to select and repeat a particular scene or passage. On-screen sequence is A TO B SET A -> A TO B SET B -> A TO B CANCELLED PAL/NTSC 1 Press the P/N button on the IR remote to select the DVD video playback format: NTSC – North American video format PAL – European video format PBC, RANDOM, PROGRAM (VIDEO CD only) 1 Video CDs with PBC (playback control) can be played with or without a menu. On the IR remote, press the PBC button to select 2 Press the RANDOM button on the IR remote to play tracks in random order 3 Press the PROGRAM button to select and program the order in which to play tracks DVD PLAYER FUNCTION PLAY, PAUSE, FAST FWD/BACK, NEXT/PREVIOUS 1 Play: playback begins automatically after disc is inserted. In most cases it will go to the DVD root menu, and it will be necessary to press the PLAY or ENTER button 2 Pause: press the button during playback to freeze the picture (still mode). Press the button again to resume playback 44 HYDROPOOL SURROUND SOUND LCD TV OVERVIEW OF CONTROLS and IR REMOTE KEY MAP All functions are accessed with the IR remote control 1 2 3 4 5 6 7 8 9 10 11 12 13 14 15 16 17 18 19 20 POWER Turns the TV ON from Standby mode, and OFF to Standby mode. Power is only completely OFF when power to the spa is turned OFF MUTE Turns the sound ON / OFF NUMBER buttons Selects TV channels PSM (Picture Status Memory) Recalls your preferred picture setting SSM (Sound Status Memory) Recalls your preferred sound setting MENU Displays Main menu, through which sub-menus are accessed ST/SAP Selects Audio mode: Stereo, SAP and Mono Q. VIEW Returns to previously viewed program TV / AV Selects input: TV, Component, Video, S-Video and PC Note: only TV and VIDEO are applicable VOLUME Adjusts sound level; Menu navigation cursor CHANNEL Selects TV channels; Menu navigation cursor OK Accepts selection CC Closed Captioning MEMORY (not applicable) SLEEP Sets the sleep timer ARC Automatic screen Ratio Control: 4:3, 16:9 or ZOOM COMPONENT Selects Component mode (not applicable) VIDEO Selects Video mode for viewing DVD S-VIDEO Selects S-Video mode (not applicable) PC Selects PC mode (not applicable) 1 2 POWER 3 5 4 SSM PSM 8 7 6 11 MENU ST/SAP Q VIEW VOL 12 OK 13 CC MEMORY SLEEP ARC COMPONENT VIDEO S-VIDEO PC English Deutsch Français Italiano Español 45 16 20 19 Language All of the on screen displays will appear in the selected language 10 15 ON SCREEN MENU LANGUAGE SELECTION Press the MENU button Select the Setup menu Select the Language menu Press the CH / button to select desired language Press the TV/AV button VOL CH 18 1. 2. 3. 4. 5. 9 14 17 The onscreen display language is selected as follows: TV/AV CH LCD TV Controls SYSTEM SETUP MENU: ON SCREEN MENUS and DISPLAYS – overview Press the... 1....MENU button to display the main system setup menu 2....CH / button to select sub-menus: Picture, Sound, Special, Setup 3....CH / button again to scroll through list of options in each sub-menu 4....VOL to select and adjust an option 5....MENU button to return to previous menu screen 6....TV/AV button to exit all menus Main menu Picture Contrast Brightness Colour Sharpness Picture Sound Special Setup 90 75 75 60 Equalizer Flat Music Movie Speech User Auto programme System Storage from Start BG 1 Sound Equalizer Balance AVL Surround POWER 0 Off Off Manual programme Special SSM MENU PSM ST/SAP Q VIEW Input Auto Sleep Blue back ARC TV Off Off 4:3 TV/AV 0 1 2 3 4 VOL OK CH ----- OOOOO OOOOO --------- Skip CC MEMORY SLEEP ARC COMPONENT VIDEO S-VIDEO PC BG 5 V/UHF OOOOO 1 Programme edit CH VOL System Channel Fine Search Name Storage Setup Auto programme Manual programme Programme edit Language Language English Deutsch Français Italiano Español 46 5 6 7 8 9 --------------------- Move LCD TV Controls PROGRAMMING TV CHANNELS Once you have pre-programmed (available) channel broadcast signals into the TV, you will be able to use the CH scan through the various channels, or the NUMBER buttons to directly access a particular channel. / to Channel programming can be done using either Auto Program or Manual Program mode. AUTO PROGRAM MODE All broadcast signals that are clear enough to be received are stored using this method. It is recommended that you use the Auto Program mode for initial set-up. 1 Press the TV/AV button and select TV 2 Press the MENU button 3 Select the Setup menu 4 Select the Auto program menu 5 Press the CH / button to select System 6 Press the VOL button to select the national broadcast * system (Europe only): BG: Germany / Austria / Sweden / Switzerland I: UK / Hong Kong / South Africa DK: China / Eastern Europe L: France 7 Press the CH / button to select Start 8 Press the VOL button to start Auto program 9 Once Auto program has completed, the screen will automatically return to normal TV mode POWER SSM MENU PSM ST/SAP Q VIEW TV/AV CH Auto programme System Storage from Start VOL BG 1 VOL OK CH CC MEMORY SLEEP ARC COMPONENT VIDEO S-VIDEO PC * About National Television Broadcast Standards: Currently, the world is divided into three Standards that are not compatible: NTSC, PAL and SECAM Why are there three Standards or systems? Basically, television was ‘invented’ at different times in various parts of the world (U.S., U.K. and France). Politics dictated which system would be employed as the national Standard in these countries. At the time these TV Broadcast Systems were established, there was no consideration given to the rise of the ‘Global Communications Age’ in which we live today, where information is exchanged electronically as easily as having a conversation with a friend. 47 LCD TV Controls MANUAL PROGRAM MODE The Manual program mode allows you to manually tune and arrange the channels in whatever order you choose. You can also assign each channel a name with up to 5 characters. 1 Press the TV/AV button and select TV 2 Press the MENU button 3 Select the Setup menu 4 Select the Manual program menu 5 Press the CH / button to select System 6 Press the VOL button to select the national broadcast * system (Europe only): BG: Germany / Austria / Sweden / Switzerland I: UK / Hong Kong / South Africa DK: China / Eastern Europe L: France 7 Press the CH / button to select Channel 8 Press the VOL button to select V/UHF or Cable as required. If possible, select the Channel number directly with the NUMBER buttons 9 Press the CH / button to select Search, and press the VOL button to commence searching. When a channel is found the search will stop 10Press the CH / button to select Name, then press the VOL button. You can use a blank +, -, the numbers 0 – 9 and the alphabet A – Z 11 Press the CH / button to select Storage. Select and assign the desired channel number using the VOL button or NUMBER buttons 12Press the OK button to store your selection. Stored will appear on the display to confirm input selection 13Press the TV/AV button to return to normal TV mode POWER SSM MENU PSM ST/SAP Q VIEW VOL Manual programme V/UHF VOL OK CH To store another channel, repeat steps 7 through 12. System Channel Fine Search Name Storage TV/AV CH BG 5 OOOOO 1 48 CC MEMORY SLEEP ARC COMPONENT VIDEO S-VIDEO PC LCD TV Controls PICTURE CONTROL Picture control enables you to adjust Contrast, Brightness, Colour and Sharpness based on user preference. MANUAL PICTURE CONTROL 1 Press the MENU button 2 Select the Picture menu 3 Press the CH / button to select parameter 4 Press the VOL button to adjust. After adjusting, wait a few seconds and the input will be stored automatically 5 Press the TV/AV button to return to normal TV mode Selected Item Picture Contrast Brightness Colour Sharpness 90 75 75 60 Setting Change Contrast More darkness VOL Brightness Less bright VOL 0-100 Colour Less colour intensity VOL Sharpness Soft picture VOL 0-100 0-100 VOL More Light VOL More bright 0-100 VOL More colour intensity VOL Sharp picture AUTO PICTURE CONTROL The factory presets - Dynamic, Standard, Mild and Game - are programmed by the manufacturer and cannot be changed. Access these settings through the PSM button. PSM (Picture Status Memory) 1 Press the PSM button repeatedly to cycle through the various presets as follows: Dynamic Ë Standard Ë Mild Ë Game Ë User • Dynamic: vivid picture colour • Standard: normal picture colour • Mild: softer more muted picture colour • Game: external video game picture set-up • User: manual picture setup 49 Equalizer LCD TV Controls Flat Music Movie Speech User SOUND CONTROL Sound control allows you to select from several factory preset sound settings: Flat, Music, Movie or Speech The sound settings can also be manually adjusted based on user preference. 1 Press the MENU button 2 Select the Sound menu 3 Press the CH / button to choose the sound parameter Equalizer, Balance, AVL** or Surround 4 For Balance, AVL or Surround: press the VOL button to adjust 5 For Equalizer: press the VOL button to select, and use the CH / button to select setting: Flat, Music, Movie, Speech or User 6 To manually adjust the Equalizer in the User settings mode: i Press the CH / button to select User ii Press the VOL button to select a sound/frequency band iiiPress the CH / button to adjust to desired level ivRepeat steps ii and iii to select and adjust all five sound/frequency bands 7 Press the MENU button to return to the preceding menu, or the TV/AV button to exit and return to normal TV mode Sound Equalizer Balance AVL Surround Equalizer Special Flat Input Music Auto Sleep Movie Blue back Speech ARC User 0 Off Off TV Off Off 4:3 **AVL, when switched ON, maintains an equal sound volume level when changing between channels/stations. Sound Equalizer AUTO SOUND CONTROL Balance 0 AVLmanufacturer and Offcannot be changed. The factory presets - Flat, Music, Movie and Speech - are programmed by the Surround Off Access these settings through the SSM button. SSM (Sound Status Memory) 1.Press the SSM button repeatedly to cycle through the various presets as follows: Flat Ë Music Ë Movie Ë Speach Ë User Special Input Auto Sleep Blue back ARC 50 TV Off Off 4:3 Sound Equalizer Balance AVL Surround 0 Off Off LCD TV Controls OTHER FUNCTIONS Special INPUT MODE Input modes may be selected via the TV/AV button or directly by pressing the appropriately labeled button. TV: VIDEO: COMPONENT: S-VIDEO: PC: Input Auto Sleep Blue back ARC TV Off Off 4:3 for normal television viewing for viewing a DVD not applicable not applicable not applicable AUTO SLEEP When Auto sleep is set to ON, the TV will automatically switch itself OFF to standby mode approximately 10 minutes after the TV channel being viewed stops broadcasting 1 Press the MENU button 2 Select the Special menu 3 Press the CH / button to select Auto sleep 4 Press the VOL button to select ON 5 Press the MENU button to go back to the Main Menu, or press the TV/AV button to exit and return to normal TV mode BLUE BACK Channels without a programmed broadcast signal appear in blue ARC (Automatic Ratio Control) Selects screen ratio mode: 4:3, 16:9 or ZOOM SLEEP TIMER The sleep timer function automatically switches the set OFF to standby mode after the user selected preset time has elapsed. 1 Press the SLEEP button to select the number of minutes: 0, 10, 20, 30, 60, 90, 120, 180, and 240 The timer will automatically begin countdown from the number of minutes selected To view the remaining sleep time, press the SLEEP button once To cancel the sleep time, repeatedly press the SLEEP button until the display disappears 51 120 Hydropool Optional waterproof Remote overview LED (red light) blinks to indicate that the remote control is sending a signal POWER - turns on/off the selected home entertainment component SETUP - use for all factory programming sequences Press TV, VCR/DVD or CD once to select a component to control GUIDE - displays program guide EXIT - to exit an on-screen menu/guide CURSOR ARROWS - for navigating menu/guide SELECT – to choose option INFO - displays current channel and program information MENU - displays an on-screen menu VOL – controls sound volume CH – selects channel MUTE – turns sound off/on LAST – recalls the last channel, also used to page back one screen in the main menu Controls available spa functions Keypad - directly selects channels Mode – switches between DVD and TV, and will also control input select feature on most TV models Enter - press once to enter selection REW, PLAY, FF, REC, STOP and PAUSE used to control CD and DVD functions 52 HYDROPOOL AM/FM CD PLAYER OPTIONAL WATERPROOF REMOTE FUNCTION CROSS-REFERENCE STANDARD NON-WATERPROOF REMOTE (included) HYDROPOOL UNIVERSAL WATERPROOF REMOTE (optional) 1 POWER MUTE SOURCE AUTO TUNE INTRO 2 RANDOM 3 AUDIO ZONE1 ZONE2 REPEAT 4 BAND VOLUME 5 DISC - 6 DISC + FUNCTIONS Power ON/OFF . . . . . . . . . . . . . . . . . . . . . . . . . . . . . . . . . . . . . . . . . . . . . . . . . . . . . . CD + Power Volume control . . . . . . . . . . . . . . . . . . . . . . . . . . . . . . . . . . . . . . . . . . . . . . . . . . . . . VOL / Mute . . . . . . . . . . . . . . . . . . . . . . . . . . . . . . . . . . . . . . . . . . . . . . . . . . . . . . . . . . . . . . Mute Source . . . . . . . . . . . . . . . . . . . . . . . . . . . . . . . . . . . . . . . . . . . . . . . . . . . . . . . . . . . . . Select Band . . . . . . . . . . . . . . . . . . . . . . . . . . . . . . . . . . . . . . . . . . . . . . . . . . . . . . . . . . . . . . Enter Tune/seek up . . . . . . . . . . . . . . . . . . . . . . . . . . . . . . . . . . . . . . . . . . . . . . . . . . . . . . . FF Tune/seek down . . . . . . . . . . . . . . . . . . . . . . . . . . . . . . . . . . . . . . . . . . . . . . . . . . . . . REW Auto . . . . . . . . . . . . . . . . . . . . . . . . . . . . . . . . . . . . . . . . . . . . . . . . . . . . . . . . . . . . . . Mode CD repeat . . . . . . . . . . . . . . . . . . . . . . . . . . . . . . . . . . . . . . . . . . . . . . . . . . . . . . . . . . Play Audio . . . . . . . . . . . . . . . . . . . . . . . . . . . . . . . . . . . . . . . . . . . . . . . . . . . . . . . . . . . . . Record 53 HYDROPOOL DVD PLAYER OPTIONAL WATERPROOF REMOTE FUNCTION CROSS-REFERENCE STANDARD NON-WATERPROOF REMOTE (included) POWER DISPLAY HYDROPOOL UNIVERSAL WATERPROOF REMOTE (optional) EJECT MUTE ZOOM PBC P/N SOURCE SHUFFLE RESUME SUB-T ANGLE REPEAT A-B TITLE SETUP PROGRAM GOTO ENTER MENU 1 2 3 4 5 6 7 8 9 -/-- CLEAR 0 SLOW 10+ FUNCTIONS Power . . . . . . . . . . . . . . . . . . . . . . . . . . . . . . . . . . . . . . . . . . . . . . . . . . . . . . . . . . . VCR/DVD + Power Eject . . . . . . . . . . . . . . . . . . . . . . . . . . . . . . . . . . . . . . . . . . . . . . . . . . . . . . . . . . . . Enter Mute . . . . . . . . . . . . . . . . . . . . . . . . . . . . . . . . . . . . . . . . . . . . . . . . . . . . . . . . . . . . Mute Display . . . . . . . . . . . . . . . . . . . . . . . . . . . . . . . . . . . . . . . . . . . . . . . . . . . . . . . . . . Info Source . . . . . . . . . . . . . . . . . . . . . . . . . . . . . . . . . . . . . . . . . . . . . . . . . . . . . . . . . . . Mode Setup . . . . . . . . . . . . . . . . . . . . . . . . . . . . . . . . . . . . . . . . . . . . . . . . . . . . . . . . . . . . Exit Menu . . . . . . . . . . . . . . . . . . . . . . . . . . . . . . . . . . . . . . . . . . . . . . . . . . . . . . . . . . . . Menu Cursor arrows . . . . . . . . . . . . . . . . . . . . . . . . . . . . . . . . . . . . . . . . . . . . . . . . . . . . . Cursor arrows Enter . . . . . . . . . . . . . . . . . . . . . . . . . . . . . . . . . . . . . . . . . . . . . . . . . . . . . . . . . . . . Select Play . . . . . . . . . . . . . . . . . . . . . . . . . . . . . . . . . . . . . . . . . . . . . . . . . . . . . . . . . . . . . Play Rapid FWD / BACK . . . . . . . . . . . . . . . . . . . . . . . . . . . . . . . . . . . . . . . . . . . . . . . . .FF / REW Skip NEXT / PREV . . . . . . . . . . . . . . . . . . . . . . . . . . . . . . . . . . . . . . . . . . . . . . . . . . CH / Stop . . . . . . . . . . . . . . . . . . . . . . . . . . . . . . . . . . . . . . . . . . . . . . . . . . . . . . . . . . . . . Stop Pause . . . . . . . . . . . . . . . . . . . . . . . . . . . . . . . . . . . . . . . . . . . . . . . . . . . . . . . . . . . . Pause Numbers 0 - 9 . . . . . . . . . . . . . . . . . . . . . . . . . . . . . . . . . . . . . . . . . . . . . . . . . . . . Numbers 0 - 9 54 HYDROPOOL LCD TV OPTIONAL WATERPROOF REMOTE FUNCTION CROSS-REFERENCE STANDARD NON-WATERPROOF REMOTE (included) HYDROPOOL UNIVERSAL WATERPROOF REMOTE (optional) POWER SSM MENU PSM ST/SAP Q VIEW TV/AV CH VOL VOL OK CH CC MEMORY SLEEP ARC COMPONENT VIDEO S-VIDEO PC FUNCTIONS Power . . . . . . . . . . . . . . . . . . . . . . . . . . . . . . . . . . . . . . . . . . . . . . . . . . . . . . Mute . . . . . . . . . . . . . . . . . . . . . . . . . . . . . . . . . . . . . . . . . . . . . . . . . . . . . . . Numbers 0 – 9 . . . . . . . . . . . . . . . . . . . . . . . . . . . . . . . . . . . . . . . . . . . . . . . TV/AV . . . . . . . . . . . . . . . . . . . . . . . . . . . . . . . . . . . . . . . . . . . . . . . . . . . . . . . Menu . . . . . . . . . . . . . . . . . . . . . . . . . . . . . . . . . . . . . . . . . . . . . . . . . . . . . . . CH (channel UP/DN) . . . . . . . . . . . . . . . . . . . . . . . . . . . . . . . . . . . . . . . . . . Menu navigation cursors . . . . . . . . . . . . . . . . . . . . . . . . . . . . . . . . . . . . . . OK . . . . . . . . . . . . . . . . . . . . . . . . . . . . . . . . . . . . . . . . . . . . . . . . . . . . . . . . . VOL (volume UP/DN) . . . . . . . . . . . . . . . . . . . . . . . . . . . . . . . . . . . . . . . . . . Menu navigation cursors . . . . . . . . . . . . . . . . . . . . . . . . . . . . . . . . . . . . . . Sleep . . . . . . . . . . . . . . . . . . . . . . . . . . . . . . . . . . . . . . . . . . . . . . . . . . . . . . . 55 TV + Power Mute Numbers 0 - 9 Mode Menu CH / Cursor arrows Select VOL / Cursor arrows Info HOT TUB WATER BALANCE – GENERAL OVERVIEW NOTABLE POINTS •It is also very important that Total Alkalinity (the ability of the water to resist a change in pH) be maintained in the recommended range as indicated in the chart on the following page. • Heater and other component failure due to improperly maintained pH or Total Alkalinity levels will not be covered under warranty. • Although there may be two identical hot tub models right next door to each other, the maintenance requirements will be different, dependant on such factors as: – bather load – frequency of use/quantity of bathers – different body chemistry – sun vs. shade – temperature •The reliability and longevity of your hot tub support equipment are directly related to how well water quality is maintained! •ALWAYS observe and follow the instructions on the chemical container. •The small volume of water in your hot tub is easily affected by external factors such as oils, lotions, perspiration and chemicals. It is imperative that you give your hot tub regular attention to maintain clean, safe and balanced water to prevent premature damage and/or failure (corrosion/calcification) to the electrical support equipment. Maintaining your hot tub water balance/ chemistry, while simple, is extremely important. Neglected hot water will allow bacteria to quickly spread. •The mineral content of hot tub water increases from water evaporation, sanitizers and other chemicals. If the mineral concentration, particularly calcium, becomes too high, the minerals will literally “drop” or precipitate out of the water and deposit on the hot tub walls, plumbing, jets, in the filter and on the heater element. •It is very important that pH be checked frequently and maintained in the recommended range as indicated in the chart water balance summary for your Hot Tub - p. 57 For these reasons, it is very important to develop proper hot tub water maintenance habits and follow your dealers recommended water maintenance procedures. Your Hydropool dealer will advise you as to what method they recommend. Surface Cleaning Built-in bottom floor cleaner eliminates small debris from settling on the hot tub floor and allows pump assisted quick draining. 100% Filtered Water to Jets Water Flow Large top load pressure Filter 100% of the Hot Tub water . is filtered in a 15 minute Cycle PUMP 56 GLOSSARY OF COMMON WATER MAINTENANCE TERMS 1CHLORINE – in granular, liquid or puck/tablet form, is an oxidant and biocidal agent. It is very effective and fast acting. Recommended chlorine residual level is 3.0 to 5.0 ppm. 2CHLORAMINES – a compound formed when chlorine combines with nitrogen or ammonia present in the water. When allowed to go unchecked, it causes eye and skin irritation and is indicated by a strong chlorine odour. 3ONE-PART BROMINE – also available in puck/tablet form, is another type of oxidant/biocidal agent, and is introduced into the hot tub water via a brominator. Recommended bromine residual level is 3.0 to 5.0 ppm 4TWO-PART BROMINE – composed of a liquid or powder component introduced manually into the water on a weekly basis, and a granular component that is added daily or as the hot tub is used. 5BROMAMINES – are formed when bromine destroys nitrogen-bearing organic matter. Unlike chloramines, bromamines don’t cause eye irritation, however, when allowed to go unchecked, will cause an objectionable odour. 6SHOCK – the practice of adding an oxidizing agent to hot tub water to destroy ammonia, nitrogenous and organic contaminants (chloramines and bromamines) 7pH – a logarithmic value expressing the relative acidity or basicity of a substance (such as hot tub water) as indicated by the hydrogen ion concentration. pH is expressed as a number on a scale of 0 to 14, where 0 is most acidic, 1 to 7 being acidic, 7 considered neutral, 7 to 14 being basic, and 14 being most basic. The ideal range for hot tub water is 7.4 to 7.6 ppm 8 pH INCREASER – raises the pH level of the water. 9 pH DECREASER – lowers the pH level of the water. 10TOTAL ALKALINITY (TA) – the amount of carbonate, bicarbonate and hydroxide compounds present in the water that determines the ability or capacity of the water to resist change in pH. Also known as the ‘buffering’ capacity. 11 ALKALINITY BOOSTER – raises the alkalinity. 12CALCIUM HARDNESS – the calcium portion of the total alkalinity which represents 70 to 75% of total hardness. Calcium concentrations determine whether water is ‘soft’ - too little calcium, or ‘hard’ -too much calcium. 13CALCIUM BOOSTER – increases the calcium level. 14TOTAL DISSOLVED SOLIDS (TDS) – a measure of the total amount of dissolved matter in the water (calcium, carbonates, bicarbonates, magnesium, metallic compounds, etc.) 15SEQUESTERANTS (STAIN AND SCALE CONTROLLERS) – keeps dissolved metals and minerals in the water from attacking the hot tub shell and support equipment components. 16DEFOAMER – removes foam build-up from the water surface. At best, this is a temporary remedy, as excessive foam is merely a symptom of improper water balance (typically high organic residue and/or high pH). 17CARTRIDGE FILTER CLEANER – degreases and cleans cartridge filters. 18OZONATOR – generates Ozone (a gaseous molecule composed of 3 atoms of oxygen) and is injected into the hot tub water for the oxidation of water contaminants. 19TEST KIT – used to monitor specific chemical residual or demands in the water. May be in the form of litmus strips or liquid drops. 20PPM – abbreviation for ‘parts per million’, the unit of measurement used in chemical testing which indicates the parts by weight in relation to one million parts by weight of water. Essentially identical to the term mg/L - milligrams per liter. WATER BALANCE SUMMARY FOR YOUR HOT TUB* SANITIZER (ppm) Chlorine Bromine MIN 1.0 2.0 IDEAL 3.0 - 5.0 3.0 - 5.0 MAX 10.0 10.0 CHEMICAL PH 7.2 7.4 - 7.6 7.8 Total Alkalinity (TA) 80 80 - 120 180 **Total Dissolved Solids (TDS) 300 1000 - 2000 3000 Calcium Hardness 150 200 - 400 500 - 1000 * National Spa & Pool Institute recommended levels for residential spas/hot tubs ** Organic TDS 57 Signs of Improper Water Balance FOAMING Foaming is caused by the agitation of total dissolved solids (TDS). This can be caused by the buildup of too much chemical by-products in the spa water, people not showering before using the hot tub, body lotions, etc. To correct, add a small amount of foam eliminator and turn on jets to circulate the water. At best, this is a temporary remedy, as excessive foam is merely a symptom of improper water balance. In extreme cases, the water will require draining and the filter will require cleaning. CLOUDY WATER Cloudy water can be caused by: • high total dissolved solids (TDS) thereby requiring full or partial water drainage • a low disinfectant level • incorrect pH requiring balancing • suspended particles necessitating a filter cleaning • insufficient filtration time SKIN IRRITATION Most skin irritation is caused by too high or too low pH. Test and adjust. Where irritation continues, consult your physician. Corona Discharge Ozone Technology All Hydropool™ hot tubs are factory prepared to accommodate ozonators. The Hydropool™ Corona Discharge Ozonator is regarded as the most technologically advanced system on the market, allowing longer contact time with the hot tub water resulting in reduced chemical consumption and clearer, cleaner water. Hot Tub Water CD Ozonator Mazzei Ozone Injector Ozone Mixing Chamber Ozone Injector Jet The Benefits are: • Better water quality • Less Chemical Purchases • Less water maintenance • A more pleasant hot tub experience Hydropool’s™ unique ozone injection system both maximizes the dispersion of the ozone gas and decreases the bubble size resulting in longer contact with the water and increased water quality and purity. The ozone/water mixture is sent down a series of tubes where the ozone is “broken down” into even smaller bubbles before being re-mixed with the water reducing the “off-gassing” commonly found with other ozone systems. 58 Suggested Routine Water Maintenance MONTHLY lways follow the instructions A on the label of the chemical container to determine the correct ratios 1Soak your filter cartridge in a filter cartridge cleaning solution. Rinse thoroughly and, if possible, allow to dry before re-installing. Hydropool recommends purchasing a second filter so that while the first is cleaning, the other is clean and ready to install. INITIAL FILL 1 Make sure the hot tub water is circulating. 2Add a sequesterant (stain and scale controller). Allow water to circulate for an hour before adding anything else to the hot tub water. 3 Add a Shock / oxidizing agent . 4Add sanitizing tablets (Bromine or Chlorine) to the dispenser: • Built in dispenser: if your Hydropool hot tub was ordered with the optional built in bromine/chlorine dispenser, (located in the lid of the cartridge filter housing), refer to section CARTRIDGE FILTER for details on removing and re-installing the lid. Once the filter lid is removed, you’ll notice a clear 2.5 cm (1”) diameter tube extending from the bottom of the lid. Unscrew the check valve assembly at the end of the tube and add 5 or 6 tablets. Do not overfill dispenser as performance will be affected. Set the dial initially to ‘5’, and allow water to circulate for 3 to 4 hours before testing level. Adjust dial more or less as necessary. • Floating dispenser: As above, add 6 or 7 tablets, adjust initially to ‘5’, allow water to circulate for 3 to 4 hours, then test. QUARTERLY 1Drain hot tub at least once per quarter and clean the acrylic shell surface with a non-abrasive cleaner designed specifically for acrylic surfaces see sections changing the hot tub water and draining your hot tub - p. 61 CHEMICAL SAFETY HINTS •Never pre-mix chemicals with each other prior to adding to hot tub water. • Add only one chemical to the water at a time. • Always add chemicals to water and not vice-versa. •Chemicals may be corrosive, so handle with care and store in a cool dark place. • Never smoke near chemicals as most are flammable •Ensure any spilled chemicals are carefully cleaned up immediately. •Always have the Poison Control telephone number handy in the event of an emergency. • Keep chemicals out of children‘s reach • Wear safety glasses and gloves when handling chemicals. CLEANING THE SKIMMER BASKET 1 Activate the standby/drain assist mode 2Remove the skimmer basket by pulling the weir door forward, and pulling the basket up and towards the front. 3Remove debris from basket. (Note: Avoid hitting the basket against objects to knock debris loose as this may damage the unit). 4 Reinsert basket. 5Take the system out of standby/drain assist mode, and as the pump begins to operate, monitor water flow over the weir door to assure that it is free floating. The tablets will dissolve slowly over a 10-14 day period, depending on dial setting, and use of the hot tub. 5 Test pH and Total Alkalinity and adjust accordingly. DAILY 1 Test water, and if necessary, add shock. 2 Ensure proper water level is maintained. WEEKLY 1 Test pH and Alkalinity. Adjust accordingly. 2 Top-up chemical dispenser. 3 Add sequesterant (stain and scale controller). 4Remove and spray cartridge filter with garden hose and re-install (see section CARTRIDGE FILTER - p. 60). 5Remove and clean out skimmer basket (see section CLEANING THE SKIMMER BASKET). 6 Add Shock / oxidizing agent. 59 CARTRIDGE FILTER The cartridge should be cleaned every two to four weeks, depending on the amount of use. Signs that the filter requires cleaning include: • Reduced jet power • Hazy gray water • Rattling noise in the pump or filter • Heater not working Removal 1 Activate the standby/drain assist mode. 2 Remove the cosmetic lid and open the small, black air vent/bleeder valve on the top of the filter lid. 3 Press down the lock tab to disengage and turn the locking ring counter clockwise. 4 Pull the filter lid upwards, and lift the cartridge element straight up and out of filter housing. Cleaning 5 With a garden hose and spray nozzle, hose off the cartridge element, ensuring to carefully separate every pleat. 6 To remove collected lotions, body oils, etc. soak the cartridge in warm water and a filter cleaning/emulsifying compound (available at your HYDROPOOL dealer). 7 A cleaning cylinder may be purchased from your HYDROPOOL Hot tub dealer. CLEANING THE ACRYLIC SURFACE 8 Rinse thoroughly and dry before replacing. The acrylic surface can be cleaned and polished using a 9 Hydropool recomends purchasing a spare filter cartridge so soft cloth and acrylic cleaner, available at your Hydropool that you always have a clean substitute ready to rotate. dealer. 10After the element has dried - if necessary, lightly brush between pleats with a fine paint-brush to remove Caution: Never use an abrasive cleaner. remaining dirt particles. CAUTION: Do not use a wire brush or other devise to clean cartridge element. Do not put in dishwasher or washing machine. SAFETY HARD COVERS When a hot tub is uncovered, over 90% of heat is lost from the water surface. This evaporation also affects the chemical balance and could create humidity problems indoors. HYDROPOOL Safety Hard Covers are engineered for maximum thermal efficiency and appearance. They are hinged in the middle for easier handling, and the zip fastener allows the tapered foam inserts to be changed if damaged. The skirt of the safety hard cover hugs the lip of the hot tub for a tight fit. The handles are placed so that even one person can easily carry a large cover. The locks, with one part fastened to the deck or skirt, prevent small children or animals from entering the hot tub. Do not drag the safety hard cover across the hot tub or decking. Fold the cover first, then lift by the handles. Standing on the hardcover could cause the tapered foam inserts to crack, which will lead to water absorption. Re-installation 11Place the cartridge filter back into the filter housing. 12Replace the filter housing lid, pushing it down to seat, ensuring that the lid o-ring does not become twisted. 13Hydropool recomends that the lid o-ring be lubricated with a non-petroleum based lubricant (ie. Silicone gel) when it becomes dry. This will help to prevent twisting and pinching as the lid is installed, and significantly increase longevity of the o-ring. 14Install the filter lock-ring, turning clockwise until the lock tab snaps into place. 15Close the air vent/bleeder valve. 16Take the system out of standby/drain assist mode. 17When the pump starts circulating on low speed, it will be necessary to release trapped air in the filter. Carefully loosen the vent valve counter-clockwise until there is the NEVER LEAN OR STAND ON YOUR HARDCOVER. hissing sound of air escaping. Once there is a steady stream of water, close the vent valve, ensuring that the The cover should be cleaned at least twice a year with a o-ring does not become pinched. vinyl moisturizer and protector. 60 CHANGING THE HOT TUB WATER 11 To completely flush the old water from the plumbing lines: allow fresh water to fill into the foot-well area while the old water continues to be pumped out. Always keep at least 10cm (4 in.) of water in the foot-well so that pump 1 remains primed. 12 When the water from the drain hose turns clear (indicating fresh fill water), flush is complete. 13 Turn off the low speed pump. 14 Close the drain-hose bib on the hot tub plumbing line and continue filling hot tub with fresh water. 15 Place cover on hot tub (to avoid splash-out). 16 Open pump 1 return gate valve. 17 Press any button on the topside control panel (other than the pump 1 button) to take the system out of Standby/drain assist mode. Pump 1 low speed and the heater will activate to circulate and heat the water while filling continues. This also reduces the possibility of an airlock occuring. 18 Continue adding fresh fill water until level is approximately 19mm (3/4 in.) from the top of the skimmer opening. 19 Once fill is complete, remove the #10 rubber expansion plug from the bottom of the skimmer housing.* 20 If the filter housing was opened to replace the cartridge filter, it will be nessesary to release trapped air from the filter housing by carefully loosening the small black air vent valve located on the top of the filter housing. When water begins to escape close the air vent valve. 21 In the unlikely event of a pump air lock (pump 1 is operating but there is no water movement from the jets), refer to section PUMP PRIMING/RELEASING AN AIR LOCK - p. 15 A hot tub should be drained every 8-12 weeks, depending on size and amount of use. If your hot tub is used daily or by a large number of bathers, the water should be drained more often. One method to determine the approximate length of time between water changes is to divide the water volume (in liters) of your hot tub by 13.5 and then divide by the average number of bathers each day. ( Formula ________ ÷ 13.5 ) ÷ (__________) = (__________) Volume of water Average in litres daily bathers Days between water changes Example: 1000 liters divided by 13.5 divided by 2 = 37 days. The hot tub water must be changed when the amount of dissolved solids becomes excessive, and is usually indicated by “gray” or dull looking water. DRAINING YOUR HOT TUB Hydropool Exclusive Quick-drain™ & fill Overview • Requires the use of 2 garden hoses - drain hose and fill hose • While first garden hose is draining old water from hot tub… • …second hose is used to wash down interior surface of the hot tub and for fresh water fill. refer to Figure 1 & Figure 2 * It may be necessary to put system into Standby/Drain ASSIST mode in order to remove plug. 1 Locate nearest drain facility (shower, laundry tub, floor drain, lawn, etc.). 2 Put the hot tub control system into standby/drain assist mode. 3 Remove the skimmer basket so that the hole beneath it is accessible, and insert the #10 rubber expansion plug provided. 4 Attach garden hose to hose bib located on plumbing line beside the hot tub control system. 5 Run garden hose to drain location. 6 Open hose bib. 7 Close pump1 return gate valve next to the hose bib (this directs the water out the drain hose). 8 Activate the low speed pump. 9 Monitor the hot tub while it drains. 10 Use the second garden hose to wash down interior surface as the hot tub continues to drain. A sponge may also be used to wipe down the interior surface. Important: Do not use detergents - the remaining residues will adversely affect water chemistry, making it difficult to maintain proper water balance. Do Not use abrasive cleaners - damage to the acrylic surface will occur. WATER SOFTENERS Never fill a hot tub with water from a water softener, as it could adversely effect the water chemistry, making it difficult to maintain proper water balance. If you live in an area with hard or soft water, give careful attention to your Calcium Hardness level. Topping up with soft water is acceptable. P1 Gate Valve Figure 1 61 Hose bib Figure 2 Hydropool Exclusive Quick-drain™ & fill #10 Skimmer Plug Fill Hose Drain Hose Gate Valve Hose Bib Skimmer/Pre-filter Heater pump Closing Pump 1 return Gate Valve 62 GAZEBOS If you are mounting, or planning to mount a gazebo over the top of your hot tub, it is critical to ensure that Hydropool is aware of this, as extra supports may be necessary. Otherwise, it will be necessary for your installer to add the extra supports where required. PROTECTING YOUR CABINET WOOD FINISH HYDROPOOL hot tub cabinets are made from Western cedar and are factory stained. Once stained, cedar weathers well, and with proper care will maintain its beauty for many years. Cetol 23 #078 or an equivalent polyurethane or marine varathane with UV inhibitors is highly recommended. These protective finishes stabilize the wood grain and build a durable, breathable water-repellent barrier between the wood surface and the elements. These products are available from your local building supply center. For a protective translucent finish and to enhance the wood grain beauty, Sikkens Cetol 01 #077 stain and Sikkens Cabinet Wing-Locks The high quality wing-locks provided on your Hydropool Hot Tub cabinet not only firmly secure the equipment access panel, they also serve as convenient handles for removal and replacement. In order to maintain optimum performance and extended life, Hydropool recommends lubricating twice annually with a silicone based lubricant. Recommended product: Super-Lube silicone based lubricant (or equivalent). Available at major retailers. Caution: Do not use a petroleum based lubricant, as this will cause premature deterioration of the lock seal. Lubrication point 63 WINTERIZING YOUR HYDROPOOL HOT TUB In the event that you do not wish to use your hot tub year-round, it is very important that you properly winterize to protect against damage from freezing. Your HYDROPOOL dealer can perform such a service for a nominal fee. If you choose to winterize your hot tub yourself, please follow the directions outlined below: • Cover exposed plumbing connections with plastic bags and duct tape. • Where practical, disconnect hot tub support equipment and store in a dry heated area. • Install the safety hardcover, and cover the entire hot tub with a tarp to prevent premature weathering of the cabinet and the safety hard cover. • Remove snow build up regularly to prevent damage to the safety hard cover. • It is assumed that your HYDROPOOL hot tub has been properly installed on a reinforced concrete pad to eliminate lifting of the hot tub due to hydrostatic ground water pressure. • Drain the hot tub entirely see section - DRAINING YOUR HOT TUB - p. 54. • Remove and clean the cartridge filter element see section - CARTRIDGE FILTER - p.53. • Using a wet/dry utility vacuum, remove remaining water from the jet openings, filter cartridge housing, and footwell. • Either pour or use a turkey-baster where necessary to add potable biodegradable RV antifreeze to areas such as pump wet end, jet channels, filter housing, blower channels. Do not use automotive antifreeze. • Add potable RV antifreeze to the holes in the bottom suction/drain to prevent any trapped water in the false floor from freezing and damaging the hot tub shell. • Turn pump on for only a few seconds to circulate the antifreeze. • Unthread and disconnect all unions in the support equipment area. Remove lowest winter drain plug on pump face plate. Repeat for all pumps, where applicable. winter Drain Plugs 64 Caution: If you are not 100% confident that your hot tub is properly winterized, please consult your authorized HYDROPOOL Hot Tub dealer. Caution recommends that an authorized Hydropool Dealer winterize your hot tub in the initial year. Damage as a result of freezing is not covered by the warranty. GENERAL TROUBLESHOOTING Electrical/Mechanical SYMPTOM POSSIBLE REASON(S) CORRECTIVE ACTION No Power – Breaker off at main panel or fuse out – Improper wiring – Fuse blown in control – G.F.C.I. tripped – Check panel – Consult electrician – Replace – Reset – G.F.C.I connected improperly G.F.C.I. Trip – Short or ground in system – As above-call Electrician or – Faulty G.F.C.I. Hydropool Dealer No Circulation – Pump is not primed – Air in waterline – Impeller clogged – Valves are closed – Water level in spa is too low – Skimmer obstructed or closed – Open drain bib – Release air – Access and clean – Open valves – Top up water – Remove/Open Jet Surge – Water level too low – Blockage in lines – Suction valve partly closed – Add water – Check valves and/or strainer – Pull valve handle “up” all the way No Heat – pressure switch not closing – Hi Limit switch tripped – Cartridge filter dirty – Low water – Faulty pressure switch – see TOPSIDE PANEL DISPLAY MESSAGES – see TOPSIDE PANEL DISPLAY MESSAGES – Clean & reinstall – Top Up – Adjust or replace – Thermostat probe improperly installed Erratic Heat – Low Water – Incorrectly adjusted pressure switch – Faulty sensor – Top Up – Adjust Noisy Motor – Damaged or worn bearings – Low voltage – Low water level – Frozen pump – Clogged Impeller – Call your Electrician or Hydropool dealer. – Check supply – Top Up – Thaw out – Access and clean Digital Top Side No Longer Displays – Improper connection – Electrical brown-out – Unplug cable and re-connect – Reboot control system Digital Temperature Display is Erratic or Flashing – Water temperature has exceeded set point – Decrease filter cycle 65 GENERAL TROUBLESHOOTING Continued WHAT TO DO IN THE EVENT OF... …Power Failure or sYstem fault during Cold Weather Conditions …POWER FLUCTUATIONS The power supply into your home is, for the most part, fairly consistent. However, when local power demand is high, there is a tendency for the voltage entering your home to drop (sometimes significantly) or fluctuate. This condition is referred to as a ‘brown-out’. Although safeguards have been built into the system to protect against this condition, supply voltage may drop low enough, if even for a second, to cause the system to display a ‘ghost’ message. Should this occur or if the display shows partial messages, try resetting the system by turning power to the hot tub off, waiting a few minutes, then turning power on again. If this does not reset the system, contact your local dealer or service organization. If your control system will not reset, (ie. GFCI trips) or if your pump will not circulate for any other reason, place a low wattage space heater or hair dryer under the cabinet in the equipment area. This will delay the risk of freezing while a service appointment is scheduled. Notes: 66 Notes: 67 Hydropool.Industries 335..Superior.Boulevard Mississauga.(Ontario).Canada.L5T.L6 www.hydropoolhottubs.com