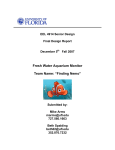
1
TRANSMITTAL ________________________________________________________________________ Florida Institute of Technology Department of Marine and Environmental Systems OCE 4915 TO: Dr. Stephen Wood Dept. of Marine and Environmental Systems Florida Institute of Technology 150 W. University Blvd. Melbourne, FL 32901 FROM: Senior Design: ROV Team, ModROV Department of Marine and Environmental Systems 150 W. University Blvd. Melbourne, FL 32901 RE: Final Report DATE SUBMITTED: July 23, 2009 Dr. Wood, Please review the attached Final Report for the ModROV team. The ROV Team: ________________________ James Miller ________________________ Zach Barton ________________________ Morgan Marmitt ________________________ Rick Paradis Florida Institute of Technology Ocean Engineering Design 2009 OCE 4915 ModROV - Final Report Presented by: The ROV Team Zach Barton James Miller Rick Paradis Morgan Marmitt 2 ACKNOWLEDGEMENTS We would like to thank: Dr. Wood for his advice, encouragement, understanding, and time in all the areas of building this project. He helped keep us going when we did not know if we could. Everyone in the Machine shop for their machining expertise and especially their patience. Most of all Larry Buist for giving us advise, support and expertise in building the ROV. He took time out of his busy schedule and helped up us finish the ROV electronics. We would like to thank all the companies (Teledyne Impulse, inc. and General Plastics Manufacturing Co.) that gave us a donation or discount on materials used in building this project. Without your help and understanding this project would not be possible. 3 LIST OF ABREVATIONS CTD Conductivity Temperature and Depth DMES Department of Marine and Environmental Systems EPA Environmental Protection Agency FIT Florida Institute of Technology LCD Liquid Crystal Display LED Light Emitting Diode MFP Marine Field Project ModROV Modular Remotely Operated Vehicle MSDS Material Safety Data Sheet’ OSHA Occupational Safety and Health Administration PIC Programmable Interface Controller TDS Tether Deployment System ROV Remotely Operated Vehicle 4 Table of Contents 1.0 Executive Summary ...................................................................................................... 7 2.0 Introduction ................................................................................................................... 8 2.1 Motivation ............................................................................................................ 8 2.2 Objectives ............................................................................................................ 8 2.3 Timeline ............................................................................................................... 9 2.4 Organization ......................................................................................................... 9 3.0 Background ................................................................................................................. 10 3.1 Basic Theory ...................................................................................................... 10 3.2 History................................................................................................................ 11 4.0 Procedures ................................................................................................................... 14 4.1 Foam Pressure Test ............................................................................................ 14 4.2 Pressure Housing Test........................................................................................ 14 4.3 Dry Electronics Test .......................................................................................... 14 4.4 Pool Trials .......................................................................................................... 15 6.0 Customer Requirements .............................................................................................. 16 6.1 Future Customer Requirements ......................................................................... 16 7.0 Project Evolution ........................................................................................................ 17 8.0 Function Decomposition Structure ............................................................................. 23 8.1 Frame ................................................................................................................. 24 8.1.1 Thrusters ...................................................................................................... 24 8.2 Pressure Housing ............................................................................................... 25 8.3 Floatation ........................................................................................................... 25 8.4 Electronics.......................................................................................................... 26 8.4.1 Control Box.................................................................................................. 27 8.4.2 ROV Electronics .......................................................................................... 28 8.4.3 Underwater Connectors ............................................................................... 30 8.4.4 Programming................................................................................................ 30 9.0 Ethical Issues .............................................................................................................. 30 10.0 Political Issues .......................................................................................................... 32 11.0 Health and Safety ...................................................................................................... 32 12.0 Budget ....................................................................................................................... 33 12.1 Bill of Materials ............................................................................................... 33 12.2 Time Expenditures ........................................................................................... 33 13.0 Results ....................................................................................................................... 34 14.0 Conclusion ................................................................................................................ 34 14.1 Recommendations ............................................................................................ 34 14.1.1 Pressure Transducer ................................................................................... 34 14.1.2 Compass ..................................................................................................... 35 14.1.3 Sensors ....................................................................................................... 35 14.1.4 Lights ......................................................................................................... 35 14.1.5 Addition of a Second Camera .................................................................... 35 14.1.6 Cathodic Protection .................................................................................... 36 14.1.7 Basket ......................................................................................................... 36 14.1.8 Manipulator Arm ....................................................................................... 36 14.1.9 Hull Cleaning Brush and Underwater Vacuum ......................................... 37 5 14.1.10 Tether Extension ...................................................................................... 37 14.1.11 Deployment/Recovery Device ................................................................. 38 15.0 References ................................................................................................................. 38 16.0 Appendices ................................................................................................................ 39 Appendix A - Slime Shark Final Report .................................................................. 40 Appendix B - Resumes ............................................................................................ 41 Appendix C - Weekly Time Log ............................................................................. 41 Appendix D - Safety Plan Requirement................................................................... 43 Appendix E - Basic Code Topside ........................................................................... 47 Appendix F - Bill of Materials: Slime Shark ........................................................... 51 Appendix G - Bill of Materials: ModROV .............................................................. 52 Appendix H – Inventory .......................................................................................... 53 Appendix I - Procedure for Hyperbaric Chamber Operation................................... 56 Appendix J - SeaBotix BTD-150 Thruster .............................................................. 57 Appendix K - Teledyne Impulse Underwater Connector ........................................ 57 Appendix L - Foam Properties ................................................................................. 59 Appendix M - User Manual ..................................................................................... 64 6 1.0 Executive Summary Our senior design group planned to complete the remote operated vehicle (ROV) that was worked upon by the previous year’s senior design group. Our primary objective was to get the ROV to a point where the team has created a finished product that is able to be utilized by the Department of Marine and Environmental Systems in the field. The scope of this project entailed taking what the previous group developed and from there finishing the remaining core systems and make the ROV operational. The benefits to society if a completely modular ROV should exist are numerous. Such benefits include: ocean exploration, search and recovery, undersea mining, cheaper hull inspection/cleaning, scientific research and many other applications. A modular ROV could be tailored to any one of these applications. This team was also interested in adding additional lighting to the ROV for work at night or in low light conditions along with looking into using the already planned “modular” mounting system to affix systems such as a manipulator or a recovery bin. Items addressed were the completion of the electronics, floatation, a recovery and deployment system, renovations to the control case, welding and finalizing the frame, affixing the motors, connecting the umbilical to the pressure housing, in addition to conducting tests and trials. The ROV team hoped to conduct tests on foam samples to determine if the samples can withstand prolonged exposure to pressure without ill effects in addition to additional testing of the pressure housing before installing the electronics. There were also plans to conduct extensive pool trials of the ROV to give a controlled environment to do tests so the ROV may be easily retrieved and quickly serviced before participating in the Marine Field Projects. Once completed, the team hoped to use the ROV at sea during the Marine Field Projects in order to make observations and to supplement other instruments and hardware onboard the research vessel. The dimensions of the ROV are approximately: 17.5 in. tall by 24 in. wide by 32 in. long. The operating depth of the ROV is 100 ft, because of the length of the tether; however, the pressure housing was tested to approximately 200 ft. 7 2.0 Introduction This ROV senior design project represents the accumulation of four years of design and development. There are a number of important subassemblies that have been developed by prior groups and were integrated into a working product. This report will detail what progress was made and what plans we have for the future. 2.1 Motivation The group’s primary design motivation was to create a finished working product that can be utilized by the Department of Marine and Environmental Systems over the years to come. This ROV was designed as a vehicle that is as modular as possible allowing for customization by future senior design groups and the department. Most ROVs that are constructed are designed to perform specific specialized tasks or to carry every conceivable piece of equipment that they may need during their operational lives. Our team’s goal was to create a system that will be able to evolve to fit the needs of the school with hardware capable to being easily mounted and installed on the ROV. This allows the ROV to serve a more versatile role than a single purpose built vehicle, with some of the potential additional features consisting of anything from a brush assembly for cleaning boat hulls, to manipulators, to sample baskets, to additional lights or cameras. The default ROV was equipped with a camera and in the future a compass, pressure transducer, and flood lights. This allowed the default configuration to be used for general inspection purposes and underwater observations. Team ModROV pursued this design due to an apparent lack of ROVs in industry with this modular capability. We hoped that the modular abilities of the ROV would be useful for future university work in addition to being potentially commercially marketable. 2.2 Objectives The primary objective for this senior design project was to field a working ROV for the Marine Field Project cruise to ensure the proper deployment of an ADCP sensor at 8 the beginning of the cruise and to make any necessary observations during the cruise. After the cruise we hoped to design and construct additional modular components. 2.3 Timeline Our timeline gives details to what was completed in the timeframe we were given. Many things that were completed were contingent on previous tasks being finished by the previous team and other people who helped on our project. The Gantt chart below explains these tasks with respect to dates: Figure 1 Gantt Chart 2.4 Organization Team ModROV had a communal organization, with all of its members participating in tasks and decisions when possible. Each member of the team had their own unique areas of expertise and set of skills that they contributed to the project. The 9 team member’s resumes’ are attached in the report’s appendix providing additional information as to their experience. 3.0 Background The background for this design project can be broken down into two parts. The first part is the basic theory of ROVs, but more specifically ModROV. The second part is all of the history, or research done on the project. 3.1 Basic Theory The theory behind ModROV was to be a completely modular, small scale vehicle that is relatively inexpensive. ModROV was as its name suggests, an ROV. This means that it is a Remotely Operated Vehicle that employs a tether system that is used to control the ROV from the boat. The team used the 100 foot tether from the previous years’ groups. The tether allows power and data to be sent up and down it from the boat to the ROV, giving the user control over the vehicle. The tether connects from the pressure housing on the ROV to the control box on topside. The control box was also from previous years' projects. To prevent damage to the tether, a system for managing the cable needed to be implemented. This means that there needed to be some sort of reel system to prevent the tether from becoming kinked, frayed, cut, or otherwise damaged. One such system for a small ROV is the one employed by VideoRay, which is the Tether Deployment System (TDS). The objective for the VideoRay ROV is to be portable, small, and to be utilized anywhere around the world. The TDS uses a 1660 Pelican case with retractable tether and wheels. (VideoRay) This system is great for low depth systems like ModROV, but can also be applied to deeper systems, as the TDS is offered in lengths of up to 1000 feet. The TDS has a built-in slip ring that allows the tether to be let out without becoming a hassle in the reeling process. ModROV utilizes a system similar to this. The tether management system employed by Team ModROV uses a basic hose reel to hold its 100 foot tether. The reel does not use a slip ring. However, it utilizes a bearing built into the side of the reel to ensure there is no snag during the reeling process. 10 ROVs use a frame to mount the pressure housing, motors, and other systems not contained in the pressure housing. The frame also protects parts of the ROV and holds everything together. The frame is the base for our modular design. The frame creates a great surface to mount mounting rails to attach modular systems to. The purpose of the ROV is to be completely modular, able to swap out any part for different applications. This is mainly seen in larger systems however, there are a few systems, such as VideoRay's systems are being made now to be able to be modified to different applications. The housing is made out of T6 6061 Aluminum. It has a camera dome on one end as well as flanges on both ends. The maximum depth was calculated using the hoop stress equation by the previous years' team. The hoop stress equation is σ = (Pr)/t where σ is hoop stress, P is pressure, r is radius, and t is thickness. The pressure housing was then tested to approximately 200 feet using the schools hyperbaric pressure chamber. ModROV is driven by the control box on the surface. The control box is where all the video, topside electronics and controls are located. The ROV is controlled using two joysticks that give us directional control of all four motors. This gives a six-axis control for the whole vehicle. The VRAM that was created by the previous years' team also has an on-off switch. The coding for the electronics was completed in Basic by the previous years' team as well. 3.2 History For the initial design of ModROV, research was completed in regards to modular ROVs on the market. There are currently two main types of ROVs that are considered by most to be “modular”. The first type is built with a certain industry in mind, such as the underwater drilling and pipe laying industry. An ROV built for this purpose that is considered modular would have everything possibly needed for the job mounted on it already. One Such ROV, the MR1 Multi-Role ROV made by Modus, is designed for underwater cable operations such as laying, cutting, and other various cable applications. It is designed so that the company would only have to buy one ROV to handle all the applications, and not have to worry about buying and deploying different ROVs for each specific job. The Modus ROV can be seen below. 11 Figure 2 Modus MR1, courtesy of Modus Modular Underwater Systems, Ltd. The second main type of ROV that is considered modular is a basic frame made by a manufacturer that is constructed to the consumer's specifications. This type of ROV is made for a specific purpose and when it reaches the consumer, it is no longer modular as the parts are permanently added onto the frame. A company that makes these types of ROVs is SharkMarine who boast their custom ROVs are built to your individual specifications. This company also has an ROV called the Sea-Dragon. This ROV is modular, in that parts can be added to make it more useful for your application, but there is only a small variety of attachments that can be bought to be added on. The Sea-Dragon is an example of an up-and coming ROV design which the base structure, power, and propulsion are setup and then there are parts made by the manufacturer that are able to be added on. Another company that is forefront in this area is VideoRay. Their vehicles boast a small size, where most models are able to fit everything needed for a job in three suitcases. Also with this is the ability to add on modular parts to the vehicle that suit the purpose. One of VideoRay's vehicles is the Pro 3 XE GTO which is one of their more advanced models, and it is made with a port on the lower part of the structure where the various add-ons can be connected. The issue with this model is that only one of these systems is able to be added on at once. This creates 12 an issue if you want to use sonar to image where you are going, but also want to use a manipulator. The Pro 3 XE GTO can be seen below. Figure 3 VideoRay's Pro 3 XE GTO, courtesy of VideoRay In our research, there has been no modular ROV similar enough to ours that we have found. The purpose of ModROV is to have any part/system on or in it swapped out whenever needed. For example, if a company were in need to do a survey of the ocean floor and needed stronger motors to make it there and maneuver in the environment, the current motors can be removed and swapped out. Obviously, there is some work that would have to be done to get it all back together; however, it is preferable to buying a whole new ROV. A future solution to this is to have our electronics boards with a specially designed plug for each component built-in. This way, the plug would only be able to go in one spot, which makes it hard to cross-connect wires and destroying critical parts. Along with all of these complications is the back plate of the pressure housing, with the addition or changing of different parts of the ROV, there may need to be different connectors to accommodate it. This would be solved by a series of back plates that are made by our company that have holes pre-cut for specific connectors. This means that the company would make all the hardware parts and carry other parts such as sensors. This way, a customer can create their own ROV, but if in the future, it is needed for a new task that the current ROV is incapable of completing, the company could be able to supply new parts to accommodate. 13 4.0 Procedures The procedures of this senior design project mainly concerned themselves with the testing and integration of the ROV’s components that had been constructed and individually tested by the previous group. These tests allowed for troubleshooting of problems and helped make design alterations to mitigate them. 4.1 Foam Pressure Test Given that the foam we received for the ROV’s floatation had never been worked with by the school before we wanted to conduct a pressure test of it to ensure that it performs according to factory specifications. Taking a small sample of the foam, the team measured the density of it to see how close to the factory specifications it was in order to plan the floatation design accordingly. Using the pressure testing chamber on campus and following the proper procedures listed in the appendix, the foam sample was tested to ensure that it followed the company’s volume change due to hydrostatic pressure and to see that it was capable of withstanding the pressures required by our design. 4.2 Pressure Housing Test The pressure housing had been tested at a limited pressure and passed. The pressure housing needed to be retested due to the holes for the tether and underwater connector being drilled in the back-plate. This was done in the university’s pressure chamber following the proper guidelines and procedure in the appendix. Additionally the pressure housing was immersed in water in the chamber for an extended period of time to test for leaks using paper towels placed about all possible points of entry. 4.3 Dry Electronics Test After connecting all of the electronics, component tests were conducted to make sure that the motor controls were connected to the correct motors. In addition the camera feed response time and quality was verified. Any wiring and program troubleshooting was performed at this point until all components performed correctly. 14 4.4 Pool Trials When ModROV had its electronic components thoroughly tested and installed along with its structural features water proof tested, it went through its first set of pool trials to ensure that all of the ROV’s systems function in unison. These tests were done to ensure that the motors provided adequate thrust and were properly calibrated. The pool trials were also done to test the maneuverability and allow time to practice steering the ROV in preparation for the Marine Field Project. Some of the things that were planned to test in the pool were the speeds at which the ROV was capable of moving along with its thrust. However, the ROV’s initial test failed due to faulty steering control. The ROV could not move multi-directionally and thus was unfit to go on the Marine Field Project cruise. In the future further tests will be conducted with the new control boards to test the vehicle’s speed and maneuverability. 5.0 Care and Maintenance During the construction of the ROV we were careful to try to make a final product that is as modular as possible. It was hoped that the final product would allow components to be added or removed relatively easily so that they could be replaced, rearranged, or upgraded. In addition to this the team attempted to use standard off the shelf components that could be found in most hardware stores should a component need to be replaced or serviced. With the current system the only difficulty in maintaining the ROV would be if one of the motors were to fail, as it would require resealing the point where they connect between the underwater connector and the rest of the thrusters. The rest of the components on the ROV can be quickly stripped with the aid of a pair of 7/16” ratchet and wrench, a 9/16” ratchet and wrench, an adjustable wrench, and a Phillips screwdriver. There are also certain steps that can be taken to help prevent damage from occurring to the ROV during normal operations. When connecting the tether to the control box it is important that a keyway is aligned as only then will the tether be able to fasten securely. The same applies to the tether connection on the back of the ROV, there is only one possible orientation for the plug so care must be taken to not bend the prongs 15 while trying to force the plug into its socket. It is also important to never attempt to lift or pull the ROV by the tether as it is only secured by friction and a plastic coupling on the back of the pressure housing that can easily break. When recovering or deploying the ROV do so either by holding onto the vehicles frame or by a rope attached to the vehicle. When the tether is not in use be sure to store it properly on its spool to avoid tangles or damage to the plugs from occurring. In order to properly maintain the ROV only a few precautions need to be taken. After each deployment the ROV must be washed thoroughly with fresh water in order to wash any salt off of the vehicle in addition to when the ROV has returned from an expedition and is being prepared for storage. Special care must be taken to thoroughly wash each of the motors as these are more susceptible to corrosion than other portions of the vehicle. 6.0 Customer Requirements At the present there are no customers for this ROV, but the ROV is currently being built so FIT can use it for MFP. Also, it will be a tool for the DMES to use as it sees fit. However, after the ROV becomes operational there are many ways to use this product. The ModROV is designed to be light and compact so that it is deployable on any ship. It is designed to be completely modular so the list of potential customers is endless. Oil companies can use this design to check piping by using just the video camera on the ROV. Mining companies can put a metal detector on the ROV and search the oceans for precious metals. These are only a few of the possible customers that are able to exploit the ModROV’s capabilities. 6.1 Future Customer Requirements A future purchaser of the ModROV may need several accessories added to the ROV that are not included in the default configuration. Such additions might be: • Manipulator arm with light • Metal detector • Another camera • Any kind of sensor package 16 • Brush (hull cleaning) • Basket/Container • Vacuum as well as any other conceivable accessory. 7.0 Project Evolution “From the beginning, the Slime Shark has undergone a variety of design changes. The first problem that was faced with this ROV was how the cleaning heads were to be oriented. One idea was to have several brushes that spun about a vertical axis. This design is already in use and is proven to be effective. The problem with this design was the difficulty designing a brush orientation that would prevent the angular momentum from the brushes from turning the cleaner. The second design that was eventually adopted was to have a long brush spin about a horizontal axis, much as a vacuum cleaner would. This design was favored due to the simplicity of the design, as well as the smaller chance of the brush getting clogged by clinging slime, as the spinning will produce enough force to expel it from the bristles. Another reason that this design was favored was that in order for this machine to EPA compliant, there would need to be a way to contain the expelled scum, and this would allow for there to be a containment unit around the head without much difficulty. The brush would be attached to the front of the ROV and the body would contain all of the necessary parts for functionality. The third design that was conceived was using a stream of pressurized water, much like a power washer, to remove the scum. This idea was also EPA compliant, but ultimately rejected as well due to the complexity of the design. After the horizontal axis brush was decided on, the brush also underwent several changes. The initial design was to use a brush similar to those in pool cleaners. The bristles would be arranged in a spiral so that the debris would be moved towards the center of the head so that it could be suctioned out through a tube to the containment device. The Slime Shark will not currently be equipped with an EPA compliant unit, but will be designed to be easily upgradeable. This design for the brush was changed, due to the provision of Dr. Geoffrey Swain, as he provided the ROV with a brush. It was stated that the brush design needed to have a horizontal axis of 18 inches. 17 This design of brush has the bristles oriented in a diagonal pattern, which covers the entire brush. It will rotate on a steel shaft in an Uhmw-Pe Bearings block bearing, which will be attached to the head, and will be able to be exchanged for other brushes. Unfortunately the brush from Dr. Swain was unable to be acquired, and due to budget constraints a generic brush had to be purchased that was similar to the one that was going to be received. The only exception is that the rod that the brush rotated on was one inch in diameter instead of a half inch. The head is can be removed from the ROV and exchanged for other heads. Additional heads will not be implemented in this project. The heads can be changed using square tubing and pins to attach it to the body. The body frame and its contents have undergone the most of the design changes for this project. The original design for the Slime Shark was to be a rectangular frame, made from T6 6061 aluminum channel bar. This design had to be expanded because all of the components could not be included with the frame and provide the pilot with the needed control over the Slime Shark. The proposed solution was to add a second tier, also made of channel bar. The tiers were to be connected using angle bar and supported by channel bar as cross pieces. This design was then changed in part to the location of a cheaper aluminum flat stock, which replace the angle bars, and the channel bar cross pieces. However, due to the lack of stability provided by the flat stock, it was decided that the channel would serve better to support the tiers, and it was also more aesthetically pleasing. The channel that was retained in the design was also expanded from 2”x 1” to 2 ½”x 1 ½” because of the availability of the material. This frame has a pressure housing mounted to it, which has a 6” nominal diameter and a length of one foot attached to it. The frame will also have two Seabotix motors on the port and starboard sides, attached by square tubing to the bottom tier. These motors will provide the thrust and turning needed. Two additional Seabotix motors will also be utilized to allow for ascending and descending. In order for the Slime Shark to effectively attach to the surface of the ships to clean them, the use of live well pumps was considered to provide enough downward thrust the keep the ROV in place. The discovery of a device called the VRAM changed this design, and was to be provided by Dr. Swain. This device is more efficient and smaller. The VRAM, however, is no longer available, so the design once again had to be modified. The replacement was the Suction Attachment Device, or SAD. The SAD 18 consists of a ducted fan powered by a bilge pump attached to the frame. Due to the measurements of the frame, the SAD had to be placed inside the frame which may weaken the attraction power, but the current design allows for a skirt to be added increased suction. Two cameras were initially going to be attached to the frame, one in the pressure housing and another in its own housing. The design was modified and the second camera removed because of limited funds and the complexity of the design. The camera in the main pressure housing will be retained though. The circuitry contained in the housing has also undergone some changes as well. Originally, there was a ROV from where the circuitry was going to be provided. However this was changed as the other ROV is going to be kept in commission, and new parts have to be obtained. The circuit boards were designed to support six motors, which required three PICs to allow for six channels of pulse width modulation. The water-proof connectors to allow for the wires to enter and exit the pressure vessel were provided from the previous ROV as well as some that were provided by Dr. Wood. The box that will house the controls on the surface was assimilated from last year as well. A Polaroid LCD screen and video overlay board were already installed, but the controls had to be constructed from scratch. The control panel was created from ABS and contains two joysticks, two dial knobs, two rocker switches as well as the tether connection and a power supply. The topside control also has a converter from AC-120V to twelve volts DC to power the circuitry in the box, and an AC-120V to 300 volt DC converter to send down the tether. The final aspect of this design is the hull of the ROV. As the name Slime Shark suggests, the machine will be in the shape of a shark, specifically a hammerhead. This design was chosen because the wide head allowed an ideal setup for the brush, and the body provided adequate space for the other components. The hammerhead shark also has good hydrodynamics, which is ideal for the ROV to operate. However, due to the complexity of the shell, it had to be postponed for a later project, as the other aspects of the ROV demanded more time (Appendix Slimeshark).” The above paragraphs are from the last group to work on the ROV, so this was where the evolution of ModROV began. For further information regarding this quotation, see Appendix A. 19 It was originally planned to weld some of the ROV components onto the frame, however this was soon scraped as the act of welding items permanently to the frame would undermine our goal of modularity and ease of maintenance. Among the items that were planned to be welded included the vertical motor mounts, one of which was relocated. The reason the back motor was moved to the outside was to improve symmetry, aesthetics, simplification of floatation design, decrease turbulence, increase motor efficiency, and improve location of the center of gravity. The vertical motors were also inverted from their original configuration in order to provide better protection for the propeller cages when the ROV is set down. Bumpers and originally cages were to surround the motors to protect them from wear and tear of normal use. Also the back bumper will be enlarged to serve as a handle for deployment. However, only bumpers on the front and back motors will be installed because of time restrictions. Generally, if the ROV is going to hit anything it will be on the front or back anyway. Mounting positions for the pressure housing was drilled to keep with the modular design. This gives an allowance for the mounting of various instruments/tools in the front of the ROV, as well as other areas. Below this section are figures of the design elements mentioned above. Figure 4 Bumper to Protect the Thruster 20 Figure 5 Relocation of Back Motor and Variable Pressure Housing Mount Originally it was planned to mount the pressure housing to the frame utilizing specially ordered aluminum u-channel. After pricing this material and examining what was already available in the lab it was decided that the pressure housing supports would be instead manufactured out of leftover pieces of frame material, cut in half to yield two 90 degree bar stock pieces. These pieces are then mounted to the frame with a set of bolts that allow the pressure housing to be removed easily. On the top of the frame there is then a line of holes drilled which allows the entire pressure housing assembly to be moved forwards or backwards on the frame in order to help compensate for the ROV’s trim when additional equipment is mounted to it. Originally it was planned to have four bolts for each support, however it was decided to reduce that number to only two bolts and to instead increase their diameter from ¼” to 3/8”. This also simplified the work done to the frame by reducing the number of holes that needed to be drilled on the frame of the ROV. To each of the pressure housing support brackets there are attached two 6” aluminum u-bolts that the previous year’s team acquired. These are mounted in a pair of 5/8” holes drilled in the pressure housing support brackets. The manner in which the 21 pressure housing supports are mounted to the frame is also significant, the vertical portion of the bar stock is used to help prevent the pressure housing from sliding forward and aft on the ROV while being held in place by the u-bolts which prevent the pressure housing from moving vertically or from side to side. In order to allow the bolts that are used to seal the pressure housing to have clearance with the pressure housing supports the initial design had a radius taken out of the center of each of the support brackets that would lower the pressure housing and bolts out of the way. In order to simplify the machining process and to improve the strength of the support brackets small cutouts were instead milled on the brackets in order to allow bolt clearance. Figure 6 Pressure Housing Supports The floatation system was designed to give the ROV neutral buoyancy with a slightly positive trim such that in the event of loss of power or of the tether the ROV will should return to the surface where it may be recovered. The design of the ROV’s floatation went through a number of iterations as new materials were considered and selected for use. The first plan was to utilize epoxy resin and glass microspheres to create syntactic foam that would then be molded and machined to the final shape. After creating a number of potential designs it was found that a large volume and mass of foam would be required to provide adequate floatation for the vehicle which would inhibit its performance underwater and make transportation and deployment more difficult. When 22 examining different options high density urethane foam was found that was easy to machine and considerably lighter than the previously considered syntactic foam. The floatation provided was General Plastics Manufacturing Company’s R-3318 Hydrostatic Pressure Resistant Foam which was a remnant donated by them to the school. According to the company's website this product is designed to provide floatation for underwater systems such as our ROV and has a density of 18 lbs/ft3 and can operate at depths up to 800 feet. The foam was mounted to the frame of the ROV using six aluminum bolts, three to each side, that were made from aluminum bar stock that was cut to length then threaded which was much cheaper than having to purchase premade bolts of the required dimensions. Calculations were made to determine the strength of these bolts with a factor of safety of three in order to verify that they would be strong enough to support the frame of the ROV. In regards to the control box, the interior control surface was lowered to accommodate the LCD screen. Part of the panel was cut out to make room for various cables or future electronics. Also, springs and handles were installed to make the control surface easier to remove. The topside power converter board was completed and attached to the bottom of the control box. It includes a FARM3 and MINIHAM components as well as various resistors, capacitors and diode required for the company’s circuit design. Controls will be labeled before completion. Our original design did not include forward lights on the ROV. However, if time permits, a light for the ROV will be designed and mounted. An evolution in the bottomside electronics also occurred. As we got further into our project it came to our attention that the bottomside electronics board had a flaw in the design that only allowed three out of the four motors to work. The board was redesigned by Larry Buist and all of the components were ordered to populate the circuit. The new board however, was also non-operational. Therefore, a new, simpler board is being designed to replace these and make the ROV operational. 8.0 Function Decomposition Structure ModROV is made of a number of components, of them are five major assemblies which are listed and outlined below. 23 8.1 Frame The frame is the primary structural component of the ROV and it is made of several welded pieces of 6061 Aluminum U-channel with the dimensions of 2 ½” x 1 ½” by 1/8“thick. The frame was TIG welded together to the proper specifications for each weld joint. The material itself has reasonable corrosive properties, is easy to weld for aluminum, and is easy to machine. It was originally designed to be a rugged frame capable of withstanding the force and vibrations from a large brush assembly for boat hull cleaning and was also able to have components easily mounted to it which helps keep with our goal of having a final product that is capable of having modular components. The wide flat faces of the frame are good for either bolting or welding components onto it. The frame is what the pressure housing and floatation systems mount to, allowing them to be easily removed should a modification need to be made for any of the components. There are plans to anodize the frame in the future in order to provide a level of protection to the frame due to it not being constructed from a marine grade aluminum alloy. 8.1.1 Thrusters The thrusters for the ROV are Seabotix BTD-150 Thrusters which were selected by the previous year’s group for “their power, price and their ease of control” (see Thruster section of Appendix A). The motors are DC Brush motors specifically designed for use in underwater robotics. The default ROV configuration uses four of these motors set in pairs of two, one pair orientated vertically and the other horizontally. Figure 7 Seabotix BTD-150 Thruster, courtesy of Seabotix, Inc. 24 8.2 Pressure Housing The pressure housing was constructed by the previous ROV senior design team and was designed to withstand a minimum of 100 feet of hydrostatic pressure. The pressure housing has holes drilled in the backside so that the tether connector could be mounted in addition to an underwater connector for the motors. Within the pressure housing are the electronics for the ROV and the camera. All these components are located on a platform that can easily be removed from the pressure housing for service or modifications. The tube that comprises the primary structure of the pressure housing is a 6” inner diameter aluminum pipe 12” long. Welded to the ends of this pipe are a pair of aluminum flanges that are 3/8” thick. The rear flange has a hole cut in it with a diameter of 6” that aligns with the inside of the pipe and an outside diameter of 8”. To this rear flange another 8” plate is bolted with six nuts and bolts about the perimeter. This rearmost flange has a small slot cut in it to house an o-ring to seal the rear of the chamber. The flange welded to the front of the pressure chamber has a 7” diameter with a small hole for the camera cut in it. The dome is placed over the camera and another o-ring seal with another 7” flange placed in front of it to secure it to the pressure chamber. Another six nuts and bolts are used to fasten these two flanges to one another and keep it sealed. The particular hardware used to secure the pressure housing are ¼” x 20 x 1 ¼” hex cap screws, washers, and locknuts. The rear flange of the pressure housing also has two holes drilled in it to accommodate the underwater connector for the motors and the tether, each 5/8” and 1” respectively. The pressure housing has been pressure tested in our hyperbaric pressure chamber to a depth of approximately 200 feet, twice the currently planned operational depth giving us a factor of safety of at least two. The weakest point on the pressure housing is the plastic dome which the camera sits behind; unfortunately there are no specifications as to what depth it is rated so we can only rely on what our tests have proven. 8.3 Floatation The floatation system is designed to give the ROV neutral buoyancy with a slightly positive trim such that in the event of loss of power or of the tether the ROV will 25 hopefully return to the surface where it may be recovered. The design of the ROV’s floatation has undergone a number of iterations as new materials have been considered and selected for use. The floatation will be provided by General Plastics Manufacturing Company’s R-3318 Hydrostatic Pressure Resistant Foam. According to the company's website this product is designed to provide floatation for underwater systems. This foam features a density of 18 lbs/ft3 and handle up to 350 psi of water pressure or 800 feet. Looking at the water penetration table for the product that can be found in the appendix, the foam will exhibit little change in volume from the pressures we expect to experience. The R-3318 foam is easy to machine and glue together which will make the construction of the floatation structure fairly easy. The exterior of the foam was covered with a layer of fiberglass and epoxy to provide it with a layer of protection from dents and scratches. The floatation system was then painted a bright yellow colour to aid in spotting the ROV underwater and on the surface and to provide an additional layer of protection to the foam in addition to making it aesthetically pleasing. 8.4 Electronics For a ROV to successfully work, the design must include carefully built electronics that are programmed to maneuver the ROV correctly, along with other control functions. There are two separate electronic boards: one in the control box and the other in the pressure housing. The ROV’s electronics are mounted within the pressure housing on a specially designed platform to allow for easy installation and removal. The camera is also mounted to this electronics platform as is the power converter that gives the proper voltage required for the control board. The control box’s electronics are housed underneath the platform containing the joysticks and buttons that control the ROV. There is also a Polaroid LCD screen that shows video output. The following sections will explain in further detail the ROV’s electronics and the control box’s electronics, as well as the programming involved. 26 8.4.1 Control Box The ROV operator utilizes the control box to maneuver the vehicle underwater. The camera feed is displayed on a Polaroid LCD screen that can have a compass and depth reading on the screen with the video overlay board that will be discussed later. This ensures that the pilot has as much information as possible to successfully fulfill any mission required. The components that are used for control, feedback and power supply are encased a Pelican 1550 case. Once the case is opened there are many components for control. The control is governed by two joysticks that rotate on an X and Y axis. The power switch and other buttons that will possibly turn on/off a light or any other future components added to the ROV are mounted here as well. Handles and springs were added to the surface of the controls to make it easier to get to the circuitry below the surface. Underneath the surface of the control box is a large part of the electronics for the entire vehicle. This is the communication board that includes several components important to the operation and control of the ROV. The PIC 16F876 and the MAX485 chips are the main parts of the circuit that are used to communicate to the ROV underneath the water. The schematic for the electronics board is shown below. For more technical detail, the specifics can be seen in last year’s group report found in the appendices. 27 Figure 8 Schematic of Control Box Electronics Feedback is sent from the ROV below the surface to the control box to be analyzed. The monitor itself can be connected to a video overlay system called XBOB. This is the system that takes data from a pressure transducer, compass, or any other realtime measuring device used on the ROV and puts it on screen as a heads-up display. The control box also includes the power source to the ROV. The main part of the voltage conversion circuit is located here. They are called the MiniHAM and FARM3 modules and convert and the AC input to 300V DC output. The high voltage and low current is used so power is not wasted by keeping the tether resistance low. The technical details in this section are taken from last year’s ROV team report that is located in Appendix A. 8.4.2 ROV Electronics The ROV’s electronics are located inside the pressure housing. They are connected to two underwater connectors: one connects the 100 ft tether to the control box and the other one connects the motors and additional accessories (lights, etc.). 28 Located in the pressure housing is another power converter that lowers the voltage to 12 V to power the electronics. It is a Vicor maxi family type 300V DC to 12V DC converter. The communications from the tether connect to another MAX485 and 3 PIC16F876 chips that are used to control the thrusters and other components. The technical details of the operation of the PICs are located in Appendix A where the last year’s ROV team report is. Below is the schematic, which was designed by Larry Buist: M1 Right side J1 1K 1K LM7805 VIN VOUT Grd U1-13 Power Input Pins .1 12 PWM 1 10uf 13 1 J2 PARTS LIST: 32ea P-Ch Mosfets 32ea N-Ch Mosfets Compass 7 Pressure 6 Analog In 1 5 4ea 74LS00 Analog In 2 4 1ea LM7805 Analog In 3 3 Digital In 2 Ground 1 2 3 4 5 6 7 3ea PIC16F876 1ea MAX485 9 MCLR/VPP/THV VDD 20 LCD Option RB7/PGD RB6/PGC RB5 RB4 RB3/PGM RB2 RB1 RB0/INT RA0/AN0 RA1/AN1 RA2/AN2/VREFRA3/AN3/VREF+ RA4/T0CKI RA5/AN4/SS 8ea 2N3904 10 6 74LS00 U4B 6.8K Dir 1 4 5 6.8K 9 28 27 26 25 24 23 22 21 10 74LS00 U4C 8 M2 Left side RC7/RX/DT RC6/TX/CK OSC1/CLKIN PIC16F876 U1 Digital I/0 11 74LS00 U4D RC5/SDO RC4/SDI/SDA RC3/SCK/SCL RC2/CCP1 OSC2/CLKOUT RC1/T1OSI/CCP2 RC0/T1OSO/T1CKI 18 17 16 15 14 13 12 11 1K 1K GRD 19 U1-12 8 360 12 PWM 2 20 13 7 2 3 4 5 6 7 3 SS 4 5 SCLK 6 SDO 1 9 Digital I/0 RA0/AN0 RA1/AN1 RA2/AN2/VREFRA3/AN3/VREF+ RA4/T0CKI RA5/AN4/SS RC7/RX/DT RC6/TX/CK OSC1/CLKIN RC5/SDO RC4/SDI/SDA RC3/SCK/SCL RC2/CCP1 OSC2/CLKOUT RC1/T1OSI/CCP2 RC0/T1OSO/T1CKI SCLK 28 27 26 25 24 23 22 21 +5v Grd RES Y-FLIP CAL CAL CI 1K U2-13 12 PWM 3 13 P/C J4 1 +5 volts 2 3 4 5 6 7 3 4 5 6 1 4.00MHZ 9 Digital I/0 RB7/PGD RB6/PGC RB5 RB4 RB3/PGM RB2 RB1 RB0/INT MCLR/VPP/THV RA0/AN0 RA1/AN1 RA2/AN2/VREFRA3/AN3/VREF+ RA4/T0CKI RA5/AN4/SS RC7/RX/DT RC6/TX/CK OSC1/CLKIN PIC16F876 U3 Grd 10 RC5/SDO RC4/SDI/SDA RC3/SCK/SCL RC2/CCP1 OSC2/CLKOUT RC1/T1OSI/CCP2 RC0/T1OSO/T1CKI 19 28 27 26 25 24 23 22 21 Dir 3 SDO CAL 1 EOC 74LS00 U7B 5 10 74LS00 U6C 8 M5 SAD M4 18 17 16 15 14 13 12 11 Rear Vertical Guide Down 2 M6 PWM5 1K Brush Motor 1K PWM6 8 3 LEDs 4 Spare 12 13 4 74LS00 U7D 11 6 74LS00 U7B 5 5 4 J5 .1 5 4 5 6 4 Comunications to surface 120 1 3 7 A RO MAX485 RE U8 DE B DI 6.8K Dir 9 8 4 6.8K Dir 4 5 2 74LS00 U6B 6 74LS00 U6B 6.8K 9 J6 SPARE PWM 4 6 6 6.8K 4 74LS00 U5B 4 11 74LS00 U6D GRD SPARES 6 1K Connection to Compass 8 SCLK 2 RAW 74LS00 U5B 8 Front Vertical Guide Up U2-12 +5v GRD 6 74LS00 U5C M3 Grd 7 Spare EOC 5 6.8K 18 17 20 EOC X FLIP 74LS00 U5B 6 GRD 19 VDD SDO 11 9 10 16 15 14 13 12 11 P/C P/C Connection to PC Board and PIC U3 - PORTB Compass MCLR/VPP/THV PIC16F876 U2 Grd 10 SDI M/S BCD BIN VDD 1 +5 volts 2 Digital I/0 plus power +5V RB7/PGD RB6/PGC RB5 RB4 RB3/PGM RB2 RB1 RB0/INT 4 74LS00 U5D 6.8K Dir 2 J3 10 1 2 3 4 74LS00 U7C 8 5 All ICs have .1uf decoupling cap accross power pins Some power pins not shown connected on schematic Larry Buist - Copyright 2008 For Ocean Engineering - Florida Tech [email protected] (321)674-7216 Title SLIME SHARK ROV CONTROL BOARD Size C Document Number Date: Rev /SUB3 Thursday , June 19, 2008 Sheet Figure 9 ROV Electronic Schematic Figure 9 shows the old design of the ROV electronic board. This design is flawed in that only three out of the four motors work. Besides less power and mobility, the flaw makes the ROV unable to go in the forward direction. Currently this group with the help of Larry Buist is designing and ordering a newer simpler circuit board to control the ROV. A previous more complicated circuit board was ordered but it did not work once made. To make the thrusters go both forward and reverse a method using H bridges was used on the flawed electronic board. This is a configuration of transistors that are 29 1 of 1 controlled by the PICs which allow the direction of the current to change and therefore the direction of the thrusters change. This is a very precise way of controlling the motors. The electronic board will also contain the compass and pressure transducer, so the pilot will know how far down the ROV is and which direction it is headed. Another accessory that the electronic board can control is a light which can only be turned on and off. The video camera itself is not part of the electronic board but it is supplied with 12V from the power converter and has a direct feed to the main tether for communication with the control box. The technical details in this section are taken from last year’s ROV team report that is located in Appendix A. 8.4.3 Underwater Connectors The thrusters, as well as any equipment added to the ROV in the future, are connected to the pressure housing via an underwater connector. Also, the main tether that includes all of the communication and video is connected using an underwater connector to the pressure housing. Last year’s underwater connector was used for the main tether, but another underwater connector was purchased for the light and thruster connections. All the parts for this connector were ordered from Teledyne Impulse, Inc. The parts include: female connector (BH-12-FS), male connector with a two foot whip (IL-12-MP ON 2’ 18/12 SO), male locking sleeve (D-LS-C/M), and female locking sleeve (D-LS-C/F). The technical details for the connectors can be found in Appendix J. 8.4.4 Programming The programming was done in Basic which allowed external people with more expertise to help the previous senior design team. Larry Buist and Thaddeus Misilo helped immensely with the programming and the electronics in general. The Basic code is located in Appendix E. 9.0 Ethical Issues There are ethical issues involved in the construction, and use of any machine or product. With ModROV the ethical issues involved with the construction were: excess 30 material left over after the construction of the ROV and work environment. The ethical issues pertaining to the use of ModROV include: disturbance of wildlife, personal safety hazards, and property damage. There is also the issue of the environmental impact that ModROV would have if it cannot be retrieved, and as an example: what would be the impact of the foam as it breaks down over time. During ModROV’s construction phase, the team faced the ethical issues of the disposal of extra materials and waste products, and personal safety in the work environment. First off, the team did not face any issues such as polluting the environment with the disposal of extra materials and waste products because the team adhered to the school’s guidelines and stipulations. Some of the excess materials were aluminum, high density urethane foam, plastic, and wire. Secondly, for personal safety, there was always going to be a certain degree of risk whenever work was done with machinery or electric tools. The ethical issues that pertained to the team’s safety in the work environment were: unprofessionalism while working, proper knowledge of the use of a tool, and a clean work environment. These issues became irrelevant for the team kept a professional attitude (absolutely NO horseplay) while working and used only the tools and machinery that the members of the team knew how to use. If a member was not familiar with a tool then assistance was sought from an FIT employee who was familiar with it. The team kept our work environment as clean as possible for safety purposes. While using ModROV the team could run into ethical issues such as disturbing wildlife, personal safety hazards, and property damage. Although there could be an issue with disturbing wildlife, it would be minimal because of the small size of ModROV. The ROV should not have any more of an impact on the environment then a scuba diver would. The personal safety hazard issues with the use of ModROV would be when there is a diver in the water with the ROV when it is being deployed, used, or retrieved. As long as the diver in the water with ModROV stays a safe distance while it is being deployed, used, or retrieved there should be minimal to no issue involved. Also while ModROV is in use and being stored there could be issues with causing damage to properties, such as the boat and other onboard equipment. To avoid these issues, the team will keep ModROV away from the boat hull if the conditions are not well enough to conduct a proper hull inspection so there would be no collision between the two; and 31 while it is being stored onboard the boat we will keep it strapped down so it cannot be bounced around and cause damage to the boat or other equipment on the deck. Also while ModROV is in use, there is a chance that it could get snagged or lost and become irretrievable. The ethical issues with losing ModROV would be what environment impacts it would have over time as it breaks down. Possible impacts over time could be the release of harmful chemicals as it breaks down. Another possible impact over time could even be the chance of parts breaking off the main body and causing damage to the environment and marine life. These issues would be minimized and avoided by operating it within its limits. For more information see Appendix D for the team’s Safety Plan which also addresses these issues. 10.0 Political Issues The political issues involved with the operation of ModROV include violating privacy and performing illegal activities. The ROV could improperly be used to violate private property or a restricted wildlife reserve as well as government property such as a naval base. The ROV could also be improperly used in illegal activities such as drug trafficking, spying, or the illegal harvesting of aquatic specimens. 11.0 Health and Safety Whenever work is done with machinery or hazardous chemicals there are always the possibilities for causing damage or personal injury. Keeping safety priority one, the ROV team performed all work on the ROV with at least two people present. This way encase an emergency of any sort occurred someone was present to lend aid or go for assistance. Individuals worked in well ventilated areas with a telephone line accessible for calling for aid when working with items that have fumes or generate dust. The use of proper personal protection equipment was mandatory when applicable to the process or materials that were worked with or on; this included items such as closed toed shoes, safety glasses, respirators, welding masks and welding gloves. When deploying and operating the ROV caution was exercised, there were plans to have certified divers in the water to aid in the recovery/deployment process and to help prevent the ROV from becoming fowled when operating underwater; however the voltage on the ROV was too 32 high so this idea was abandoned. Care was taken when working with electronics to avoid shock and electrocution. The ROV uses 300 volts for some applications and that poses a potential danger if proper care is not executed. Caution was exercised by making sure that live wires were not touched and that any circuitry was turned off before handling. For more information please see Appendix D for the team’s Safety Plan which also addresses these issues. 12.0 Budget This project had two budget areas, the material costs and the time costs from the team. The time costs are based on a ten dollar an hour rate for each team member plus the rate of any outside consulting work which we had done. Our monetary budget primarily came from funds allocated by the College of Engineering and the Marine Field Projects. Other sources of funds came from donations or funds raised by the team for the project. Following is a breakdown of the materials used in the project and their costs. 12.1 Bill of Materials The Bill of Materials located in the appendix lists all of the components used to construct the ROV. The items listed with a cost of $0.00 are items which have been carried over from the previous year, for their costs please see their list of materials. Our monetary budget consisted of $400.00 from the College of Engineering in addition to $1000.00 allocated from the Marine Field Projects. By utilizing components and materials from the previous year, in addition to seeking discounts and donated materials from companies, the team was able to stretch the budget to cover all expenses. A full list of our expenses and materials can be found in the Appendix F and G. 12.2 Time Expenditures In some instances it was difficult to log the entire amount of time spent on the project, especially with the assistance we received from the previous year’s group and the work done outside of class or normal meetings. Time logs can be found in the appendix taken from weekly progress reports along with an estimation of our outside consulting work. 33 13.0 Results The team was unable to produce any experimental results, as we were unable to complete a fully operational ROV by the end date. The ROV was designed to be as modular as possible with the ability for components to be easily installed and removed in the future. Hopefully future senior design groups will be able to design and integrate additional systems for the ROV such as those outlined in our recommendations. 14.0 Conclusion This team’s ROV is an improvement of the last team’s design. There have been significant changes to the design and the electronics are being completed so that there is an operational ROV for the Department of Marine and Environmental Systems. Lights, a pressure transducer, and a compass need to be added to the electronics as well. The team was able to perform tests on the ROV with the initial board, however there were some difficulties as the ROV was only able to run with three motors and control was not completely functional. This issue caused the time needed to complete the electronics to run past the date of the Marine Field Projects Symposium. The team plans to continue and ensure completion of the project by the senior design showcase in the spring. 14.1 Recommendations The following recommendations for the ModROV would build upon the modular ROV theme and make it more useful in an industrial setting. 14.1.1 Pressure Transducer Currently the ROV control board has inputs for a pressure transducer which has been purchased by a previous group. This component provides a reading of the water pressure outside the ROV in a video overlay upon the control box’s monitor. This device allows the ROV operator to know what depth the ROV is at. This is useful in the regards to navigation and safety of the ROV. The pressure transducer can also be used in tandem with other sensors on board the deployment vessel to show the depths of items of interest underwater. 34 14.1.2 Compass Another component that needs to be integrated into the ROV control board is a compass which displays the heading of the ROV on the control screen via the video inlay. The compass proves invaluable to underwater navigation and for describing positions of underwater items. 14.1.3 Sensors Scientific sensors can be built or bought and added to the frame of the ROV. A second pressure housing can be built to house sensors with electronics that need to be dry. This would involve running a cable to the main pressure housing and then sending the information up through the main communication tether. Also, the additional pressure housing can be used to store the data and then be transferred to a computer once the ROV is topside. Sensors that can be added to this ROV include: • Any sonar devices • CTD • Mineral/metal detector (for undersea mining purposes) 14.1.4 Lights The ROV needs additional lighting in order for the camera to provide a decent picture in low light conditions. There are currently provisions for a default pair of lights to be installed on the underwater connector used by the motors in order to provide the ROV with adequate light. These lights will be mounted on the front of the ROV to enhance the picture quality. 14.1.5 Addition of a Second Camera An addition of a second camera to the ROV is recommended. Placement of the camera could be in two places: the back of the ROV or the bottom of the ROV within the frame. In keeping with the original idea of last year’s team the back mounted camera would help with navigation of the ROV and it would allow the pilot to see what has been cleaned on the hull. The bottom mounted camera would be consistent with the modular 35 theme of this year’s design. The camera would help with navigation of the ROV and/or a manipulator arm or basket. An additional LCD screen, pressure housing, electronics board and cable would be needed for this extra camera. 14.1.6 Cathodic Protection ModROV is made of mostly aluminum 6061-T6; however, there is also some stainless steel and brass. A cathodic protection plan should be initialized in the future, and since almost every part of the frame and pressure housing are aluminum the protection plan will not be that extensive. The bolts and some parts of the underwater connectors are stainless steel so therefore when the protection plan is implemented these will need a zinc sacrificial metallic anode to protect them. An anti-fouling paint can be applied in the future if deemed necessary, but since ModROV will be in the water for only a minute period of time and not continuously it would be highly unlikely that any bio-fouling will occur. Even if there are anodes set in place other precautions should be taken, such as rinsing the ROV and its cable with fresh water every time it is removed from the water. When not in use, it should be stored indoors in a cool dry place. Following just these simple measures will help prevent corrosion. The revised details in this section are taken from last year’s ROV team report that is located in Appendix A. 14.1.7 Basket A basket would be a useful addition to the ROV in the future. It would allow for the collection and storage of samples either collected by divers operating in conjunction with the ROV or by future add-ons such as a manipulator arm or scoop system. This addition would be rather easy to implement with the only difficulties arising from the device needed to collect the samples. 14.1.8 Manipulator Arm A manipulator arm could be designed for future use with ModROV. It could be used for the righting of ADCP’s to an acceptable angle for collecting data. It could also 36 be used with a basket, being especially helpful with the collection of specimens, such as rock or plant life, and recovering items from the bottom. To install a manipulator arm certain steps would need to be accomplished. First, extra electronics and code would have to be written and installed in ModROV and its control box. Secondly, another hole would have to be strategically drilled into the pressure housing so as not to weaken the structural integrity. Finally, there would need to be a counter weight added to the opposite side that the manipulator arm would be attached to. 14.1.9 Hull Cleaning Brush and Underwater Vacuum The hull cleaning brush assembly was originally designed and partially constructed by the Slime Shark team for their senior design project. The brush core is made of polyethylene and is 18” long by 4 ½” in diameter with nylon bristles that extend and additional ½” making the brush’s total diameter 6”. This brush was chosen so that it would be less likely to damage ship hulls during the cleaning process. The shaft upon which the brush rotates is made of 304 stainless steel with overall dimensions of 25” length and 1” diameter. The shaft spins with the aid of two Uhmw-Pe Bearings which are made of polyethylene and stainless steel housing. The entire brush assembly is mounted on an aluminum frame similar to that of the ROV that has mounting points to allow for easy installation and removal of the entire system. The final component to the Hull Cleaning Brush is the SAD assembly. The SAD is a large ducted thruster that is mounted to the underside of the ROV within its frame and helps aid in the hull cleaning process by providing suction, pulling the ROV close to the ship’s hull so that it can clean the ship. For commercial applications it would be necessary to mount a vacuum and filter system on the ROV in order to collect the debris removed from the ship hull. As the ROV currently is a research device this EPA compliance is not necessary. For more information see the Slime Shark ROV report where these details originated. 14.1.10 Tether Extension Currently one of the major limiting factors of this ROV’s design is the length of tether available. Only 100 feet long and somewhat stiff, one of the greatest areas of improvement would be to replace the current tether with a longer more flexible one. This 37 would allow the ROV greater freedom of movement in addition to a greater operational depth that would be limited by the pressure housing’s capabilities rather than the tether’s length. 14.1.11 Deployment/Recovery Device A better method of deploying and recovering the ROV could be made. A frame of its own that the ROV may sit in and be lowered into the water needs to be built. At the present the ROV can be lowered via a rope looped through the back of the frame if the water level is significantly below the deck of the research vessel, but if the water level is relatively close, the ROV can just be picked up by its frame and lowered into the water by hand. To recover the ROV a hook can be used to grab the handle at the back of the frame. There are too many things that could go wrong with this method. The plastic dome where the camera is mounted can be scratched or broken, from improper handling, which would endanger the integrity of the pressure housing with this method of deployment. Another possible solution is to devise a mounting point or set of points where hooks from a crane can be affixed to raise and lower the ROV from the water. The only issue with this system is the need to have a pole or a diver in the water to connect and disconnect the ROV from the lift, something that would be potentially dangerous in rough seas. 15.0 References American Society of Welding. “Safety and Health Fact Sheet No. 2- Radiation.” October 2003. <http://files.aws.org/technical/facts/FACT-02.PDF> American Society of Welding. “Safety and Health Fact Sheet No. 7- Burn Protection.” September 1995. <http://files.aws.org/technical/facts/FACT-07.PDF> American Society of Welding. “Safety and Health Fact Sheet No. 12- Contact Lens Wear. September 1995. <http://files.aws.org/technical/facts/FACT-12.PDF> American Society of Welding. “Safety and Health Fact Sheet No. 31- Eye and Face Protection for Welding and Cutting Operations. December 2006. <http://files.aws.org/technical/facts/FACT-31.pdf> Florida Institute of Technology. “Florida Institute of Technology Diving Control 38 Program.” 2005. Seabotix. International Ocean Systems. January/February 2007. Volume 11 Number 1. Pg 4. General Plastics Manufacturing Company. “Last-a-Foam® R-3300”. 26 April 29, 2009. <http://www.generalplastics.com/products/product_detail.php?pid=16&> Modus Modular Underwater Systems, Ltd. “MR1 – Multi Role ROV”. 26 April 2009. <http://www.modus-ltd.com/equipment/multirolerov.aspx> SeaBotix, Inc. “AUV/ROV Thruster – BTD150”. 26 April 28, 2009. < http://www.seabotix.com/products/pdf_files/BTD150_Data_Sheet.pdf> Shark Marine Technologies, Inc. “SharkMarine – ROV”. 26 April 26, 2009. <http://www.sharkmarine.com/rov.htm> Teledyne Impulse. “Wet Pluggable”. 28 April 2009. < http://www.impulse-ent.com/products/wetplug.aspx> VideoRay. “VideoRay ROVs”. 26 April 2009. <http://www.videoray.com/categories/overview> Ward, Chris. ROV.net. 2002. Work Ocean Limited. 13 Mar. 2008 <http://www.rov.net > West Systems Inc. “Material Safety Data Sheet West Systems Inc. Resin 105.” 3 January 2008. <http://www.westsystem.com/webpages/userinfo/safety/MSDS105.pdf> 16.0 Appendices Attached is additional information necessary to understand the construction and operation of ModROV. Included is information on the teammates, materials used, and information from the work done by the previous teams. 39 Appendix A - Slime Shark Final Report Please see end of ModROV report for entire Slime Shark report. 40 Appendix B - Resumes Resume’s removed for student confidentiality. 41 Appendix C - Weekly Time Log 19-Jan 26-Jan 2-Feb 16-Feb 23-Feb 9-Mar 16-Mar 23-Mar 30-Mar 6-Apr 13-Apr 20-Mar 27-Apr 11-May 18-May 26-May 1-Jun 8-Jun 15-Jun 22-Jun 29-Jun 6-Jul 13-Jul 20-Jul 27-Jul James Miller 3 4 7 5 3 0 3 4 5 9 5 9 9.5 0 2 25 20 32 6.25 4 10 10 16 45 27 Morgan Marmitt 3 5 8 4 5 3 4.5 4 5 9 5 8 20 0 1.5 25 37 48 16.75 2 10 17 40 35 25 Rick Paradis 3 4 5 4 3 0 3 4 5 10 5 9 9.5 0 1.5 10.5 15 11 6.25 2 10 10 12.75 45 25 Zach Barton 3 4 5 5 3 1 3 4 5 8 5 8 11 0 2 25 20 32 5.5 4 10 10 20 45 25 Total 263.75 340.75 213.5 263.5 Gross = 1081.5 42 Appendix D - Safety Plan Requirement Senior Design 2008-2009 Zach Barton Morgan Marmitt James Miller Rick Paradis 1.1.1 Project General Description Our senior design group plans to complete the ROV that was worked upon by the previous years’ senior design group. Our primary objective was to get the ROV to a point where we have a finished product that is able to be utilized by the Department of Marine and Environmental Systems in the field. The scope of this project entailed taking what the current group has been able to develop and from there finishing the remaining systems and making the ROV operational. We also were interested in adding additional lighting to the ROV for work at night or in low light conditions along with looking into using the already planned “modular” mounting system to affix a manipulator or a recovery bin. Things which were addressed are the completion of the electronics, floatation, a recovery and deployment system, renovations to the control case, welding and finalizing the frame, affixing the motors, connecting the umbilical to the pressure housing, in addition to conducting tests and trials. We also conducted tests on foam samples to determine if they could withstand prolonged exposure to pressure without ill effects in addition to testing the pressure housing before installing the electronics. We also planned to conduct extensive pool trials of the ROV to give us a controlled environment to do our tests where the ROV may be easily retrieved and quickly serviced before taking it out for a field test. 1.1.2 Hazard Analysis Materials and Conditions 1) Aluminum 6061 a) In the form of hardware, bar stock, and rods b) Used throughout the ROV for its frame, pressure housing, hardware, and other connectors c) Machining, Cutting, Filing i) Involves working with potentially dangerous equipment which may cause injury or death to operator or those nearby ii) Sharp edges may form when cuts are made iii) Powder from cutting aluminum may cause irritation or catch fire d) Welding i) Aluminum may become hot, causing burns if handled or fires if placed near flammable items ii) Risk or electrical shock from improper use or malfunction of welding equipment 43 iii) Retinal scarring could also occur if welding masks are not worn 2) Epoxy Resin and Hardener a) Mixing i) Contact with skin may cause irritation, chemical resistant gloves should be worn in order to prevent this in addition to whatever else is necessary ii) Should be done in an area with adequate ventilation to prevent illness iii) Spills may occur and require appropriate clean up measures and precautions b) Machining, Cutting, Sanding i) Involves working with potentially dangerous equipment which may cause injury or death to operator or those nearby ii) Dust may cause irritation and require proper safety equipment be worn c) Storage i) If stored under inappropriate conditions epoxy may catch fire or explode 3) Syntactic Foam a) Machining and Sanding i) Dust from foam may cause irritation in ones eyes, skin and airways 4) General Plastics R-3318 Last-a-foam a) Machining and Sanding i) Dust from foam may cause irritation in ones eyes, skin and airways ii) Mechanical air filtering masks may be necessary in instances when high volumes of dust is generated Environmental Impact Analysis Storage: Epoxies will be stored in a fire cabinet to help reduce the risk of fire Disposal: Give unused materials to university safety department for proper disposal or place in proper storage for future use. Unused epoxy is a hazardous material and must be given to the university safety office. The R3318 high density urethane foam can be disposed of in a landfill as per the material specifications and small quantities used. Miscellaneous: When deploying an ocean system there is always a risk of loosing the vehicle. The aluminum frame will eventually corrode away, however the floatation should be impervious to decay and will remain in the ocean indefinably. 1.1.3 Human Safety Analysis Personal Protection Equipment Machining: Safety glasses Dust Masks (foam) 44 Sanding: Safety Glasses Dust Masks (foam) Mixing Epoxy: Safety Glasses Gloves (latex or other) Testing (ship board): Life Vest Close Toe Shoes General Work Safety Keeping safety priority one, we will perform all work on the ROV with at least two people present. This way if there is an emergency of any sort there is someone present to lend aid. We will also work in well ventilated areas with a telephone line accessible for calling for aid. We will also make sure that we all wear proper personal protection equipment applicable to the process or materials that we are working with. When deploying and operating the ROV we will exercise caution and have certified divers in the water to aid in the recovery process. Care must be taken when working with electronics to avoid shock and electrocution. We will be working with 300 volts and that poses a potential danger if proper care is not executed, making sure that live wires are not touched and that circuits have been fully discharged before handling. University Insurance We do not believe that this project poses any new insurance risks that the university is not already covered for. Our travel is going to be already a part of another university sponsored event therefore already covered. We are not working with any outside companies or organizations and our vehicle is relatively small. 1.1.4 Failure Modes and Effects Analysis Failure Mode - Cable detachment - Electrical short Effects Analysis - Loss of vehicle - Electrocution - Whip like effect - Damage to cable or connector - Electrocution - Shock - Damage to electronics - Water damage to control box - Damage to electronics - Electrocution - Bolt failure - Loss of part or all of ROV - Injury to individuals Failure Mitigation - Ensuring secure connection - Maintain slack in the tether - Make sure electronic components are properly installed - Ensure tether is free of damage - Secure control box to deck - Keep control box in a dry area - Ensure bolts securely fastened 45 -Deployment/recovery - Foam crush - Pressure housing failure - Electronics malfunction - Motor failure - Damage to ROV or ship -Loss of ROV -Damage to ship - Loss of buoyancy - Failure to recover ROV - Loss of buoyancy - Loss of electronics and control - Potential loss of ROV - Loss of control of vehicle - Personal Injury - Damage to ROV - Potential loss of vehicle - Loss of control of vehicle - Personal Injury - Damage to ROV - Potential loss of vehicle - Camera failure - Loss of vehicle control - Vehicle entanglement - Loss of vehicle - Environmental damage - Biological interference - Loss of vehicle - Damage to vehicle or organism -Death of organism - Adequate bolt strength -Ensure proper procedure is followed -Use correct lifting points - Keep ROV within operational depths - Keep ROV within operational depths - Ensure pressure housing bolts securely fastened - Make sure electronics installed properly - Make sure the circuits are coded - Make sure motors connected properly - Wash ROV to prevent corrosion after each deployment - Make sure camera is properly installed - Avoid entanglement situations - Have recovery divers available - Be aware of surroundings 46 Appendix E - Basic Code Topside '******************Amanda - OE - "Joycontrol1"******************** DEFINE OSC 4 DEFINE ADC_BITS 10 ' set to ten bits DEFINE ADC_CLOCK 3 DEFINE ADC_SAMPLEUS 50 '.......................CONFIGURE LCD DISPLAY.......................... DEFINE LCD_DREG PORTB'..... set data port DEFINE LCD_DBIT 4'......... set starting data bit DEFINE LCD_RSREG PORTB'.... set rs port DEFINE LCD_RSBIT 3'........ set rs bit - pin 24 DEFINE LCD_EREG PORTB'..... set en port DEFINE LCD_EBIT 2'......... set en bit - pin 23 DEFINE LCD_BITS 4'......... set LCD buss size - 4 or 8 bits DEFINE LCD_LINES 4'........ set number of lines on LCD DEFINE LCD_COMMANDUS 2000'.. set command delay time in us DEFINE LCD_DATAUS 100'...... set data delay time LCDOut $fe, 1 'clear LCD adcon1.7=1 TRISA=%111111 TRISB=0 TRISC=0 ch1 VAR WORD ch2 VAR WORD ch3 VAR WORD ch4 VAR WORD ch5 VAR WORD 47 Basic Code Topside Cont. ch6 VAR WORD M1spd VAR WORD M2spd VAR WORD calcspd VAR WORD M1D VAR BIT m2D VAR BIT Start: ADCIN 0, ch1' pin8 forward/reverse numeric (front-back) ADCIN 1, ch2' pin7 forward/reverse (side-side) ADCIN 2, ch3' pin6 ADCIN 3, ch4' pin5 ADCIN 5, ch5' pin9 - with RCO low High PORTC.0' RCO ADCIN 5, ch6' pin10 - with RCO high Low PORTC.0 Pause 10 'Check if in Center IF ch1>500 AND ch1<520 Then ' joystick in center M1spd = 0 M2spd = 0 EndIF IF ch2 > 500 AND ch2 < 520 Then m1spd = 0 m2spd = 0 EndIF 48 Basic Code Topside Cont. 'Rotate on Axis IF ch1>500 AND ch1<520 AND ch2 > 520 Then m1spd= (ch2-520) m2spd= m1spd m1D=1:m2d=0 EndIF IF ch1>500 AND ch1<520 AND ch2 < 500 Then m1spd= (500-ch2) m2spd= m1spd m1D=0:m2d=1 EndIF 'Moving Forward IF ch1 > 520 Then ' steer motors forward M1spd = ch1-520 M2spd = ch1-520 M1D=1:M2D=1 ' direction EndIF 'Moving Reverse IF ch1 < 500 Then ' steer motors reverse M1spd = 500-ch1 M2spd = 500-ch1 M1D=0:M2D=0'direction EndIF 49 Basic Code Topside Cont 'Turning while moving IF ch1 > 520 OR ch1 < 500 AND ch2 < 500 Then calcspd = 500-ch2 IF m1spd < calcspd Then m1spd = 0 Else M1spd= M1spd - (500 - ch2) EndIF EndIF IF ch1 > 520 OR ch1 < 500 AND ch2 > 520 Then calcspd = ch2-520 IF m2spd < calcspd Then m2spd = 0 Else M2spd= M2spd - (ch2 - 520) EndIF EndIF display: LCDOut $fe,$80," It Works :) "' print 1st line LCDOut $fe,$C0,"ch1= ",DEC4 ch1," ch2= ", DEC4 ch2 ' print 2nd line LCDOut $fe,$94,"m1= ",DEC4 m1spd, " m2 =",DEC4 m2spd ' print 3rd line LCDOut $fe,$D4,"M1D =",DEC1 M1D," M2D= ",DEC1 m2D'print 4th line Pause 100 GoTo start 50 Appendix F - Bill of Materials: Slime Shark 51 Appendix G - Bill of Materials: ModROV 52 Appendix H – Inventory Item thrusters Frame pressure housing camera with board Ubolt O rings (rear pressure house) Nylock nuts med. Lockwashers washers+flat washers 10-24 hex machine screw 15" LCD screen 100' tether flat washer 12V converter 300V converter hex bolts cave light 10w HID joysticks Phillips stainless Phillips stainless seaweed ROV box o' stuff 1/2 bell washer Taps Marine tex resin & hardener Lube nuts zinc bildge pump and housing DC motor spare dome Relay flat head phillips Tether connector PVC cleaner PVC cement Pool trial tape Brush with motor and belt Random AL scrap Electric control/mounting board LED housing Circuit Components Size 6" 3/8" #10 1x1/4" 2" Quantity 6 1 1 1 2 6 10 1 1 5/8" 2 1 1 1/4-20 1/4x3/4x20 3 10-24x3/4 10-24x1 1/4 3/8-18 1/4-18 3/4-18 10-32 2 #8x2-1/2 wires resistors diodes capacitors 53 video board Hinge power supply pneumatic rods zinc round Philips emergency stop/start button link pins bread board goggles underwater connectors pressure transducer max 889resa? Chip Sukafa009a Chip video cables RCA Power cable wire strippers cutters small LCD screens Zip ties Rope thermometer O2 sensor PIC 16LF877 4 MHz timer SFLM .59 4700P/110/250 V Cap Film 0.61uF 10% 250 V RDL MOV 220V 10mm Dia. Metal Oxide Varistor (MOV) DTVS 51V 5% 1.5 kW DO-201 Diode 1 amp 1N5817 Schottky Barrier Rectifier Cap 470 uF 350V Cap 1000 pF 50V 10% rad 150kΩ 0.5W Carb Comp Underwater Connector [female] Underwater Connector [male] Locking sleeve [male] Locking sleeve [female] Brass 5/8-18 nut [5 pack] 5/8 dia 3/8x16 - 2 1/4" 3/4" x 6 3/8"x16 3/8" 250 Ω 0.125W 5/8" 1/2" x 4 conn housing 2 pos conn housing 4 pos conn housing 6 pos conn housing 7 pos 8-32x1/2 2 2 1 2 8 4 8 4 4 4 4 4 3 4 1 1 1 1 1 6 5 15 10 5 3 8 24 100 10 10 10 54 conn term female conn term female SFLM .89 .33M/10/250 V RFI IND 19#17 19#17 W/TAPE (03347) 1/4"-20 Rod 3/8"x4' Spring #45 4-40x1/2" 4-40 6-32x1 1/2" 6-32 1/4"-20x2 1/2" 1/4"-20 3/8"-16 Spring #147 Plastic Epoxy Fastcure Pen (Gorilla Glue) Angle 1/8x1x4' Al Rod 1/4"x4' Bondo Repair Kit Quart Ace Extra Time Epoxy Quick Link 1/8" SS 3/8" 7/16"x12" 300V-15V Power Converter MOSFET P-CH 40V 14A DPAK IC PIC MCU FLASH 8KX14 28 DIP IC QUAD 2-INUT AND GATE 14-DIP IC HEX INVERTER 14-DIP IC TXRX RS485/RS422 LOWPWR 8DIP VOLTAGE REG POS 8V 1500MA 10220 IC REG 1A POS 5V TO-220 CONN HEADER 7POS .100 VERT TIN CONN HEADER 4POS .100 VERT TIN CONN HEADER 2POS .100 VERT TIN CONN HEADER 6POS .100 VERT TIN RESISTOR .005 OHM 1W 1% 2512 IC 2-IN AND GATE QUAD 14-DIP IC SENSOR TEMP PREC FAHR TO-92 MOSFET N-CHAN 20V 35A D-PAK 300V-12V Power Converter 2" Chip Brush Unpopulated Control Boards + S/H Hardener Resin 206 B Gal Gel Coat Canary Yellow 2oz MEKP Catalyst 100 100 4 4 4 2 4 9 9 4 12 1 1 8 4 1 2 1 1 1 1 2 10 1 1 100 6 10 10 5 5 5 10 10 10 10 10 10 5 100 1 3 2 1 1 1 55 Appendix I - Procedure for Hyperbaric Chamber Operation 1. Connect water hose to the inlet value on the pressure chamber making sure the inlet valve is open 2. Fill the pressure chamber with water and insert test samples 3. Lower the lid to the pressure chamber making certain that it is centered above the mouth of the chamber 4. Open outlet valve on the lid of the pressure chamber and wait until water flows out of it for approximately six seconds 5. While chamber fills tighten the pressure chamber’s lid in a star pattern 6. After water flows from the outlet valve close the outlet valve and then the inlet valve 7. Attach an air hose to the inlet of the pressure chamber and the other to the air compressor 8. Open the compressor’s inlet valve and begin to pressurize the chamber until the desired pressure is reached 9. When the desired pressure is reached, turn off the compressor and then open the water inlet valve to drain the water above the rim of the main chamber 10. Loosen the bolts and lift the lid off the chamber and remove test samples to be analyzed 56 Appendix J - SeaBotix BTD-150 Thruster 57 Appendix K - Teledyne Impulse Underwater Connector 58 Appendix L - Foam Properties 59 Appendix M – Users Guide ModROV MK.1 User's Guide Power on Sequence: Plug in the monitor, the box, and the twelve volt converter contained inside the box. Turn on the box using the switch above the plug. Allow a few seconds for the vehicle to power up and begin testing motion and camera. Deployment: Connect tether to vehicle and to control box. Connect power to the control box, including the connections inside the box for the monitor and for the internal power converter. Perform a surface test by moving the joysticks to move the motors and by waving a hand in front of the camera to ensure functionality. Power down the unit. Using the handles on the ROV, place it in the water. If on a boat, the handles can be 60 utilized to hang the ROV from a lifting structure to be placed in the water. Power up the unit. Perform a wet test of the vehicle, maneuvering it in all directions and checking the monitor for video. Perform task Recovery: 1) Bring the ROV to the surface. 2) Hook the ROV by the handles with a gaff or other hook device. 3) Pull the ROV towards you slowly, while reeling in the tether. 4) Wash the tether with fresh water as you are reeling it in. 5) Once the ROV is near enough to grab, pull it up by the handles on the ROV. DO NOT PICK THE ROV UP BY THE TETHER. This can damage the tether and cause further damage to the vehicle. If on a boat, hook a rope or lifting device to the handles and hoist it up onto the deck. 6) Power down the unit. 7) Thoroughly wash the ROV with fresh water once on deck. 8) Disconnect all cables and power to the control box and the ROV. 9) Stow and secure the ROV on the deck. Specifications: ● Length: 32.5 in. ● Width: 24 in. ● Height: 17.5 in. ● Weight: ~80 lbs. ● Tether Length: 100 ft. ● Tether Voltage: 300 V DC ● Main Power: 120 V AC ● Motor Thrust: 6.4 lbs/ft. 61 ● Pressure Housing tested to: 200 ft. ● Foam Crush Depth: 800 ft. Troubleshooting: Error: The monitor is not showing any video. Solutions: Check to ensure that the monitor is plugged in. Check to ensure that the cables are plugged in correctly and tightly. Check to ensure that power is going to the unit with a multimeter or other electrical diagnostic device. Check to ensure that the unit is turned on. Error: There is no control for the ROV. Solutions: Check to ensure that all cables and tethers are plugged in correctly and tightly. Check to ensure that power is going to the unit with a multimeter or other electrical diagnostic device. Check to ensure that the unit is turned on. Check to ensure that the motors are not entangled or damaged. Contact: For any other questions, please contact Dr. Stephen Wood at Florida Institute of Technology, Department of Marine and Environmental Systems, 150 West University Blvd., Melbourne, Fl 32901 (321) 674-7244 Or go to http://my.fit.edu/~mmarmitt/Projects/senior_design/senior_design.htm 62