1
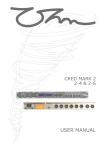
OYSTER 2-6 LOUDSPEAKER
MANAGEMENT SYSTEM
USER MANUAL
Software version 3.6.8
USER MANUAL
OYSTER LOUDSPEAKER MANAGEMENT SYSTEM
The information contained within this manual does not include all of the details of design, production
or variations of the equipment. Nor does it cover every possible situation that may arise during
installation, operation or maintenance. If you need particular assistance beyond the scope of this
manual please contact our technical staff.
Magnetic Field - Caution
CAUTION
If an equipment rack is to be used, we would recommend
mounting the amplifiers in the bottom of the rack and
mounting pre-amplifier and other sensitive equipment
such as the Oyster at the top of the rack.
RISK OF ELECTRIC SHOCK
DO NOT OPEN
WARNING! RISK OF HAZARDOUS ENERGY!
TO REDUCE RISK OF ELECTRIC SHOCK OR FIRE DO
NOT EXPOSE TO RAIN OR MOISTURE.
NO USER SERVICEABLE PARTS INSIDE.REFER
SERVICING TO QUALIFIED SERVICE PERSONNEL.
UNIT MUST BE EARTHED AND CORRECTLY FUSED.
Do not locate sensitive high-gain equipment such as
pre-amplifier or tape decks directly above or below
amplifiers.
Because amplifiers have a high power density there
is a strong magnetic field which can induce hum into
unshielded devices that are located nearby. The field is
strongest just above and below the unit.
The lightning bolt triangle is used to alert
the user to the presence of uninsulated
“dangerous voltage” within the unit that may
constitute a risk of electric shock.
The exclamation mark triangle is used to
alert the user to important operating or
maintenance instructions in the literature
accompanying the product.
CE Conformity
Features
This equipment has been tested and found to conform
to the requirements of the EMC Directive 89/336/EEC,
the requirements of the Low Voltage Directive
73/23/EEC, amended by 93/68/EEC and to the
following standards:
•
Intended mainly for fixed installation use
•
No front panel access making the unit tamper proof
•
Uses the OHM SPYDER digital signal processing
platform
•
The front panel has a USB port for easy access when
the unit is rack mounted
•
2 in 6 out configuration using XLR connectors
•
Power, Signal and Peak indicators on the front panel
EMC Emission
EN55103-1 (1996)
EMC Immunity
EN55103-2 (1996)
Electrical Safety
EN60065
(1998)
Wellington Close • Parkgate • Knutsford
Cheshire • WA16 8XL • England
Tel: +44 (0)1565 654641 • Fax: +44 (0)1565 755641
Email: [email protected] • Website: www.ohm.co.uk
2
OYSTER 2-6 LOUDSPEAKER MANAGEMENT SYSTEM
Contents
Information...........................................................................page 2
features
Introduction..........................................................................page 4
Unpacking
Packing List
Precaution
Installation Guide.................................................................page 5
Oyster Installation
Software Installation
Quick Reference Guide..........................................................page 6
Front Panel Guide
Rear Panel Guide
Specifications........................................................................page 7
Input Section
Output Section
General Performance
General Information
Input / Output Functions
Crossover Filters
Delays
EQ
3
Introduction
Thank you for purchasing an OHM OYSTER Loudspeaker Management System.
Please read this manual and familiarise yourself with the operation of your OHM OYSTER Loudspeaker
Management System before you attempt to power up this unit. For your own safety we recommend
you take the time to read all the warnings and precautions on page two and study the connection
details to ensure correct usage and avoid any misuse which may invalidate your warranty.
Record the model and serial number, found on the back of the unit, in the spaces designated on the
warranty card and in the space provided below. Refer to the model and serial number whenever you
call upon your dealer for information or service on this product.
Model
Serial Number
The OHM OYSTER Loudspeaker Management System represents the current state-of-the-art.
Taking advantages of the latest advances in analogue to digital conversion and digital signal processing
technologies the units achieve performance levels that have only recently been made possible.
This modern design is combined with OHM Factory Presets to deliver the optimal match for OHM
cabinets and systems. These presets allow the user to simply achieve the best possible sound quality.
Unpacking
Carefully open the shipping carton and check for any noticeable damage. Verify that all the items listed
below are included, please contact your dealer if any parts are missing.
Every OHM OYSTER Loudspeaker Management System has been rigorously tested and inspected
before being carefully packaged, prior to shipping. If any damage has occurred to the packaging or the
unit during transit, please notify the delivery company as soon as possible. Only the consignee can file
a claim against the carrier for shipping damage. Be sure to save the carton and all packing materials
for the carriers inspection.
We recommend that you retain the original carton and packing materials for use should you transport
or ship the unit in future.
Packing List
1x
1x
1x
1x
OYSTER 2-6 Loudspeaker Management System
Power Cable
USB Cable
Manual and Warranty card.
Precautions
•
•
•
•
•
•
•
•
•
4
Retain this manual for future reference.
Do not stand the unit vertically on it’s rear.
Always check the correctly rated power is supplied with your unit.
Avoid direct contact of your OYSTER with water or other liquids.
When cleaning the unit, wipe with a soft, dry cloth. if more heavy duty cleaning is required,
disconnect from the mains and use a damp cloth ensuring the unit is completely dry before
reconnecting to the mains.
Do not use solvents or chemicals on the exterior of the unit as the may cause the surface to
discolour or peel.
Do not use if the power cord is frayed or broken.
If you experience continuous problems, disconnect from the mains and refer to a qualified service
engineer.
This unit is only intended for qualified personnel to operate and install. Do not attempt to repair
or service yourself. Please refer to qualified technical service department. The user must have
sufficient electrical contact to earth. Electrostatic charges may effect the operation of the OYSTER.
OYSTER 2-6 LOUDSPEAKER MANAGEMENT SYSTEM
Installation
Once your OYSTER has been unpacked you are now ready to install it.
The Oyster is a 1U 19” unit and will fit into any standard 19” rack unit or 19” flying case. Place the
OYSTER into desired position and fix into place using the correct fixing elements for your case/unit.
When you are happy with the positioning of your OYSTER connect the signal source for example DJ
mixer or zoning mixer to the inputs on the OYSTER, then connect amplifier/s to the outputs on the
OYSTER. The OYSTER will allow 2 inputs and 6 outputs on a single unit.
Before You Start.
You must install the Spyder software.
Visit www.ohm.co.uk/downloads and download the latest SPYDER SOFTWARE and SPYDER
SOFTWARE PDF Manual.
Software Installation.
1. Once you have downloaded the software from the OHM website, unzip the file and start the
installation process by double clicking the OHM SPYDER SETUP.MSI file.
2. A welcome to OHM SPYDER control software set up wizard will pop up. Click “NEXT” to install the
software. However if you do not wish to install the software at this time please click “CANCEL”.
The software will not be installed and you will not be able to program your OHM controllers using
a PC.
3. The next screen is the License Agreement, read the agreement carefully and once you are happy
with the terms set out tick the box and click “NEXT” to proceed. If you do not accept the license
agreement the software will cancel and will not be installed.
4. At the install program screen, click “NEXT” to install the OHM SPYDER control software to the
default folder. If you require the software to be installed to another folder click “CHANGE” and
“BROWSE” to the new folder location. Once the new location is selected click “NEXT”.
5. The OHM SPYDER control software is now ready to install, if you need to make changes to any of
the previous screens click “BACK” otherwise click “INSTALL” to continue.
6. Your software is now installed. You may be required to install Microsoft VC++ Runtime Libraries
for this software to run, if you require this click the “INSTALL” box if not then click “FINISH”.
NB: if you are unsure if you need to install Microsoft VC++ Runtime Libraries click the box
anyway and it will either install or the option to repair or uninstall comes up, at this point you
can click cancel to leave the install or continue.
Once the Software is installed, connect your OYSTER unit to your PC using the USB cable provided and
power it up. If this is the first time an Oyster Unit has been connected to this PC the drivers will install.
If the drivers fail to install you will need to manually install them, to do this please follow the instructions
below.
Goto the control panel/system/hardware/device manager.
click the + next to Ports (COMS & LPT) to expand the list this will have a yellow triangle next to it
showing there is a problem.
double click alldsp usb bridge go to driver/update driver.
Check install from list and click next.
Browse for the drivers these are located in “program files/ohm/spyder/drivers” for 32 bit OS,
alternatively if you have windows 7, 64 bit OS drivers will be in “program files (x86)/ohm/spyder/
drivers”.
Note for Windows 7 and Vista you may need administrator privileges.
If there are any issues with the driver or software installs please contact OHM.
Start the software and ensure that there is a link achieved this will show as a green light in the Link
Status section on the main page of the software.
Please refer to your software guide for further instructions.
5
Quick Reference
Front Panel
1
1
2
3
2
4
1 Input Peak Indicator
Red LED indicating that the input on the channel has reached it’s peak value. This light can be on
momentarily but continuous illumination indicates that input signal should be reduced.
2 Input Signal Indicator
Green LED Indicating that there is a signal present on the input.
3 USB Connector
The USB connector on the front panel allows connection to a PC. Once connected the OHM proprietary
software will allow control of the unit. Mac software is under development.
4 Power Indicator
Blue LED indicating that there is power connected to the unit.
Rear Panel
1
2
2
2
2
2
2
3
3
1 Power Inlet
The OHM OYSTER unit should be connected to a suitable mains electricity supply using the cable
supplied. The processor has a switch mode power supply that is capable of operating with a nominal
mains voltage of 180V to 260V 50~60Hz
2 Audio Output Connectors
The processed outputs are impedance balanced, and wired pin-1 ground, pin-2 hot and pin-3 cold. An
unbalanced input may be driven by connecting pin-3 ‘cold’ unconnected.
3 Audio Input Connectors
All audio connections are fully balanced and wired pin-1 ground, pin-2 hot & pin-3 cold. The two inputs
have pin-1 connected directly to the chassis and feed the signal processing chains. If an unbalanced
source is used, a connection should be made between the pin-3 ‘cold’ signal and the ground connection
of the unbalanced source.
6
OYSTER 2-6 LOUDSPEAKER MANAGEMENT SYSTEM
SPECIFICATIONS
Input Section
Input Impedance
Nominal Input Level
Maximum Input Level
Input Gain
CMRR
Input connector
10 kΩ
+6 dBu
+22 dBu
-48 to +12 variable in 0.25db steps
Better than 50dB (30Hz-20kHz)
2 x female 3 pin XLR, balance
Output Section
Output Impedance
Maximum Output Level
Output Gain
Output Connector
50 Ω (electronically balanced)
+12 dBu
-50 to +12 dB
6 x Male 3 pin XLR, balanced
General Performance
Frequency Response
Sampling frequency
Dynamic range
Channel Separation
Distortion (THD)
Input Metering (+20dBu)
20 Hz to 20 kHz
48 kHz
114 dBA (D/A converter), 110 dBA (A/D converter)
>75dB, 30Hz to 20kHz
Distortion: 0.01 %
Signal = -48dB, Peak = +3dB relative to the nominal input level
of +6dBu
General Information
Serial Connector
Dimensions (w x h x d)
Weight
Mains Power
Mains
Consumption
Fuse
USB Port type B
482mm x 44mm x 128mm
3 kgs unpacked
65 - 265 V AC, 50-60Hz ~
3 pin IEC Mains Socket
<10watts
T500mAL250V
Input / Output Functions
Cross Over Filters
Slopes
Type
6, 12, 18 or 24 dB/octave
Bessel, Butterworth or Linkwitz-Riley
Delays
Delay
Delay Step
Max Delay Time
Limiter
0 to 2 Secs
15μs
2 Secs inputs and outputs.
Zero-attack peak limiter with threshold adjustable in 0.25dB steps
EQ
EQ Type
EQ Frequency
EQ Gain
EQ Width
PEQs per output:
Parametric.
20Hz to 20kHz variable in 1Hz steps
-12 to +12 dB variable in 0.25 dB steps
0.06 to 4.75 Oc
10
7
OHM UK HEAD OFFICE
OHM EUROPE
OHM (UK) Limited
Wellington Close
Parkgate Industrial Estate
Knutsford
Cheshire
WA16 8XL
England
Danzer & Kamm Gbr
Schnieglinger Str. 166
D-90425 Nuremberg
Germany
OHM CHINA
Guangzhou OHM Audio Co., Limited
No. 13 TaiXing Road,
BangXi Village, DaLong Street
PanYu, GuangZhou
P.R. China
Tel: +49 (0) 911 230 85 10
Fax: +49 (0) 911 230 85 33
e-mail: [email protected]
www.ohm-europe.com
Tel: + 86 (0) 20 2388 1111
Fax: + 86 (0) 20 3488 6650
e-mail: [email protected]
www.ohmchina.com
Tel: +44 (0) 1565 654641
Fax: +44 (0) 1565 755641
e-mail: [email protected]
www.ohm.co.uk
OHM POLAND
OHM ASIA
OHM Polska Sp.z.o.o
ul. Makowa 2, Przyborki
62-300 Wrzesnia
Poland
Harness Overseas (P) Limited
SCO 381
Sector 37D
Chandigarh
India
Tel: +91 (0) 172 2697 465
Fax: +91 (0) 172 2688 254
e-mail: [email protected]
www.harnessasia.com
Tel: +48 (0) 603 984 136
Fax: +48 (0) 616 255 999
e-mail: [email protected]
www.ohm.pl
Dealer Stamp