1
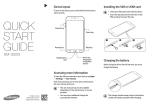
Gmate User
User’’s manual
English version 1.0.0
IOS Platform
1
DIRECTOYR
........................................................................................................... 3
� SECTION I: ATTENTIONS
ATTENTIONS...........................................................................................................
AVOIDANCE OF INTERFERENCE..............................................................................................................3
SAFE DRIVING....................................................................................................................................... 3
ACCESSORIES.........................................................................................................................................3
WATER RESISTANCE...............................................................................................................................3
REPAIR................................................................................................................................................... 3
HIGH TEMPERATURE..............................................................................................................................4
.............................................................................................................
4
� SECTION II: OVERVIEW
OVERVIEW.............................................................................................................
.............................................................................................................4
ABOUT YOUR SKYROAM DEVICE.......................................................................................................... 4
CUSTOMER SERVICE.............................................................................................................................. 4
................................................................................................
5
� SECTION III: NOTICE FOR USE
USE................................................................................................
................................................................................................5
OEM ACCESSORIES OF DEVICE.............................................................................................................5
BUTTON AND PARTS.............................................................................................................................. 5
SUPPORTED VERSION.............................................................................................................................5
.....................................................................................
6
� SECTION IV: FUNCTIONS OF GMATE
GMATE.....................................................................................
.....................................................................................6
FUNCTION OF CALL ANSWERING AND DIALING.................................................................................... 6
FUNCTION OF SHORT MESSAGE.............................................................................................................6
FUNCTION OF INTERNET........................................................................................................................ 6
...........................................
7
� SECTION V: DESIGNATED SYMBOLS IN CLIENT SCREEN
SCREEN...........................................
...........................................7
INSTALLATION OF SIM CARD................................................................................................................ 8
STATUS OF INDICATION LIGHT OF SKYROAM DEVICE............................................................................8
STARTUP................................................................................................................................................ 9
SHUTDOWN............................................................................................................................................9
RESTORATION OF EX-FACTORY SETTING............................................................................................... 9
DOWNLOAD GMATE CLIENT.................................................................................................................. 9
INSTALLATION GMATE CLIENT............................................................................................................. 10
CONNECTION OF GMATE......................................................................................................................12
GMATE................................................................................................................................................. 13
RECENTS..............................................................................................................................................14
CONTACTS........................................................................................................................................... 15
KEYPAD............................................................................................................................................... 16
SMS.................................................................................................................................................... 16
INTERNET.............................................................................................................................................17
2
� Section I: Attentions
Avoidance of Interference
The Gmate device shall be shut down in places that require shutdown of mobile
equipment like the airplane and areas placed with medical equipment, fuel, chemical,
explosive or blasting zone.
Safe Driving
During the driving, please do not use Gmate device to call to assure your safety.
Accessories
Please use accessories and batteries verified. The use of incompatible accessories
may damage Gmate device.
Water Resistance
The Gmate device is not water-proofing, so please keep it dry. It is not allowed
to use liquid or wet cloth containing strong detergent to clean your Gmate device.
Make sure the device does not contact with any liquid. If such condition occurs,
please dismantle the battery and contact with our customer service department or
the designated maintenance office.
Repair
The Gmate device may be damaged if opened by non-professional personnel. If there
is certain failure in your Gmate device, please contact with our customer service
department or the designated maintenance office. Accessories not produced by the
original manufacturer are disqualified for guarantee repair.
3
High Temperature
Avoid the use of Skyroam device in excessive high or low temperature. Also, avoid
the exposure of Gmate device under intense sunlight or relatively high humidity.
<Warning>: our company will bear no responsibility for the consequences caused by the
failure of observation of the abovementioned suggestions or improper use.
If the contents mentioned in the manual are not conforming to your Gmate device,
please take the Gmate device you hold as the standard.
Our company is entitled to modify this user’s manual at any time, and no further
notice will be provided. Please check or download the latest version in our official
website of http://www.skyroam.com
� Section II: Overview
About Your Skyroam Device
The Gmate device described in the user’s manual are suitable for GSM, 850, 900,
1800 and 1900 networks after verification. Please consult your service supplier for
more information related to network.
When using various functions of Gmate device, please abide by various laws and
regulation and respect the local custom as well as others’ privacy and legitimate
rights and interests (including copyright).
When it is connected to other devices, please read this user’s manual to obtain
detailed safety description. Please never connect Gmate device to incompatible
products.
The installation of Gmate device requires the downloading of software in the official
website of the Gmate of http://m.skyroam.com/cydia and then it can be used. The
specific installation steps are detailed in http://www.skyroam.com (during the
installation process, please keep WIFI unimpeded).
Customer Service
You may obtain other data of the products of our company and download information
related to service, maintenance, etc by visiting http://www.skyroam.com
4
� Section III: Notice for Use
OEM Accessories of Device
USB data line :Use USB data line to connect the Skyroam device to the computer
to charge.
Battery
:Standby battery
Button and Parts
Supported Version
Currently, Skyroam device supports versions above4.0 on the IOS platform.
photos in this manual are provided according to the interface of iTouch 4.2.1.
5
� Section IV: Functions of Gmate
Function of Call Answering and Dialing
Make sure iTouch and Skyroam device are at the open status if you want to dial and
answer calls. Also, valid SIM card shall already be installed. Meanwhile, it shall
be within the service area of mobile network.
Function of Short Message
In the information, the short messages can be sent and received.
Note: Skyroam device can only send and receive test message. It does not support
the sending and receiving of multimedia messages for the time being.
Before sending or receiving short messages, the following operations may be
required:
>> Insert the valid SIM card to Skyroam device and make sure it is within the mobile
network service area.
>> Verify the network to see it supports the information function to be used and
also this function is already started in your SIM card.
Function of Internet
Make sure Gmate and Client are be connected,and valid SIM card shall already be
installed.Meanwhile, it shall be within the service area of mobile network.You can
use internet after setting successfully.
6
� Section V: Designated Symbols in Client Screen
Home of client
Recents
Contacts
Short message transmission and sending at the client
Keypad
The device is in GSM network (network service)
Battery: The higher the indication bars is, the stronger the battery capacity
will be.
GSM signal icon
Status of disconnection between client and the Skyroam device
Has been connected to the GPRS
Silent
Hands free
Add calls
Call hold
Short message edition backspace key
Rotate the screen
7
Section VI
VI: Operation Instruction
Installation of SIM Card
Insert SIM card to the Gmate device according to the direction drawn in the following
diagram to make sure the contact of SIM card is correctly connected to the contact
of Gmate device.
Status of Indication Light of Skyroam Device
A) Light off: shutdown status
B) Twinkling yellow light: startup status, but not connected
C) Twinkling green light: startup status, and connected
D) Charge: during the charging, the red light and green light twinkle in turn. The
more the time the green light stays, the more the electric quantity charged.
After the completion of charging, the green light will be on for a long time.
E)Flashing red light : low battery status
8
Startup
Press on the power button for 3 seconds, and release it after the status light turns
green. Then, the device enters the startup program.
Shutdown
Press on the power button for 3 seconds, and release it after the status light turns
red. Then, the device enters the shutdown program.
Restoration of Ex-factory Setting
Under the startup status,use clip or other similar tool to aim at the reset hole
and press on it for 3 seconds, and then the device is restarted.
Download Gmate client
Note:Please make sure that your iTouch must have Cydia
for the download and
installation of Gmate client software.
To download Client software, choose from the available sources:
USA Server: http://m.skyroam.com/cydia
China Server: http://c.skyroam.com/cydia
It is recommended to select http://m.skyroam.com/cydia a source which is closest
to your location.
The following is an example for selecting the International Server
�Manage
�
A) Connect Wi-Fi after iTouch is hacked, and then open Cydia �user
user�
Manage�
Sources � Edit �Add,Appear under the map,Enter http://m.Skyroam.com/cydia
and click Add Source
9
B)After a successful download,click Return to cydia to return the Sources.And there
are http://m.skyroam.com/cydia links below the lists.Click Gmate,Appear under the
map,where shows the latest Gmate edition below the lists.Then clisk it into the
details of the software information.
Installation Gmate client
A)After the following diagram appears, click Install�Confirm
,Install
10
B)During the installation process, the following interface will appear, and click
Okay
C)there will pop up a recommended choice Complete Upgrade for the user for the
first time).When the installation is complete,the screen will display a hint
Reboot Device,Click, iTouch restarted, the main menu interface will Gmate
client icon.
11
Connection of Gmate
Open the iTouch's GUI Gmate
Connection State
Gmate�Connection
State� search
search,to search for all nearby
Bluetooth devices within 10 meters,Connect the Bluetooth device with the name of
“Gmate”. Enter the Bluetooth password (default password: 1234). The connection
succeeds.
Note: to be safe ,it suggest to change PIN code and Gmate device 's name .Each
Battery compartment of Gmate device affixed with its own Bluetooth address,if
unable to confirm the device, you can find the Bluetooth address .
12
Settings
Connection State:Can be turned on or off (blue represents the connected status
while white represents the unconnected status).
�Autorun on boot up: Can be turned on or off (blue represents the
Settings�
connected status while white represents the unconnected status).
�Sounds
�Connected: Can be turned on or off (blue represents the turned
Sounds�
Settings�
on status while white represents turned off status).
�Sounds
�Disconnected: Can be turned on or off (blue represents the
Sounds�
Settings�
switched on status while white represents the switched off status).
�Sounds
�Mute Ringtone: Turn on to have mute ringtone.
Sounds�
Settings�
�Sounds
� Call Ring:Choose from a list of ringtones
Sounds�
Settings�
� Sounds
�Sms Ring:Choose from a list of ringtones
Sounds�
Settings�
� Sounds
�Ringtone Through: Can be turned on or off, ringtone will
Sounds�
Settings�
come from the headset when turned on. otherwise it will come from loudspeaker.
�Internet Setting�
�APN Name:the APN name dependent on your
Settings�
telecom carrier,Please contact your carrier for the APN Name
�Internet Setting�
� Authentication:Can be turned on or off.
Settings�
�Internet Setting�
�Proxy: Input Server and Port , APN
Settings�
informations are different from different SIM cards. Please contact your
SIM carrier for the informations.
�Gmate Setting�
�SIM Name: Customizable (removal of SIM card will
Settings�
display a blank)
�Gmate Setting�
�SIM Number:The phone number on the SIM (removal of
Settings�
SIM card will display a blank)
�Gmate Setting�
�Gmate Name:Customizable(Default name is "Gmate")
Settings�
�Gmate Setting�
�Change PIN : Customizable (This PIN code is the
Settings�
matching code with the Bluetooth.
The default PIN is 1234.
�About Gmate�
�Show the current Client version, Gmate version
Settings�
and Gmate Bluetooth address
�Reset : SMS data,call history and password records will be
Settings�
cleared, All Settings (Autorun, ringtones, and GPRS settings) will restore to
factory settings.
Internet:Can be turned on or off(You can use GPRS internet after turning on and
setting up DNS )
GPRS Traffic
Traffic:Used to display the Internet traffic,will accumulate the Internet
flow。
GPRS Traffic�Clear Traffic:
Traffic:Click on the GPRS flow number to reset
Check for Update:Will check for latest client updates if available.
13
Recents
All:Display missed calls(The missed calls are displayed as red. The calls processed are
displayed as orange. )
Received calls(No icon is displayed below the numbers)、Dialed(Number below
the icon has been allocated),All call records.
Missed:Show only missed call records
Clear:Will remove the records of "all the calls" and "missed calls"
Edit:Select this button,in front of Call History list,there is the icon ,click,
can delete a single record.
Choose Call logs、SMS、New Contact:click
,enter it ,you can perform it.
14
Contacts
Import
Import:Click the import button to import the contacts in SIM to iTouch..
Add contacts
contacts:click ,Enter the adding interface.
Edit contacts
contacts:Click the contact you want to edit,then click "Edit",you can edit
or delete.
15
Keypad
Call dialing::the user selects “Dial Keyboard” in the main interface of the client
and enters the numbers to call.
Add new contact
contact:the user selects “Dial Keyboard” in the main interface of the
client and enters the numbers,click
,you have added the new contact.
SMS
Send SMS:click enter new message.
Select the phone number to send SMS:click enter new SMS,click enter phone
book list.
Mass SMS:click enter new SMS,enter multiple numbers in the input number box,Can
perform
Receive SMS:Phone has text messaging and SMS tone cue ,open Gmate client
SMS Menu,you can view messages.
SMS List:The form of short messages is such as chatting form,Unread
messages:there is green dot in front of the number.
Forward,delete a single record and Clear All:in the interface of viewing
messages,clickEdit,there is “Forward”,“delete a single record ”and “Clear
All”in the interface.
Call,Add To Contact:in the interfaceof viewing messages,there are “Call”
and “Add To Contact”menu below the number,click,you can perform it.
note:Currently Gmate only supports SMS, MMS is not supported.
16
Internet
Note: When using Gmate+ internet, internet settings on your i-Device must be disabled;
Gmate+ supports gsm(edge), and can be used with or without proxy settings.
Without Proxy
1.Settings�Internet Setting�APN Name:Input APN Name (Your APN Name depends on
your SIM card, please consult with your operator for details)。The figure below
uses China Mobile as example.
2.Switch on Internet from the client’s main interface, the
icon will appear in
the upper-right corner of the screen of your i-Device(indicating internet
function enabled),once the
icon turns blue(indicating online status),
internet is online and available for use(As shown below)。
17
With Proxy
1. Settings�Internet Setting�APN Name:Input APN Name (depends on your SIM
card, please consult with your operator for details)。The figure below uses China
Mobile as example.
2. Settings� Internet Setting � switch on Proxy option, input Server and Port
(depends on your SIM card, please consult with your operator for details). The
figure below uses China Mobile as example.
Click Done to save settings.
3. Switch on Internet from the client’s main interface, the
icon will appear
in the upper-right corner of the screen of your i-Device(indicating internet
function enabled),once the
icon turns blue(indicating online status),internet
is online and available for use(As shown below)。
18
19