1
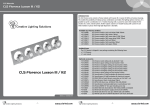
CLS Manuals
CLS Manuals
CLS PiXelbar 36
CLS Atmosphere LED-panel
INTRODUCTION:
Thank you for selecting the CLS PiXelbar 36. The CLS PiXelbar 36 is a universal DMX-controlled luminary
that uses 36 Luxeon® I LEDs to create an even light-output. Its numerous rigging facilities makes it the
perfect choice for rental companies worldwide.
The CLS PiXelbar 36 features:
• Built-in electronic power supply
• DMX input & output
• DMX 512 controlable
• 20 built-in fixed colours
• 9 built-in fade programs
Included items
The CLS PiXelbar 36 is shipped in one package containing the following items:
• 1 CLS PiXelbar 36
(item nr. 875600)
• 1 neutrik input power connection plug
(item nr. 946411)
• 2 floor brackets
(item nr. 875750)
• 1 user manual
Optional accessories
• 25° lens (standard mounted on the fixture) • CLS PiXelbar optional 25 x 45° lens
• CLS PiXelbar optional lens holder 25 / 25 x 45°
• Diffuser / frost filter
• PiXelbar floor bracket • Special G-clamp with wingbolt, black
• CLS Omega bracket for coupling of PiXelbar
• CLS cable 80cm XLR 3P complete
• CLS cable 1,5mtr XLR 3P complete • CLS cable 3mtr XLR 3P complete • CLS cable 5mtr XLR 3P complete • CLS cable 10mtr XLR 3P complete
• CLS cable 15mtr XLR 3P complete • CLS cable 20mtr XLR 3P complete
CLS PiXelbar 36
(item nr. 875700)
(item nr. 875705)
(item nr. 875720)
(item nr. 875730)
(item nr. 875750)
(item nr. 875760)
(item nr. 704811)
(item nr. 911200)
(item nr. 911201)
(item nr. 911203)
(item nr. 911205)
(item nr. 911206)
(item nr. 911207)
(item nr. 911209)
NOTE: It is important to read this manual before you install ore use this product.
Version 1.2 March 2009
- 1-
www.cls-led.com
-2-
www.cls-led.com
CLS PiXelbar 36
SAFETY INFORMATION
Warning! This product is for professional use only.
Read this manual before powering up or installing the CLS PiXelbar 36. Follow the instructions
listed below and observe all warnings in this manual.
INSTALLATION
Unplug from the mains before installation. Mount the brackets on the fixture. Connect the AC power cord
to the socket.
Dimensions
Protection from electric shock
• Disconnect the power supply from AC power before installing, dismounting or maintaining the unit.
• Make sure all connectors are connected properly.
• Use only a source of AC power that complies with local building and electrical codes.
• Do not expose the unit to rain or moisture.
• Refer all service to a qualified technician.
Protection from burns and fire
• Provide a clearance of at least 50 mm around the unit.
• Do not install the CLS PiXelbar 36 near a heat source.
• Do not install the CLS PiXelbar 36 in a corrosive, flammable or explosive area.
• Do not modify the CLS PiXelbar 36, or install other than genuine parts.
• Do not operate the unit if the ambient temperature exceeds 40°C.
• Operate in a well ventilated area.
Protection from injury due to falls
• Verify that all covers and mounting hardware is securely fastened.
• Block the access below the work area whenever installing or removing the unit.
Wiring diagram
OPERATION DETERMINATIONS
The CLS PiXelbar 36 is made for indoor use only. If the unit has been exposed to drastic temperature
changes, do not switch it on immediately. The arising condensation might damage your unit. Leave the unit
switched off till it has reached room temperature.
Only operate the unit after having checked the housing. Make sure it is firmly closed and the screws fastened
tightly. Do not shake the CLS PiXelbar 36. Avoid brute force when installing or operating the CLS PiXelbar 36.
Operate the CLS PiXelbar 36 only after having familiarized with its functions. Do not permit operation by
persons who are not qualified for operating the CLS PiXelbar 36. Most damages are the result of
unprofessional operation!
DMX
IN
DMX
A C in
p
5 0 /6 0 u t1 0 0 V ~ 2 4
Hz
0V
The maximum ambient temperature of 40 degrees must never be exceeded.
Please consider that unauthorized modifications on the CLS PiXelbar 36 are forbidden due to safety reasons!
-3-
OUT D
MX IN
DMX
C o n tr
A C in
o ll e r
p
5 0 /6 0 u t1 0 0 V ~ 2 4
Hz
0V
-4-
www.cls-led.com
CLS Manuals
CLS Atmosphere LED-panel
CLS PiXelbar 36
OPERATION
Lock functionality
When the display is off, the button functionality is locked. To unlock, press the menu button and hold it for 3
seconds. The display will light up.
When none of the buttons are in use for 30 seconds, the display will turn off. This will automatically lock the
button functionality.
DMX address settings:
For setting up a DMX address, press Menu until you see 3 numbers. The display shows the DMX address. Press
Up and Down to select the desired address from 001-512.
Stand alone
There are two possibilities to use the CLS PiXelbar in a stand alone mode.
1) Fixed colour
There are 20 built-in fixed colours. Press Menu until the display shows C01. Press Up and Down to select the
desired colour from C01~C20.
2) Fade program
There are 9 built-in fade programs. Press Menu until the display shows F01. Press Up and Down to select the
desired program from F01~F09.
The fade time of the program can be changed from 01~99% (0.5~50 sec). To change the fade times press
and hold the menu button. The display now shows S--, hold the button until the display shows two numbers.
The fade time can be adjusted from 01~99% by pressing Up and Down. To confirm and activate speed
settings, press Menu again.
A dd.
001
S- -
M enu
C01
DMX mode setting
Before selecting the DMX modes, first disconnect the DMX XLR connector. See page 5 for the lock
functionality if the display is off.
Press Menu until the display shows S--.
Press Up and Down to select the desired program from S01~S31.
Press Menu again to confirm it.
S10: Control all LED fixtures in the same channel (default)
S11: Control all LED fixtures independently
S20: Master off (default)*
S21: Master
S30: RGB 3 channels (Default)
S31: RGB dimming, strobe 5 channel
DMX mode S30:
Ch 1 = Red LED (single or group)
Ch 2 = Green LED (single or group)
Ch 3 = Blue LED (single or group)
DMX mode S31:
Ch 1 = Red LED (single or group)
Ch 2 = Green LED (single or group)
Ch 3 = Blue LED (single or group)
Ch 4 = Master
Ch 5 = Strobe (01~255/slow~fast)
* The slave units must be set on DMX add. 001 when running the Master / Slave function. The Slave unit
follows the Master unit’s functions. When the PiXelbar 36 is in slave mode and receiving DMX from the
Master unit, the display shows --- and the DMX LED is burning.
F01
Fade
M enu Down
-5-
Up
-6-
www.cls-led.com
CLS Manuals
CLS Atmosphere LED-panel
CLS PiXelbar 36
Changing the lenses of the Pixelbar 36
Technical Specifications
Step 1: Make sure no power is connected to the unit.
Step 2: Remove the side plate of the Pixelbar 36.
Step 3: Slide out the front cover plate of the Pixelbar 36.
Step 4: Carefully remove the lenses. By removing the lenses from the lens holders with a small flat
screwdriver. Be sure that the lens holder stays on the PCB. (see pictures).
Step 5: Change the lenses in the lens holders.
Input voltage:
Power consumption:
LEDs:
Colour:
Lens beam angle:
Weight:
Shipping weight:
Dimensions: Shipping dimensions:
Working temperature:
Communication:
Housing:
Application area:
IP value:
100 ~ 240 VAC
max 120 VA
36 x Luxeon® I
RGB
25°
(optional 25º x 45º lenses)
3,8 kg
4,5 kg
81 x 795 x 77 mm (hxwxd)
130 x 830 x 150 mm (hxwxd)
-10 °C to +40 °C
DMX 512 (1990) 3-pin XLR
First grade aluminum, black coated
Indoor use only
IP20
Note: When mounting the 25 x 45° lens be sure to mount the lens in the correct way; the vertical stripes of the lens have to be at a right angle to the PiXelbar.
Step 6: Slide back the front cover plate.
Step 7: Mount back the side plate and make sure the screws are firmly tightened.
2007 CLS-LED BV. All rights reserved. Information subject to change without notice, CLS-LED BV and all affiliated
companies disclaim liability for injury, damage direct or indirect loss, consequential or economic loss or any other loss
occasioned by the use of, inability to use or reliance on the information contained in this manual. No part of this manual
may be reproduced, in any form or by any means, without permission in writing from CLS-LED BV. Other legal information
can be found in our General conditions to be found on the back of your CLS-LED BV invoice or on our website
www.cls-led.com/Conditions.pdf
-7-
-8-
www.cls-led.com