1
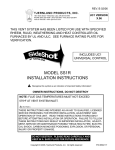
TJERNLUND PRODUCTS, INC.
1601 Ninth Street • White Bear Lake, MN 55110-6794
PHONE (800) 255-4208 • (651) 426-2993 • FAX (651) 426-9547
Visit our web site • www.tjernlund.com
READ OWNERS INSTRUCTIONS CAREFULLY PRIOR TO INSTALLATION.
THESE INSTRUCTIONS MUST REMAIN
WITH EQUIPMENT. DO NOT DESTROY.
For Residential Capacity Clothes Dryers
DRYER DUCT BOOSTER® FAN
MODEL LB1
DESCRIPTION & PURPOSE
The Dryer Duct Booster®, Model LB1, has been specifically designed to boost residential capacity clothes dryer duct exhaust velocities where dryer duct runs exceed 25 equivalent feet. Proper exhaust velocities will reduce drying times, save energy and prevent lint
buildup in the dryer duct. The LB1 is controlled by an electronic Pressure Response Control (PRC) for automatic operation. The LB1
utilizes galvanized steel construction, a reverse inclined, particulate handling impeller that is guaranteed not to clog with lint and
an externally mounted PSC motor for trouble-free operation.
SPECIFICATIONS & COMPONENTS
MODEL LB1
4"
Blower:
160 cfm
Motor:
115 Volts ~ 60 Hz
0.80 amps maximum
UL507
CSA 22.2 NO. 113-M
14"
OUTLET
56826
10.75"
Impeller:
Reverse inclined, particulate handling
Components: (1) LB1 wired fan assembly
(1) 16 gauge galvanized steel mounting bracket
(1) mounting hardware packet
10.5"
INLET
4"
6.25"
INSTALLATION RESTRICTIONS
The LB1 must be installed in compliance with your local building codes. Verify compliance before installing this unit.
The LB1 must be installed in an area in which ambient air temperatures are between -20° F and 140° F
(-29° C and 60° C) and ambient humidity does not exceed 85% relative humidity.
DIAGRAM A
Do not install the LB1 in a position where dryer exhaust temperatures exceed 175° F (80° C) at LB1 inlet.
The dryer duct in which the LB1 is installed must terminate with a dryer vent hood with a damper.
Not recommended for dryer duct runs exceeding 100 equivalent feet. Equivalent feet equals linear feet
plus 5 additional feet for each 90O elbow and 2.5 feet for each 45O elbow.
Do not install the the LB1 with the discharge facing down, (See Diagram A).
Do not install the LB1 in an orientation where the sensing tube port might fill
with condensation, (See Diagram B).
DIAGRAM B
DO NOT INSTALL LB1 IN A
POSITION WITH THE SENSING
PORT AT THE BOTTOM OF
DRYER DUCT WHERE CONDENSATION CAN POOL IN
SENSING TUBE PORT.
©2008 TJERNLUND PRODUCTS, INC. ALL RIGHTS RESERVED
P/N: 8504142 REV A 0508
INSTALLATION RECOMMENDATIONS
Avoid installing the LB1 within 15 equivalent feet* of the
dryer or within 5 equivalent feet of the dryer vent hood,
(See Diagram C).
DIAGRAM C
15 EQUIVALENT FT.
5 EQUIVALENT FT.
*Equivalent feet equals linear feet plus 5 additional feet
for each 90O elbow and 2.5 feet for each 45O elbow.
Avoid installing the inlet or outlet of the LB1 within 1 foot of
dryer duct elbows.
NO
FIGURE 8050015
YES
NO
2/25/08
Install the LB1 as close to the middle of the dryer duct run as possible.
MOUNTING
DIAGRAM D
NOTE: Do not use screws in the dryer duct installation. The LB1 motor can be mounted in
a horizontal or vertical orientation. Discharge must face up if mounted vertically,
(See Diagram D). Do not install the LB1 in an orientation where the sensing tube
port might fill with condensation, (See Diagram B).
1. Considering dryer duct routing and LB1 location, use the (4) #10 x 1 3/4" wood screws to
secure the mounting bracket to the wood structure using the (4) 3/8" holes in the ½ moon
portion of the bracket. Do not to over tighten the screws.
2. Based on the desired mounting orientation, position the mounting bracket onto 3 of the 4
vibration isolators located on the LB1. Tighten the bracket in place using the (3) provided
1/4” nuts.
HORIZONTAL
MOUNTING
3. Insert dryer duct on inlet and outlet of LB1 and secure using reinforced foil duct tape.
See “Initial Setup / Reset of Pressure Response Control (PRC)”, below before plugging in.
VERTICAL MOUNTING
MUST DISCHARGE
FACING UP
SEQUENCE OF OPERATION
The LB1 is controlled by an electronic Pressure Response Control (PRC). The control continuously monitors the pressure in the dryer
duct. When the dryer is activated, dryer exhaust pressurizes the inside of the dryer duct, activating the LB1. When the LB1 and dryer
are operating together, they establish a resulting pressure that is monitored by the PRC. When the dryer shuts off, this pressure
decreases and the PRC shuts off the LB1.
INITIAL SETUP / RESET OF PRESSURE RESPONSE CONTROL (PRC)
When first supplied electrical power or if power is reestablished, the LB1 will load its program (about 20 seconds) and then
run for 15-30 seconds to learn the pressure baseline of the vent system. To prevent injury or impeller damage, install the LB1
in dryer vent system before supplying power.
Each residential capacity clothing dryer installation is unique due to dryer duct length, vent hood type, location of LB1, dryer make &
model, etc. Because of these varying conditions, the LB1 needs to learn the application it is installed on. As part of the start up routine,
the LB1 will load its program (about 20 seconds) and then run for 15-30 seconds to learn the pressure baseline of the vent system when
power is first supplied or if power is reestablished.
IMPORTANT:
For new construction or installations where the dryer is not present, it is necessary for the end user of the dryer to
perform the setup procedure below to program the PRC sensing control before initial use of the dryer.
Once dryer, dryer duct and LB1 are installed and before initial use of the dryer OR if the LB1 cycles erratically, the PRC sensing control
can be set / reset by performing the following procedure:
FOLLOW STEPS BELOW FOR INITIAL SETUP / RESET OF PRC SENSING CONTROL
• Remove all articles from the dryer.
• Clean dryer lint trap and reinstall.
• Verify that dryer door is completely closed.
• Verify that dryer vent system is cool. If need be, cool down the vent system by running dryer for 5 minutes on “Air Dry”.
• Verify that dryer is not operating.
IMPORTANT: The dryer, dryer duct and LB1 must be installed before continuing setup / reset of PRC sensing control.
1. Disrupt power to the LB1 by unplugging from electrical outlet or tripping circuit breaker powering the outlet.
2. Wait 10 seconds.
3. Reestablish power to the LB1. In 20 - 30 seconds the LB1 will run to learn the baseline.
4. In 15 - 20 seconds, the LB1 will shut off. Wait at least 30 seconds for learn process to be completed before using clothes dryer.
MAINTENANCE & SERVICE
The LB1 motor and fan assembly are maintenance free. The fan impeller is designed for particulate handling. The pressure sensing
tube is self-cleaning. If the LB1 is acting erratically, perform the reset procedure of the Pressure Response Control (PRC) as outlined on
the previous page.
If you have any questions about your LB1 we suggest that you contact your installer, contractor or service agency. If you require
technical information contact Tjernlund Products, Inc. at 1-800-255-4208 or visit www.tjernlund.com.
When contacting Tjernlund Products, Inc., please have the following information available:
1. Name and address of installer and service agency.
2. Job code on nameplate, date of original installation and dates any service work was performed.
REPLACEMENT PARTS AND WARRANTY
Part Number
Part Number
Sensing Tube Assembly Kit
950-9100
Pressure Response Control Kit
950-9102
Motor Kit
950-9101
WHAT IS NOT COVERED
Product installed contrary to our installation instructions.
Any freight charges related to the return of the defective part.
Product that has been altered, neglected or misused.
PRESSURE RESPONSE CONTROL (FACTORY WIRING)
Ground Wire
Motor Black (M1)
Motor White (L2)
Power Cord
Non-Ribbed (L1)
Power Cord
Ribbed (L2)
Any labor charges related to evaluating and replacing the defective part.
TJERNLUND LIMITED FIVE YEAR MATERIAL AND NO-CLOG WARRANTY
Tjernlund Products, Inc. warrants to the original purchaser of this product that the product will be free from defects due to faulty material or workmanship for a period of (5)
years from the date of original purchase or delivery to the original purchaser, whichever is earlier. Remedies under this warranty are limited to repairing or replacing, at our
option, any product which shall, within the above stated warranty period, be returned to Tjernlund Products, Inc. at the address listed below, postage prepaid. Additionally,
Tjernlund warrants to the original purchaser of this product that the unit will not become inoperable due to lint blockages that restrict the impeller’s motion for a period of (5)
years from the date of original purchase or delivery to the original purchaser, whichever is earlier. THERE ARE NO WARRANTIES WHICH EXTEND BEYOND THE
DESCRIPTION ON THE FACE HEREOF, AND TJERNLUND PRODUCTS, INC. EXPRESSLY DISCLAIMS LIABILITY FOR INCIDENTAL OR CONSEQUENTIAL DAMAGES ARISING FROM THE USE OF THIS PRODUCT. THESE WARRANTIES ARE IN LIEU OF ALL OTHER EXPRESS WARRANTIES AND NO AGENT IS AUTHORIZED TO ASSUME FOR US ANY LIABILITY ADDITIONAL TO THOSE SET FORTH IN THESE LIMITED WARRANTIES. IMPLIED WARRANTIES ARE LIMITED TO THE
STATED DURATION OF THIS LIMITED WARRANTY. Some states do not allow limitation on how long an implied warranty lasts, so that limitation may not apply to you. In
addition, some states do not allow the exclusion or limitation of incidental or consequential damages, so that above limitation or exclusion may not apply to you. This warranty gives you specific legal rights and you may also have other rights which may vary from State to State. Send all inquiries regarding warranty work to
Tjernlund Products, Inc. 1601 9th Street, White Bear Lake, MN 55110-6794. Phone (651) 426-2993 • (800) 255-4208 • Fax (651) 426-9547 • Email [email protected].