1
#
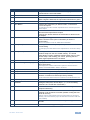
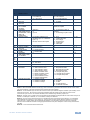
Feature
Function
1
IR Receiver
The yellow LED is illuminated when receiving signals from the
infrared remote control transmitter
2
POWER Switch
Illuminated switch for turning the unit ON or OFF
3
IN SELECTOR Buttons
Select the input to switch to the output.
When a signal is detected, the input button illuminates in green
4
OUT SELECTOR Buttons
Select the output to which the input is switched
5
ALL Button
Pressing ALL followed by an INPUT button, connects that
input to all outputs
For example, press ALL and then Input button # 2 to connect input # 2 to
all the outputs
6
OFF Button
Press an OUT SELECTOR button and then an OFF button to
disconnect that output from the inputs
Press the ALL button and then the OFF button to disconnect all
the outputs
7
TAKE Button
Pressing TAKE toggles the mode between the Confirm mode
and the At Once mode (user confirmation per action is
unnecessary)
8
STO (Store) Button
Pressing STO followed by an input/output button stores the
current setting
When in the Confirm mode, the TAKE button illuminates
For example, press STO and then the Output button # 3 to store in Setup
#3
9
RCL (Recall) Button
Pressing the RCL button and the corresponding IN/OUT button
recalls a setup from the non-volatile memory. The stored
status blinks. Pressing a different IN/OUT button lets you view
another setup. After making your choice, pressing the RCL
button again implements the new status
10
LOCK Button
Disengages the front panel switches
11
STATUS 7-segment Display
Displays the selected input switched to the output (marked
above each input)
Also displays the number of IN and OUT ports, the firmware version
number, and the MACHINE #. Refer to section 6.1
12
15-pin HD INPUT Connectors
13
15-pin HD OUTPUT Connectors
Connect to the video sources (from 1 to 8)
Connect to the output acceptor (from 1 to 8)
14
FLASH PROG Button
Push in for “Program” to upgrade to the latest Kramer
firmware, or release for Normal (the factory default)
15
RS-232 9-pin D-sub Port
Connects to the PC or the Remote Controller
16
DELAY and SETUP DIPswitches
DIP-switches for setup of the unit (DELAY dips 1, 2, 3 are for
setting the delay time; SETUP dips 1, 2, 3, 4 are for setting
machine #; 8 is for RS-485 Termination)
17
ETHERNET Connector
Connects to the PC or other Serial Controller through
computer networking
18
REMOTE IR 3.5mm Mini Jack
Connect to an external IR receiver unit for controlling the
machine via an IR remote controller (instead of using the front
panel IR receiver)
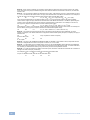
The FLASH PROG “Reset” button is located on the underside of the unit
Optional. Can be used instead of the front panel (built-in) IR receiver to
remotely control the machine (only if the internal IR connection cable has
been installed)
19
RS-485 Terminal Block Port
Pin G is for Ground connection; Pins B (-) and A (+) are for
RS-485
20
Power Connector with Fuse
AC connector enabling power supply to the unit
VP-8x8 - Overview
5