1
ultimail Metering System Operator Manual 2 The control panel – display and keyboard Display (illuminated) Multifunction keys (Softkeys) Multifunction keys (Softkeys) Arrow keys Metering labels SET UP menu: Change system settings Loading postage: TELESET Display postage register Info key: Display help Back to the home menu Numeric keys: – Enter digits – Enter letters, punctuation and special characters Start/Stop key: Start letter transport/ metering Go back to the higher window/menu level Enter key: – Confirm the input – Acknowledge error messages C/CE key: – Delete input – Call default setting In the home menu, press C/CE for 3 seconds: Home menu is reset to standard Contents About this operator manual _____________________________________7 1 Safety tips ___________________________________________________9 2 A short description of the ultimail _______________________________10 3 Switching the ultimail ON/OFF __________________________________12 4 ultimail Operating Basics ______________________________________14 4.1 Access control by MasterCard/UserCard _____________________14 4.2 The operating menu _____________________________________15 4.3 Trial run ______________________________________________16 5 Metering ____________________________________________________17 5.1 5.1.1 5.1.2 5.1.3 Preparations __________________________________________17 Setting up catch tray ____________________________________17 Letter guide adjustment (only feeder/sealer) _____________________17 Switch on/off seal function (only sealer/feeder) ___________________20 5.2 5.2.1 5.2.2 5.2.3 5.2.4 5.2.5 Setting the meter imprint _______________________________21 Postage value _________________________________________21 Logo imprint ___________________________________________23 Type of mail endorsement ________________________________24 Date of meter imprint ____________________________________25 Using the memory ______________________________________26 5.3 Change account _______________________________________27 5.4 5.4.1 5.4.2 5.4.3 5.4.3.1 5.4.3.2 Positioning and metering a letter _________________________28 ultimail with manual positioner _____________________________28 ultimail 60 with sealer ____________________________________29 ultimail 90 with feeder ___________________________________30 Positioning letters in stack ________________________________30 Positioning single letters _________________________________31 5.5 Metering labels (optional) _________________________________32 6 Rate calculation (optional) _______________________________________33 6.1 Scale menu ___________________________________________33 6.2 Setting postal rates for rate calculation ______________________35 6.3 Weighing, determining postage, metering ____________________38 6.4 Saving postal rates and calling them from memory _____________39 3 4 ultimail Operator Manual 7 Special functions ____________________________________________ 40 7.1 Postage correction _____________________________________ 40 7.2 Redate _______________________________________________ 41 7.3 Working with pre-select counter ___________________________ 42 7.4 Using the ultimail as incoming mail stamp ___________________ 44 7.5 Only seal letters (optional) _________________________________ 46 7.6 Using an external postage scale ___________________________ 47 7.6.1 Connecting an external postage scale ______________________ 47 7.6.2 Determining postage and metering _________________________ 48 8 Postage register _____________________________________________ 49 9 Loading postage – TELESET ___________________________________ 50 10 Account administration _______________________________________ 53 10.1 Set up a new account ___________________________________ 53 10.2 Change settings for existing accounts _______________________ 55 10.2.1 Change standard setting for the logo _______________________ 55 10.2.2 Release/block TELESET access ___________________________ 57 10.2.3 Changing budgets and assigning credits ____________________ 58 10.2.4 Change name _________________________________________ 60 10.3 Generate/block UserCard(s) for an account __________________ 61 10.4 Switch on/off “access card required?” _______________________ 63 10.5 Display and print account information _______________________ 64 10.6 Set account counter to zero ______________________________ 66 10.6.1 Set one account to zero _________________________________ 66 10.6.2 Set all accounts to zero __________________________________ 66 10.7 Delete accounts ________________________________________ 67 10.7.1 Delete one account _____________________________________ 67 10.7.2 Delete all accounts _____________________________________ 67 11 System settings _____________________________________________ 68 11.1 Setting the operating mode _______________________________ 68 11.2 Display, print and send system information ___________________ 70 11.3 Meter type ____________________________________________ 71 11.4 Setting the print offset for the meter imprint __________________ 72 11.5 Setting low postage warning – limit _________________________ 73 11.6 Setting high postage – limit _______________________________ 74 11.7 Tone signal ___________________________________________ 75 11.8 Display contrast ________________________________________ 76 11.9 Display and reset item counter ____________________________ 77 Contents 11.10 11.10.1 11.10.2 11.10.3 Time _________________________________________________78 Day light saving time ____________________________________78 Adjusting the current time ________________________________80 Setting time zone _______________________________________81 11.11 11.11.1 11.11.2 11.11.3 11.11.4 Print image data administration __________________________82 Logo display and printing _________________________________82 Change the logo names __________________________________83 Loading print image data from card _________________________84 Delete print image data __________________________________85 11.12 11.12.1 11.12.2 11.12.3 Short code memories __________________________________86 Saving settings _________________________________________86 Display and print saved settings ___________________________88 Delete memories _______________________________________89 11.13 11.13.1 11.13.2 11.13.3 11.13.4 11.13.5 11.13.6 Internal scale (optional) ___________________________________90 Tare _________________________________________________90 Setting weighing mode ___________________________________91 Switching on and off automatic type of mail endorsement ________92 Rate table update _______________________________________93 Delete all rate tables ____________________________________94 Change local ZIP code for rate calculation ___________________94 11.14 11.15 11.16 11.17 11.18 11.19 11.20 11.21 Setting print head standby time ____________________________95 Setting letter transport run-on time _________________________96 Modem configuration – adjusting dialing parameters ___________97 Generate MasterCard ___________________________________99 Changing the origin ZIP code _____________________________99 Selecting the user interface language ______________________100 Account administration extension _________________________101 Changing phone numbers _______________________________102 12 Maintenance and care ________________________________________103 12.1 Cleaning the ultimail metering system ______________________103 12.2 Changing the ink cartridges ______________________________104 12.3 Adjust the ink cartridges _________________________________109 12.4 Cleaning the print system _______________________________110 12.5 Filling the water tank (optional) _____________________________111 12.6 Cleaning / changing the moistening sponge (optional) ___________113 12.7 Adjust moistening level (optional) ___________________________117 12.8 Changing the battery ___________________________________118 5 6 ultimail Operator Manual 13 Troubleshooting ____________________________________________ 120 13.1 Problems and remedies ________________________________ 120 13.2 Removing letter jams ___________________________________ 126 13.3 Attach adjustable letter guide to feeder/sealer _______________ 128 13.4 Display, print and send diagnostics list _____________________ 129 Appendix Moving the ultimail to another location ________________________________ 131 Dismantling the ultimail metering system __________________________ 132 Reinstalling the ultimail metering system __________________________ 136 Access rights ____________________________________________________ 140 Operating menu (overview) _________________________________________ 142 Country codes ___________________________________________________ 143 Tips and tricks ___________________________________________________ 147 How to enter text _____________________________________________ 147 How to prepare letter stacks for batch mailing with the feeder ultimail 90 __ 149 How to prevent jamming and double-feeding during batch mailing ______ 150 How to feed similar mail pieces at the sealer ultimail 60 ______________ 152 Glossary _______________________________________________________ 153 Technical Data __________________________________________________ 155 Index __________________________________________________________ 160 Service ________________________________________________________ 169 About this operator manual About this operator manual Please read this operator manual before using the ultimail metering system. Please keep the manual near the ultimail at all times for reference. This operator manual applies to all configurations and equipment varieties of postage meters ultimail 60 and ultimail 90. Functions which are only available with certain configurations are recognizable by a suffix, e.g. (optional). Quick reference The quick reference gives you an overview of the operating menu and metering with the ultimail. The following keywords and safety signs identify the safety tips in this operator manual. Warning! indicates a potential hazard which may result in injury. Warning! indicates a potential danger of injury caused by rotating components. Danger areas of the ultimail are marked with such a safety sign. Caution! indicates a potential hazard that may result in damage to the ultimail or impair the metering process. The following symbols and text features are used in this operator manual: MEMORY “Dial …” Menu names and options from the operating menu are written in capital letters. Prompts and messages are highlighted by quotation marks. A tip offers advice or additional suggestions for improving the operation. 7 8 ultimail Operator Manual Safety tips 1 Safety tips The ultimail is a digital metering system with an inkjet printer for metering letter mail. The ultimail complies with the pertinent safety regulations for office information equipment. Please observe the following tips for your own safety: • Installation and commissioning of the metering system ultimail are only done by qualified personnel authorized by Francotyp-Postalia. • Only operate the ultimail system on a grounded single-phase power socket. • Use only the power and modem cables provided or approved by FrancotypPostalia. Make sure that cables are not damaged. • Make sure the socket for connecting the ultimail is close by and easily accessible at all times. • Do not reach into the danger areas marked with a safety sign. Keep long hair, fingers, loose clothing pieces, shawls and jewellery away from moving machine parts. • Do not remove any part of the safety and protective equipment. Do not make them inoperative. Do not remove any parts of the housing. • Never cover the ventilation slots in the housing. • Pull out the power plug in the event of danger! Call the after-sales service. • Make sure that no liquids or foreign objects penetrate the interior of the ultimail. If this happens, pull out the power plug immediately. Have the ultimail metering system checked by Francotyp-Postalia service before starting it up again. • Use the ‘Sealer ultimail 60’ only with the ultimail 60 postage meter. It is not possible to operate the sealer without the ultimail 60 postage meter. • Use the ‘Feeder ultimail 90’ only with the ultimail 90 postage meter. It is not possible to operate the feeder without the ultimail 90 postage meter. • Only use original ink cartridges from Francotyp-Postalia. Observe the information enclosed with every cartridge. • Only use the batteries provided by Francotyp-Postalia. Observe the instructions enclosed with the battery for correct use and disposal. • Only have maintenance and repair work done by qualified personnel authorized by Francotyp-Postalia. Otherwise your warranty will be voided. You will be liable for any damages. • Observe the specific notes for moving the ultimail metering system on page 131 if you wish to install the ultimail at another location. 9 10 ultimail Operator Manual 2 A short description of the ultimail The ultimail is a digital postage meter with horizontal letter transport and ink jet technology (ink jet print with two ink cartridges arranged side by side). Structure In its basic version, the metering system consists of the postage meter, manual positioner and catch tray. The postage meter is available as model – ultimail 60 with a processing speed up to 60 letters per minute – ultimail 90 with a processing speed up to 90 letters per minute Menu-supported user interface The user interface in the lit display will lead to the desired results in a fast and safe way. Simply follow the instructions in the display, whether for setting the meter imprint, modifying the system settings or service functions, e.g. changing cartridges. Help No illegal entries are allowed by the ultimail – you are informed by an appropriate message. A help function offers additional advice and support. Metering On one glance, the home menu will show you the current settings for the meter imprint. You simply position the letter – the ultimail will seize the letter, meter it and place it in the catch tray ready for dispatch. You can meter – mail pieces up to a thickness of ¼" (6.35 mm) of an ink absorbent material. – self-adhesive labels. Logo imprint TELESET Protection against unauthorized use ultimail prints a logo of your choice on every mail piece. Load new postage by TELESET procedure via the built-in modem – fast, comfortably and, if necessary, 24 hours a day. The MasterCard/UserCard functionality protects the ultimail against unauthorized use and facilitates the assignment of individual access rights. A short description of the ultimail Additional functions You will quickly appreciate the following comfortable functions: – Account function. Recording and accounting of postage according to accounts. – 6 short codes for frequently used postage imprint settings. – Stamp of receipt. Imprint ‘Received on: …’ for stamping incoming mail. – Printing of account data, postage register states, system information. – Warning in case of high postage and too low amount of postage available. – Print offset for changing the postage imprint position on the envelope. – Telediagnostics. You can transfer important system data via the built-in modem to the Francotyp-Postalia service. Flexible and up to date Options New logos, type of mail endorsements or rate changes of the United States Postal Service – you can easily load the latest data in your ultimail. The following components are available for functionality extension: – Internal scale. When the equipment includes an internal scale, the ‘rate calculation’ function is available. The ultimail calculates the postage on the basis of selected mailing data in a fast and reliable way. Postage and type of mail endorsement are set automatically. – Label dispenser to print self-adhesive labels for large/thick mail pieces. – Sealer ultimail 60. Automatic sealer for the ultimail 60 to moisten and seal letters. The letters are positioned manually. – Feeder ultimail 90. Automatic feeder with sealer for the ultimail 90. The letters are separated from the stack, optionally moistened and sealed, and fed to the ultimail 90 postage meter. You will find an overview of the ultimail system components on pages 166 to 168. 11 12 ultimail Operator Manual 3 Switching the ultimail ON/OFF Use the power switch on the back of the postage meter to switch the ultimail and installed optional system components ON/OFF. ON Switching on • Switch the power switch on the back of the postage meter to the I position. Power switch (back of the machine) The display light goes on and a start routine is initiated. All system components are now checked and activated by the ultimail. The self-test is accompanied by signalling beeps and information on display. Home menu (example) The home menu appears in the display. The ultimail is ready for operation. Note: The example shows the complete home menu. SCALES only appears with a system with internal scale. ACCOUNT only appears if an access card is plugged in or if access control is switched off. Switching the ultimail ON/OFF Switching off Caution! Always switch the ultimail off using the power switch. Never simply pull the power cord or interrupt the power in any other way before the printing system has moved to sealed position. Only in that way can you prevent drying and maintain a constant printing quality. OFF • Make sure the ultimail displays the home menu. If necessary: call the home menu by pressing the key. • Switch the power switch to the O position. Power switch (back of the machine) The ultimail finishes all operations which are currently in process and moves the printing system to sealed position (switch off routine “Shutting down machine”). This process may take some time. ultimail switches off thereafter. The display illumination switches off as well. 13 14 ultimail Operator Manual 4 ultimail Operating Basics In this chapter you will learn about the basic ultimail functions and how to handle the operating menu. 4.1 Access control by MasterCard/UserCard MasterCard and UserCard, both designated as access cards, control access rights to use the ultimail. A MasterCard allows you to access all functions. Among others, you need a MasterCard for the following functions: – – – – Setting up accounts Assigning UserCards to an account Switching access control ON/OFF Setting print offset. A UserCard allows you to access selected functions only. – Metering to the assigned account. – Assigning a logo to the account. The authorization for metering can be set so that no access card is necessary. Then metering will be possible without MasterCard or UserCard to all accounts. You will find an overview of the access rights on page 140. How to plug the access card into the card reader • Plug access card into the card reader in the direction of the arrow. The chip on the card should face downward. • Push access card in as far as it goes. You will feel the card snap in. How to remove the access card • Simply pull access card out of the card reader. ultimail Operating Basics 4.2 The operating menu In this chapter you will get to know the home menu. The total of the ultimail user interface works in a similar way. You will soon get used to the other windows (SET UP menu, input, prompt, error message, help). Number of current account Account name Postage value Type of mail endorsement The home menu The home menu appears after switching on and successful completion of the start routine. On one glance, you will see all settings for the metering process. In the home menu, you can – set the meter imprint (postage value, type of mail endorsement, logo, date) – call saved meter imprint settings (MEMORY) – change to rate calculation (SCALES). This rate calculation function is only available on systems with internal scale. Logo (advertising imprint) Status line Input field Date of stamp How menu sequences are visualized SET UP SYSTEM SETTINGS MORE TONE SIGNAL The ‘path’ through the operating menu to the different functions is represented in this way: SYSTEM SETTINGS TONE SIGNAL. MORE You will see menu names, options or functions which you should select one after the other by pressing the associated multifunction keys. For fast orientation you will find an overview of the operating menu on page 142. 15 16 ultimail Operator Manual 4.3 Trial run You can check the settings for the metering process by doing a trial run with postage value “0.00” (zero imprint). • Type the postage value “0” in the home menu. The digit “0” appears at the bottom right of the status line. • Confirm with the key for postage value. (This is the multifunction key at the top right - directly next to the postage value display.) Postage value is set to “0.00”. • Place an empty envelope on the letter receiving tray. – side to be printed face up – the upper edge flush to the letter guide face. • Push the envelope in until the letter sensor recognizes the envelope and starts letter transport. Letter guide face The ultimail feeds the envelope, prints, and places the printed envelope in the catch tray. You can also start letter transport with the key. Position, in the same way, an empty envelope for trial run at the sealer or at the feeder. For details how to handle sealer and feeder, read Chapter 5. Metering 5 Metering 5.1 Preparations 5.1.1 Setting up catch tray The catch tray can be adjusted to various envelope formats – up to ISO C5 maximum. You work without catch tray when processing larger formats. • Slide the two limit guides until they engage into the desired position. The limit guides are provided with three notches for the most frequently used envelope formats. 5.1.2 Letter guide adjustment (only feeder/sealer) The letter guide ensures that letters are fed in straight run. You adjust the letter guide to the envelope format using the bar. The format markings on the letter receiving tray facilitate the adjustment. At the sealer • Folding the adjustable letter guide up vertically to letter receiving tray: Simply press down the recess grip on the letter guide. 17 18 ultimail Operator Manual Move the letter guide upwards. • Hold the bar in the grip recess and slide it so that the letter guide outside is directed to the suitable format marking. The letter guide is adjusted correctly if the format marking arrow points to the exterior of the letter guide. For large deliveries: • Adjust bar so that it is flush with the housing edge. • Fold letter guide down to letter receiving tray. Metering On the feeder • Folding the adjustable letter guide up vertically to letter receiving tray: Simply press down the recess grip on the letter guide. Move the letter guide upwards. • Hold the bar in the grip recess and slide it so that the exterior of the letter guide is directed to the suitable format marking. The letter guide is adjusted correctly if the format marking arrow points to the exterior of the letter guide. For large deliveries: • Pull the bar as far as it goes, and fold down the letter guide. 19 20 ultimail Operator Manual 5.1.3 Switch on/off seal function (only sealer/feeder) Sealing: If the letters are to be sealed: • Place the switch to the rear into seal position. • Check filling level in water tank. • Fill more water if required. Read Chapter 12.5 on page 111. The envelopes should be suited for sealing by machinery. For details to envelope specifications, read on page 158. Not seal If you do not want to seal letters or if they are already sealed: • Place the switch to the front into nonseal position. Metering 5.2 Setting the meter imprint Logo Postage value Type of mail Date The following settings determine the meter imprint: – – – – Postage value Logo (advertising imprint) Type of mail endorsement Date for meter imprint (= current date of deposit of the mail piece). You set the meter imprint in the home menu. After switching on and successful completion of the start routine, the display always shows the home menu with current settings for the meter imprint. – Postage value and type of mail endorsement are default settings saved under MEMORY 1. – The date is set to the current day. – The logo is determined by the currently set account. Each account is provided with a default setting for the logo (ACCOUNT ADMINISTRATION menu). With the 5.2.1 key you go back to home menu from other menus. Postage value • Enter the desired postage value in cents. The entered value appears at the bottom right of the status line. • Confirm with the postage value key. (This is the multifunction key at the top right – directly next to the postage value display.) 21 22 ultimail Operator Manual High postage The ultimail will warn you if you enter an amount that is higher than the preset. The ultimail thus helps to avoid overmetering and loss of postage. You can change the limit for the monitoring function in the SET UP menu (see page 74). You can also enter the postage in the following way: • Press the postage value key in the home menu. (This is the multifunction key at the top right – directly next to the postage value display.) The input window for postage value appears. • Enter the desired postage value. You will see the input value in $ in the input window. • Confirm with the key. The ultimail closes the input window. The new postage value is set in the home menu. Metering 5.2.2 Logo imprint • Press the key next to the logo in the home menu. The SELECTING LOGO menu offers all logos available in your ultimail. • Press the key next to the desired logo. In the example, this is the logo CEBIT 2003. The ultimail goes back to home menu. The advertising imprint is set. You can have a look at the advertising imprints: Press for at least 3 seconds the key next to the logo in the SELECTING LOGO menu. A simplified preview image appears in the display. If you know the logos and the associated codes, you can directly set the advertising imprint in the home menu: • Type the logo number. The entered number appears at the bottom right of the status line. • Confirm with the key next to the logo. 23 24 ultimail Operator Manual 5.2.3 Type of mail endorsement • Press the key next to the type of mail endorsement in the home menu. The SELECTING TYPE OF MAIL ENDORSEMENT menu offers all available type of mail endorsements. • Press the key next to the desired type of mail endorsement. In the example, this is “First class”. The ultimail goes back to home menu. The type of mail endorsement is set. You can also directly set the type of mail endorsement in the home menu. The procedure is described on page 23 by the example of the advertising imprint. Metering 5.2.4 Date of meter imprint The date for the meter imprint is set automatically to the current date by the system clock. You can set the date forward by up to 30 days. The ultimail does not allow to set the date backward. • Press the key next to the date display in the home menu. The input window for the date appears. The date indication of the ultimail consists of 2 digits each for the month (MM), the day (DD) and the year (YY). • Enter new date. You only have to type the day (DD) for the date. The ultimail automatically adds the month and year details. • Confirm with the key. The ultimail closes the input window and sets the new date in the home menu. You can also set the date for the meter imprint directly in the home menu: • Type new date. The entered value appears at the bottom right of the status line. • Confirm with the key next to the date indication. Set back to current date: • Press the key. • Confirm with the key next to the date display. 25 26 ultimail Operator Manual 5.2.5 Using the memory The ultimail has 6 short code memories. You can call the saved settings for postage value and endorsement in the home menu. • In the home menu, press the key next to MEMORY. The SELECTING THE MEMORY menu offers the selection of all occupied short code memories. You will see the saved settings for postage value and type of mail endorsement. • Press the key next to the desired memory. The ultimail goes back to home menu and displays the number of the selected memory. The postage value and the type of mail endorsement saved are set. Memory no. 5: – Postage value $ 2.67 – Metering without type of mail endorsement If no type of mail endorsement is saved in the memory, the last selected type of mail endorsement remains set in the home menu. No type of mail endorsement saved For saving, changing or deleting of memories, read Chapter 11.12 on page 86. You can also directly set the short code in the home menu. • Type the memory number in the home menu. • Confirm with the key next to MEMORY. Metering 5.3 Change account You can only change the account if you work with MasterCard or if all accounts are released for metering (in account mode: ACCESS CARD REQUIRED: OFF). If you work with UserCard the account for the UserCard is set automatically and cannot be changed. For account set up and account data evaluation, use account administration in SET UP menu (see page 53). How you change the account: • Press the key next to the account display in the home menu. The ultimail opens SELECT ACCOUNT menu. The created accounts are listed by account numbers. If more than 8 accounts are set up, you can scroll through the accounts list using MORE / PREVIOUS. • Press the key next to the desired account. In the example, this is account 10789 “Service”. The ultimail goes back to home menu. The selected account is set up. You can also directly set the account in the home menu. • Type the account number. The entered number appears at the bottom right of the status line. • Confirm with the key next to the account display. 27 28 ultimail Operator Manual 5.4 Positioning and metering a letter You can meter letters up to a thickness of ¼" (6.35 mm). For thicker deliveries you should meter the empty envelope or use labels. Use envelopes made of ink-absorbent material with as smooth a surface as possible. This gives the best printing results. How to position letters at the manual positioner and work with sealer or feeder, read in Chapters 5.4.1 to 5.4.3. You can select total pieces prior to metering. This ultimail function will help you to have the metered deliveries readily stacked by numbers for the dispatch. Read Chapter 7.3 on page 42. 5.4.1 ultimail with manual positioner When the display shows the home menu and the ultimail is in METERING mode (indication in the status line), you can position and meter letters. • Place the letter on the letter receiving tray so that: – the side to be printed is face up (address window is visible) – the upper edge is flush to the letter guide face. • Push the envelope in until the letter sensor recognizes the envelope and starts letter transport. Letter guide face The ultimail feeds the envelope, prints, and places the metered envelope in the catch tray. You can also start letter transport with the key. Metering 5.4.2 ultimail 60 with sealer When the display shows the home menu and the ultimail is in METERING mode (indication in the status line) you can position and meter letters. • Place the letter on the letter receiving tray at the sealer so that: – the envelope flap is face down – the side to be printed is face up (address window is visible) – the upper edge is flush to the letter guide face. • Push the envelope in until the letter sensor recognizes the envelope and starts letter transport. The sealer feeds the letter, moistens the flap (if seal function is switched on) and transfers the letter to the postage meter. The metered letter is placed in the catch tray. You can also start letter transport with the key. Press down moistened envelope flaps To ensure that envelopes are well sealed, we recommend pressing down the envelope flaps firmly after metering. 29 30 ultimail Operator Manual 5.4.3 ultimail 90 with feeder 5.4.3.1 Positioning letters in stack Caution! Observe the following notes for stack processing: – Position letters of the same format only (max. 9" x 4.5"/229 mm x 114 mm). – The ultimail processes letters of a thickness up to ¼" (6.35 mm). – Only position letters of nearly the same thickness in the stack ( +– 0.04"/1 mm). – Only position letters in stack which are to be printed with the same meter imprint (postage, type of mail endorsement…). Positioning and metering a letter stack When the display shows the home menu and the ultimail is in METERING mode (indication in the status line) you can position the letter stack into the feeder. Letter guide face • Align the letter stack to the letter guide face. Place the letters with the flap side face down on the belt conveyor. • Observe limits of stack heights. Markings at the letter guide face at the feeder indicate stacking height limits for letters postcards and . • The letter stack should have a clearance of abt. 0.08" to 0.1" (2 to 3 mm) between the letter guide face and the adjustable letter guide. If necessary, slide the letter guide to adjust the clearance. Make sure that no mail pieces can penetrate underneath the adjustable letter guide. • Fan the letters so that the lower letter is protruding. • Align the front edges of the letters to the letter guide slope. You thus achieve optimum processing speed. Metering Letter transport starts automatically. The feeder separates the letters individually from the stack, moistens the flap (if seal function is switched on) and transfers the letter to the postage meter. The metered letter is placed in the catch tray. As soon as the feeder is empty, the ultimail stops. Detailed information on preparing letter stacks for batch mailing with feeder ultimail 90 can be found on page 149. Press down moistened envelope flaps To ensure that envelopes are well sealed, we recommend pressing down the envelope flaps firmly after metering. 5.4.3.2 Positioning single letters Position large mail pieces (max. format B4) and deliveries that are not suited for stack processing, individually and manually to the feeder. • Place the letter on the letter receiving tray at the sealer so that: – the envelope flap is face down – the side to be printed is face up (address window is visible) – the upper edge is flush to the letter guide face. 31 32 ultimail Operator Manual 5.5 Metering labels (optional) The ultimail uses the ‘Label dispenser’ option to print self-adhesive FP labels. Caution! Only use original FP labels. We can ensure correct label processing only when you comply with this. Caution! Do not put in more than the pre-packaged 40 labels. • Remove labels from the package. • Insert labels into the lable dispenser with support material face down. The paper side to be printed is face up. • Set the meter imprint as usual. When the display shows the home menu and the ultimail is in METERING mode you can start label printing. Metering a label • Press the key. The ultimail prints a label. Metering several identical labels • Type the number of labels. • Press the key. The ultimail prints the number of labels you have set. During metering the status line shows the number of labels still to be metered. Rate calculation 6 Rate calculation (optional) 6.1 Scale menu With the ‘Internal scale’ option, the home menu makes the function SCALES available. Calling the scale menu • In the home menu, press the key to the left of SCALES. The ultimail opens the scale menu. What you should know about the scale menu … Postage value Available postal rates Weight – You will see, in the left part of the display, the postal rates available: select with multifunction keys to the left of the display. – You will see the postal rates settings, the weight and the calculated postage value in the right-hand part of the display (display section). – A postage value appears only if all required postal rates for rate calculation are selected and the scale has determined a weight exceeding 0 oz. – If there are more than four choices: go to next/previous page using MORE / PREVIOUS. Display section – In the scale menu, the multifunction keys at the right-hand side of the display have no function. 33 34 ultimail Operator Manual Default setting The default setting for rate calculation is: 1ST CLASS/PRIORITY. To set the scale menu back to default setting: • Press the key in the scale menu. Exiting the scale menu • With the home menu. key you go back to When you exit the scale menu, the ultimail saves the current settings. When you switch off, postal rates are reset to default setting (1ST CLASS/ PRIORITY). You will find basic settings and service functions for the internal scale in the SET UP menu. Read Chapter 11.13 on page 90. Rate calculation 6.2 Setting postal rates for rate calculation You set the postal rates in a dialogue with the ultimail, i.e. the ultimail requests all the data required for calculating postage one after the other. You select from the postal rates offered each using the multifunction keys. Deleting current setting • In the scale menu, for about 3 seconds, press the key. The postal rates setting is deleted. Display section is empty. or • Delete, step by step, the postal rates you have set, with key. Selecting postal rates • Select desired setting with the associated multifunction key. In the example, this is PACKAGE SERVICE. The ultimail shows the selected setting in the display section. • Select the next setting. In the example, this is PARCEL INTER BMC. And so on … 35 36 ultimail Operator Manual Entering destination ZIP code For some types of mail (such as First Class mail with a weight exceeding 1 lb., Package service Inter BMP), it is necessary to enter the destination ZIP code. The ultimail opens an input window for the ZIP code. • Enter the first three digits of the destination ZIP code. • Confirm with key. The ZIP code set and the assigned zone appear in the display section. Entering country code For all mail being sent abroad, it is necessary to enter a three-digit country code. The ultimail opens an input window for the country code. • Enter three-digit country code of destination country. • Confirm with key. The name of the destination country set appears in the display section. Selecting oversize You have to select “oversize” if the mail piece format exceeds the specified limits for length, width, thickness. • Select OVERSIZE with the associated multifunction key. Rate calculation Additional service If you wish to use special services of the United States Postal Service (such as Registered Mail, Return Receipt): • Select the desired additional service. In the example, this is CERTIFIED MAIL. You can select several additional services for one delivery. The ultimail does not allow illegal combinations. Insured Mail, Registered Mail, C.O.D.: Insured Mail, Registered Mail, C.O.D. require the input of the value of the delivery. Once the mail piece sits on the weighing platform (indicated weight > 0 oz. ), the ultimail opens a window for the value. • Enter the value in $. • Confirm with Value of the delivery key. You will see the value of the delivery you have set below the relevant additional service (left-hand side of display). Return Receipt and Signature Confirmation: Return Receipt and Signature Confirmation are valid only if combined with Registered, Insured or C.O.D. Deselect an additional service • Press once again the associated multifunction key. The additional service is cleared in the display section. 37 38 ultimail Operator Manual 6.3 Weighing, determining postage, metering Caution! The integrated scale is designed for a maximum weight of 11 lb. (5 kg). While you use the ‘Rate calculation’ function the monitoring function ‘High postage’ is switched off. • In the home menu: Set your advertising imprint (logo) and, if required, a type of mail endorsement. • Call the scale menu. • Place the mail piece on the weighing platform. • Set the postal rates. The ultimail determines the weight and calculates the postage value. The postage value is set for the meter imprint. In the status line, the ultimail displays readiness for metering. If you have switched on automatic endorsement, the ultimail will also set an appropriate type of mail endorsement. • Remove the mail piece from the weighing platform and position as usual. You can also meter labels with the displayed postage value (only for systems with label dispenser). How to switch on/off automatic setting of endorsement is shown on page 92. Rate calculation 6.4 Saving postal rates and calling them from memory You can save frequently used postal rates on numeric keys 1 through 9 and call them by pushbutton operation. Saving postal rates • Set the desired postal rates. • Press, for at least 3 seconds, the numeric key to which you wish to save the postal rate ( to ). • The ultimail shortly overlays the message “Entry saved”. The displayed rate setting is saved on the selected numeric key. Deleting/reassigning the memory You can overwrite the saved rate settings at any time with some new assignment. Calling saved postal rates • In the scale menu briefly press the key to which you have saved the desired postal rate setting. The key has been set at factory to default setting 1ST CLASS/PRIORITY. You cannot change default settings. 39 40 ultimail Operator Manual 7 Special functions 7.1 Postage correction You can correct faulty meter imprints on an already metered letter. The correction print must always be printed on the non-address-side of the mail piece. If you have metered a postage value which is too low, print a correction with the missing amount on the non-address-side of the mail piece. Print postage correction SET UP MODE SETTING CORRECTION • Call SET UP menu with key. • Select MODE SETTING CORRECTION. The ultimail sets the correction imprint and goes back to home menu. The CORRECTION mode is set. • Enter the amount to be imprinted on the mail piece in addition to the postage value already metered. • Confirm with the key for postage value. • Position the mail piece the non-address-side face up. The ultimail prints the correction imprint. End mode “Correction” • Press the key for about 3 seconds. The ultimail goes back to METERING mode. Special functions 7.2 Redate If the meter imprint shows an incorrect date, you can print a correction with the correct date on the non-address-side of the mail piece already metered. Print redate • Call SET UP menu with SET UP MODE SETTING • Select MODE SETTING key. REDATE. The ultimail sets the correction imprint and goes back to home menu. The REDATE mode is set. REDATE • Enter new date. • Confirm with the key next to the date indication. • Position the mail piece the non-address-side face up. The ultimail prints the redate imprint. End mode “Redate” • Press the key for about 3 seconds. The ultimail goes back to METERING mode. 41 42 ultimail Operator Manual 7.3 Working with pre-select counter You can use the pre-select counter function to meter a preset number of letters. This function is especially useful for stack processing with feeder. – The ultimail will stop once the total number of letters is finished. – You can start again with key and meter the next stack. • Call SET UP menu with SET UP key. • Select MODE SETTING. • Type the desired number. MODE SETTING The entered amount appears at the righthand side of the status line. • Confirm with key next to PRE-SELECT COUNTER. • Go back to home menu with key. In the home menu, you will see the number of mail pieces to be metered. Current setting: 0 = pre-select counter OFF During the metering process, the status line will always show the current number of mail pieces still to be metered. Once the number set is metered, the display jumps back to the preset number defined in the pre-select counter. Desired piece number (new) When the machine is switched off, the pre-select counter is reset to default value “0”, that means that the pre-select counter function is switched off. Special functions Selecting total pieces in the home menu You can also select total pieces directly in the home menu. The pre-select counter in the SET UP menu remains unchanged. • Type the desired number. The entered number appears at the bottom right of the status line. • Press key. • Position the mail pieces as usual. Number of mail pieces still to be metered During metering, you will see the number of mail pieces still to be metered in the status line. 43 44 ultimail Operator Manual 7.4 Using the ultimail as incoming mail stamp For registering your incoming mail (up to a thickness of ¼"/6.35mm), you can use the ultimail as incoming mail stamping machine. For this function, use the INCOMING STAMP mode. The ultimail will print ‘Received on: …’ together with the date displayed. All users can use this function, even without access card. Setting incoming mail stamp function • Call SET UP menu with SET UP key. • Select MODE SETTING INCOMING STAMP. MODE SETTING INCOMING STAMP The ultimail sets the incoming mail stamp and goes back to home menu. The home menu only shows the date set and, if required, the account (if an access card is plugged in). Change date If necessary, you can change the date in the same way as for the meter imprint (see page 25). Special functions Print “Received on: …” • Feed incoming mail in single pieces and manually. Place the side to be printed face upwards! The ultimail prints the incoming mail stamp and ejects the mail to the righthand side. End “Incoming stamp” mode • Press the key for about 3 seconds. The ultimail goes back to METERING mode. 45 46 ultimail Operator Manual 7.5 Only seal letters (optional) You can seal letters with the feeder or the sealer without metering them. Switch on sealer • Place the ‘seal envelope’ switch to the rear into seal position. The envelopes must be suited for mechanical sealing (see page 158). Make sure that the quality of the envelopes used is a high one. Setting “Only transporting” mode SET UP MODE SETTING ONLY TRANSPORT, NO PRINTING • Open the SET UP menu with key. • Select MODE SETTING ONLY TRANSPORT, NO PRINTING. The ultimail goes back to home menu. The home menu does not show any meter imprint settings now. In the status line, you will see MODE: ONLY TRANSPORTING. • Position the letters, as usual, at the sealer or feeder. Press down moistened envelope flaps To ensure that envelopes are well sealed, we recommend pressing down the envelope flaps firmly after metering. Special functions 7.6 Using an external postage scale The ultimail is equipped as a standard feature with a 9-pin interface. You can connect to this interface an existing postage scale made by Francotyp-Postalia (e. g. a flexiscale). The FP postage scale determines the weight and calculates the postage value. The postal data (postage and, if necessary, the type of mail endorsement) are automatically transmitted to the ultimail and set in the home menu. 7.6.1 Connecting an external postage scale For connecting an external postage scale to the ultimail, you need a special interface cable. You will be furnished an interface cable on order from Francotyp-Postalia. Caution! Never use such interface cables as were received by you for connecting the postage scale to other postage meters (e. g. T 1000, JetMail). Caution! Read the Operator’s Manual of your FP-Postage scale before connecting the scale to ultimail. Obtain information on how to connect the postage meter to the FP-postage scale and how to set the scale for operation with the postage meter. ON • Switch off the ultimail metering system. • Switch off the FP postage scale. Power switch (back of the machine) • Plug the interface cable you obtained from Francotyp-Postalia in the 9-pin interface marked by the sign and tighten screws. The interface is located on the back of the machine. 47 48 ultimail Operator Manual • Connect the interface cable to the FP postage scale. • Switch on the ultimail. • Switch on the FP postage scale. • Set up the FP-postage scale for operation on ultimail. Pay special attention to the setting in respect of the automatic endorsements selection. 7.6.2 Determining postage and metering Caution! Also read the Operator’s Manual of your FP-postage scale. Obtain information particularly, on the safe handling of the FP-postage scale. • Switch on the ultimail and wait for the start routine to finish. ultimail has to be ready for metering: – display shows the home menu – mode: METERING – status: Machine ready. • Only thereafter, shall the FP-postage scale be switched on. • Determine the postage value with the FP-postage scale. The postal data (postage and, if necessary, the type of mail endorsement) are automatically transmitted to the ultimail and set in the home menu. • Check further settings for meter imprint on ultimail and adjust if necessary (logo print). • Meter the mailpieces with ultimail. Postage register 8 Postage register The ultimail saves important parameters and postage used information in registers. You can have the register states displayed and printed on an empty envelope or a label. • Press key. You will see the current register states: R1 – DESCENDING Postage available in $. R2 – ASCENDING Total value of all meter imprints performed (in $). R3 – CONTROL TOTAL Sum of all loaded values (total) in $. R4 – TOTAL PIECES Number of meter imprints performed (including zero imprints). Print register • Position an empty envelope or a card. • Start the printing process with key. or • Print the information on labels using key (only for ultimail with label dispenser). Please note: On the register printout the cents of the ‘Postage Available’ amount are ‘cut off’. 49 50 ultimail Operator Manual 9 Loading postage – TELESET TELESET is the loading of the desired postage credit via modem. The modem is built into the ultimail. To load postage a connection is made to the TELESET data center with the ultimail and the desired amount is loaded. Accounting is as per your contract with the United States Postal Service. Make sure that the ultimail is connected to the phone line and that all selection parameters for the modem are correctly set (see Chapter 11.16 on page 97). Permissible amounts which may be loaded: Amounts in steps of $ 10 up to a maximum of $ 99.000 are permissible. The maximum amount which may be loaded is dependent on the postage credit still available at your ultimail. When topping up, you must not exceed the upper postage credit limit of $ 99,999.99. Loading postage • Open the TELESET menu with the key. • Select TELESET MODEM to start the TELESET procedure. Now simply follow the instructions in the display. • Maintain the indicated loading amount or overwrite with a new amount. Acknowledge with CONTINUE. After a security prompt the ultimail establishes a connection with the TELESET data center. Messages in the display will inform you about the status (connection establishment, data transfer…). Please note: If you have entered a new reset amount, you will be asked to confirm the process again within 30 seconds. At the end of the remote setting, the ultimail will show the new descending. • Press CONTINUE to end the TELESET process. Loading postage – TELESET Display/print booking report In the SELECT TELESET menu you can display a booking report for the last load procedure and print it on an envelope or label. SELECT TELESET • Open the TELESET menu with the key. • Select BOOKING REPORT… BOOKING REPORT… The ultimail will display information to the last load procedure. Print report • Position an empty envelope. • With the key print the last booking report on the empty envelope. or • With the key print the booking report on a label (only for systems with label dispenser). Please note: On the booking report printout the cents of the ‘Postage Available’ amount are ‘cut off’. 51 52 ultimail Operator Manual Account administration 10 Account administration You can use the account administration to register and evaluate postage used separately for each account. Accounts may be sections/departments of an enterprise or single companies of shared offices. You can save, for each account, a standard setting for the logo, limit the postage available (set a budget), and define authorizations connected with the MasterCard/ UserCard function. The ultimail 60 is rated for 10 accounts in serial equipment. You can at any time extend the account function to 50 accounts without problems, even at a later time. Consult your FP partner and read Chapter 11.20 on page 101. The ultimail 90 has a standard administration of up to 50 accounts. For the maximum number of available accounts and number of accounts in use, see SET UP menu SYSTEM INFORMATION. How to set up accounts for metering, read in Chapter 5.3 on page 27. 10.1 Set up a new account • Call SET UP menu with the key. SET UP • Select ACCOUNT ADMINISTRATION SET UP NEW ACCOUNT. ACCOUNT ADMINISTRATION Now simply follow the instructions in the display. You are prompted by the ultimail to enter, one after the other, all required information: – account number – account name – standard logo – TELESET access – define type of budget and limits. SET UP NEW ACCOUNT If all information is completely entered, the ultimail signals “You have successfully set up the account…”. • Confirm the message with . 53 54 ultimail Operator Manual Possible settings and their meaning: Account number from 2 to 99999 Account 1 is permanently assigned to MasterCard. (MASTER account). Account name letters, special characters and digits maximum 19 characters Please find more information to text input on pages 147 to 148. Standard logo NO STANDARD LOGO When you set up the account for metering, the last selected logo will remain set in the home menu. all available logos The selected logo is automatically set to the account during the change. ON TELESET is released. The account user is authorized to load postage. OFF TELESET function is blocked. UNLIMITED The total postage of the ultimail is available. RESTRICTED Account is supplied with a certain credit (= current limit). TELESET access Budget When the credit is used up, the ultimail blocks the account until a new credit is assigned (see Chapter 10.2.3 on page 58). MONTHLY The account is provided with a monthly credit (= monthly limit). In addition, you define the current credit for the account (current limit). On every change of the month, the ultimail sets the credit (current limit) back to the monthly limit. You can change the current limit at any time, independently from that. Account administration 10.2 Change settings for existing accounts 10.2.1 Change standard setting for the logo • Call SET UP menu with the SET UP key. • Select ACCOUNT ADMINISTRATION ACCT EDIT. ACCOUNT ADMINISTRATION ACCT EDIT Account number The EDIT ACCOUNTS… menu appears. You can see the account number in the head line. Now you can change the standard logo settings for the account displayed. Define a standard logo • Press the key next to the current logo. The SPECIFY STANDARD LOGO menu appears. • Select the desired logo with the associated key. Setting standard logo From now on, this logo is the new default setting for this account. The ultimail goes back to EDIT ACCOUNTS menu. You will find information on the meaning of possible settings for the logo on page 54. 55 56 ultimail Operator Manual Other account Selecting another account If you wish to change settings of another account: • Open the menu for selecting accounts with SELECT ANOTHER ACCOUNT. • Select the account the settings of which you want to change. The ultimail goes back to EDIT ACCOUNTS… menu. Now you can change the standard logo for this account. You can also select an account in the following way: • Type the account number. • Confirm with SELECT ANOTHER ACCOUNT. Account administration 10.2.2 Release/block TELESET access • Call SET UP menu with the key. SET UP • Select ACCOUNT ADMINISTRATION ACCT EDIT. ACCOUNT ADMINISTRATION The EDIT ACCOUNTS… menu appears. You can see the account number in the head line. ACCT EDIT If you wish to change the TELESET access for other accounts select the desired account using the SELECT ANOTHER ACCOUNT function. Account number Release/block TELESET In the EDIT ACCOUNTS… menu: • Press the key next to TELESET ACCESS until the desired setting is displayed. ON = release OFF = block. From that moment, the displayed setting for TELESET access is activated. Block/release TELESET access 57 58 ultimail Operator Manual 10.2.3 Changing budgets and assigning credits More information on the meaning of budget settings can be found on page 54. • Call SET UP menu with the SET UP key. • Select ACCOUNT ADMINISTRATION ACCT EDIT FURTHER FUNCTIONS. ACCOUNT ADMINISTRATION ACCT EDIT The FURTHER FUNCTIONS ACCOUNT… menu appears. In the head line, you can see the account number. FURTHER FUNCTIONS Account number If you wish to change the budget settings for other accounts select the desired account using the SELECT ANOTHER ACCOUNT function. Setting budget type In the FURTHER FUNCTIONS ACCOUNT… menu: • Press the key next to BUDGET TYPE until the desired setting UNLIMITED, RESTRICTED or MONTHLY is displayed. The budget type set will determine which additional functions for credit setting (limits) appear. Account administration Setting the current credit In the FURTHER FUNCTIONS ACCOUNT… menu: • Type the amount for credit which you want to make available for the account. • Set the new credit using the key next to CURRENT LIMIT. The displayed current limit is available to this account for metering. Specify the monthly credit In the FURTHER FUNCTIONS ACCOUNT… menu: • Type the amount for credit which you want to make available to the account each month. • Specify the credit using the key next to MONTHLY LIMIT. On every change of the month, the ultimail sets the current limit automatically to the specified monthly limit. You can directly change the current limit at any time, independently from that. 59 60 ultimail Operator Manual 10.2.4 Change name • Call SET UP menu with the SET UP key. • Select ACCOUNT ADMINISTRATION ACCT EDIT FURTHER FUNCTIONS EDIT NAME. ACCOUNT ADMINISTRATION The ultimail opens the menu for changing the account name. ACCT EDIT FURTHER FUNCTIONS If you wish to change the name of another account select the desired account with the SELECT ANOTHER ACCOUNT function. EDIT NAME In the EDIT NAME menu: • Change the name of the account. • Register the new name with CONTINUE. The new account name is saved. How to enter text, read on pages 147 to 148. Account administration 10.3 Generate/block UserCard(s) for an account When you generate a UserCard you permanently assign an account to it. To allow several users the access to an account, you can program for one account several identical UserCards. Each user has, with his UserCard, only access to his account, including all authorizations and budget specifications set to it. To protect the ultimail, in case of UserCard loss, for instance, from unauthorized metering, you can disable the assignment between account and UserCard(s). • Call SET UP menu with the SET UP key. • Select ACCOUNT ADMINISTRATION ACCT EDIT ASSIGN/REMOVE USERCARD. ACCOUNT ADMINISTRATION ACCT EDIT ASSIGN/REMOVE USERCARD The ASSIGN/REMOVE USERCARD menu appears. In the head line, you can see the account number. If you wish to generate/block a UserCard for another account select the desired account with the SELECT ANOTHER ACCOUNT function. Assign UserCard to an account In the ASSIGN/REMOVE USERCARD menu: • Press the key next to ASSIGN USERCARD. Now simply follow the instructions in the display: • Remove MasterCard. • Plug in a UserCard. The ultimail programs the UserCard for the displayed account and signals when the procedure is successfully completed. 61 62 ultimail Operator Manual • Remove UserCard. The UserCard is valid for the assigned account. • To generate further UserCards or for any other settings in the account administration, plug the MasterCard in again. You can rewrite UserCards which are no longer needed or invalid by another account assignment. Block UserCard(s) In the ASSIGN/REMOVE USERCARD menu: • Press the key next to CANCEL ASSIGNMENT. The assignment account - UserCard(s) is canceled without further prompt. • Confirm the final message “The link... has been deleted” with . All UserCard(s) assigned to this account are invalid now. Account administration 10.4 Switch on/off “access card required?” Caution! Mode ACCESS CARD REQUIRED: OFF. This setting cancels access restrictions to accounts. Every ultimail user can meter on all accounts and call all account data. • Call SET UP menu with the key. SET UP • Select ACCOUNT ADMINISTRATION. ACCOUNT ADMINISTRATION • Press the key next to MODE: ACCESS CARD REQUIRED. The setting switches over between ON and OFF. MODE: ACCESS CARD REQUIRED The displayed setting is active. Possible settings and their meaning: ON Metering is possible only with a valid access card (MasterCard or UserCard). OFF No access restrictions for metering. Metering is possible without access card on all accounts. 63 64 ultimail Operator Manual 10.5 Display and print account information The ultimail displays the current settings for individual accounts and ascending information in various overviews. For more information to the overview contents, read page 65. • Call SET UP menu with the SET UP key. • Select ACCOUNT ADMINISTRATION. Information on the account… ACCOUNT ADMINISTRATION In the ACCOUNT ADMINISTRATION menu: • Select ACCOUNT/S DISPLAY. The ultimail displays a menu with information to the related account. To display information about another account: • Select the desired account with the SELECT ANOTHER ACCT function. Information on all accounts In the INFORMATION ACCOUNT… menu: • Select DISPLAY ALL ACCOUNTS. The ultimail displays a list with information on all accounts. Type of mail list In the ACCOUNT ADMINISTRATION menu: • Select DISP. TYPE OF MAIL STATS. (ALL ACCT). The ultimail displays the evaluation of the imprints of type of mail endorsements. Account administration Overview of account information: Information about the account… Display of data for one account: – Current settings (standard logo, budget type and limits, TELESET access) – Remaining postage – Postage used (postage costs used by the account since the last zero reset) – Total pieces (number of meter imprints by the account since the last zero reset) Information on all accounts List of all accounts (listed by numbers) Type of mail list Evaluation of endorsements across all accounts, display of: Display of: – Account number – Account name – Postage used (postage costs of individual accounts since the last zero reset) – Piece (number of meter imprints by individual accounts since the last zero reset) – Postage used for meter imprints with endorsement, specified as per types of mail – Number of meter imprints with endorsement, specified as per types of mail – Total postage used and total pieces of all imprints The SEND LIST OF ALL ACCOUNTS TO PC function offers you the chance to transfer account data for further evaluation to a personal computer. The ultimail can print all account information: – Position empty envelope or card and start the print with the If necessary, position further envelopes/cards. – Print the information on labels using the (only for ultimail with label dispenser). key key. 65 66 ultimail Operator Manual 10.6 Set account counter to zero 10.6.1 Set one account to zero • Call SET UP menu with the key. SET UP • Select ACCOUNT ADMINISTRATION ACCT EDIT. ACCOUNT ADMINISTRATION The EDIT ACCOUNTS… menu appears. You can see the account number in the head line. ACCT EDIT In order to reset another account to zero: SET ACCOUNT TO ZERO • Select the desired account with the SELECT ANOTHER ACCOUNT function. • Press the key next to SET ACCOUNT TO ZERO. • Follow the instructions in the display. 10.6.2 Set all accounts to zero • Call SET UP menu with the SET UP key. • Select ACCOUNT ADMINISTRATION DELETE / ZERO ALL ACCT SET ACCOUNTS TO ZERO. ACCOUNT ADMINISTRATION • Follow the instructions in the display. DELETE / ZERO ALL ACCT SET ACCOUNTS TO ZERO Account administration 10.7 Delete accounts 10.7.1 Delete one account • Call SET UP menu with the SET UP key. • Select ACCOUNT ADMINISTRATION ACCT EDIT FURTHER FUNCTIONS. ACCOUNT ADMINISTRATION ACCT EDIT The FURTHER FUNCTIONS… menu appears. You can see the account number in the head line. To delete another account: FURTHER FUNCTIONS DELETE ACCT • Select the desired account with the SELECT ANOTHER ACCOUNT function. • Press the key next to DELETE ACCT. • Follow the instructions in the display. 10.7.2 Delete all accounts • Call SET UP menu with the SET UP key. • Select ACCOUNT ADMINISTRATION DELETE / ZERO ALL ACCT DELETE ACCOUNTS. ACCOUNT ADMINISTRATION • Follow the instructions in the display. DELETE / ZERO ALL ACCT DELETE ACCOUNTS Use this function to delete all accounts set in the ultimail, except the Master account (account 1). 67 68 ultimail Operator Manual 11 System settings 11.1 Setting the operating mode You can operate the ultimail in different operating modes (modes). • Call SET UP menu with the SET UP key. • Select MODE SETTING. MODE SETTING Current setting In the head line, you can see the current setting. How to change the mode: • Press the key next to the desired mode. The ultimail sets the selected mode and goes back to home menu. In the status line, you can see the mode set. All functions not supporting this mode are switched off. The set mode is active and is maintained until the ultimail is switched off or until another mode is selected. How to set the ultimail back to METERING: • Press for about 3 seconds the key. System settings Possible settings and their meaning: METER ITEMS TO BE SENT PRINT LOGO ONLY INCOMING STAMP ONLY TRANSPORT, NO PRINTING The ultimail prints the complete meter imprint. Mode: METERING (default setting after every switching on). The ultimail prints only the logo. The ultimail prints only the current date (ultimail as incoming mail stamping machine). Read Chapter 7.4 on page 44. The postage meter transports letters without printing. This operating mode can be used in connection with a feeder or sealer (see Chapter 7.5). CORRECTION The ultimail prints the correction imprint for postage correction. REDATE The ultimail prints the redate imprint with the current mailing date. 69 70 ultimail Operator Manual 11.2 Display, print and send system information • Call SET UP menu with the SET UP DISPLAY SYSTEM INFORMATION key. • Select DISPLAY SYSTEM INFORMATION. You will see system information. You can scroll up and down the list with the arrow keys. Print system information • Print the information on labels using the key. (only for ultimail with label dispenser). or Have some empty envelopes or cards ready. The ultimail will print system information in several parts. • Position an empty envelope or a card. • Start the printing process with the key. The ultimail needs some time for print image creation. Letter transport is not started before that. The ultimail prints the first list of system information. • Position further envelopes if required. You can follow the print process progress in the display. Send system information The function SEND TO FP SERVICE DEPT. sends the system information to customer service. Start this function only when requested to do so by FrancotypPostalia. System settings 11.3 Meter type The ‘Meter type’ setting determines whether the ultimail will print postage as $0.00 or $0.000 decimal mode. SET UP • Call SET UP menu with the key. • Select SYSTEM SETTINGS MORE. SYSTEM SETTINGS MORE • Press the key next to METER TYPE until you see the desired setting <0.00> or <0.000>. The displayed setting is activated and maintained until the next change, even if you switch the ultimail off. Possible settings and their meaning: <0.00> <0.000> Prints the postage in whole cents. Prints the postage in tenth of cents. 71 72 ultimail Operator Manual 11.4 Setting the print offset for the meter imprint The print image normally appears always at the same distance from the right-hand letter edge. In special cases, you can slide the meter imprint on the envelope to the left away from standard position. You can adjust print offset in steps of 1 mm from 0 to maximum 50 mm. Default setting is Zero (= no offset). SET UP • Call SET UP menu with the key. • Select SYSTEM SETTINGS PRINT. SYSTEM SETTINGS PRINT In the ADJUSTING PRINTING menu you will see the current print offset setting. How to adjust print offset: • Type the desired offset (from 0 to 50 mm). The value appears at the righthand side of the status line. • Assign the value with the key next to PRINT OFFSET. The print offset is set. Caution! The meter imprint offset is maintained until the next change, even if you switch the ultimail off. System settings 11.5 Setting low postage warning – limit The ultimail signals when the remaining postage falls below a certain limit. You can set the limit for low postage warning. ultimail warns you, if – the descending register (R1) falls below the set limit – the remaining budget (current limit) of the account falls below the set limit. SET UP • Call SET UP menu with the key. • Select SYSTEM SETTINGS MORE. SYSTEM SETTINGS MORE How to change the limit for low postage warning: • Type the desired limit. The value appears at the right-hand side of the status line. • Assign the value with the key next to LOW POSTAGE WARNING. The limit for low postage warning is set and maintained until the next change is made. You can reset the default setting for low postage warning ($100) with the C/CE key. 73 74 ultimail Operator Manual 11.6 Setting high postage – limit This function gives an alarm if the set postage exceeds a certain limit. You can set the limit for ‘High postage’. SET UP • Call SET UP menu with the key. • Select SYSTEM SETTINGS MORE. SYSTEM SETTINGS MORE How to adjust high postage: • Type the desired value in cents. The value appears at the right-hand side of the status line. • Assign the new value with the key next to HIGH POSTAGE. The limit for ‘High postage’ is set and maintained until the next change is made. You can reset the default setting for ‘High postage’ ($10.00) with the C/CE key. System settings 11.7 Tone signal The ultimail acknowledges every press of a key with a beep. A sequence of tone signals is an alarm due to errors. You can adapt this function to your requests. SET UP • Call SET UP menu with the key. • Select SYSTEM SETTINGS MORE. SYSTEM SETTINGS MORE • Press the key next to TONE SIGNAL until you see the desired setting: ON, OFF or ONLY ERROR WARNING. The displayed setting is activated and maintained until the next change, even if you switch the ultimail off. Possible settings and their meaning: ON OFF ONLY ERROR WARNING tone signal on every key pressure no tone signal tone signal due to errors 75 76 ultimail Operator Manual 11.8 Display contrast • Call SET UP menu with the SET UP key. • Select SYSTEM SETTINGS DISPLAY. SYSTEM SETTINGS DISPLAY • Use the associated keys to REDUCE or INCREASE the display contrast. After each key activation, you will at once see the display change. Adjust the setting until it is comfortable for your eyes. • Save the setting with SAVE. Current setting • Press within 5 seconds the key next to ACKNOWLEDGE. The display contrast is set and maintained until the next change, even if you switch the ultimail off. If you do not confirm the changes within 5 seconds, the ultimail jumps back to the last display contrast setting used. System settings 11.9 Display and reset item counter The item counter will count all meter imprints (including zero imprints) in the METERING mode. In all other modes PRINTING LOGO, INCOMING STAMP and ONLY TRANSPORTING the item counter is not activated. SET UP • Call SET UP menu with the key. • Select SYSTEM SETTINGS MORE. SYSTEM SETTINGS MORE You can see the current value of the item counter under DELETE ITEM COUNTER. How to reset the item counter to zero: • Press the key next to DELETE ITEM COUNTER. • Confirm the cancellation with YES. The item counter is reset to Zero. If you do not wish to set the item counter to zero, abort with NO. The displayed total pieces are maintained. 77 78 ultimail Operator Manual 11.10 Time 11.10.1 Day light saving time The ultimail automatically changes the time at the beginning and end of day light saving time. You can disable this function. Deactivate/activate automatic change-over • Call SET UP menu with the SET UP key. • Select SYSTEM SETTINGS SUMMER TIME. SYSTEM SETTINGS SUMMER TIME The SUMMER TIME menu displays under AUTO. CHANGE-OVER the current setting. How to deactivate/activate automatic change-over: • Press the key next to AUTO. CHANGEOVER. The setting switches between ON and OFF. The displayed setting is active and maintained until a change is made. Possible settings and their meaning: ON OFF The ultimail automatically changes the clock at the beginning and end of the day light saving time. You can set the moments of automatic change-over. The ultimail does not automatically change the clock at the beginning and end of the day light saving time. System settings Setting the beginning and end of day light saving time To set the beginning and end of the day light saving time, automatic change-over must be activated. • Press the associated keys until month, week in the month and day of the week show the desired setting for BEGIN and END. Beginning and end of day light saving time are set and maintained until the next change is made. 79 80 ultimail Operator Manual 11.10.2 Adjusting the current time The built-in battery-operated system clock safely provides the current date and hour of the day. So it is only in rare cases required to correct the system clock for adjusting a minor difference. Basic settings and corrections of major deviations are always carried out by Francotyp-Postalia customer service. • Call SET UP menu with the SET UP key. • Select SYSTEM SETTINGS CURRENT TIME. SYSTEM SETTINGS CURRENT TIME • Adjust the current time with BACK -5 and FORWARDS +5. You can adjust the current time in steps of 5 seconds each. You can advance or set back the current time by five minutes when adjusting it. • Save the setting with SAVE. The current time is adjusted. Selected value Please observe that you can readjust the current time at the earliest after a period of seven days after any adjustment. System settings 11.10.3 Setting time zone If you move the ultimail from one time zone to another within one country you need to adjust the time zone. SET UP • Call SET UP menu with the key. • Select SYSTEM SETTINGS ZONE. TIME SYSTEM SETTINGS TIME ZONE • Use the associated keys to shift the time zone by BACK -0.5 or FORWARDS +0.5. Time zone setting can be shifted in steps of half an hour each. • Save the setting with SAVE. The time zone is set. Selected setting Abort setting If you do not wish to save the setting, quit the SETTING TIME ZONE menu with QUIT. The former setting is maintained. 81 82 ultimail Operator Manual 11.11 Print image data administration The ultimail offers a large number of efficient functions to manage individual print image components. This includes plain text input for logos and type of mail endorsements, graphic preview, logo printing and the possibility to print lists. You can load logos and type of mail endorsements from card. The following chapters present the functions in detail. 11.11.1 Logo display and printing You can see the logos saved in the ultimail in the display and print these. • Call SET UP menu with the SET UP EDIT PRINT IMAGE/SMS TEXT LOGO DISPLAY/PRINT key. • Select EDIT PRINT IMAGE/SMS TEXT LOGO DISPLAY/PRINT. You will see an overview of the saved logos. • Press the key next to the desired logo. The display will show a simplified graphic version of the logo. The head line will show memory number and logo name. • With or process. start the printing or • with back to overview. System settings 11.11.2 Change the logo names Each logo has a name under which the motif is saved in the ultimail. You can change these names according to your requests. • Call SET UP menu with the SET UP EDIT PRINT IMAGE/SMS TEXT LOGO NAME EDIT key. • Select EDIT PRINT IMAGE/SMS TEXT LOGO NAME EDIT. • Among the overview of saved logos, choose the logo name of which you wish to change. The ultimail opens a menu for editing the name. • Change the name for the logo as desired. Read more about text input function on the ultimail on page 147. • Save the name with CONTINUE and confirm once again. Read more about text input function on the ultimail on page 147. 83 84 ultimail Operator Manual 11.11.3 Loading print image data from card You can easily load print image data (e.g. logos, type of mail endorsements) from cards. Order the card with the desired print images from Francotyp-Postalia. • Call SET UP menu with the SET UP EDIT PRINT IMAGE/SMS TEXT LOAD key. • Select EDIT PRINT IMAGE/SMS TEXT LOAD. • Keep card(s) with data ready for loading. • Follow the instructions in the display. The ultimail will guide you step by step through the loading process. Displays and security prompts will protect you against inadvertent loading and rewriting of data. Carefully read all information in the display. System settings 11.11.4 Delete print image data You can delete print image data which are no longer required (logos, types of mail). Therefore you gain memory space, for new logos, for instance. • Call SET UP menu with the SET UP key. • Select EDIT PRINT IMAGE/SMS TEXT DELETE. EDIT PRINT IMAGE/SMS TEXT DELETE • Press the key next to the print image data which you wish to delete, e.g. LOGO DELETE. An overview of all saved print image data appears. • Press the key next to the print image to be deleted. If you wish to delete the data now selected: • Confirm the security prompt with CONTINUE. The ultimail deletes the data. A message will inform you about the end of the deleting process. • Confirm the message with CONTINUE. 85 86 ultimail Operator Manual 11.12 Short code memories The ultimail has 6 short code memories. In each of the memories, you can store a postage value with a suitable type of mail endorsement. You can directly call the saved settings from the home menu. 11.12.1 Saving settings • Call SET UP menu with the key. SET UP • Select EDIT MEMORY. EDIT MEMORY • Press the key next to the memory under which you wish to save the settings. The EDIT MEMORY menu appears. • Select SAVE COMPLETE MEMORY or SAVE MEMORY WITH AMOUNT. Save only postage value Save postage value and type of mail Possible settings and their meaning: SAVE COMPLETE MEMORY The ultimail saves postage value and type of mail endorsement. When calling the memory, the ultimail will set both the saved postage value and the type of mail. SAVE MEMORY WITH AMOUNT The ultimail saves the postage value only. When calling the memory, the ultimail will set the saved postage value. The currently activated type of mail endorsement remains unchanged. System settings The ultimail opens the menu for setting the memory values. • Set the postage and type of mail to be saved as usual. • Continue with SAVE to save the displayed settings. The ultimail eventually displays the saved settings. Setting the postage value • End the saving procedure to the memories with CONTINUE. Type of mail endorsement to select Notes to “Memory 1” – The settings which you save as memory 1, will be the default settings for postage and type of mail endorsement. – Memory 1 can only be saved in the complete form (postage and type of mail). Memories that are already occupied can simply be overwritten with new data. 87 88 ultimail Operator Manual 11.12.2 Display and print saved settings • Call SET UP menu with the SET UP key. • Select EDIT MEMORY. EDIT MEMORY You will see current data contents of all short code memories. Print list of short codes • Position an empty envelope or a card. • Start the printing process with the key. or Memory 2 = not occupied • Print the memory list on a label using the key (only for ultimail with label dispenser). The ultimail needs some time for print image creation. Letter transport is not started before that. The ultimail prints the memory list. System settings 11.12.3 Delete memories • Call SET UP menu with the key. SET UP • Select EDIT MEMORY. EDIT MEMORY • Press the key next to the memory number that you wish to delete. The EDIT MEMORY menu appears. • Press the key next to DELETE MEMORY. If you wish to delete the selected memory now: • Confirm the security prompt with YES. The memory concerned is deleted. For deleting selected memory You cannot delete memory 1 since the ultimail must have access to the postage and type of mail saved here as default settings. 89 90 ultimail Operator Manual 11.13 Internal scale (optional) 11.13.1 Tare The internal scale calibrates automatically. If the scale does not find any zero point, or if you wish to weigh with a preload, you will have to tare the scale. • Call SET UP menu with the SET UP key. • Select SYSTEM SETTINGS INTEGRATED SCALES. SYSTEM SETTINGS INTEGRATED SCALES • Press the key next to TARE CALCULATION. For some seconds the display shows the information that the scale is being zeroed. System settings 11.13.2 Setting weighing mode In the ADJUSTING THE INTERNAL SCALES menu you can change the weighing mode to NORMAL and use the ultimail simply as scale. The NORMAL weighing mode is not available for rate calculation. • Call SET UP menu with the SET UP key. • Select SYSTEM SETTINGS INTEGRATED SCALES. SYSTEM SETTINGS INTEGRATED SCALES • Press the key next to WEIGHING MODE. The setting switches between LOCK and NORMAL. When quitting the menu, the ultimail automatically sets the weighing mode back to LOCK. Possible settings and their meaning: LOCK If you add further mail pieces to the delivery on the weighing tray and take them off again, the scale will not determine any new weight. The original display remains unchanged. Only if you fall below the initial weight or fully unload the scale, the ultimail determines a new weight (=default setting). NORMAL The ultimail will continuously determine the loaded weight and display the momentary value. 91 92 ultimail Operator Manual 11.13.3 Switching on and off automatic type of mail endorsement This setting specifies whether rate calculation should control the setting for type of mail endorsement in the home menu. • Call SET UP menu with the SET UP key. • Select SYSTEM SETTINGS INTEGRATED SCALES. SYSTEM SETTINGS INTEGRATED SCALES • Press the key next to AUTO ENDORSEM. SEL. The setting switches between ON and OFF. The displayed setting is maintained until the next change, even if you switch the ultimail off. Possible settings and their meaning: ON The ultimail determines, during rate calculation, on the basis of the selected postal rates a suitable type of mail endorsement and sets this one automatically for metering. This type of mail endorsement should be present in your ultimail. If no suitable type of mail endorsement is present, the ultimail meters without type of mail endorsement. OFF The ultimail does not set type of mail endorsements automatically. The ultimail prints during metering the type of mail endorsement set in the home menu. System settings 11.13.4 Rate table update If postage regulations and rates are changed, you can load new rate table data. The ultimail supports the loading from cards which you can order from Francotyp-Postalia. • Call SET UP menu with the SET UP EDIT POSTAGE TABLE DATA key. • Select EDIT POSTAGE TABLE DATA. The ultimail displays information about the rate table to be used. Loading rate table from card • Keep the card with new rate table ready. • Press the key next to LOAD FROM CHIP CARD. • Follow the instructions in the display. The ultimail will guide you step by step through the loading process. Displays and security prompts will protect you against inadvertent loading of outdated data. Carefully read all information in the display. Switch-over to the new rate table is controlled by the system clock of ultimail, i.e. it updates itself automatically as soon as it is valid. 93 94 ultimail Operator Manual 11.13.5 Delete all rate tables • Call SET UP menu with the key. SET UP • Select EDIT POSTAGE TABLE DATA DELETE ALL RATE TABLES. EDIT POSTAGE TABLE DATA • Confirm the security prompt with YES. The ultimail deletes all stored rate tables. DELETE ALL RATE TABLES You have to load a new rate table before you can use the rate calculation function again. 11.13.6 Change local ZIP code for rate calculation This setting determines which place of deposit the ultimail uses for rate calculation. • Call SET UP menu with the SET UP key. • Select SYSTEM SETTINGS INTEGRATED SCALES. SYSTEM SETTINGS INTEGRATED SCALES • Enter the first three digits of your local ZIP code. • Confirm with the key next to the ZIP code. System settings 11.14 Setting print head standby time The standby time is the period between the last printing and the print head travelling to the idle position. SET UP • Call SET UP menu with the key. • Select SYSTEM SETTINGS PRINT. SYSTEM SETTINGS PRINT How to adjust standby time: • Type the desired time (from 40 to 80 seconds). The value appears at the right-hand side of the status line. • Assign the new time with the key next to STANDBY TIME PRINTHEAD. The standby time is set and maintained until the next change, even if you switch the ultimail off. You can reset the default setting for the standby time (40 seconds) with the C/CE key. 95 96 ultimail Operator Manual 11.15 Setting letter transport run-on time The letter transport run-on time is the period from ejecting the last letter to letter transport standstill. • Call SET UP menu with the SET UP SYSTEM SETTINGS key. • Select SYSTEM SETTINGS PRINT LETTER TRANSPORT RUN-ON TIME. PRINT LETTER TRANSPORT RUN-ON TIME • Adjust the run-on time with REDUCE or INCREASE. You can adjust run-on time between 3 and 30 seconds in steps of 1 second each. • Register the displayed run-on time with SAVE. Selected run-on time The letter transport run-on time is set and maintained until the next change, even if you switch the ultimail off. System settings 11.16 Modem configuration – adjusting dialing parameters Francotyp-Postalia customer service sets, during ultimail commissioning, correct dialing parameters for the built-in modem. After moving to new premises or any change of your phone equipment, you should check the settings and adjust them if necessary. • Call SET UP menu with the SET UP key. • Select SYSTEM SETTINGS MODEM. SYSTEM SETTINGS MODEM The ADJUST MODEM CONFIGURATION menu offers the selection of possible parameter settings. The table on page 98 lists and explains all parameters. During setting procedure, all parameters that are not technically reasonable do not appear or further parameters are displayed, depending on the selected parameters. • Press the associated keys until all required settings display the desired values. • Save the parameters with SAVE. • End the display of the new modem settings with CONTINUE. Quit modem configuration: • Quit the ADJUST MODEM CONFIGURATION menu with QUIT. The previous configuration will be restored. 97 98 ultimail Operator Manual Possible settings and their meaning: Line Setting Explanation TYPE OF PHONE LINE MAIN STATION The ultimail is operated on a main line. EXTENSION The ultimail is operated on an extension of the phone equipment. PULSE DIALING (Impulse dialing method) Both methods are possible from modern extensions. DIALING METHOD TONE DIALING (Multifrequency dialing method) ACCESS METHOD (Only for type of phone line EXTENSION) EXCHANGE DIGIT GROUND HOOK FLASH EXCHANGE DIGIT (Only with access method by EXCHANGE DIGIT) WAIT (Only with access method by EXCHANGE DIGIT) PAUSE (Only with access method by EXCHANGE DIGIT) Tone dialing is faster. If necessary, contact your local phone company. Defines how you access central office from an extension. Usually, you dial EXCHANGE DIGIT. The Hook Flash time of the built-in modem is permanently set to 200 msec. You have to enter the exchange digit by means of numeric keys with the modem configuration. The exchange digit can also have several places. The exchange digit depends upon the extension equipment. ON Waits for the dial tone after the exchange digit. OFF No waiting for the dial tone. ON Adds a dialing pause after you have dialed the exchange digit. OFF No dialing pause after having dialed the exchange digit. Usually you use a 0. System settings 11.17 Generate MasterCard MasterCard holders can generate another MasterCard with this function. • Call SET UP menu with the SET UP SYSTEM SETTINGS MORE key. • Select SYSTEM SETTINGS MORE MORE CREATE NEW MASTERCARD. • Follow the instructions in the display. The ultimail will guide you step by step through the generating procedure for a new MasterCard. MORE CREATE NEW MASTERCARD 11.18 Changing the origin ZIP code If you wish to use the ultimail elsewhere (e.g. after moving to new premises), you must register the new location of your ultimail with Francotyp-Postalia. At the new location you must load the new origin Zip code by modem from the TELESET data center. • Call SET UP menu with the SET UP SYSTEM SETTINGS MORE MORE CHANGE ZIPCODE key. • Select SYSTEM SETTINGS MORE MORE CHANGE ZIPCODE. Your ultimail now establishes a connection with the TELESET data center and loads the new origin ZIP code. 99 100 ultimail Operator Manual 11.19 Selecting the user interface language The ultimail user interface supports the languages English and German. Language change-over will have immediate effect. SET UP SYSTEM SETTINGS MORE • Call SET UP menu with the key. • Select SYSTEM SETTINGS MORE. MORE • Press the key next to LANGUAGE. The menu language switches over from English to German at once. MORE How to go back to the English user interface: • Call SET UP menu with the SET UP SYSTEMEINSTELLUNGEN WEITERE WEITERE key. • Select SYSTEMEINSTELLUNGEN WEITERE WEITERE. • Press the key next to SPRACHE. The menu language switches over from German to English at once. System settings 11.20 Account administration extension As a standard, the ultimail is provided with 10 account memories. You can increase the number of possible accounts to 50. For this purpose you need an authorization code which you can order from Francotyp-Postalia. With an ultimail 90, a total of 50 accounts are supported. SET UP • Call SET UP menu with the key. • Select SYSTEM SETTINGS NUMBER OF ACCT. MORE SYSTEM SETTINGS MORE NUMBER OF ACCT • Type the authorization code. • Confirm the input with CONTINUE. Now there are 50 accounts available. In the SYSTEM SETTINGS menu you will see under NUMBER OF ACCT the number 50. You can reduce the number of accounts back to 10. The steps are the same as shown for the extension to 50 accounts. Caution! When reducing to 10 accounts, the accounts 11 to 50 and associated account information are irrevocably deleted. We recommend printing the information on all accounts prior to resetting (see Chapter 10.5 on page 64). 101 102 ultimail Operator Manual 11.21 Changing phone numbers The ultimail saves important phone numbers. In this menu you can see and change all saved phone numbers. Caution! Any incorrect setting of the phone number for the TDC (TELESET data center) results in non loading of postage. • Call SET UP menu with the SET UP SYSTEM SETTINGS • Select SYSTEM SETTINGS MORE MORE CHANGE PHONE NUMBERS. MORE The ultimail opens the PHONE NUMBERS menu. MORE • Press the key next to the phone number you wish to change. CHANGE PHONE NUMBERS key. The ultimail opens a menu for changing the displayed phone number. • Enter the new phone number. With INSERT BLANK you can design the phone number display for clearer view. • Save the displayed phone number with SAVE. If you are sure that you really wish to change the phone number: • Confirm the security prompt with YES. The ultimail saves the new phone number. Maintenance and care 12 Maintenance and care Have your metering system cleaned and serviced once a year by our authorized service personnel. Therefore you can ensure long-term trouble-free operation. Contact us for our low-price maintenance and service agreements. You can carry out yourself the following cleaning and servicing jobs: – clean the outer housing parts – exchange ink cartridges – adjust the ink cartridges – automatic print head cleaning – top up the water tank for moistening – clean/replace moistening sponge – change battery. 12.1 Cleaning the ultimail metering system Warning! Make sure that no liquids or foreign objects penetrate the interior of the ultimail. If this happens, pull out the power plug immediately. Have the ultimail metering system checked by Francotyp-Postalia service before starting it up again. • Switch off the ultimail metering system. OFF • Pull the power cable of postage meter and of feeder (if any) out of the power socket. • Clean dirt from the housing with a slightly damp cloth. Power switch (back of the machine) 103 104 ultimail Operator Manual 12.2 Changing the ink cartridges The ultimail will remind you that the cartridge should be exchanged. If the ink cartridges are empty, the ultimail automatically starts the software-guided exchange procedure. The ultimail is no longer ready for operation. First replace the two cartridges before you can start printing again. If you wish to replace the ink cartridges before the exchange procedure is started automatically, you can do this from the SET UP menu. Read the paragraph “Start the exchange procedure…” on page 108. We recommend always keeping in stock two new ink cartridges as spare parts. Warning! Ingestion of the ink can be damaging to your health. Avoid contact with the eyes. Keep the ink cartridge away from children. Further instructions for use are enclosed with the ink cartridges. Caution! Only use original ink cartridges from Francotyp-Postalia. Caution! Always replace the ink cartridges in pairs. Always use new ink cartridges. Caution! Only replace cartridges if you are requested to do so by the ultimail. The cartridges will then be in exchange position. Change ink cartridges This is the message which is displayed by the ultimail to request you to change the cartridges … • Follow the instructions in the display. • Confirm the steps using the key next to CONTINUE. The different steps (open cartridge flap, remove old cartridges…) are described in detail on the following pages. Maintenance and care Remove ink cartridges… • Open cartridge flap with a powerful sudden motion and fold up as far as it goes. Note: The cartridge flap is provided, at its front edge, about in the centerline, a clip lock engaging into the housing. Do not be shy if the flap slightly jams at this locking point when being opened. Open the green catches at both of the two cartridges: • Left-hand catch by a clockwise quarter turn. • Right-hand catch by a counterclockwise quarter turn. • Remove both of the ink cartridges in an upward direction out of the retainer. 105 106 ultimail Operator Manual Insert new ink cartridges… Caution! Insert the cartridges only after the cartridges have adapted to the ambient temperature of the postage meter (e.g. after storage in cellar or after conveyance in a cold vehicle). Else, no correct calibration can be performed. • Unpack the new cartridges from their packages. • Remove the protective strip from the ink cartridges. • Insert the two ink cartridges. The contacts on the cartridges should be directed to the rear of the machine. Close the green catches at both of the two cartridges: • Left-hand catch by a counterclockwise quarter turn. • Right-hand catch by a clockwise quarter turn. Caution! Make sure that both of the cartridges are locked before closing the cartridge flap. Maintenance and care • Close the cartridge flap. The clip lock audibly clicks into place. After cartridge exchange, the ultimail will calibrate the cartridges. You can follow the process progress in the display. Have a little patience until calibration is completed. • Continue with ink cartridge adjustment. Adjusting the ink cartridges… It is necessary to adjust the new ink cartridges to obtain a perfect print image without offset. In the ADJUSTING PRINTING menu: • Press the key next to ADJUST INK CARTRIDGES. The ultimail will prompt you to position an empty letter. • Position an empty envelope for ultimail test print. The ultimail prints the test print. • Determine the number on the test imprint where the horizontal partial lines are most exactly one besides the other. • Enter the determined number with numeric keys. The entered number appears in the display behind “Your input: __”. • Confirm with CONTINUE. 107 108 ultimail Operator Manual • Determine the number on the test imprint where the vertical partial lines are most exactly one above the other. • Enter the determined number with numeric keys. The entered number appears in the display behind “Your input: __”. • Read the text in the display very carefully. Then select: TEST NEW ADJUSTMENT, to repeat the adjustment or END ADJUSTMENT PROCEDURE. • If necessary, repeat the adjustment several times until the cartridges are correctly aligned. Start the exchange procedure… If you wish to change the ink cartridges before being prompted by the ultimail, call the change procedure in the SET UP menu. • Call SET UP menu with key. SET UP • Select SYSTEM SETTINGS PRINT CHANGE INK CARTRIDGES. SYSTEM SETTINGS The change procedure starts: The ultimail requests you to open the flap and to change the cartridges. PRINT CHANGE INK CARTRIDGES • Change the cartridges. Follow the instructions how to change cartridges on pages 104 to 107. • Adjust the cartridges. Read pages 107 to 108. Maintenance and care 12.3 Adjust the ink cartridges It is necessary to adjust the ink cartridges to obtain a perfect print image without offset. It is necessary to do the adjustment: – after every cartridge exchange – if the meter imprints contain misalignments. • Call SET UP menu with key. SET UP • Select SYSTEM SETTINGS PRINT ADJUST INK CARTRIDGES. SYSTEM SETTINGS PRINT The ultimail will start a procedure for cartridge adjustment. Follow the instructions in the display. ADJUST INK CARTRIDGES. For details of the adjustment procedure, read pages 107 to 108. 109 110 ultimail Operator Manual 12.4 Cleaning the print system You should start the cleaning process for the ink cartridges only if the quality of the imprint is not good enough (e. g. gaps in the imprint after longer periods out of use). Caution! Never clean the print heads mechanically. You would damage the print heads and destroy them. Cleaning SET UP SYSTEM SETTINGS PRINT • Call SET UP menu with • Select SYSTEM SETTINGS CLEAN PRINT HEAD. key. PRINT A message will inform you about the progress of the cleaning procedure. CLEAN PRINT HEAD Intensive cleaning SET UP You should start the intensive cleaning process if regular cleaning does not improve print quality in a sufficient way. • Call SET UP menu with key. SYSTEM SETTINGS PRINT INTENSIVELY CLEAN PRINT HEAD • Select SYSTEM SETTINGS PRINT INTENSIVELY CLEAN PRINT HEAD. A message will inform you about the progress of the cleaning procedure. • Test the imprint quality by an ultimail test print with postage value “0.00” (see Chapter 4.3 on page 16). If such an intensive cleaning process does not improve imprint quality as expected, contact the Francotyp-Postalia service. Maintenance and care 12.5 Filling the water tank (optional) Feeder and sealer are supplied with the same moistening unit. Filling the water tank is done in the same way. Warning! Please observe the following safety tips when handling the water tank: • Make sure that the screw cover on the water tank is firmly tightened and well sealing before inserting the tank into the machine with its opening down. • Be extremely careful when using water. Immediately pull out the power plug if water has penetrated the interior of the ultimail. Have the ultimail metering system checked by Francotyp-Postalia service before starting it up again. • Release the flap by pressing on the recess, and fold up as far as it goes. Recess • Remove water tank out of housing. 111 112 ultimail Operator Manual • Unscrew water tank cover. • Fully empty water tank and, if necessary, clean it. • Fill tap water into water tank. • Place water tank screw cover and tighten. • Turn water tank upside down in nondangerous area (e. g. over a sink) to check if the cover is well sealed. • Insert water tank into the housing with the cover downward. • Close the flap and lock with light pressure on the recess. Maintenance and care 12.6 Cleaning / changing the moistening sponge (optional) Feeder and sealer are supplied with the same moistening unit. Cleaning/changing the sponge is done in the same way. Warning! Please observe the following safety tips for cleaning and changing the sponge on the feeder and sealer: • Be extremely careful when using water. Immediately pull out the power plug if water has penetrated the interior of the ultimail. Have the ultimail metering system checked by Francotyp-Postalia service before starting it up again. • It is advisable to switch off the postage meter before removing the water tank and changing the sponge. • Switching off the metering system: Switch the power switch on the back of the postage meter to the O position. OFF Power switch (back of the machine) • Release the flap by pressing on the recess, and fold up as far as it goes. 113 114 ultimail Operator Manual • Remove water tank out of housing and put it at a safe place. • Release roller transport by pressing on release key. Roller transport moves upward. Now you have access to the moistening brush beneath the roller support. • Lift the brush up and to the left. At the rear of feeder/sealer: • Carefully pull out to the back the water tray. • Empty water tray. Maintenance and care • Lift out of the water tray the basket with the sponge. Remove sponge from basket. • Clean sponge or replace with a new one. Sponge Basket • Put a new sponge into water before inserting it, and let soak completely. The flaps are thus correctly moistened from the first letter on. • Insert sponge in basket. Sponge must be closely positioned to the bars and rest on the lateral limit. Ensure that sponge is not pressed by the bars. Two flaps on the longitudinal side hold sponge to the basket. Cut-out Checks: Sponge closely below the bars (without protrusion) Basket on the extreme left Basket flushed on top • Insert basket with sponge into water tray as shown in the figure. Mind the position of the cut-out. • Check if the basket is correctly seated: It must rest on the extreme left in the water tray and close on top in a flushed manner. • Insert the complete water tray into the housing until it clicks into place. • Check if the sponge is correctly seated. It should be directly below the moistening felt and brush. 115 116 ultimail Operator Manual • Check if moistening felt and brush are well moistened. If necessary, apply some water and stroke with your finger several times over the brush. • Lower the brush into the horizontal position. • Press roller transport down until it clicks into place. • Fill tap water into water tank. Check for leakages. (For further information see Chapter 12.5.) • Insert water tank into the housing with the cover downward. • Close the flap and lock with some pressure on the recess. You can switch on the metering system again. Maintenance and care 12.7 Adjust moistening level (optional) There are two hoses of different length included in the scope of supply, to be mounted on the cover of the water tank. The moistening level can thus be adapted to the letters accordingly. Moistening can be reduced through the insertion of a hose-piece: the longer the hose the weaker the moistening of the envelope flaps. • Remove water tank out of the housing (for further information see Chapter 12.5 on page 111). Without hose-piece Normal moistening (without hose-piece) Moistening is factory-set to achieve best results in most cases. With hose-piece Reduce moistening • Plug the short hose-piece on the cover of the water tank. or • Plug the long hose-piece on the cover of the water tank for lesser moistening. • Insert water tank into the housing with the cover downward. Close the flap (see page 116). 117 118 ultimail Operator Manual 12.8 Changing the battery The metering system monitors the battery charge status. An appropriate message appears in the display when it is time to change the battery. Caution! Only use a battery 90.4701.8004.00 as provided by FrancotypPostalia. Warning! Observe the instructions enclosed with the battery for correct use and disposal. • Switch off the ultimail metering system and all connected external equipment (PC, external postage scale). OFF • Remove the power cable from the postage meter and feeder (if any). • Remove the connecting cable to the feeder or sealer (if any). Power switch (back of the machine) • Remove the connecting cable to external equipment (if any). • Remove weighing platform (if any). Read on page 133. • Remove catch tray and corresponding feeding equipment. How to remove the catch tray or the manual positioner or optional feeders, read on page 134. • Tilt the postage meter on the right-hand side. You now have access to the battery compartment on the bottom of the ultimail. Maintenance and care Opening battery compartment: • Press the clip lock at the battery compartment cover and take off battery compartment cover. • Take out the used battery. Clip lock Battery compartment cover • Insert new battery (90.4701.8004.00). Make sure that the polarity is correct. (Symbols in the battery compartment indicate the correct position.) • Close the battery compartment. • Place postage meter upright again. • Replace catch tray and corresponding feeding equipment. How to attach the catch tray or the manual positioner or optional feeders, read on page 136. • Establish all cable connections (see page 137). • Reconnect the power cable of postage meter and feeder (if any). Now you can restart the metering system. 119 120 ultimail Operator Manual 13 Troubleshooting 13.1 Problems and remedies Problem Possible cause and remedy …in general Blank display. Check whether the power cable is plugged in correctly and if the power switch is switched on. Display light on, but display blank Software problem. Switch off power switch and pull power plug. The ultimail does not respond to pushbutton operation. Caution! The print system possibly is not in sealed position! Let the ultimail finish running before powering off. Wait one minute. Start the ultimail up again. Functions are missing in the display. These functions are not available with the currently plugged access card. You will find an overview of access rights on page 140. The ultimail does not switch off, does not shut down. The ultimail was not in home menu when the power switch was actuated. Change to the home menu with the home key. Switch off the ultimail by power switch. The ultimail does not Beeps are a sign that the ultimail cannot execute a execute the desired action function (for instance, if keys are without functions in and “beeps” several times. the current menu, or if the previous action is not yet finished). Carefully read all information in the display. Troubleshooting Problem Possible cause and remedy …when metering Metering not possible. No access card plugged in. Plug in UserCard or MasterCard. Card is not properly plugged in. Plug the card in correctly (chip must face down)! Card reader does not recognize access card. Remove access card and plug in again. Metering is not possible No postage in the postage meter. with the postage value set. Please load postage! Too low credit of current account. Have assigned new budget from system administrator. Home menu does not show all functions. The ultimail is not in “Metering” mode. Status line shows current mode. Press the C/CE key for 3 seconds. For setting the mode, read Chapter 11.1. The ultimail does not print, Sensor does not recognize letter. letter transport does not Position the letter again, or start letter transport with start. Start/Stop key. The ultimail does not display the home menu. Change to the home menu with the home key, and try again. Problems with label metering. Before loading the label dispenser: Loosen labels. You have used unsuited labels. Only use original labels from Francotyp-Postalia. Put in a maximum of 40 labels (as pre-packaged). 121 122 ultimail Operator Manual Problem Possible cause and remedy Meter imprint is incomplete, value stamp is missing. The ultimail is not in “Metering” mode. Status line shows current mode. The ultimail transports letters without metering them. The ultimail is in “Only transporting” mode. Status line shows current mode. Gaps in the imprint. Clean the print system (see Chapter 12.4). Print image distorted. Adjust ink cartridges (see Chapter 12.3). Letter jam. Read “Removing letter jams” on page 126. Press the C/CE key for 3 seconds. For setting the mode, read Chapter 11.1. Setting the “Metering” mode: Press the C/CE key for about 3 seconds. For setting the mode, read Chapter 11.1. …when weighing and for rate calculation Postage is missing in the display. No postal rates selected or the postal rates are incomplete or incorrect. Fully select postal rates (see Chapter 6.2). The scale does not determine any weight for the mail piece. Scale is overloaded or the weight of the mail piece is too low. Use the scale only for mail pieces within the weight range limits (see page 159). The scale does not recognize any Zero point. Tare the scale (see page 90). Troubleshooting Problem Possible cause and remedy …when loading postage Desired amount cannot be called. Impermissible amount. Enter a permissible amount and try again (see Chapter 9). The ultimail cannot connect to the TELESET data center. Check modem configuration (see Chapter 11.16). …with basic settings, maintenance and care New account cannot be created. All available account memories are already occupied. Delete an account you no longer need. Cartridge adjustment does Call adjustment procedure in SET UP menu not start automatically (see Chapter 12.3). after cartridge exchange. Data for logo, types of mail Card is defective. or rate table are not Call Francotyp-Postalia customer service. loaded into the ultimail from the card. 123 124 ultimail Operator Manual Problem Possible cause and remedy …with envelope sealing (only feeder/sealer) Letters are not sealed. Seal envelope is switched off. Switch on seal envelope (see page 20). Water tank is empty. Fill more water (see Chapter 12.5). Letters are not correctly sealed. Rub powerfully with your hand over the letter stack once in the area of the flaps. Moistening sponge and brush are dried because the water tank was empty over a longer period of time. Remove sponge and let it soak up completely (see Chapter 12.6). Sponge is dirty. Clean the sponge (see Chapter 12.6). Sponge is worn. Exchange the sponge (see Chapter 12.6). You have used unsuited envelopes. Observe specifications (see page 158). The ultimail does not start when you have positioned mail pieces. Entry sensor does not recognize the letters. Start letter transport with Start/Stop key. Troubleshooting Problem Possible cause and remedy …with automatic feeding from stack (only feeder) Double feeding, jam Material is unsuited for processing, cards are bent too much, mail pieces stick to each other. Fan thin material to remove paper dust and prevent adherence of the mail pieces. Leaf open card stack on all sides prior to positioning. Press the air out of thick letters. Observe notes for preparing letter stacks (page 149) and envelope specifications (page 158). Jam Read “Removing letter jams” on page 126. Mail piece jammed in the entry section. Letter guide is not correctly adjusted, stack is not sitting on lower letter guide support of. Mail pieces are not fed or not correctly fed. Slightly lift the stack at the rear part. Mail pieces are mistracking through the ultimail. Letter guide is not correctly adjusted. Last mail piece of stack is not fed. Push letter manually in until the feeder seizes the letter. 125 126 ultimail Operator Manual 13.2 Removing letter jams Removing letter jam in the postage meter Warning! Do not reach into the danger areas marked with a safety sign. Keep long hair, fingers, loose clothing pieces, shawls and jewellery away from moving machine parts. • Unlock letter transport: Reach into the opening and press locking device upward. • Pull letter transport to the right out of the ultimail. • Take out jammed letters. • Insert letter transport. The locking bar clicks into place. The ultimail is ready for operation again. Troubleshooting Removing letter jams in the feeder or in the sealer Warning! Do not reach into the danger areas marked with a safety sign. Keep long hair, fingers, loose clothing pieces, shawls and jewellery away from moving machine parts. • Release roller transport by pressing on release key. Roller transport moves upward. • Take out jammed letters. • Press roller transport powerfully down until it clicks into place. The ultimail is ready for operation again. 127 128 ultimail Operator Manual 13.3 Attach adjustable letter guide to feeder/sealer Clips On both sides, the adjustable letter guide is provided with clips for locking the bar. The two slots in the front edge of the lug will hold the wire spring on the bar. Slots How to insert the letter guide: Wire spring Pin • Pull out the bar for adjusting the letter guide as far as it goes. • Insert the letter guide so that the wire spring (in the bar) engages into the two narrow slots on the front edge of the lug. Tilt the letter guide downward (in the direction of the letter receiving tray). Place the two clips on the pins at the bar with slight pressure and lock into place. You can avoid the letter guide being pulled off: – For adjusting the letter guide, always hold in the recessed grip at the bar. – Always set the letter guide so that a clearance of about 0.08" to 0.1" (2 to 3 mm) is left. – Fold down the letter receiving tray for large, wide mail pieces. Troubleshooting 13.4 Display, print and send diagnostics list The diagnostics list of the ultimail lists the last 30 faults (date, time of day, error code, error description). • Call SET UP menu with SET UP DISPLAY SYSTEM INFORMATION DISPLAY DIAGNOSTICS LIST key. • Select DISPLAY SYSTEM INFORMATION DISPLAY DIAGNOSTICS LIST. You can scroll through the diagnostics list with the arrow keys. Print diagnostics list • Print the information on labels using key (only for ultimail with label dispenser). or Have some empty envelopes or cards ready. The ultimail will print system information in several parts. • Position an empty envelope or a card. • Start the printing process with key. The ultimail needs some time for print image creation. Letter transport is not started before that. The ultimail prints the first list. • Position further envelopes if required. You can follow the print process progress in the display. Send diagnostics list The function SEND TO FP SERVICE DEPT. sends the diagnostics list to customer service. Start this function only when requested to do so by FrancotypPostalia. 129 130 ultimail Operator Manual Appendix – Moving the ultimail to another location Moving the ultimail to another location Warning! Switch off the postage meter ultimail and all connected equipment prior to dismantling and transporting the metering system. Make sure that no liquids or foreign objects penetrate the interior of the ultimail. If this happens, pull out the power plug immediately. Have the ultimail metering system checked by Francotyp-Postalia service before starting it up again. Caution! Observe the following notes for preventing damage on the ultimail: • Fully empty the water tank and water tray before transporting feeders or sealers. • Never transport the components holding at attachments, such as label dispenser, weighing platform, adjustable letter guide, etc. • Hold the individual components best by the bottom part of the housing. • Always move the metering system in a horizontal position. • Once you have set the metering system from a cold environment to the new location: Wait for two hours at least before starting up the ultimail once again. The ultimail adapts to room temperature. Any condensation evaporates. • We recommend using the original packaging if you wish to move the ultimail or send it to the Francotyp-Postalia service. This chapter describes how to dismantle and install the ultimail including its optional components. If some of the measures do not apply to your configuration, just continue with the next step. 131 132 ultimail Operator Manual Dismantling the ultimail metering system Preparations • Remove MasterCard or UserCard. OFF • Switching off the metering system: Switch the power switch on the back of the postage meter to the position O. • Switch off all connected external equipment (PC, external rate calculation scale). Power switch (back of the machine) Removing connecting cables • Pull the postage meter power cable out of the power socket. • Pull the feeder power cable out of the power socket. • Pull the phone cable out of the phone socket. On the feeder: • Unplug the power cable. Appendix – Moving the ultimail to another location On the postage meter: • Unplug the power cable. • Removing the phone cable from the postage meter: Press the spring on the plug and pull the plug out of the phone socket. • Removing the connecting cable to the feeder or sealer: Unscrew and carefully pull off the plug. • Removing connecting cables to other external devices: Unscrew and carefully pull off the plug. Taking off the weighing platform • Release the weighing platform of the internal scale by turning counterclockwise for a quarter turn. • Lift off the weighing platform. 133 134 ultimail Operator Manual Emptying water tank and water tray • Take water tank and water tray out of the feeder/sealer and empty. Proceed as shown on pages 113 and 114. Separate catch tray from postage meter • Pull off catch tray toward the right-hand side of the postage meter. Separate feeder from postage meter • Taking off manual positioner: Slightly lift the manual positioner to release it from the two locking clips on the postage meter. Appendix – Moving the ultimail to another location or • Taking off feeder: Slightly lift feeder to release it from the two locking clips on the postage meter. • Slide the bar for adjustable letter guide so that it is flush with the housing edge. or • Taking off sealer: Slightly lift the sealer to release it from the two locking clips on the postage meter. • Slide the bar for adjustable letter guide so that it is flush with the housing edge. • Fold the adjustable letter guide down to letter receiving tray. 135 136 ultimail Operator Manual Reinstalling the ultimail metering system • Install the ultimail metering system on a plane, stable surface. Attaching the feeder • Place manual positioner on the two locking clips on the postage meter housing. or • Place feeder on the two locking clips on the postage meter housing. or • Place sealer on the two locking clips on the postage meter housing. Appendix – Moving the ultimail to another location Attaching the catch tray • Push catch tray from the right-hand side against the postage meter. • Align catch tray in such a way to postage meter that catch tray and letter eject slot on postage meter are well contacting. The fork-type lug engages in one foot on the postage meter. The catch tray is thus sufficiently protected against slipping. Placing the weighing platform • Position weighing platform as shown in the figure and lock by turning clockwise for a quarter turn. Plugging power and connecting cables On the feeder: • Connect the power cable to the feeder. The socket for the power connection is on the back of the feeder. 137 138 ultimail Operator Manual On the postage meter: • Connect the power cable to the postage meter. The socket for the power connection is on the back of the ultimail postage meter. • Connect the phone cable to the postage meter phone socket. Make sure that spring is in correct position. • Plug connecting cable of feeder/sealer in 25-pin interface on postage meter and tighten screws. The interface is marked with the sign. Setting up connections • Connect postage meter power cable to a grounded single-phase power socket. • Connect feeder power cable to a grounded single-phase power socket. • Connect phone cable to a phone socket (analogue). This is usually a fax connection. Appendix – Moving the ultimail to another location Commissioning and function test • Fill water tank. Read Chapter 12.5 on page 111. ON Power switch (back of the machine) • Switching on the ultimail metering system: Switch the power switch on the back of the postage meter to the I position. • Wait until the display shows the home menu. The ultimail is ready for operation. We recommend the following short function test: • Do a trial run. For instructions on the trial run, read Chapter 4.3 on page 16. • Adjust the ink cartridges if the meter imprint has shifted position. Read Chapter 12.3 on page 109. • Clean the print system if necessary (e.g. gaps in the print image). Read Chapter 12.4 on page 110. • Tare the scale. Read Chapter 11.13.1 on page 90. 139 140 ultimail Operator Manual Access rights Status Functions Without With access card UserCard With MasterCard Mode: Access card OFF Assign budget for account Change logo name Create/block UserCards Create/delete accounts Display/print postage register Incoming mail stamp Load postage / TELESET if released Metering on all accounts Metering only on assigned account Preset advertising imprint (logo) for account Release TELESET access Reload print image data (type of mail endorsements/logos …) only your own if released Appendix – Access rights Status Functions Without With access card UserCard With MasterCard Mode: Access card OFF Reset account counter Seal envelopes without metering System settings View account data Zero imprint (Postage value “0.00”) not all not all 141 142 ultimail Operator Manual Operating menu (overview) Appendix – Country codes Country codes Country Code A Afghanistan Albania Algeria Andorra Angola Anguila Antihua Argentina Armenia Aruba Ascension Australia Austria Azerbaijan Azores Code C 100 101 102 103 104 105 106 107 108 109 110 111 112 113 114 B Bahamas Bahrain Bangladesh Barbados Belarus Belgium Belize Benin Bermuda Bhutan Bolivia Bosnia-Herzegovina Botswana Brazil British Virgin Islands Brunei Darussalam Bulgaria Burkina Faso Burundi Country 115 116 117 118 119 120 121 122 123 124 125 126 127 128 129 130 131 132 134 Cambodia Cameroon Canada Cape Verde Cayman Islands Central African Republic Chad Chile China Colombia Comoros Congo Republic Congo, Democratic Republic Corsica Costa Rica Cote d’Lvoire Croatia Cuba Cyprus Czech Republic 202 135 136 137 138 139 140 141 142 143 144 145 315 146 147 148 149 150 151 152 D Denmark Djibouti Dominica Dominican Republic 153 154 155 156 E East Timor Ecuador Egypt El Salvador Equatorial Guinea Eritrea Estonia Ethiopia 157 158 159 160 161 162 163 164 143 144 ultimail Operator Manual Country Code F Falkland Islands Faroe Islands Fiji Finland France French Guiana French Polinesia 165 166 167 168 169 170 171 172 173 174 175 176 177 178 179 180 181 182 183 184 185 186 H Haiti Honduras Hong Kong Hungary 187 188 189 190 I Iceland India Indonasia Iran Code Iraq Ireland Israel Italy 195 196 197 198 J Jamaica Japan Jordan 199 200 201 K G Gabon Gambia Georgia Germany Ghana Gibraltar Great Britain Greece Greenland Grenada Guadeloupe Guatemala Guinea Guinea-Bissau Guyana Country 191 192 193 194 Kazakhstan Kenya Kiribati Korea, Democratic People’s Republic (North) Korea, Republic of (South) Kuwait Kyrgyzstan 203 204 205 206 207 208 209 L Laos Latvia Lebanon Lesotho Liberia Libya Liechtenstein Lithuania Luxembourg 210 211 212 213 214 215 216 217 218 M Macao Macedonia Madagascar Madeira Islands Malawi Malaysia Maldives 219 220 221 222 223 224 225 Appendix – Country codes Country Code Mali Malta Marocco Martinique Mauritania Mauritius Mexico Moldova Montenegio Montserrat Mozambique 226 227 236 228 229 230 231 232 234 235 237 N Namibia Nauru Nepal Netherlands Netherlands Antilles New Caledonia New Zealand Nicaragua Niger Nigeria Norway 238 239 240 241 242 243 244 245 246 247 248 O Oman 249 P Pakistan Panama Papua New Guinea Paraguay Peru Philippines Pitcaim Islands Poland Portugal 250 251 252 253 254 255 256 257 258 Country Code Q Qatar 259 R Reunion Romania Russia Rwanda 260 261 262 263 S Saint Christopher Saint Helena Saint Lucia Saint Pierre & Miquelon Saint Vincent & the Grenadines San Marino Sao Tome & Principe Saudi Arabia Senegal Serbia-Montenegro Seychelles Sierra Leone Singapore Slovak Republic Slovenia Solomon Islands Somalia South Africa Spain Sri Lanka Sudan Suriname Swaziland Sweden Switzerland Syria 264 265 266 267 268 269 270 271 272 273 274 275 276 277 278 279 280 281 282 283 284 285 286 287 288 289 145 146 ultimail Operator Manual Country Code T Taiwan Tajikistan Tanzania Thailand Togo Tonga Trinidad Tristan da Cunha Tunisia Turkey Turkmenistan Turks & Caicos Islands Tuvalu 290 291 292 293 294 295 296 297 298 299 300 301 302 U Uganda Ukraine United Arab Emirates Uruguay Uzbekistan 303 304 305 306 307 V Vanuatu Vatican City Venezuela Vietnam 308 309 310 311 W Wallis & Futuna Islands Western Samoa 312 313 Y Yemen 314 Z Zambia Zimbabwe 316 317 Appendix – Tips and tricks Tips and tricks This chapter contains supplementary information for handling the ultimail. You can read here, among others, how to prepare the mail pieces for batch mailing and preventing jamming and double-feeding by reasonable positioning. Text input is described in detail by the example of entering an account name. How to enter text Entering characters For name input, the ultimail opens a special text input menu. A cursor _ marks the position for character input. • Press the numeric key for the desired character as many times in rapid succession as necessary to display the desired character. Text input Cursor After a short time, the cursor jumps one place to the right. Now you can enter the next character. Quit input saved name is maintained Save new name Key assignment for text input Characters are entered with the numeric keys to . The assignment is printed to the housing beneath the key. Punctuation and special characters .1,?!-&’ are entered with the key. Blanks are inserted with the key. 147 148 ultimail Operator Manual Change/correct text • Use the functions CURSOR LEFT and CURSOR RIGHT to place the cursor to the corresponding place in the text. • Overwrite the marked character with the desired new character. Deleting characters … • You can delete characters with the key. Every key actuation deletes one character. Example You wish to give an account the name “SHOP 1 & 2”: • Delete the old name with the How to enter the new name: Press four times (S). Press twice (H). Press 3 times (O). Press once (P). Press once (blank). Press twice (1). Press once (blank). Press seven times (&). Press once (blank). Press four times (2). • With CONTINUE save the name. key. Appendix – Tips and tricks How to prepare letter stacks for batch mailing with the feeder ultimail 90 Caution! Observe the following notes for stack processing: – Only position in stack letters of the same format max. 9" x 4.5" (229 x 114 mm). – The ultimail processes letters of a thickness up to ¼" (6.35 mm). – Only position letters of nearly the same thickness in the stack ( +– 0.04"/1 mm). – Only position letters in stack which are to be printed with the same meter imprint (postage value, type of mail endorsement…). • Sort out any deliveries which are unsuited for stack processing. You feed such mail pieces individually and manually (see page 31). Stack height • Take about as many mail pieces as the ultimail will be able to process in one stack. Maximum stack height depends upon the material. Type / material of mail pieces Permissible stack height Letters 2" (50 mm) abt. 70 letters, contents: 1 sheet, non folded Postcards of a paper weight of at least 67 lb. (250 g/m2) 1.2" (30 mm), abt. 100 cards Postcards of a paper weight of less than 67 lb. (250 g/m2) 0.6" (15 mm), abt. 80 cards Markings at the letter guide face at the feeder indicate stacking height limits for letters and postcards . 149 150 ultimail Operator Manual • Arrange the letter stack so that all envelope flaps are face down. • Align upper edges flush: Loosen letter stack with the upper edge on a level base and shake smooth. Letter upper edges • Fan the letter stack so that the lower letter is the first protruding when inserted in the feeder. How to prevent jamming and double-feeding during batch mailing By simple preventive measures and special care when positioning the stacks, you can reduce feeding incidents and increase processing speed. Selecting and preparing the mail pieces Material and form of the mail pieces are of essential influence on the behavior during feeding and separating from the stack. We have had good experiences with processing envelopes of gray recycling material. Thick letters (> 0.08"/2 mm) Shortly press on the stack to remove any air. Thin material (< 0.08"/2 mm) Fan the stack from all sides by waving several times. Air can thus enter between the mail pieces and paper dust will be removed. Cards Leaf open the stack from all sides. Sort out any cards which are too strongly arched (arch > 0.15"/4 mm). Sort out any cards with front edge arched upward. Appendix – Tips and tricks When setting the lateral letter guide – The stack should have enough clearance between letter guide face and adjustable letter guide (about 0.1"). – Avoid too large clearance between letter guide face and adjustable letter guide. If the clearance is too wide, the mail pieces are not correctly guided during feeding. This may result in off straight meter imprints or frequent jamming. – The adjustable letter guide is provided with a narrow loading area at the inner side. Adjust the letter guide so that the stack is securely sitting on this surface. When positioning the letter stack in the feeder The figure shows how the letter stack should sit in the feeder. – The letter stack should be flush with the letter guide face. – The letter stack should be scaled out so that the front edges form a slope in the shape of the adjustable letter guide. – Make sure that no mail pieces can penetrate underneath the adjustable letter guide. – Make sure that no envelope flaps can penetrate underneath the belt conveyor. – With difficult materials, support letter feeding by slightly lifting the rear edges. 151 152 ultimail Operator Manual How to feed similar mail pieces at the sealer ultimail 60 Especially when metering large quantities of similar mail pieces, you can save time by optimized letter feed. • Arrange letters so that address areas are face up. • Loosen letter stack with the upper edge on a level base and shake smooth. • Scale up the letter stack so that the top letter is the first protruding when positioned. • Hold the fanned out letter stack with your left hand and place it on the letter receiving tray as shown in the figure. • Push with your right hand the top letter in the direction of the arrow. Make sure that the upper edge is flush to the letter guide face. • Once the letter is fed you can follow with the next letter from the stack. Appendix – Glossary Glossary Label Special self-adhesive label which you can meter and stick onto your mail pieces. Necessary for large, heavy and thick mail pieces. Use only labels from Francotyp-Postalia. MasterCard Plastic card with a memory chip. Access card for system administrator. MasterCard allows access to all system functions. Meter imprint Metering mail for carrying by the United States Postal Service. When metering, the ultimail prints among other things the indica, the postage value, the date and the machine identification on the envelope. An advertising imprint and an endorsement can also be printed. Modem Electronic unit built into the ultimail which enables exchange of code numbers and desired postage amounts over the phone line. Outside dialing parameters A single or several “0” and pauses to dial into the public phone network (outside line access). RRC – Remote Rate Change Online update of rate table for rate calculation. Data for new rate table are directly loaded to the ultimail via modem from the Remote rate table center. This service is currently not yet available in USA. TELESET data center (TDC) Data center of Francotyp-Postalia. Postage is released and accounts managed. The Teleset data center is at your service for loading postage 24 hours a day via the built-in modem. 153 154 ultimail Operator Manual TELESET remote value setting Postage meter accounting system of FrancotypPostalia AG & Co. KG. The ultimail and the Teleset data center exchange value specifications via modem when loading postage which release the desired postage amount. Test print Imprint consisting of a series of different patterns. You can align the cartridge with the aid of horizontal and vertical bar patterns. Trial run Meter imprint with the postage value “0” (zero imprint). This enables you to check the settings for the meter imprint. UserCard Plastic card with a memory chip. Access card for an account. A UserCard allows the metering to one account and the access to selected system functions. Appendix – Technical Data Technical Data Dimensions (Length x Width x Height) 22.2 x 15.8 x 10.8 " (564 x 400 x 273 mm) 22.2 x 15.8 x 11.8 " (564 x 400 x 299 mm) Weight ultimail 60/ultimail 90 with manual positioner and catch tray … and scale* 31.5 x 15.8 x 10.8 " (807 x 400 x 273 mm) 31.5 x 15.8 x 11.8 " (807 x 400 x 299 mm) ultimail 60 with sealer* and catch tray … and scale* 40.5 x 15.8 x 10.8 " (1028 x 400 x 273 mm) 40.5 x 15.8 x 11.8 " (1028 x 400 x 299 mm) ultimail 90 with feeder* and catch tray … and scale* 19.6 lb. (8.9 kg) 21.2 lb. (9.6 kg) 0.9 lb. (0.4 kg) 0.9 lb. (0.4 kg) 9.3 lb. (4.2 kg) 21.7 lb. (9.7 kg) postage meter ultimail 60/ultimail 90 … with scale* and label dispenser* catch tray manual positioner sealer ultimail 60* feeder ultimail 90* Power connection 115 V / 60 Hz Power consumption max. 70 W max. 70 W max. 50 W Battery 3.6 V / 2 Ah / 20 mA, order no. 90.4701.8004.00 ambient temperature: -67°F to 185°F (-55 to +85°C) Performance (with ISO C6/5) 60 letters/min 90 letters/min Display LCD, illuminated, 320 x 240 pixels *) optional postage meter ultimail 60 postage meter ultimail 90 feeder ultimail 90* postage meter ultimail 60 postage meter ultimail 90 155 156 ultimail Operator Manual Print system ink jet print system (with 2 ink cartridges) printing range max. 6.1 x 0.9 " (155 x 24 mm) printing resolution 300 dpi x 300 dpi Noise emission < 65 dB(A) 62 dB(A) 60 dB(A) Equipment metering system ultimail 90 metering system ultimail 60 postage meter (stand alone) Appendix – Technical Data Mail piece specifications for metering Format min. 5.5" x 3.5" (140 mm x 90 mm) max. 14" x 10" (353 mm x 250 mm) sealing*: max. 9" x 6.3" (229 mm x 162 mm) stack processing*: max. 9" x 4.5" (229 mm x 114 mm) Thickness postcards: max. 1/25 " (1 mm) letters: max. 1/4 " (6.35 mm) Material bleached, colored or recycling paper rough through glossy 20 lb. to 32 lb. (75 g/m2 to 120 g/m2) colors: white, pale blue, pale gray, pale brown, yellow ink absorbent material, on which ink will dry within one minute no material with air cushions no corrugated paper no high-gloss on the side to be imprinted Friction coefficient 0.3 to 0.4 Labels self-adhesive Envelopes with address window address window size: max. 4.5" x 1.8" (115 mm x 45 mm) address window may not be inside the printing range *) optional 157 158 ultimail Operator Manual Envelope specifications for sealing Flap position on the longitudinal side Flap height 1" to 3" (25 mm to 75 mm) Flap shape and size You cannot process rectangular, pointed or high flaps. The side cuts of the flap should be parallel and very close to the side fold edge. Appendix – Technical Data ultimail – operating and storage conditions Operating environment only use in closed rooms Operating temperature 50°F to 104°F (+10°C to +40°C) do not expose to direct sunlight recommended for optimum printing quality: 59°F to 95°F (+15°C to +35°C) Rel. humidity 30% to 80% non-condensing recommended for optimum printing quality: 30% to 80% Storage temperature -13°F to 140°F (-25°C to +60°C) Ink cartridges – operating and storage conditions Operating temperature 50°F to 104°F (+10°C to +40°C) recommended for optimum printing quality: 59°F to 95°F (+15°C to +35°C) Rel. humidity 30% to 80% non-condensing recommended for optimum printing quality: 30% to 80% Storage temperature -13°F to 140°F (-25°C to +60°C) Integrated postage scale Weighing area 0.1 oz. to 11 lb. (3 g to 5000 g ) Smallest display value (display accuracy) +– 0.1 oz. Weighing accuracy +– 0.1% of final value 159 160 ultimail Operator Manual Index A B Access card 14 See also MasterCard, UserCard MasterCard 14 plugging 14 removing 14 UserCard 14 Access card required OFF 27 ON/OFF 63 Access method 98 Access rights 14, 140 Account 53 assign credits 58 change 27 change name 60 current limit 59 delete, all 67 delete, one 67 monthly limit 59 new set up 53 number 54 selecting 56 set to zero 66 standard logo 54, 55 TELESET access 54 type of budget 54 Account information display and print 64 Accounts display number of accounts 53 increase number of accounts 101 ACCT. See Account(s) Additional service deselect 37 select 37 Address window 157 Advertising imprint. See Logo Ascending 49 Authorization code for more accounts 101 Automatic feeding 30 Automatic type of mail endorsement switch on/off 92 Available postage 49 Back to higher menu level 2 Batch mailing. See Stack processing Battery change 118 permissible type 155 Battery compartment 119, 168 Belt conveyor 167 Booking report display/print 51 Budget type change 58 monthly 54 restricted 54 unlimited 54 C Call help 2 Card reader 168 Cartridge. See Ink cartridges Catch tray 168 attaching 137 remove 134 Change ink cartridges cartridges are empty 104 cartridges are nearly empty 108 Cleaning housing 103 moistening unit 113 print system 110 Commissioning (after moving) 139 Connecting external postage scale 47 feeder 138 feeder power cable 137 phone cable 138 postage meter power cable 138 sealer 138 Connecting cable 166, 167 Control panel 2 Control total 49 Counter item counter 77 pre-select 42 Appendix – Index Country codes 143 Cover flap ink cartridges 168 water tank 166, 167 Current limit 59 Cursor 147 Customer Service 169 when loading postage 123 when metering 121 when sealing letters 124 when weighing 122 with stack processing 125 External postage scale connect 47 using 47 D Date 21, 25 Day light saving time automatic changeover 78 setting beginning/end 79 Default setting 2 postage value 21 type of mail endorsement 21 Default settings 2 Delete 2 all accounts 67 memories 89 one account 67 print image data 85 rate tables 94 Descending 49 Diagnostics list 129 Dialing method 98 Dialing parameters 153 Dismantling (metering system) 132 Display 2, 168 contrast 76 language 100 E Envelope flap shape 158 specifications 158 with address window 157 Equipment 156 Error general 120 in basic settings 123 rate calculation 122 scale 90 signal tones 75 F Feeder 11, 167 connect 168 connecting with postage meter 136 separating from postage meter 135 Feeding large mail pieces 31 letter stack 30 letter, postcard 29 similar mail pieces at sealer 152 Format markings 18, 19 Franking. See Metering G Gaps in print image 122 H High postage 22, 74 Home menu 12, 15, 21 back to 2 meter imprint settings 15 overview 15 I Imprint offset. See Print offset Impulse dialing method 98 Incoming mail position 45 stamp 44 Incoming mail stamp function end 40, 41, 45 using 44 161 162 ultimail Operator Manual Ink cartridges 159, 168 adjust 107, 109 change 104, 108 insert 106 remove 105 Installation (when changing location) 136 Interface 25-pin 168 9-pin 156, 168 Internal scale. See Scale Item counter is displayed 77 reset 77 K Key functions 2 Keyboard 2, 168 L Label 153, 157 insert 32 printing 32 Label dispenser 11, 168 Language (display) 100 Letter guide adjustment 17 Letter guide face 166, 167, 168 Letter guide, adjustable 166, 167 adjust at sealer 17 adjust on the feeder 19 attach 128 Letter stack place 151 position 30 prepare 30, 149 selecting material 150 Letter transport, run-on time 96 Letters large 18, 19 metering 28 not seal 20 only seal (not meter) 46 positioning (feeder) 30 positioning (manual) 28 positioning (sealer) 29 seal 20 weighing 38 Limit current 54 for high postage warning 74 for low postage warning 73 monthly 54 Loading postage 50 print image data 84 rate table 93 LOCK (weighing mode) 91 Logo 21 change names 83 delete 85 is displayed 82 load 84 printing 69, 82 set 23 Low postage warning 73 M Manual positioner 168 attaching 136 separating from postage meter 134 MasterCard 14, 27, 153 generate 99 Memory 86 call 26 calling data 39 delete 39, 89 display data contained 88 for postal rates (rate calculation) 39 memory ‘no. 1’ 87, 89 postage value with type of mail 86 print list 88 reassigning 39 save settings 86 Menu 15 home menu 15 scale menu 33 SET UP menu (overview) 142 Appendix – Index Meter imprint 153 example 21 set 21 slide to the left 72 Meter type 71 Metering labels 2, 32 letters 28 letters from stack 30 Mode CORRECTION 40 INCOMING STAMP 44, 69 METERING 15, 22, 28, 69 ONLY TRANSPORTING 46, 69 PRINTING LOGO 69 REDATE 41 set 68 Mode access card 63 Modem 97, 153 change dialing parameters 97 configuration 50, 97 dialing parameters, overview 98 Moistening adjust 117 changing sponge 113 cleaning sponge 113 Monthly limit. See Limit 59 Multifrequency dialing method 98 Multifunction keys 2 P Not seal / non seal 20 Phone line connection 168 Phone numbers change 102 customer service 169 Phone socket 168 Postage scale, external 47 Postage table. See Rate table Postage used 49 Postage value 21 determining with scale 38 display in scale menu 33 display in the home menu 15 set 21 Postal rates calling default setting 34 delete selection 35 saving 39 set 35 Power connection feeder 137, 167 postage meter 138, 168 Power switch 12, 13, 47, 168 Pre-select counter 42 Print head standby time 95 Print image data 82 delete 85 editing 82, 83 loading from card 84 Print image, faulty 122 Print offset 11, 72 Print system, cleaning 110 O Q Offset of meter imprint 72 Operating and storage conditions ink cartridges 159 ultimail 159 Operating modes 68 Quick reference 7 Quick select. See Memory N 163 164 ultimail Operator Manual R Rate calculation 33 call 33 eliminating faults 122 exit 34 Rate table delete 94 loading from card 93 update 93 ‘Received on:___’ 44 Register 2, 49 display 49 print 49 Reinstalling 136 Release key 166, 167 Remote setting. See TELESET Removing letter jams 126 feeder 127 postage meter 126 sealer 127 Roller transport 166, 167 RRC 153 Run-on time 96 S Safety sign 166, 167, 168 Safety tips 7, 9, 131 Scale external 47, 168 internal 11, 90 tare 90 weighing mode 91 Scale menu 33 special characteristics 33 Seal envelope 166, 167 switch off 20 switch on 20 Sealer 11, 166 connect 168 connecting with postage meter 136 separating from postage meter 135 Service 169 SET UP menu 2 Short code memory. See Memory Signal tone 75 Softkey 2 Sponge 166, 167 change 113 cleaning 113 Stack height 149 markings 167 Stack processing 30, 149 stack height limits 30, 149 Stamp of receipt 11, 44 Standby time, print head 95 Status line 15 Stock specifications 157 Summer time. See Day light saving time Switch ‘seal /non seal’ 166, 167 Switching OFF 13 Switching ON 12 Symbols 7 System clock 80 System information 70 System settings 2, 68 T Tare (scale) 90 TDC 153 Technical Data 155 Telediagnostics 11 TELESET 2, 50, 154 block access 57 error 123 loading postage 50 modem 50 permissible amounts 50 release access 57 Test print 154 Text change account name (example) 148 delete 148 input 147 Time 78 correct 80 day light saving 78 Time zone 81 Tone dialing 98 Tone signal, setting 75 Appendix – Index Total pieces 49 Trial run 16, 154 Troubleshooting 120 See also Errors Type of mail endorsement 21 automatic setting 92 delete 85 set 24 U ultimail 60 / 90 10 UserCard 14, 27, 154 blocking 61, 62 create 61 generate 61 V Ventilation slots 167, 168 W Water tank 166, 167 filling 111 Water tray 166, 167 Weigh 38 Weighing mode 91 lock 91 normal 91 Weighing platform 168 attaching 137 remove 133 Weight display 33 Z Zero all accounts 66 one account 66 Zero imprint 16 165 166 Sealer ultimail 60 * To open: press here Cover flap, with the water tank underneath Roller transport Safety sign Release key Letter guide face Seal / non seal switch Letter receiving tray Letter guide (adjustable) Bar with recessed grip (setting the lateral letter guide) Cover flap, with the water tank underneath Water tray with sponge Connecting cable * optional Feeder ultimail 90 (automatic feeding with sealer)* To open: press here Cover flap, with the water tank underneath 167 Postage meter ultimail 60/ultimail 90 Cartridge flap, with 2 ink cartridges underneath Weighing platform* Display Keyboard Roller transport Safety sign Letter guide face Label dispenser* Catch tray Markings for maximum stack height Release key Safety sign Manual positioner Seal / non seal switch’ Belt conveyor Letter guide face Letter receiving tray Bar with recessed grip (setting the lateral letter guide) Battery compartment (on the bottom) Card reader (without card) Letter guide (adjustable) Cover flap, with the water tank underneath Ventilation slots Ventilation slots Water tray with sponge 9-pin interface (connection for external rate calculation scale) 25-pin interface (connection for feeder or sealer) Connecting cable Locking clips (for manual positioner or feeder/sealer) Power switch Power connection Phone line connection Power connection * optional * optional 168 Service Every ultimail metering system is thoroughly checked before leaving the factory. Should any faults occur with your ultimail in spite of our extensive quality control, please contact FrancotypPostalia help line. Our main office will be pleased to tell you the address of your local servicing dealer. Francotyp-Postalia, Inc. 140 N. Mitchell, Suite 200 Addison, IL 60101-7200 Customer Service (800) 341-6052 [email protected] www.fp-usa.com 2003-06 / 300 / helbig berlin email Internet 51.0033.3209.00 Rev. 01 AE-Nr. 03-1572 Service 169
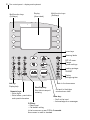


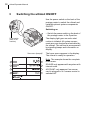
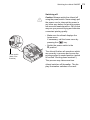


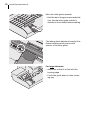


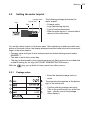


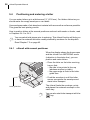

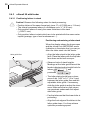

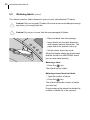


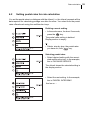

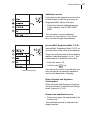
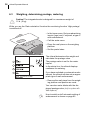
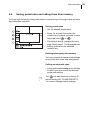
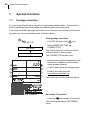
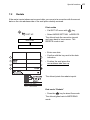
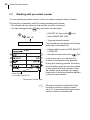
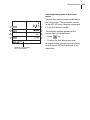

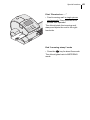

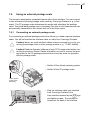
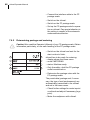
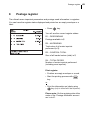
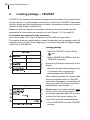
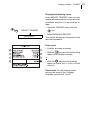

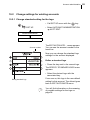


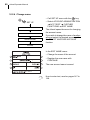

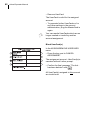
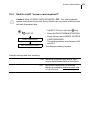


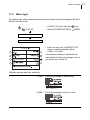
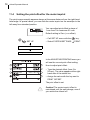
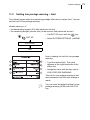

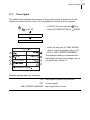
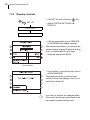
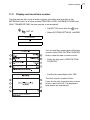


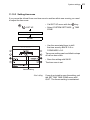

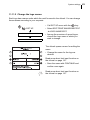
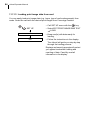

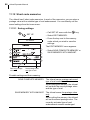
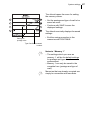

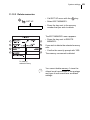

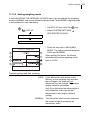
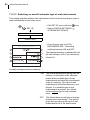
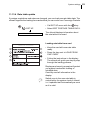

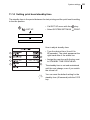

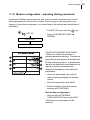
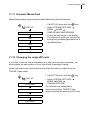
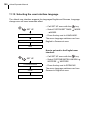


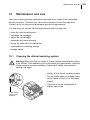
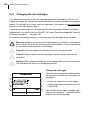
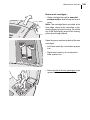


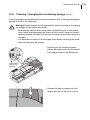
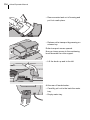

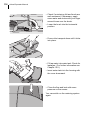
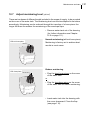

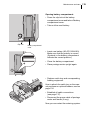

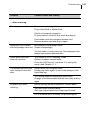

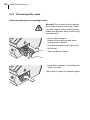

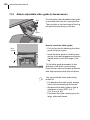
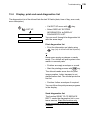

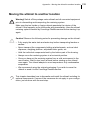
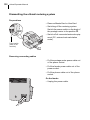
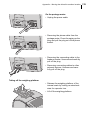
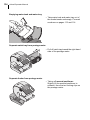
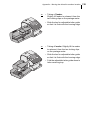


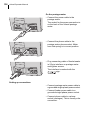

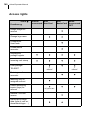
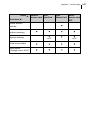


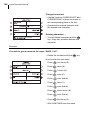
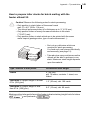


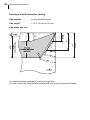


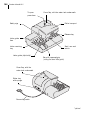
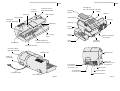
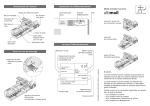


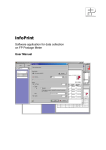
![[mailcredit / ENG] User Manual](http://vs1.manualzilla.com/store/data/005957121_1-8f833d5244dc8652c61044097905507f-150x150.png)