Download Modem RB-24 User`s Manual
Transcript
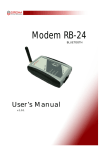
Modem RB-24
USB / RS232
User’s Manual
v.1.0.1
Page 2
ATTENTION
SWITCH ON SAFELY
Do not switch the modem on when wireless devices use
is prohibited, or when it may cause interference or danger.
INTERFERENCE
All wireless modems may be susceptible to interference,
which could affect performance.
SWITCH OFF IN HOSPITALS
Follow any restrictions. Switch the modem off near
medical equipment.
QUALIFIED SERVICE
Only qualified personnel may install or repair this product.
WATER-RESISTANCE
Your modem is not water-resistant. Keep it dry.
USE SENSIBLY
Use only in the normal position as explained in the product
documentation. Don't touch the antenna unnecessarily.
Page 3
WELCOME
This document will provide you with the instructions
how to install and use modem “RB 24” and its software.
RB24 terminal is powered by Motorola’s G24. It features
multiple configurations, including USB, Bluetooth and RS232.
RB24 RS232 is a small terminal-modem powered by Motorola G24
embedded engine. RS232 version is a EDGE/GPRS/GSM dedicated
for users seeking for easy and mobile internet access. It enables
users to use all services provided by GSM operators. Internet/APN
Access (EDGE/GPRS), CSD, SMS or FAX just to mention basic
capabilities.
Additionally it can be used as a mobile phone for voice
communication. Perfect when traveling, no need for any external
power supply or batteries. Ready PC software for WindowsXP and
Linux OS. RS232 version is typical terminal/driver. Small sized
easy to install is a perfect solution for any GSM/GPRS telemetry
system.
Page 4
1. PACKAGE CONTENTS
Modem RB-24 is supplied to clients in carton with all
contents, which are needed for connection to PC and normal
work:
1)
2)
3)
4)
5)
6)
7)
carton;
modem RB-24;
RS-232 connecting cable (only RB24 RS232);
“USB A
mini USB B” connecting cable;
external GSM antenna;
power supply: 5V DC
CD with User’s Guide and drivers.
If any of the components is missing please contact your local
distributor.
Page 5
1
2. Technical information
2.1. Modem features.
GSM / GPRS / EDGE / CSD / SMS / FAX modem
GSM 850 / 900 / 1800 / 1900 / E-GSM
Functions:
EDGE (Mult-slot class 10, max BR downlink 236,8 Kb/s)
GPRS (Multi-slot class 10, max BR downlink 85,6 Kb/s)
FAX (3 group 1 class) 9600bit/s
SMS (AT commands ETSI 07.05 & 07.07, PDU & Text)
CSD (Max BR 14,4 Kb/s)
2
PC Communication: full RS232, DB9F
2.2. Electrical and operating specifications.
Power supply: 5V DC
Power consumption: max 950mA
SIM Card: 3V DC
Page 6
2.3. Weight and dimensions.
Page 7
Weight
100 g
Length
Width
Depth
95 mm
65 mm
30 mm
2
3. Software setup
3.1. Modem Selection Window
While launching GPRS Control, you will be asked to select
a modem which you currently want to use. Remember that
your modem must be actually connected to the PC.
3
Page 8
3.2. PIN/PUK Section.
After the first launch of the application it is essential to
enter a PIN code (Personal Identification Number). This action
has to be repeated every time the program is launched or the
PIN code can be saved by checking “Store PIN”:
.
3
With this option chosen the code will not be required
further on once it was entered before. If you will enter wrong
PIN code three times in a row, the program will ask you to
enter the PUK code and a new PIN. When the required data
inserted correctly, click “Enter PUK and new PIN” button .
Page 9
3.4. Main settings.
GPRS Control has the capability of changing modems it
Operates with without the necessity of exiting from the application.
Just select one of the modems available in the system and
remember that it has to be connected to your PC (RB24 RS232 and
Bluetooth version can be detected by the Windows XP although it is
not actually plugged in). That feature enables you to keep three
versions of RB24 (USB, RS232 and Bluetooth) connected to the PC
simultaneously and skip between them in GPRS Control. Please
note that terminals must be plugged in before you start the
application. Otherwise they won’t be detected by the GPRS Control.
3
Program starts with language settings which have been
chosen during an installation. If you want to change it, just
select another one from the list:
.
Page 10
3.4. Internet Section.
The following instructions will help you establish your
Initial connection to the Internet. The purpose of GPRS Control is
to set up a modem connection and establish a communication
link between your modem and a remote modem that is attached
to the Internet. To be able to access a network you must have
a Dial-Up Networking connection. Instructions on how to set-up
such a connection can be found at the end of that section.
In the bottom right corner there is an indicator which
states if an EDGE or GPRS coverage is available
.
3
The whole process of connecting to the Internet is very
simple – just select a particular connection on the list and press
“Connect” button. It may take a few seconds to establish a
connection. Remember to check an EDGE/GPRS coverage indicator
beforehand. If GPRS or EDGE coverage is not available, change
location of your modem. In order to disconnect press “Disconnect”.
Simply quitting your applications will not automatically terminate
your connection. Always remember to click on the “Disconnect”
button to terminate the connection
.
Page 11
On the left side there are three buttons helping you launch
Your default Internet Browser, default
Mail Client or create e-mail message:
3
If you don't have any connections
created you have to configure a new
one by pressing “New connection” button.
On the first screen it is necessary to fill a text box with a connection
name which identifies the connection you are configuring. It is
also essential to select a device you want to use. On the second
page you can enter some settings provided by your service provider.
Depending on the connection type different settings are required.
When it comes to GPRS/EDGE you have to know the APN (Access
Point Name) and sometimes user name and password as well.
To enter the APN, etc. press an arrow on the right to make fields
collapse. Remember do not hide them otherwise they won't be
taken under consideration while establishing a connection. On
the third page you can set TCP/IP properties
.
Page 12
3.5. SMS Section.
To start using GPRS Control's SMS capabilities you must
first open the SMS Inbox and Outbox by selecting a node in the
three view on the left side and consequently expanding the
whole tree
.
3
To display all the received messages click on the Inbox.
Messages will be listed with their descriptions: sender’s
telephone number and a status (unread, read). After selecting a
single SMS on the list its content will be shown in the box below
and the status changed to “read”
.
Page 13
A big advantage of GPRS Control is that you don’t have
to check manually whether you received any new messages – you
will be informed about it each time a new message arrives by
a short report shown on the status strip at the bottom of the
window:
3
The Outbox stores SMs which are to be send. They are
displayed in the same way as those in the Inbox. The only
difference is that their status (unsent, sent) changes after
selecting a single line and pressing the “Send message” button .
To create and send a new SM click on the “New Message”
button. A new window will appear where you are supposed to
enter receiver’s phone number and a message body accordingly.
A single SM can consists of 160 characters so it is advisable to
control the length of the text that is being typed. There is
a counter of characters under the text box which you can find
very helpful
.
When the
new message is
completed
you
can either send it
straight away by
Pressing
the
“Send message”
button or save it
on the SIM card
by
choosing
“Save message” – as a result a SM will
be moved to the Outbox where you can
send it later from.
Page 14
3.6. Phone Section.
In order to have GPRS Control software running to its full
potential you should connect a headset to your RB24 USB or
Bluetooth Modem (in RB24 RS232 this option is not available).
From then on you are able to set up a single call and accept or
reject an incoming calls. To establish your own session just enter
a phone number of the called party in the “Phone” text box. You
can do it using your PC keyboard or a keypad in the application
as well. Eventually, press the green button to make a call.
3
If you succeed, a call timer will occur on the status strip
at the bottom of the window showing total time of the connection.
Page 15
To disconnect press the red button. GPRS Control informs
about an incoming call by playing a ringing tone and displaying
a message on the status strip. Such message can contain a
description of the caller if there is an entry in the phone book
corresponding to the caller’s telephone number. The picture
below shows two types of information shown on the status strip:
1) notification without details
2) notification with full description
3
To reject an incoming call press the red button.
GPRS Control enables you to make use of a wide variety
of supplementary services which are provided by your operator.
In order to do this just press the “Supplementary services”
button located under the keypad. A separate window will occur.
After entering a proper service code and pressing “Send”
button, operator's response will be shown in the text box titled
“Operator's response”. Thanks to that feature you can check
for instance your account, bills, plan details, the exact date
when your account's validity expires (when it comes to the
prepaid services), etc
.
Page 16
3.6. Phone Book.
While using phone and SMS capabilities of the GPRS
Control, instead of entering telephone numbers manually it is
sometimes better to use a phone book. You can do this by
clicking on phone book button:
.
On the first time it takes a while to copy all the entries
from the modem and SIM card memory. You will be informed
About the progress of that operation by additional window:
3
When the process is completed, a new window containing
your contact list appears. You can arrange your list by deleting
your contacts (remember to select the proper one on the list)
or adding new ones. In order to add a new entry press the “Add”
button and fill all the blank text boxes on the “New entry” form.
Page 17
Please note that there is an option to choose the memory
(modemor SIM card) where you want the new entry to be
saved on
.
3
If you find looking up a particular entry difficult, you
can make use of a phone book search tool. Just enter the
name describing an entry in the “Name” text box, press “Find”
Button and a searching result will be selected on the contact list.
After selecting
an entry and pressing
the “Choose” button,
a
text
box
with
Telephone number of
SMS receiver or called
party will be filled with
the
corresponding
number.
Page 18
3.6. Update Section.
We are putting a lot of effort to create high standard
products which would meet our client’s expectations. To fully
satisfy our customers we are constantly improving and
developing our software taking under consideration their
suggestions and bug reports
.
To check for an update of GPRS Control press the button
under the caption with the current version. If the update is
available, it will be automatically downloaded. The current
application will be terminated and an installer of a new one will
be launched
.
Page 19
3
Important Notes
If you receive an error “The maximum baud rate for
the device is 115200. Parameter name: baudRate.“ as shown
below:
3
when trying to establish or disconnect an internet connection,
the most likely cause is that you have an old Bluetooth stack
or driver attached to your Bluetooth Radio device. In that case
you need to perform a series of steps to remove undesirable
software and install the new one
.
Page 20


