1
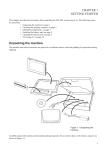
Time Reorder Utility User Manual Revisions .............................................................................................................................................. 3 Introduction ......................................................................................................................................... 4 Getting Started ..................................................................................................................................... 5 For TR40xx / TR51x time recorder & WEC200-01 controller terminal................................... 5 For WEC200-00 controller terminal ............................................................................................ 6 Running Modes ................................................................................................................................... 7 Tray icon menu.................................................................................................................................... 7 Enter Password.................................................................................................................................... 8 Connections ......................................................................................................................................... 8 Define Connections ........................................................................................................................ 8 Verify Connections ......................................................................................................................... 9 Normal Mode..................................................................................................................................... 10 Terminal Properties ..................................................................................................................... 10 Download Time Data ................................................................................................................... 13 Extended Mode .................................................................................................................................. 15 Configure Security Settings......................................................................................................... 16 User ............................................................................................................................................ 17 Time Zone .................................................................................................................................. 19 Holiday Groups .......................................................................................................................... 20 Control Assign............................................................................................................................ 22 Master Card ................................................................................................................................ 22 Miscellaneous............................................................................................................................. 24 Automation ................................................................................................................................... 26 View Time Data ............................................................................................................................ 28 Handle the Terminals ................................................................................................................... 30 Lock specified terminal .............................................................................................................. 30 Set specified terminal to Normal Mode ..................................................................................... 30 TRU - Client Program ................................................................................................................. 31 User Level Security – Set Accounts and Permissions................................................................ 31 Installation .................................................................................................................................. 32 First Launch ............................................................................................................................... 32 Run the TRU – Client program .................................................................................................. 33 Maintain Database ............................................................................................................................ 34 Backup Database .......................................................................................................................... 35 Clear Time Data ........................................................................................................................... 35 Restore Database .......................................................................................................................... 35 Compact Database ....................................................................................................................... 35 FAQ .................................................................................................................................................... 35 Contact Us ......................................................................................................................................... 37 Appendix A – WEC200-01 ................................................................................................................ 38 Firmware....................................................................................................................................... 38 Upgrades Firmware #1 – Main board IC U5 ............................................................................. 38 Upgrades Firmware #2 – Tios Operating System ...................................................................... 39 Upgrades Firmware #3 – Tios Application ................................................................................ 39 Change WEC200-01 to WEC200-00........................................................................................... 40 Off-line Security Policy ................................................................................................................ 43 Appendix B – Push Mechanism for TR515 UDP Terminal............................................................. 45 GIGA-TMS Inc. Document Version: v1.4 Date: 7/10/2008 2 Revisions Release Date Version Description 7/28/2005 V1.0 Original document release SW Version:V1.1R9 2/15/2006 V1.1 Add. Support TR510-515 terminal Modify. Rename program from [TR4020-4030 Downloader] to [Time Recorder Utility] SW Version:V1.1R17 5/10/2006 V1.2 Add. Support WEC200-00 terminal SW Version:V1.1R26 9/11/2006 V1.3 Add. Support WEC200-01 terminal SW Version:V1.1R37 7/10/2008 V1.4 Add. Support UDP protocol of TR515 terminal SW Version:V1.1R56 GIGA-TMS Inc. Document Version: v1.4 Date: 7/10/2008 3 Introduction Time Recorder Utility (TRU) program is used to communicate with TR40xx / TR51x time recorder terminal and WEC200-00 terminal. By TRU, it is easy to download the punch time data* or utilize the terminal just only by a single click, such as setting up the date, time, bell tables or any other properties that the terminal / controller owns. TRU supports multi-connected terminals network, no matter the communications are going through RS232 or Ethernet (UDP/TCP protocol). It also allows you to schedule the time for downloading* the time data. Even more, with the Extended Mode, TRU can implement the connected terminal to be an access control terminal. This will allow the terminal to control the door lock to meet your security policies. * The function of downloading time data doesn’t apply to WEC200-00 terminal because it doesn’t have the ability to store punched tag code. If you use the WEC200-00 terminal, you can skip the information of downloading time data in this user manual. GIGA-TMS Inc. Document Version: v1.4 Date: 7/10/2008 4 Getting Started Getting started with Time Recorder Utility (TRU) is easy. This chapter provides a procedural checklist, along with instructions on the set up and installation of the TRU program on the PC. For TR40xx / TR51x time recorder & WEC200-01 controller terminal The following check list of activities will insure you have everything set up correctly. 1. Install Time Recorder Terminal Install Terminal (refer to Hardware User Guide). Connect communication cable. For RS232 interface terminal: Connect the cable from terminal to PC. For Ethernet interface terminal: Using WAS1498 cable to direct connects from 2. 3. terminal to PC. Or using WAS1499 cable to connect via hub. Attach power connector. Install Program Optimize PC if required and make sure your system is sufficient1. Install the TRU program on your PC. Set up terminal information2. Set up the file name & path that the downloaded time data is going to be saved to3. Test the system by: 1. Enter several in and out punches in the terminal. 2. 3. Poll or manually download the data clock in TRU Communications4. Check the downloaded time data by the Notepad program 5. Data should appear for all badge IDs that have been punched. Be sure correct date is set up in terminal. Notes: 1. System Required: Microsoft Windows version Windows 98/ME/NT/2000/XP 30MB free hard drive space ※ The Windows NT should be installed the SP3 and IE4.01 or later version. GIGA-TMS Inc. Document Version: v1.4 Date: 7/10/2008 5 ※ The Auto E-mail function must be associated with the Email Account of the Outlook Express v5.5 or later version. 2. 3. 4. 5. On the [Connections] Inspection, click to add a terminal with the specified IP or Comport. On the [Tools] menu, click [Option]. Select the [Download] tab, type the file name and path On the [Download] Inspection, select the terminal that you just added. Click on the toolbar to download data. From [Start] menu, click [Programs]/[Accessories] and launch the Notepad program. For WEC200-00 controller terminal The following check list of activities will insure you have everything set up correctly. 4. Install WEC200-00 terminal Install Terminal (refer to Hardware User Guide). Connect communication cable. Using WAS1498 cable to direct connects from terminal to PC. Or using WAS1499 cable to connect via hub. Attach power connector. 5. Install Program 6. Optimize PC if required and make sure your system is sufficient1. Install the TRU program on your PC. Set up terminal information2. Test the system by: On the [Download] inspection, select the terminal that you just added. Click on the toolbar to view the internal settings of terminal. Notes: 1. System Required: Microsoft Windows version Windows 98/ME/NT/2000/XP 30MB free hard drive space ※ The Windows NT should be installed the SP3 and IE4.01 or later version. ※ The Auto E-mail function must be associated with the Email Account of the Outlook Express v5.5 or later version. 2. On the [Connections] Inspection, click GIGA-TMS Inc. Document Version: v1.4 to add a terminal with the specified IP. Date: 7/10/2008 6 Running Modes The mode defines the behaviors that TRU should run, Normal Mode or Extended Mode. Below is the comparison table for these two modes. Functions Supported Modes Normal Mode Retrieve time data stored din the internal memory of terminal* ○ Modify Properties ○ Extended Mode Real-time get punch time data ○ Real-time display message* ○ Real-time control relay ○ * Doesn’t apply to WEC200-00 terminal For the Normal Mode, the connections between terminals and TRU will not be established until a command is issued. The command could be downloading time data, retrieving or editing terminal properties. After the command is executed (completed), the connection will be terminated. The Real-time means access right away. This function is mainly used for access control purposes. While TRU is starting the Extended Mode, the connections between terminals and TRU will be established. The connections are kept all the time until TRU goes into Normal Mode or ended. Keep the connection opened will let TRU get the punch time data instantly, not like the Normal Mode, using the polling method to get time data. Not all terminals support Extended Mode, only the connection type with (EX) are allowed using this features. Tray icon menu When TRU is running you can see its icon in the system tray bar (which usually located in the right-bottom corner of screen, near the system clock). Tray icon menu is available by right mouse button click on TRU icon in the system tray. Normal Mode and Extended Mode GIGA-TMS Inc. Document Version: v1.4 Date: 7/10/2008 7 are using different icons. For Normal Mode: For Extended Mode: Tray icon menu contains the items: Open Time Recorder Utility: Open TRU window. Exit: End the program. Enter Password A password is always needed on below conditions: Launching TRU main window Exit program Note: if you are using TRU first time, the TRU will require you to enter a new password. Please keep this password for future uses. If the password is lost, you cannot enter the program anymore. Connections Define Connections Before starting to communicate with terminals, the connection has to be defined first. A connection contains the information that can tell TRU how to communicate with the connected terminal, and the properties that the terminal owns. For TR51x terminal, each connection only contains one terminal. For TR40xx terminal, GIGA-TMS Inc. Document Version: v1.4 Date: 7/10/2008 8 each connection may contain one or more than one terminals (with slave terminal connected). To define a new connection, please do the following steps: Go to [Connections] inspection. Click , a [Add Connection] window will pop up. Enter a connection name. Select terminal type. Specify the Comport or IP where the terminal is connected. Enter Port (Only for Ethernet interface). If with slave terminal(s) connected, select [Multiple Link] (Only for TR40xx terminal). Click [OK] to save the change. If the protocol that terminal uses is TCP, and is in the same subnet as PC (TRU installed), then you can click to specify or change the terminal’s IP. Verify Connections After adding or editing a connection, it should verify the connection right away to ensure the settings are correct or not. To verify connections, please do the following steps: Go to [Download] inspection. Click GIGA-TMS Inc. for scanning the changes. Document Version: v1.4 Date: 7/10/2008 9 View the [Status] column to get the scanning result. If the [Multiple Link] of connection settings is selected, the connected slave terminal(s) will be displayed on the list view. If the scanning result is failed, please re-check the connection settings, and the communication cable / terminal power is proper set or not. Normal Mode Under the Normal Mode, you can easily access all the information of the specified terminal, or download the time data that stored in the internal memory. Terminal Properties Each terminal contains its own properties, such as machine number, date, time, bell tables and so on. To display the properties values, in the [Download] inspection, double-clicking the specified terminal on the list view, or select the terminal, then click . A properties window will pop up as below. GIGA-TMS Inc. Document Version: v1.4 Date: 7/10/2008 10 TR40xx terminal properties window: TR51x terminal properties window: WEC200-00 properties window WEC200-01 properties window GIGA-TMS Inc. Document Version: v1.4 Date: 7/10/2008 11 For TR40xx terminal, some properties need to login before editing. To login, from [Tools] menu, click [Login]. If the password is not blank, then a password required window would pop up. After entering a correct password, the terminal will go into login mode. To modify the property value, just double-click the item value. After entering a wanted value. Click [OK] to save the change. If you want to run the Extended Mode (implements the Access Control function), please give each terminal a unique Machine Number. This unique number will identity each door (terminal) TRU connects. GIGA-TMS Inc. Document Version: v1.4 Date: 7/10/2008 12 Download Time Data While users punch the time data, the Tag ID will be stored in the internal memory of terminal, associated with the date, time, event id and shift number (shift number is only for TR40xx terminal). There are two ways to get the stored time data out, one is via the floppy disk (if floppy drive is built in), another way is, this chapter will introduce, download it via communication cable. After setting up the connections, all the terminals will be displayed in the [Download] inspection. In this inspection, you can get a brief view of the properties of connected terminals, such as the machine number, name etc. If you want get more detail information, just double-click the list item, a properties window will pop up, which shows all the information of the selected terminal. Please keep in mind, some of the properties need to login first prior to modify. Under Normal Mode, TRU provides two ways to download the time data: Download at once and Scheduling, which are detailed as below. Download at once: Select the checkbox on the list view, and then click on the toolbar. All the time data of selected (checked) terminals will be downloaded and saved to the specified path. For flexible purposes, TRU also allows to download the highlighted one or specified terminals. To do this, click the button menu of Recorder] or [Checked Time Recorder(s)]. GIGA-TMS Inc. Document Version: v1.4 Date: 7/10/2008 button, then click [Highlighted Time 13 Scheduling: By using Scheduling, you can schedule any time to download the time data. Scheduling starts each time you start the TRU program and is able to run in the background. With Scheduling, you can schedule a time to download time data daily, weekly, monthly, or at certain times. To configure the scheduled time, from [Tools] menu, click [Options]. On the [Options] window, click [Schedule] tab. To enable the Scheduling function, select the Type to Schedule. First, select the [Schedule Task] for days period of scheduling, and then click [Time Table] to edit the specified times of downloading time data. After completing the scheduling configuration, click [OK] to activate the settings. GIGA-TMS Inc. Document Version: v1.4 Date: 7/10/2008 14 Extended Mode While starting [Extended Mode], TRU will issue a [Extended Mode Login] command to the connected terminals of the connection that the type is with (EX) (refer to Running Modes section). If acknowledged, the terminal will go into Extended Mode until getting a [Extended Mode Logout] command. When the terminal is running on Extended Mode, the punch time data will send to the TRU instantly (the time data is also restored the data into the internal memory). After retrieving the time data, TRU will determine how to display the specified messages on the terminal screen, or trigger the relay depending on the security settings and rules. To run the [Extended Mode], please follow below steps: 1. On main window, from [Tools]/[Extended Mode], click [Go into Extended Mode]. 2. While the [Extended Mode] window pops up, it will automatically scan the connected terminals, and then displays them on the tree view. GIGA-TMS Inc. Document Version: v1.4 Date: 7/10/2008 15 If the terminal is disconnected, a cross red symbol will paint on terminal icon. Configure Security Settings TRU provides three settings to secure the doors. It can verify a valid punch by 1) the tag code, 2) date / time and 3) the door (terminal). If the three settings are all verified successfully, then the punch will be treated as an allowed punch. If a punch is allowed, TRU will open the door (trigger the terminal’s relay) and show the message on the terminal’s screen. If not a valid punch, the door will not open and a warning message will be displayed on the terminal’s screen. For TR40xx terminal, the valid punch message is the user name. The invalid punch will display the reason why the punch is invalid. For TR51x terminal, the valid or invalid punch message will be a message code (4 digital numbers). To launch the security settings window, from [Tools] menu, click [Configure Access Control]. GIGA-TMS Inc. Document Version: v1.4 Date: 7/10/2008 16 Pops up the [Access Control Configuration] Window: Below will guide you how to configure the security settings. User A user can be an employee, visitor or customer. Those who own the tag to punch the terminals should be defined as users. To add a new user, click on the toolbar. GIGA-TMS Inc. Document Version: v1.4 Date: 7/10/2008 17 Two fields – [Name] and [Code] are needed to be entered. Below details the way of setting up the user information. Name: The user name. Code: The tag code. If the tag code extracted function of terminal properties is set, the code should be the extracted one. For example, if the tag code is 1234567890, for non-extracted setting, enter whole code 1234567890 in the Code field. If the extracted function is set, and the setting, for example, is extracted from 2, length is 5, then enter 23456 in the Code field. Personal ID: The Personal ID should be consistent with your HR, T&A or payroll settings. Time Zone: Defines the weekday and time period that the user is allowed to enter. Holiday Group: Defines the holiday and time period that the user is allowed to enter. Control Assign: Defines which doors (terminals) the user can enter. If two or more than two terminals share the same machine number, they will be treated as the same door. Department: The department that the user belongs to. Title: User’s title (position). Valid Period: Defines the date period that the user can enter. This is most used to visitors, customers or inactive employees. To modify defined user, select the user, click . To delete defined user, select the user, click . To save user settings to a file, click . After specifying the users and saved path and file name (extension name is .tdu), click OK to save the settings. GIGA-TMS Inc. Document Version: v1.4 Date: 7/10/2008 18 To import user settings file, click . Specify the file and then click OK to import the settings. If there are duplicate tag codes, the old ones in the database will be overwritten. The exported file of user settings is a text format file, you can use Notepad program to open it. Below is the content of the file. Tom 0001 00040265420256 3 0,2 System Develop Engineer Joe 0002 00040265420255 4 0 0 Sales Manager 0 The fields name and sequence for each record are: 1. User Name 2. Personal ID 3. Tag Code 4. Time Zone Index 5. Machine Numbers Composition (allowed the user to enter) 6. Department Name 7. Title Name 8. Holiday Group Index Each field is separated by TAB character. For Machine Numbers Composition field, each number is separated by comma character. Time Zone Time Zone defines the valid time period for entering the doors on every weekday (from Sunday to Saturday) in a week. By the Time Zone settings, TRU can limit the user to enter the doors in a certain time period and weekday. GIGA-TMS Inc. Document Version: v1.4 Date: 7/10/2008 19 To define a Time Zone, in the Time Zone inspection, click . Give the new Time Zone a name, and then using the mouse to click (mark) or drag and drop the week grid to set the valid time period. The valid period time will be marked as green color. To modify defined Time Zone, select the Time Zone on the list view, click . To delete defined Time Zone, select the Time Zone on the list view, click . Because Time Zone only defines a week valid time period, TRU will treat the Time Zone as a week template and rotate it (the settings) on every week. Holiday Groups The purpose for Holiday Groups is to enhance the Time Zone function, because Time Zone GIGA-TMS Inc. Document Version: v1.4 Date: 7/10/2008 20 only defines a week template, which makes it not so flexible to meet some special day’s requirements. For example, if 1/1 day is holiday and the weekday is Monday, then it should not be a workday and may not allow users to enter any doors. But for Time Zone settings, the Monday may be a workday that allows a certain people to enter the doors. By using Holiday Groups, it can meet this kind of needs. To add a new Holiday Group, in Holiday Group, click . Give the new Holiday Group a name and select the Time Zone it will use, then click OK to save the settings. Before adding a new Holiday Group, you should create a Time Zone that is special for the Holiday Groups use. Next step is to add the holidays, which are included in Holiday Group. Select the Holiday Group, and then click . Give the holiday a name and select the date, then click OK to save the settings. To modify defined Holiday Group, select the Holiday Group on the list view, click . To delete defined Holiday Group, select the Holiday Group on the list view, click . To modify defined holiday of Holiday Group, select the holiday on the list view, click . To delete defined holiday of Holiday Group, select the holiday on the list view, click . GIGA-TMS Inc. Document Version: v1.4 Date: 7/10/2008 21 Control Assign Control Assign defines the doors (terminals) that who can enter in. To assign the users to specified machine number of terminal, select the terminal, and then click . Select the users then click OK to save the settings. Master Card By using Master Card, it can be much more flexible for administrators to maintain the security system. There are three types of Master Card, details as below: Lock System: Once a Lock System master card is punched in any of terminals, all the doors will be locked. TRU will not open any doors even a valid tag is punched. Unlock System: While a Lock System master card is punched, the system will be in a GIGA-TMS Inc. Document Version: v1.4 Date: 7/10/2008 22 totally lock mode. You can use the Unlock System Master Card to punch any of terminals to disable the lock mode. Unlock System doesn’t mean opening the doors. One Day Pass: This is most useful to make a quickly new tag for a one-day uses of visitor or customer. To define the one-day use tag is very simple; first, punch the One Day Pass master card. Second, punch another tag; TRU will define the second tag next to the One Day Pass master card as a one-day use tag. This tag is not limited by the Control Assign or Time Zone settings, which means it can enter all the doors and all the time period in the defined date. Not like user defined tag, with a name given, the one-day use tag will not get a name associated with, which means you don’t know who takes the one-day use tag to punch the terminals. The only information is the punch date, time and doors. But you can use a jotter to record the person who takes this one-day use tag while releasing. To add a Master Card, in [Master Card] inspection, click . Enter the owner name and code; select the Master Card type, then click OK to save the settings. To modify defined a Master Card, select the Master Card on the list view, and click To delete defined a Master Card, select the Master Card on the list view, and click GIGA-TMS Inc. Document Version: v1.4 Date: 7/10/2008 . . 23 Miscellaneous General tab: This tab defines the way of how TRU reply to the terminal if a punch time data is retrieved from terminal. Display: If selected, for TR4xx terminal, TRU will display the user name or the reason of invalid punch on the screen of terminal. For TR51x terminal, four digits will be displayed on the screen. Below table details the four digits. Digits Description 8800 Valid Punch 8801 Invalid Tag Code 8802 Invalid Time Zone 8803 Invalid Holiday Group 8804 Tag Code doesn’t Take Effective 8805 Tag Code is Expired 8806 Lock System – Master Card Punched 8807 Unlock System – Master Card Punched 8808 One Day Pass – Master Card Punched 8809 One Day Use Tag 8810 Lock out - System is in Lock Mode 8811 Invalid Door (terminal) 8812 Invalid Prefix 8813 Invalid Suffix 8814 Valid Punch - Valid Prefix or Suffix Punch GIGA-TMS Inc. Document Version: v1.4 Date: 7/10/2008 24 If not selected, for TR40xx terminal, the tag code, date and time will be displayed on the screen. For TR51x terminal, the last four digits of tag code will be displayed on the screen. For WEC200-00 terminal, it doesn’t feature a screen, but it can show the user about the punch result by sounding different pattern of beeps. An approved entry will sound a long beep; otherwise, an in-continuous beep will sound. Display duration defines how much time the message will be kept on the screen. If there is a punch during the displaying, TRU will clear the previous message and show the next one. Lock: If selected, TRU will open the door (trigger the rely) while retrieving a valid punch. If not selected, TRU will not open the door even a valid punch is retrieved. Lock duration defines how much time it will take to open the door. But please keep in mind, TRU is not able to know that the door is closed or not. Bell: If selected, TRU will sound the external speaker (trigger the rely) while retrieving a valid punch. If not selected, TRU will do nothing for the external speaker even a valid punch is retrieved. Bell duration defines how much time it will last to sound the external speaker. The Bell setting is only available for TR40xx terminal. Organization tab: Defines your company organization – Department and Title. To set up the organization will help you to search or filter the concerned time data more quickly. Verify Rules tab: For a valid tag code, besides the defined user tags, TRU also provides another way to verify a valid tag code by its prefix and suffix. To enable the prefix and suffix settings, just select the [Verify parts of the content of punched tag code] item. Please be aware of the prefix/suffix settings, too many prefixes or suffixes will lower GIGA-TMS Inc. Document Version: v1.4 Date: 7/10/2008 25 down the TRU system security. Automation After TRU starts Extended Mode and establishes all the connections, it will STAY and WAIT for the incoming time data punched from terminals. If there are exceptions occurred at the remote connected terminals, like power off or memory full, it will not know. If such kinds of exceptions happen in TRU security system, the users may meet to be locked out of the doors. To setup the automation may reduce the exceptions but not eliminate completely, because PC crushed (TRU installed) may also cause the users to be locked out. To setup the automation, from [Tools], click [Options]. Auto-Download Time Data tab: While users punch the tag, terminal will store the tag code to internal memory. From time to time, when the memory is full, users can’t punch tags anymore. The time data in memory must be downloaded and removed before GIGA-TMS Inc. Document Version: v1.4 Date: 7/10/2008 26 next new punch. Of course, the administrators can do this by manually (return to Normal Mode and download / clear the time data), but by enabling the auto-download time data function will be more reliable to ensure the memory is not going to be full. There are 24 time periods you can set. When the time is up, TRU will return to Normal Mode and download the time data automatically. After the time data is downloaded and cleared completely, TRU will back to Extended Mode. 1. Auto-Scan tab: While the terminal’s TCP connection is closed (only for Ethernet interface terminal) or the running mode is in Normal Mode (on terminal side, not TRU), TRU will not get the punch time data of the problem one terminal in real-time. The busy network or connection timeout may cause TCP disconnected, and the not in Extended Mode of terminal may be caused by that the terminal has ever been powered off and on again (the default mode for terminal is Normal Mode). These two exceptions can be solved by enabling the auto-scan function. Please take notes; too much frequency scanning the terminals may eat much more PC resources, and it will also slow down the reaction (open door or display messages) of TRU to terminal. But if the disconnection is caused by the no-power terminal or disconnected communication cable, then there is no way to establish the connection. For TRU, in this kind of exceptions, you can set up the auto-email function to inform the administrator(s) where the disconnected door (terminal) is and the time that exception happens (The email account must consist with your MS Outlook Express’s account). Auto-Update User Info. tab: This function has nothing to do with the system exceptions. If you have your own program and want to define the user information by yourself (your program), including user name, tag code and allowed entering doors etc, and often to make modification, then you may need this function. First, your program must export the user information to a file, which the format is detailed in export file format of User definition section. Second, set the update timetable for importing and updating the user information to TRU database. Please take notes; the duplicated user (tag code) will be overwritten. GIGA-TMS Inc. Document Version: v1.4 Date: 7/10/2008 27 Miscellaneous tab: This setting defines how many time data will be displayed in the Extended Mode main window. Too many displaying records will slow down the launching speed of Extended Mode. View Time Data Under Extended Mode, TRU displays the retrieved time data on the list view, and uses the icons to present the punch results of tag verification. Below table details the presentation of the icons. GIGA-TMS Inc. Document Version: v1.4 Date: 7/10/2008 28 Icon Description Valid Punch Invalid Tag Code (not defined) Invalid Time Zone Invalid Holiday Group Tag Code doesn’t take Effective Tag Code is Expired Lock System – Master Card Punched Unlock System – Master Card Punched One Day Pass – Master Card Punched One Day Use Tag Lock out - System is in Lock Mode Invalid Door (terminal) Invalid Prefix Invalid Suffix Valid Punch - Valid Prefix or Suffix Punch Because the main window of Extended Mode only displays a certain number of time data, if you want to view more or all records, or want to get the concerned time data right away, please use the [View Punched Time Data] window. To launch this window, from [View] menu, click [Punched Time Data]. In this window, you can filter the time data by departments, titles, connections, terminals and the date range specified. It also allows you to export or print out the filtered time data. GIGA-TMS Inc. Document Version: v1.4 Date: 7/10/2008 29 Handle the Terminals Lock specified terminal In some cases, you will need to lock certain door(s) that not allows any person to enter in, no matter a valid or invalid tag punches on the terminal. To do this, select the terminal (in the tree view of terminals list), on the toolbar, click . The selected terminal will change to lock mode (for TR40xx terminal, icon changed from to ). To return the lock mode back, on the toolbar, click . Although the terminal is set to lock mode, the terminal still sends out the punch time data to TRU, which will display on the list view and store into the database. Set specified terminal to Normal Mode If you want to verify the punch by terminal itself (check the tag code by the prefix setting of terminal), select the terminal, click . The selected terminal will be in the Normal Mode (for TR40xx terminal, icon changed from to ). To return the selected terminal back to Extended Mode, on the toolbar, click . While the terminal is in Normal Mode, the punch time data will not send out to TRU, which means this data will not be displayed on the list view of program, but will be still stored in the internal memory of terminal. GIGA-TMS Inc. Document Version: v1.4 Date: 7/10/2008 30 TRU - Client Program TRU provides a way of sharing the database file to allow client program viewing and editing the database, such as security configuration, viewing time data. By using this way, you can install the TRU program into a PC that not so many people to operate, which can ensure the TRU can work without any incident or man-made exceptions happen. TRU also provides user-level security (permissions) to limit client user to access the database. For example, a client user may only allow viewing time data but can’t edit the security configuration. User Level Security – Set Accounts and Permissions Before starting the client program, the user accounts and permissions have to be set up firstly. To setup the accounts and permissions, under TRU’s Normal Mode main window, from [Tools] / [Extend Mode], click [Set Accounts / Permissions]. Pops up the main window. Users folder: Defines the users account, password and the Groups that belongs to. GIGA-TMS Inc. Document Version: v1.4 Date: 7/10/2008 31 Groups folder: Defines the group name, users belong to, and the permissions. Installation The setup files of TRU – Client program is located in the [Client] folder of Setup CD. Double-clicking the setup.exe file to install the program. The program short cut is located in the [Start] / [Programs] / [GIGA-TMS] / [Time Recorder Utility - Client]. First Launch For the first launch, TRU – Client will inquire the file and path of TRU database (TR.mdb). After locating the file, a login window will pop up. GIGA-TMS Inc. Document Version: v1.4 Date: 7/10/2008 32 (Default account - User Name: User, Password: 0000) Enter a valid user name (case-sense) and password, pops the TRU – Client main window. Run the TRU – Client program Below details how the command buttons of main window work. Access Control Configuration: Launch [Access Control Configuration] window, which is totally same to the TRU program. But some functions may be limited to access depending on the permissions settings. View Punched Time Data: Launch [View Punched Time Data] window, which is totally same to the TRU program. Options: Database tab: Locate the path of TRU database file. View Time Data tab: Set the frequency of refreshing time data. You also refresh the time data by manually. Exit: End program GIGA-TMS Inc. Document Version: v1.4 Date: 7/10/2008 33 Maintain Database From time to time, it is important for the TRU database to be backed up, purged and compacted. The frequency at which these tasks are performed depend on the size of your time data and the speed at which the TRU database file is growing. Before we continue, read the definitions of each action that can be performed on the TRU database: Backup Database – This function makes an copy of the TRU database as of the time the function is executed. This is very useful for keeping a copy of your data file in case of a disaster. It should be performed on a weekly basis or even more frequently if the data in TRU is extremely important. This method of backup should not take the place of a normal daily tape backup. Clear Time Data – This function can be used to delete all time data records, which are retrieved under Extended Mode. This should never be done without first performing a backup. When time data is removed from the database, it can never be recovered. This function rarely needs to be performed, if at all. Restore Database – This function can be used to import the backup database. Please keep in mind; the current database settings will be overwritten by the imported database. Compact Database – To increase performance, when records are deleted from the TRU database, they are not permanently deleted. However, when many deleted records accumulate in the TRU database, it can hinder performance. To permanently remove deleted records (and therefore reduce the size of the database and increase performance) 'Compacting' the database is recommended on a monthly or semi-monthly basis. A good indication of when you should clear time data is when TRU performance seems to have slowed considerably due to the increase in file size (usually well over 10MB). If reporting is taking much longer than it used to, it might be time to clear time data. All the database maintenances are all running under Normal Mode. GIGA-TMS Inc. Document Version: v1.4 Date: 7/10/2008 34 Backup Database To backup data, follow these instructions: From Tools menu, click Database Utility/Backup Database. You will be asked to give a path name for the copy of the database. Enter a valid path name and click OK. Clear Time Data To clear time data, follow these instructions: From Tools menu, click Database Utility/Clear Time Data. You will be given a warning. Read the warning and click OK if you wish to remove time data from the database. Restore Database To restore database, follow these instructions: From Tools menu, click Database Utility/Restore Database. You will be given a warning. Read the warning and click Yes if you wish to continue. Specify the path that the backup database is located. Click Open if you are certain you want to continue. Compact Database To compact the database, follow these instructions: From Tools menu, click Database Utility/Compact Database. FAQ Q: How do I know my current use terminals are supported Extended Mode or not? If not supported, can I upgrade the terminals’ firmware to meet the needs? A: For TR40xx version, only TR40xx-20 models are supported (firmware version is V3.69 or later). For TR51x terminal, the firmware version is V1.81 or later. You can use the [Terminal Properties] window to view the firmware version. For the TR51x terminal, they all can use firmware upgrade method to get the new features of implementing Extend Mode. For TR40xx terminal, if the interface is RS232, then they all can use the firmware upgrade method; if is Ethernet interface, only using TCP protocol GIGA-TMS Inc. Document Version: v1.4 Date: 7/10/2008 35 (TR40xx-10/TR40xx-15/TR40xx-20) can be upgraded, which means, the TR40xx-00 model, with UDP protocol is not available for the Extended Mode. Q: Can terminal switch to Normal Mode automatically while disconnected to server PC? A: This function only applies to TR40xx and TR51x terminal, not for WEC200-00. To achieve this, needs two properties to be set on the terminal. One is the [Prefix] property; another is [Punch Error Time – Mode Switch] property. Q: Why TR510 can’t open the door (activate the relay) under Extended Mode even a valid tag code is punched in? A: Make sure the property of [Relay is Used for] is set to [0 – Door unlock]. GIGA-TMS Inc. Document Version: v1.4 Date: 7/10/2008 36 Contact Us Giga-TMS Inc. 8F, No. 31, Lane 169 Kang Ning Street Hsi Chih City Taipei Taiwan ROC Tel: +886-2-2695-4214 Fax: +886-2-2695-4213 E-mail: [email protected] Or visit us on the World Wide Web at http://www.gigatms.com.tw GIGA-TMS Inc. Document Version: v1.4 Date: 7/10/2008 37 Appendix A – WEC200-01 Firmware There are three kinds of firmware reside separately in the WEC200-01 device, details as below: Firmware #1: Resides in the IC U5 of main board. The firmware #1 file is upgraded by the TRU program. This firmware is irrelevant to firmware #2 & #3, which means after upgrading the firmware #1, it doesn’t need to upgrade firmware #2 & #3. Firmware #2: Resides in EM200 module, which plays the role of operating system (Tios - Tibbo Operating System). The Tios firmware file is upgraded by the [Device Explore] program. After upgrading Tios firmware, the Tios application will be removed. So it needs to upgrade the application firmware after Tios firmware is upgraded. Firmware #3: Resides in the EM200 module, which plays the role of application program running under Tios. For WEC200-01, the Tios application name is mini-TRU. This firmware file is upgraded by the [Device Explore] program. Tios application firmware can be upgraded alone without upgrading Tios firmware firstly. The Device Explore program is built in the TIDE (Tibbo Integrated Development Environment) program. To set up TIDE, from the tide folder of Setup CD, click tide-1-15-09-beta.exe. This set up file may be upgraded in the future. You can get the latest version on tibbo web site (http://www.tibbo.com/). Upgrades Firmware #1 – Main board IC U5 Below procedures guides you how to upgrade firmware #1. Launch WEC200-01 properties window. From Tools menu, click Firmware Upgrade. On the Firmware Upgrade window, select the firmware file (extension name is bin), and then click OK to start upgrading. GIGA-TMS Inc. Document Version: v1.4 Date: 7/10/2008 38 Upgrades Firmware #2 – Tios Operating System Below procedures guides you how to upgrade firmware #1. From Start / Programs / Tibbo / Tibbo IDE, click Device Explore. On the Device Explore window, select the upgraded device. Click Upload, select Load Firmware Through the Network. Select Tios firmware file (extension name is bin). Click Open to start upgrading firmware. Upgrades Firmware #3 – Tios Application Below procedures guides you how to upgrade firmware #3. GIGA-TMS Inc. Document Version: v1.4 Date: 7/10/2008 39 From Start / Programs / Tibbo / Tibbo IDE, click Device Explore. On the Device Explore window, select the upgraded device. Click Upload, select Load Application Through the Network. Select Tios Application firmware file (extension name is tpc). Click Open to start upgrading firmware. Change WEC200-01 to WEC200-00 The hardware between WEC200-00 and WEC200-01 is totally identical; the only difference part is the firmwares in EM200 moudle. For WEC200-00, the EM200 firmware is “Device Server”, for WEC200-01, the EM200 firmware is “Tios”. Before changing the firmware, it has to install the DS Manager program into Windows system firstly. The setup file of DS Manager program is located in the folder “tdst” of the setup CD. To change the firmware from “Tios” to “Device Server” please follow below steps: From Start / Programs / Tibbo / Tibbo IDE, click Device Explore. GIGA-TMS Inc. Document Version: v1.4 Date: 7/10/2008 40 On the Device Explore window, select the upgraded device. Click Upload, select Load Firmware Through the Network. Select “Device Server” firmware file (extension name is bin). This file is located in the folder “tdst” of setup CD. The file name is EM_362D.BIN. This name may be changed in the future at firmware upgraded. Click Open to start upgrading firmware. After the upgrading is completed, the device will restart automatically. Next steps will initialize the Device Server settings of EM200 by DS Manager program. To do this, From Start / Programs / Tibbo, click DS Manager GIGA-TMS Inc. Document Version: v1.4 Date: 7/10/2008 41 . Select the upgraded device (This IP-address should be 127.0.0.1*), click Initialize. * The default IP-address for the later version is 1.0.0.1 The device will reboot, it will take about 5~10 seconds. After starting the device, click Settings. On the Settings DS window, click Connection tab. Select the value of Transport protocol to 1- TCP. GIGA-TMS Inc. Document Version: v1.4 Date: 7/10/2008 42 Click OK to update the setting. Off-line Security Policy WEC200-01 features the off-line access control application. It also allows you to do on-line access control, just like WEC200-00, or other time recorders, such as TR51x and TR40xx. Below lists all the features of WEC200-01. Provide master card for appending or deleting personal authority from external reader directly. 2K Memory capacity, which can store 50 users, 20 time data and 10 visitors. Circuit design with 2 input devices for door broken detective. Feature of door unlocked detection. Provide 2 relay outputs for external alarm and electric lock. Separate controller and reader for higher security demand. With Ethernet connection to PC and able to work independently at off line with PC. Provide 1 holiday table that allows defining 10 holiday dates. Provide 3 time zones of door-unlocked mode. Provide setting for length reading and checking of card numbers. All the off-line security settings can be configured via the WEC200 properties window. To modify the property value, double-click the selected item; the value window will pop up. Enter the wanted value and click OK to update the value. GIGA-TMS Inc. Document Version: v1.4 Date: 7/10/2008 43 Each property description is displayed under the grid. Refer to the description to set up the security rules to meet the needs. Some properties changed need to restart the device, such as IP-address, Gateway IP etc. The reboot process may take about 10 seconds. The timer will stop if the device power is shutting down. Even if the power is always on all the day, it is still lagging about 30 seconds (in a single day). If the timer is not updated by server frequently (at least once per day), it recommends to disable the security settings that is related to date and time, such as Time Zone, Holiday Group etc. GIGA-TMS Inc. Document Version: v1.4 Date: 7/10/2008 44 Appendix B – Push Mechanism for TR515 UDP Terminal The “push mechanism” means the TR515 terminal will send the punch time data to host PC right away; it doesn’t require the host PC to “poll” the time data. The time data is still kept in the internal memory of terminal, which can be downloaded to host PC later on. Only TR515 terminal that uses UDP protocol supports this feature. Using TCP protocol or RS232 interface is not available for the “push mechanism”. To enable the “push mechanism”, please follow below steps: While adding or editing the connection, click [Correct Network Setting] button. On the Options window, click [Miscellaneous #1] tab, tick the “Enable the real-time receiving function for TR51x terminal (Using UDP protocol)”. On the properties window, set the Access Mode to 1. GIGA-TMS Inc. Document Version: v1.4 Date: 7/10/2008 45 GIGA-TMS Inc. Document Version: v1.4 Date: 7/10/2008 46